Unlock the Power of AWS EFS! Scalable Shared Storage for Multi-Instance EC2 Environments
 Damilola Linda Olowookere
In the world of cloud computing, scalability and seamless data sharing are key to building efficient, high-performance applications. But how do you ensure multiple EC2 instances can access the same data in real time? without complex configurations or storage bottlenecks?
Enter Amazon Elastic File System (EFS), a fully managed, highly scalable file storage solution that allows multiple EC2 instances to read and write from the same file system, just like a traditional network drive. AWS EFS eliminates the hassle of manually syncing files across instances, when running web applications, containerized workloads, or processing big data.
In this guide, I’ll walk you through how to:
✅ Create an Elastic File Share and configure it for shared access
✅ Deploy and secure multiple EC2 instances
✅ Mount the EFS on your EC2 instances for seamless file sharing
✅ Monitor performance and optimize storage usage
By the end of this tutorial, you’ll have a fully functional shared storage setup, ready to power your cloud applications with ease.
Step 1 - Create and Configure an Elastic File System on AWS.
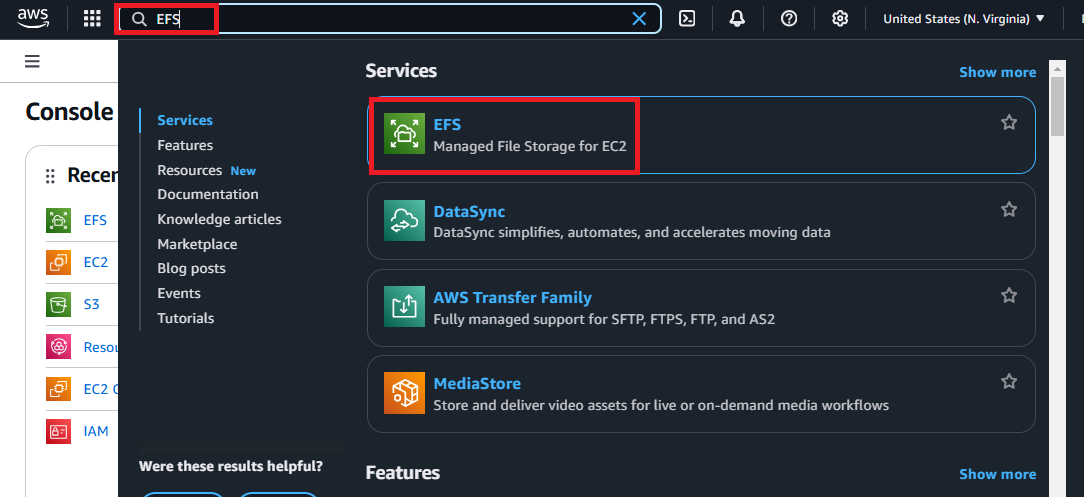
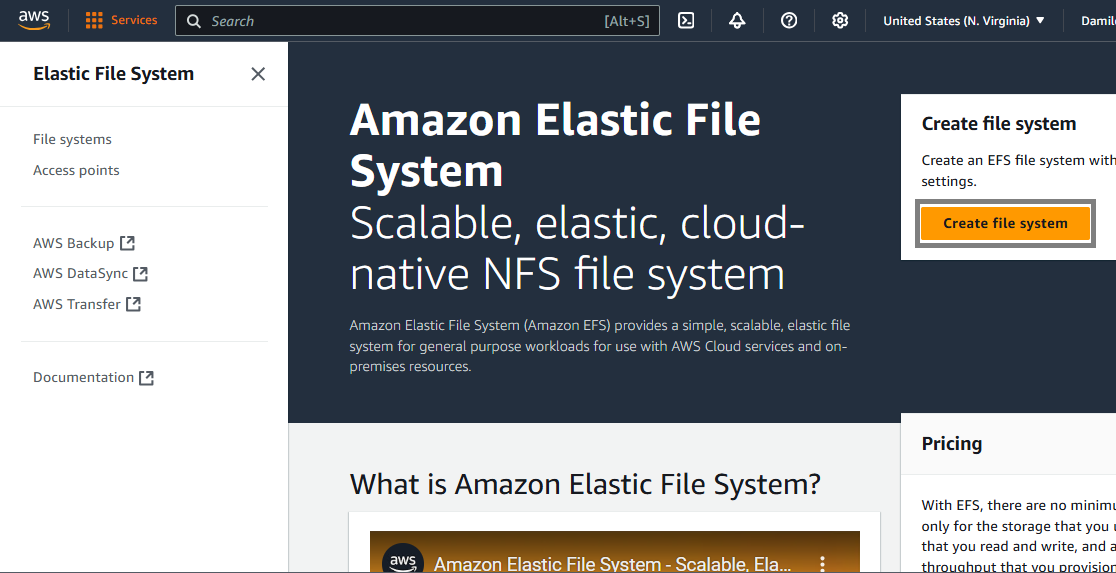
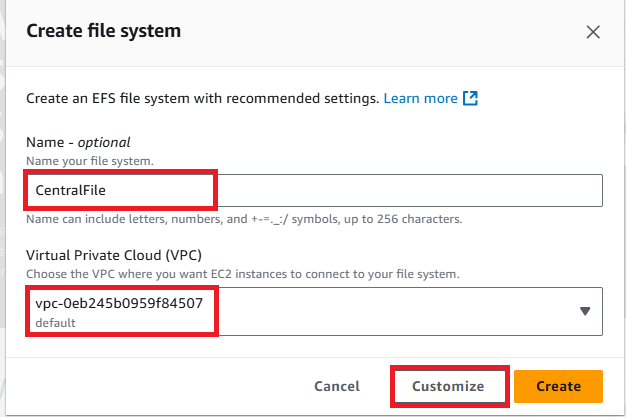
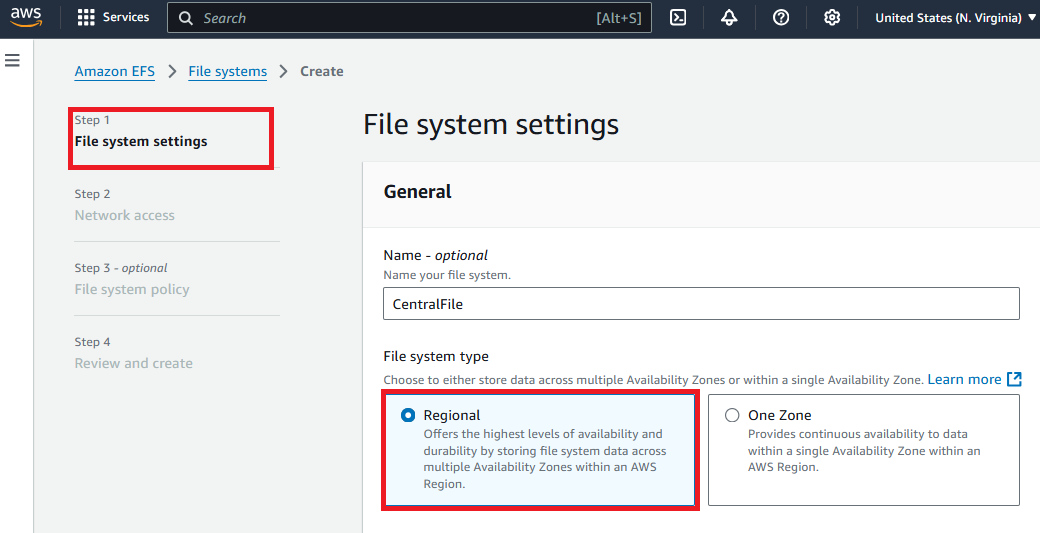
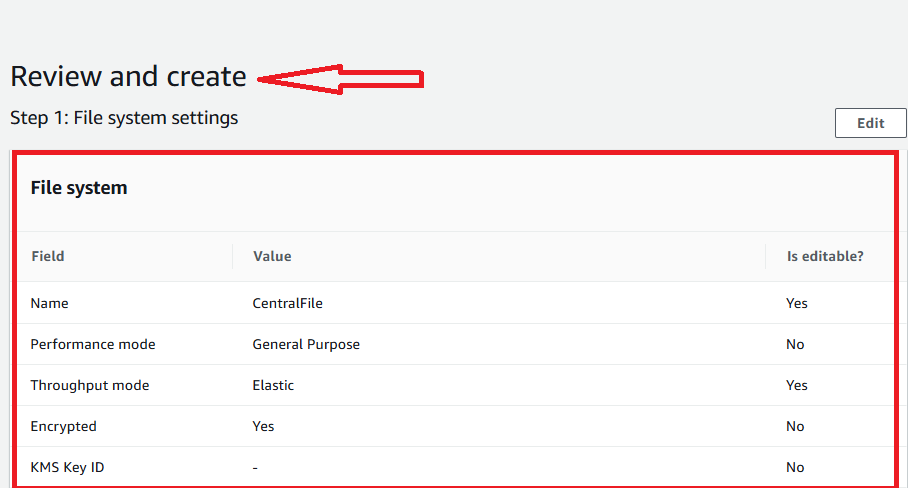
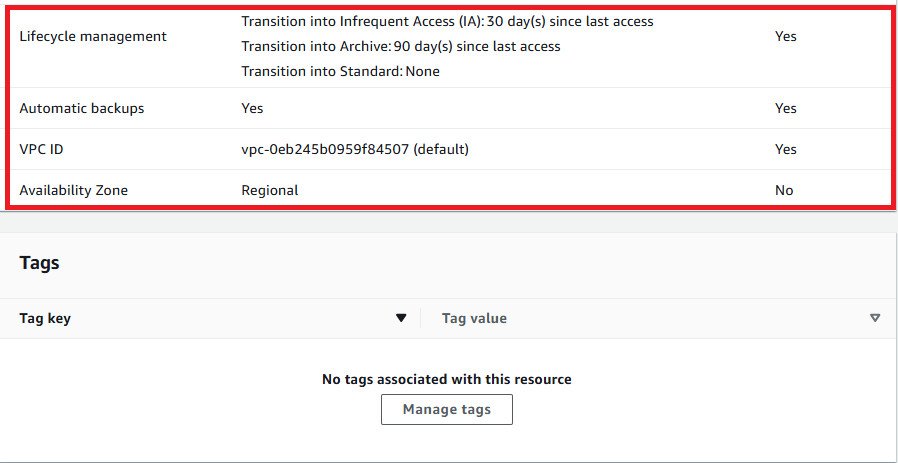
I. To do this, sign into your AWS console and search for “EFS“, click to create a File System. Give the file a name, e.g CentralFile, choose the Virtual Private Cloud (VPC) where you want EC2 instances to connect to your File system. I’m leaving it at default. You can then click on “Customize” to further configure.
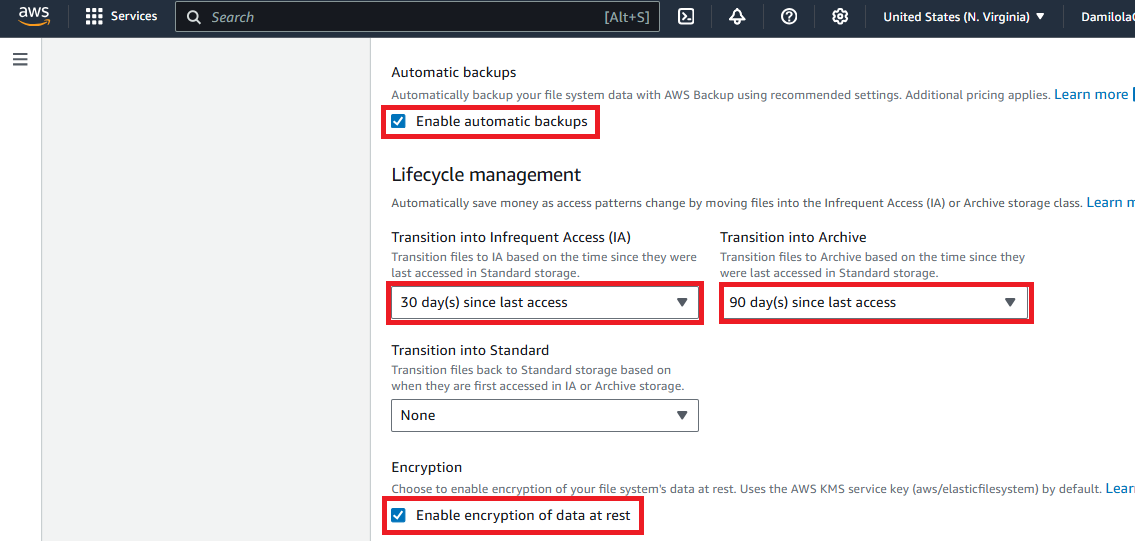
II. For the File system settings, you can choose to store data across multiple availability zones(offers the highest levels of availability), which is why I am selecting “Regional“ for my File system type. I am enabling automatic backup and setting up the Life Cycle Management which helps me automatically save on cost by moving files into the Infrequent Access (IA) or Archive Storage Classes. Note that It is very important to enable encryption of data at rest as it provides a high level of data security.
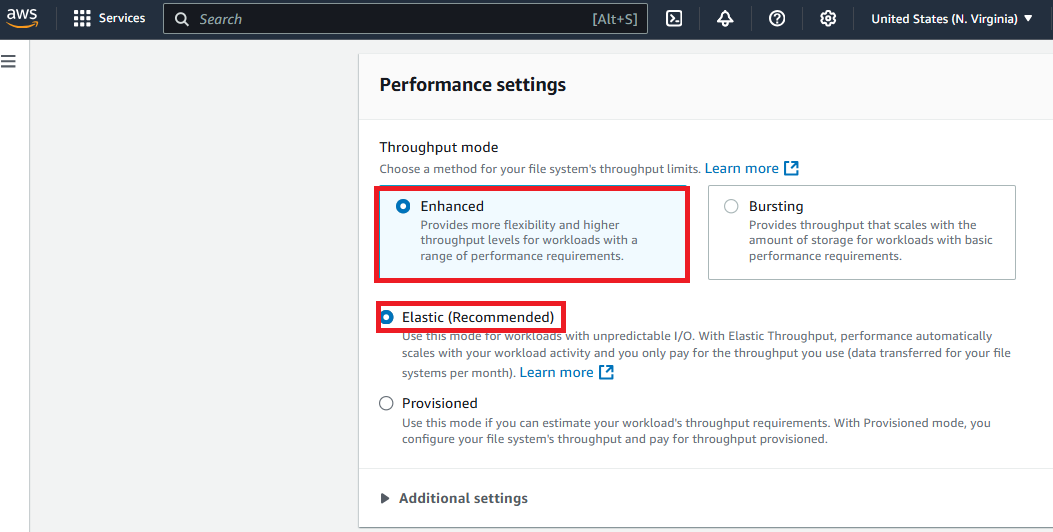
III. I am selecting “Enhanced“ together with an “Elastic“ throughput for the file system’s throughput limits. This enables more flexibility and higher throughput levels for workloads with a range of performance requirements.
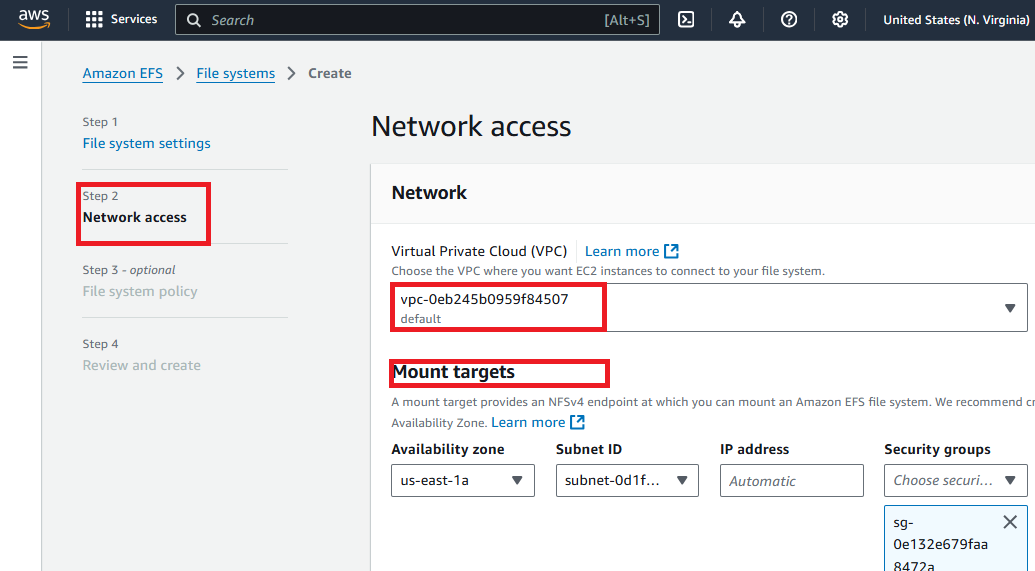
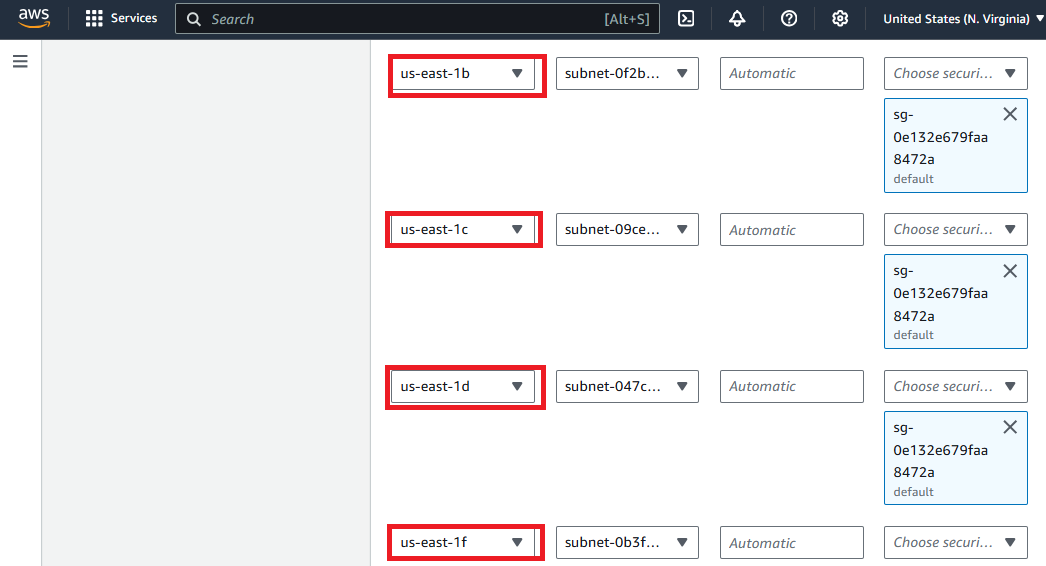
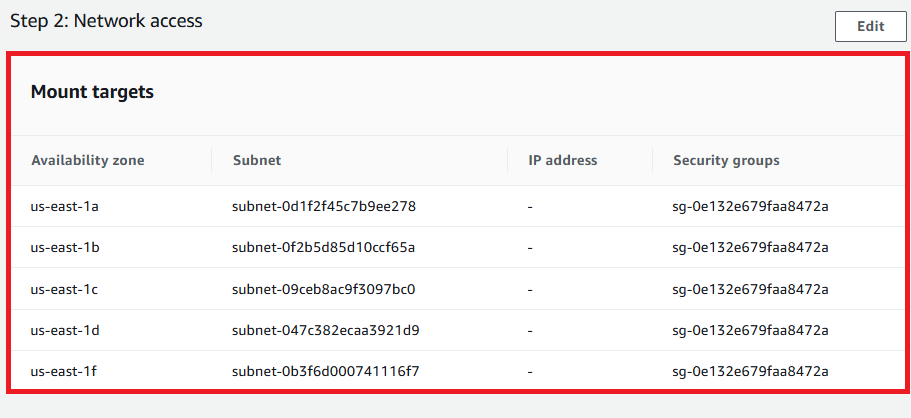
IV. To configure the Network Access, I’m leaving my VPC and NFSv4 endpoints selected for me at default. I have five different NFSv4 endpoints with the availability zone, Subnet ID, IP addresses and Security Groups. Please refer to the screenshots below for more clarity.
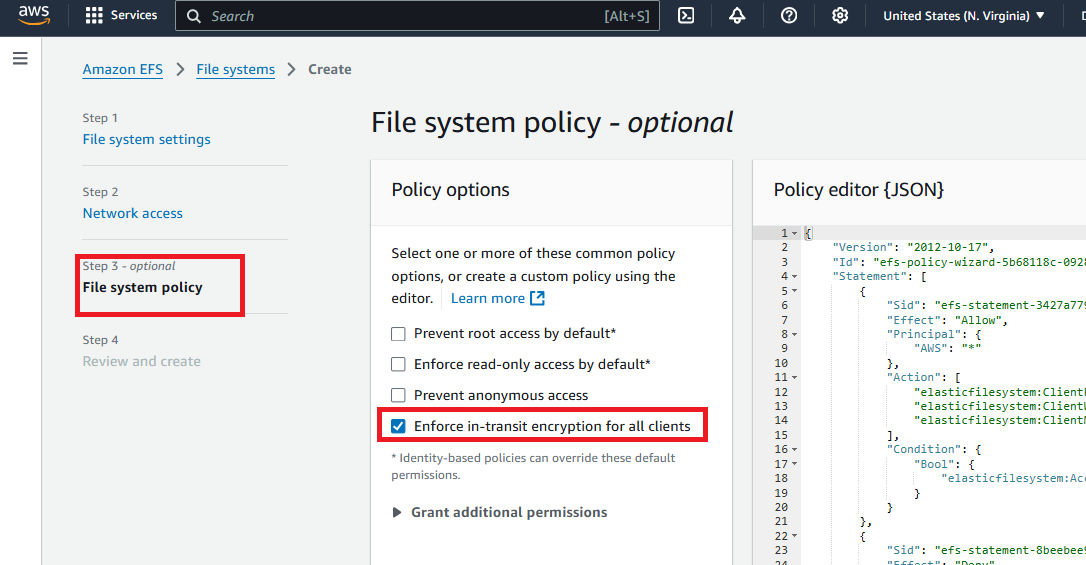
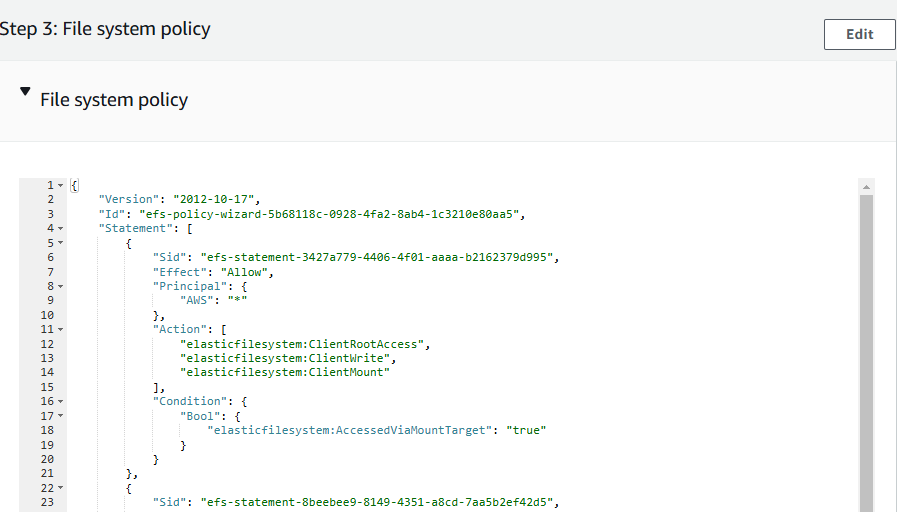
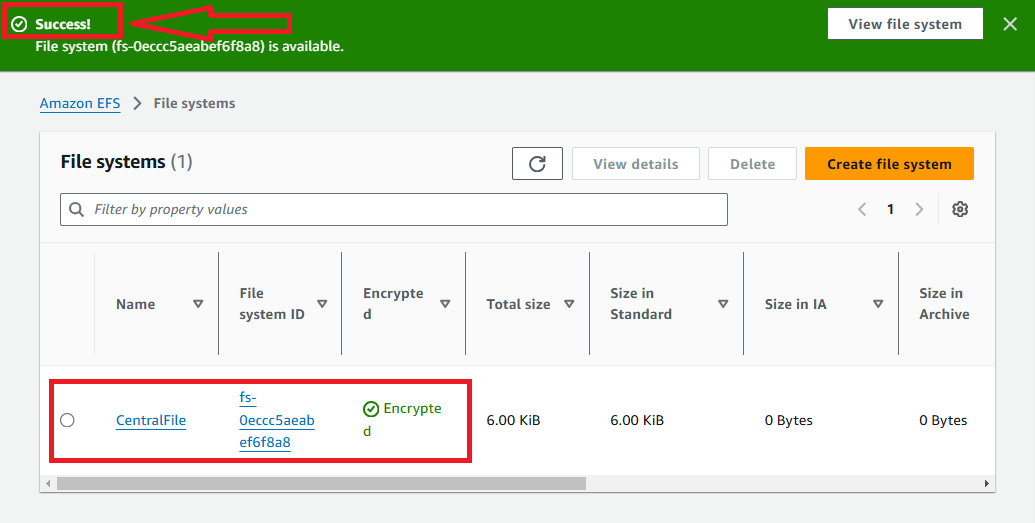
V. For my File System Policy, I’m also enforcing in-transit encryption for all clients, clicking on “Review and Create” to create my File System.
Step 2 - Deploying Multiple EC2 Instances and Configuring Security Groups.
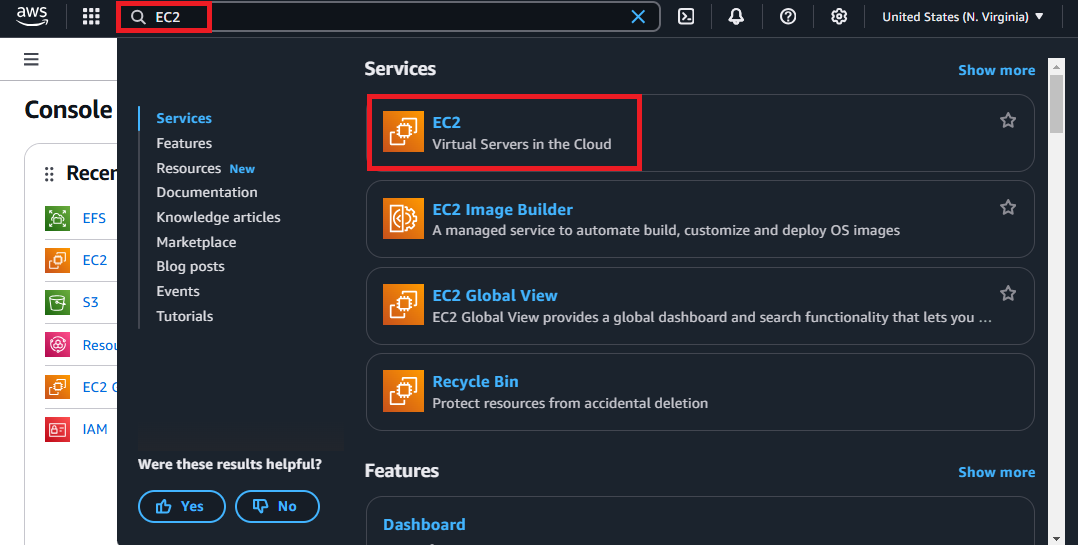
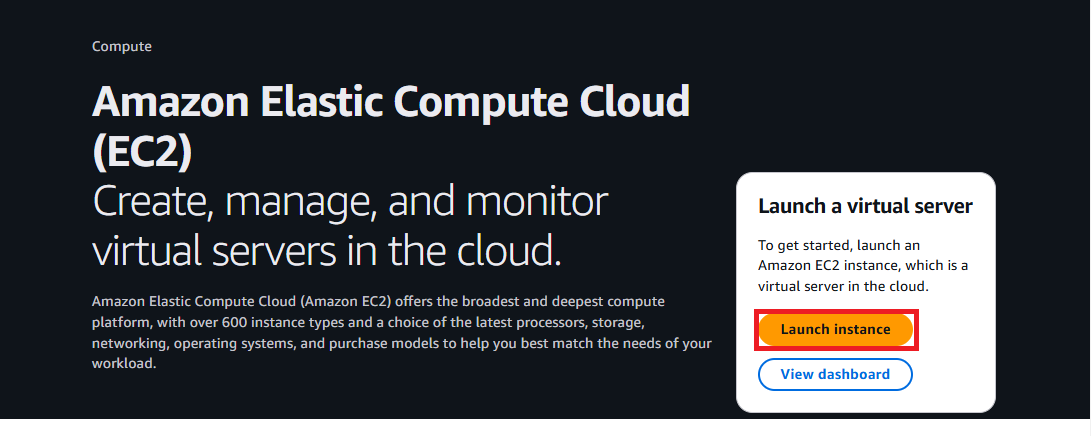
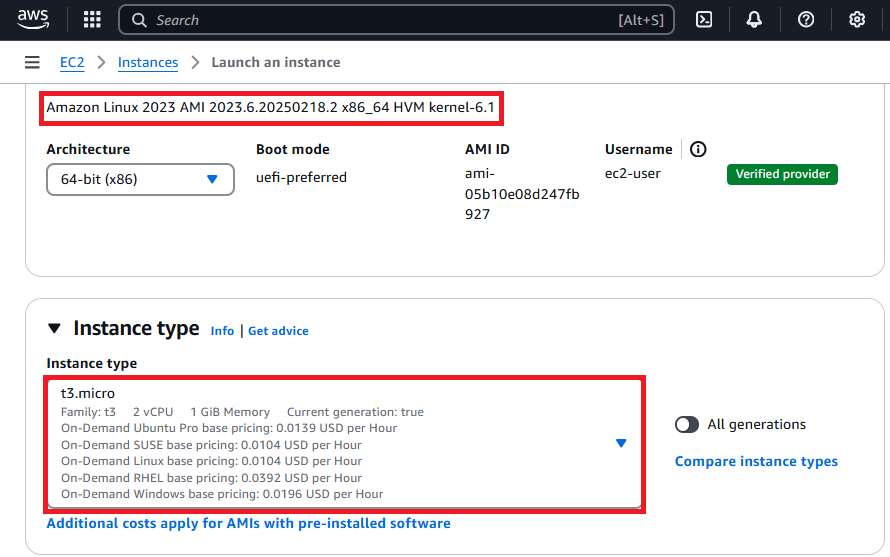
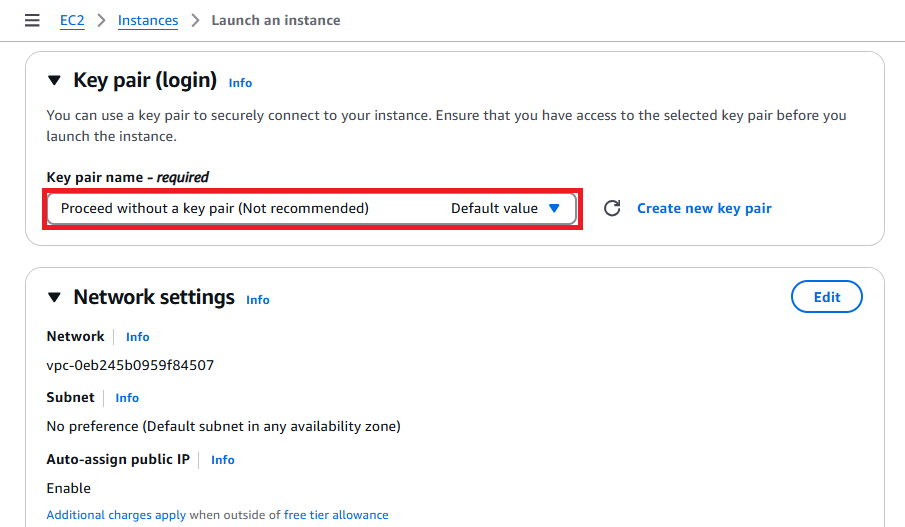
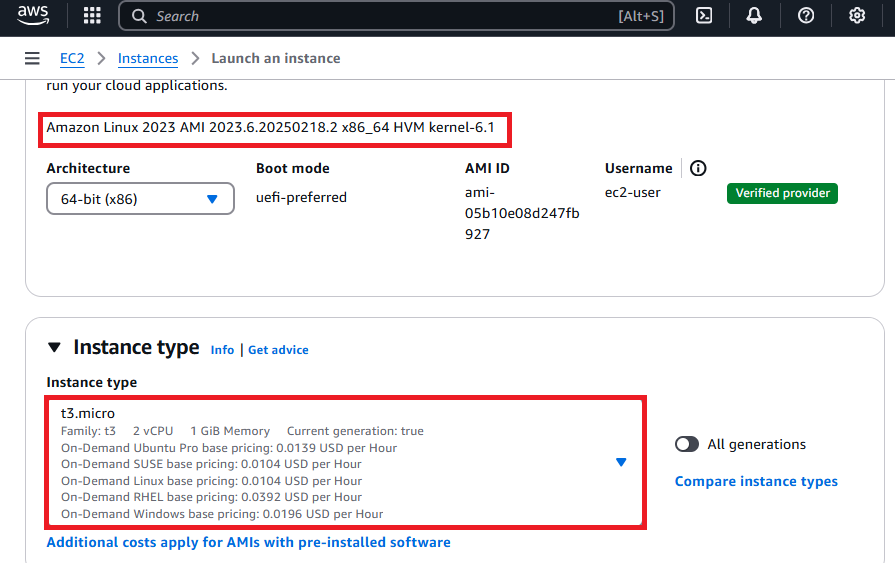
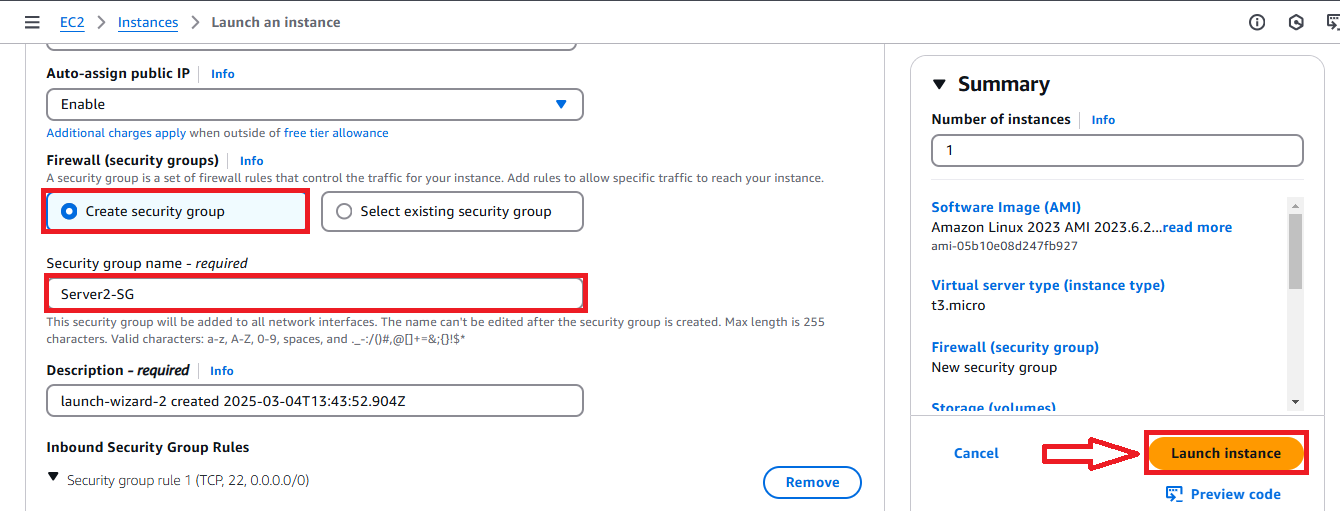
I. From your console or Home page, search “EC2” and click to create an instance. Give your instance a name “Server1“ and also select “Amazon Linus“ as the OS Image. Select the Instance Type as “t3 micro”. You can proceed “without a key pair” for now. In the Network settings, it is essential to give a name to the security group of this particular instance e.g Server1-SG, you can also give it a description(optional). Click on “Launch Instance“ to launch the instance.
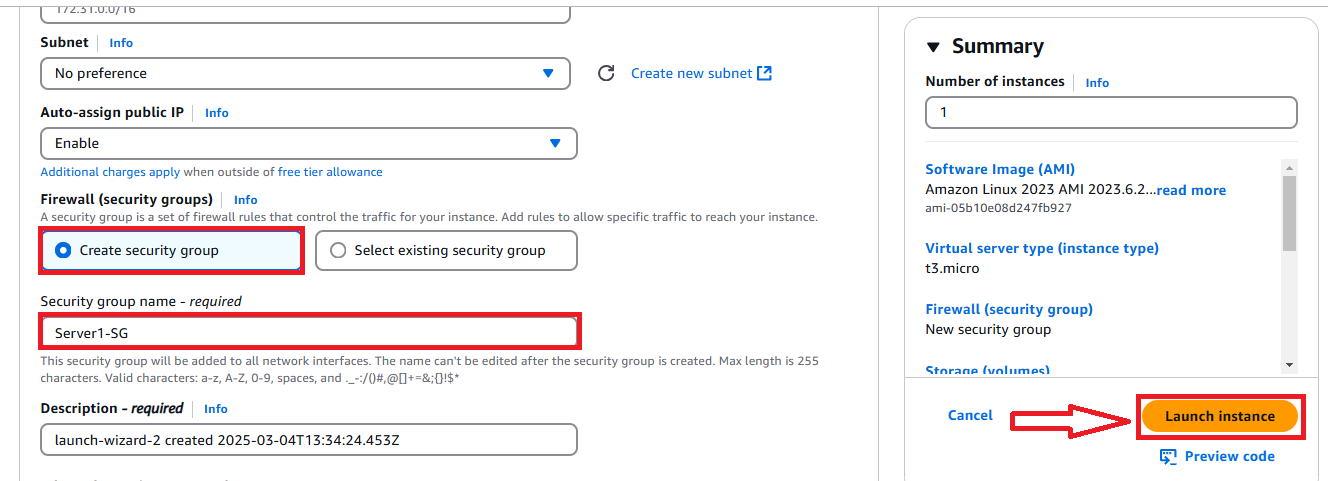

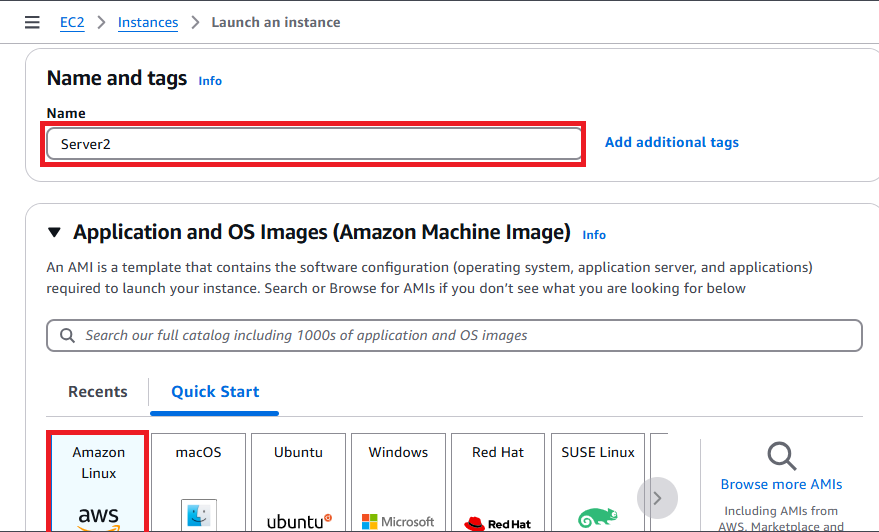
II. I am creating another EC2 Instance, a second one(Server2), to be able to test how files and other documents can be shared in real time among two or more instances with our Elastic File System. Please repeat the steps in (I) above to create a second Instance. You can also refer to the screenshots below for more clarity. In the Network settings of the second instance, it is essential to give a name to the security group e.g Server2-SG, you can also give it a description(optional). Click on “Launch Instance“ to launch the instance.

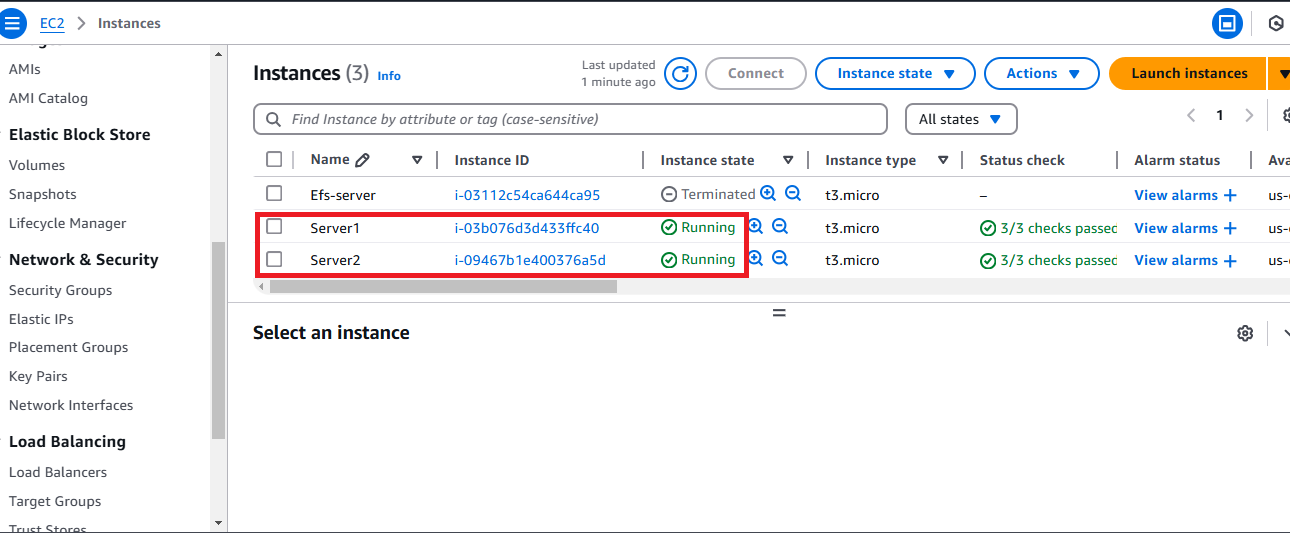
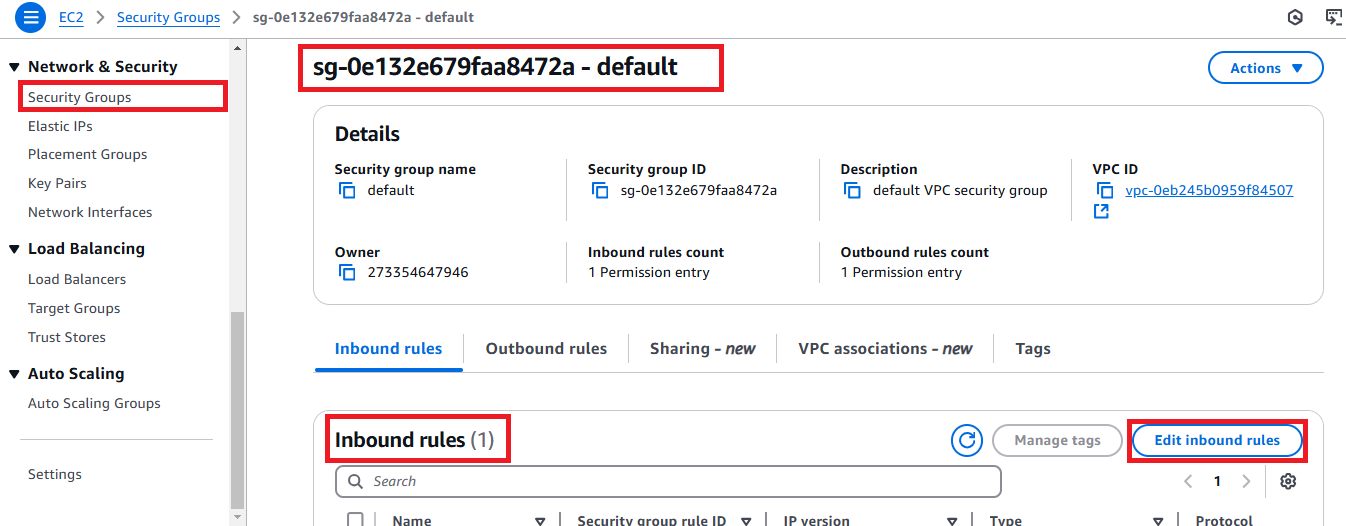
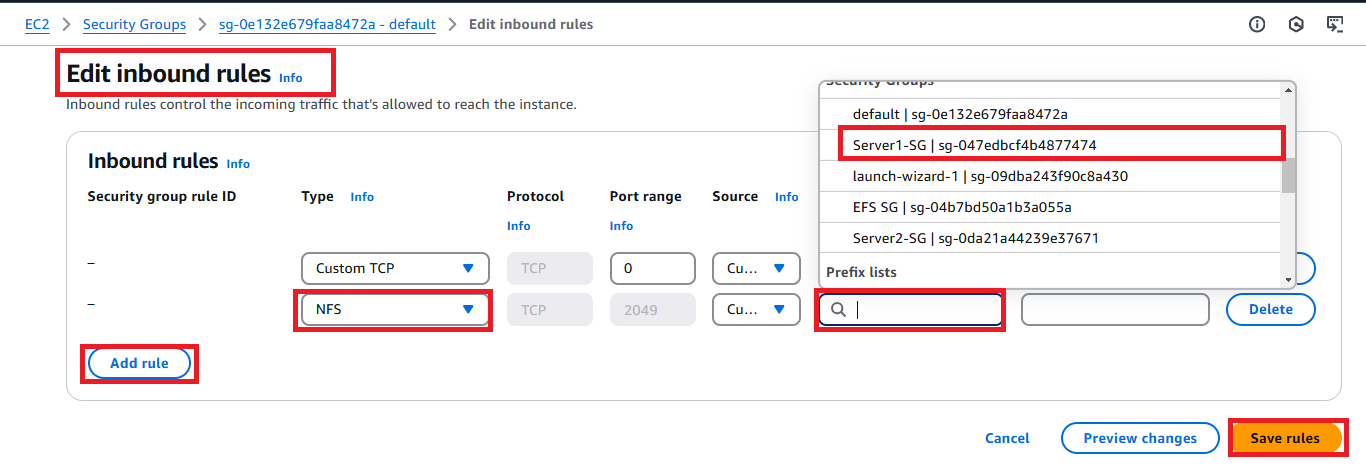
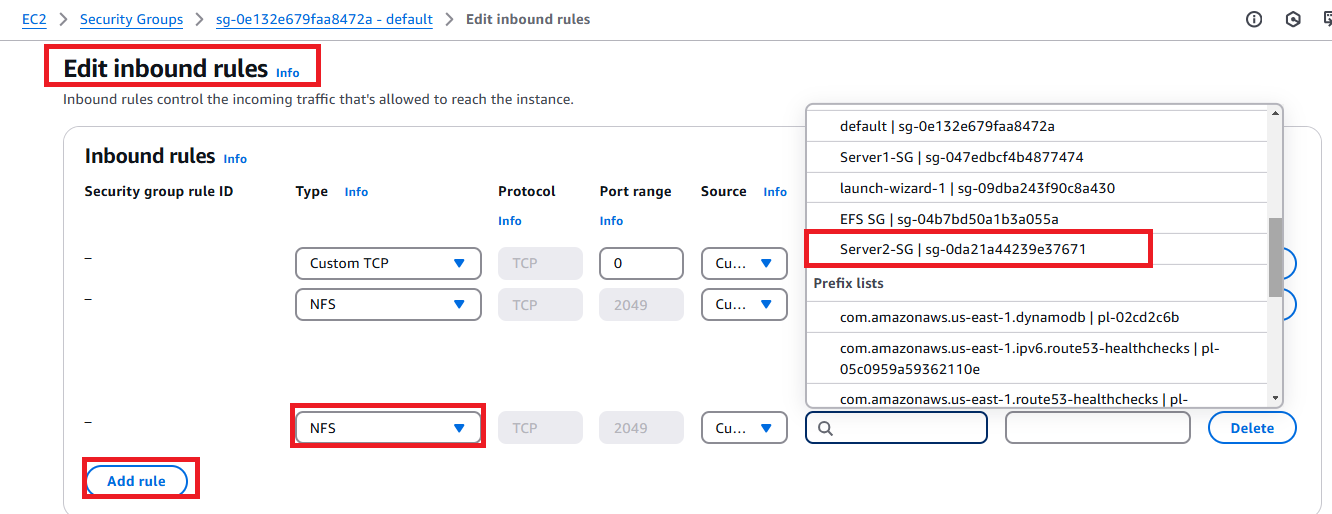
III. Here, I have two instances successfully created and running, Server1 and Server2. To configure the Security Groups of both Instances, on the left pane, Click on security group and select the Default group to configure it. In the Default group, under inbound rule, click on “edit inbound rule“, this allows you to add a rule. Click on “add rule“, for the rule type, select “NFS“, for the rule source, you can then select and add the security group you named Server1-SG. Then “save rule“. To configure the Server2 security group, click on “add rule“ again, for the rule type, select “NFS“, for the rule source, you can then select and add the security group you named Server2-SG, and save rule.


Step 3 - Mounting EFS on EC2 Instances for Seamless Sharing
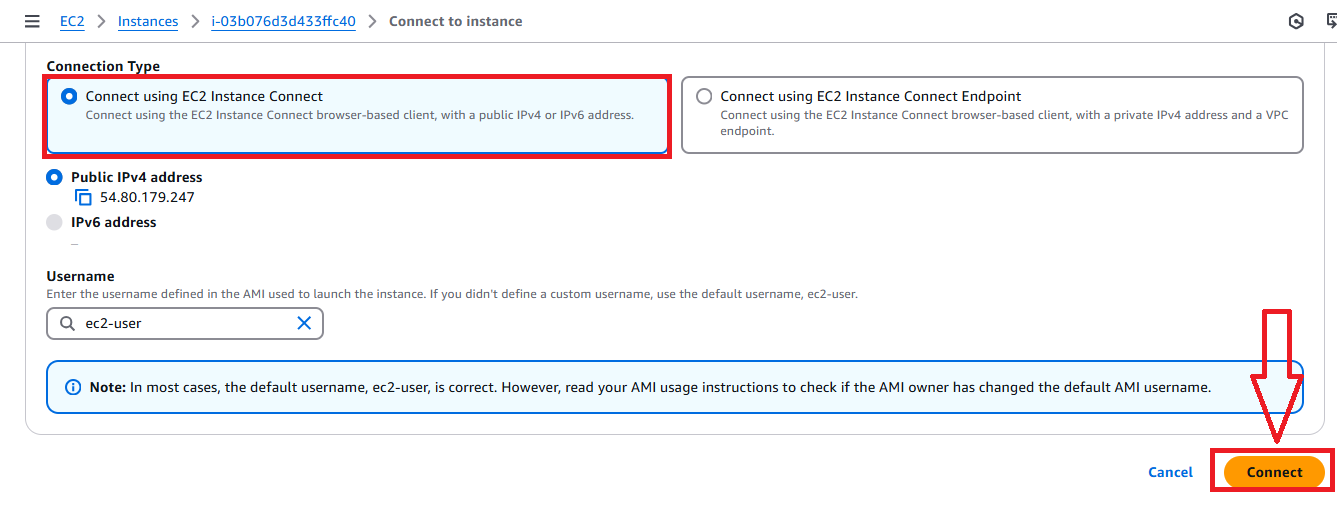
I. To mount the EFS on our Instances, you have to connect to each instance. Click on the first instance and connect using EC2 Instance Connect. After it opens up successfully, the first thing is to install amazon EFS utilities by running the command, “sudo dnf install -y amazon-efs-utils“, then click on enter.

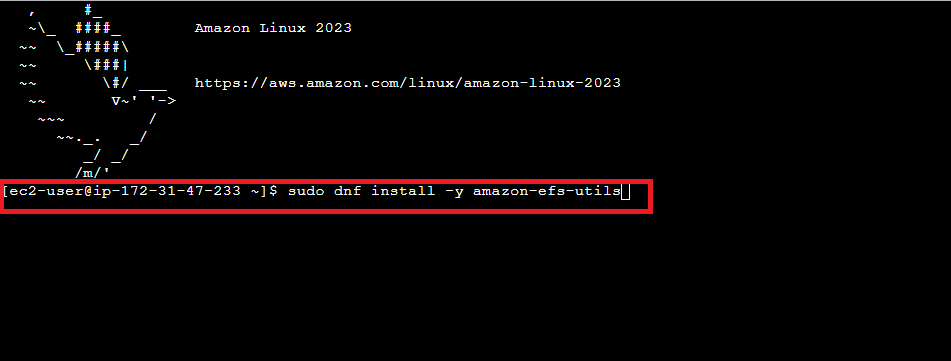


II. As you can see in the screenshot above, Amazon EFS utilities has been successfully installed. After successful installation, create a directory with the command, “sudo mkdir efs“. Then go to the Elastic File System created earlier, open it up, click on “Attach“ and copy the EFS mount helper. Go back to the First instance already opened and paste the command. Please refer to the screenshot below for clarity.
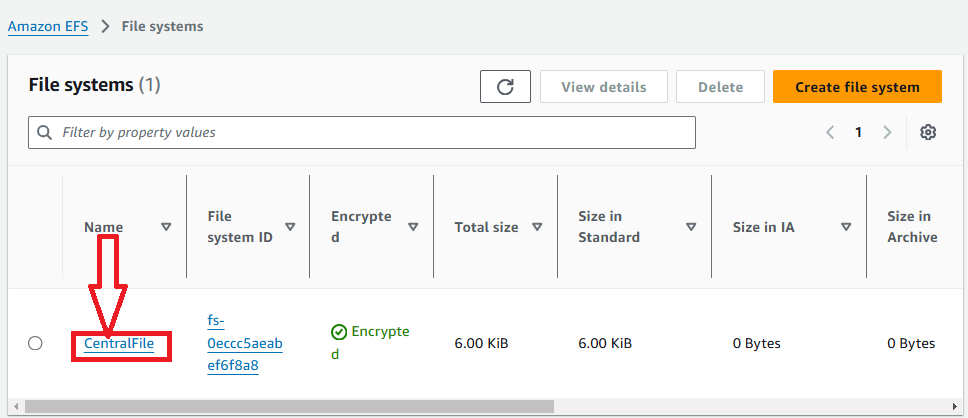
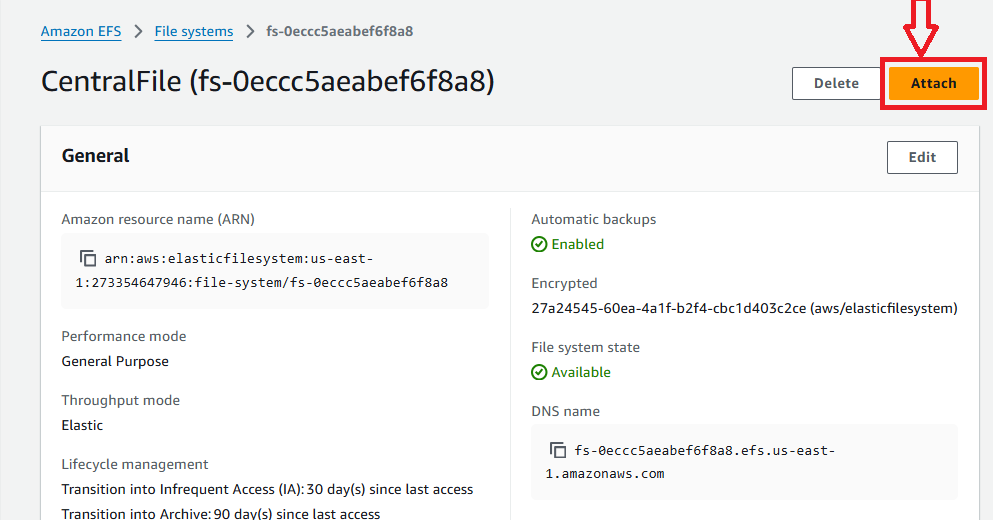
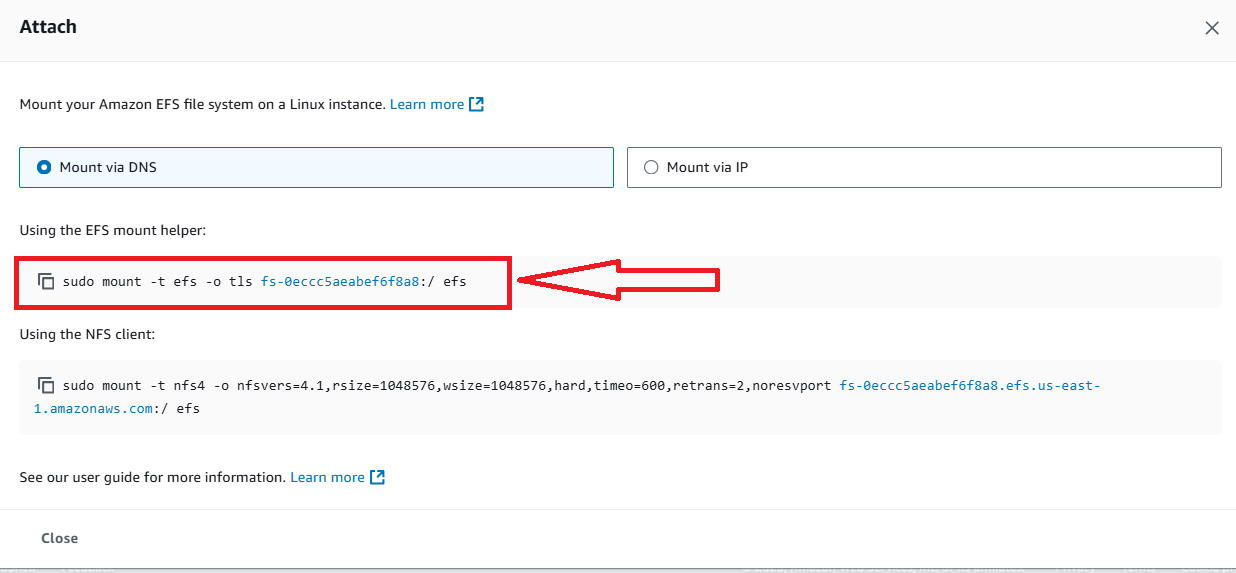

III. To confirm if our EFS has been successfully mounted, run the command, “df - T”. You will get to see the path of the EFS on the EC2 instance.

IV. Next, you have to change ownership of the efs directory to that of the current EC2. To do that, run the command, “sudo chown ec2-user efs/“.
You can sudo into the efs directory to create file, it could be a text file, html file, etc. To enter into the directory, use the command “cd efs“.
To create a file in the directory when you’re in, run “sudo touch [filename.extension]“ e.g “sudo touch index.html“, “sudo touch mainfile.txt“.
To check the content of your directory, run “ls”
To check the ownership right of these content, run “ls-l”


V. Now let’s mount EFS on the second EC2 instance and confirm that files can be shared in real time. From AWS, click to connect to the second instance. After connecting to it, install Amazon EFS Utilities, make a directory, copy and paste the mount helper from your EFS onto the EC2 instance to mount the EFS on the second EC2, Change ownership of the directory to that of the EC2 instance. (All commands are in I - IV in Step 3 above).
Enter into your directory and run the command “ls“. This is going to list all the files created on the directory in the first instance. It proves that you can access, edit and exchange files in real-time due to the EFS shared access. Please refer to the screenshots below.


Step 4 - Monitor And Optimize Storage Usage.
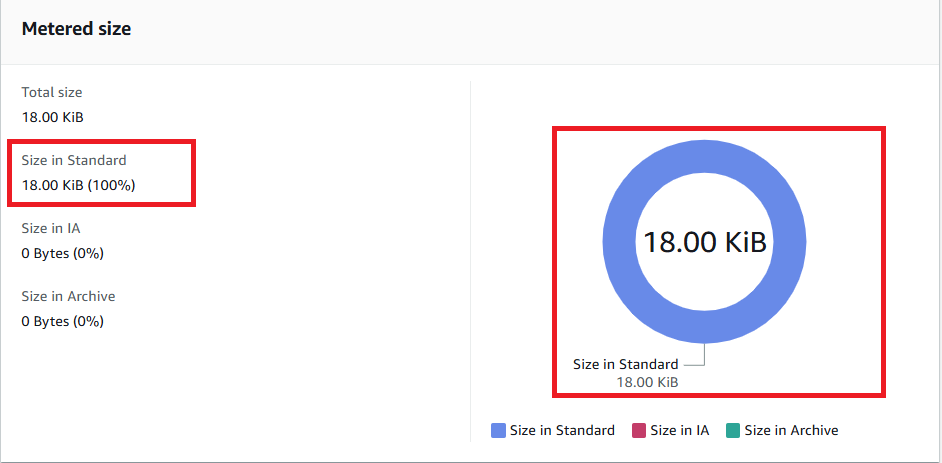
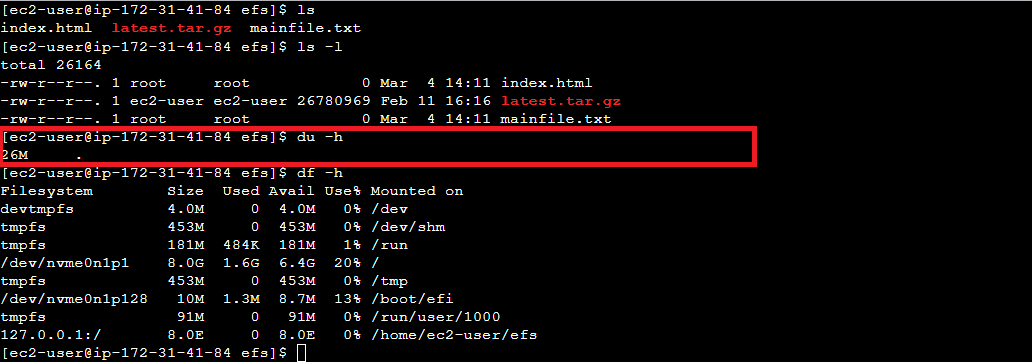
I. You can monitor and optimize your storage usage. To check the storage size currently in use, on AWS, go to the Metered Size on the EFS, you will be able to see the total size and the used disk space. You can also check on the OS GUI, by running the command, “du - h”.
And that’s it! You’ve successfully set up AWS Elastic File System (EFS) for shared storage across multiple EC2 instances. With EFS, you can now scale your storage seamlessly, enable real-time file sharing, and optimize your cloud infrastructure for efficiency. When hosting applications, managing containerized workloads, or running data-intensive processes, EFS provides the flexibility and performance you need.
But this is just the beginning! I’ll be sharing more hands-on AWS tutorials, cloud best practices, and step-by-step guides to help you level up your cloud computing skills. If you found this helpful, don’t forget to hit the subscribe button and stay tuned for my next article! Have questions or feedback? Drop a comment below, I’d love to hear from you!
See you in the next post!
Subscribe to my newsletter
Read articles from Damilola Linda Olowookere directly inside your inbox. Subscribe to the newsletter, and don't miss out.
Written by
