Step-by-Step Guide to Creating a Virtual Machine on Azure
 Abdullateef Kabir Opeyemi
In this tutorial, we will learn the step by step guide to creating and connecting a virtual machine on Microsoft Azure. Furthermore, we will also remotely access the windows virtual machine and initialise our VM for use.
It is important to note that Azure virtual machines (VMs) enable you to create dedicated compute resources in minutes that can be used just like a physical desktop or server machine. Azure virtual machines (VMs) can be created through the Azure portal. This method provides a browser-based user interface to create VMs and their associated resources. This quickstart shows you how to use the Azure portal to deploy a virtual machine (VM) in Azure that runs Windows Server 2022 Datacenter. To see your VM in action, you then RDP to the VM and install the IIS web server.
Lets Dive into it…
Enter virtual machines in the search.
Under Services, select Virtual machines.
In the Virtual machines page, select Create and then Azure virtual machine. The Create a virtual machine page opens.
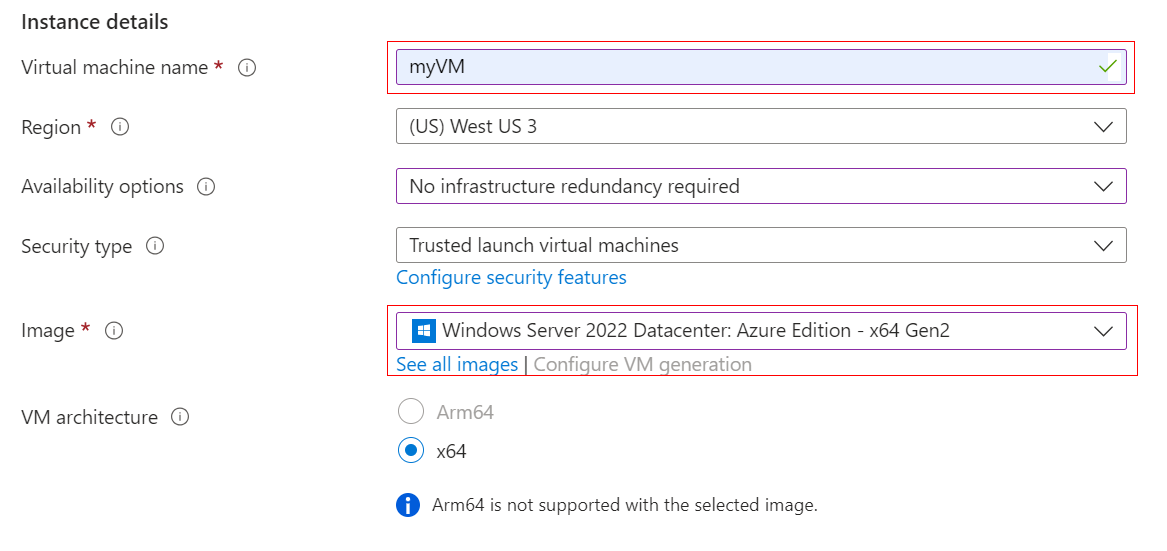
Under Instance details, enter myVM for the Virtual machine name and choose Windows Server 2022 Datacenter: Azure Edition - x64 Gen 2 for the Image. Leave the other defaults.

Under Administrator account, provide a username, such as azureusername and a password. The password must be at least 12 characters long and meet the defined complexity requirements

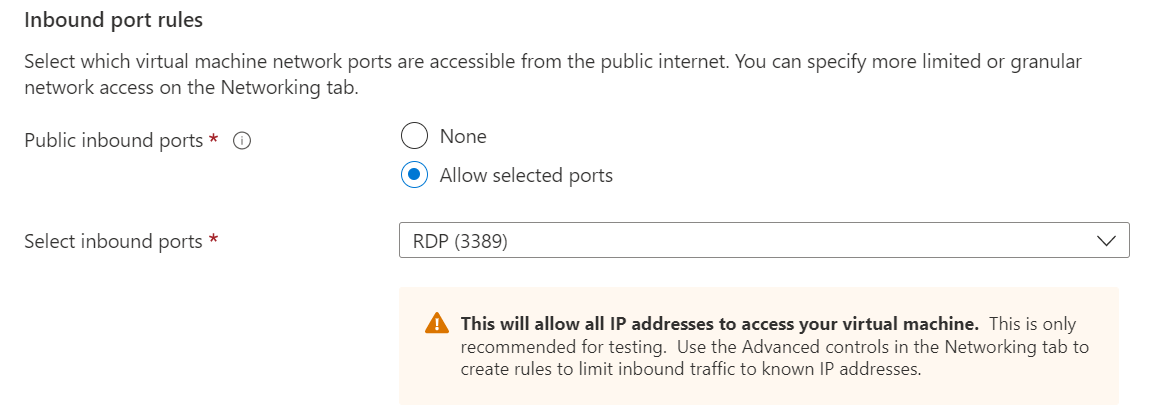
Under Inbound port rules, choose Allow selected ports and then select RDP (3389) and HTTP (80) from the drop-down.

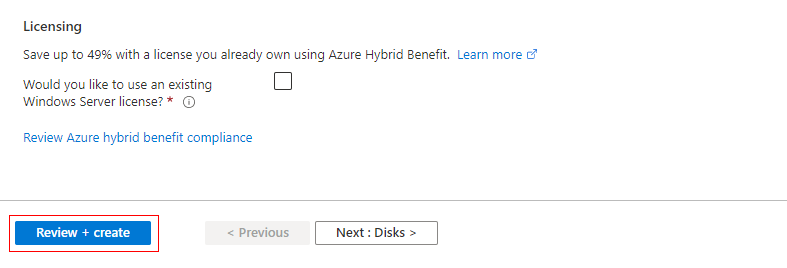
Leave the remaining defaults and then select the Review + create button at the bottom of the page.

After validation runs, select the Create button at the bottom of the page.

After deployment is complete, select Go to resource.

On the overview page for your virtual machine, select the Connect > RDP.

In the Connect with RDP tab, keep the default options to connect by IP address, over port 3389, and click Download RDP file.
pen the downloaded RDP file and click Connect when prompted.
In the Windows Security window, select More choices and then Use a different account. Type the username as localhost\username, enter the password you created for the virtual machine, and then click OK.
You may receive a certificate warning during the sign-in process. Click Yes or Continue to create the connection.
In conclusion, creating a virtual machine on Azure using the Azure portal is a straightforward process that involves several key steps. By following the step-by-step guide, you can quickly set up a Windows Server 2022 Datacenter virtual machine. The process includes selecting the appropriate image, configuring the administrator account, setting inbound port rules, and validating the configuration before deployment. Once the VM is deployed, you can connect to it using Remote Desktop Protocol (RDP) to manage and utilize your virtual machine effectively. This guide provides a comprehensive approach to deploying and accessing a virtual machine, making it accessible for users to leverage Azure's powerful cloud computing capabilities.
Subscribe to my newsletter
Read articles from Abdullateef Kabir Opeyemi directly inside your inbox. Subscribe to the newsletter, and don't miss out.
Written by
