Docker Networking, Volumes and Compose
 Pratik Bapat
Table of contents
- 🛠️ Initial Tasks
- 🔥 Challenges and Solutions
- 🔹Challenge 1: Create a custom bridge network and connect two containers (alpine and nginx).
- 🔹 Challenge 2: MySQL Container with Named Volume
- 🔹 Challenge 3 & 4: Flask API + PostgreSQL with Docker Compose and Secure Database Credentials Using Environment Variables
- 🔹 Challenge 5: Deploy WordPress + MySQL
- 🔹 Challenge 6: Create a multi-container setup where an Nginx container acts as a reverse proxy for a backend service.
- 🔹 Challenge 7: Set up a network alias for a database container and connect an application container to it.
- 🔹 Challenge 8: Use docker inspect to check the assigned IP address of a running container and communicate with it manually.
- 🔹 Challenge 9: Deploy a Redis-based caching system using Docker Compose with a Python or Node.js app.
- 🔹 Challenge 10: Implement container health checks in Docker Compose (healthcheck: section).
🛠️ Initial Tasks
✅ Task 1: Inspect Default Docker Networks
Before diving into networking, let's list all available Docker networks:
docker network ls

You'll typically see bridge, host, none, and some custom networks if any exist.
✅ Task 2: Install Docker Compose
Ensure Docker Compose is installed. You can install it using:
sudo curl -L "https://github.com/docker/compose/releases/latest/download/docker-compose-$(uname -s)-$(uname -m)" -o /usr/local/bin/docker-compose
sudo chmod +x /usr/local/bin/docker-compose

Verify installation:
docker-compose --version

🔥 Challenges and Solutions
🔹Challenge 1: Create a custom bridge network and connect two containers (alpine and nginx).
To create a bridge network and connect two containers:
docker network create my_bridge
docker run -dit --name alpine1 --network my_bridge alpine
docker run -dit --name nginx1 --network my_bridge nginx
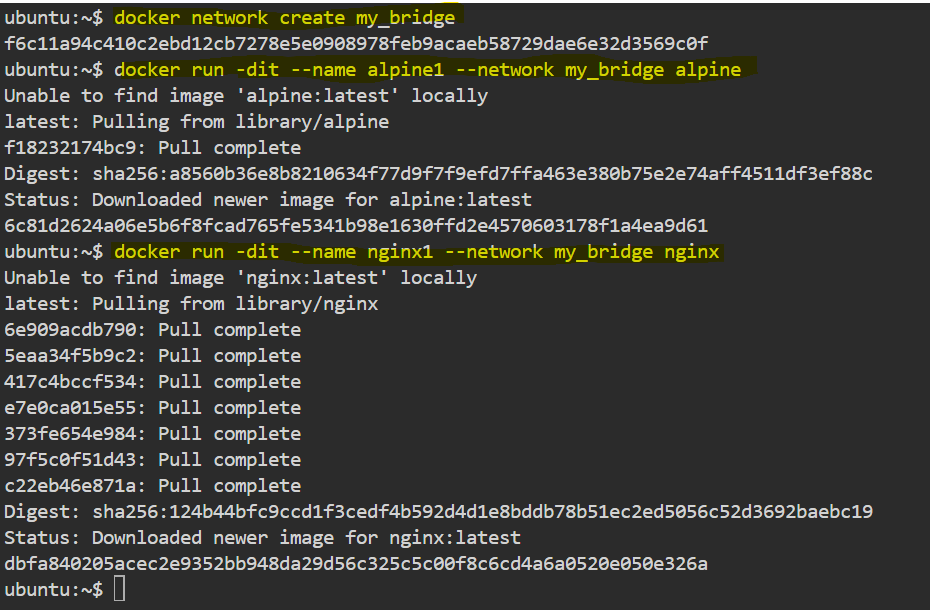
Verify connection:
docker network inspect my_bridge
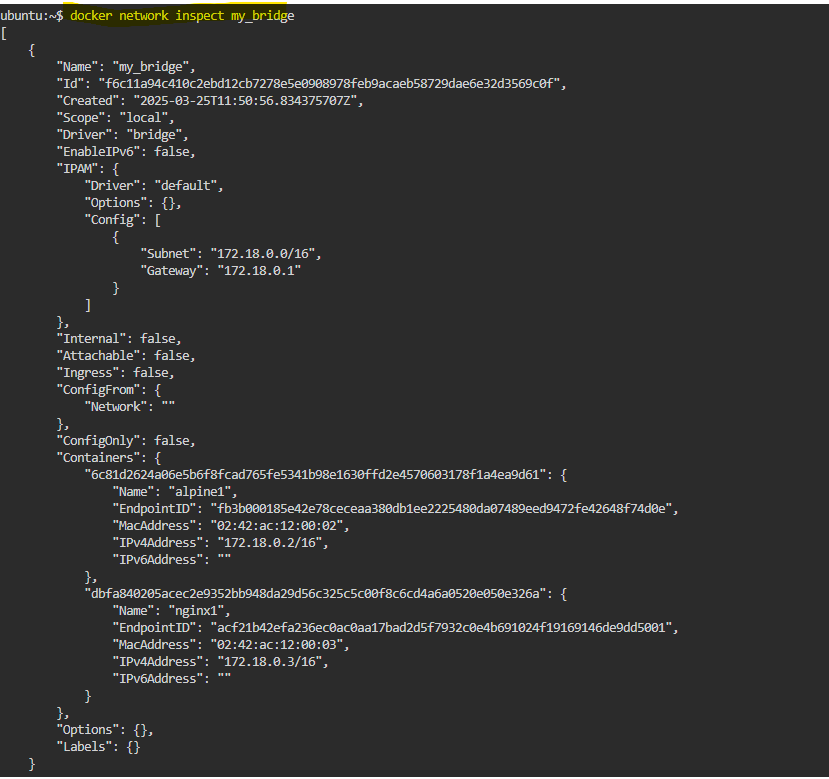
🔹 Challenge 2: MySQL Container with Named Volume
Run MySQL with a named volume:
docker volume create mysql_data
docker run -d --name mysql-container -v mysql_data:/var/lib/mysql -e MYSQL_ROOT_PASSWORD=root mysql
docker exec -it mysql-container mysql -uroot -proot

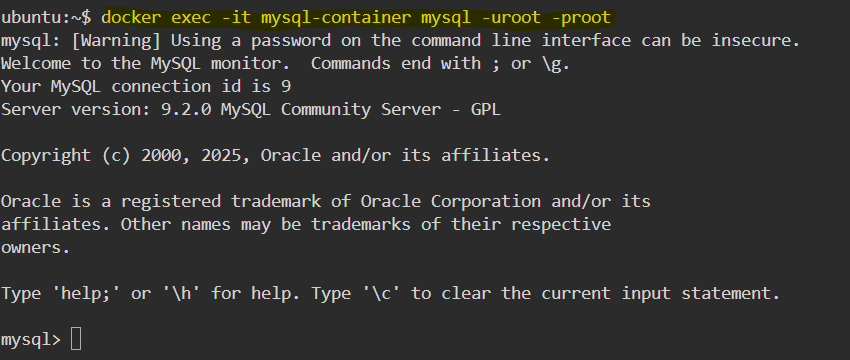
Insert data into the MySQL database and verify it:
CREATE DATABASE test_db;
USE test_db;
CREATE TABLE test_table (id INT PRIMARY KEY, name VARCHAR(50));
INSERT INTO test_table VALUES (1, 'Test Name');
SELECT * FROM test_table;
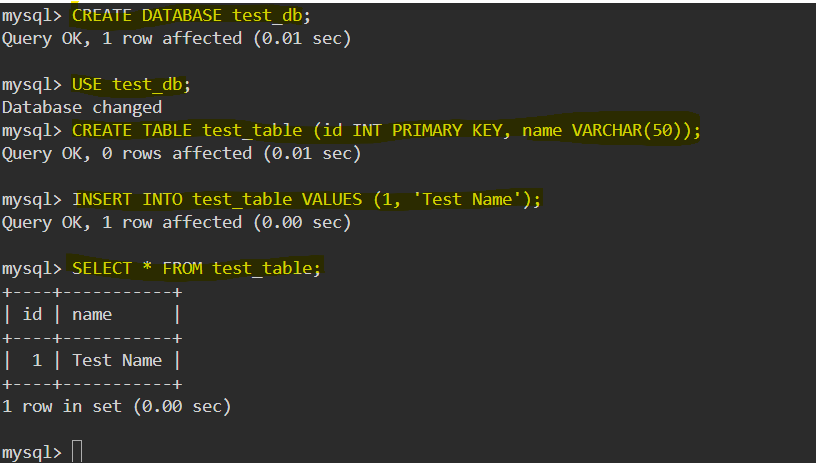
Restart the container and confirm persistence:
docker stop mysql-container && docker rm mysql-container
docker run -d --name mysql-container -v mysql_data:/var/lib/mysql -e MYSQL_ROOT_PASSWORD=root mysql
docker exec -it mysql-container mysql -uroot -proot
USE test_db;
SELECT * FROM test_table;

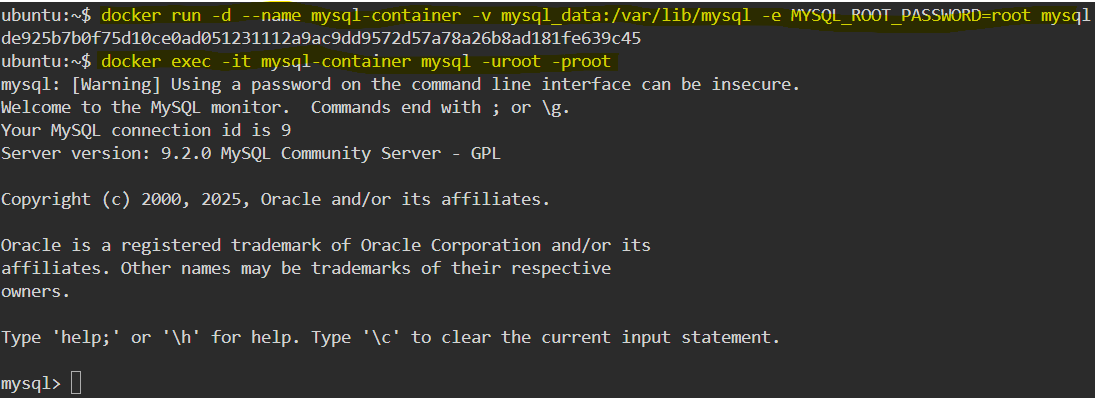
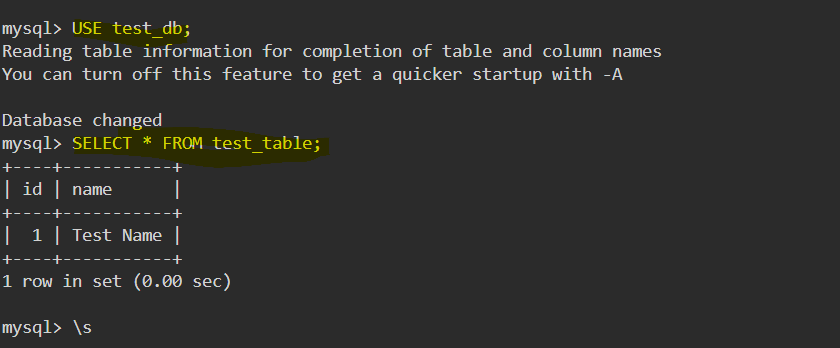
This ensures that the database data persists even after the container is removed. ✅
🔹 Challenge 3 & 4: Flask API + PostgreSQL with Docker Compose and Secure Database Credentials Using Environment Variables
Step 1: Create the Flask API
1️⃣ Create the app.py file
from flask import Flask, jsonify
import psycopg2
import os

app = Flask(__name__)

# Database connection parameters from environment variables
DB_NAME = os.getenv("POSTGRES_DB")
DB_USER = os.getenv("POSTGRES_USER")
DB_PASSWORD = os.getenv("POSTGRES_PASSWORD")
DB_HOST = os.getenv("POSTGRES_HOST", "db")
DB_PORT = os.getenv("POSTGRES_PORT", "5432")

def get_db_connection():
    try:
        conn = psycopg2.connect(
            dbname=DB_NAME,
            user=DB_USER,
            password=DB_PASSWORD,
            host=DB_HOST,
            port=DB_PORT
        )
        return conn
    except Exception as e:
        print(f"Database connection failed: {e}")
        return None

@app.route("/")
def home():
    return jsonify({"message": "Flask API is running!"})

@app.route("/users")
def get_users():
    conn = get_db_connection()
    if not conn:
        return jsonify({"error": "Database connection failed"}), 500

    cur = conn.cursor()
    cur.execute("SELECT id, name FROM users;")
    users = cur.fetchall()
    cur.close()
    conn.close()

    return jsonify(users)

if __name__ == "__main__":
    app.run(host="0.0.0.0", port=5000)
2️⃣ Create the requirements.txt file
Flask
psycopg2
3️⃣ Create the Dockerfile for Flask API
# Use official Python image
FROM python:3.9

# Set working directory
WORKDIR /app

# Copy application files
COPY . /app

# Install dependencies
RUN pip install --no-cache-dir -r requirements.txt

# Expose Flask port
EXPOSE 5000

# Run the application
CMD ["python", "app.py"]
Step 2: Create the .env File
POSTGRES_DB=mydatabase
POSTGRES_USER=myuser
POSTGRES_PASSWORD=mypassword
POSTGRES_HOST=db
POSTGRES_PORT=5432
Step 3: Create the docker-compose.yml File
version: '3.8'

services:
  db:
    image: postgres:15
    container_name: postgres-db
    env_file:
      - .env
    volumes:
      - pg_data:/var/lib/postgresql/data
    ports:
      - "5432:5432"

  app:
    build: ./app
    container_name: flask-api
    depends_on:
      - db
    env_file:
      - .env
    ports:
      - "5000:5000"
    restart: always

volumes:
  pg_data:
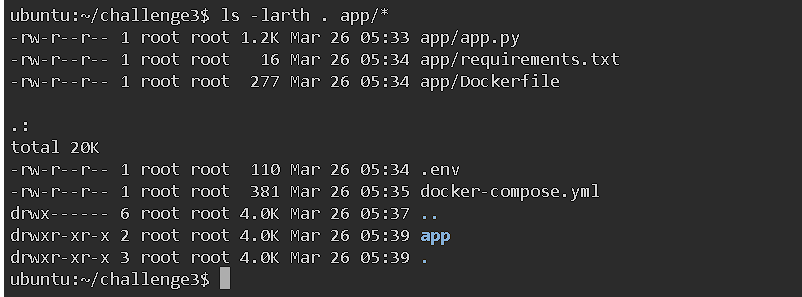
Step 4: Deployment
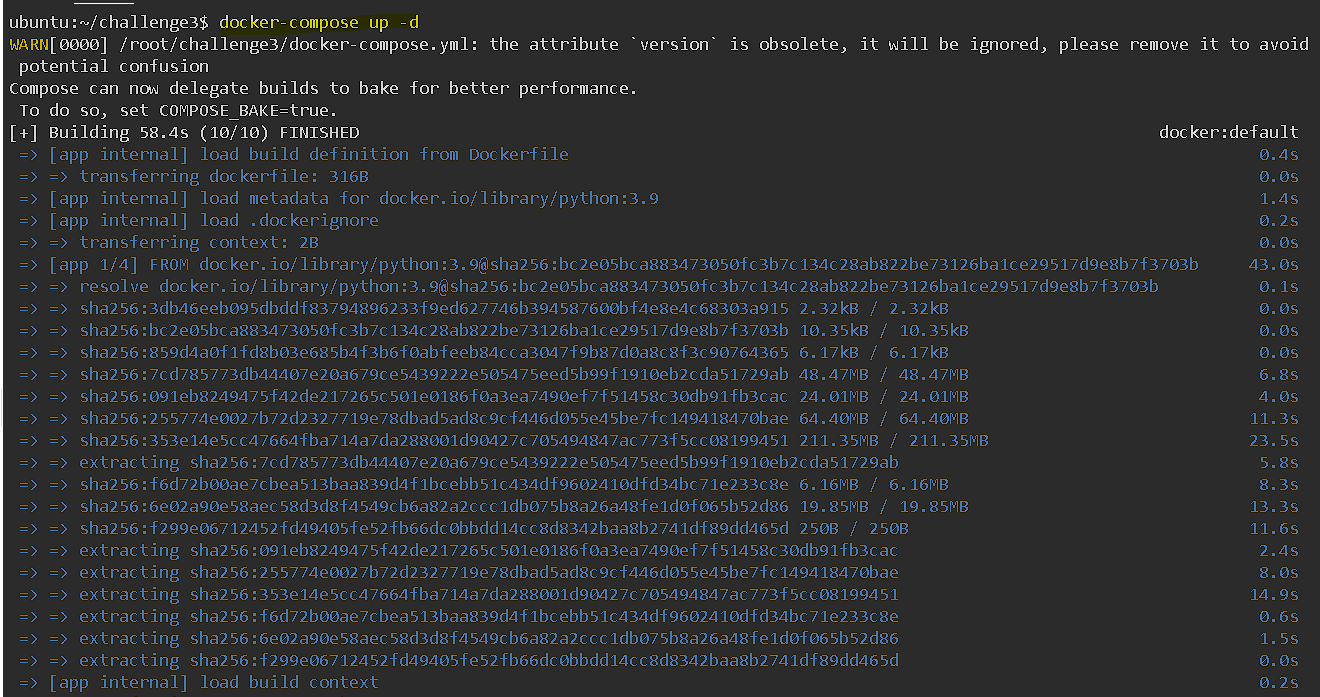
Run the setup:
docker-compose up -d

Step 5: Test the Application
1️⃣ Check running containers:
docker ps

2️⃣ Access the Flask API:
curl http://localhost:5000/
Expected Output:

3️⃣ Create a users table inside PostgreSQL:
docker exec -it postgres-db psql -U myuser -d mydatabase

Then, run inside PostgreSQL shell:
CREATE TABLE users (id SERIAL PRIMARY KEY, name TEXT);
INSERT INTO users (name) VALUES ('Manish'), ('Tushar'), ('Swapnil');

4️⃣ Fetch users via Flask API:
curl http://localhost:5000/users
Expected Output:

🔹 Challenge 5: Deploy WordPress + MySQL
Step 1: Create a docker-compose.yml File
services:
  db:
    image: mysql:5.7
    container_name: wordpress-mysql
    restart: always
    environment:
      MYSQL_ROOT_PASSWORD: root
      MYSQL_DATABASE: wordpress
      MYSQL_USER: wordpress
      MYSQL_PASSWORD: wordpress
    volumes:
      - wp_db_data:/var/lib/mysql
    networks:
      - wp_network

  wordpress:
    image: wordpress:latest
    container_name: wordpress-site
    restart: always
    depends_on:
      - db
    environment:
      WORDPRESS_DB_HOST: db:3306
      WORDPRESS_DB_NAME: wordpress
      WORDPRESS_DB_USER: wordpress
      WORDPRESS_DB_PASSWORD: wordpress
    volumes:
      - wp_data:/var/www/html
    ports:
      - "8080:80"  # Map container's port 80 to localhost:8080
    networks:
      - wp_network

volumes:
  wp_db_data:
  wp_data:

networks:
  wp_network:
Step 2: Deploy the WordPress Site
1️⃣ Run the following command to start WordPress and MySQL:
docker-compose up -d


2️⃣ Verify that the containers are running:
docker ps
Expected output:

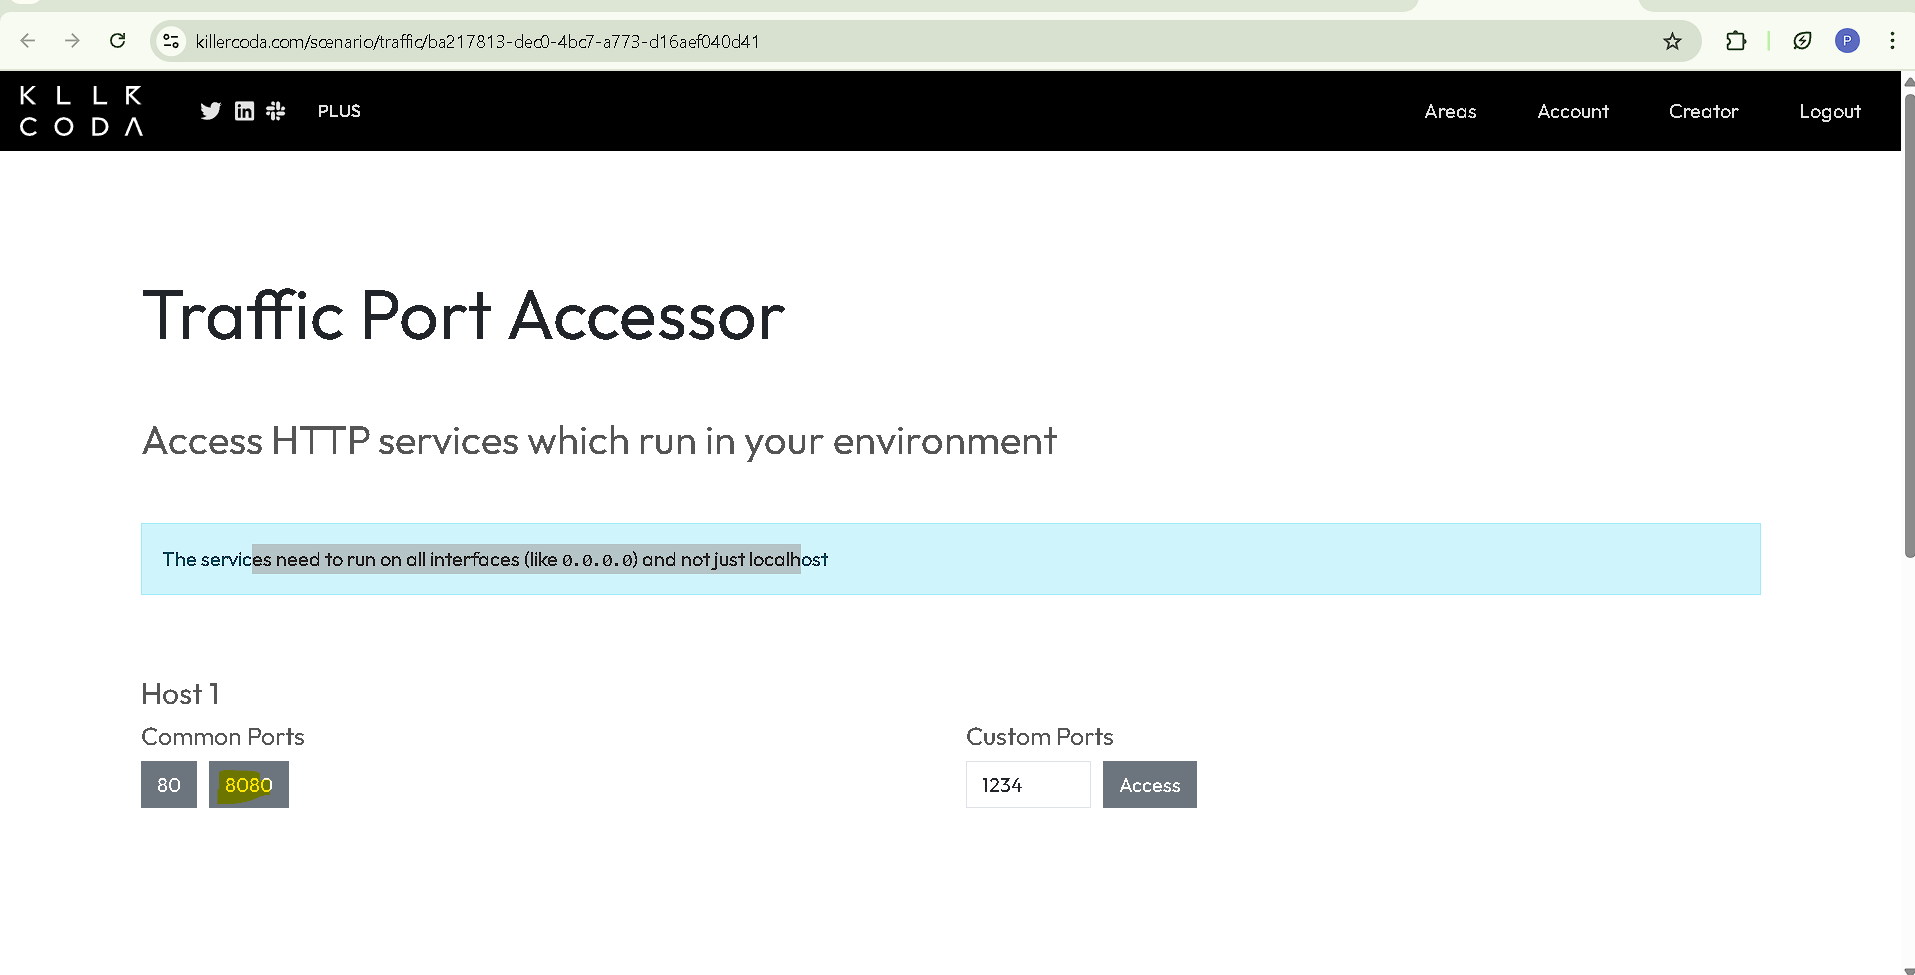
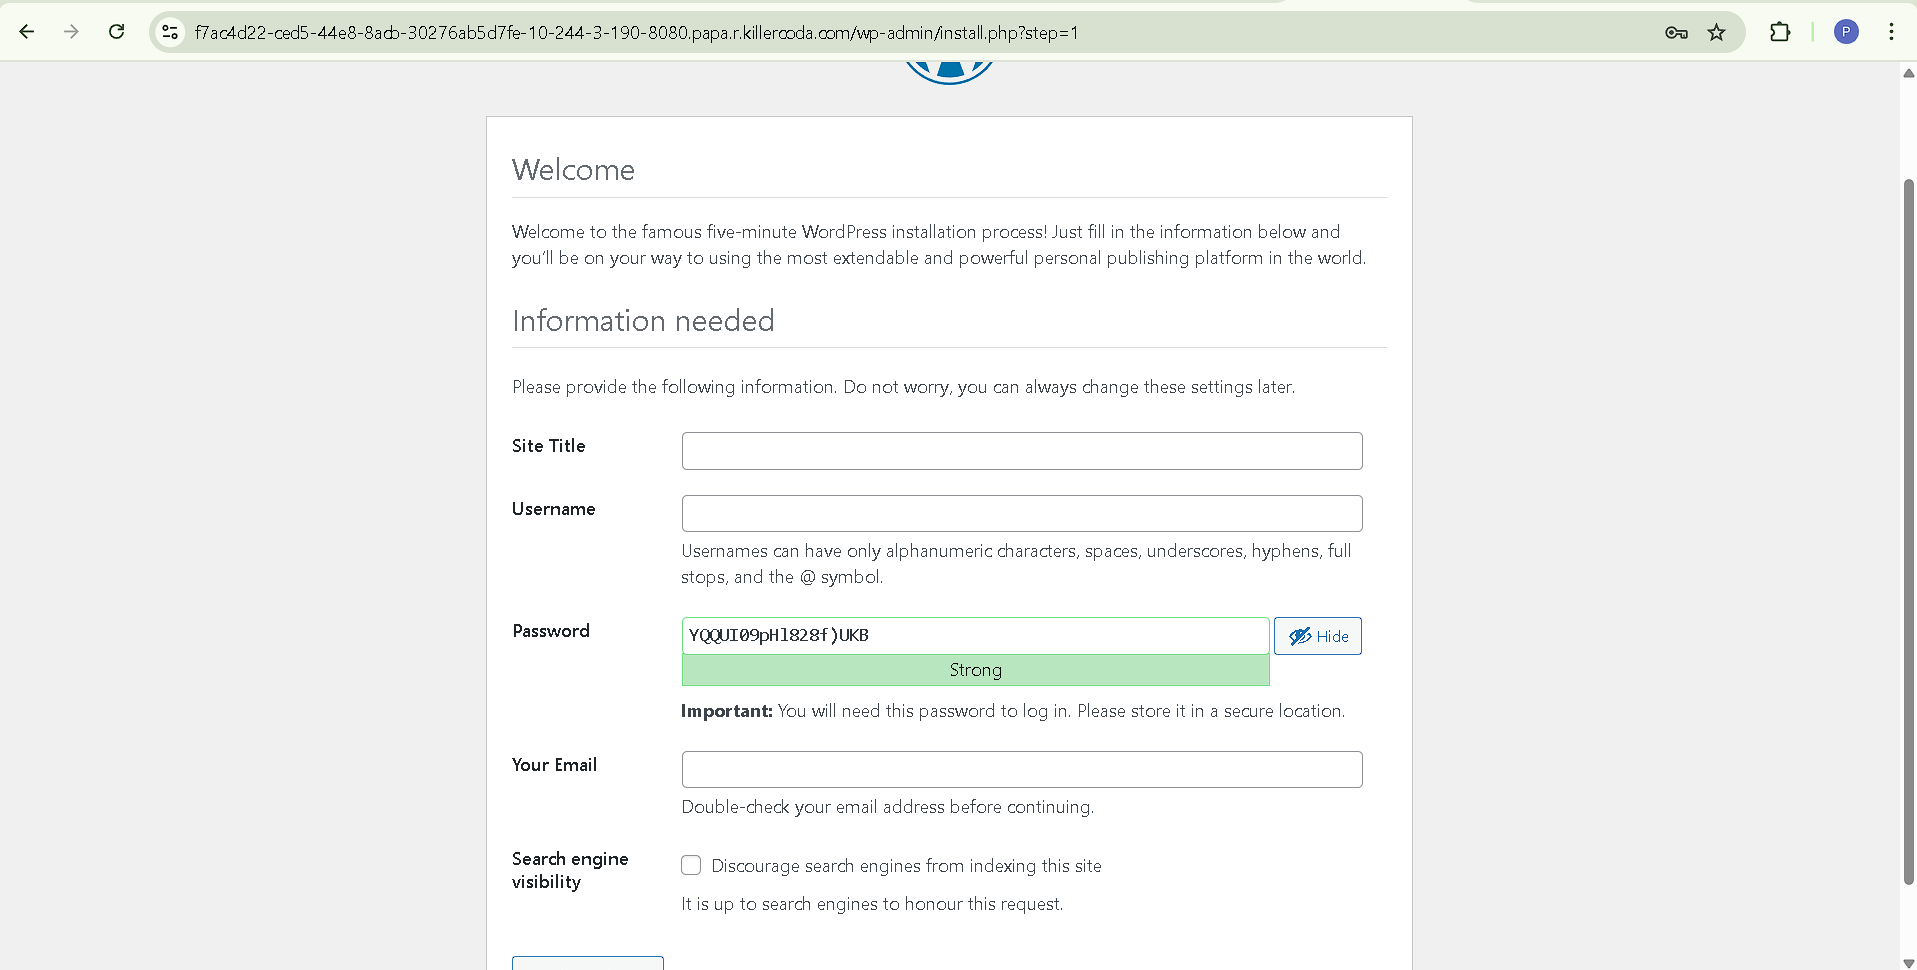
Visit http://localhost:8080 to access WordPress if you are running this locally . For killerkoda --> Click hamburger menu --> Traffic ports --> click port 8080

🔹 Challenge 6: Create a multi-container setup where an Nginx container acts as a reverse proxy for a backend service.
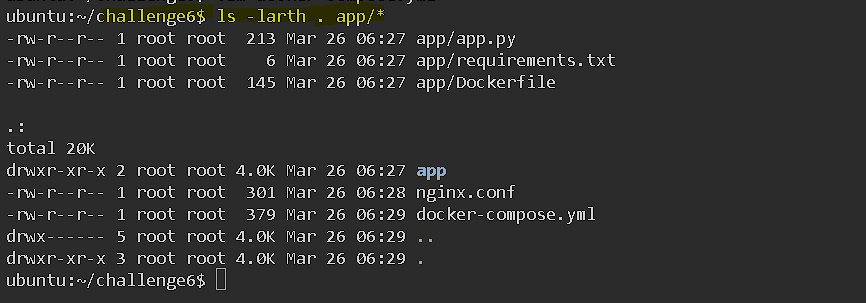
Step 1: Create the Folder Structure
mkdir challenge6 && cd challenge6
mkdir app
Step 2: Create Flask API (app/app.py)
vim app/app.py
from flask import Flask, jsonify

app = Flask(__name__)

@app.route('/')
def home():
    return jsonify({"message": "Hello from Flask backend!"})

if __name__ == '__main__':
    app.run(host='0.0.0.0', port=5000)
Step 3: Create requirements.txt
vim app/requirements.txt
Add:
flask
Step 4: Create Flask Dockerfile (app/Dockerfile)
vim app/Dockerfile
FROM python:3.9-slim

WORKDIR /app
COPY requirements.txt .
RUN pip install --no-cache-dir -r requirements.txt
COPY . .

CMD ["python", "app.py"]
Step 5: Create Nginx Configuration (nginx.conf)
vim nginx.conf
events {}

http {
    server {
        listen 80;

        location / {
            proxy_pass http://backend:5000;
            proxy_set_header Host $host;
            proxy_set_header X-Real-IP $remote_addr;
            proxy_set_header X-Forwarded-For $proxy_add_x_forwarded_for;
        }
    }
}
Step 6: Create docker-compose.yml
vim docker-compose.yml
Modify docker-compose.yml:
services:
  backend:
    build: ./app
    container_name: flask-backend
    networks:
      - app_network

  nginx:
    image: nginx:latest
    container_name: nginx-reverse-proxy
    depends_on:
      - backend
    ports:
      - "8080:80"
    volumes:
      - ./nginx.conf:/etc/nginx/nginx.conf:ro
    networks:
      - app_network

networks:
  app_network:
    driver: bridge
Step 7: Deploy the Containers
Run:
docker-compose up -d --build


Check running containers:
docker ps
Expected output:

Step 8: Test the Reverse Proxy
Since we are using KillerKoda, open port 8080:
1️⃣ Click "OPEN PORT" in KillerKoda.
2️⃣ Enter 8080 and open it in a new tab.

3️⃣ Or use curl to test:
curl -X GET http://localhost:8080
Expected JSON response:

🔹 Challenge 7: Set up a network alias for a database container and connect an application container to it.
Step 1: Create the Folder Structure
mkdir challenge7 && cd challenge7
mkdir app
Step 2: Create a .env File
POSTGRES_DB=mydatabase
POSTGRES_USER=myuser
POSTGRES_PASSWORD=mypassword
POSTGRES_HOST=db-alias
POSTGRES_PORT=5432
Step 3: Create Flask Application (app/app.py)
import os
import psycopg2
from flask import Flask, jsonify
from dotenv import load_dotenv
import socket

# Load environment variables from .env file
load_dotenv()

app = Flask(__name__)

# Database connection parameters using environment variables
DB_PARAMS = {
    "dbname": os.getenv("POSTGRES_DB"),
    "user": os.getenv("POSTGRES_USER"),
    "password": os.getenv("POSTGRES_PASSWORD"),
    "host": os.getenv("POSTGRES_HOST"),
    "port": os.getenv("POSTGRES_PORT")
}

@app.route('/')
def check_db():
    try:
        conn = psycopg2.connect(**DB_PARAMS)
        cur = conn.cursor()
        cur.execute("SELECT version();")
        db_version = cur.fetchone()
        cur.close()
        conn.close()
        return jsonify({"message": "Connected to database", "db_version": db_version[0]})
    except Exception as e:
        return jsonify({"error": str(e)})

@app.route('/check-network-alias')
def check_network_alias():
    """ Test the resolution of db-alias inside the Flask app """
    try:
        db_host = os.getenv("POSTGRES_HOST")
        db_ip = socket.gethostbyname(db_host)
        return jsonify({"message": f"Network alias {db_host} resolved to {db_ip}"})
    except Exception as e:
        return jsonify({"error": str(e)})

if __name__ == '__main__':
    app.run(host='0.0.0.0', port=5000)
Step 4: Create requirements.txt
flask
psycopg2-binary
python-dotenv
Step 5: Create Flask Dockerfile
FROM python:3.9-slim

WORKDIR /app
COPY requirements.txt .
RUN pip install --no-cache-dir -r requirements.txt
COPY . .

CMD ["python", "app.py"]
Step 6: Create docker-compose.yml
version: "3.8"

services:
  db:
    image: postgres:latest
    container_name: postgres-db
    env_file:
      - .env
    networks:
      app_network:
        aliases:
          - db-alias  # Setting network alias

  app:
    build: ./app
    container_name: flask-app
    depends_on:
      - db
    env_file:
      - .env
    networks:
      - app_network
    ports:
      - "5000:5000"

networks:
  app_network:
    driver: bridge
Step 7: Deploy the Containers
docker-compose up -d --build


Check running containers:
docker ps

Step 8: Verify the Database Connection Using API
1️⃣ Check Flask API for Database Connection
curl -X GET http://localhost:5000
Expected JSON response:

2️⃣ Test db-alias Network Resolution
curl -X GET http://localhost:5000/check-network-alias
Expected output:

Now, the app can refer to the DB as mydb.
🔹 Challenge 8: Use docker inspect to check the assigned IP address of a running container and communicate with it manually.
Step 1: List Running Containers
docker ps
You'll see output like:

Step 2: Get the Container's IP Address
- To get the IP address of a container (e.g., flask-app), use:
docker inspect -f '{{range.NetworkSettings.Networks}}{{.IPAddress}}{{end}}' flask-app

- For the database container (
postgres-db):
docker inspect -f '{{range.NetworkSettings.Networks}}{{.IPAddress}}{{end}}' postgres-db

Step 3: Communicate with the Container
1️⃣ Test Flask API
- If your Flask app runs on port 5000, try:
curl http://172.19.0.3:5000

🔹 Challenge 9: Deploy a Redis-based caching system using Docker Compose with a Python or Node.js app.
Step 1: Create the Folder Structure
mkdir challenge9 && cd challenge9
mkdir app
Step 2: Create .env File
REDIS_HOST=redis
REDIS_PORT=6379
Step 3: Create app.py (Simple Redis Test App)
- Create
app/app.py
import redis
import os

# Load Redis connection details from environment variables
REDIS_HOST = os.getenv("REDIS_HOST", "redis")
REDIS_PORT = int(os.getenv("REDIS_PORT", 6379))

# Connect to Redis
r = redis.Redis(host=REDIS_HOST, port=REDIS_PORT, decode_responses=True)

# Set and get a value
r.set("key", "Hello from Redis!")
print(r.get("key"))
Step 4: Create requirements.txt
- Create
app/requirements.txt
redis
Step 5: Create a Dockerfile for the Python App
- Create
app/Dockerfile
FROM python:3.9-slim

WORKDIR /app

# Install dependencies
COPY requirements.txt .
RUN pip install --no-cache-dir -r requirements.txt

# Copy app
COPY . .

CMD ["python", "app.py"]
Step 6: Define docker-compose.yml
version: '3.8'

services:
  redis:
    image: redis:latest
    container_name: redis
    restart: always
    networks:
      - app_network

  python-app:
    build: ./app
    container_name: python-app
    depends_on:
      - redis
    env_file:
      - .env
    networks:
      - app_network

networks:
  app_network:
    driver: bridge
Step 7: Build and Run Containers
docker-compose up --build


Step 8: Verify Redis Connection
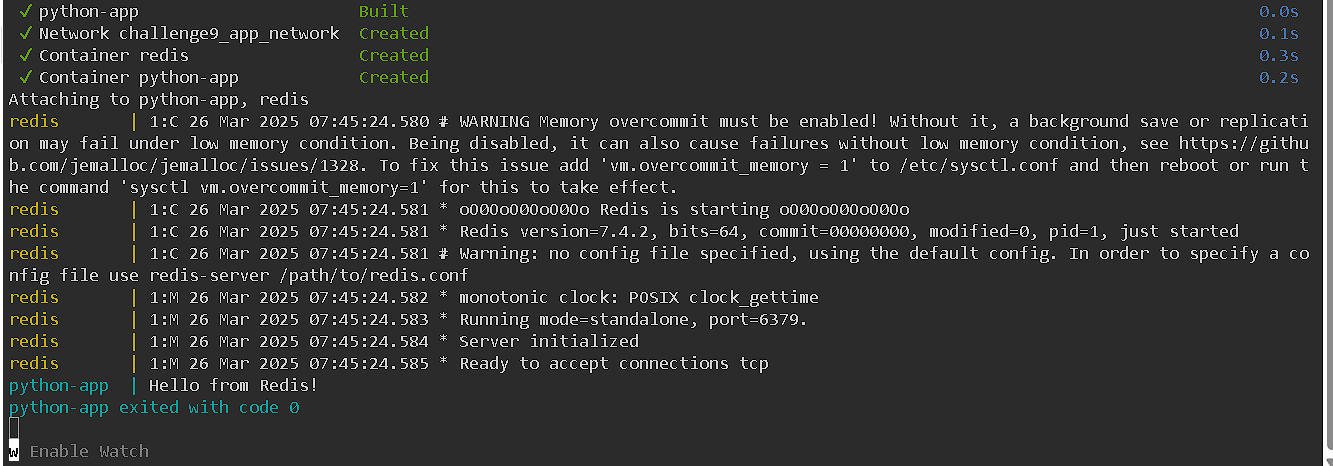
- Check logs to see if the Python app successfully connects to Redis and retrieves the value:
docker logs python-app
output:

🔹 Challenge 10: Implement container health checks in Docker Compose (healthcheck: section).
Step 1: Update docker-compose.yml in challenge 9 with Health Checks for redis service
version: '3.8'

services:
  redis:
    image: redis:latest
    container_name: redis
    restart: always
    networks:
      - app_network
    healthcheck:
      test: ["CMD", "redis-cli", "ping"]
      interval: 10s
      timeout: 5s
      retries: 3
Step 2: Build and Run Containers
docker-compose up --build

Step 3: Check Health Status of redis container
Run:
docker ps
Look at the STATUS column. It should show:
healthy

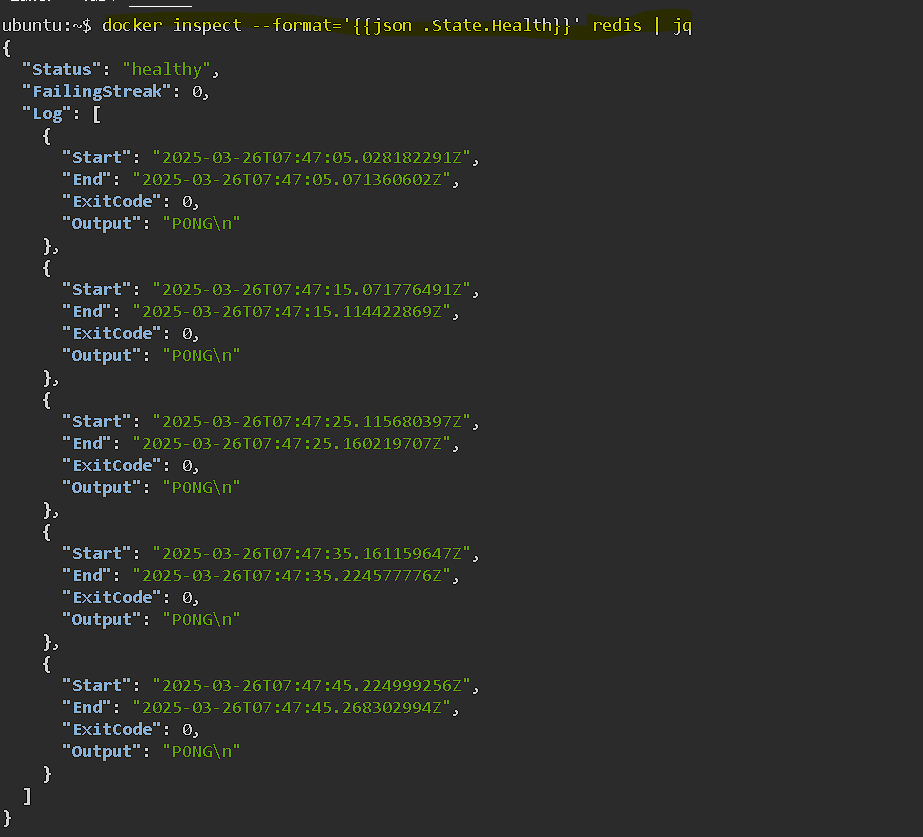
Alternatively, check specific container health:
docker inspect --format='{{json .State.Health}}' redis
Subscribe to my newsletter
Read articles from Pratik Bapat directly inside your inbox. Subscribe to the newsletter, and don't miss out.
Written by
