How to Automate EC2 AMI anda RDS Backup Using AWS Backup?
 Arav Yadav
Step 1: Create a Backup Vault
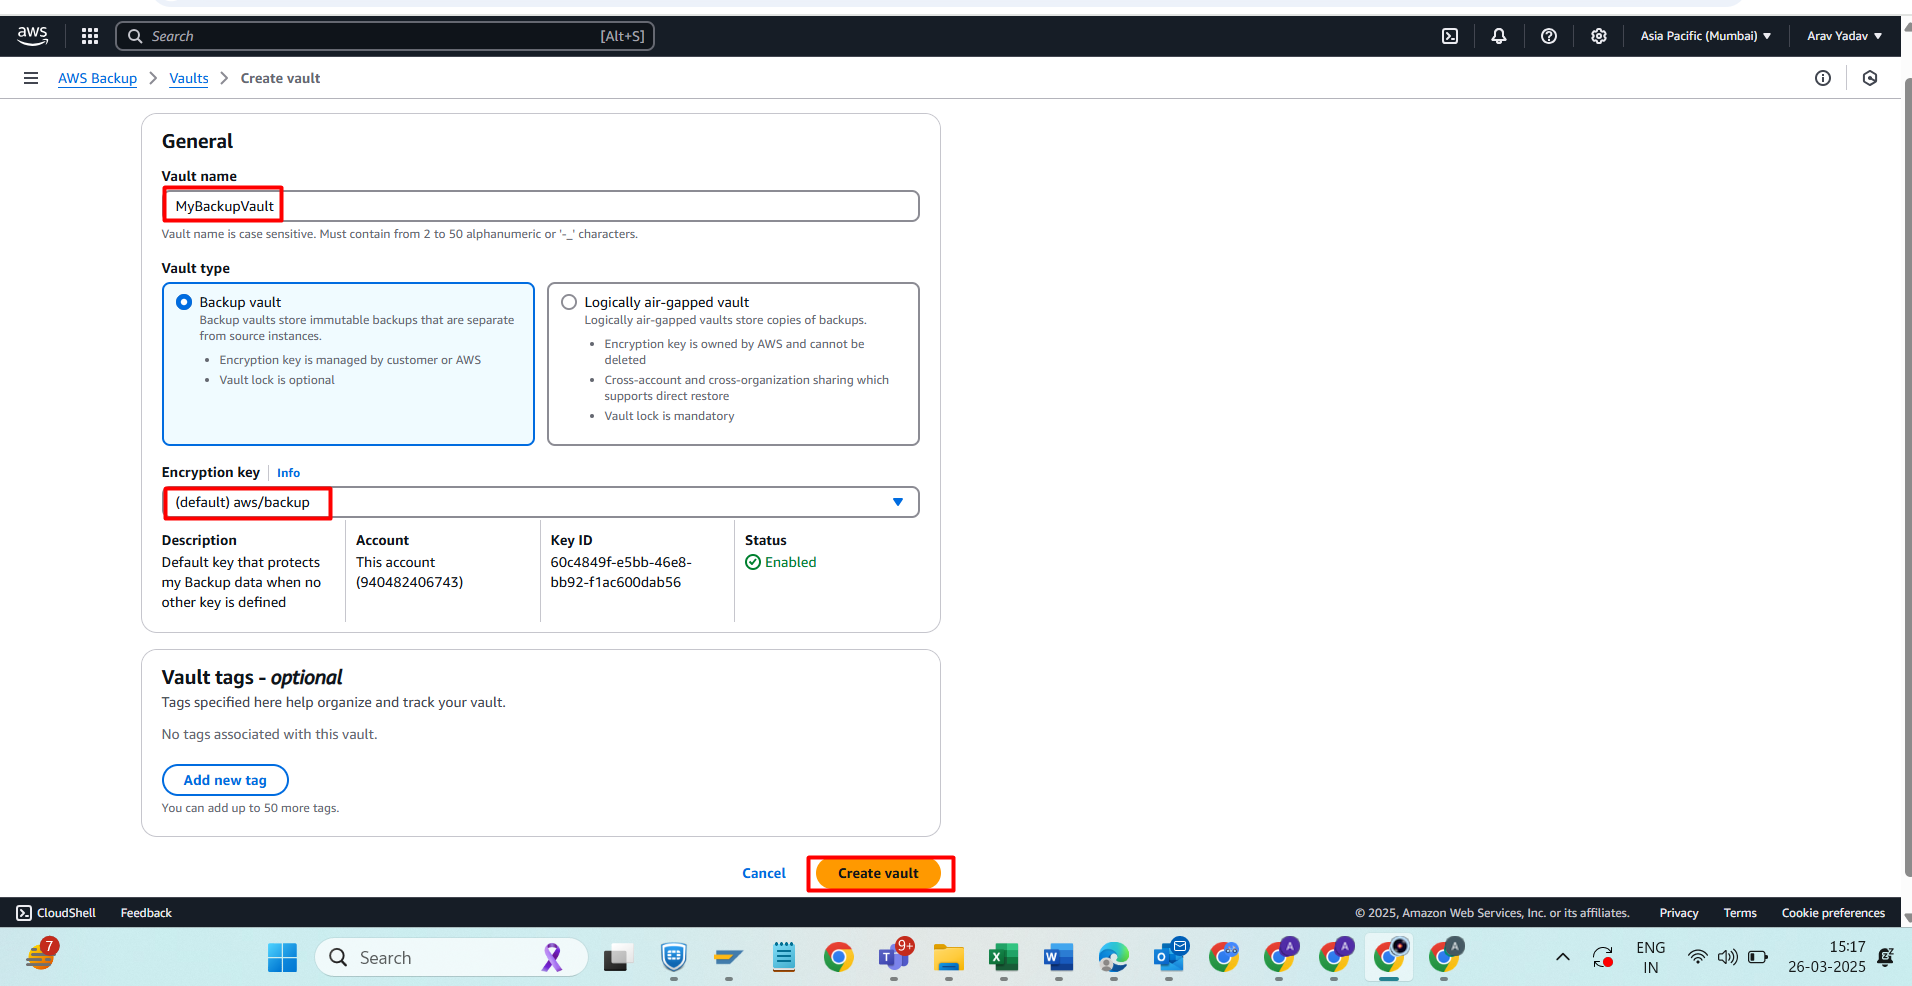
In AWS Backup, go to Backup vaults.
Click Create Backup Vault.
Provide a name (e.g.,
MyBackupVault).Choose an encryption key (default AWS Key Management Service (KMS) key or a custom key).
Click Create Backup Vault.
Step 2: Create a Backup Plan
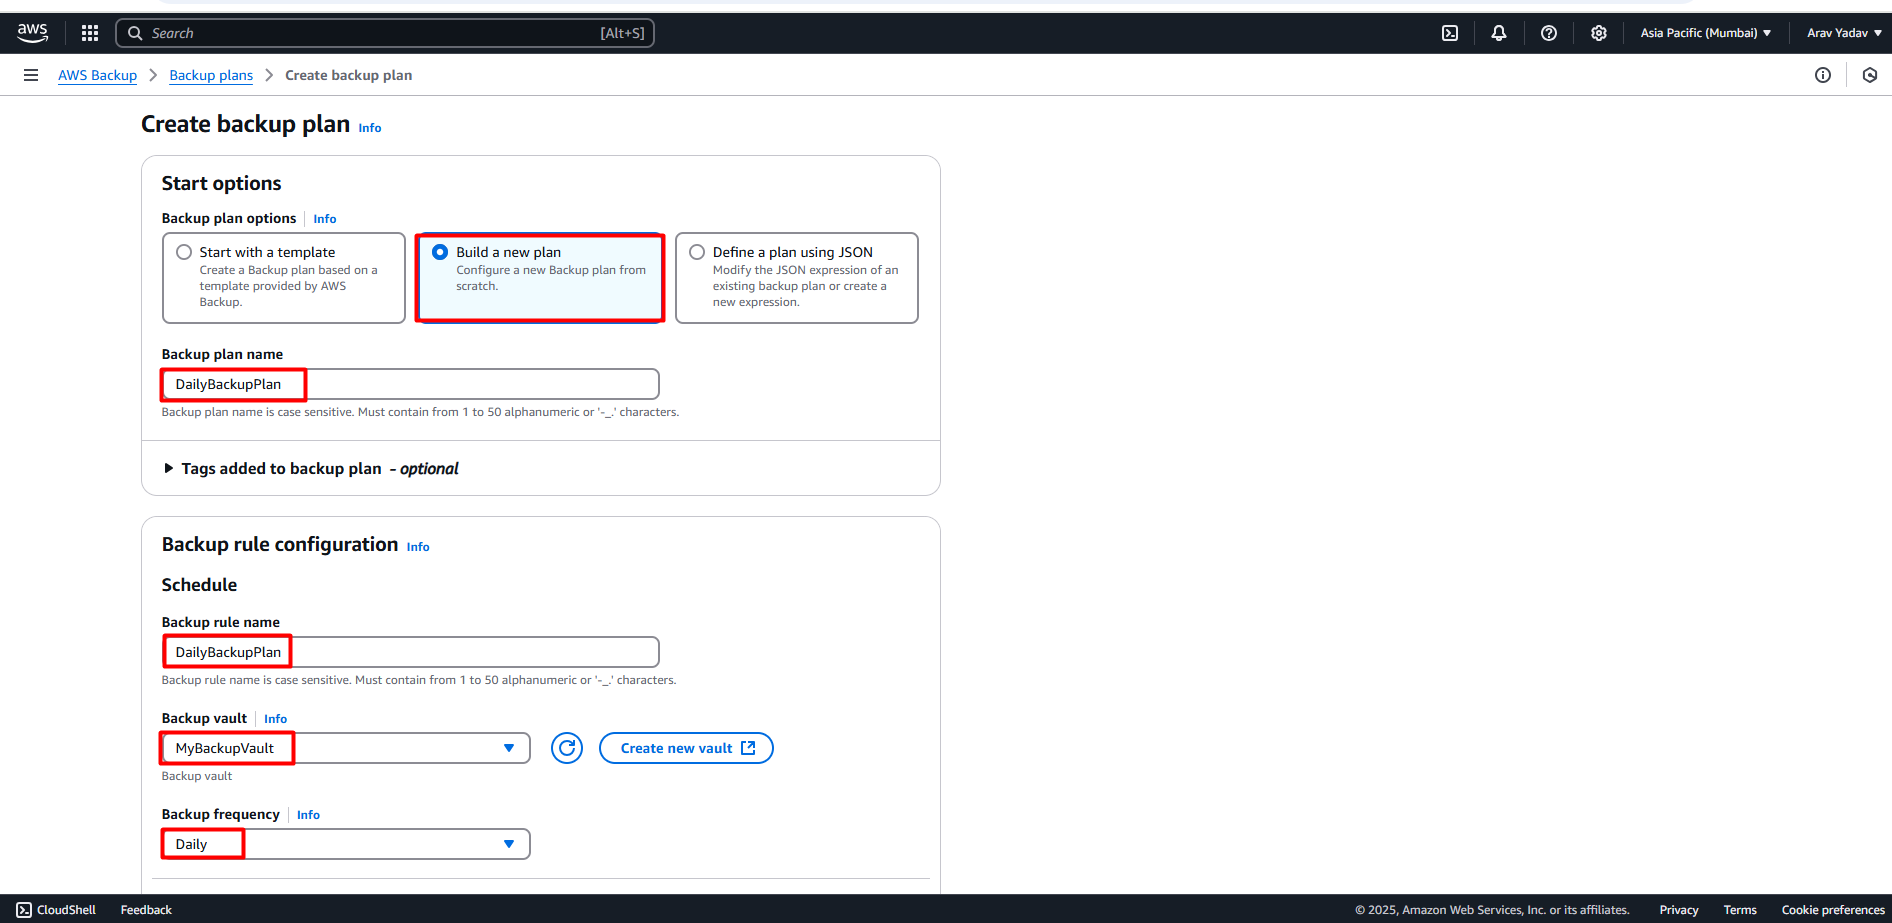
Go to AWS Backup > Backup plans.
Click Create Backup Plan.
Choose:
Start with a template (predefined schedules) OR
Build a new plan (customized retention and schedules).
Name your backup plan (e.g.,
DailyBackupPlan).Under Backup rule configuration:
Set Frequency (e.g., daily, weekly).
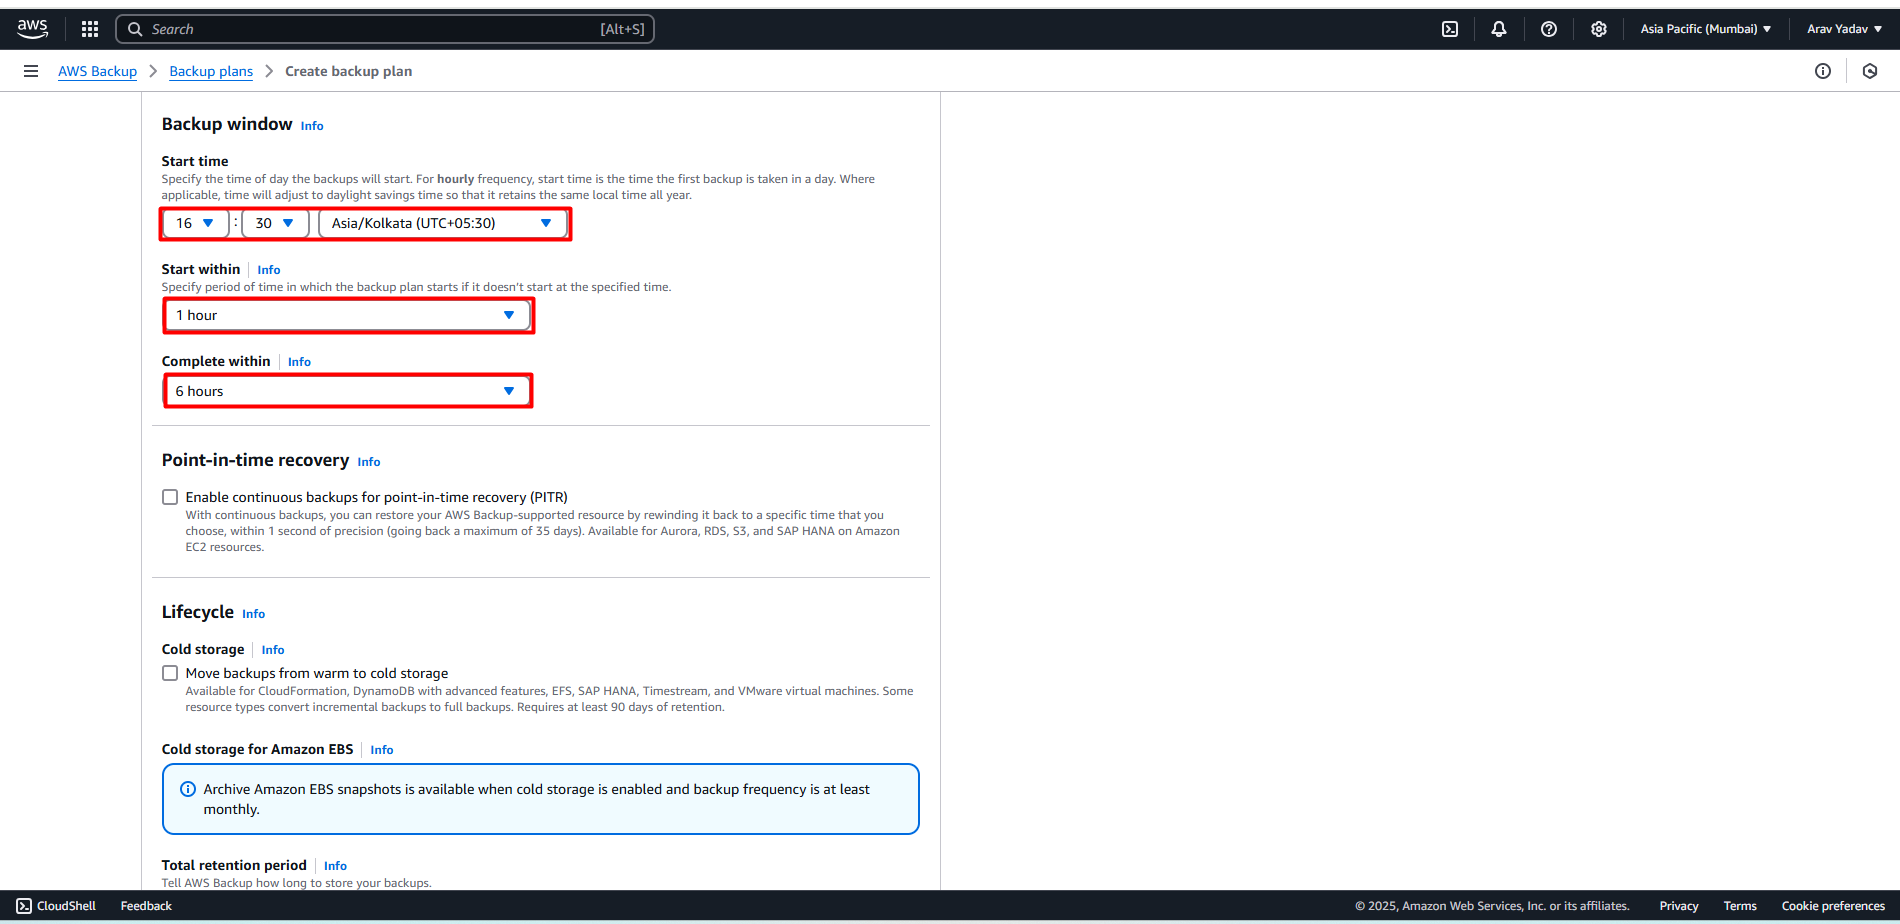
Choose Backup window (preferred time for backups).
Select Lifecycle settings (transition to cold storage, retention period).
Assign the Backup vault created earlier.
Click Create Plan.
Step 3: Assign Resources (EC2 & RDS)
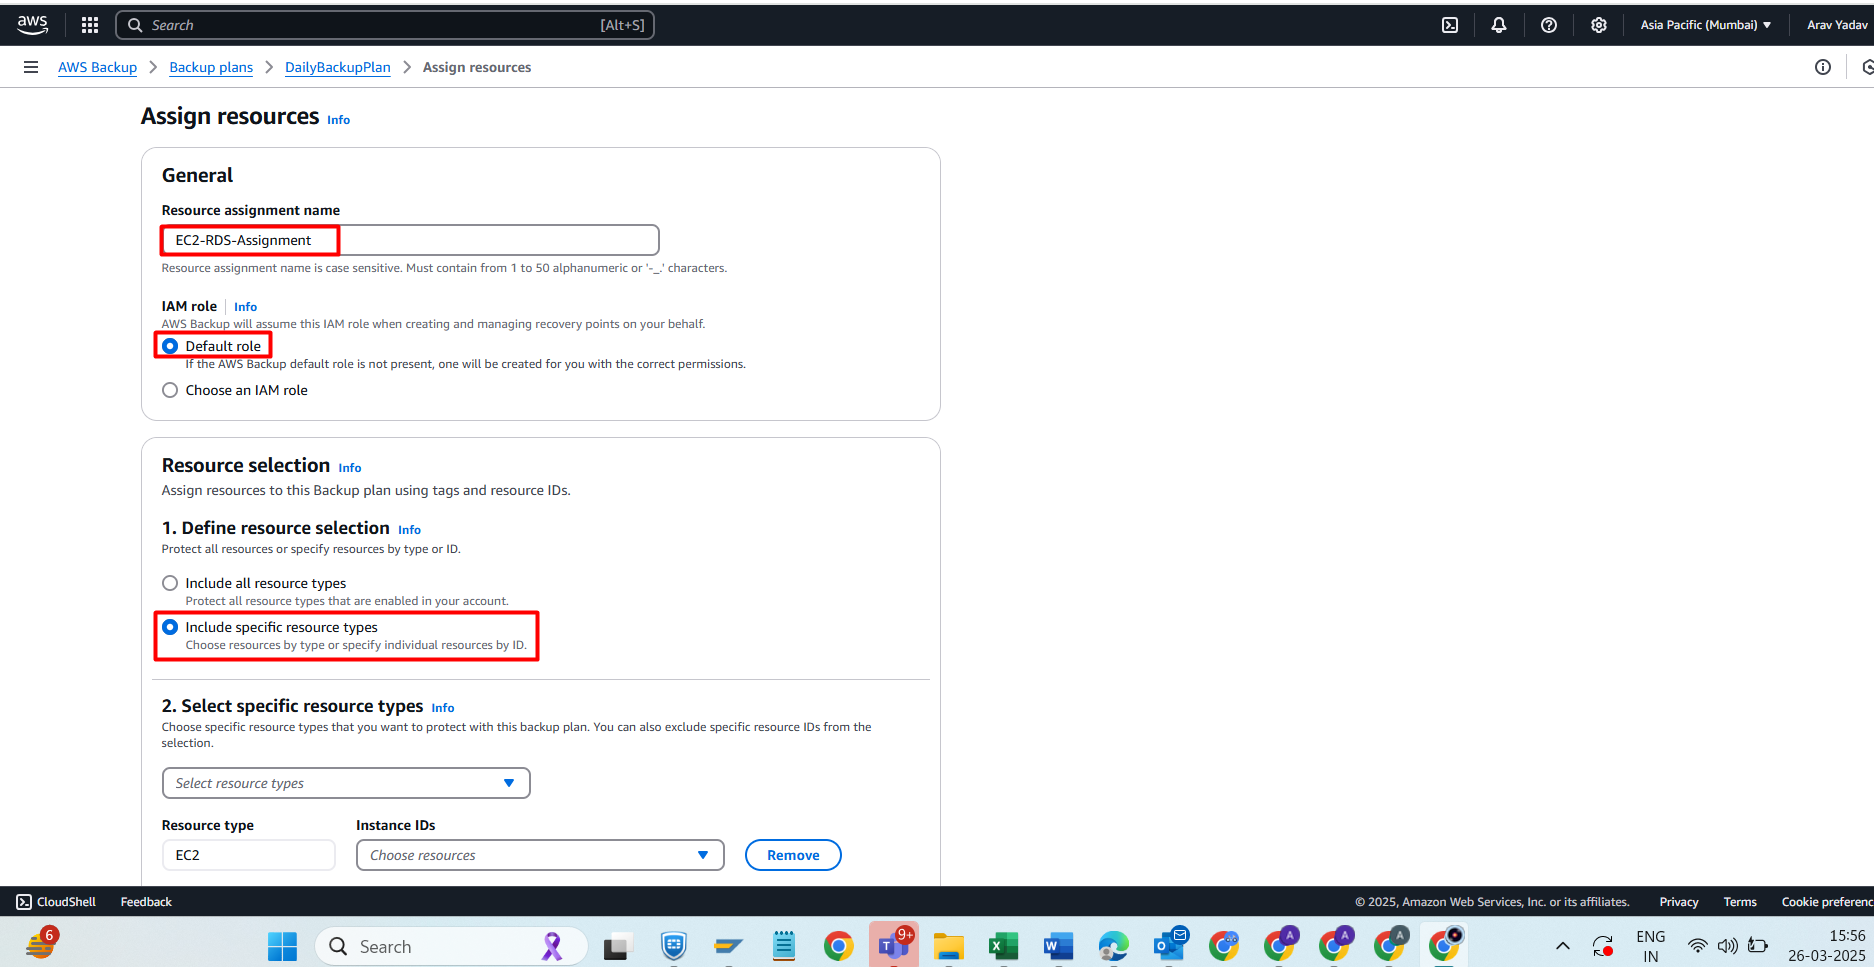
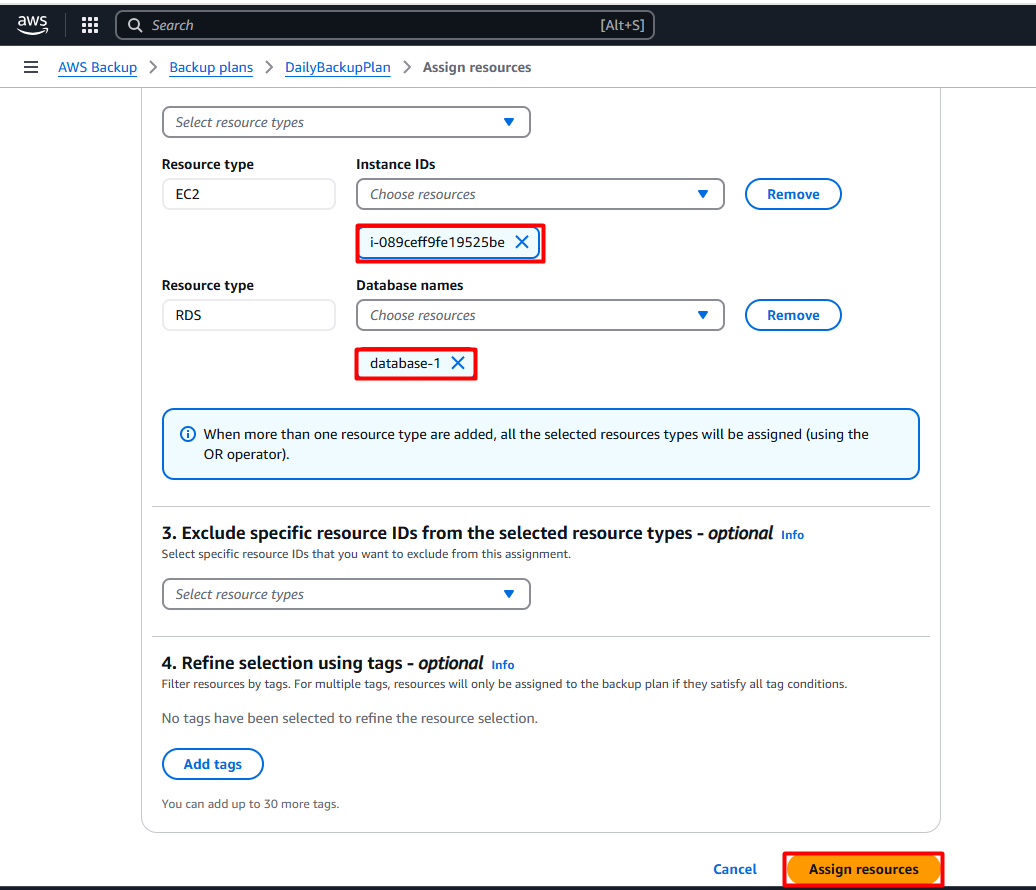
In the Backup plan, click Assign resources.
Provide an assignment name (e.g.,
EC2-RDS-Assignment).Choose a Resource type:
Amazon EC2 for EC2 instances.
Amazon RDS for RDS databases.
Select specific resource IDs (instances or databases).
Assign an IAM role (use the default AWS Backup role or create a new one).
Click Assign resources.
Step 4: Verify Backup & Restore
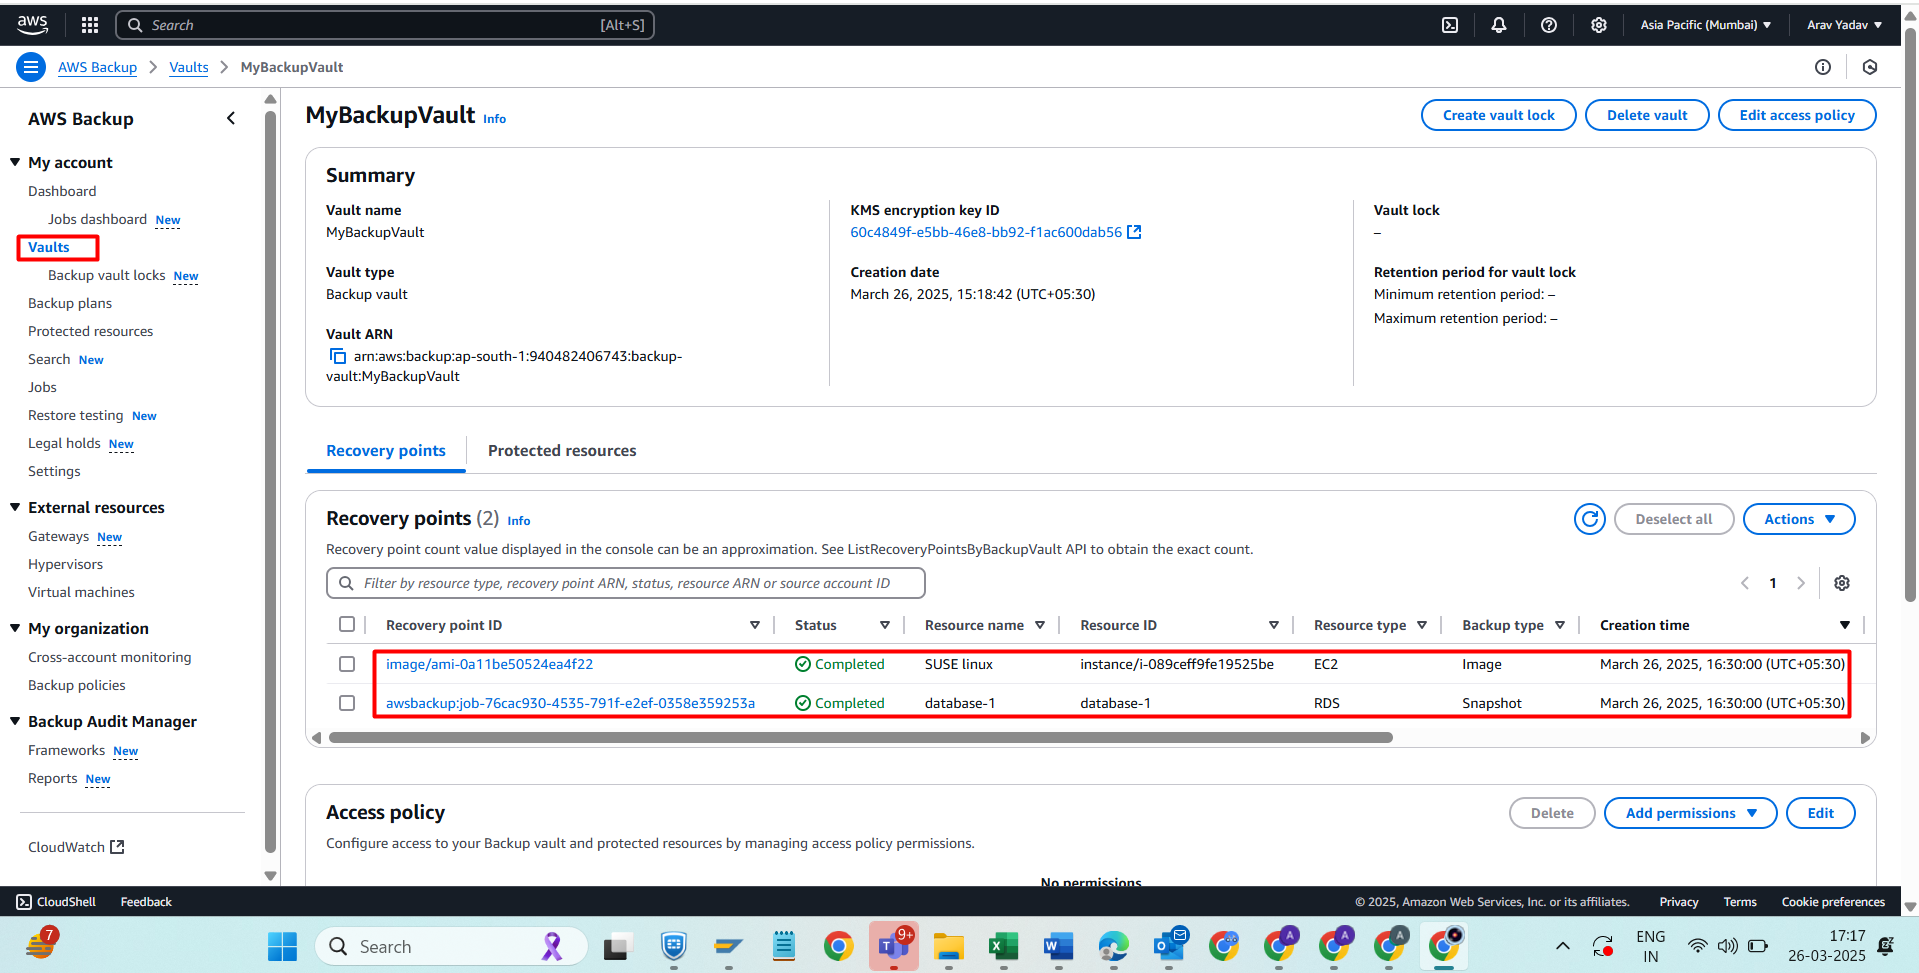
Go to AWS Backup > Jobs to monitor scheduled backup jobs.
To restore:
Go to Backup vaults > Select vault > Recovery points.
Choose the resource (EC2 or RDS).
Click Restore and follow the prompts.
🎯Additional Considerations
Cross-region backup: Configure cross-region replication if needed.
Cross-account backup: Share backups across AWS accounts.
That's it! we have succesfully Configure AWS Backup Services for EC2 and RDS.🚩
Subscribe to my newsletter
Read articles from Arav Yadav directly inside your inbox. Subscribe to the newsletter, and don't miss out.
Written by

Arav Yadav
Arav Yadav
An enthusiastic and determined AWS Cloud learner looking for positions in the IT industry with the goal of enhancing career to secure a challenging position in a reputable organization to expand my learnings, knowledge, and skills AWS, Linux, Python