Leveraging Alchemy for dApp Development on Rootstock: A Comprehensive Guide
 Pranav Konde
In the rapidly changing landscape of decentralized applications (dApps), developers are on the lookout for innovative platforms that can bridge the gap between established technologies and new possibilities. Rootstock stands out as a groundbreaking smart contract platform that integrates Ethereum's robust capabilities with the security of the Bitcoin network. To streamline the development process and enhance interaction with the Rootstock ecosystem, the Alchemy RPC Provider emerges as a powerful tool for developers. In this blog, we’ll delve into how to harness Alchemy to elevate your dApp development experience on Rootstock.
What is Rootstock?
Rootstock (RSK) is a smart contract platform that is built on top of the Bitcoin blockchain. It aims to extend Bitcoin's functionality by enabling the execution of smart contracts, similar to what Ethereum offers. Rootstock achieves this by utilizing a two-way peg mechanism that allows Bitcoin to be converted into RSK tokens (RBTC) and vice versa. This integration allows developers to create decentralized applications (dApps) that benefit from Bitcoin's security while leveraging the flexibility of smart contracts.
Key features of Rootstock include:
Compatibility with Ethereum: Rootstock is designed to be compatible with Ethereum's tooling and smart contract standards, allowing developers to easily port their Ethereum dApps to the Rootstock network.
Security: By leveraging the Bitcoin network's security, Rootstock provides a robust environment for executing smart contracts.
Scalability: Rootstock aims to improve transaction throughput and reduce fees compared to the Ethereum network, making it an attractive option for developers and users alike.
What is Alchemy?
Alchemy is a powerful blockchain development platform that provides developers with the tools and infrastructure needed to build and scale decentralized applications. It offers a suite of APIs, developer tools, and analytics that simplify the process of interacting with blockchain networks. Alchemy is designed to enhance the developer experience by providing reliable and efficient access to blockchain data and services.
Key features of Alchemy include:
Robust API: Alchemy's API allows developers to easily interact with various blockchain networks, including Ethereum and Rootstock, enabling them to make API calls for transactions, smart contract interactions, and more.
Real-time Analytics: Alchemy provides real-time monitoring and analytics tools that help developers track the performance of their dApps, understand user behavior, and optimize their applications.
Developer-Friendly SDKs: Alchemy supports multiple programming languages and SDKs, making it accessible for developers with different preferences and expertise levels.
Enhanced Performance: Alchemy offers features like Reinforced transactions, which improve the speed and reliability of on-chain transactions.
Getting Started with Alchemy
Before diving into the technical details, it’s essential to ensure you have a solid foundation. Familiarity with smart contracts and Ethereum-based dApp development will be beneficial. Additionally, having a development environment set up for blockchain interactions and basic programming knowledge in languages like JavaScript or Python will help you navigate the process smoothly.
Step 1: Create Your Alchemy App
To begin, head over to the Alchemy Dashboard and sign up for a free account if you haven’t already. Once logged in, you will be greeted with a user-friendly interface that allows you to manage your applications and monitor their performance.
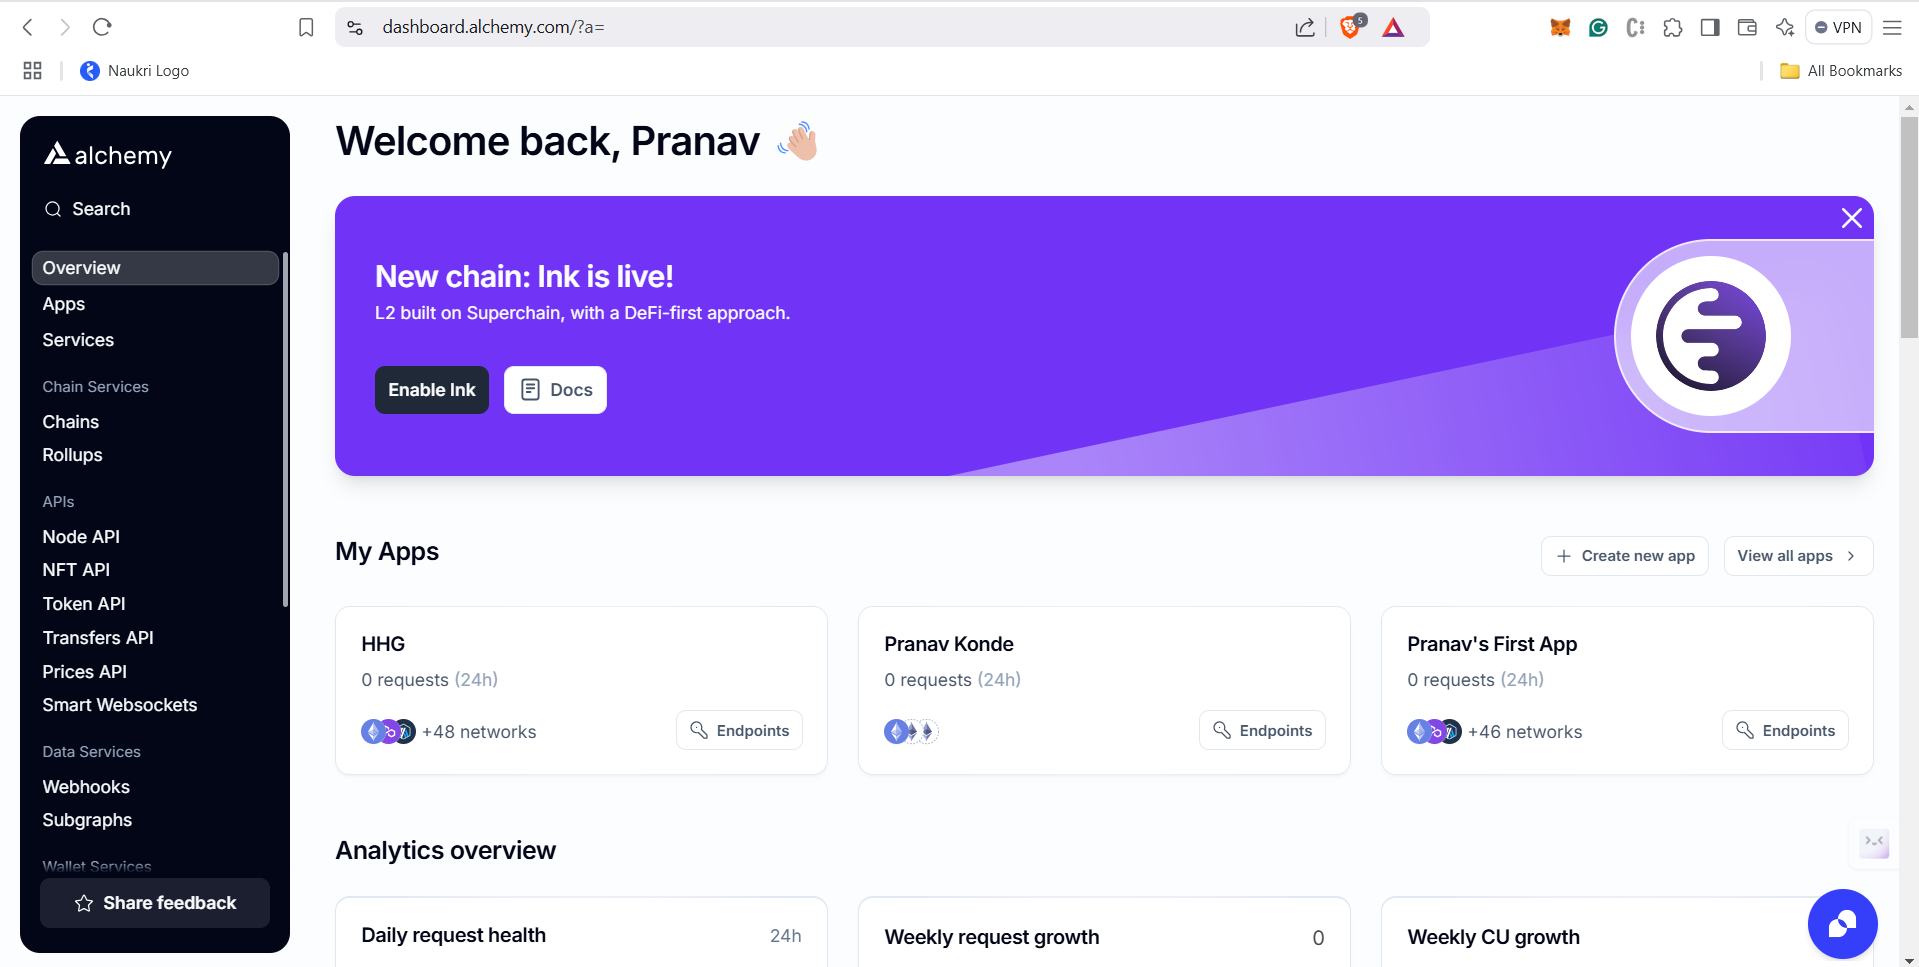
If you already have an account, simply log in, and your dashboard will look like this
Step 2: Select the Rootstock Network
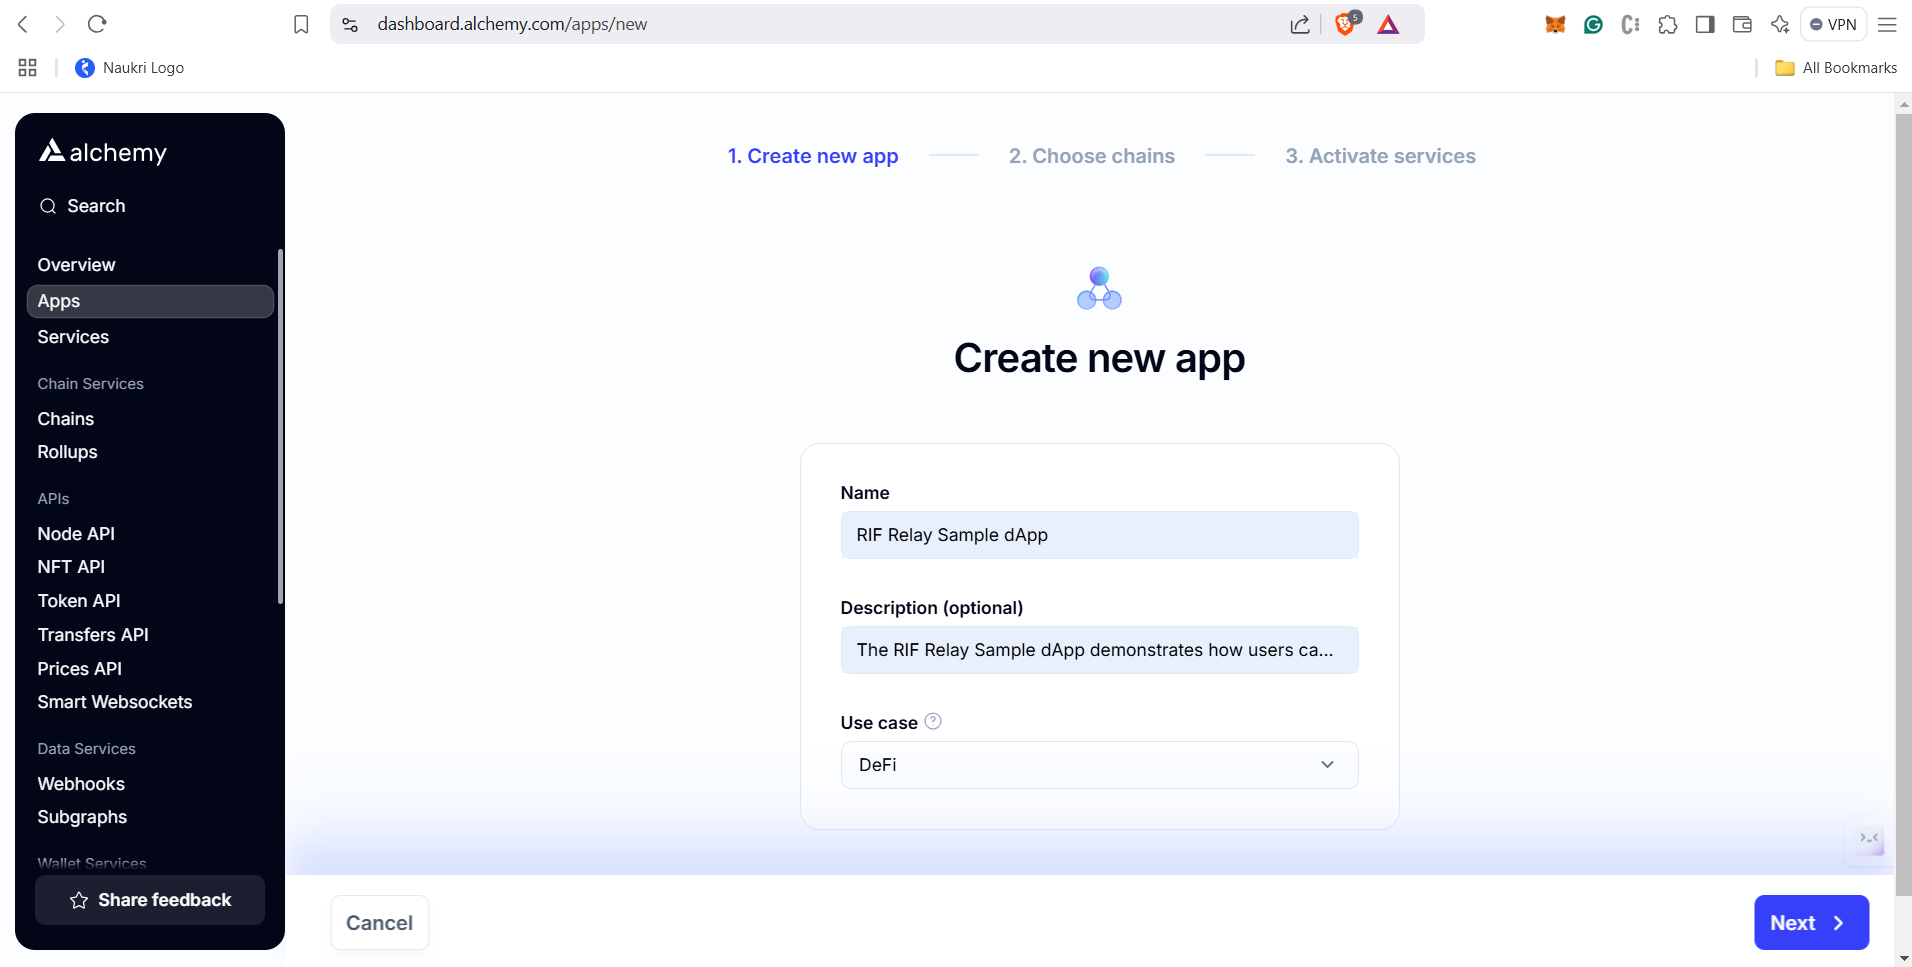
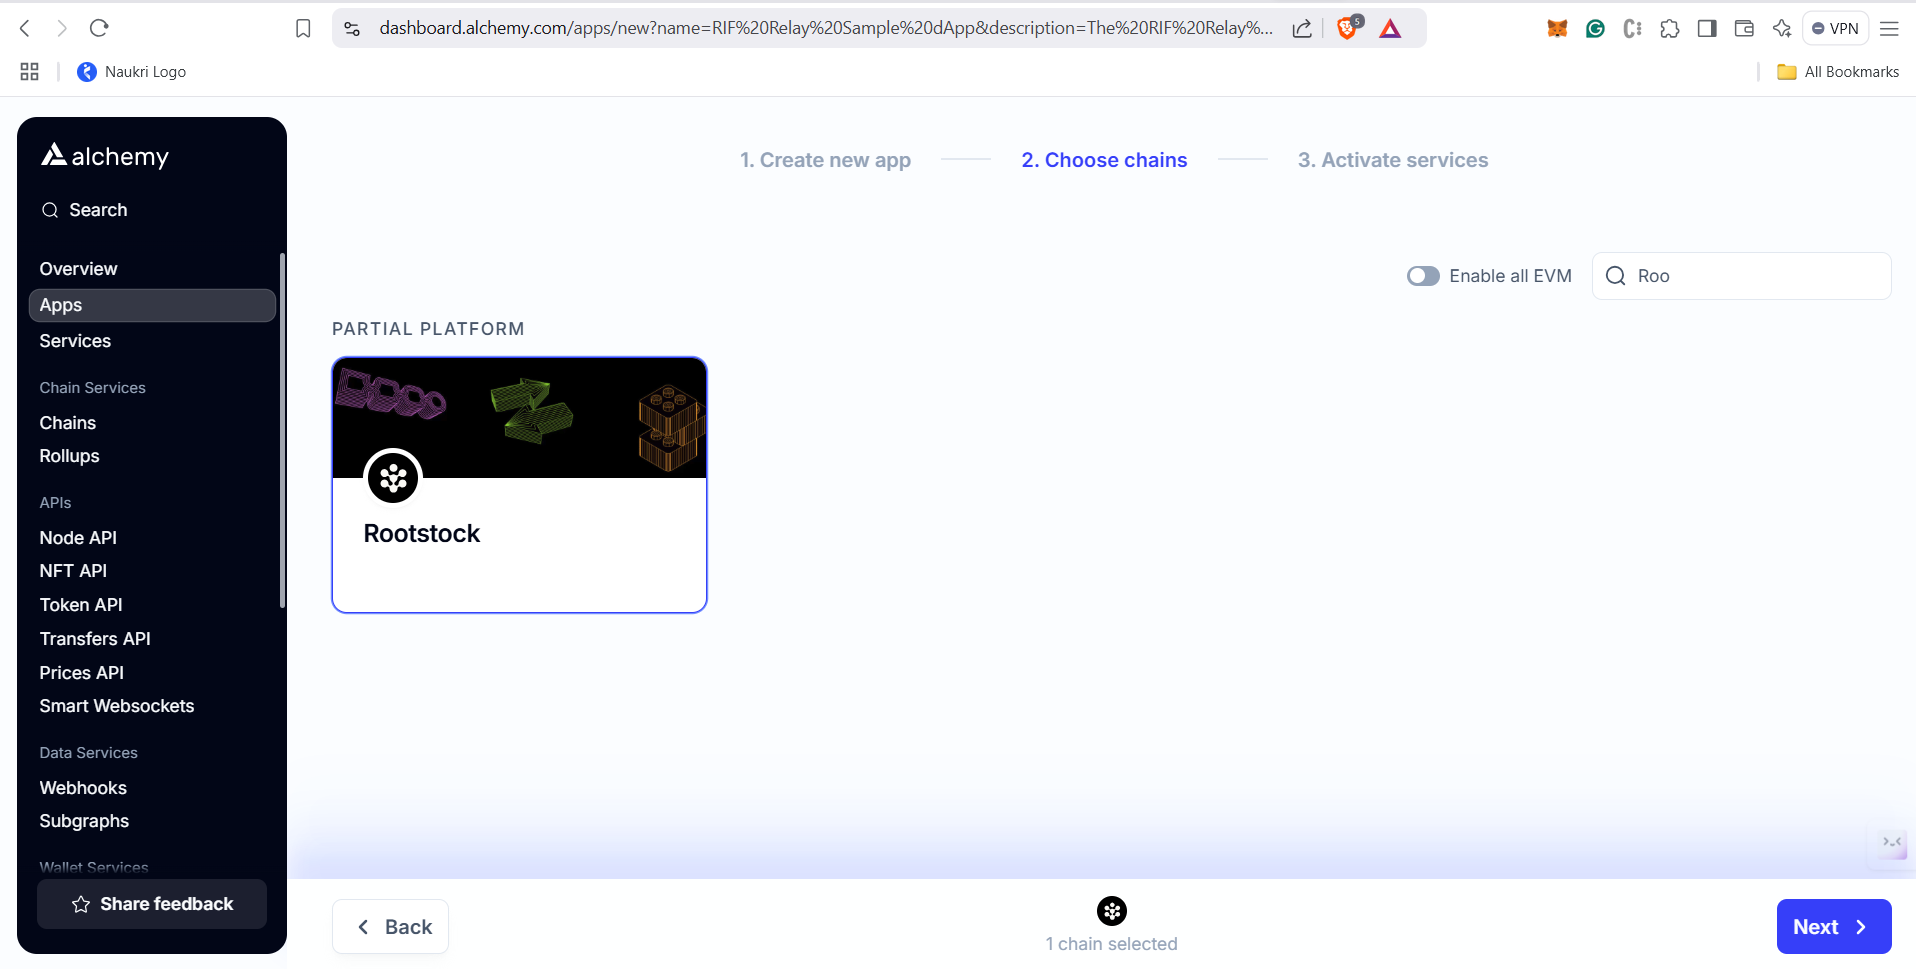
Creating a new application is a straightforward and exciting process that opens up a world of possibilities. To get started, you will need to provide a unique name for your app, along with a brief description that captures its essence. Additionally, it's important to specify the intended use case for your application whether it falls under categories like Decentralized Finance (DeFi), gaming, analytics, or any other innovative domain. This step is crucial, as it helps configure your app for optimal performance and ensures that it meets the specific needs of its users.
Once you have successfully created your app, the next step is to choose the appropriate network for your decentralized application (dApp). This is a vital decision that can significantly impact the functionality and reach of your app. To select the right network, simply search for "Rootstock" in the network selection field. By choosing Rootstock, you are connecting your app to a robust and versatile blockchain that is designed to enhance your application's capabilities.
Selecting Rootstock allows you to leverage its unique features, such as smart contract functionality, scalability, and interoperability with the Bitcoin network. This connection not only empowers your app with the tools it needs to thrive but also positions it within a vibrant ecosystem of decentralized applications. With Rootstock, you can ensure that your app is equipped to handle the demands of modern users while taking full advantage of the benefits that blockchain technology has to offer.
Step 3: Activate Services
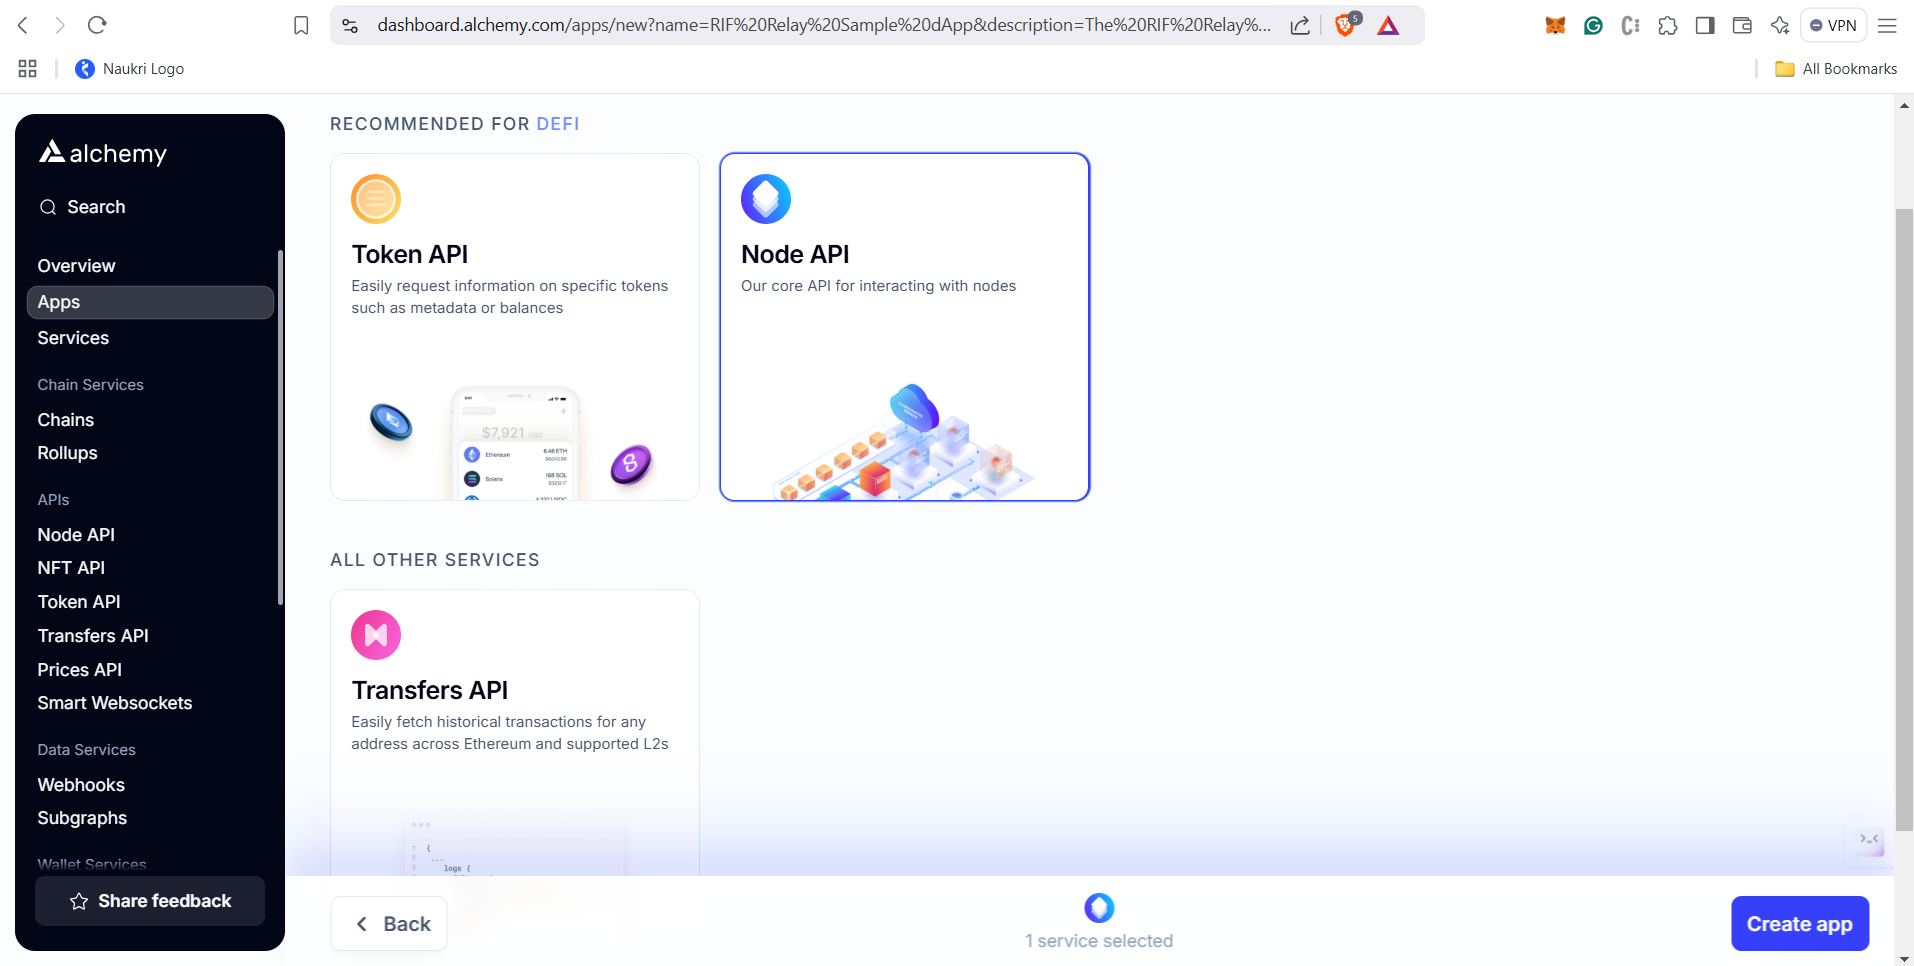
Once you’ve selected the Rootstock network, the next crucial step is to activate various services that will enhance the functionality of your application. One of the most important services you will need to activate is the NODE API. This step is vital for the seamless operation of your app, as it enables your application to communicate effectively with the Rootstock nodes.
Activating the NODE API is not just a technical requirement, it is a foundational element that allows your app to interact with the Rootstock blockchain in a meaningful way. By establishing this connection, your application gains access to a wealth of essential data that is critical for its operation. This includes vital information such as logs, transactions, and balances, which are necessary for providing users with real-time insights and updates.
The NODE API serves as a bridge between your application and the blockchain, facilitating smooth data exchange and ensuring that your app can perform its functions efficiently. For instance, with access to transaction data, your app can track user activities, verify transactions, and provide users with accurate information about their balances. This capability is especially important in use cases like Decentralized Finance (DeFi), where users need to monitor their assets and transactions closely.
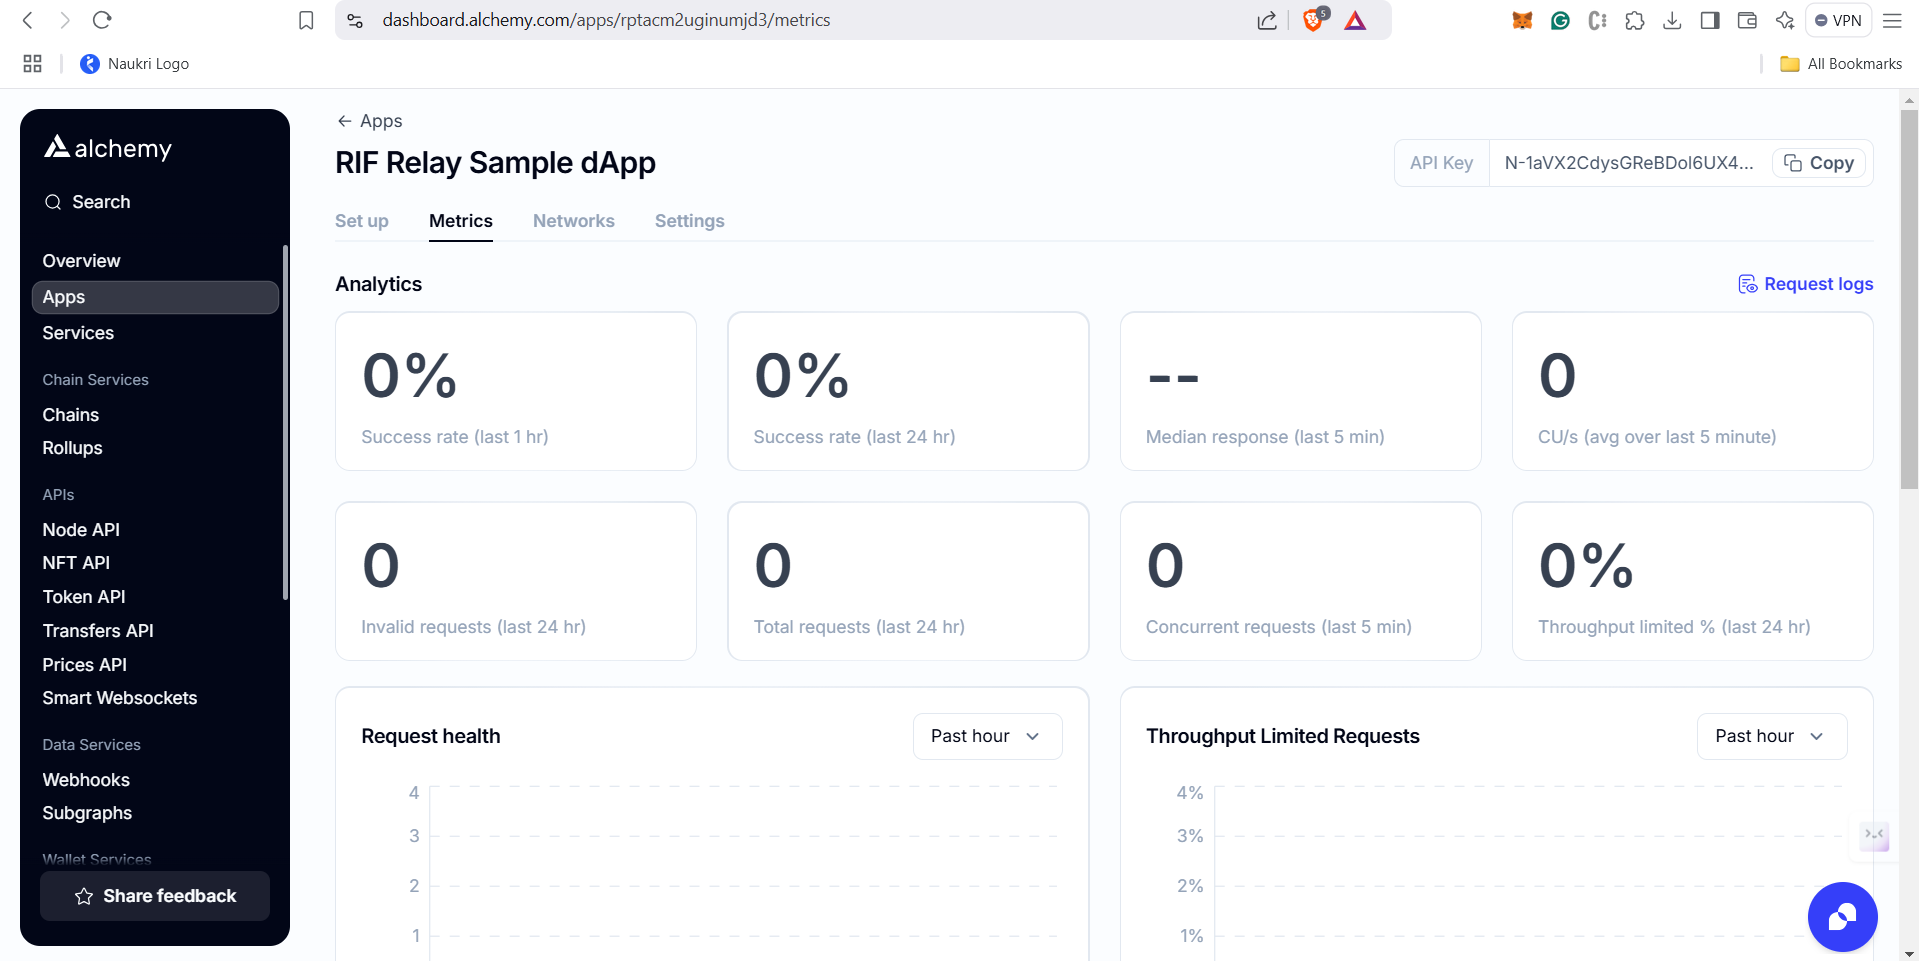
Your Dashboard will look like this:

Making Your First API Call
With your app set up, you can start making API calls. Alchemy provides a user-friendly interface that allows you to choose from various programming languages and SDKs. For instance, if you opt for JavaScript, you can use the Viem SDK to interact with the Rootstock network. Here’s a simple example of how to get the latest block:
import { createPublicClient, http } from "viem";
import { rootstock } from "viem/chains";

const client = createPublicClient({
  chain: rootstock,
  transport: http("https://rootstock-mainnet.g.alchemy.com/v2/<API_KEY>"),
});

const block = await client.getBlock({
  blockNumber: 123456n,
});

console.log(block);
This code snippet demonstrates how to set up a public client and retrieve block information, showcasing the simplicity and efficiency of using Alchemy.
Using Ethers.js SDK
You can also use the Ethers.js SDK for a similar purpose:
import { JsonRpcProvider } from 'ethers';

// Connect to the Ethereum network
const provider = new JsonRpcProvider("https://rootstock-mainnet.g.alchemy.com/v2/<API_KEY>");

// Get block by number
const blockNumber = "latest";
const block = await provider.getBlock(blockNumber);

console.log(block);
Using Fetch API
If you prefer a more straightforward approach without SDKs, you can use the Fetch API:
const url = "https://rootstock-mainnet.g.alchemy.com/v2/<API_KEY>";
const headers = {
  Accept: "application/json",
  "Content-Type": "application/json",
};

const body = JSON.stringify({
  id: 1,
  jsonrpc: "2.0",
  method: "eth_getBlockByNumber",
  params: ["finalized", false],
});

fetch(url, {
  method: "POST",
  headers: headers,
  body: body,
})
  .then((response) => response.json())
  .then((data) => console.log(data))
  .catch((error) => console.error("Error:", error));
Switching to Testnet
If you want to use the Testnet instead of the Mainnet, simply replace the "mainnet" keyword with "testnet" in the URL. This flexibility allows you to test your dApps without incurring costs associated with Mainnet transactions.
To connect MetaMask to the Rootstock Testnet, open MetaMask > Settings > Networks > Add Network, and then enter the required details.
Network Name: Rootstock Testnet
RPC URL:
https://public-node.testnet.rsk.coChain ID: 31
Currency Symbol: tRBTC
Block Explorer URL:
https://explorer.testnet.rootstock.io/
Get Test RBTC Visit the Rootstock faucet to acquire some test RBTC. This will cover your deployment transaction costs.
To connect MetaMask to the Rootstock Mainnet, open MetaMask > Settings > Networks > Add Network, and then enter the required details.
Network Name: Rootstock Mainnet
RPC URL:
https://public-node.rsk.coChain ID: 30
Currency Symbol: RBTC
Block Explorer URL:
https://explorer.rootstock.io/
Or you can simply add it using Chainlist
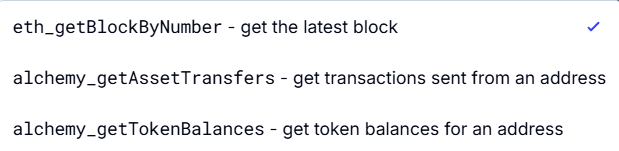
Method Selection
There are multiple methods to call on, but here we used eth_getBlockByNumber, so if we want to change just select the required method so accordingly the API will change
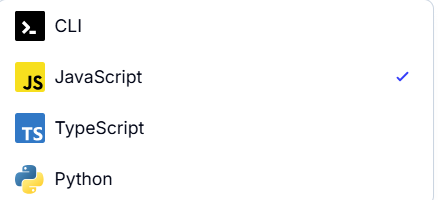
Language Options
Alchemy offers a variety of programming languages to cater to developers with diverse preferences and expertise:
Command Line Interface (CLI): This option does not provide any SDK choices.
JavaScript: Developers can choose from several SDK options, including Viem, Ethers.js, or Fetch, allowing for flexibility in building applications.
TypeScript: For TypeScript developers, the Viem SDK is the sole option available, ensuring a streamlined experience.
Python: Python enthusiasts can utilize the web3.py SDK, which provides robust tools for interacting with blockchain networks.
This range of language options ensures that developers can select the tools that best fit their workflow and project requirements.
Monitoring Metrics
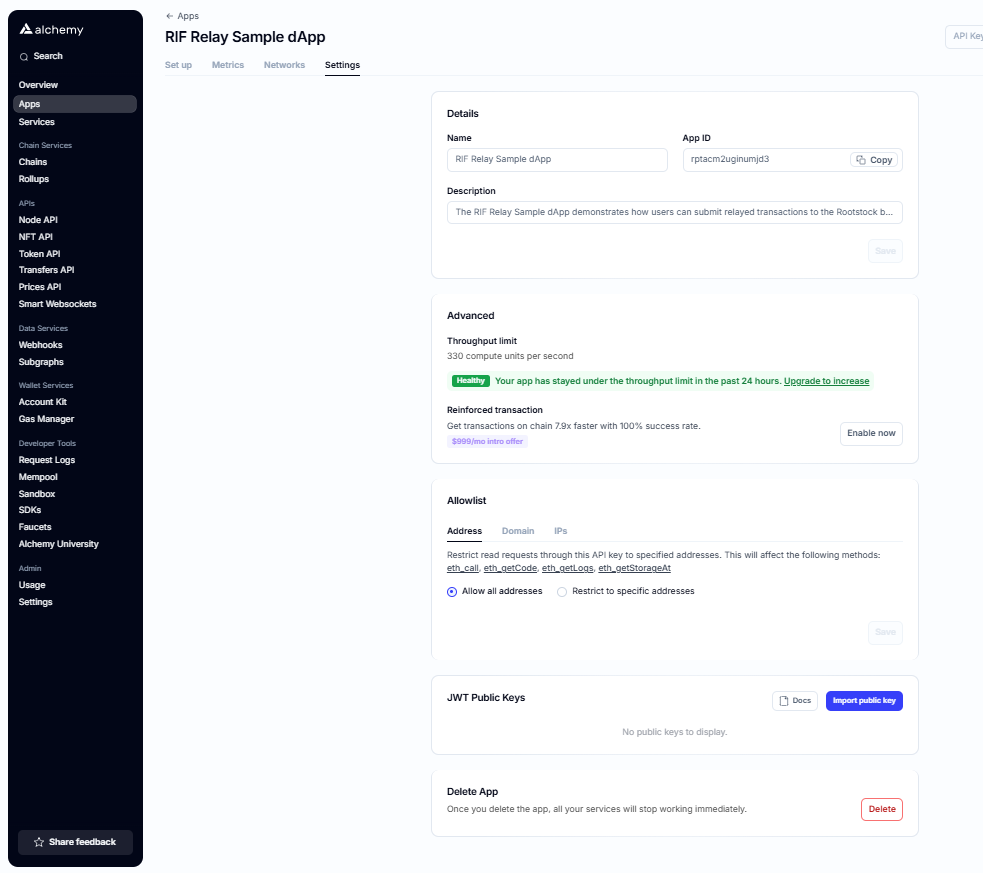
Alchemy provides a metrics section where you can monitor the performance of your app. Currently, the app operates within a throughput limit of 330 compute units per second and has maintained a healthy status, staying under this limit in the past 24 hours.
For enhanced performance, users can opt for the Reinforced transaction feature, which promises to get transactions on-chain 7.9 times faster with a 100% success rate, available at an introductory offer of $999 per month. Additionally, the app provides options for IP address restrictions, allowing users to either allow all IPs or restrict access to specific IPv4 addresses for read and write requests through the API key.
Currently, there are no public JWT keys imported, and users have the option to delete the app, which would immediately halt all associated services. If you want to change any settings, you can do so from the settings menu in your dashboard.
The setting section would look like this:
Building Your First dApp on Rootstock with Alchemy
Rootstock (RSK) is rapidly gaining traction as a Bitcoin sidechain that enables smart contract functionality while leveraging Bitcoin's unparalleled security. When combined with Alchemy's powerful infrastructure, it creates an ideal environment for building decentralized applications (dApps). We'll create a simple "Message Board" dApp that demonstrates the key benefits of this stack, while also highlighting the unique advantages of Rootstock and providing additional resources for newcomers.
Why Rootstock + Alchemy?
Bitcoin Security
Rootstock is merged-mined with Bitcoin, inheriting its robust security features. This means that dApps built on RSK benefit from the same level of security that Bitcoin enjoys, making it a reliable choice for developers concerned about the safety of their applications.
Ethereum Compatibility
RSK uses the Ethereum Virtual Machine (EVM), allowing developers to write smart contracts in Solidity, the same language used for Ethereum development. This compatibility means that developers can leverage their existing knowledge and tools, making the transition to RSK seamless.
Lower Costs
Transactions on RSK are generally cheaper than those on the Ethereum mainnet. This cost-effectiveness is particularly beneficial for developers looking to build applications that require frequent transactions, as it allows for more extensive testing and user engagement without incurring high fees.
Reliable Infrastructure
Alchemy provides stable, scalable node access and development tools, ensuring that developers can focus on building their applications without worrying about the underlying infrastructure. With Alchemy, you can expect high availability and low latency, which are crucial for user experience.
Prerequisites
Before we dive into the development process, ensure you have the following prerequisites:
Node.js installed (v14 or higher)
A MetaMask wallet set up
Some test RBTC (Rootstock's native token) for transaction fees
Project Overview
We'll build a simple message board where users can:
Post messages to the blockchain
View all posted messages
Tip message authors in RBTC
Step 1: Setting Up the Development Environment
First, let's create our project structure:
mkdir rsk-message-board
cd rsk-message-board

npm init -y
npm install hardhat @nomiclabs/hardhat-waffle ethereum-waffle chai @nomiclabs/hardhat-ethers ethers @openzeppelin/contracts dotenv
Next, create a .env file in the root of your project:
ALCHEMY_API_KEY=your_api_key
PRIVATE_KEY=your_wallet_private_key
Troubleshooting Tips
If you encounter issues with Node.js installation, ensure that your version is compatible (v14 or higher).
If you face problems with package installations, try deleting the
node_modulesfolder and runningnpm installagain.
Step 2: Smart Contract Development
Create a new file contracts/MessageBoard.sol:
// SPDX-License-Identifier: MIT
pragma solidity ^0.8.0;

contract MessageBoard {
    struct Message {
        address author;
        string content;
        uint256 timestamp;
        uint256 tips;
    }

    Message[] public messages;

    event MessagePosted(address indexed author, string content, uint256 timestamp);
    event MessageTipped(address indexed tipper, uint256 indexed messageId, uint256 amount);

    function postMessage(string memory _content) public {
        messages.push(Message({
            author: msg.sender,
            content: _content,
            timestamp: block.timestamp,
            tips: 0
        }));

        emit MessagePosted(msg.sender, _content, block.timestamp);
    }

    function tipMessage(uint256 _messageId) public payable {
        require(_messageId < messages.length, "Message does not exist");
        require(msg.value > 0, "Tip amount must be greater than 0");

        Message storage message = messages[_messageId];
        message.tips += msg.value;

        payable(message.author).transfer(msg.value);

        emit MessageTipped(msg.sender, _messageId, msg.value);
    }

    function getMessages() public view returns (Message[] memory) {
        return messages;
    }
}
Key Features of the Smart Contract
Message Struct: Represents a message with an author, content, timestamp, and tips.
Events: Emit events for posting and tipping messages, which can be listened to by the frontend.
Functions: Allow users to post messages, tip authors, and retrieve all messages.
Step 3: Configuring Hardhat for RSK
Create hardhat.config.js:
require("@nomiclabs/hardhat-waffle");
require("dotenv").config();

module.exports = {
  solidity: "0.8.4",
  networks: {
    rskTestnet: {
      url: `YOUR_RSK_TESTNET_URL_ON_ALCHEMY`,
      accounts: [`0x${process.env.PRIVATE_KEY}`],
      chainId: 31
    }
  }
};
Explanation of Configuration
Solidity Version: Specifies the version of Solidity to use.
Network Configuration: Sets up the RSK testnet with the Alchemy API key and your wallet's private key.
Step 4: Frontend Development
Create a new React app and install dependencies:
npx create-react-app client
cd client
npm install ethers
Create the main App component (client/src/App.js):
import { useState, useEffect } from 'react';
import { ethers } from 'ethers';
import MessageBoard from './artifacts/contracts/MessageBoard.sol/MessageBoard.json';

const CONTRACT_ADDRESS = "YOUR_DEPLOYED_CONTRACT_ADDRESS";

function App() {
  const [messages, setMessages] = useState([]);
  const [newMessage, setNewMessage] = useState("");

  async function requestAccount() {
    await window.ethereum.request({ method: 'eth_requestAccounts' });
  }

  async function fetchMessages() {
    if (typeof window.ethereum !== 'undefined') {
      const provider = new ethers.providers.Web3Provider(window.ethereum);
      const contract = new ethers.Contract(CONTRACT_ADDRESS, MessageBoard.abi, provider);
      try {
        const data = await contract.getMessages();
        setMessages(data);
      } catch (err) {
        console.log("Error: ", err);
      }
    }
  }

  async function postMessage() {
    if (!newMessage) return;
    if (typeof window.ethereum !== 'undefined') {
      await requestAccount();
      const provider = new ethers.providers.Web3Provider(window.ethereum);
      const signer = provider.getSigner();
      const contract = new ethers.Contract(CONTRACT_ADDRESS, MessageBoard.abi, signer);

      try {
        const transaction = await contract.postMessage(newMessage);
        await transaction.wait();
        setNewMessage("");
        fetchMessages();
      } catch (err) {
        console.log("Error: ", err);
      }
    }
  }

  async function tipMessage(messageId) {
    if (typeof window.ethereum !== 'undefined') {
      await requestAccount();
      const provider = new ethers.providers.Web3Provider(window.ethereum);
      const signer = provider.getSigner();
      const contract = new ethers.Contract(CONTRACT_ADDRESS, MessageBoard.abi, signer);

      try {
        const transaction = await contract.tipMessage(messageId, {
          value: ethers.utils.parseEther("0.01")
        });
        await transaction.wait();
        fetchMessages();
      } catch (err) {
        console.log("Error: ", err);
      }
    }
  }

  useEffect(() => {
    fetchMessages();
  }, []);

  return (
    <div className="App">
      <h1>RSK Message Board</h1>

      <div>
        <input
          type="text"
          value={newMessage}
          onChange={e => setNewMessage(e.target.value)}
          placeholder="Write your message..."
        />
        <button onClick={postMessage}>Post Message</button>
      </div>

      <div className="messages">
        {messages.map((message, index) => (
          <div key={index} className="message">
            <p>{message.content}</p>
            <small>
              By: {message.author}
              <br />
              Tips: {ethers.utils.formatEther(message.tips)} RBTC
            </small>
            <button onClick={() => tipMessage(index)}>
              Tip 0.01 RBTC
            </button>
          </div>
        ))}
      </div>
    </div>
  );
}

export default App;
Explanation of the Frontend Code
State Management: Uses React hooks to manage the state of messages and new message input.
Ethereum Interaction: Connects to the Ethereum provider (MetaMask) and interacts with the smart contract to fetch messages, post new messages, and tip authors.
User Interface: Simple UI to post messages and display them along with tipping options.
Step 5: Deployment
Deploy the smart contract:
npx hardhat run scripts/deploy.js --network rskTestnet
Update the CONTRACT_ADDRESS in your React app with the deployed address.
Starting the Frontend
Start the frontend application:
cd client
npm start
Testing the dApp
Connect MetaMask to RSK Testnet: Ensure your MetaMask wallet is connected to the RSK testnet.
Get Test RBTC: Use the RSK faucet to obtain some test RBTC for transactions.
Post a Message: Write a message and see it appear on the board.
Tip Other Messages: Try tipping other messages to see the functionality in action.
Key Benefits Demonstrated
Speed: Notice how quickly transactions are confirmed on RSK, providing a smooth user experience.
Cost-Effectiveness: Transaction fees are significantly lower than those on the Ethereum mainnet, making it easier to engage users.
Reliability: Alchemy's infrastructure ensures a stable connection and quick response times, crucial for user satisfaction.
Ethereum Compatibility: We used standard Ethereum tools (Hardhat, ethers.js) seamlessly, showcasing the ease of development.
This simple example demonstrates how Alchemy and RSK combine to create a powerful development environment for dApps. The familiarity of Ethereum tools, combined with the security of Bitcoin, makes it an attractive option for developers looking to build scalable applications.
Next Steps
Add Message Editing Functionality: Allow users to edit their messages after posting.
Implement Message Categories: Organize messages into categories for better user experience.
Add User Profiles: Create user profiles to enhance community engagement.
Explore RSK's Unique Features: Investigate features like RIF Name Service for enhanced usability.
Integrate More Alchemy APIs: Utilize additional Alchemy APIs for enhanced functionality, such as analytics and monitoring.
Hackathon Use
These instructions can serve as a foundation for a demo or prototype at a hackathon. The simplicity of the message board dApp allows for rapid development and iteration, making it an excellent choice for showcasing your skills. You can expand on this project by adding features like user authentication, advanced messaging options, or even integrating with other blockchain services.
Upcoming Rootstock Hackathons:
Encode Denver Modular DeFi Hackathon - February 24
ETHGlobal Taipei - April 4
ETHGLobal Prague - May 30
ETHGlobal New Delhi - September 26
Conclusion
Leveraging Alchemy for dApp development on Rootstock opens up a world of possibilities for developers looking to create efficient and scalable applications. With its robust API, user-friendly interface, and support for multiple programming languages, Alchemy simplifies the process of interacting with the Rootstock blockchain. By following the steps outlined in this guide, you can quickly set up your development environment, make API calls, and monitor your app's performance. As the blockchain landscape continues to evolve, tools like Alchemy will play a crucial role in empowering developers to build the next generation of decentralized applications.
If facing any errors, join Rootstock discord and ask under the respective channel.
Until then, dive deeper into Rootstock by exploring its official documentation. Keep experimenting, and happy coding!
Subscribe to my newsletter
Read articles from Pranav Konde directly inside your inbox. Subscribe to the newsletter, and don't miss out.
Written by