The Single Post You Need to Learn the Basics of Flyte
 Sam (Mohsen) Kamrani
Flyte is an open-source, Kubernetes-native workflow orchestrator implemented in Go. It enables highly concurrent, scalable and reproducible workflows for data processing, machine learning and analytics.
Flyte is built on simple concepts and provides powerful and flexible tools and methods to orchestrate ML and data processing workflows. If you have no idea what Flyte does, you can compare it with Airflow but with its own flavour.
I personally find the simplicity of Flyte one of its key strengths. If you’re already familiar with Airflow, you should find it very simple to learn and master, and even without that, the learning curve is moderate.
In this post, without any unnecessary side information, I show you how to set up Flyte locally and will touch on different concepts so you can continue to learn the rest on your own easily.
We will create two dummy CSV files and process them through multiple tasks in a workflow. While the workflow is very simple, it gives the opportunity to cover all the necessary fundamental concepts.
Install flytectl
mac:
brew install flyteorg/homebrew-tap/flytectl
other:
curl -sL https://ctl.flyte.org/install | bash
Verify:
flytectl version
Start a local deployment
flytectl demo start
If everything goes as planned at the end of the logs in your terminal you should see an output like this:
👨💻 Flyte is ready! Flyte UI is available at http://localhost:30080/console 🚀 🚀 🎉
❇️ Run the following command to export demo environment variables for accessing flytectl export FLYTECTL_CONFIG=/<HOME>/.flyte/config-sandbox.yaml
🐋 Flyte sandbox ships with a Docker registry. Tag and push custom workflow images to localhost:30000
📂 The Minio API is hosted on localhost:30002. Use http://localhost:30080/minio/login for Minio console, default credentials - username: minio, password: miniostorage
Now you can open the Flyte UI in your browser: http://localhost:30080/console

This demo also gives you access to a local Minio deployment which you can assess in your browser: http://localhost:30080/minio/login
username: minio
password: miniostorage
Create the test data
sales_fb.cs
----
date,product,quantity,price
2025-02-01,Widget,10,20.00
2025-02-12,Gadget,1,35.00
2025-02-20,Widget,2,20.00
2025-02-28,Gadget,7,35.00


sales_jan.csv
----
date,product,quantity,price
2025-01-03,Widget,4,20.00
2025-01-15,Gadget,2,35.00
2025-01-25,Widget,3,20.00
2025-01-30,Gadget,5,35.00
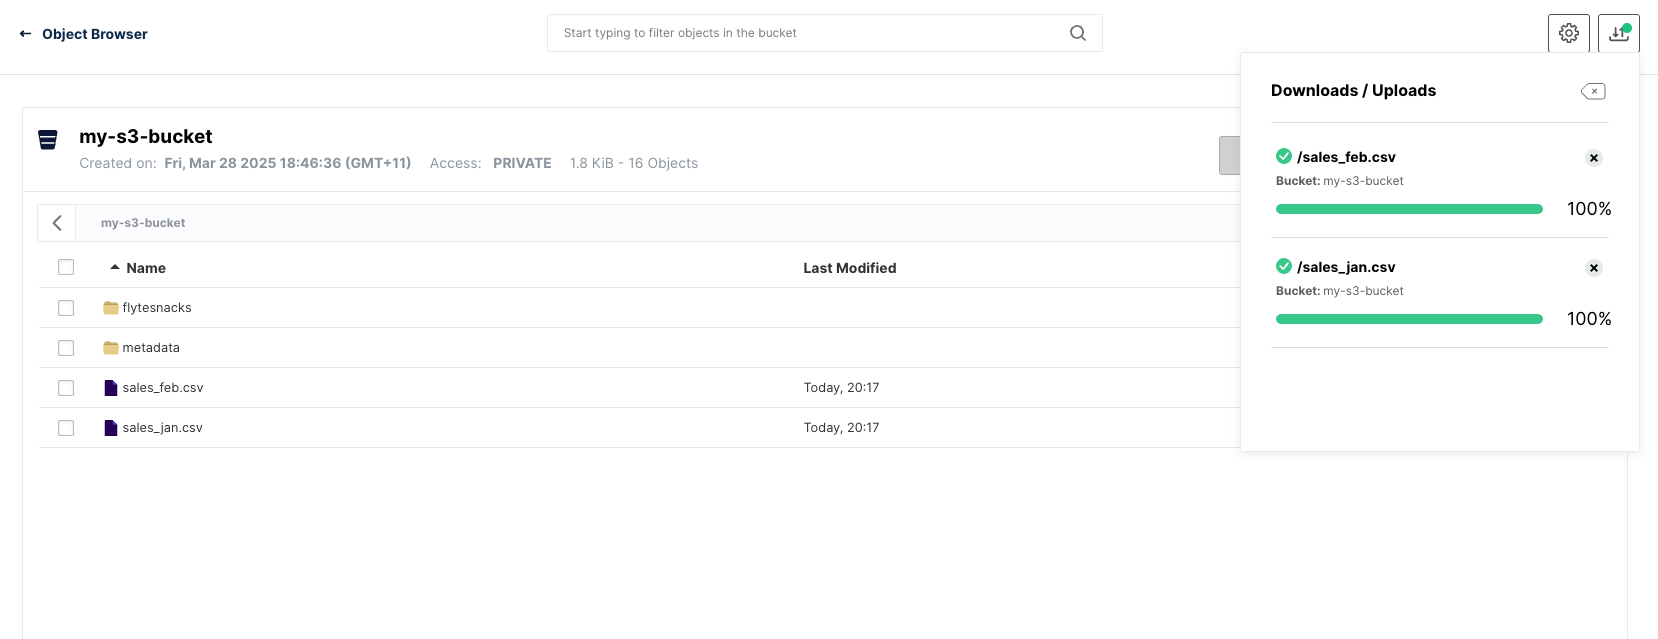
Upload the test data
Upload the files containing the test data to the default bucket in your local Minio

Create the project
export FLYTECTL_CONFIG=~/.flyte/config-sandbox.yaml

flytectl create project --id sales-analysis --name sales-analysis --description "Sales Analysis" --domain development
You can verify the project is created successfully in the UI:

Create the workflow
You use python to create your tasks and workflows which are comprised of multiple tasks. Annotations are the common way you dictate the behaviour and role of the functions.
#sales-analysis-wf.py

from flytekit import task, workflow
from flytekit.types.file import FlyteFile
import pandas as pd
import numpy as np
from flytekit import ImageSpec
from datetime import timezone


image_spec = ImageSpec(
   name="<your account on docker hub>/flytekit",  # docker image name - the name is arbitrary
   base_image="ghcr.io/flyteorg/flytekit:py3.11-1.10.2",  # the base image that flytekit will use to build your image.
   packages=["pandas", "numpy", "flytekit", "s3fs", "pyarrow"],
   python_version="3.11",  # Optional if python is installed in the base image.
   platform="linux/arm64" # Set this based on you OS as we're running Flyte locally
)


@task(container_image=image_spec)
def load_data(sales_jan: FlyteFile, sales_feb: FlyteFile) -> pd.DataFrame:
    df_jan = pd.read_csv(sales_jan.download())
    df_feb = pd.read_csv(sales_feb.download())
    combined = pd.concat([df_jan, df_feb], ignore_index=True)
    return combined

@task(container_image=image_spec)
def clean_data(df: pd.DataFrame) -> pd.DataFrame:
    df['date'] = pd.to_datetime(df['date'])
    df['total'] = df['quantity'] * df['price']
    return df

@task(container_image=image_spec)
def aggregate_monthly_sales(df: pd.DataFrame) -> pd.DataFrame:
    df['month'] = df['date'].dt.to_period('M')
    monthly = df.groupby(['month', 'product'])['total'].sum().reset_index()
    return monthly

@task(container_image=image_spec)
def detect_outliers(df: pd.DataFrame) -> pd.DataFrame:
    def z_scores(values):
        mean = np.mean(values)
        std = np.std(values)
        return [(x - mean) / std if std > 0 else 0 for x in values]

    df['z_score'] = df.groupby('product')['total'].transform(z_scores)
    return df[np.abs(df['z_score']) > 2]

@task(container_image=image_spec)
def create_report(monthly: pd.DataFrame, outliers: pd.DataFrame) -> FlyteFile:
    import tempfile

    report = "Monthly Sales Summary:\n"
    report += monthly.to_string(index=False)
    report += "\n\nDetected Outliers:\n"
    report += outliers.to_string(index=False)

    with tempfile.NamedTemporaryFile("w", suffix=".txt", delete=False) as f:
        f.write(report)
        local_path = f.name

    return FlyteFile(local_path)

@workflow()
def sales_data_workflow() -> FlyteFile:
    jan_file = FlyteFile("s3://my-s3-bucket/sales_jan.csv")
    feb_file = FlyteFile("s3://my-s3-bucket/sales_feb.csv")

    raw_data = load_data(sales_jan=jan_file, sales_feb=feb_file)
    cleaned = clean_data(df=raw_data)
    monthly = aggregate_monthly_sales(df=cleaned)
    outliers = detect_outliers(df=monthly)
    report = create_report(monthly=monthly, outliers=outliers)

    return report
We created a dummy workflow with a few steps and save it as sales-analysis-wf.py just to showcase a few features of Flyte.
As you can see we have defined image_spec and used it in our steps. This is a mechanism to build the docker image with all the dependencies to run our tasks. You can have different images all built this way for different tasks if needed.
Run the workflow
Now that you have created the workflow file, you can run it with this command - pay attention to the flags we pass to the command:
pyflyte run --remote -p sales-analysis -d development sales-analysis-wf.py sales_data_workflow
Note: You have to login to your docker account using
docker loginto be able to push the image. If the image is not pushed automatically, you can simply push the image and run thepyflyte runcommand above again.
Result
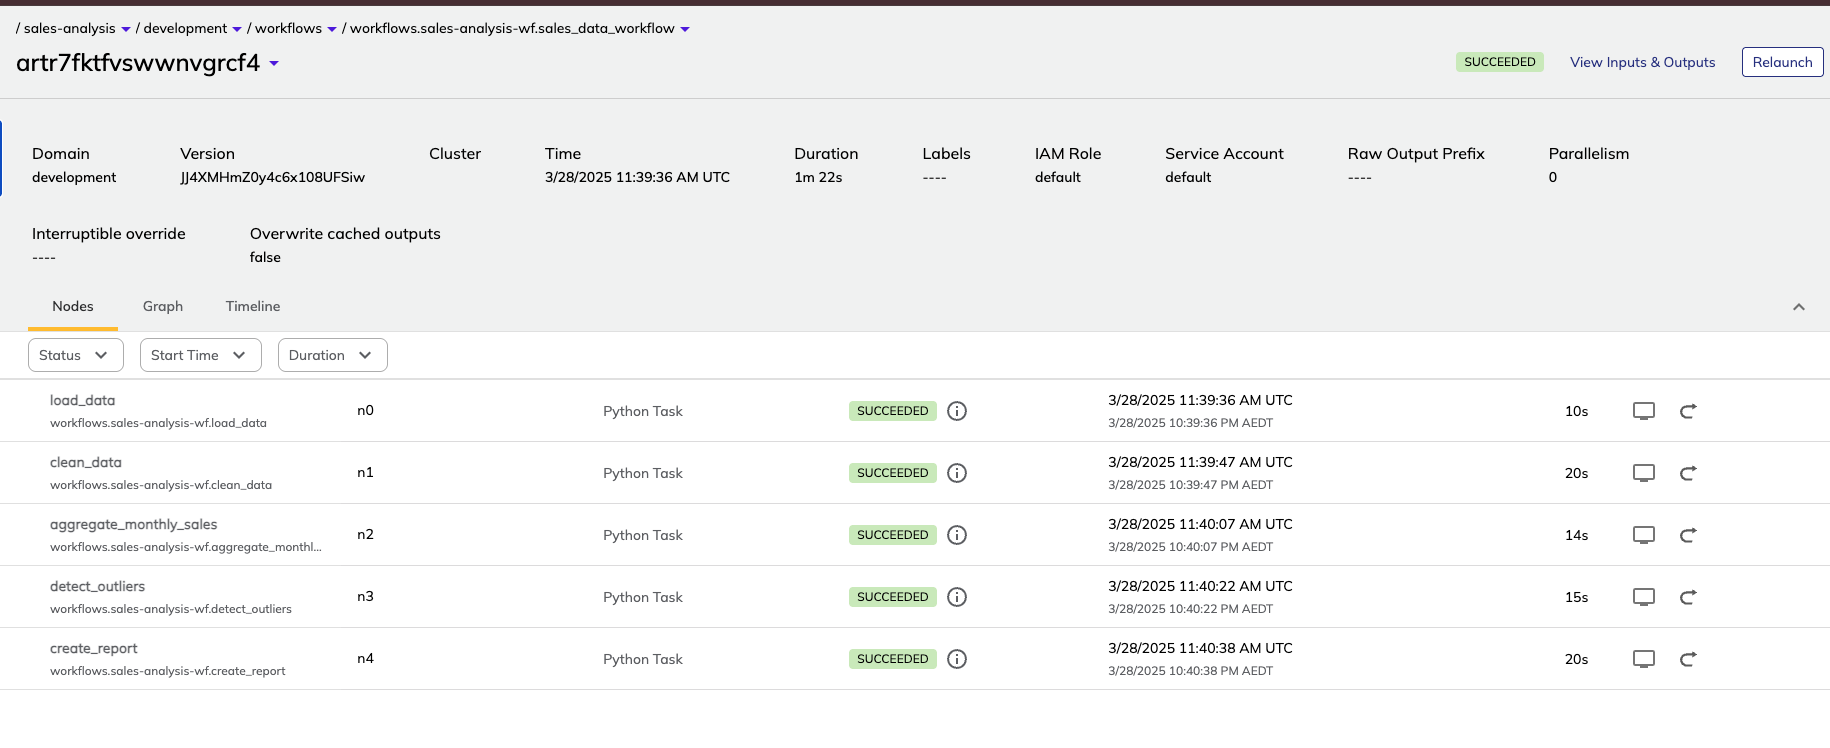
Once you run the command you can track the progress on the UI with the link you receive in the terminal.

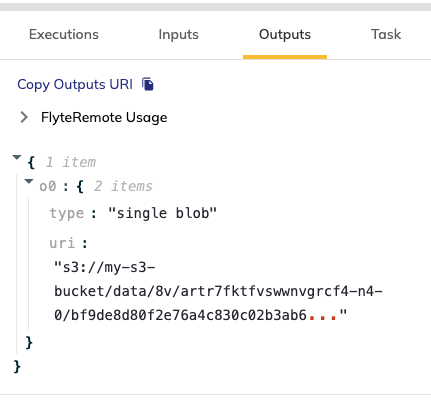
This workflow generates a simple report with txt format and stores it on Minio. You can click on the task and get the details from the Outputs tab:

We can download the file from the Minio UI:

Well done! Now you know all the basics needed to find your way around when using Flyte in your platform.
Subscribe to my newsletter
Read articles from Sam (Mohsen) Kamrani directly inside your inbox. Subscribe to the newsletter, and don't miss out.
Written by

Sam (Mohsen) Kamrani
Sam (Mohsen) Kamrani
Founder of https://dotenx.com