Using EmailJS to create a contact form
 Mayur K Setty
I was introduced to Email JS a third-party JavaScript library that allows users to integrate forms in their web application projects to receive emails from users. Email JS is extremely powerful as it runs directly from the client side and does not require a backend server to send emails. This saves me a lot of time and effort of having to build a Node.JS backend server which also makes life easier when deploying the application. This also means that I don’t have to deploy the frontend and backend separately for example frontend on Netlify and the backend on Render and then integrate them so that all the URL’s are correct.
Guide on How to Use Email.js
Signing Up and Setting Up Your Account
The first thing that you need to do is head to the Email.js website and create an account using your email address.
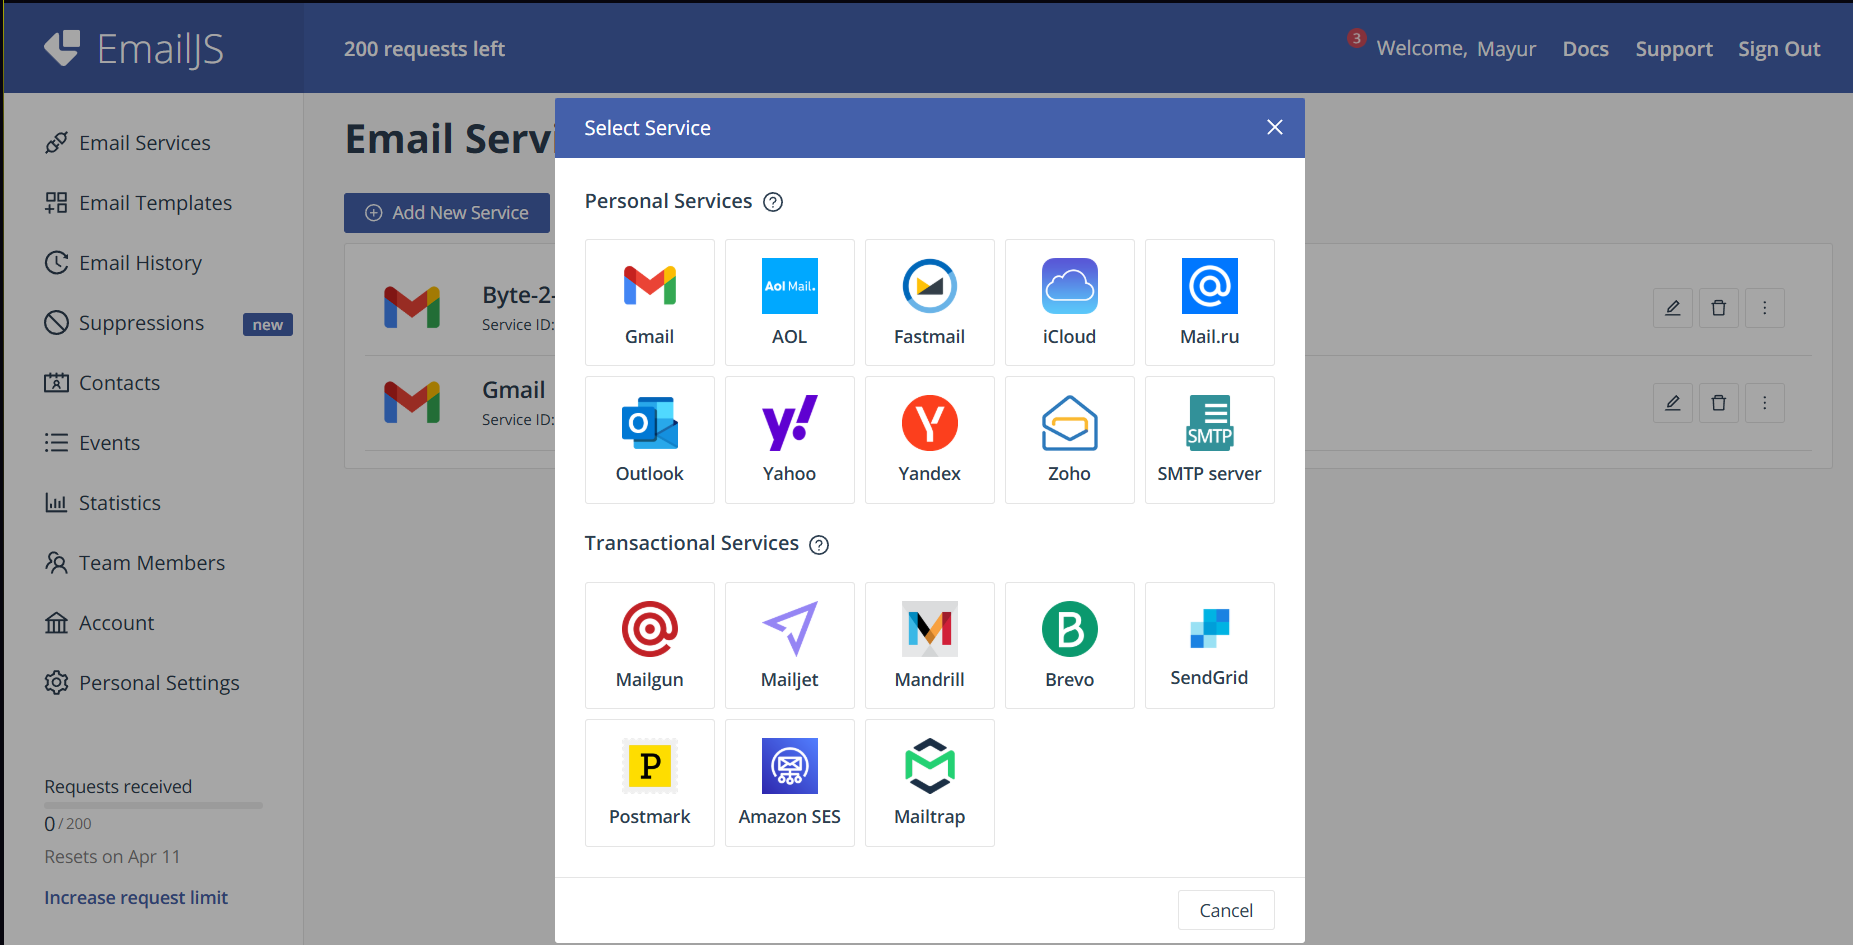
Once you are logged in, go to the Email Services page by navigating through the sidebar, and clicking on the “Add New Service” button.
Once the service has been created, select the email provider you want to use (e.g., Gmail, Outlook, Yahoo) and follow the on-screen instructions to connect your email service to Email.js

Creating an Email Template
Navigate to the Email Templates section from the sidebar.
Click on “Create New Template” and design your email structure by adding placeholders for dynamic content.
Save your template and take note of the template ID, as you will need it when making API calls.
Here is an example of a template that I made:
 You have a mail from {{name}}
 Name: {{name}}

 Email: {{email}}

 Subject: {{subject}}

 Organization: {{organization}}

 Message:

 {{message}}
Integrating Email.js in Your Project
Install Email.js in your project by adding the CDN in your HTML file or installing it via npm:
npm install emailjs-comImport Email.js into your JavaScript/React project:
import emailjs from 'emailjs-com';Initialize Email.js by including your User ID, Service ID, and Template ID:
 emailjs.send("service_ID", "template_ID", {
   to_name: "Recipient Name",
   from_name: "Your Name",
   message: "Your Message Here",
   reply_to: "your_email@example.com"
 }, "user_ID")
 .then(response => {
     console.log("Email sent successfully!", response.status, response.text);
 })
 .catch(error => {
     console.error("Error sending email:", error);
 });
Also, don’t forget to create your actual form! I am using Vite x React, so here is what I made (This is the complete code):
import React, { useState } from "react";
import emailjs from "emailjs-com";
import "./Contact.css";

const Contact = () => {
  const [formData, setFormData] = useState({
    name: "",
    email: "",
    subject: "",
    organization: "",
    message: "",
  });

  const [status, setStatus] = useState("");

  const handleChange = (e) => {
    const { name, value } = e.target;
    setFormData({
      ...formData,
      [name]: value,
    });
  };

  const handleSubmit = async (e) => {
    e.preventDefault();
    setStatus("Sending...");

    try {
      await emailjs.send(
        "xxxxxxxx", // EmailJS service ID
        "xxxxxxxx", // EmailJS template ID
        formData,
        "xxxxxxxxxx" // EmailJS public key
      );

      setStatus("Message sent successfully!");
      setFormData({
        name: "",
        email: "",
        subject: "",
        organization: "",
        message: "",
      });
    } catch (error) {
      console.error("EmailJS error:", error);
      setStatus("Failed to send message. Please try again later.");
    }
  };

  return (
    <div className="contact-form-container">
      <h2>Get in Touch</h2>
      {/* Actual Contact Form */}
      <form onSubmit={handleSubmit}>
        <div className="form-group">
          <label htmlFor="name">Name:</label>
          <input
            type="text"
            id="name"
            name="name"
            value={formData.name}
            onChange={handleChange}
            required
          />
        </div>

        <div className="form-group">
          <label htmlFor="email">Email:</label>
          <input
            type="email" // Use "email" type for proper validation
            id="email"
            name="email"
            value={formData.email}
            onChange={handleChange}
            required
          />
        </div>

        <div className="form-group">
          <label htmlFor="organization">Organization:</label>
          <input
            type="text"
            id="organization"
            name="organization"
            value={formData.organization}
            onChange={handleChange}
          />
        </div>

        <div className="form-group">
          <label htmlFor="subject">Subject:</label>
          <input
            type="text"
            id="subject"
            name="subject"
            value={formData.subject}
            onChange={handleChange}
            required
          />
        </div>

        <div className="form-group">
          <label htmlFor="message">Message:</label>
          <textarea
            id="message"
            name="message"
            value={formData.message}
            onChange={handleChange}
            required
          ></textarea>
        </div>
        <button type="submit">Send</button>
      </form>

      {status && <p>{status}</p>}
    </div>
  );
};

export default Contact;
What did I make?
So you must be curious about what I ended up with in the end… Here it is take a look:
Check out this link: https://youtu.be/UEI6UM9tW6g
Subscribe to my newsletter
Read articles from Mayur K Setty directly inside your inbox. Subscribe to the newsletter, and don't miss out.
Written by

Mayur K Setty
Mayur K Setty
Student at RV University x Kalvium (BCA in Software Product Engineering) | MERN Stack Dev {} | Wildlife Enthusiast | Photographer | Runner | Guitarist