Building a Secure CI/CD Pipeline with Jenkins and SonarQube: A Complete DevSecOps Tutorial
 Oshaba Samson
In this tutorial we will see how to build a complete Devsecops CICD pipeline using Jenkins, SonarQube and Docker
Prerequsite
Jenkins
Sonarqube
Docker
Dockerhub
Objective
Continuous Integration and continuous deployment using Jenkins
Code Quality Analysis using SonarQube
Push image to dockerhub
Deploy application to EC2 Instance
Before we begin creating a CI/CD pipeline using Jenkins and SonarQube, we need to set them up first. You can refer to my previous tutorial for the setup instruction Master Jenkins and SonarQube Setup for Continuous Integration and Code Quality. We also need to create an access token. You can checkout my previous post on how to create access token on dockerhub Step-by-Step Guide to Setting Up a Docker Registry and Generating Access Tokens
To build a CICD pipeline using Jenkins
We need to integrate the access token generated on Dockerhub.
- Click on Manage Jenkins
- Click on Credentials
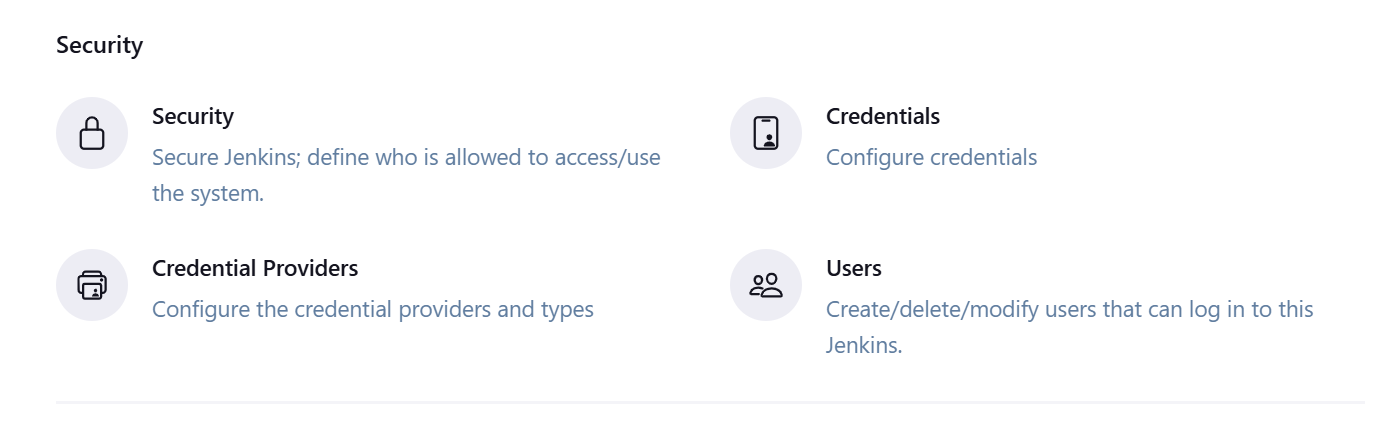
- Click on System

- Click Global Credentials

- Click Add Credentials
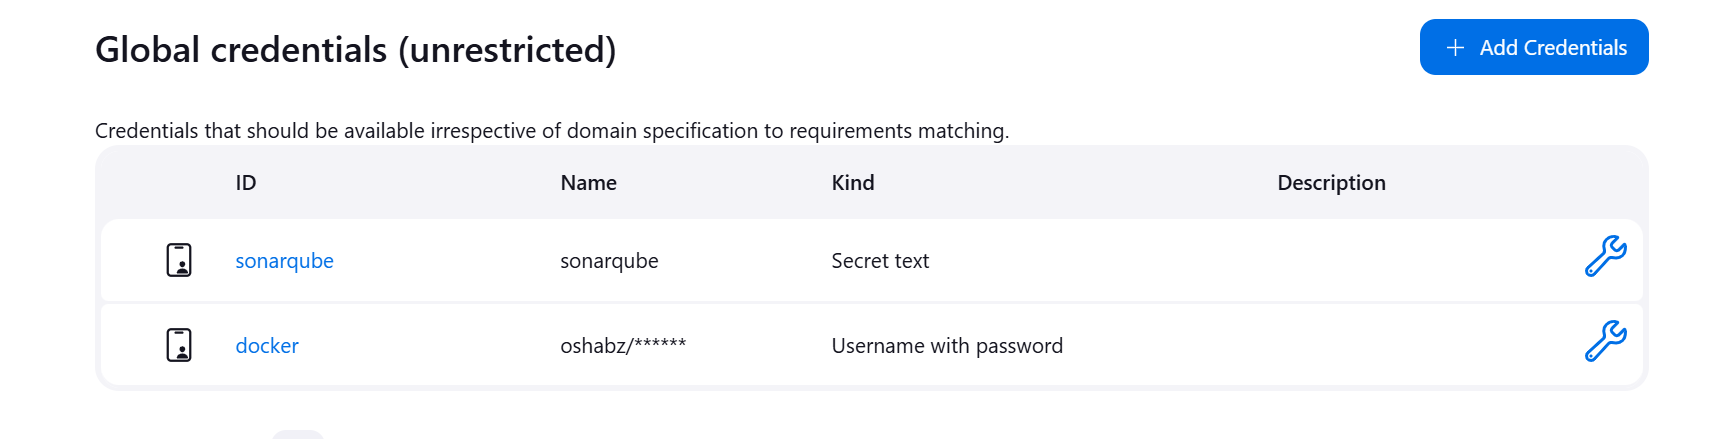
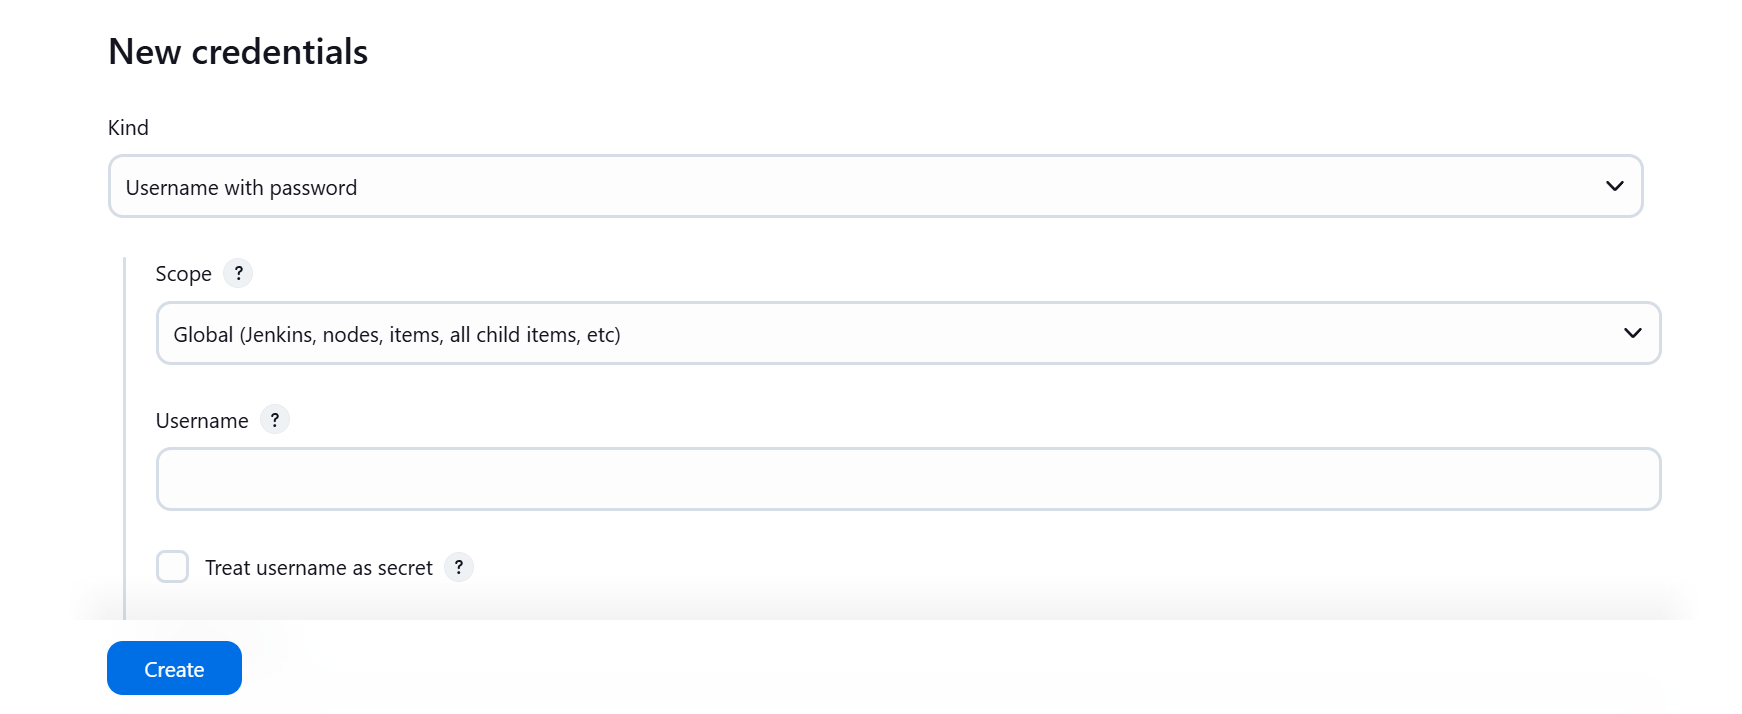
Click on New Credentials
Type username and token as password
Create
To Configure Jenkins
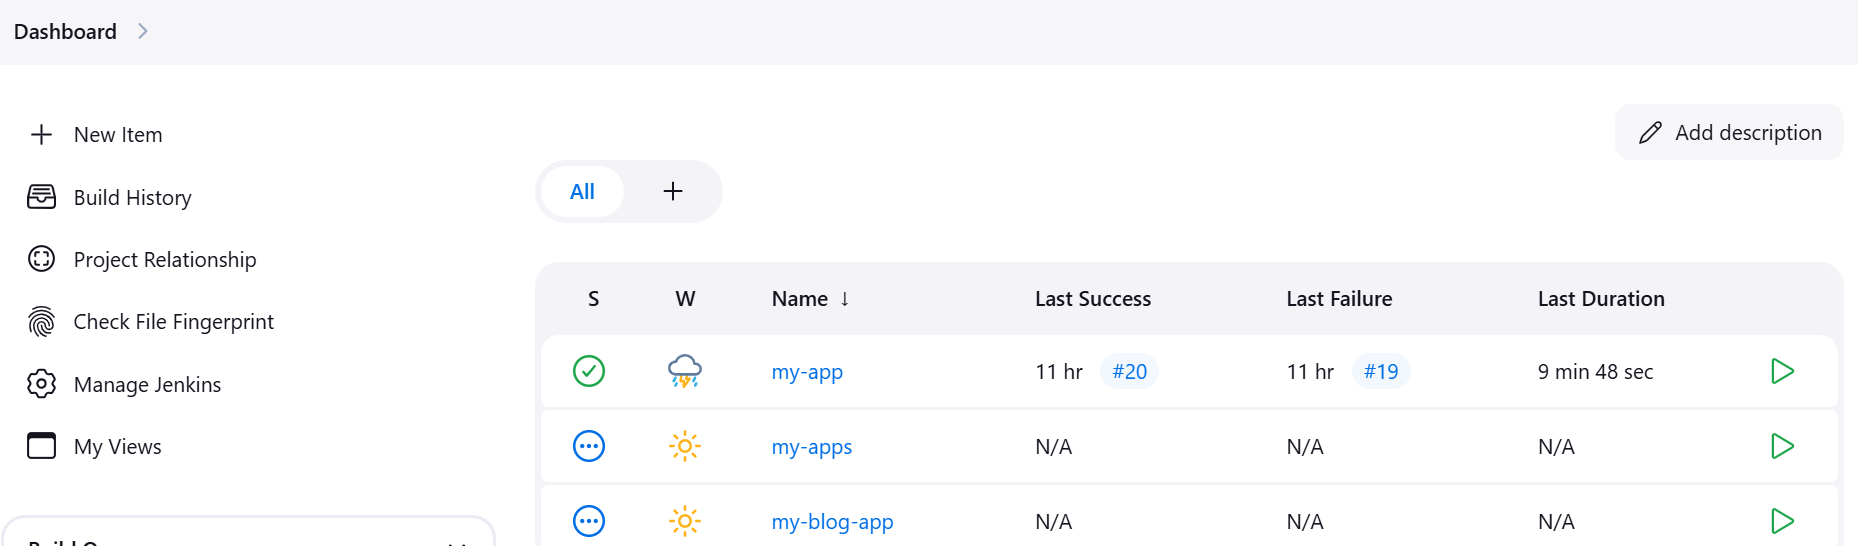
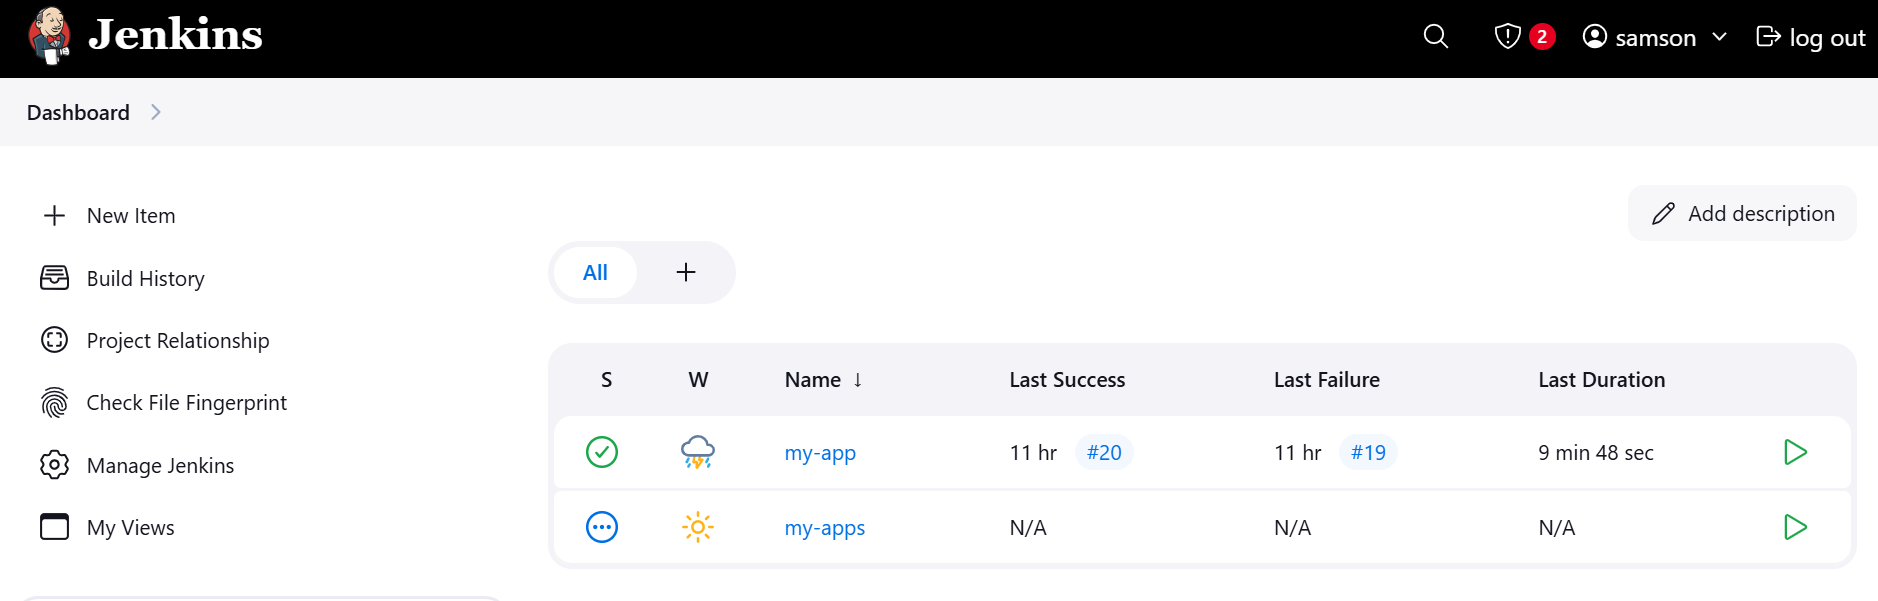
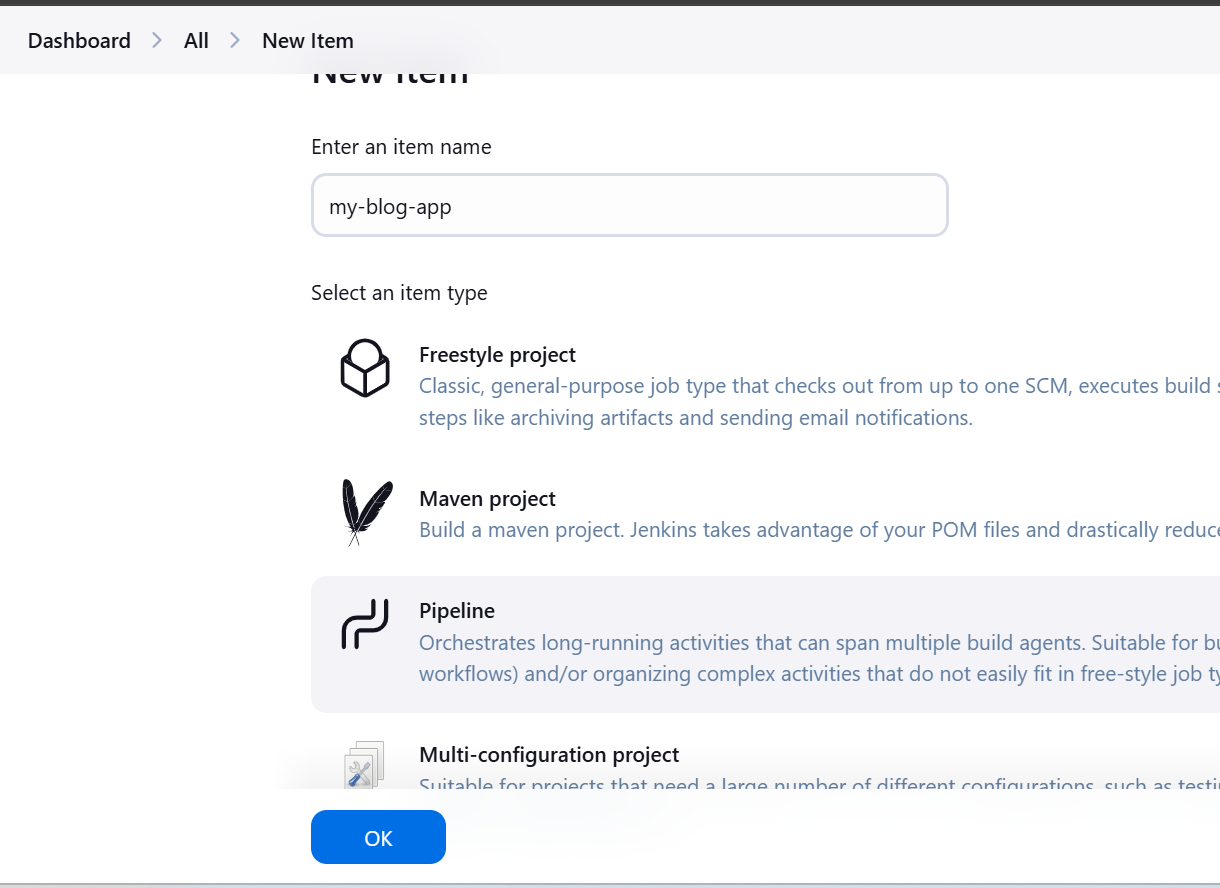
Go to the dashboard
Click on New Item
Enter Name
Select Pipeline
Create
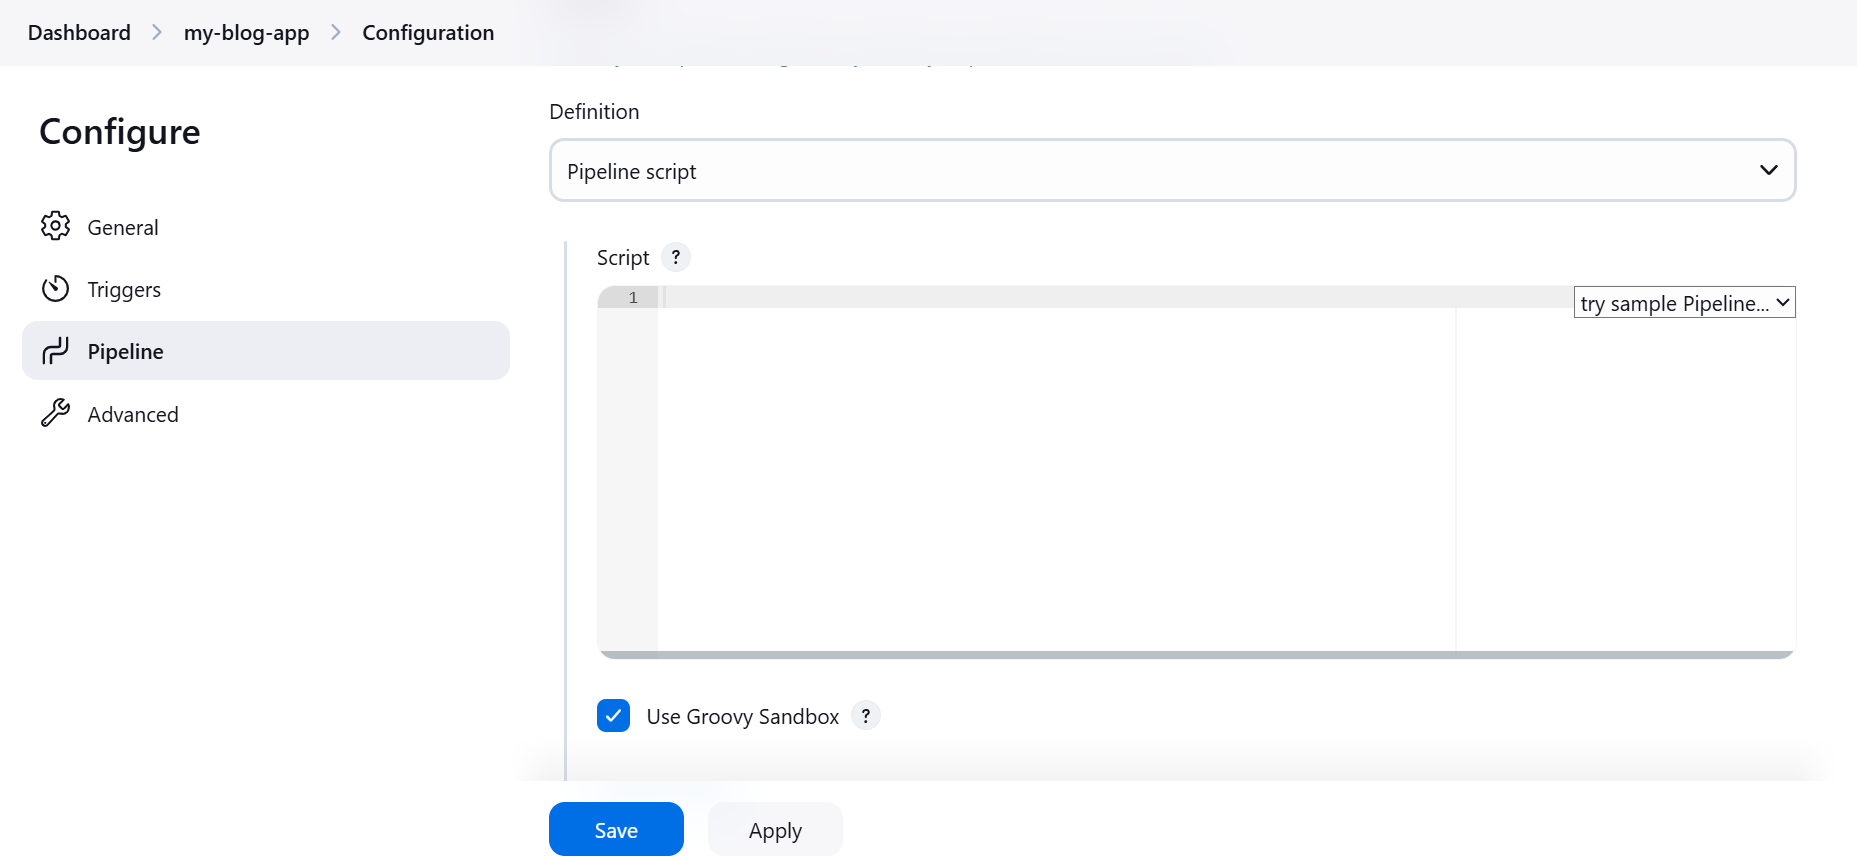
Scroll to pipeline script
Enter the following code inside the script box
- Pipeline Declaration
pipeline {
    agent any
    tools {
        jdk 'jdk'
        nodejs 'nodejs'
    }
    environment {
        SCANNER_HOME = tool 'sonarqube'
        DOCKER_CREDENTIALS = credentials('docker')  // Use the credentials ID
    }
    stages { ... }
}
- Stage: Clean Workspace
stage('clean workspace') {
    steps {
        cleanWs()
    }
}
- Stage: Checkout from Git
stage('Checkout from Git') {
    steps {
        git branch: 'main', url: 'https://github.com/chuksdsilent/jenkins-reactjs.git'
    }
}
- Stage: SonarQube Analysis
stage("Sonarqube Analysis") {
    steps {
        withSonarQubeEnv('sonar-server') {
            sh ''' $SCANNER_HOME/bin/sonar-scanner -Dsonar.projectName=my-app \
            -Dsonar.projectKey=my-app '''
        }
    }
}
- Stage: Quality Gate
stage("quality gate") {
    steps {
        script {
            waitForQualityGate abortPipeline: false, credentialsId: 'sonarqube'
        }
    }
}
- Stage: Install Dependencies
stage('Install Dependencies') {
    steps {
        sh "npm install"
    }
}
- Stage: OWASP Dependency-Check Scan
stage('OWASP FS SCAN') {
    steps {
        dependencyCheck additionalArguments: '--scan ./ --disableYarnAudit --disableNodeAudit', odcInstallation: 'DP'
        dependencyCheckPublisher pattern: '**/dependency-check-report.xml'
    }
}
- Stage: Docker Build & Push
stage("Docker Build & Push") {
    steps {
        script {
            withDockerRegistry(credentialsId: 'docker', toolName: 'docker') {
                sh "docker build -t bingo ."
                sh "docker tag bingo oshabz/my-app:latest"
                sh "docker push oshabz/my-app:latest"
            }
        }
    }
}
- Stage: TRIVY Scan
stage("TRIVY") {
    steps {
        sh "trivy image oshabz/my-app:latest > trivyimage.txt"
    }
}
- Stage: Deploy to Container
stage('Deploy to container') {
    steps {
        sh 'docker run -d --name my-app -p 3000:5000 oshabz/my-app:latest'
    }
}
Putting everything together
pipeline{
    agent any
    tools{
        jdk 'jdk'
        nodejs 'nodejs'
    }
    environment {
        SCANNER_HOME=tool 'sonarqube'
         DOCKER_CREDENTIALS = credentials('docker')  // Use the credentials ID
    }
    stages {
        stage('clean workspace'){
            steps{
                cleanWs()
            }
        }
        stage('Checkout from Git'){
            steps{
                git branch: 'main', url: 'https://github.com/chuksdsilent/jenkins-reactjs.git'
            }
        }
        stage("Sonarqube Analysis "){
            steps{
                withSonarQubeEnv('sonar-server') {
                    sh ''' $SCANNER_HOME/bin/sonar-scanner -Dsonar.projectName=my-app \
                    -Dsonar.projectKey=my-app '''
                }
            }
        }
        stage("quality gate"){
           steps {
                script {
                    waitForQualityGate abortPipeline: false, credentialsId: 'sonarqube'
                }
            }
        }
        stage('Install Dependencies') {
            steps {
                sh "npm install"
            }
        }
        stage('OWASP FS SCAN') {
            steps {
                dependencyCheck additionalArguments: '--scan ./ --disableYarnAudit --disableNodeAudit', odcInstallation: 'DP'
                dependencyCheckPublisher pattern: '**/dependency-check-report.xml'
            }
        }
        stage("Docker Build & Push"){
            steps{
                script{
                   withDockerRegistry(credentialsId: 'docker', toolName: 'docker'){
                       sh "docker build -t bingo ."
                       sh "docker tag bingo oshabz/my-app:latest "
                       sh "docker push oshabz/my-app:latest"
                    }
                }
            }
        }
        stage("TRIVY"){
            steps{
                sh "trivy image oshabz/my-app:latest > trivyimage.txt"
            }
        }
        stage('Deploy to container'){
            steps{
                sh 'docker run -d --name my-app -p 3000:5000 oshabz/my-app:latest'
            }
        }

    }
}
Apply and Save
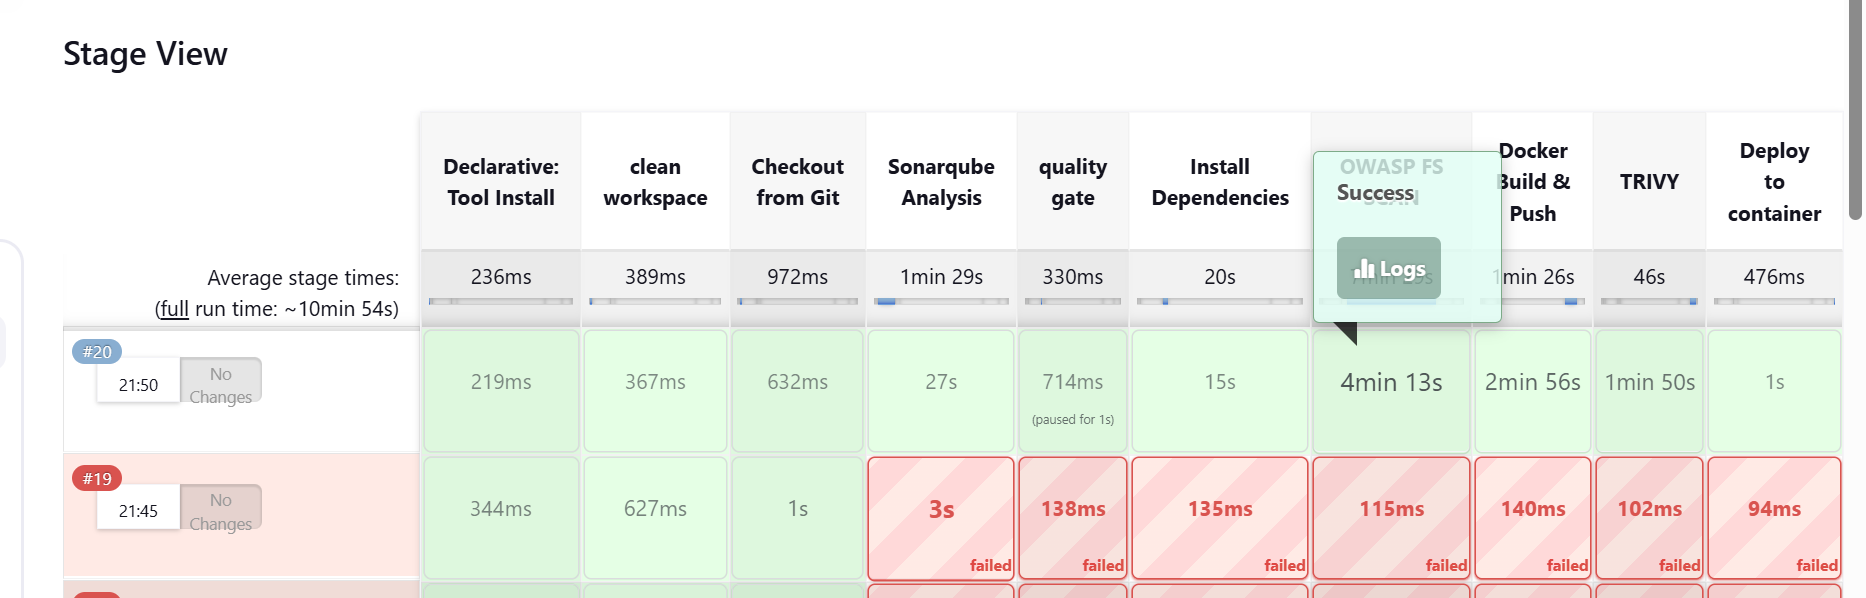
Click on Build Now
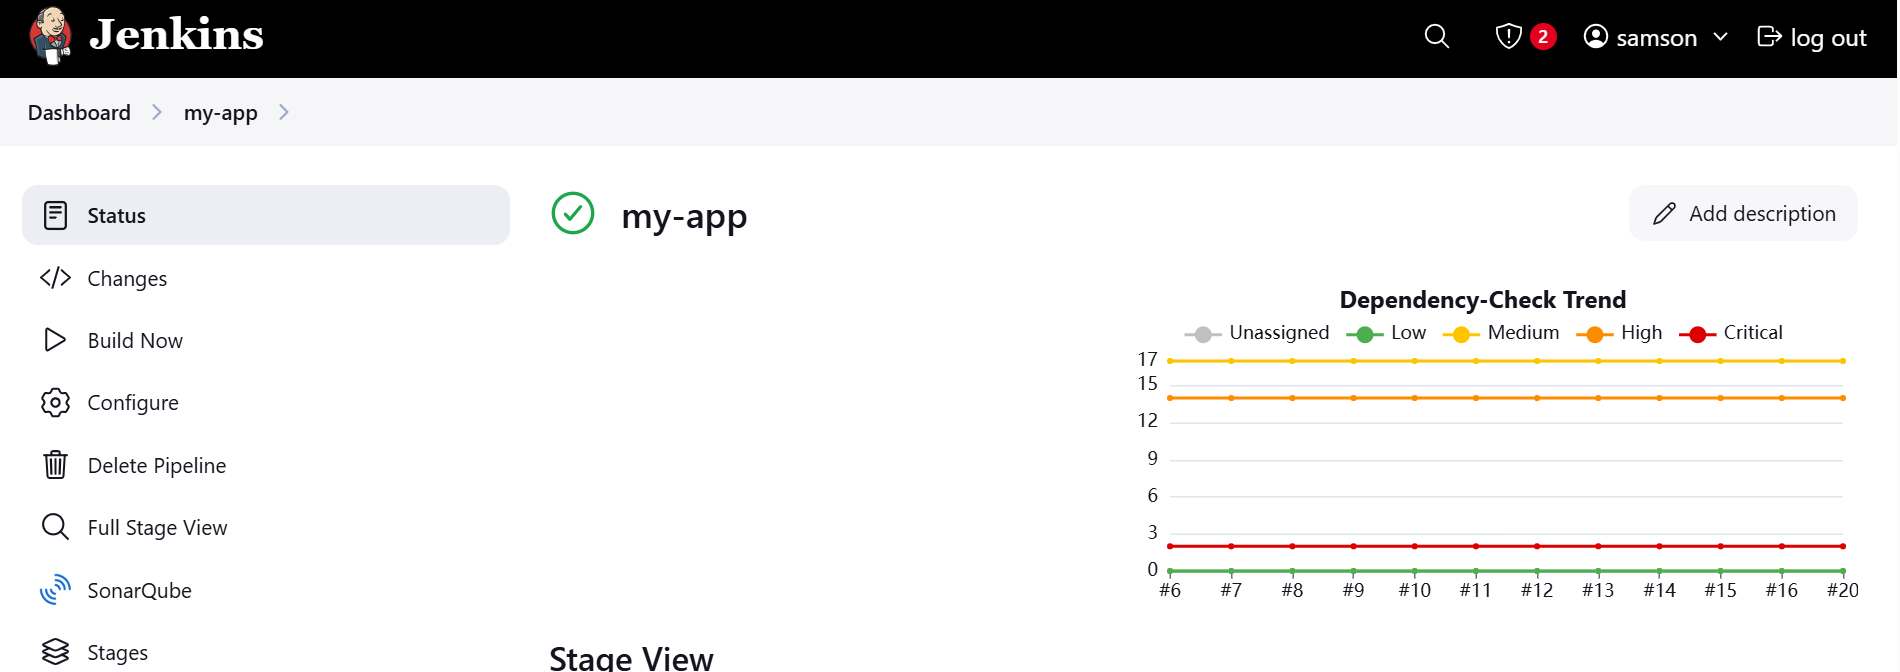
To view dependency check results
- Scroll down and click on the build number
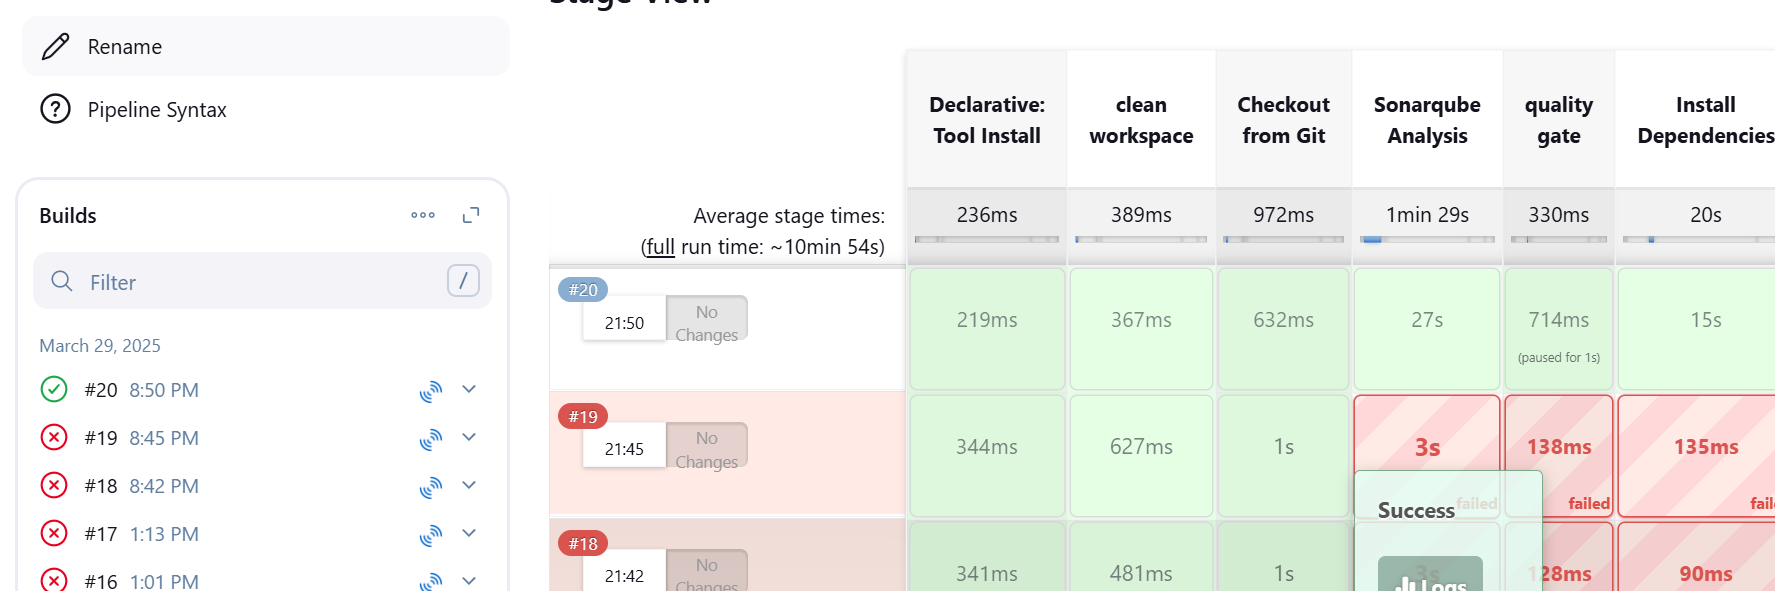
- Click on Dependency check

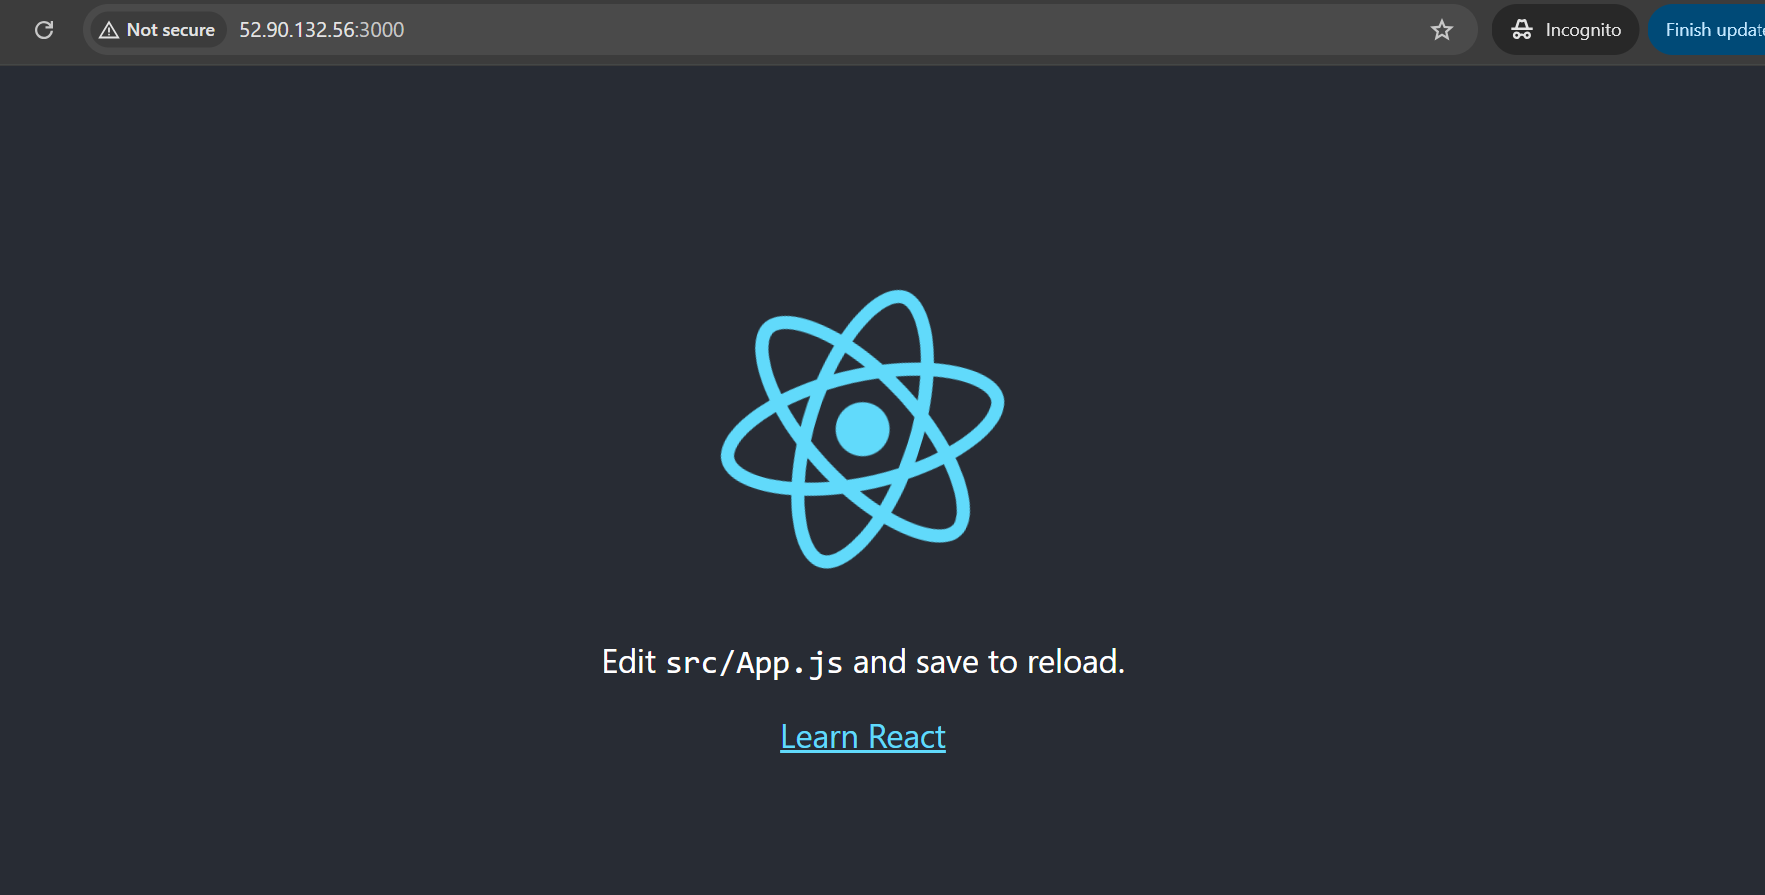
To have access the website we need to open port 3000. you can checkout my previous tutorial on how to manage ec2 instance port Managing EC2 Instance Ports on AWS: A Step-by-Step Guide
Subscribe to my newsletter
Read articles from Oshaba Samson directly inside your inbox. Subscribe to the newsletter, and don't miss out.
Written by
Oshaba Samson
Oshaba Samson
I am a software developer with 5 years + experience. I have working on web apps ecommerce, e-learning, hrm web applications and many others