Git Introduction: A Hands-On Guide for Beginners
 Dhananjay kulkarni
Table of contents
- Introduction
- Setup: Environment Preparation
- 1️⃣ Git Installation & Configuration
- 2️⃣ Initializing a Git Repository
- 3️⃣ Creating & Tracking Files
- 4️⃣ Making Changes & Tracking Versions
- 5️⃣ Reverting to Previous Versions
- 6️⃣ Undoing Mistakes in Git
- 7️⃣ Working with Remote Repositories (GitHub)
- 8️⃣ Branching & Merging
- 9️⃣ Handling Merge Conflicts
- 🔟 Forking & Pull Requests (PRs)
- 🎯 Exercise for You
- Conclusion
Introduction
Git is a powerful version control system (VCS) that enables multiple people to collaborate on a project, track changes, and maintain version history. In this blog, we’ll walk through setting up Git on an AWS EC2 Ubuntu instance, performing basic operations, handling mistakes, and working with remote repositories on GitHub.
By the end of this tutorial, you’ll have hands-on experience with Git commands, branching, merging, and collaborating on repositories.
Setup: Environment Preparation
Before diving into Git commands, let's set up our environment.
Prerequisites
Ubuntu instance on AWS EC2
VS Code (Connected to EC2 via SSH)
👉 Watch this tutorial on connecting VS Code to EC2.
1️⃣ Git Installation & Configuration
🔹 Step 1: Install Git
Run the following command on your EC2 instance to install Git:
sudo apt update
sudo apt install git -y
To verify installation, check the Git version:
git --version

🔹 Step 2: Configure Git
Set up your username and email:
git config --global user.name "Your Name"
git config --global user.email "your.email@example.com"
To confirm the configuration:
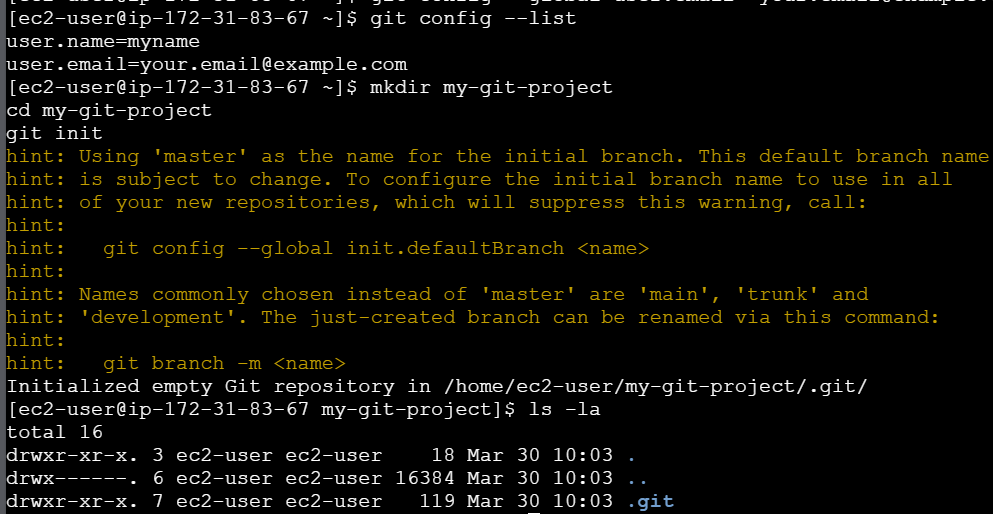
git config --list

This stores your Git identity for tracking changes.
2️⃣ Initializing a Git Repository
🔹 Step 3: Create a Project Folder & Initialize Git
mkdir my-git-project
cd my-git-project
git init
After running git init, Git creates a hidden .git folder. You can check this by running:
ls -la
3️⃣ Creating & Tracking Files
🔹 Step 4: Create a File & Check Git Status
touch index.html
echo "<h1>Welcome to Git</h1>" > index.html
git status
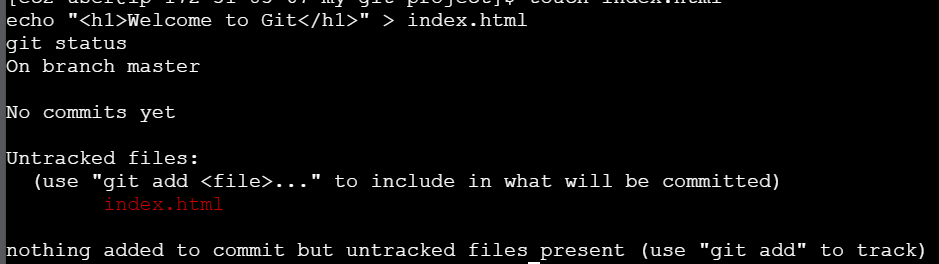
This will show that index.html is an untracked file.
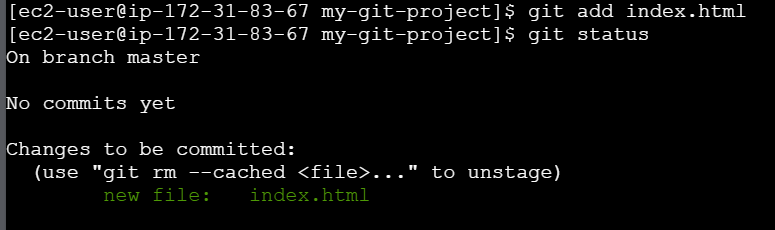
🔹 Step 5: Add File to Staging Area
git add index.html
Alternatively, add all modified files:
git add .
🔹 Step 6: Commit Changes
git commit -m "Initial commit - Added index.html"
What does commit do?
A commit captures a snapshot of your changes in Git. Run the following to check commit history:
git log --oneline

4️⃣ Making Changes & Tracking Versions
🔹 Step 7: Modify the File & Check Changes
Modify index.html:
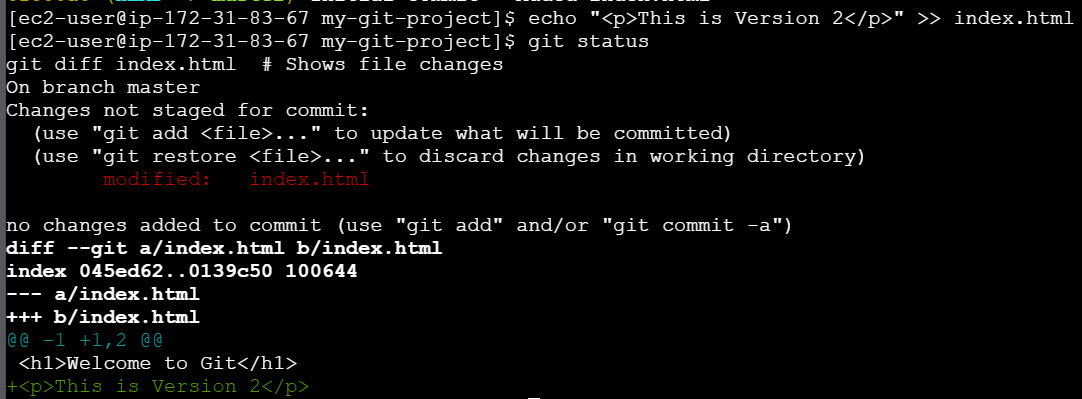
echo "<p>This is Version 2</p>" >> index.html
Check the status:
git status
git diff index.html  # Shows file changes
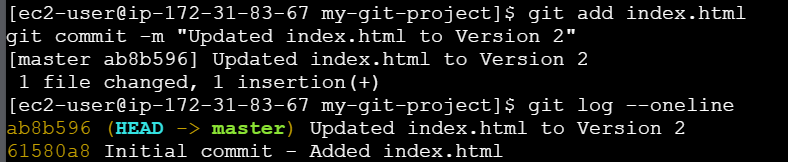
🔹 Step 8: Commit New Changes
git add index.html
git commit -m "Updated index.html to Version 2"
Now check commit history again:
git log --oneline
5️⃣ Reverting to Previous Versions
🔹 Step 9: View an Older Version of the File
List commits:
git log --oneline
Copy any commit ID and run:
git show <commit-id>:index.html

🔹 Step 10: Reset a File to an Old Version
git checkout <commit-id> -- index.html

Note: It will show the first commit version instead of version 2.
If you want to reset all files:
git checkout <commit-id> -- *
Return to the latest version:
git checkout master -- *

6️⃣ Undoing Mistakes in Git
🔹 Unstage a File (Before Commit)
git restore --staged index.html
In the demo below, I made some unwanted changes to the file and added it to the staging area. Since I do not want to commit these changes, I need to revert the file back to the working directory. To do this, I used the command mentioned above.
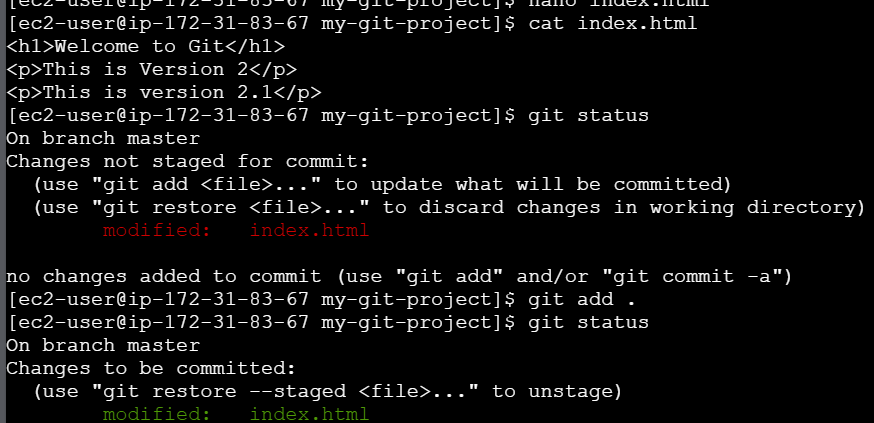

This moves the file back to the working directory.
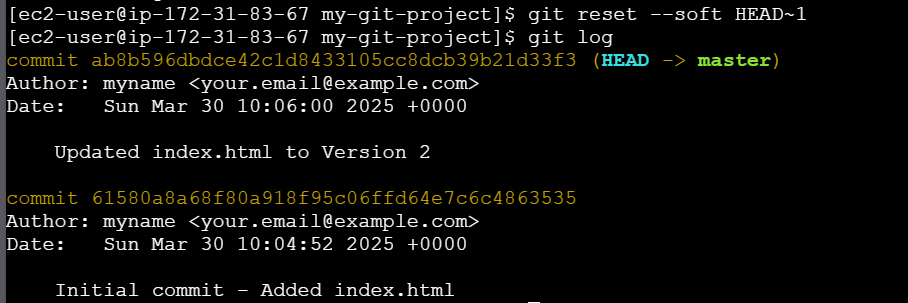
🔹 Undo Last Commit (Keep Changes)
Now again in the last demo that unwanted change I did again let’s add this and commit as well.
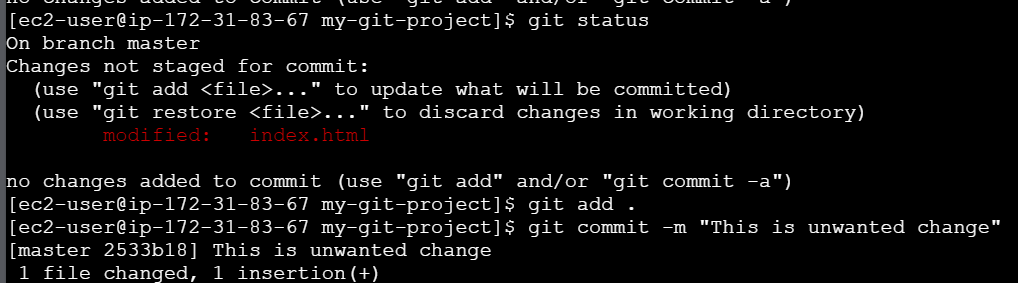
git reset --soft HEAD~1
🔹 Undo Last Commit (Discard Changes)
git reset --hard HEAD~1
7️⃣ Working with Remote Repositories (GitHub)
🔹 Step 11: Connect to a GitHub Repository
1️⃣ Create a repository on GitHub (e.g., myrepo).
2️⃣ Link the repository to your local project:
git remote add origin <repo-URL>
git branch -M main
git push -u origin main
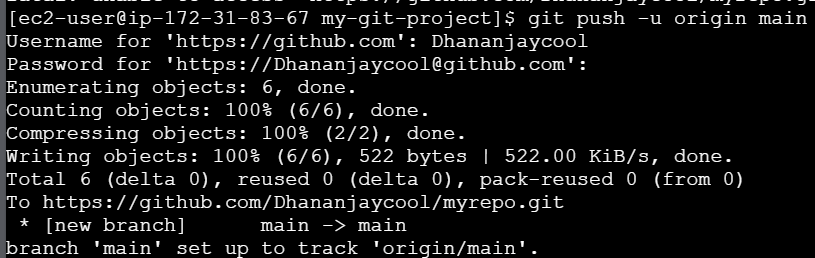
Your code is now on GitHub! 🎉
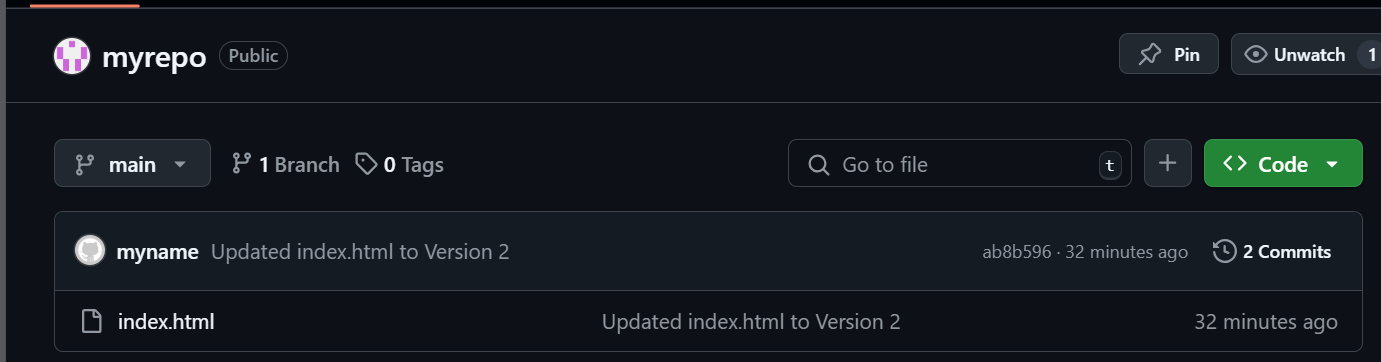
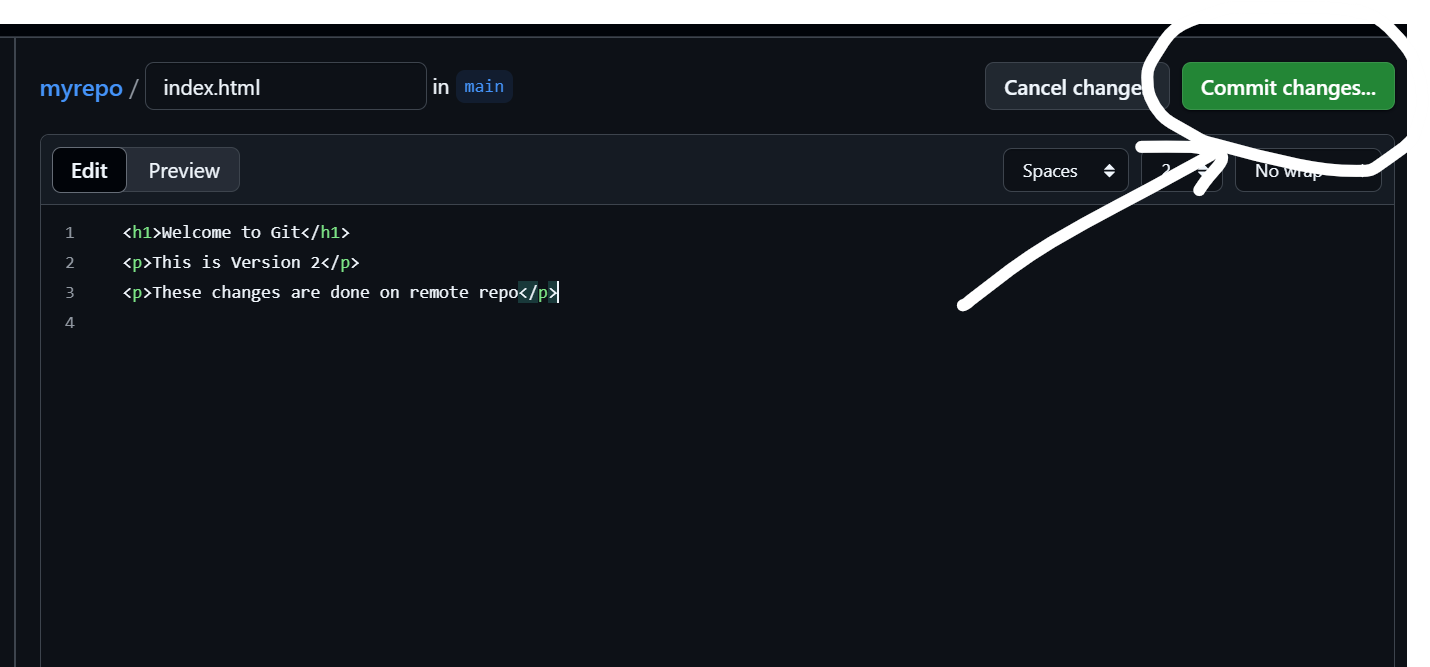
🔹 Step 12: Pull Remote Changes
If someone else modifies the repository(let’s add some change here and commit on Github UI itself):
git pull origin main
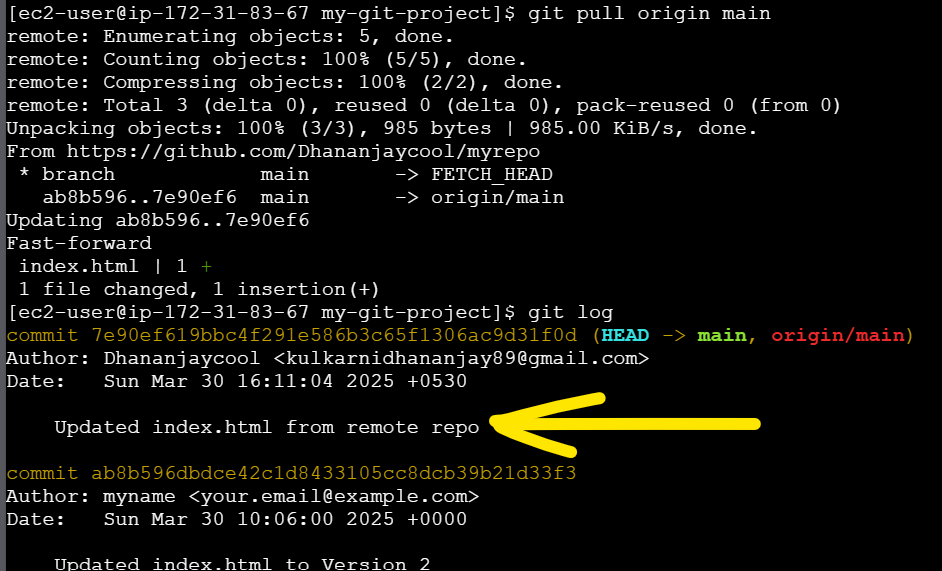
This syncs your local repository with GitHub.
🔹 Step 13: Clone a GitHub Repository
git clone <repo-URL>
cd <repo-name>
8️⃣ Branching & Merging
🔹 Step 14: Create & Switch Branches
git branch new-feature
git checkout new-feature
Or, create and switch in one command:
git checkout -b new-feature
🔹 Step 15: Make Changes & Merge Branch
Modify index.html, then:
git add .
git commit -m "Added new feature"
git checkout main
git merge new-feature
Check history with:
git log --oneline --graph --decorate --all
9️⃣ Handling Merge Conflicts
🔹 Step 16: Create a Conflict
1️⃣ Open index.html on the main branch and change a line.
2️⃣ Switch to new-feature and modify the same line.
3️⃣ Try merging:
git merge new-feature
If a conflict occurs, Git will notify you. Open the file and resolve the conflict manually, then:
git add index.html
git commit -m "Resolved merge conflict"
git push origin main
🔟 Forking & Pull Requests (PRs)
Step 17: Fork a Repository on GitHub
1️⃣ Find a repository on GitHub and click Fork.
2️⃣ Clone the forked repo:
git clone <your-forked-repo-URL>
3️⃣ Make changes and push to your fork.
4️⃣ Create a Pull Request (PR) to propose your changes to the original repository.
🎯 Exercise for You
Set up Git on your system and initialize a repository.
Create and track a file (
README.md) and commit it.Modify the file and commit again.
Rollback to a previous commit and restore changes.
Create a new branch and merge it into the
mainbranch.Fork a repository on GitHub, make a change, and submit a pull request.
Conclusion
Git is an essential tool for developers, enabling version control, collaboration, and backup management. By practicing the steps above, you’ll build confidence in managing projects with Git.
What’s next? Explore advanced Git concepts like rebasing, cherry-picking, and interactive rebasing in future tutorials. 🚀
Subscribe to my newsletter
Read articles from Dhananjay kulkarni directly inside your inbox. Subscribe to the newsletter, and don't miss out.
Written by
Dhananjay kulkarni
Dhananjay kulkarni
I write articles on Cloud, DevOps & Cybersecurity