React-i18next
 nidhinkumar
React-i18next is a powerful internationalization framework for React / React Native which is based on i18next. react-i18next is optimally suited for server-side rendering. It provides extra extension point to work with next.js
1.Installation
To use react-i18next in our application we need to first install the package to our existing React application like below
npm install react-i18next i18next --save
npm i i18next-browser-languagedetector
Once the package is installed create a new file named i18n in the src directory and add the initial setup details like below
import i18n from "i18next";
import { initReactI18next } from "react-i18next";

const resources = {
  en: {
    translation: {
      welcome: "Welcome to React i18n",
      description: {
        line1: 'Hello <1>{{user}}</1> welcome to React i18n',
        line2: 'Nice to see the content'
      }
    },
  },
  fr: {
    translation: {
      welcome: "bienvenue dans React 18",
      description: {
        line1: 'Bonjour {{user}}, bienvenue sur React i18n',
        line2: 'Heureux de voir le contenu'
      }
    },
  },
  ar: {
    translation: {
      welcome: "مرحباً بكم في React i18n",
      description: {
        line1: 'مرحبًا بكم {{user}} React i18n',
        line2: 'يسعدني رؤية المحتوى'
      }
    },
  },
};

i18n.use(LanguageDetector).use(initReactI18next).init({
  resources,
  lng: "en",
});

export default i18n;
In the above snippet we have created the translation resources for each language like English, French and Arabic as well as the since we are using this in the React app we used the initReactI18next.
The interesting part is i18n.use(initReactI18next) where we pass the i18n instance to react-i18next which will make it available for all the components via the context api.
Once the above configuration is done go to main.tsx file and import i18n like below
import { StrictMode } from 'react'
import { createRoot } from 'react-dom/client'
import './index.css'
import App from './App.tsx'
import './i18n';

createRoot(document.getElementById('root')!).render(
  <StrictMode>
    <App />
  </StrictMode>,
)
Now the setup of i18n is complete now we can see how to use the translation in the component.
2.Using the translator hook
Inside the component where we need to use the translation we can simply use the useTranslation() hook like below
function App() {
  const { t } = useTranslation();

  return (
    <>
      <h1>{t("welcome")}</h1>
    </>
  );
}

export default App;
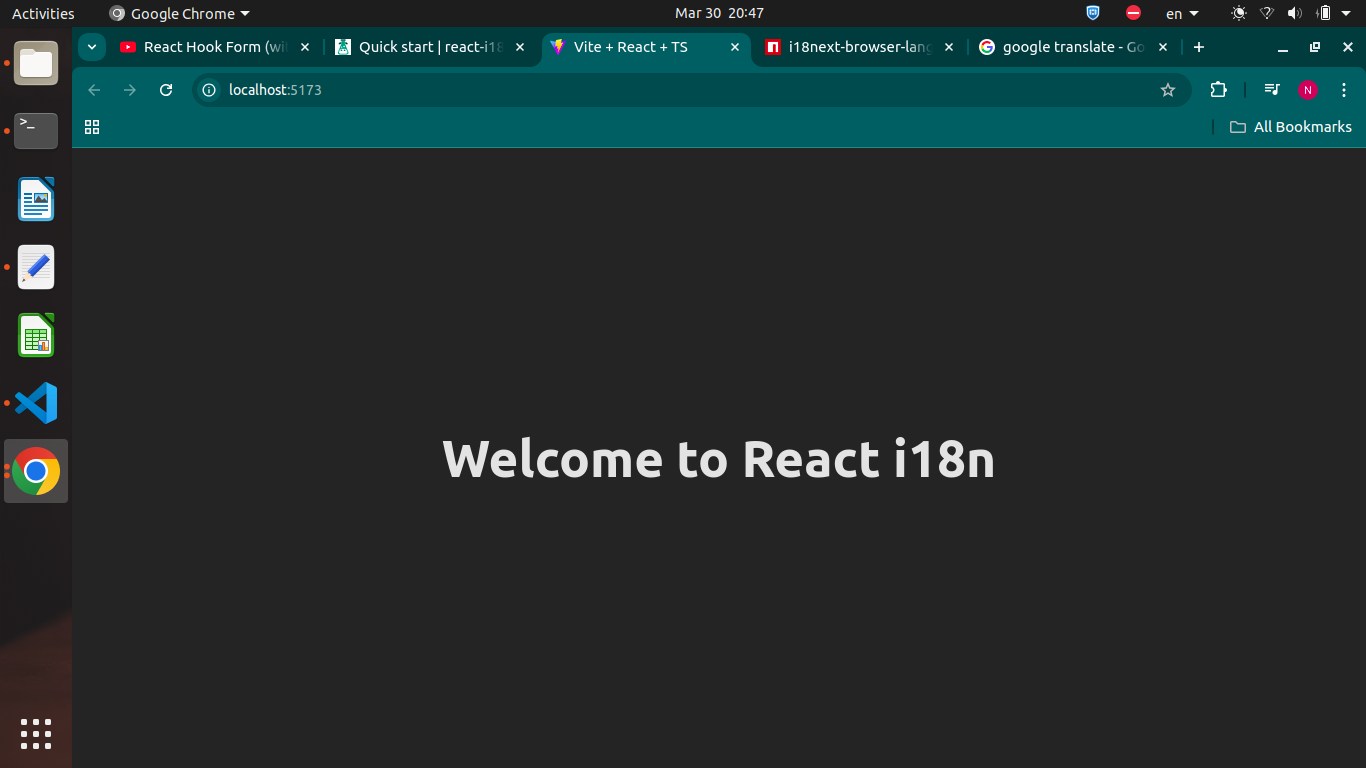
It will show the output like below based on the language which is setup in the i18n init

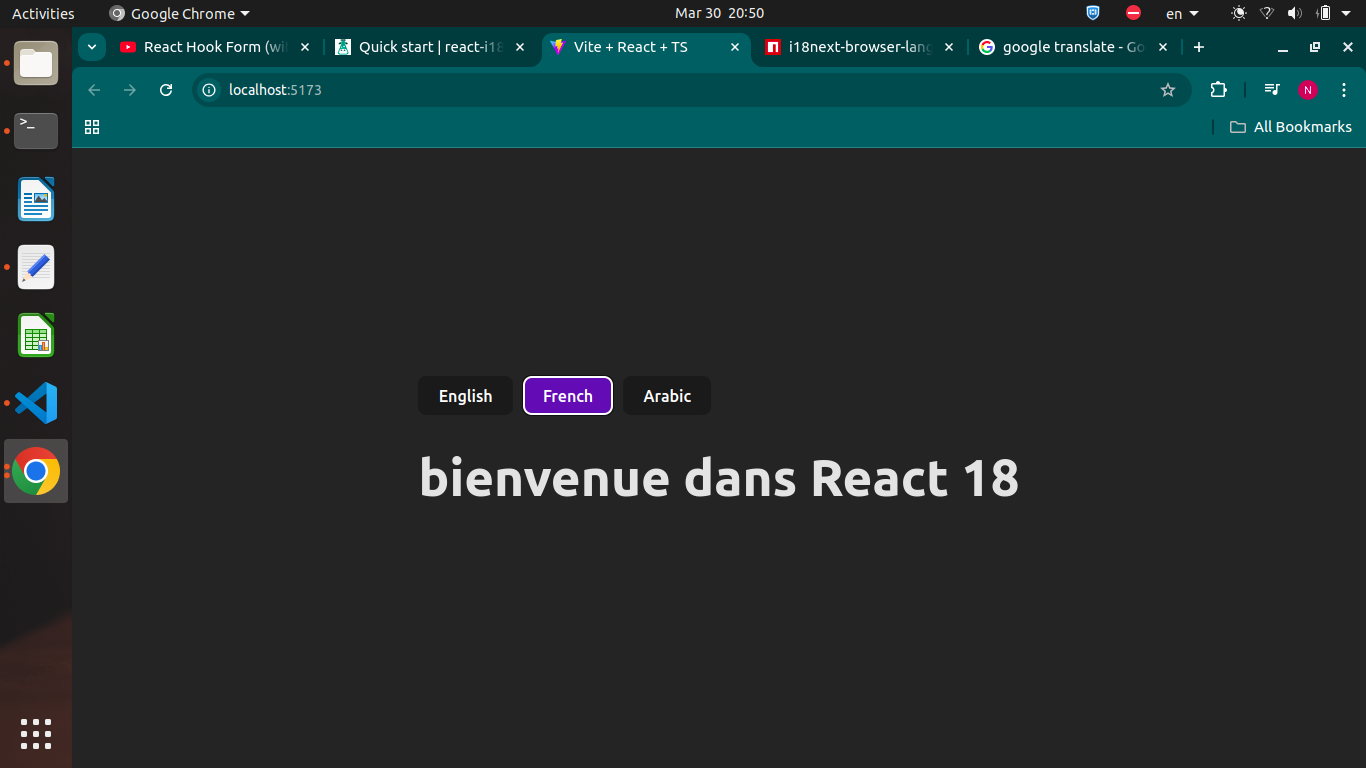
Now we will add some button to see the changes of the languages for that we will create a component named LanguageSelector inside the components folder
import { useEffect } from "react";
import { useTranslation } from "react-i18next";

const LanguageSelector = () => {
  const { i18n } = useTranslation();

  const languages = [
    { lang: "English", key: "en" },
    { lang: "French", key: "fr" },
    { lang: "Arabic", key: "ar" },
  ];

  const changeLanguage = (code: string) => {
    i18n.changeLanguage(code);
  };

  useEffect(() => {
    document.body.dir = i18n.dir();
  }, [i18n, i18n.language])


  return (
    <div className="btn-container">
      {languages.map((lng) => (
        <button className={lng.key === i18n.language ? 'selected': ''} key={lng.key} onClick={() => changeLanguage(lng.key)}>
          {lng.lang}
        </button>
      ))}
    </div>
  );
};

export default LanguageSelector;
Import this LanguageSelector component in App.tsx to see the CTA which can be used to change the language

3.Using RTL and LTR
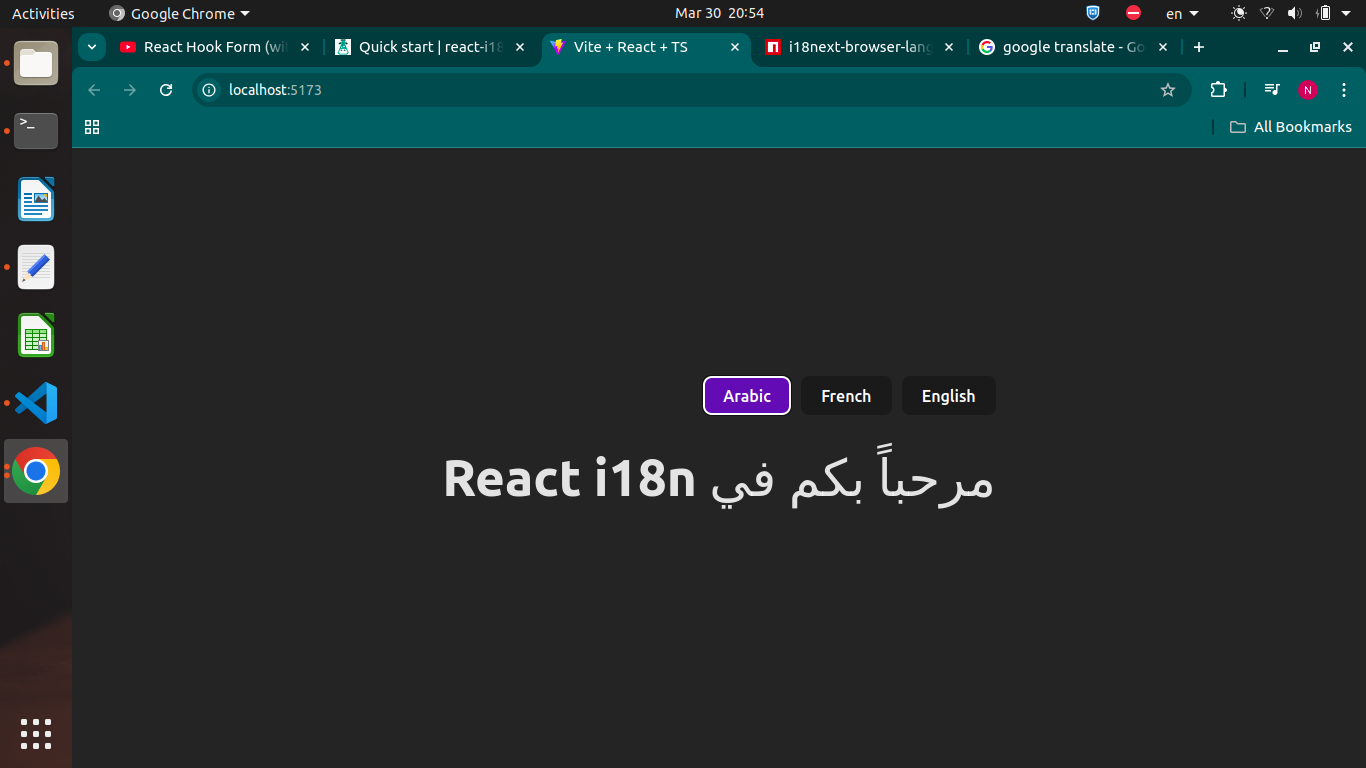
In our example you have noted that we are having the language Arabic which typically starts from RTL direction in this case if we need our contents and text to show in that way we can use.
In the LanguageSelector component you can notice when we click on the button we are calling a function changeLanguage as well as useEffect which will change the direction based on the language selected once a new language is selected
 const changeLanguage = (code: string) => {
    i18n.changeLanguage(code);
  };

  useEffect(() => {
    document.body.dir = i18n.dir();
  }, [i18n, i18n.language])

4.Passing dynamic Values
Suppose if we need to pass dynamic values in our translation we can use string interpolation in the translation like below
fr: {
    translation: {
      welcome: "bienvenue dans React 18",
      description: {
        line1: 'Bonjour {{user}}, bienvenue sur React i18n',
        line2: 'Heureux de voir le contenu'
      }
    },
  },
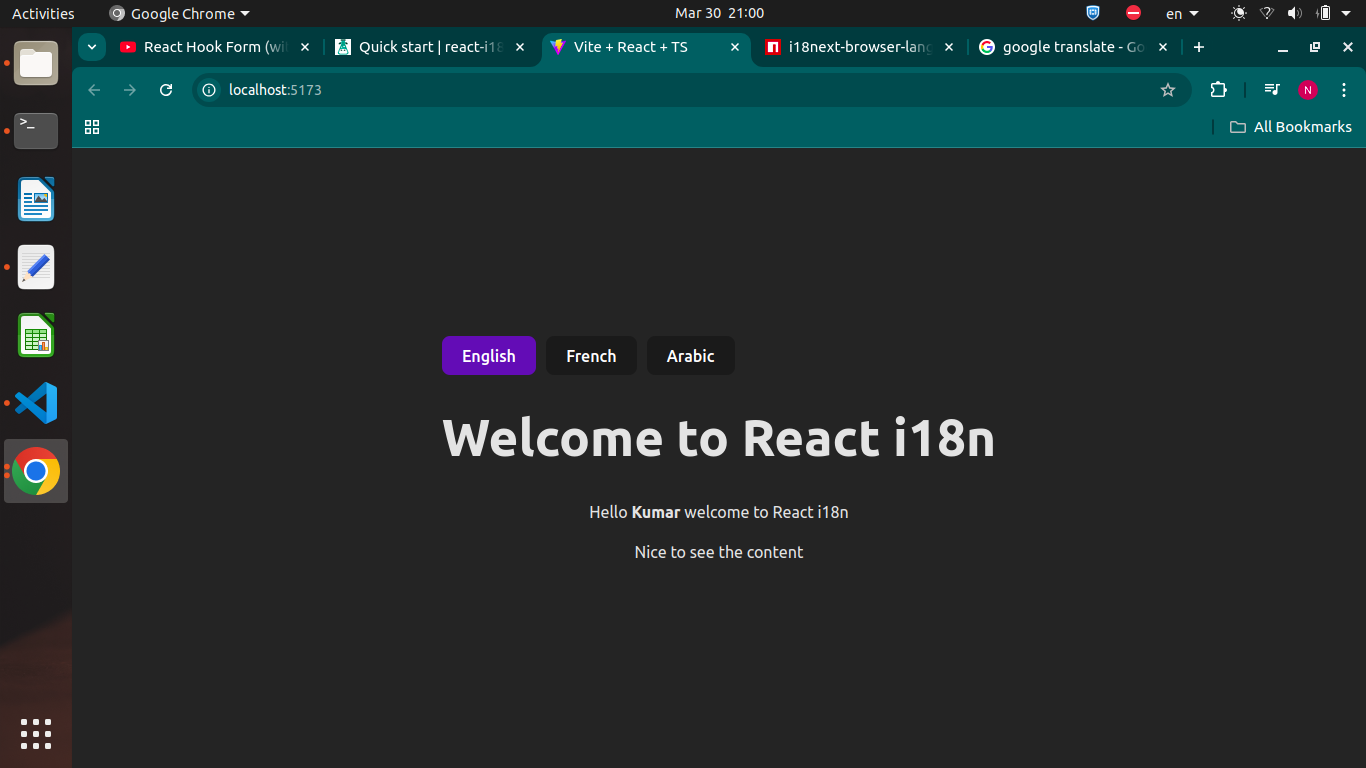
If you look at the descripton object line1 property we are having the user as a dynamic value which can be updated in the component like below
const { t } = useTranslation();
const { line1, line2 } = t("description", {
     user: 'Nidhin'
 })
If not you can alos use the Trans Component like below
<Trans
   i18nKey={line1}
   values={{
     user: "Kumar",
   }}
 />
Another advantage of using the Trans component is suppose if you need to bold the text you can extend it to another component like below
//Translation
en: {
    translation: {
      welcome: "Welcome to React i18n",
      description: {
        line1: 'Hello <1>{{user}}</1> welcome to React i18n',
        line2: 'Nice to see the content'
      }
    },
  },

//Transcomponent to bold a text

 <Trans
   i18nKey={line1}
   values={{
     user: "Kumar",
   }}
   components={{ 1: <b /> }}
 />

5.Using Objects in Translation
Suppose if you have a nested objects in your translation like below
 en: {
    translation: {
      welcome: "Welcome to React i18n",
      description: {
        line1: 'Hello <1>{{user}}</1> welcome to React i18n',
        line2: 'Nice to see the content'
      }
    },
  },
Where the description is having line1 and line2 and if you try to use it it in the component it won’t work for that you need to add the following property in the i18n config like below
i18n.use(LanguageDetector).use(initReactI18next).init({
  resources,
  lng: "en",
  returnObjects: true, //to have objects in the translation
});
Now you can directly destructure the object like below in the component and use it
const { t } = useTranslation();
const { line1, line2 } = t("description", {
 user: 'Nidhin'
})

<p>{line1}</p>
In this post we have covered the basics of reacti18next which you can use it in your application in quick time. Feel free to look at the document of react-i18next for more features
Subscribe to my newsletter
Read articles from nidhinkumar directly inside your inbox. Subscribe to the newsletter, and don't miss out.
Written by
