Sonatype Nexus: The Central Hub for Artifact Management
 Yash Patil
Introduction
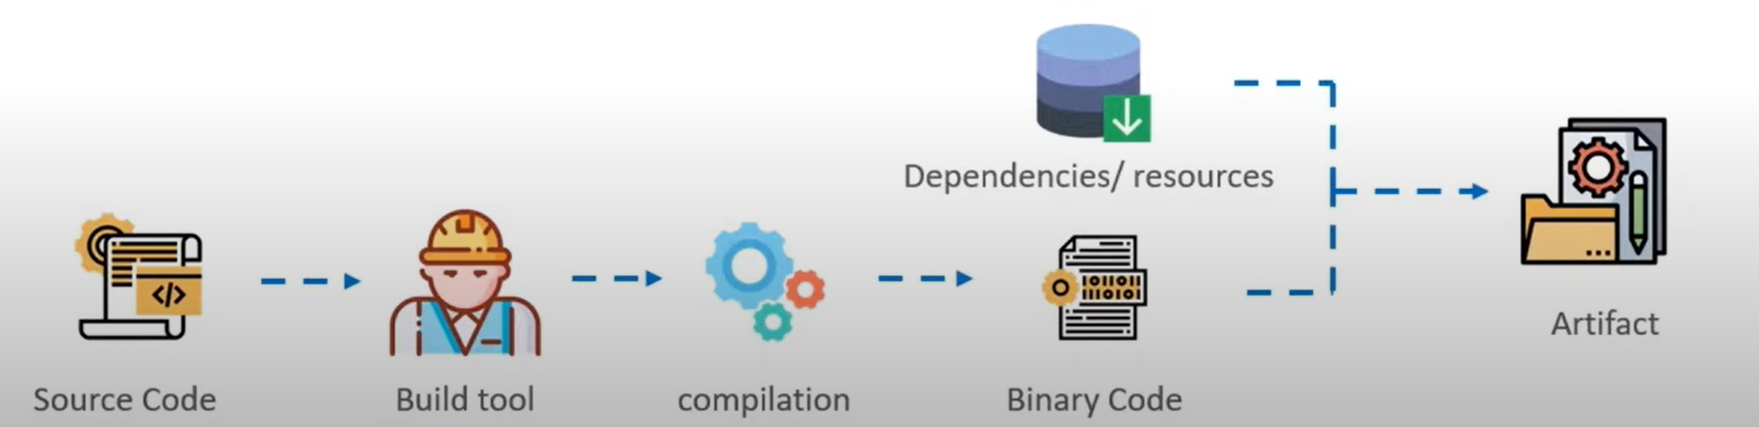
In our previous blog, we explored build tools like Maven, Gradle, and npm—how they help automate the build process and generate artifacts. (I'll link those blogs here.)
But once these artifacts are created within automation pipelines, where should they be stored? How can teams efficiently manage and distribute these artifacts across environments?
This is where artifact repositories come into play. They act as centralized storage solutions for artifacts, ensuring efficient versioning, security, and distribution across teams and CI/CD pipelines.
In this blog, we’ll dive deep into Sonatype Nexus, one of the most widely used artifact repositories. We will not only explore its theoretical explanation but see a practical demo.
What is an Artifact Repository Manager?
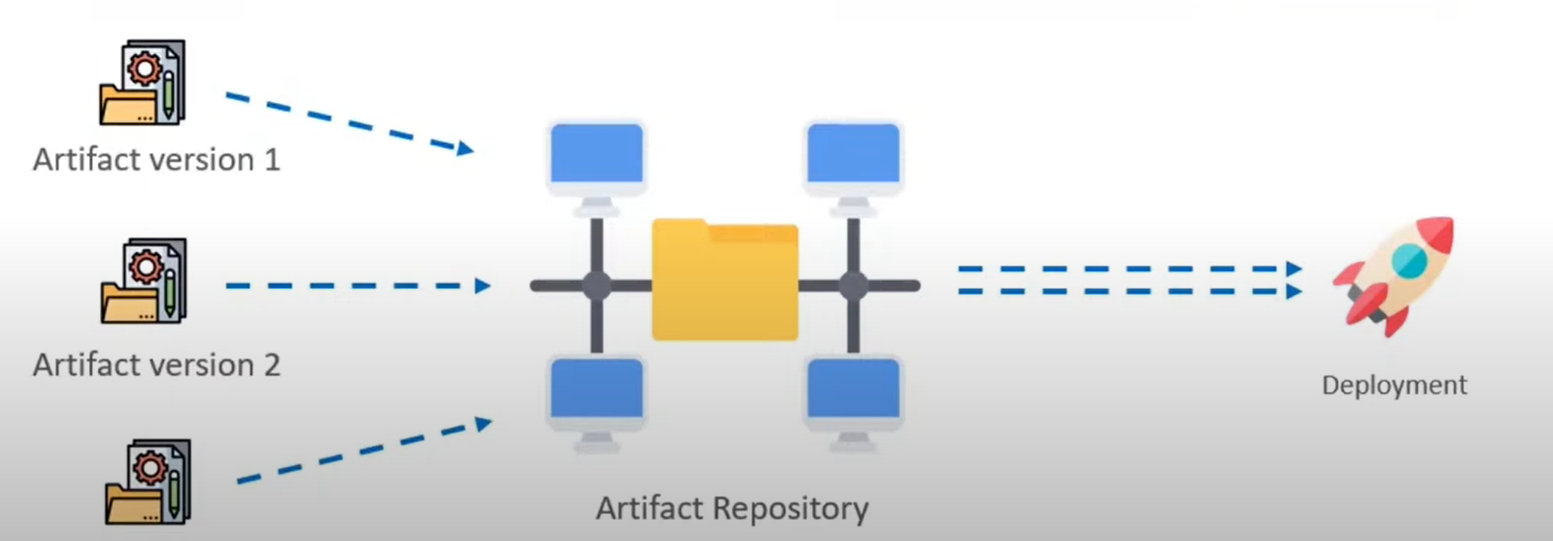
An artifact repository is a central hub of software artifact management where we can store multiple versions of software artifacts and use them according to organizational needs! Each time a software artifact is created it is stored, used and distributed through a server dedicated for these artifacts!
Sonatype Nexus, Artifact Repository Manager
Nexus is a tool used in DevOps methodology, one of it purposes being a central storage for these software artifacts that are created in the code pipeline.
Imagine a scenario where an organization working on several projects and applications based on different tech stacks such as Java, Python, .NET and many other. So basically when you build these application they will certainly produce different types of artifacts. Hence you will need a distinct and different repository for each type of these artifacts.
Nexus is one of the most popular artifact repository manager used for the same. It lets you upload and store different types of software artifacts in separate repositories which lie under a central hub of Nexus.
It also supports fast retrieval of these artifacts while deploying an application to a deployment server using a CI/CD pipeline.
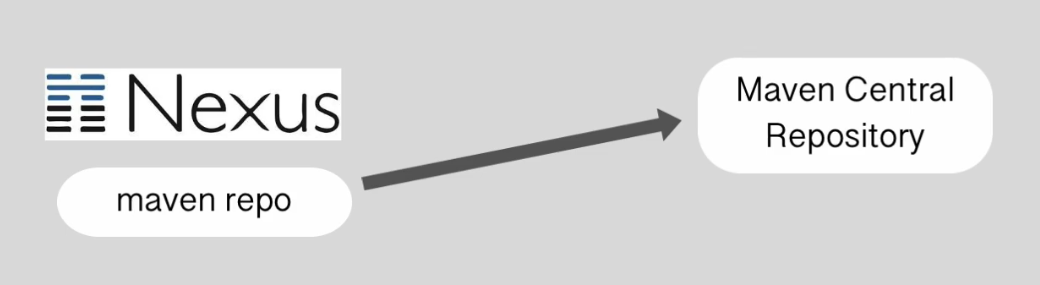
Not only that but you can configure Nexus to act as a buffer for downloading dependencies for build tools and languages which basically means we can set up proxies on Nexus for public repositories. Eg. : We can setup a Maven Proxy Repository in Nexus for the Maven Central Repository which is a public artifact repository for Java based projects. Main reason of doing this would be to consolidate all of your artifact and dependencies management in one spot!
Below is an example of all the artifact repository formats Nexus can host :

Features of Sonatype Nexus
Sonatype Nexus is a powerful artifact repository that provides robust features for managing artifacts efficiently. Here’s a deeper look at some of its key features:
1️⃣ Integration with User Access Management Tools
Nexus supports role-based access control (RBAC), allowing administrators to define permissions and roles for different users or teams. It can integrate with external authentication and authorization systems, such as:
LDAP (Lightweight Directory Access Protocol)
Active Directory (AD)
Single Sign-On (SSO) providers
This ensures secure access control, prevents unauthorized modifications, and simplifies user management across large teams.
2️⃣ Powerful and Flexible REST API for Integration
Nexus offers a RESTful API that allows developers to interact with it programmatically. This API can be used to:
Upload and download artifacts
Search and manage repositories
Automate artifact cleanup
Integrate with CI/CD pipelines and build tools (like Jenkins, GitHub Actions, GitLab CI/CD, and Maven)
This makes it easier to automate software delivery workflows and maintain consistency across development environments.
3️⃣ Backup and Restore
To ensure business continuity and disaster recovery, Nexus provides backup and restore capabilities. Users can:
Perform scheduled backups of repositories, metadata, and configurations
Restore from snapshots in case of accidental deletion or system failures
Store backups in external storage solutions for added security
This feature is crucial for organizations managing large artifact repositories over time.
4️⃣ Metadata Tagging (Labeling and Tagging Artifacts)
With metadata tagging, developers can assign labels or tags to artifacts, making it easier to organize, filter, and retrieve them.
Tags can indicate environment stages (e.g.,
dev,staging,production)Custom metadata can help classify artifacts based on project, version, or team ownership
Improves artifact tracking and dependency management in CI/CD workflows
5️⃣ Cleanup Policies
Over time, artifact repositories can become cluttered with outdated or unused artifacts, leading to storage bloat. Nexus provides cleanup policies that help:
Automatically delete old snapshots and unused artifacts
Set rules based on time, version count, or last access date
Reduce storage costs and improve repository performance
Cleanup policies ensure that the repository remains efficient without manual intervention.
6️⃣ Token Support for System User Authentication
Sonatype Nexus provides token-based authentication for system users, enabling secure and automated access to the repository without relying on traditional username-password authentication.
Support for API Tokens & Bearer Tokens – Allows system users (like CI/CD tools and scripts) to authenticate securely.
Improved Security – Reduces exposure of sensitive credentials in automation workflows.
Scoped Permissions – Tokens can be assigned specific roles, limiting access to only necessary operations.
Token Expiry & Rotation – Ensures security best practices by allowing periodic token regeneration.
Setting up NEXUS
I will be creating a AWS EC2 Instance to host and use our Nexus Artifact Repository Manager.

Hence I have created and logged into the EC2 Instance.
Nexus needs Java version 8 to be installed on the server so lets go ahead and do that :
sudo apt-get install openjdk-8-jdk

Now let us go ahead and install Nexus!
wget https://download.sonatype.com/nexus/3/nexus-unix-x86-64-3.78.2-04.tar.gz
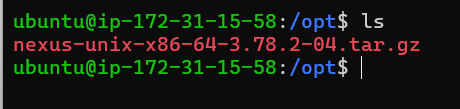
Go ahead and extract the Nexus files :
sudo tar -zxvf nexus-unix-x86-64-3.78.2-04.tar.gz

Why do we have these 2 directories and what are the differences between them?
The Nexus folder contains the runtime, binaries and the application of the Nexus.

The Sonatype folder contains custom configurations for Nexus and the data. This entails log files which collects the application logs and IP addresses requesting and accessing the Nexus Server upon which it is hosted, the plugins that are installed in the Nexus and the uploaded files such as software artifacts along with their metadata. Hence it makes sense to always backup this folder since it contains all the Nexus data.
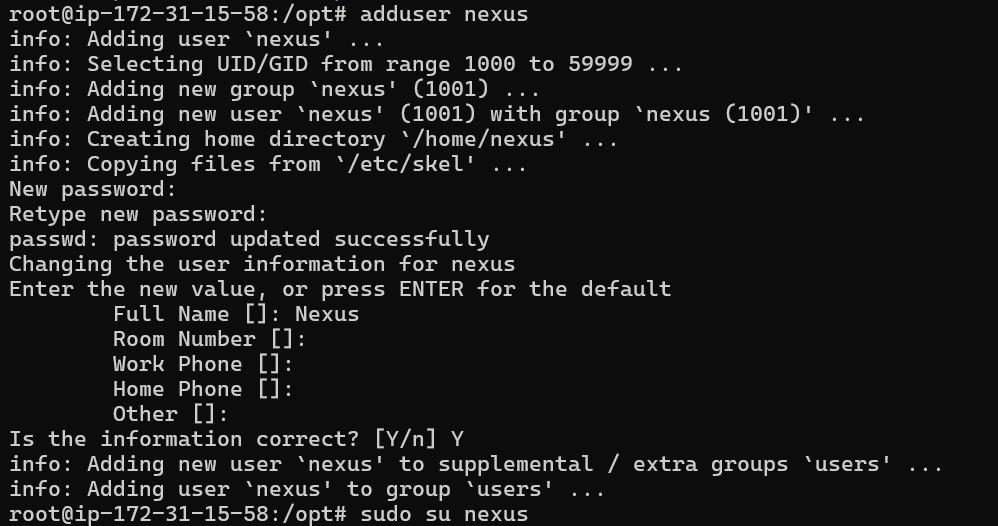
Before starting the application using the Nexus executable in the nexus folder we have to consider creating a new system user for Nexus. We should not start services using the root user permissions, instead we must create a new system user which only has permissions for that specific service.
adduser nexus
Also change the ownership of both folders (sonatype and nexus) to the nexus user.
chown -R nexus:nexus nexus-3.78.2-04 && chown -R nexus:nexus sonatype-work
And now lets start our nexus application :
/opt/nexus-3.78.2-04/bin/nexus start
Make sure to edit inbound rules for port 8081 where Nexus starts!
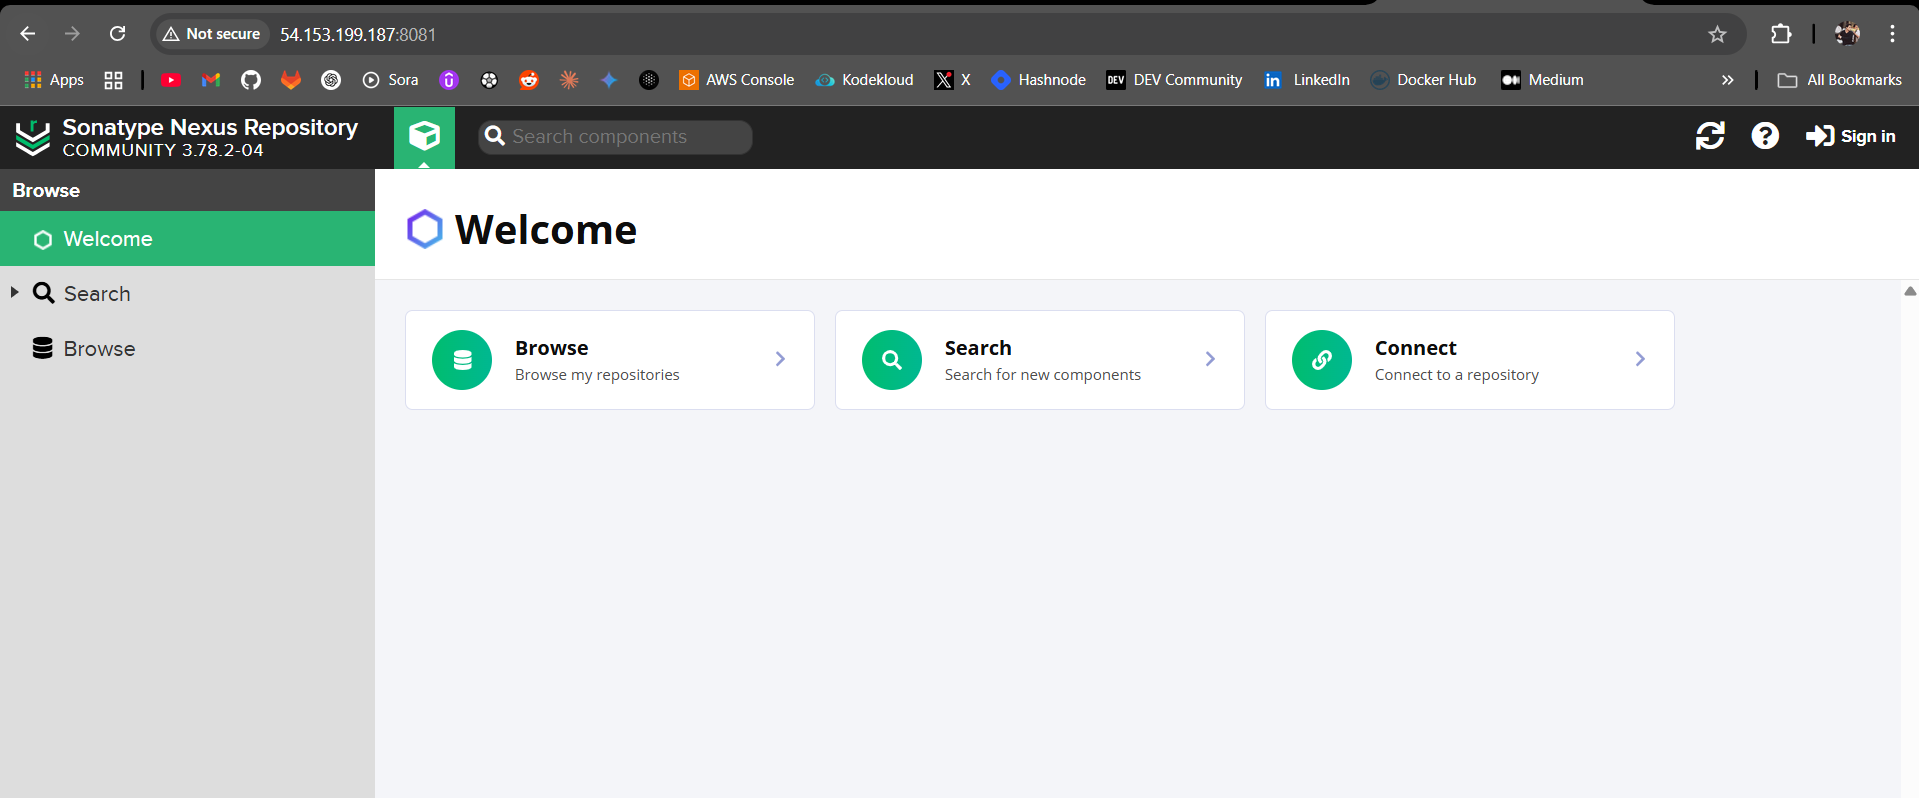
Hence we have successfully installed and started Nexus Artifact Repository Manager on our AWS EC2 Instance.
Click on sign-in and set up the new password as you want!
As you can see some repositories have already been created :
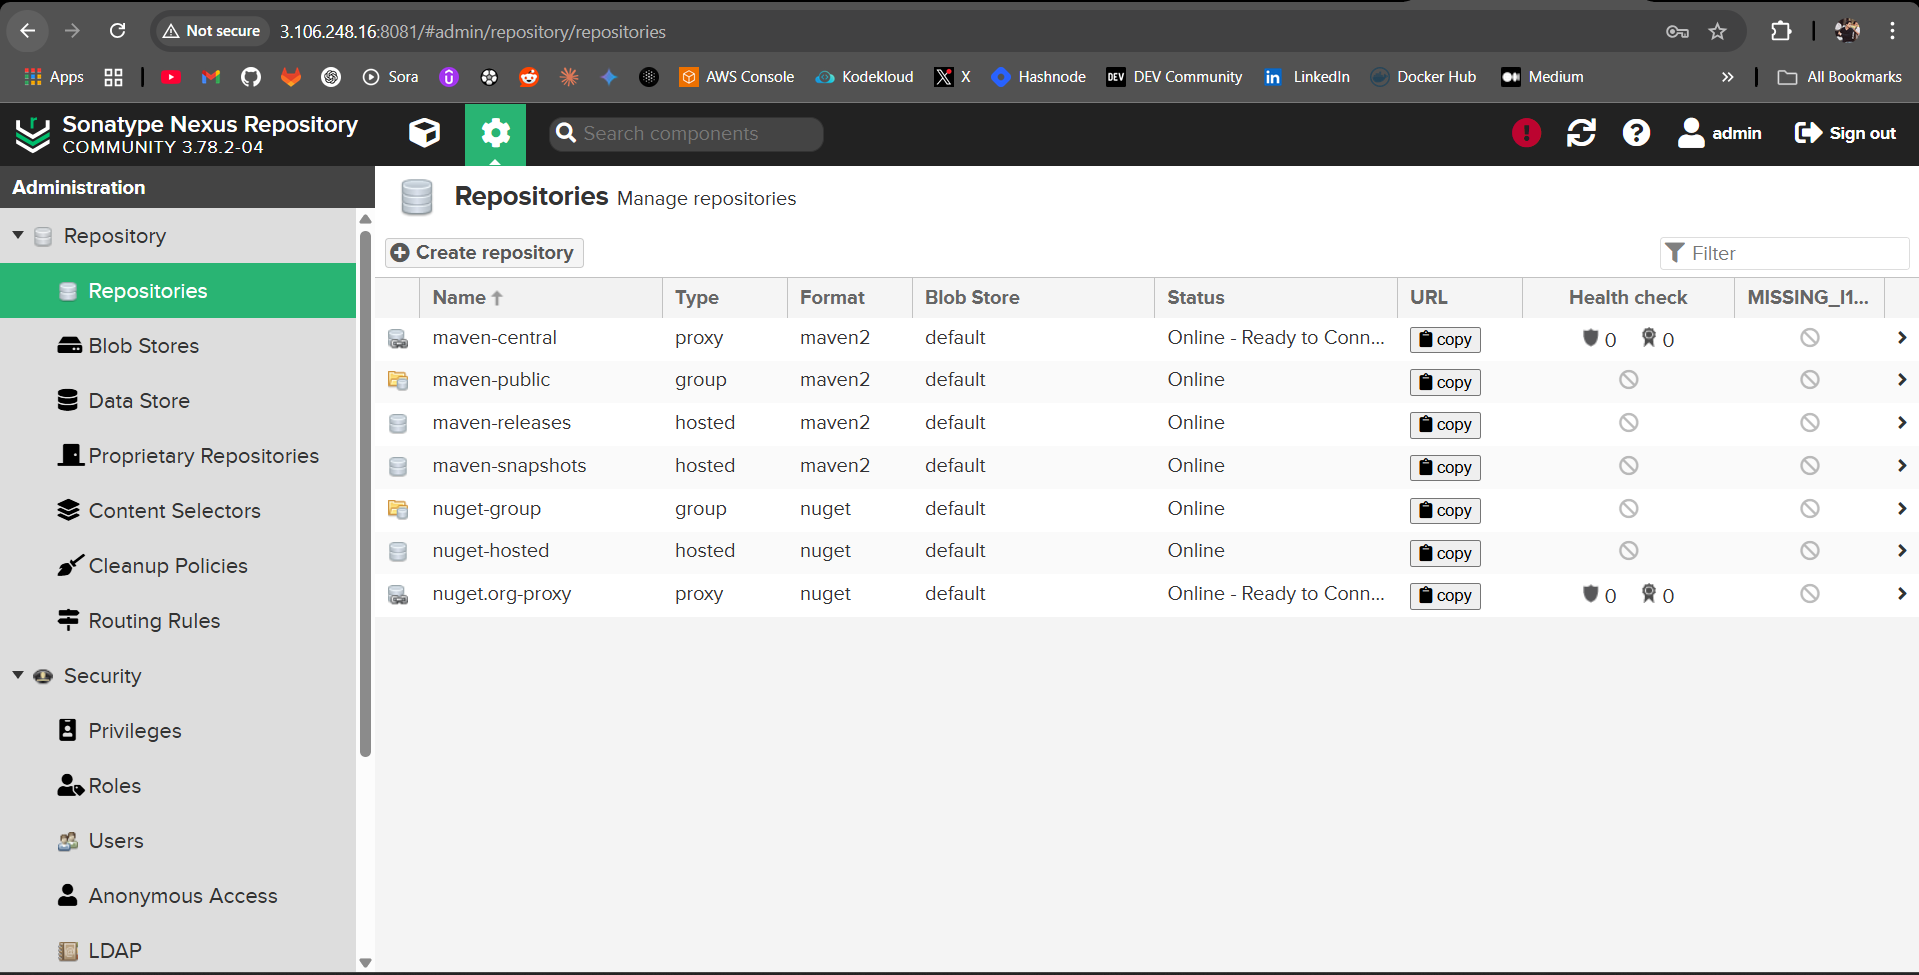
Now lets use these repositories and upload .jar artifact files of Maven and Gradle projects to them!
As you already know both Maven and Gradle have sperate commands to deploy their project artifacts to these kind of repositories but before doing so we have to configure these tools to connect to Nexus.
Gradle Project
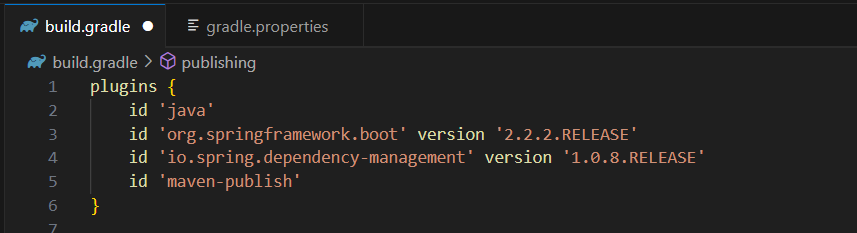
First lets add a plugin to publishing a jar artifact to a Maven formatted repository. Something to remember from my previous blogs is that both Maven and Gradle use Maven formatted repositories.
First apply a ‘maven:publish‘ plugin in plugins{} in your build.gradle file.
And now add a publishing{} block which will have 2 components :
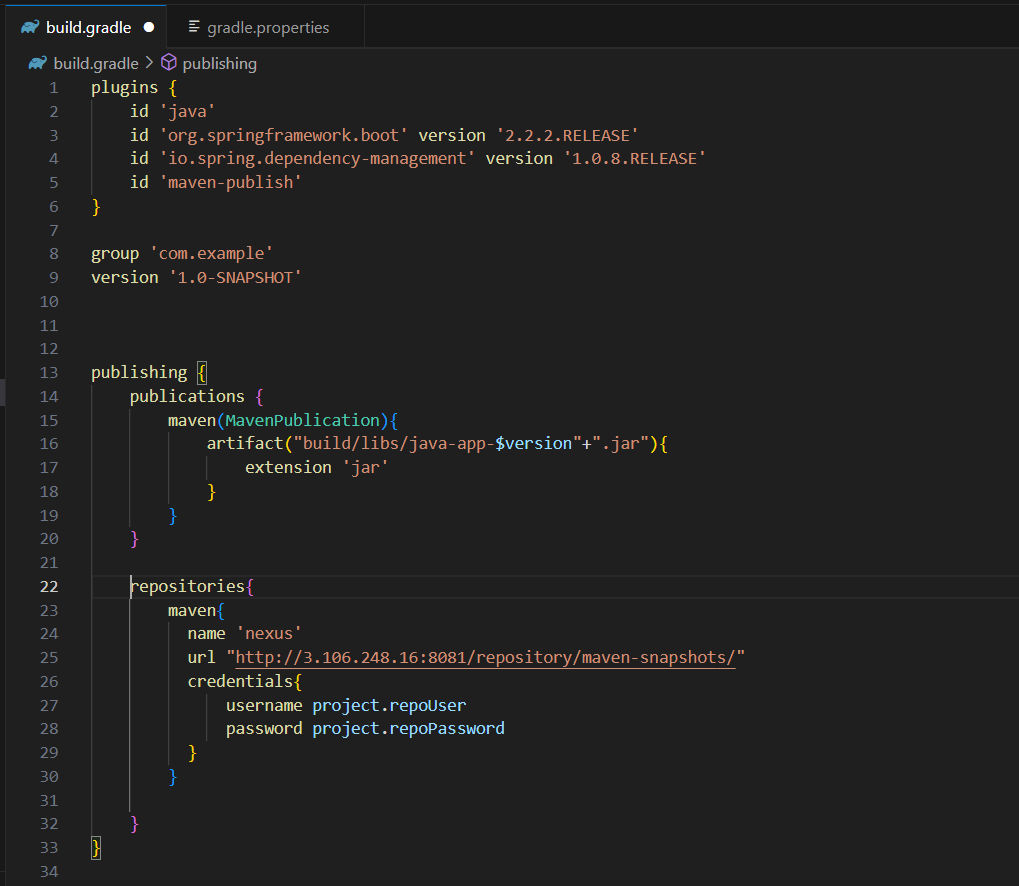
publications{} block contains details about your jar artifact. This entails the artifact name and its extension.
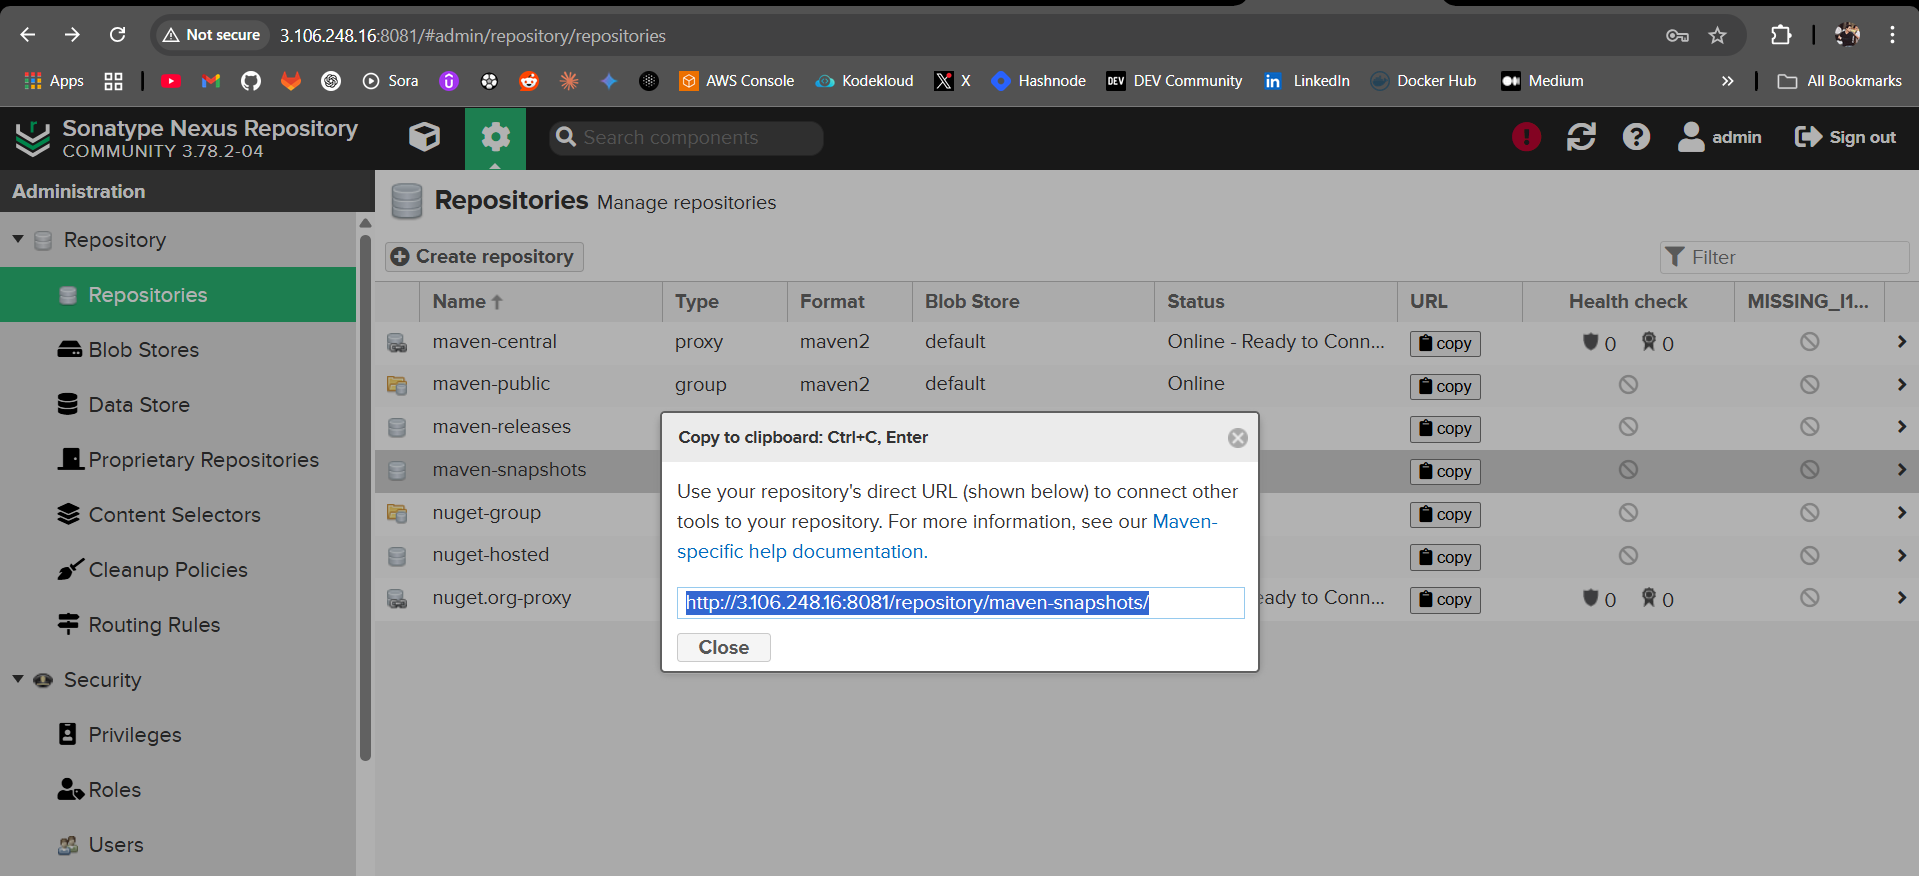
repositories{} block contains details about your maven hosted repository on Nexus. Copy paste the nexus maven-snapshots URL.
And for credentials create a
gradle.propertiesfile where you can store the username and password of your Nexus Account.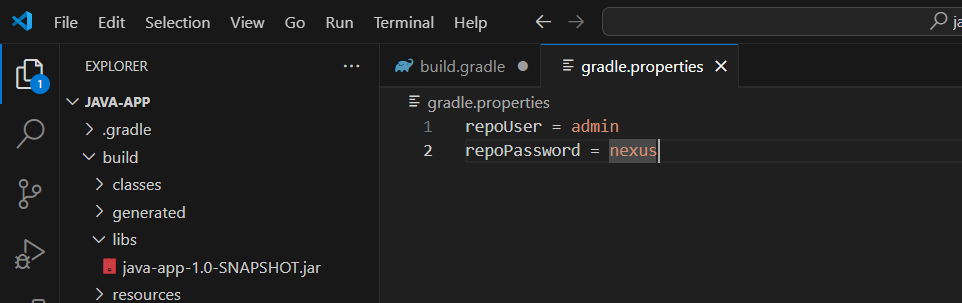
And use these variables in your
build.gradlefile :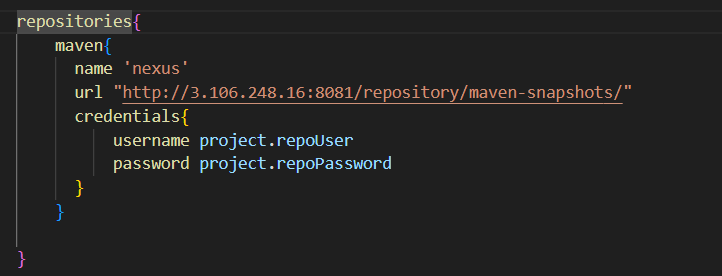
Now that everything is configured, lets build the Gradle project using the Gradle Wrapper using :
./gradlew build
Already covered this in the last blog-post, checkout!

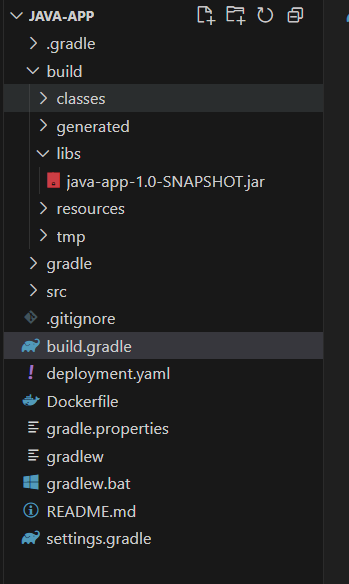
And there you go build is successful and the artifact is built in the exact same location where we specified it to be in the build.gradle file.
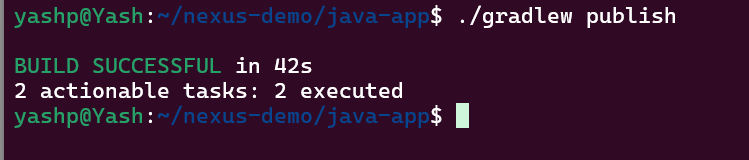
Now lets upload this built artifact to our Nexus’ Maven-Snapshots repository using :
./gradlew publish
This command is not available by default in gradle but we configured it using the plugin.
Upload was successful!!
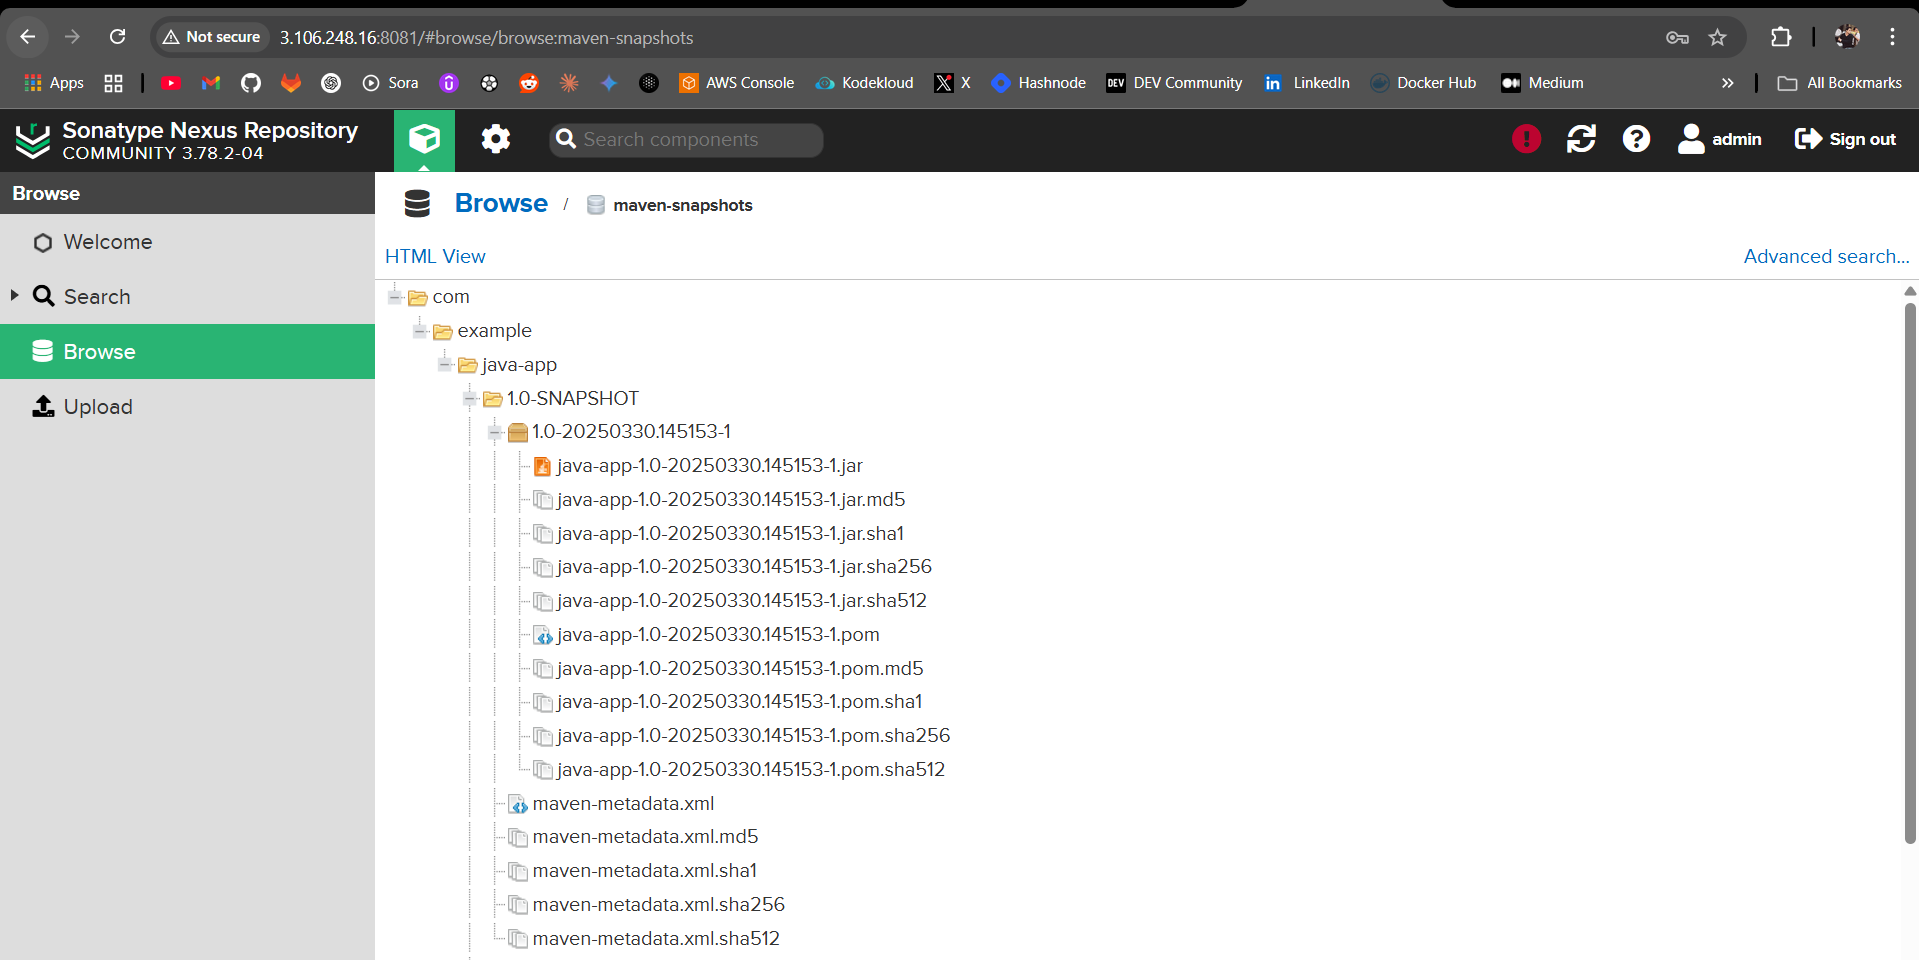
And there you go!!!!!!! We have successfully uploaded our Gradle project jar file to our Nexus Maven Hosted repository!
It not only uploaded the jar artifact but also its metadata with it, pretty neat huh ?!
Maven Project
Now that we have uploaded a gradle project artifact to the Nexus Maven hosted repository, lets also do this for a Maven project!
NOTE : Make sure Maven is installed on the machine from which you are executing maven commands.
For this we have to use the maven-deploy plugin of maven and we have to configure this in the pom.xml which is the main configuration file of Maven.
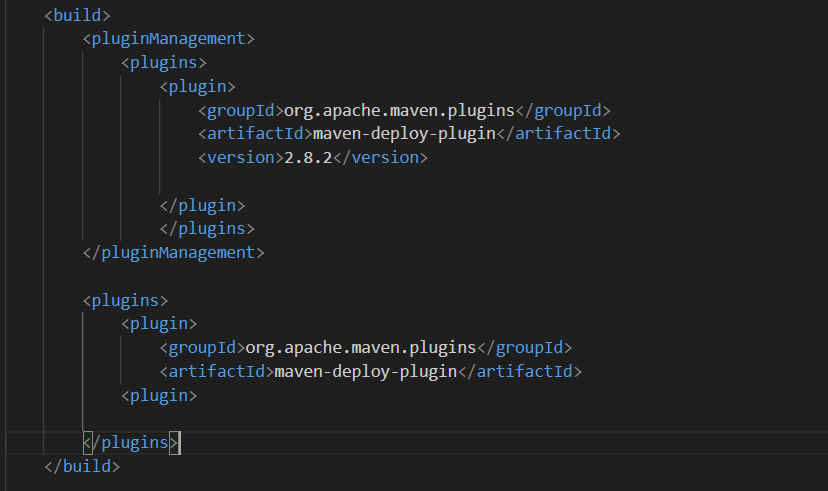
The first block specifies that this plugin is to be used and download, while the second block makes use the the specified plugin.
Along with this we also have to configure a <distributionManagement> block which identifies the remote Maven hosted repository on Nexus.
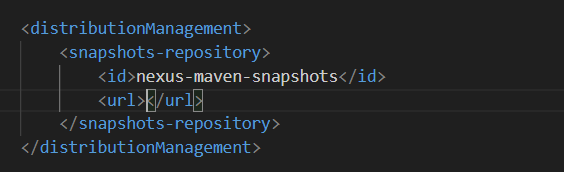
<snapshotRepository> tag is specially used for maven-snapshots, and maven-releases will obviously have its special tag. (fix the tag to snapshotRepository)
<id> is just a custom name for the Nexus Maven Snapshots hosted repository in case the artifact is to be uploaded to multiple repositories. <url> specifies the URL of the hosted repository.
This is enough for Maven to find and connect with the Nexus Repository.
But what about authentication while uploading the artifact? This is to be configured in the local .m2 folder which is the maven folder.
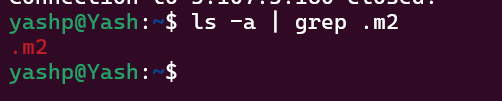
This is a hidden folder in your home directory. Inside we will create a settings.xml file which will handle the maven’s global credentials can be defined, accessible to all maven projects.
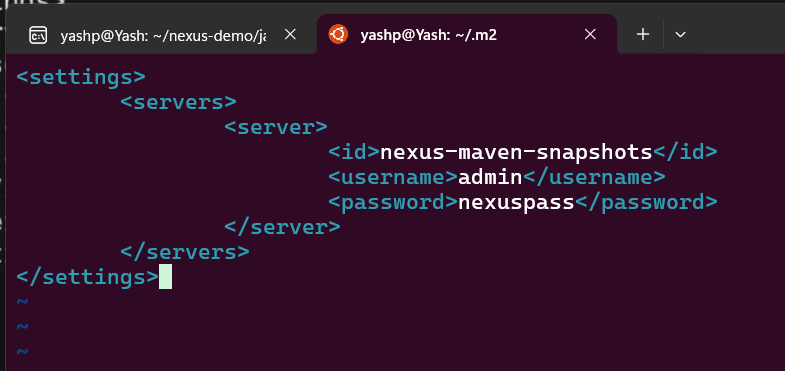
This is what we need to configure the credentials.
<servers></servers> : Basically any server that Maven needs to authenticate to.
<id></id> : Make sure this is exactly the same id that you configured in the pom.xml file under <distributionManagement>
<username> and <password> : Username and Password of the Nexus User.
Now everything is set to upload the jar file to the Nexus Hosted repository!
Lets build the application :
mvn package
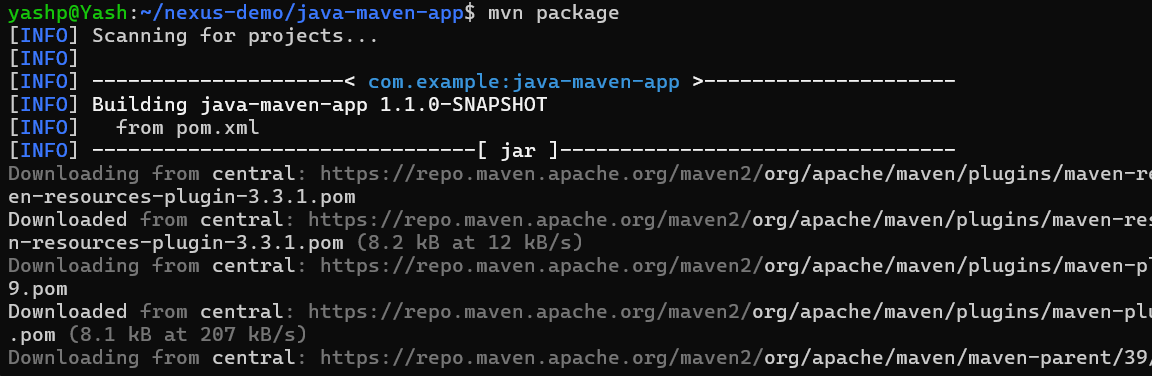
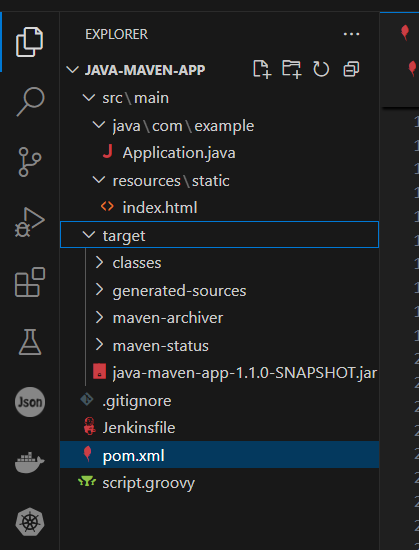
Build was successful and the jar file was built :
And now lets upload the jar file to our Nexus Centrally Hosted Maven Snapshots Repository :
mvn deploy
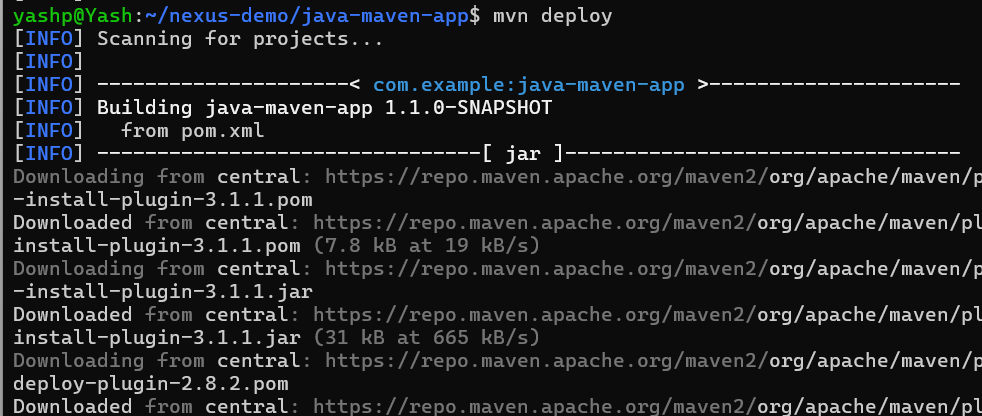
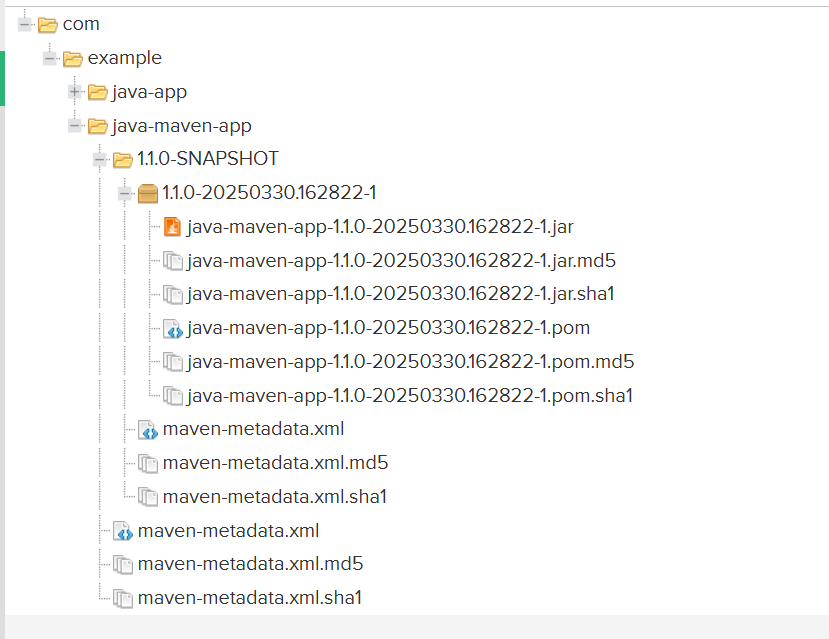
And there you go, our Java Maven project artifact has successfully been uploaded to the Maven hosted repository on Nexus!
Blob Stores
Till this point you saw that we have uploaded Maven and Gradle project artifacts to the Maven Hosted repository on Nexus. But how does Nexus configure the storage for these uploaded artifacts?
Nexus uses Blob Stores as storage for its components. A blob store is a internal storage mechanism for binary parts of the artifacts.
Storage for these blob stores can be either the local file system of the sever where Nexus is hosted or AWS cloud storage S3.
Each blob store can be used by multiple repositories simultaneously.
A default blob store always get created every time we set up Nexus on a server!
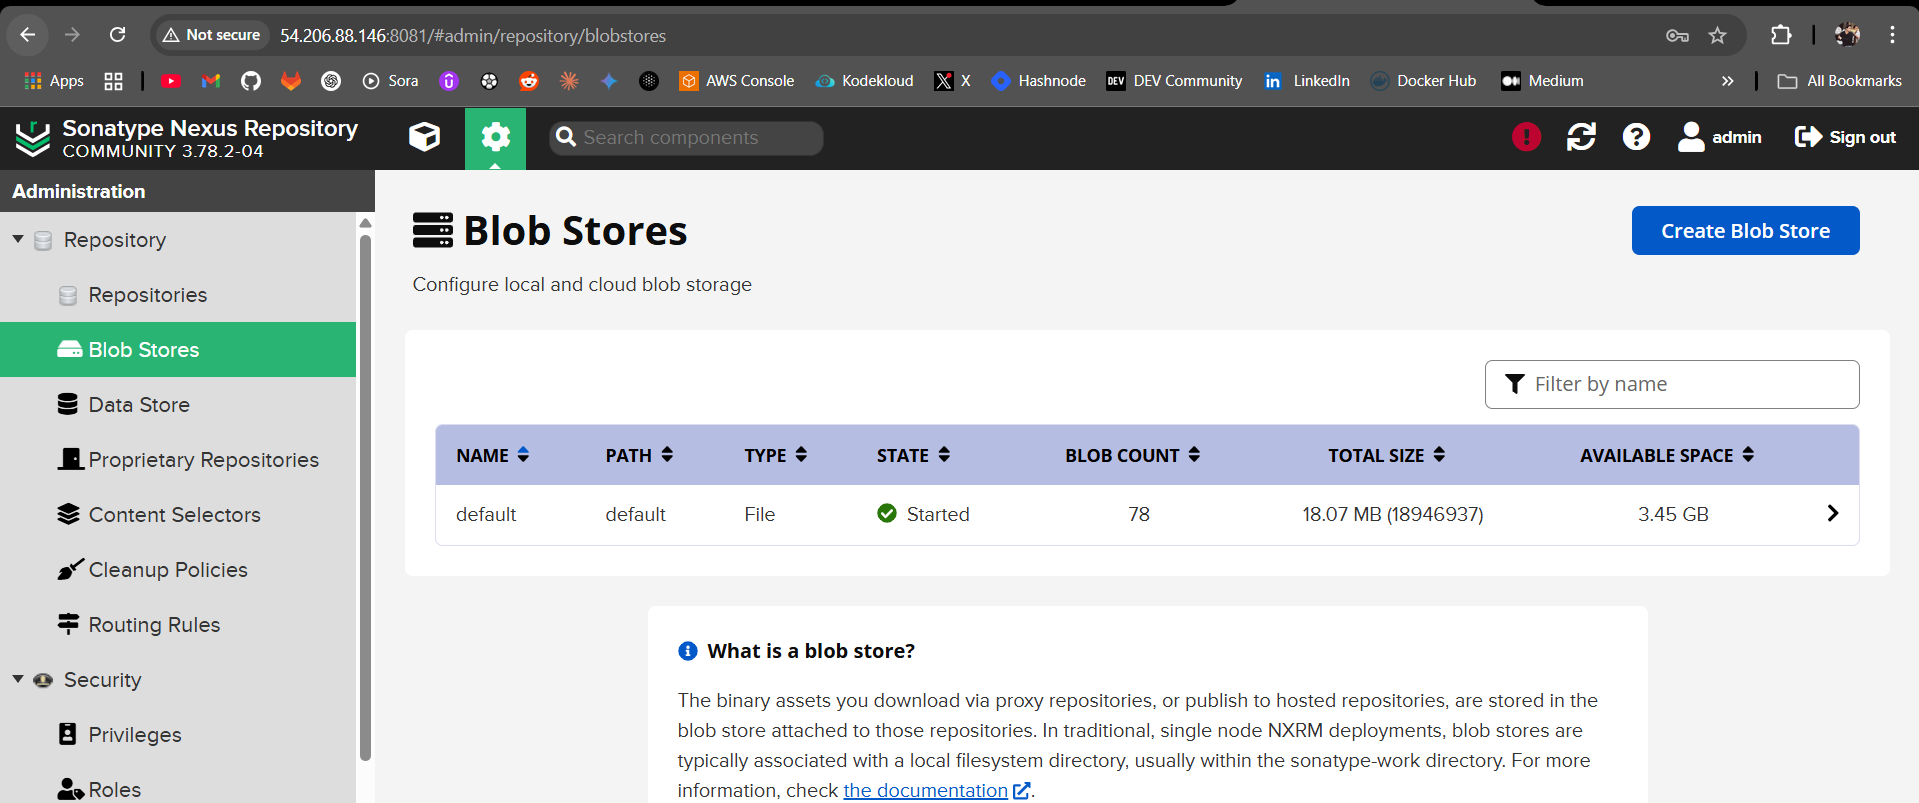
This is where all the configuration of blob stores is present :

in the blobs directory!

As I said, a default blob store is created every time we setup Nexus Server.
Lets create a new blob store!
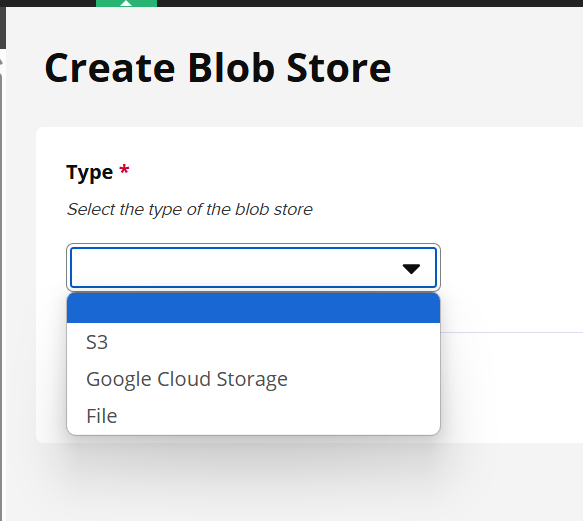
Its gives us the option to choose the type of backend storage. Lets choose file for now.
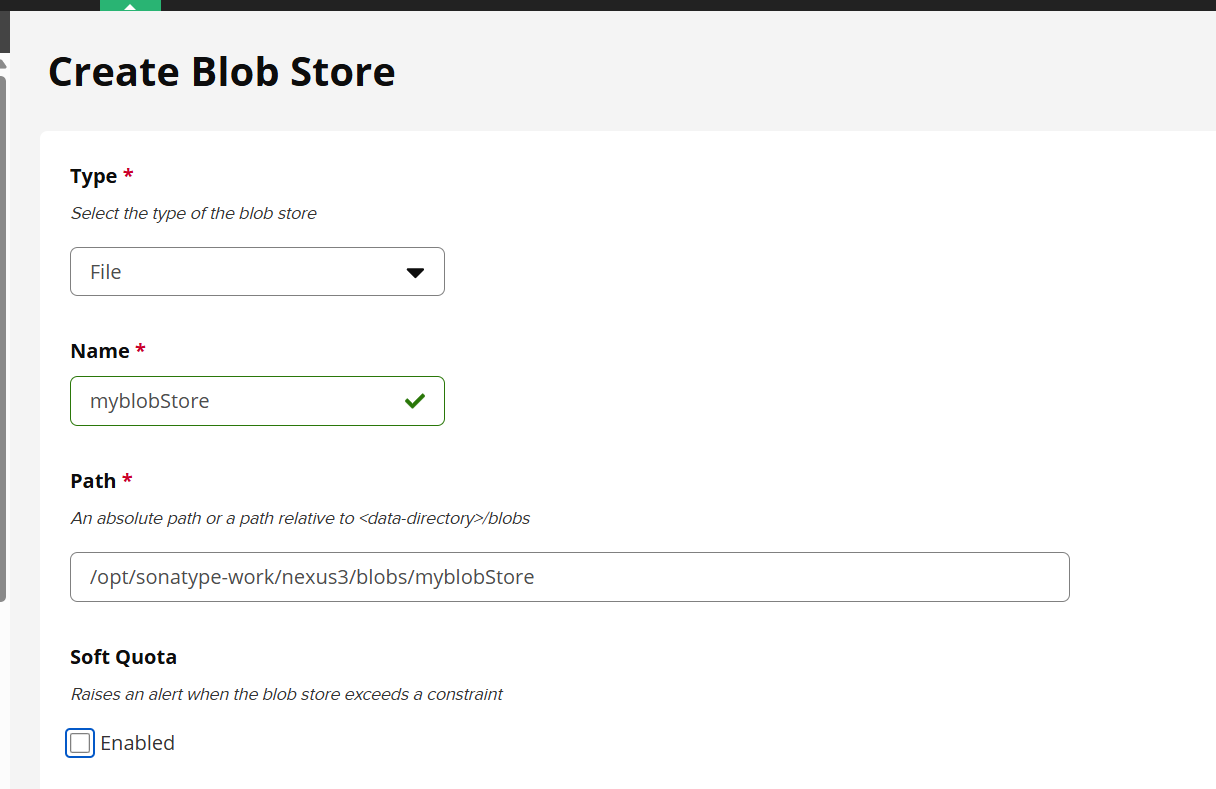
Provide the absolute path on the server where you want your Blob Store to configure and use its storage.

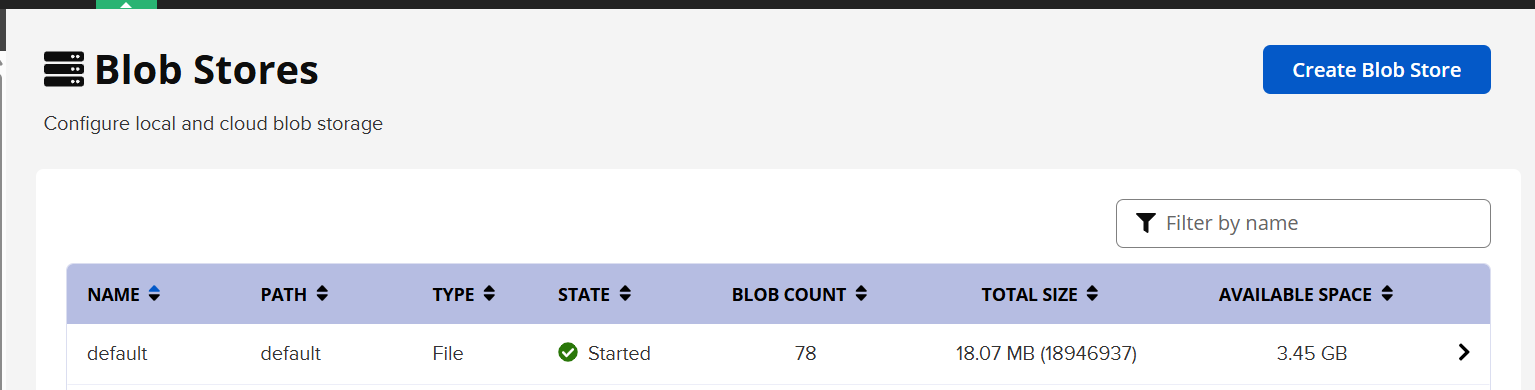
There you go, our Blob Store has been created which now can be used by Nexus artifact repositories!
Some things to note while creating blob stores is that :
Blob Stores cant be modified
Blob Stores used by an repository cannot be deleted.
Hence you have to decide :
How many blob stores you want to create?
What its size must be?
Which ones you will use for which repositories?
Hence you must approximately know, How much space each repository will ultimately need? This will depend on the size of software artifacts, how often you are uploading artifacts to these repositories and what are your clean-up policies?
Once a blob store is assigned to a repository, it cannot be changed!
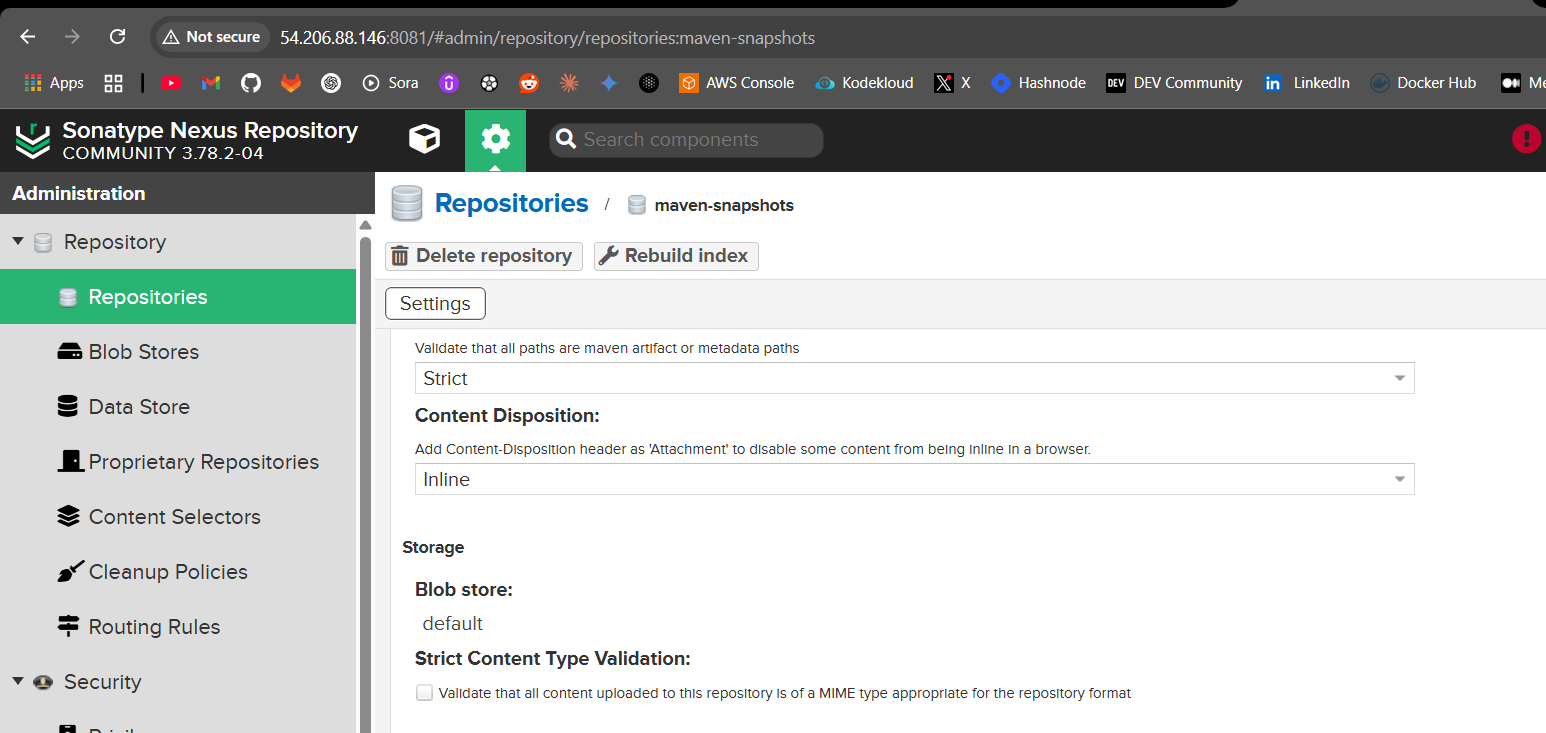
As you can see, Maven Snapshots uses the default blob store and it cannot be changed.
Lets try to attach our created blob-store to a new repository :

When I am trying to create a Docker hosted repository for Docker images it does allow me to use my custom created Blob Store!
Cleanup Policies
Finally lets discuss the Cleanup Policies.
We can configure rules in terms of Cleanup Policies which will cleanup artifacts from the repositories based on how old they are or last usage, etc. in order to free up storage for newer Artifacts.
Lets create a custom cleanup policy.
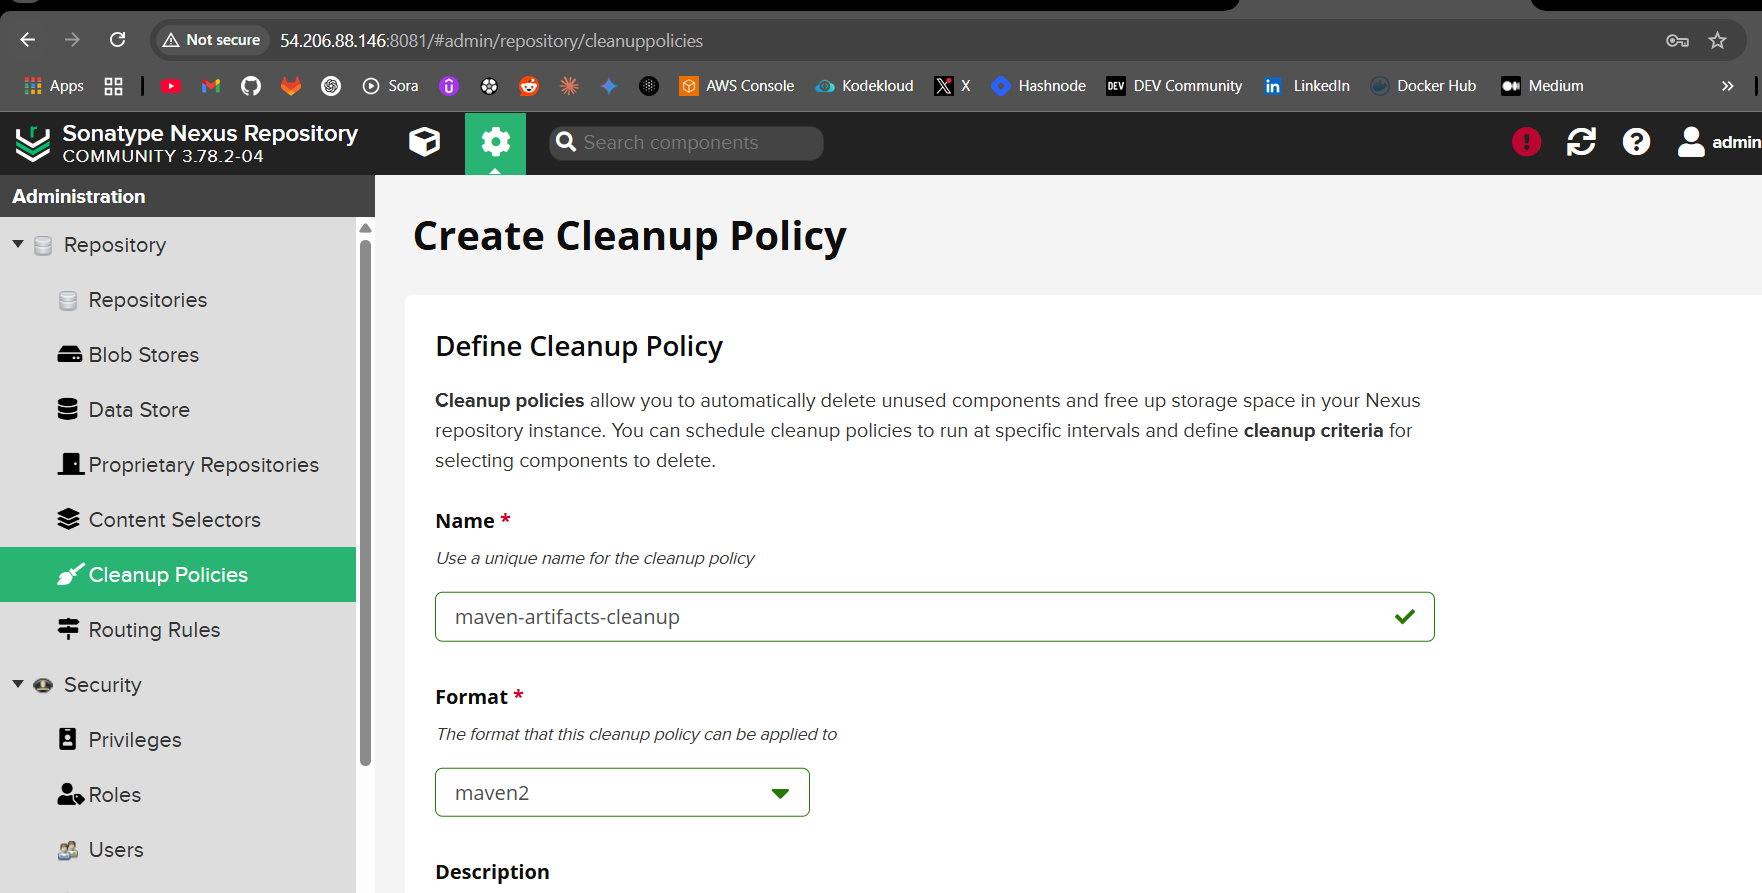
As you can see I am creating a cleanup policy for Maven based artifacts.
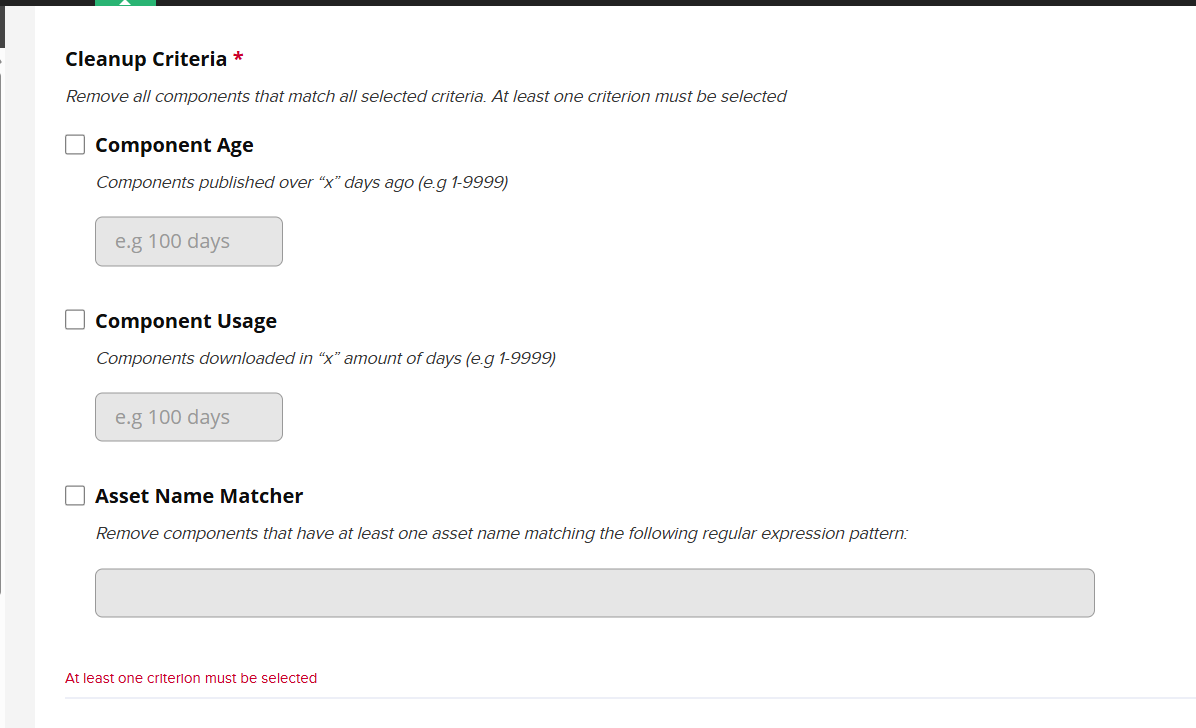
Your cleanup criteria as I said can be based on factors mentioned above. To demonstrate Cleanup Policies lets use the Asset Name Matcher criteria :
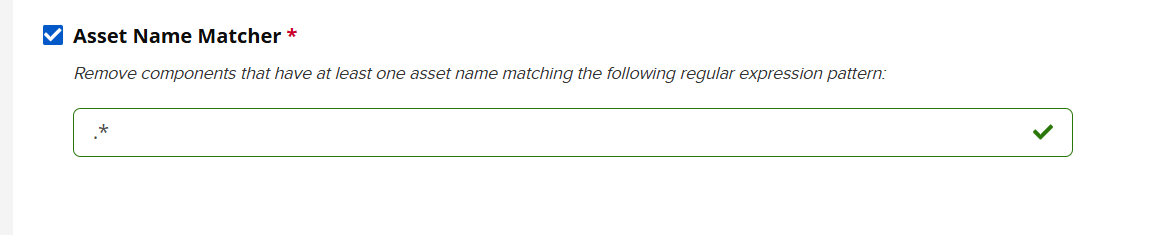
This will target all maven2 format components throughout our Nexus. Lets preview its results before actually implementing that policy :
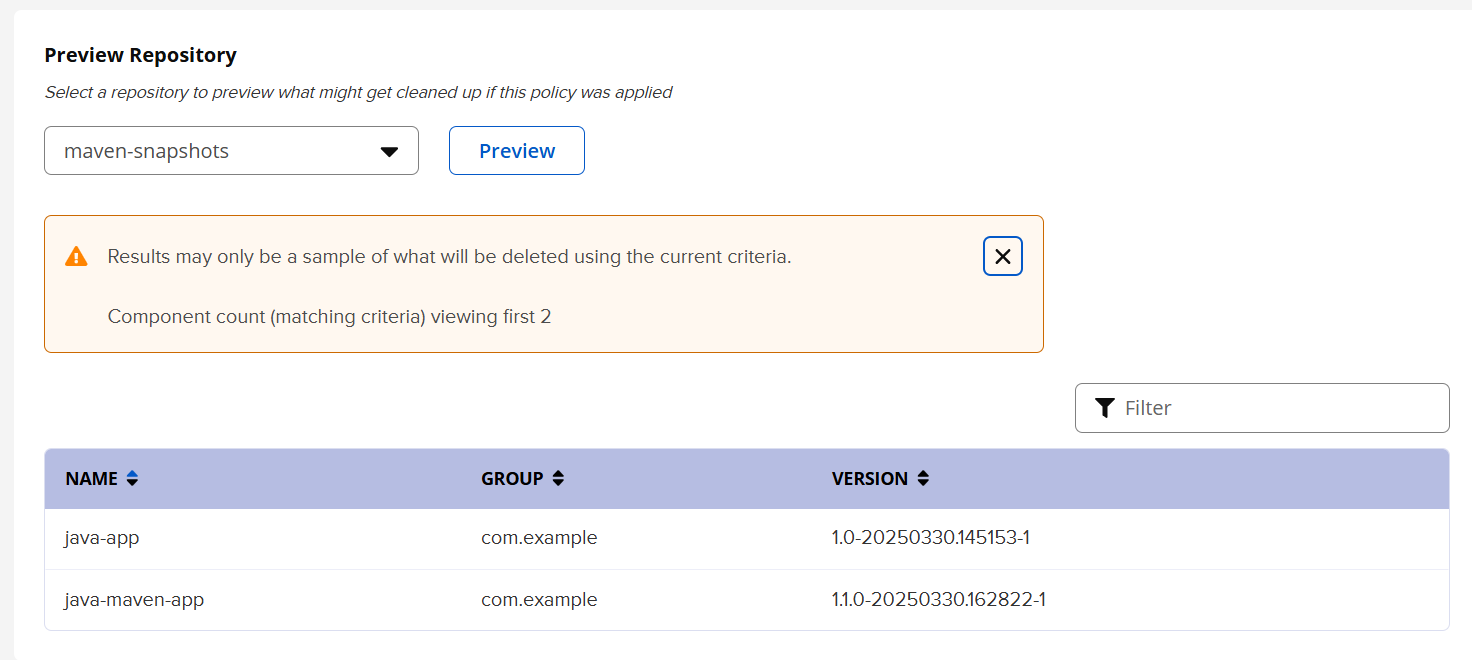
The above mentioned components or artifacts will be deleted as a result of my custom policy for the particular repository! You can preview results for other repositories as well. Go ahead save it if you are satisfied with its preview results.
Now apply this policy to any any repository you want.
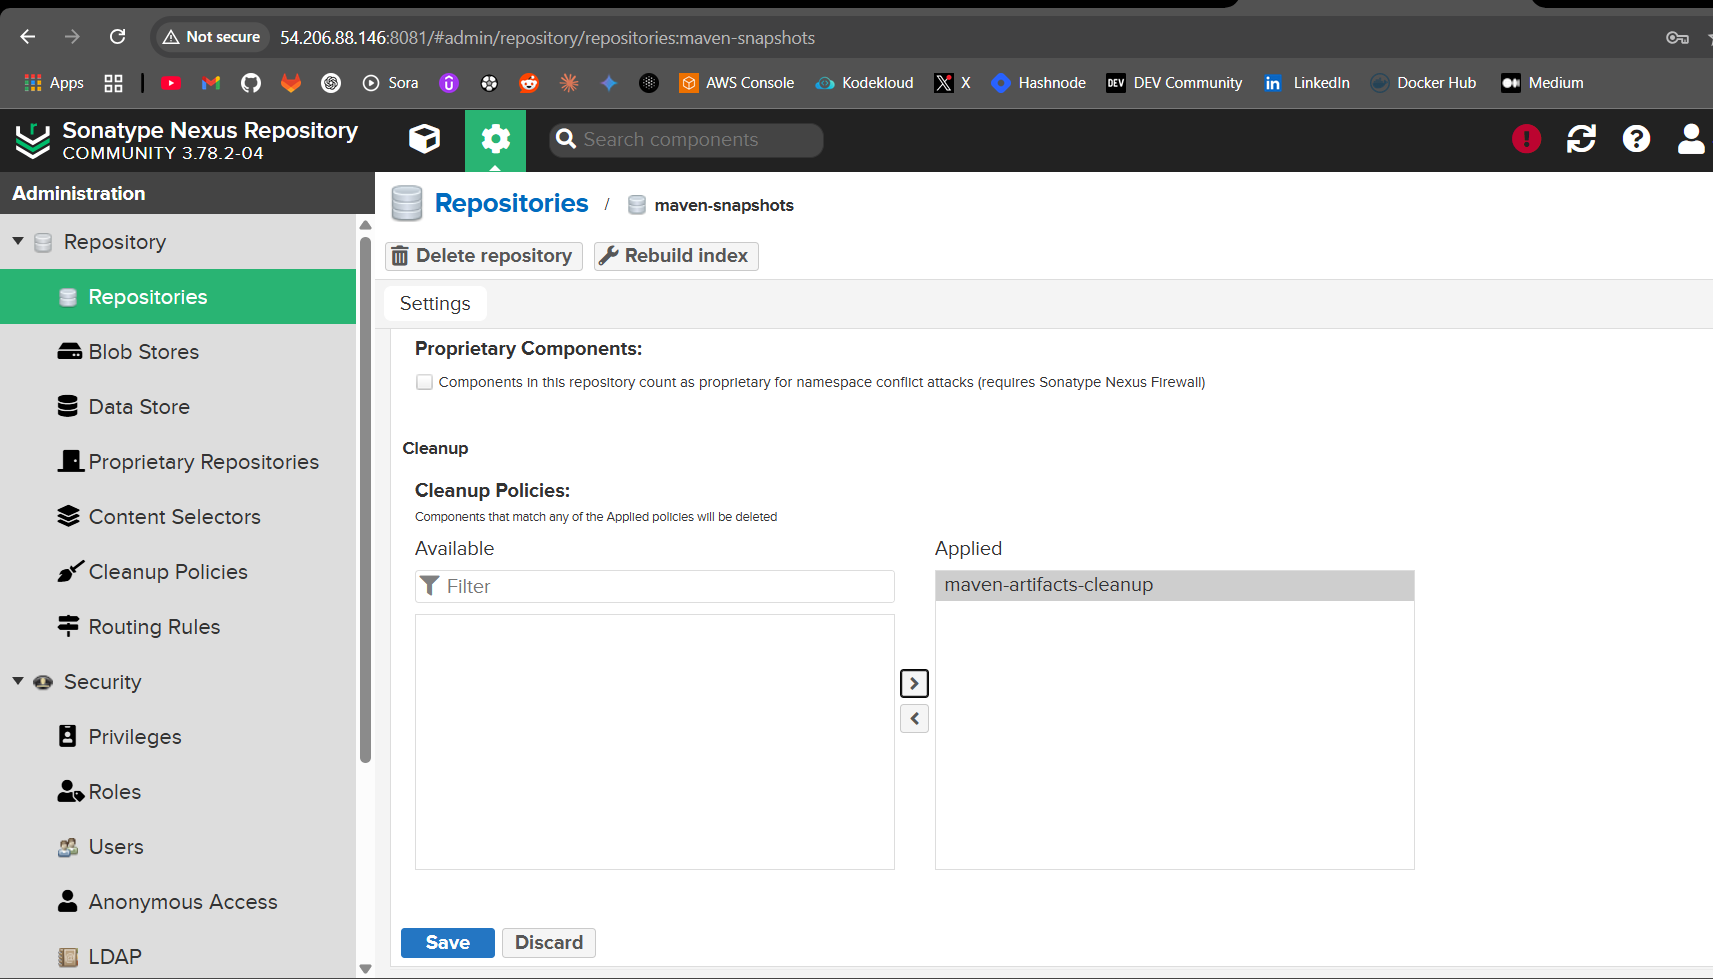
Applying it to the Maven Snapshots Repository where we uploaded our Maven and Gradle artifacts to!
Lets run this Cleanup policy task manually which you can also trigger using CRON.
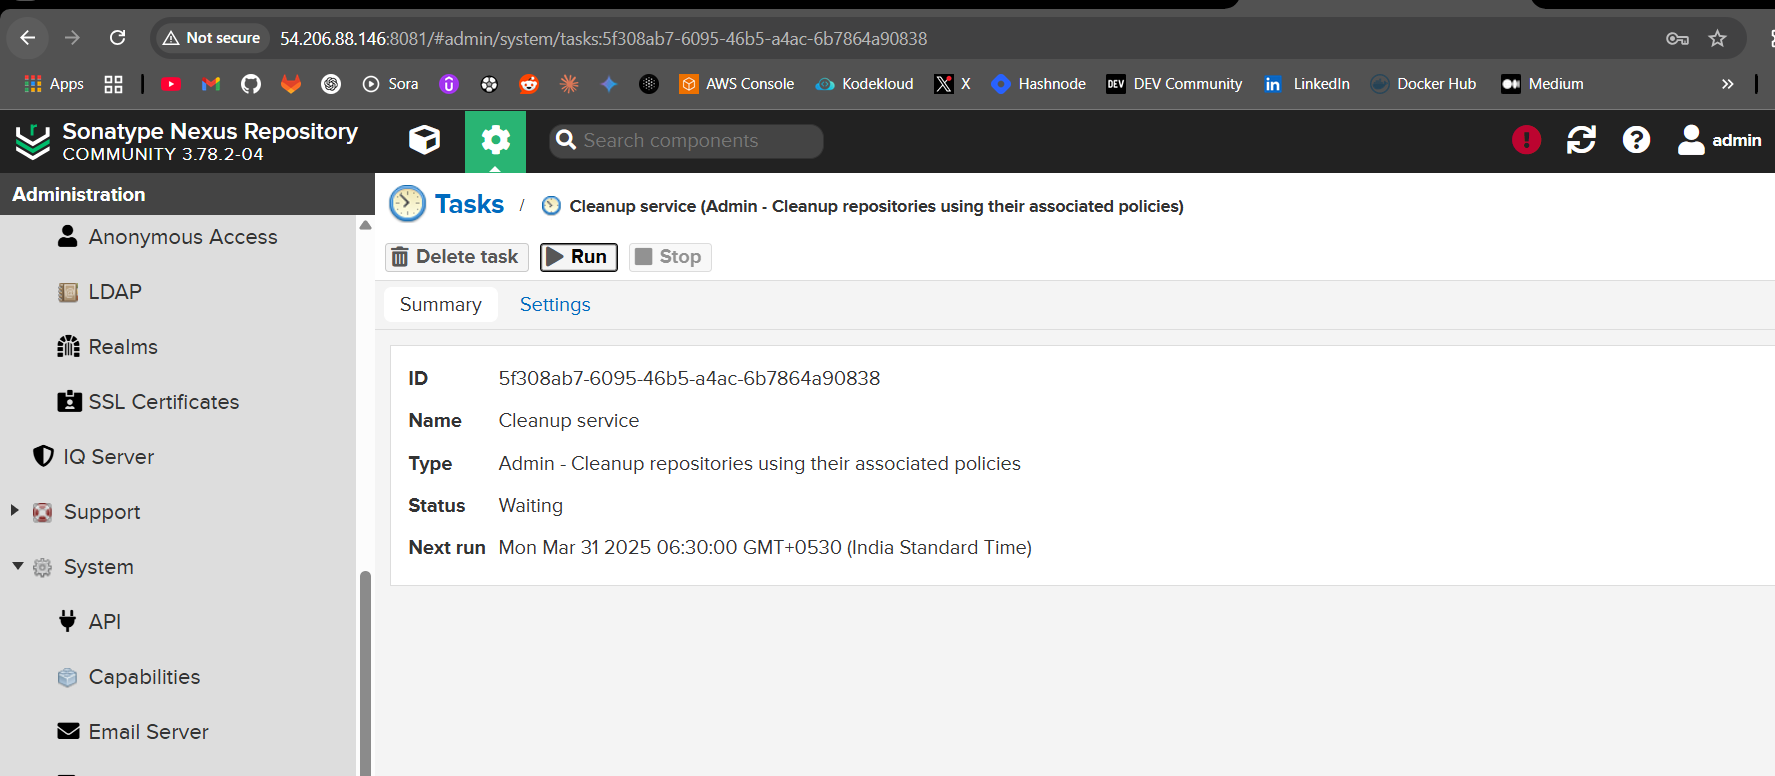
Execute ‘RUN’
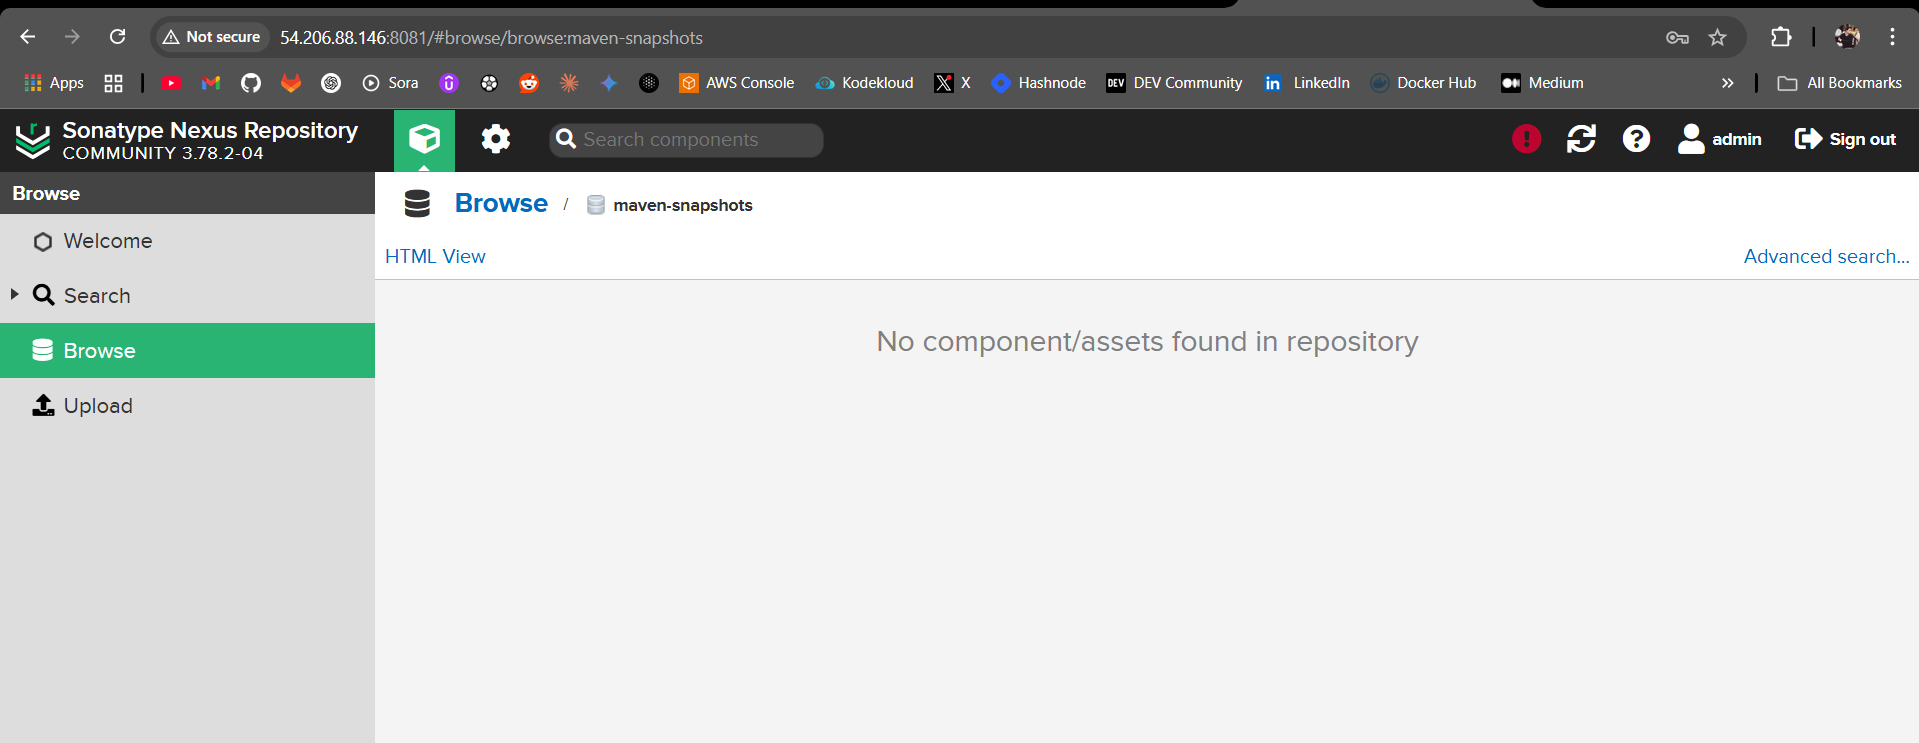
And there you go, our uploaded artifacts have been deleted!
But take a look at this! Our Blob store still is not empty. What that cleanup policy does is, it marks the artifacts for deletion. In order to delete the artifacts from the blob store and clean up space, we have to create another task!
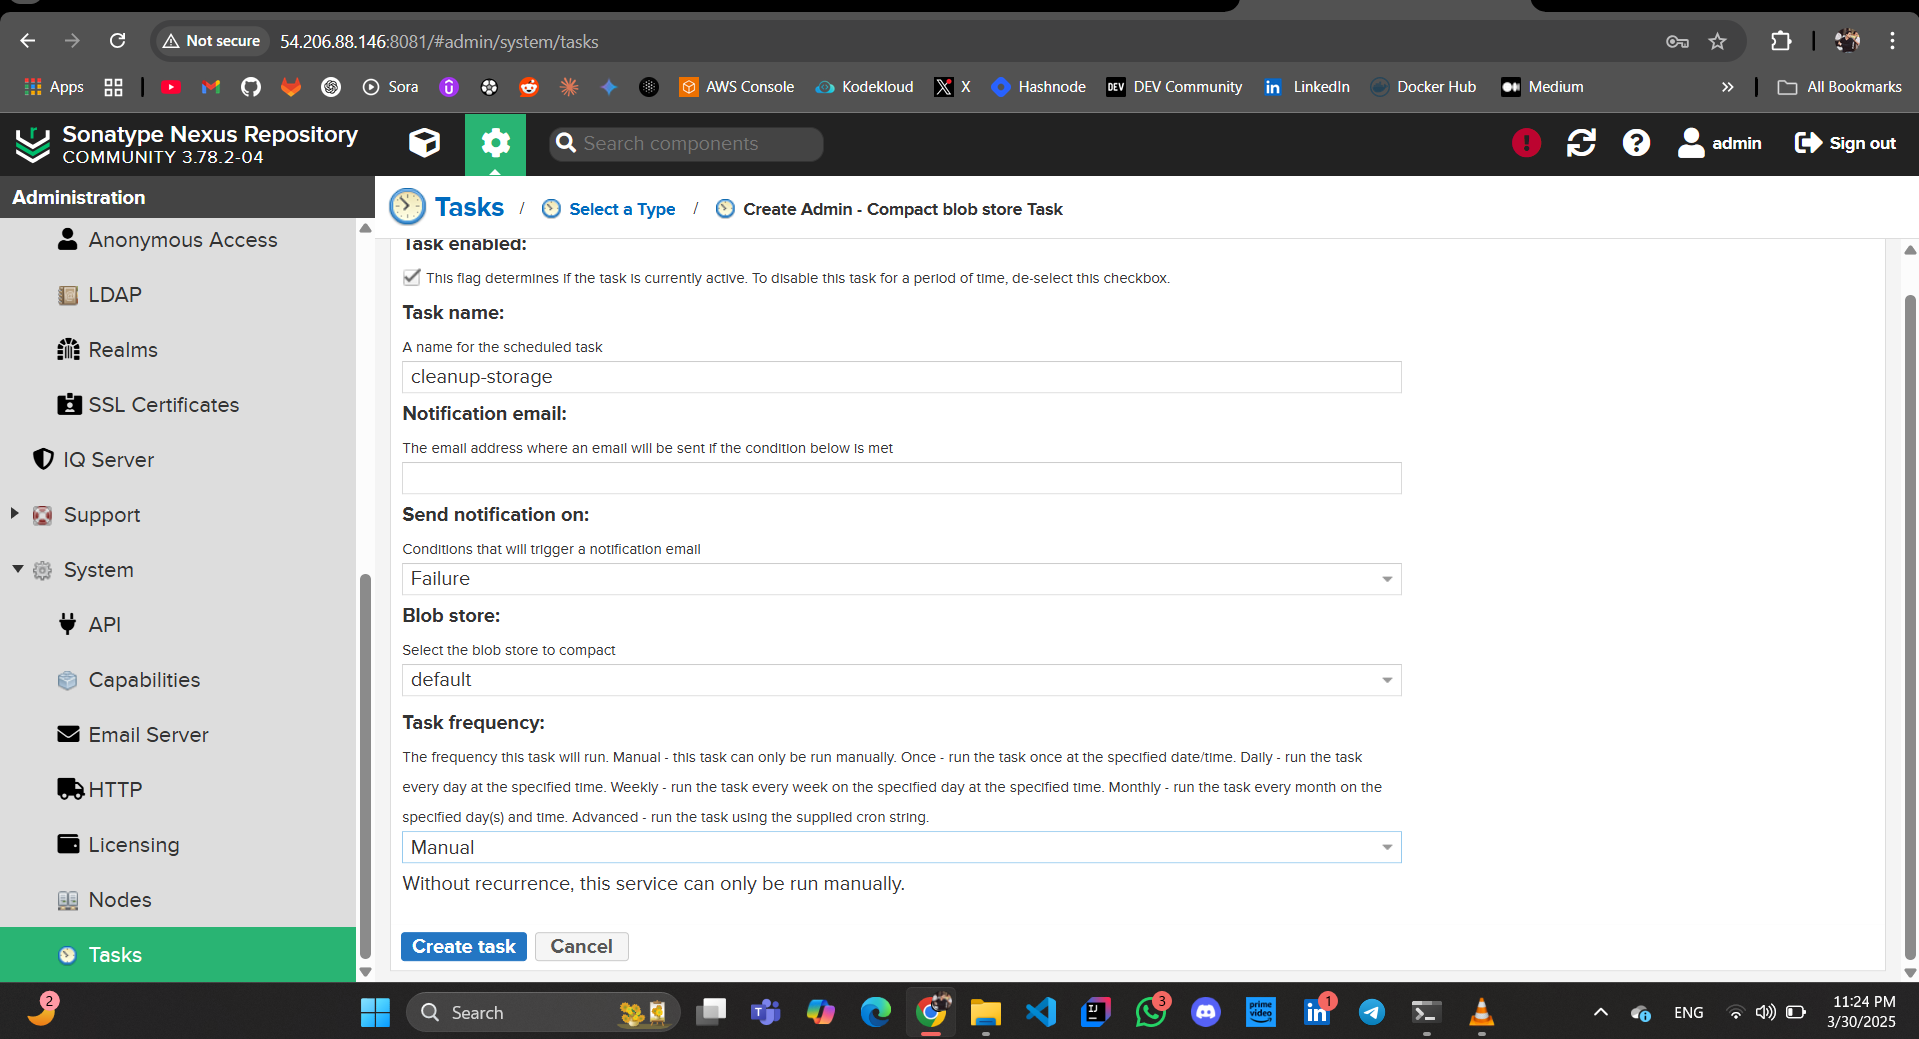
Select the Compact blob store Task, which is used to cleanup blob stores storage.
Create and Run the task manually or periodically using CRON!
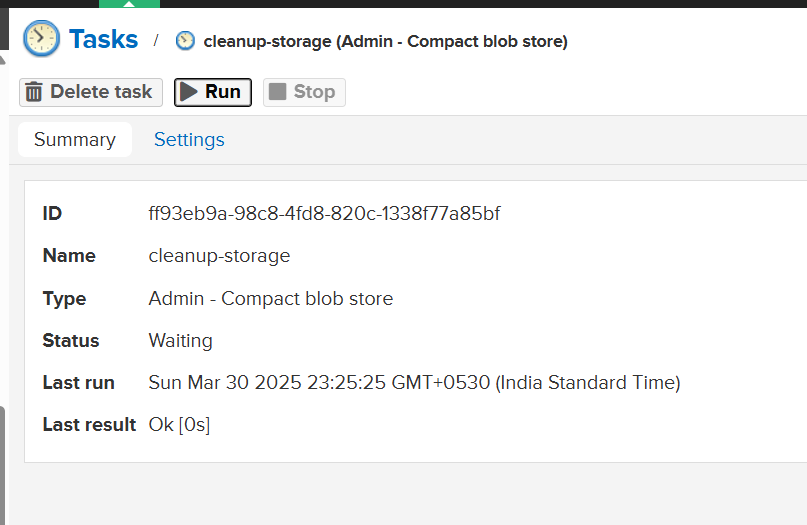
The task was executed successfully, and the default blob store storage is also cleared!
Conclusion
Wow okay, that was a lot!
Sonatype Nexus is an essential tool for managing and distributing build artifacts efficiently. As software development grows increasingly complex, having a centralized artifact repository like Nexus ensures better dependency management, version control, and security across projects.
In this blog, we explored the fundamentals of artifact repository managers, introduced Nexus and its key features, and walked through setting it up on an Amazon EC2 instance. We also covered how to upload Maven and Gradle artifacts, manage blob stores for efficient storage, and apply cleanup policies to maintain repository hygiene.
By leveraging Nexus, teams can optimize their build pipelines, reduce redundant storage usage, and enforce better governance over software artifacts. Whether you are managing internal dependencies or distributing releases, Nexus provides a scalable and reliable solution for artifact management.
Make sure you connect me on LinkenIn !’
And checkout the rest of my blog !
Subscribe to my newsletter
Read articles from Yash Patil directly inside your inbox. Subscribe to the newsletter, and don't miss out.
Written by