Building Your Local CI/CD Pipeline: Jenkins & GitLab on a VM
 Tonmoy Chiran
As a software engineer or an aspiring DevOps engineer, practicing CI/CD (Continuous Integration/Continuous Deployment) is essential to staying up-to-date with modern technology and expanding our knowledge. However, there’s often a misconception that CI/CD can only be implemented on a live server, such as a VPS or EC2 instance — I once shared this belief myself.
Through extensive research and experimentation, I discovered that deploying a GitLab server in a local environment is not only possible but also highly beneficial. This approach has allowed me to practice Jenkins, webhooks, and other key CI/CD concepts in a more flexible and controlled setting, making it easier to learn and experiment freely. This project's codebase is managed using Git, with the repository residing on a GitLab instance in a self-hosted solution. Your free to use open source alternative such as Gitea (https://about.gitea.com/products/gitea/).
I. Prerequisites
To successfully proceed, ensure you have the following components readily available:
Virtualization Environment: A virtualization platform such as VirtualBox or VMware Workstation/Player is required to host the virtual machine.
Guest Operating System: A Linux-based distribution (e.g., Ubuntu, CentOS) installed within the virtual machine.
Command-Line Proficiency: Familiarity with basic Linux command-line operations is essential for installation and configuration.
Installation Packages: The necessary GitLab and Jenkins installation files should be downloaded and accessible.
Note: Instructions for setting up the Virtual Machine and Operating System are considered outside the scope of this document.
II. Installation
For detailed instructions on installing GitLab and Jenkins, please refer to the official documentation provided below. You have the flexibility to choose the installation method that best suits your environment (Linux, Docker, etc.).
III. Gitlab Post Installation
After gitlab is installed succesfully, there are some works to be done.
- Create a user, if you wish to have user alongside root / administrator
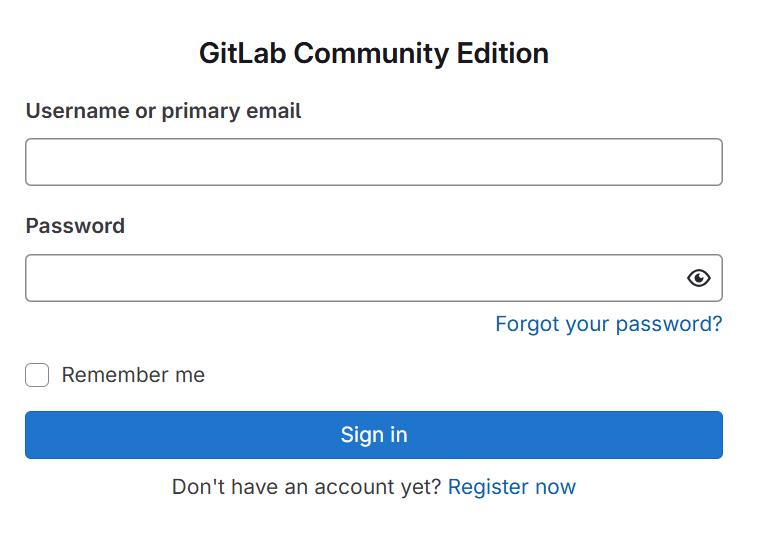
When you open the GitLab web interface (accessible via http://ip:port or http://localhost:port), you will see a login page similar to the one shown below.
To create a new user account, click on "Register Now". After completing the registration click action, you will be redirected to the next screen as shown below.
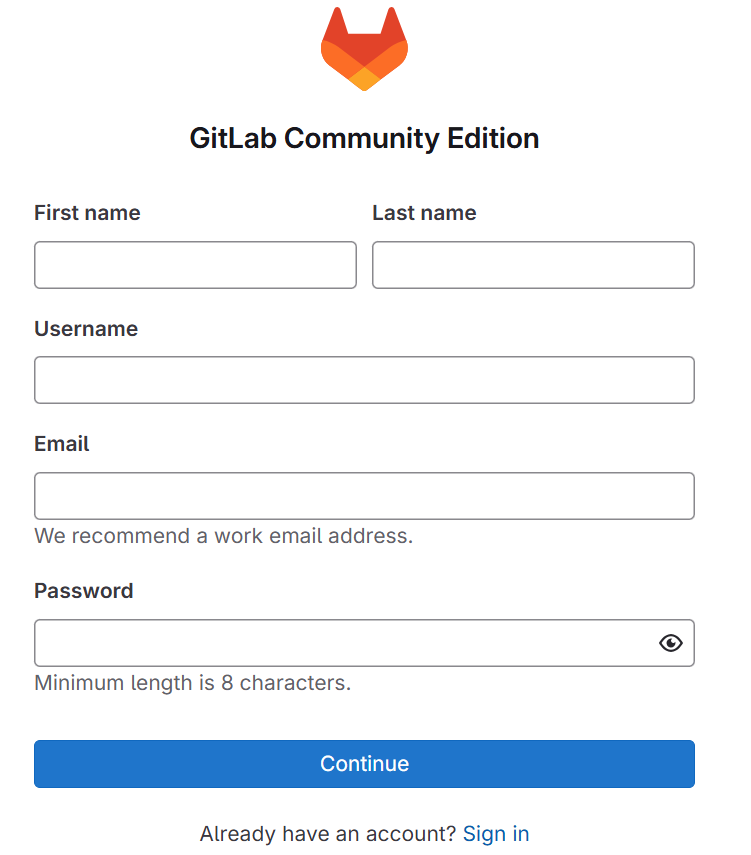
Please do fill out all information including email, you might not receive any email confirmation as its not setup or required for our purpose. You might see some text message like below

As you can see, your signed up. But without root / administration approval you are not allowed to log in. Your next step is to ask administrator or login as root as you have root credentials
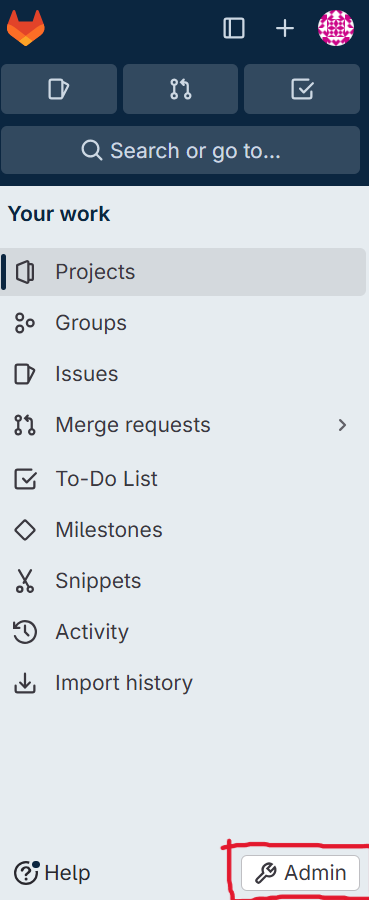
You should see a side menu or have a button to open the side menu, on that side menu you will find setting named admin, please do click on that
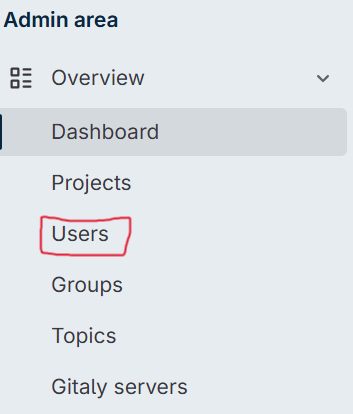
After clicking on admin, you will find something like the above image where you have to click on users. You should see pending approval under users similar like below image, do click on filter list of pending approval

Upon filtering you will find the user, that is pending. Just click on red marked three dots and choose approve. After approval you should be able to login to your local gitlab portal.

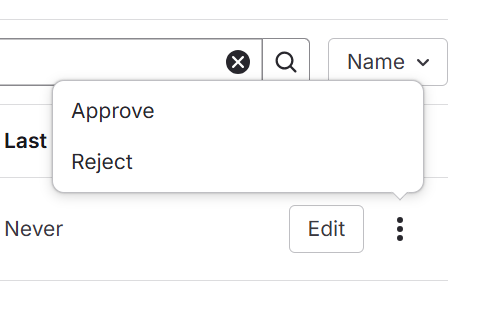
Our gitlab setup is complete, we can now move forward to jenkins integration with gitlab
IV. Gitlab Integration With Jenkins
To integrate gitlab with jenkins, please visit your jenkins and go to manage jenkins > Tools > Available plugin and in search input write “Gitlab“. You should get gitlab below same as below image

After installation is completed, create new item (Dashboard > New Item). Please provide your preferred name and you can select any type pipeline or freestyle or any.
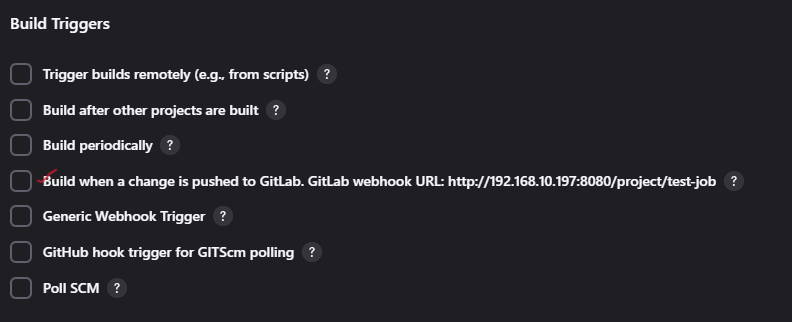
You should now see new page, where you will have section named build triggers and red marked portion should be visible, copy the gitlab webhook url for later.
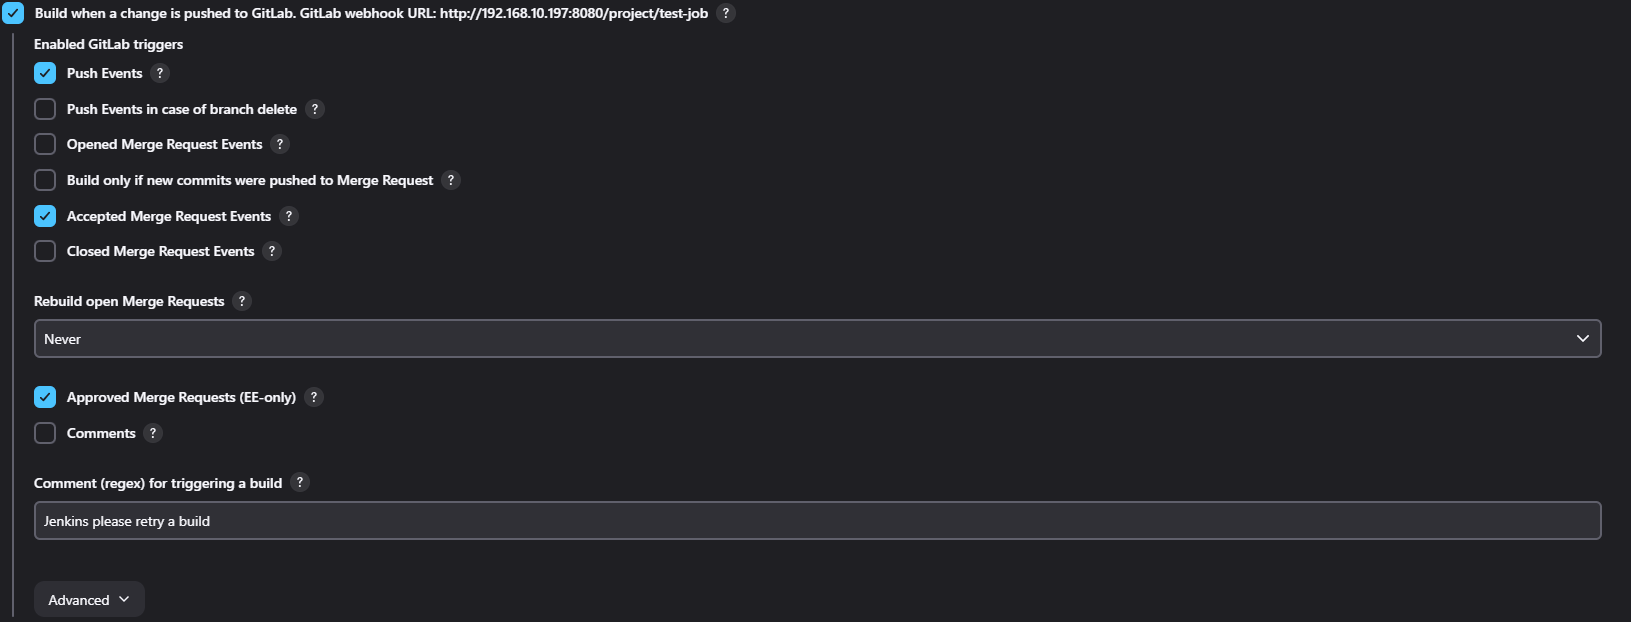
Upon clicking on red marked, you must have below options like the image. Make sure to check just like the image and do click on advanced, so we can get secret token for webhook basic auth
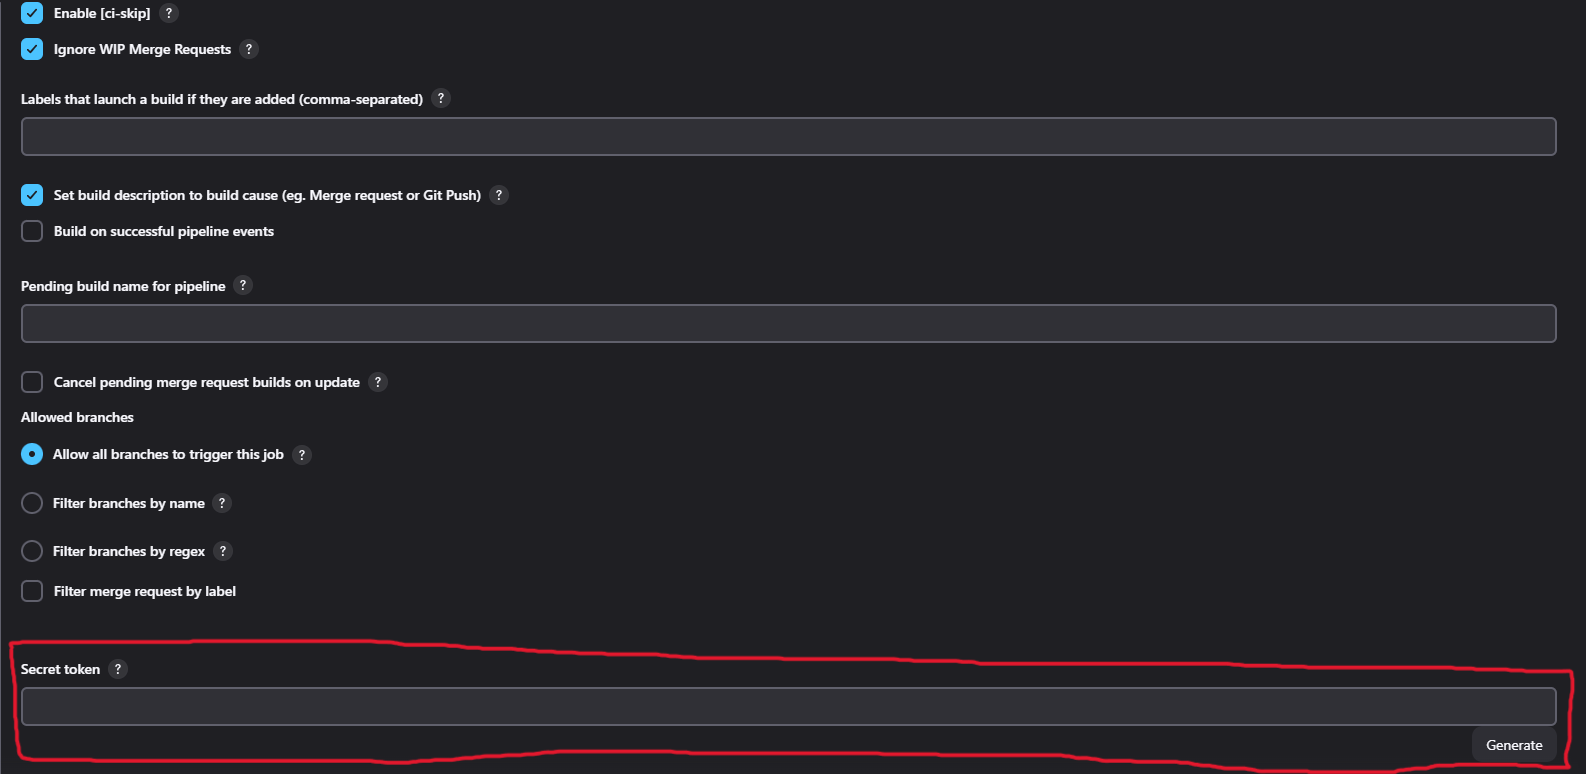
After clicking on advanced, you will have options just like below image. You just have to scroll to secret or red marked portion, click on generate button and copy the secret token.
V. Gitlab webhook setup
Now your ready to integrate gitlab with jenkins through webhook and run job automatically on push to main branch. Before that, as our gitlab is self hosted in same network and is accessing via ip address, we have some works to do. We need to enable Allow requests to the local network from webhooks and integrations. You must log in as root / administrator, click on admin like below image
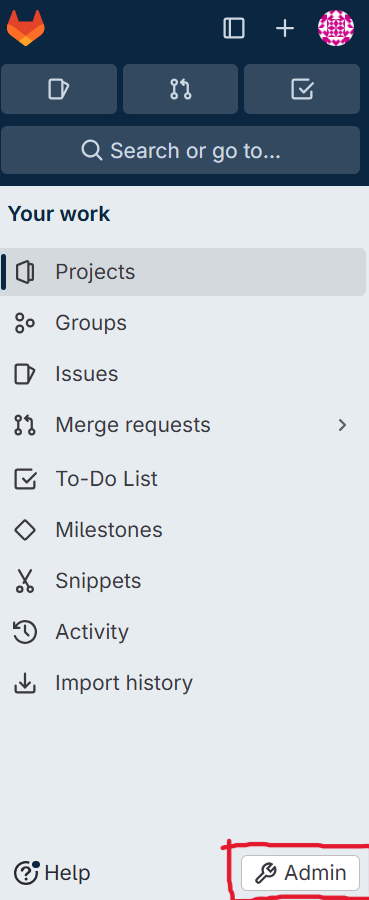
You should see network under settings, click on that.
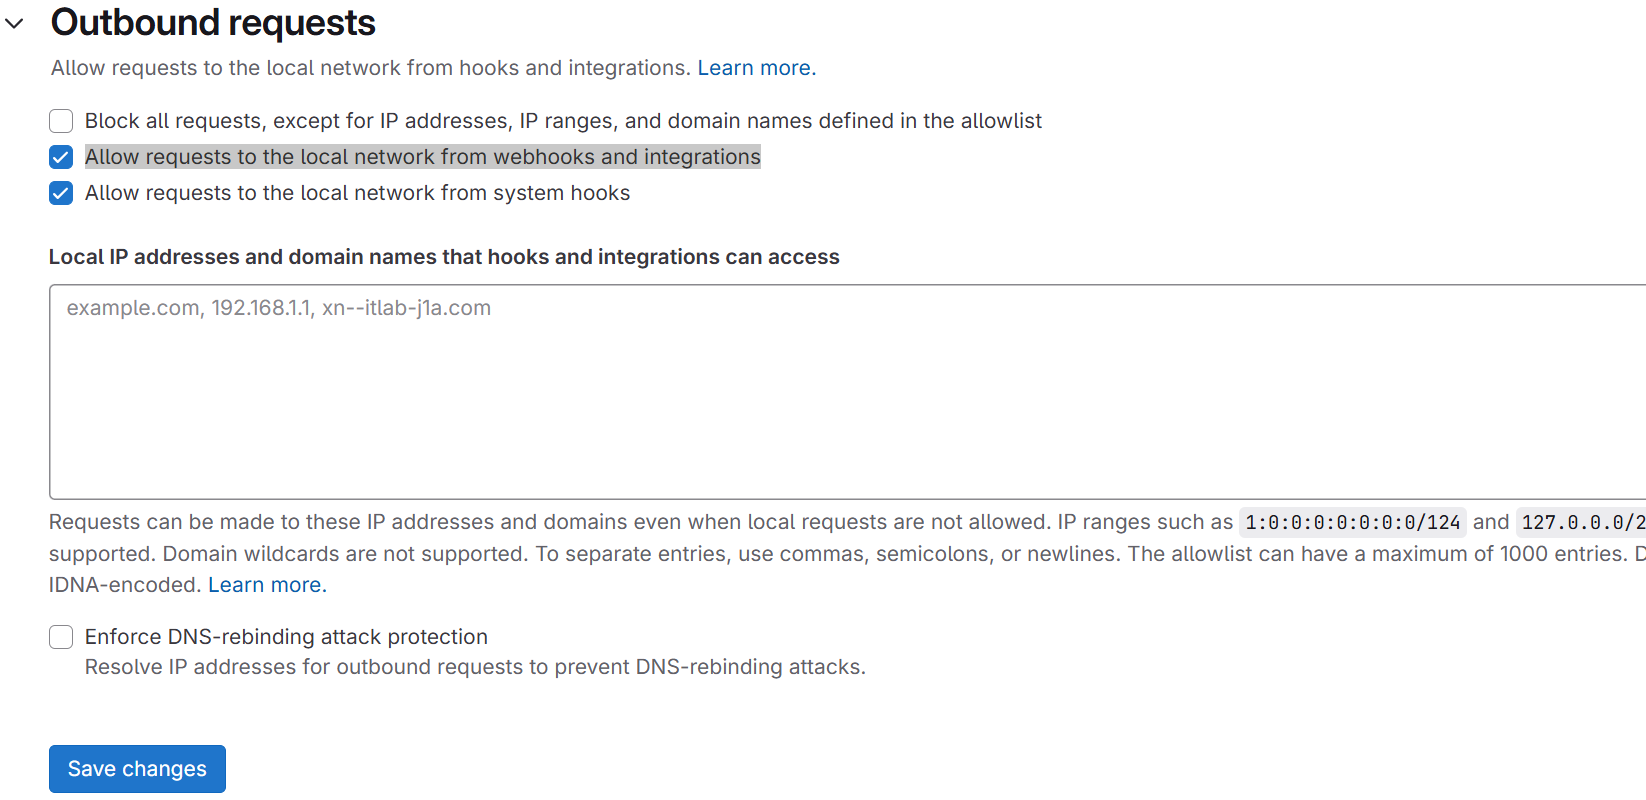
On network you will find outbound requests, scroll and click on outbound requests. Make sure to check like the image and click on save changes. This will allow us to send and received webhook from same or local network.
Now create new project and visit that project page. On project page, hover or click on settings you will see webhooks, click on webhooks.

Put the url that we copied from jenkins, gitlab webhook url.
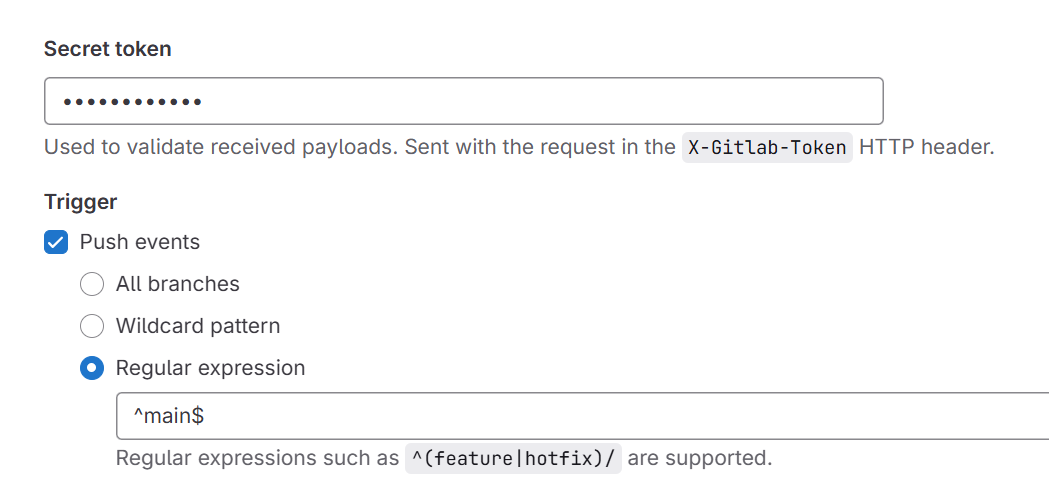
Also provide the secret token and follow push events same as image or change main to master or any branch you wish to trigger the job when that specific branch is merged with pr or pushed something to that branch.
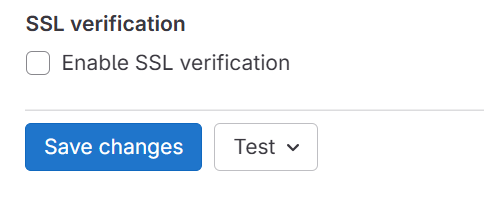
And don’t forget disable SSL verification as we are working locally. Finally press save changes.

After your webhook is added successful you will have list like this, click on test and select push events to check if its triggering jenkins job or not.
Subscribe to my newsletter
Read articles from Tonmoy Chiran directly inside your inbox. Subscribe to the newsletter, and don't miss out.
Written by
