Cloud Security with AWS IAM: A Step-by-Step Guide
 Eneojo Attah-Olottah
Imagine you just started working on a team managing an AWS environment. Your first task? Granting access to new team members without giving them complete control over the infrastructure. How do you ensure that everyone gets the right level of access without compromising security? This is where AWS Identity and Access Management (IAM) comes into play. IAM allows you to create users, organize them into groups, and assign permissions, ensuring that each team member has just the right level of access to AWS resources.
This guide is based on my personal project, where I explored IAM best practices while securing an AWS environment. In this step-by-step walkthrough, we’ll cover:
What IAM users and groups are
Why they are essential
How to create IAM users and user groups
How to manage permissions effectively
How to test user access
Let's dive in!
Step 1: Creating EC2 Instances
What is Amazon EC2?
Amazon Elastic Compute Cloud (EC2) provides virtual servers in the cloud. These instances allow you to run applications, host websites, and perform various computing tasks.
Launching Instances
Log in to AWS Management Console and navigate to EC2.
Set your AWS region to the one closest to you for better performance.
Click Launch instances and configure:
Name:
production-yourname(replaceyournamewith your name)Tags:
- Key:
Env, Value:production
- Key:
Amazon Machine Image (AMI): Choose a Free Tier eligible option.
Instance Type: Select a Free Tier eligible type.
Key Pair (Login): Select Proceed without a key pair (not recommended for production environments).
Click Launch instance.
Creating a Development Instance
Repeat the steps above, but change:
Name:
development-yournameTags:
Key: Env, Value: development
Step 2: Create an IAM Policy
What is AWS IAM?
AWS Identity and Access Management (IAM) controls who can access AWS resources and what actions they can perform.
Creating an IAM Policy
Navigate to the IAM Console.
In the left panel, click Policies.
Click Create policy.
Switch to the JSON editor and replace the content with:
 {
   "Version": "2012-10-17",
   "Statement": [
     {
       "Effect": "Allow",
       "Action": "ec2:*",
       "Resource": "*",
       "Condition": {
         "StringEquals": {
           "ec2:ResourceTag/Env": "development"
         }
       }
     },
     {
       "Effect": "Allow",
       "Action": "ec2:Describe*",
       "Resource": "*"
     },
     {
       "Effect": "Deny",
       "Action": [
         "ec2:DeleteTags",
         "ec2:CreateTags"
       ],
       "Resource": "*"
     }
   ]
 }
Click Next.
Set Name as
MyDevEnvironmentPolicy.Provide a description (without apostrophes to avoid errors).
Click Create policy.
Step 3: Create an AWS Account Alias
Why Create an Account Alias?
AWS assigns each account a unique numeric ID for login. An alias makes it easier to access the console with a readable URL.
Setting Up an Alias
Navigate to IAM Dashboard.
Under Account Alias, click Create.
Enter a readable alias like
Yourname-AWS.Click Save changes.
Step 4: Create IAM Users and User Groups
What Are IAM Users and User Groups?
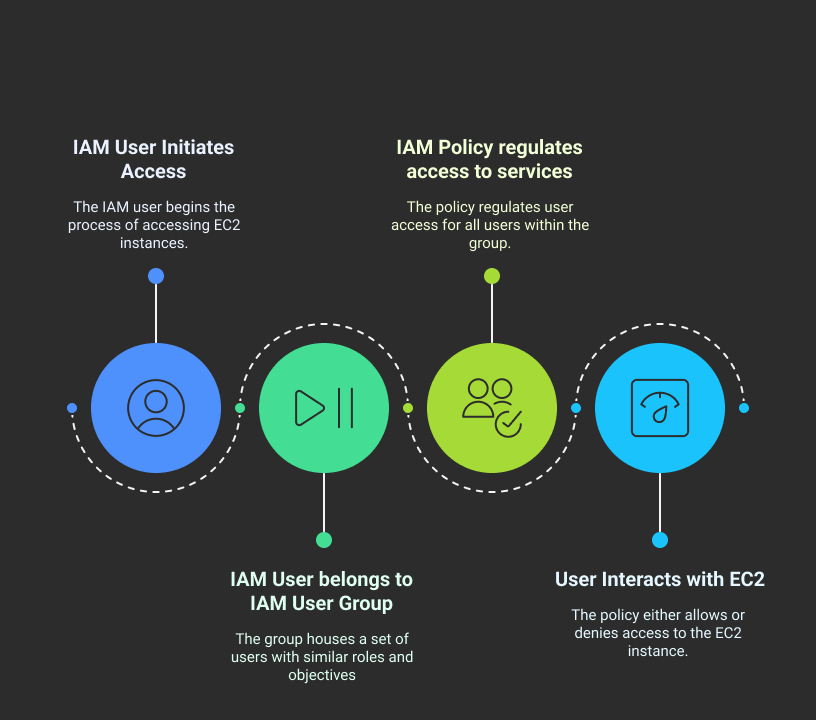
IAM Users
An IAM user represents a specific person or application that needs access to AWS resources. Each IAM user has a unique name and can be assigned credentials (like passwords or access keys) to interact with AWS.
IAM User Groups
An IAM user group is a collection of IAM users that share the same permissions. Instead of assigning permissions to each user separately, you can create a group, set its permissions, and simply add users to it. This makes managing access more efficient and scalable.
💡 Example: If you have a team of developers, you can create a "Developers" user group with permissions to access AWS Lambda and Amazon S3 but restrict access to billing or security settings.
Creating an IAM User Group
Sign in to the AWS Management Console and navigate to the IAM service.
In the left navigation panel, click User groups.
Click Create group.
Enter a Group Name (e.g.,
Developers-Team).Attach a Policy: Select the permission created in step 2
MyDevEnvironmentPolicy.Click Create group.
Creating an IAM User
In the IAM console, click Users on the left panel.
Click Create user.
Enter a Username (e.g.,
john-doe).Check Provide user access to the AWS Management Console.
Set Password Settings:
Choose Auto-generated password (or set a custom one).
Uncheck "Users must create a new password at next sign-in" (optional for test accounts).
Click Next: Permissions.
Assign the User to a Group:
- Select the
Developers-Teamgroup created earlier.
- Select the
Click Next, review details, then click Create user.
Once the IAM user is created, AWS provides a sign-in URL and credentials. Share these securely via: Email with temporary credentials or a password manager like LastPass or Bitwarden
⚠ Never send credentials over chat or store them in plain text!
(Leave this page open for the next step).
Step 5: Testing EC2 Access
Open a new incognito window on your browser.
Open the new sign-in URL provided after creating the user in the previous step, in your incognito window.
Log in with the User name and Console password given in your IAM tab
Navigate to the EC2 Console.
Ensure you're in the correct AWS Region where the instances are deployed.
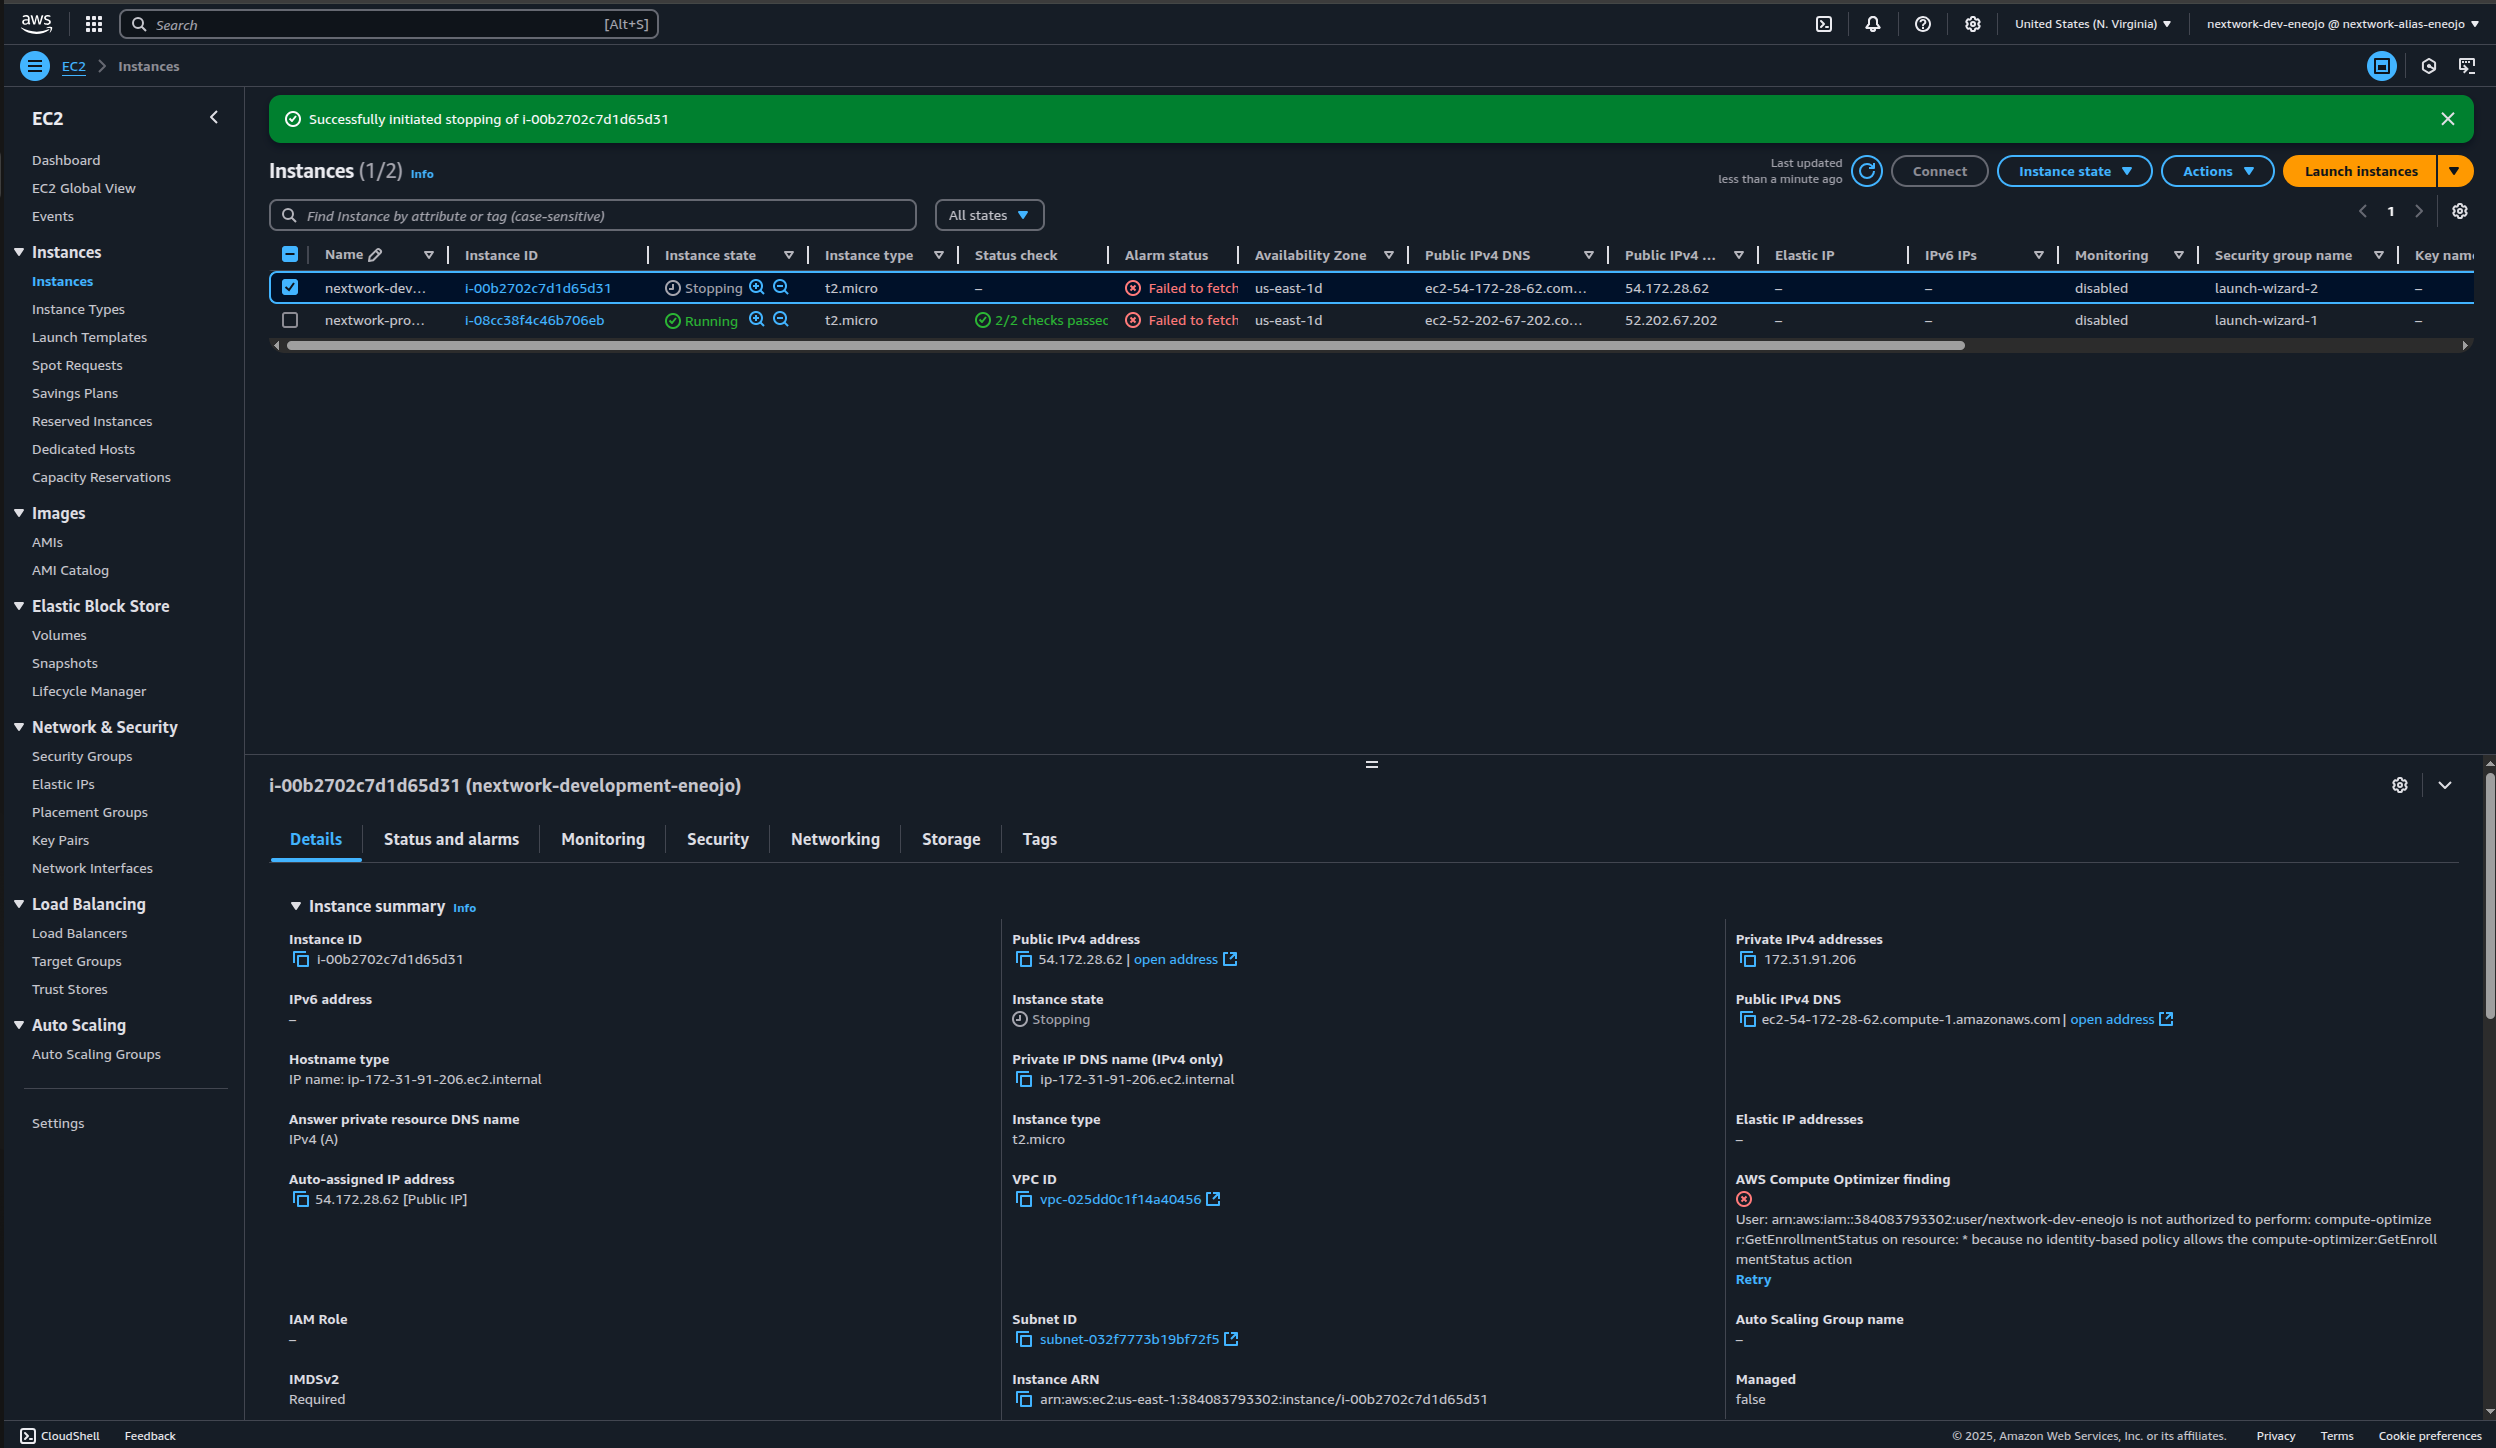
Select your production instance.
In the Actions dropdown, select Manage instance state.
Try to stop the instance by clicking Stop, then Change state.
💡 You should see an Access Denied error

Now, try stopping the development instance.
Repeat the steps to stop the instance.
💡 You should see a Success pop up
Congratulations! 🎉 You've successfully created IAM users and user groups, assigned permissions, and tested access. This ensures your AWS environment remains secure and well-managed.
Now, go ahead and explore more IAM features, like IAM roles and policies, to enhance security further. Happy cloud computing! ☁🚀
Before you wrap up, make sure to terminate any unused instances and resources! Keeping your AWS environment clean prevents unnecessary costs and ensures a clutter-free workspace.
Subscribe to my newsletter
Read articles from Eneojo Attah-Olottah directly inside your inbox. Subscribe to the newsletter, and don't miss out.
Written by