Configuring SAML and SCIM: Microsoft Entra ID to AWS IAM Identity Center (formerly AWS SSO)
 Balraj Singh
Table of contents
- Introduction
- Step 1: Enabling AWS SSO
- Step 2: Configuring SAML in AWS
- Step 3: Configuring Azure AD for AWS SSO
- Step 4: Configuring SAML in AWS
- Step 5: Enabling Automatic User Provisioning
- Step 6: Assigning Users and Groups in Azure AD
- Step 7: Assigning AWS Permissions to Users
- Step 8: Verifying Login to AWS Using Azure AD
- Conclusion
Introduction
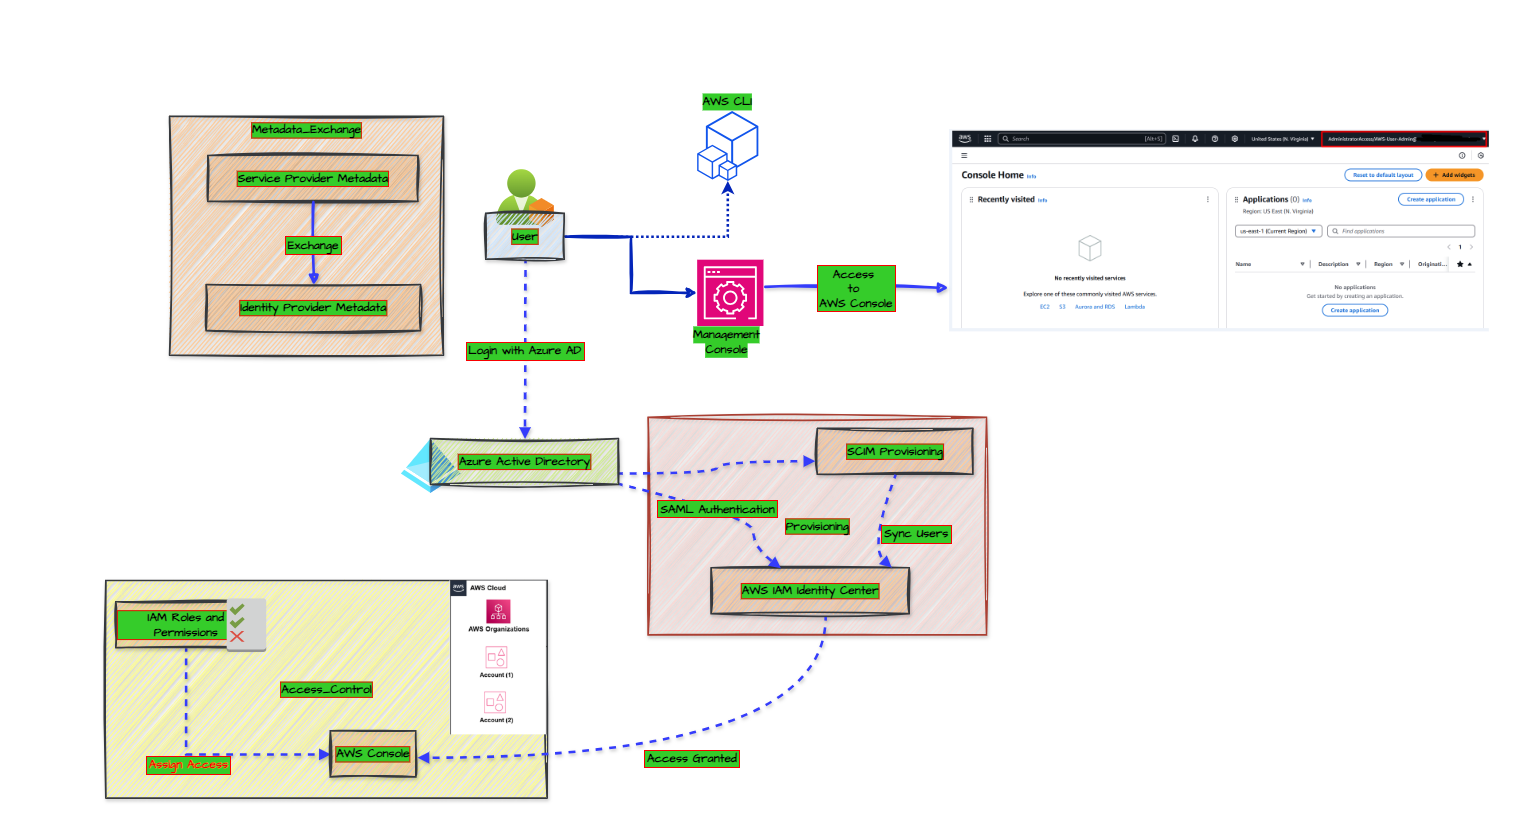
Integrating Azure Active Directory (Azure AD) with Amazon Web Services (AWS) allows organizations to unify authentication, enabling users to log in using their existing Azure AD credentials. This integration eliminates the need for multiple credentials and enhances security through Azure AD’s Conditional Access Policies. The process is achieved using Security Assertion Markup Language (SAML), where Azure AD acts as the Identity Provider (IdP) and AWS as the Service Provider (SP).
This guide provides a detailed step-by-step approach to configuring Azure AD Authentication for AWS using SAML.
Step 1: Enabling AWS SSO
1.1 Log into AWS Management Console
Navigate to the AWS Console.
Search for IAM Identity Center in the AWS search bar.
Click on IAM Identity Center to launch the service.
In the IAM Identity Center dashboard, enable the SSO Feature.
1.2 Configure Identity Source
In the IAM Identity Center dashboard, go to Settings.
Scroll down to Identity Source.
Click on Actions → Change Identity Source.
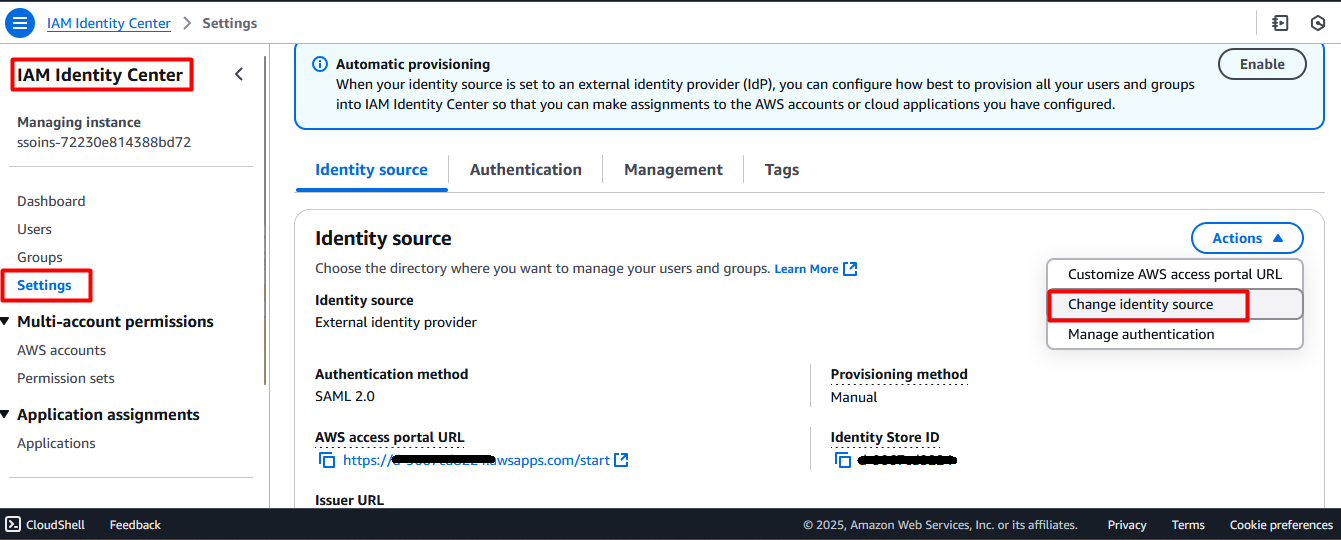
Choose External Identity Provider.
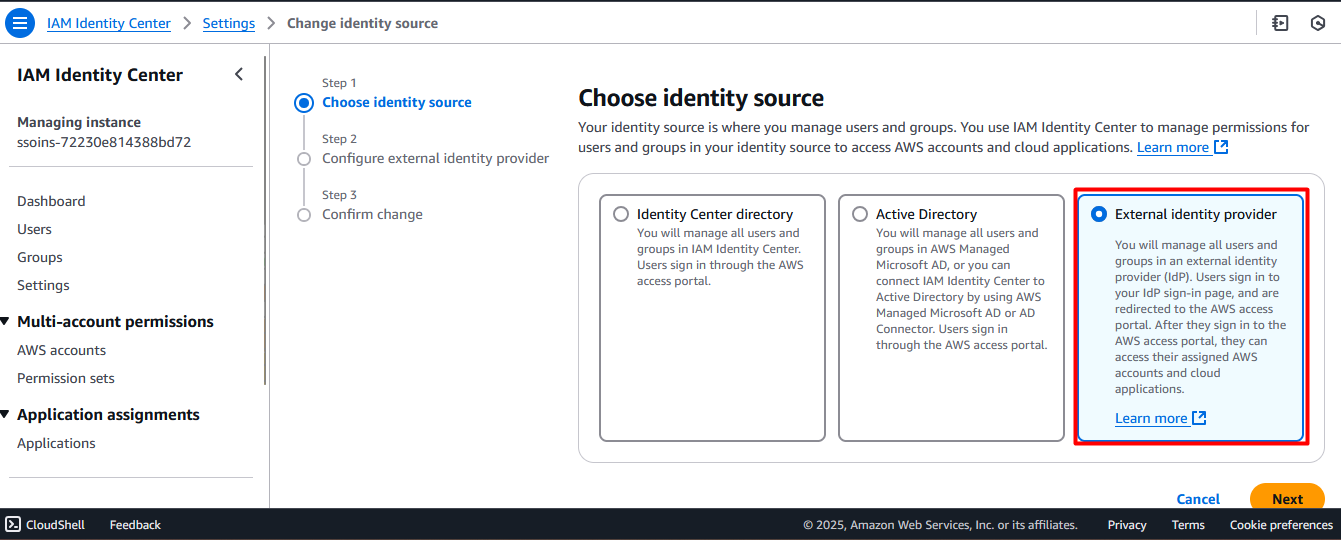
Click Next.
Step 2: Configuring SAML in AWS
2.1 Download AWS SAML Metadata
Under Identity Provider Configuration, download the AWS SAML Metadata file.

Save this file for later use in Azure AD configuration.
Step 3: Configuring Azure AD for AWS SSO
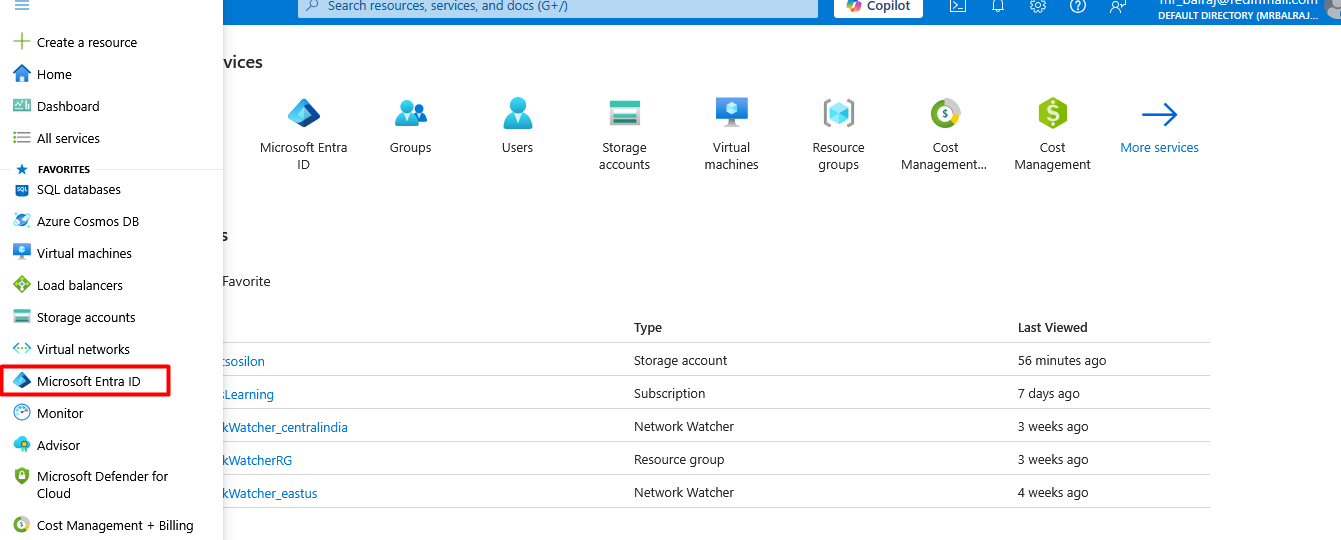
3.1 Log into Azure Portal
Navigate to Azure Portal.
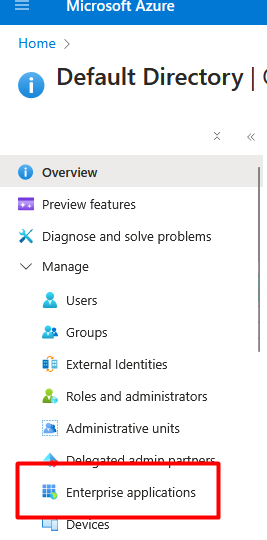
Select Miscrosoft Infra ID from the left panel.
Click on Enterprise Applications → New Application.

Search for AWS IAM Identity Center and select it.
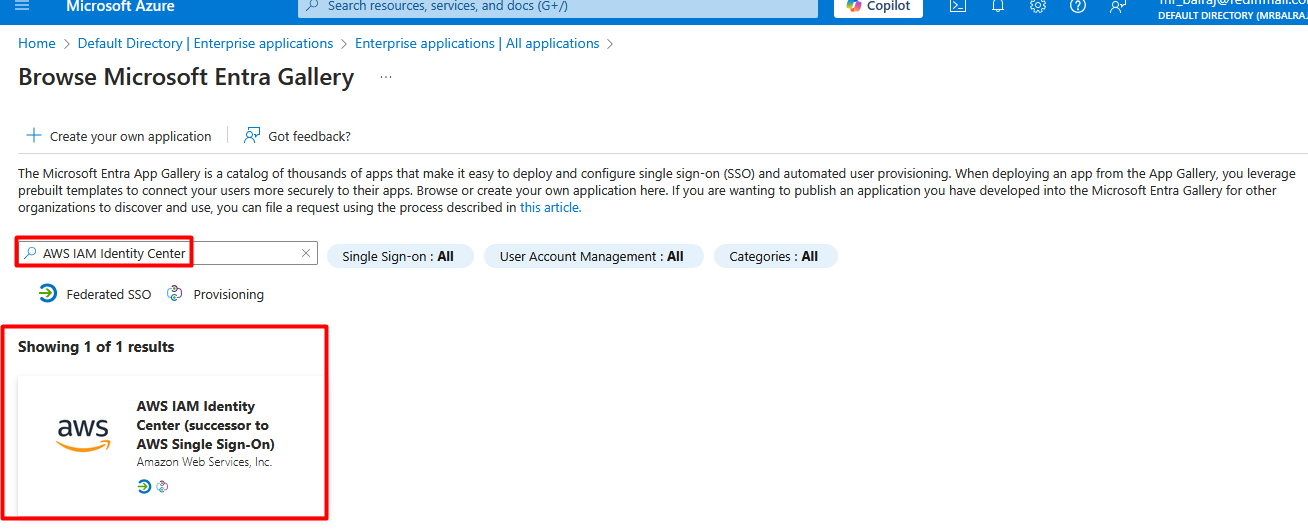
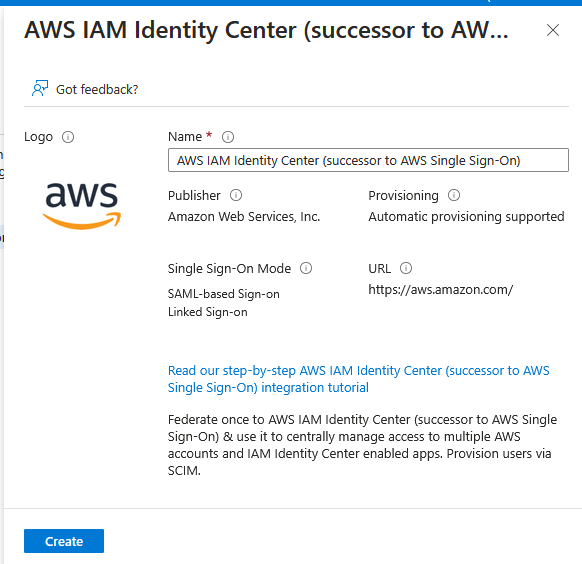
Click Create to add the application.
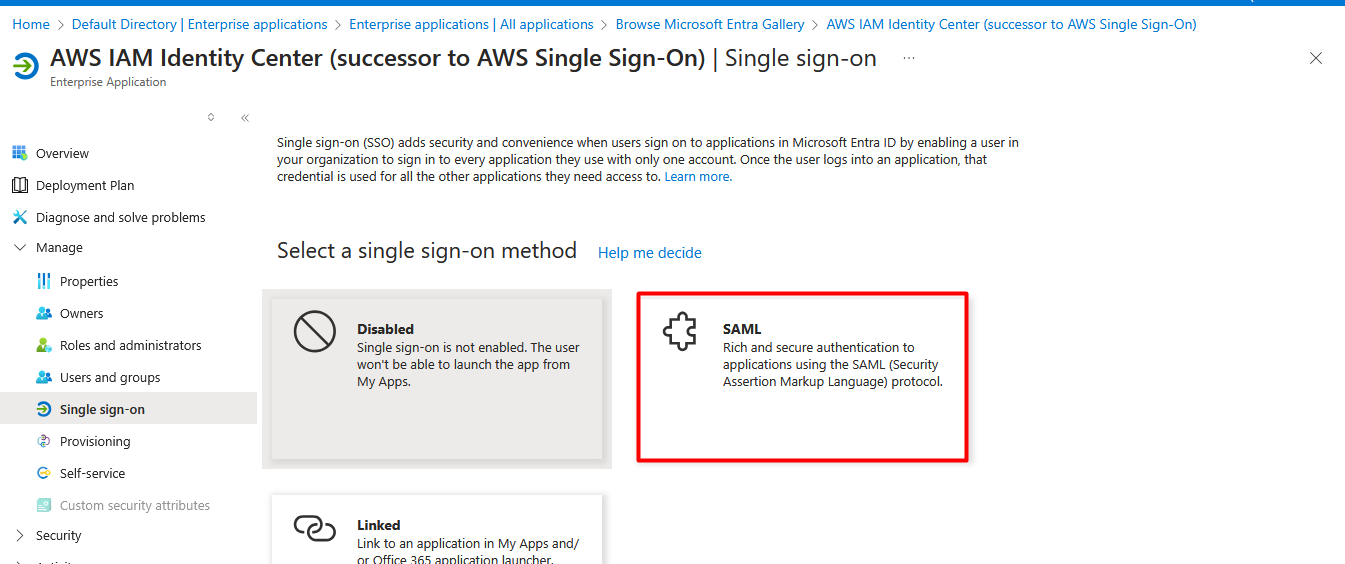
3.2 Configure Single Sign-On (SSO)
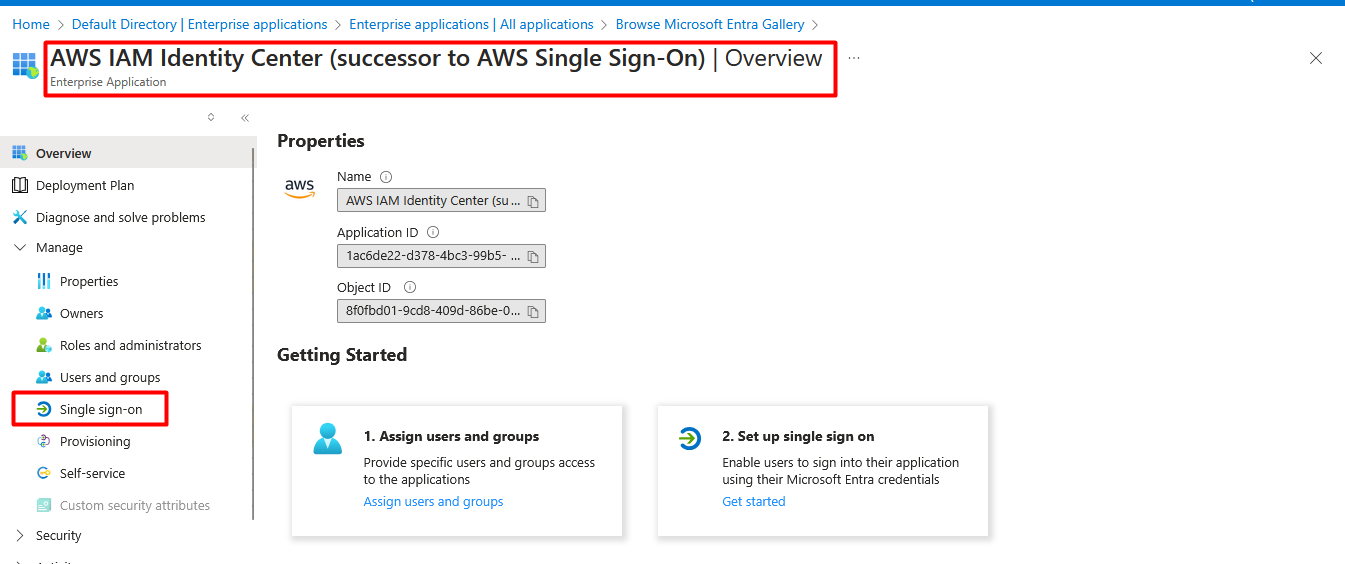
Open the created AWS IAM Identity Center application.
Select Single Sign-On → SAML.
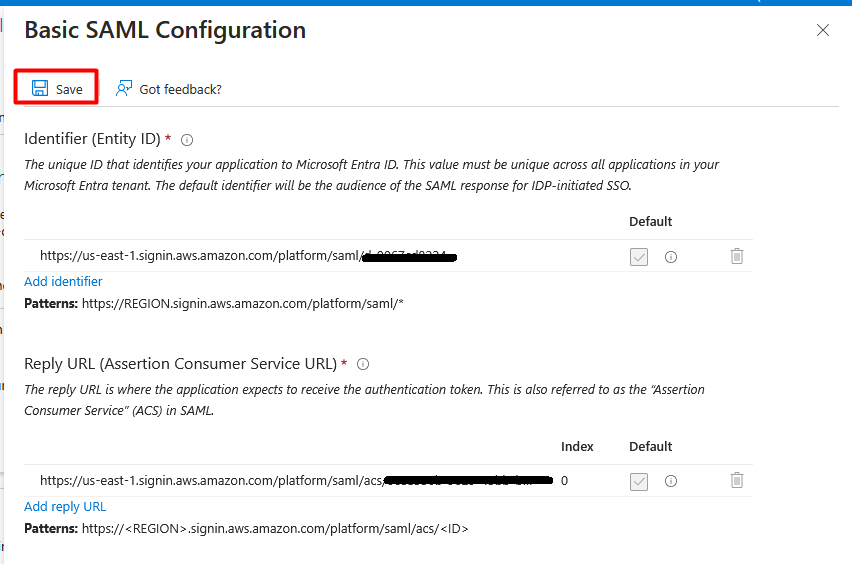
Click Upload Metadata File and select the AWS SAML metadata file downloaded earlier in
steps 2.1.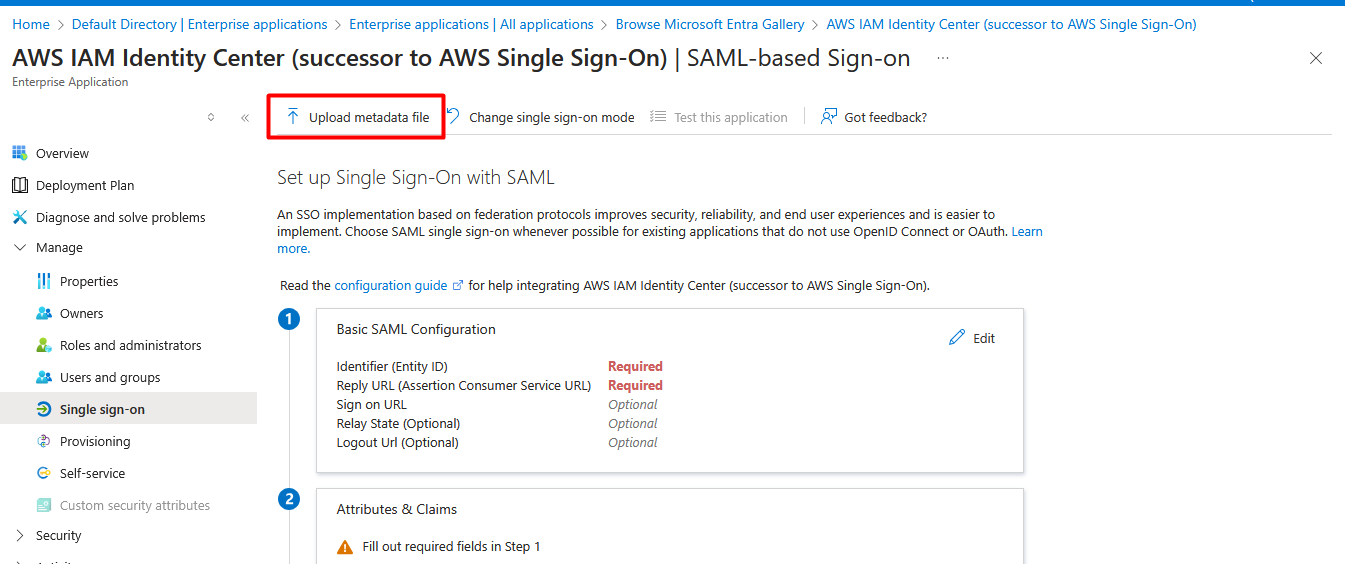
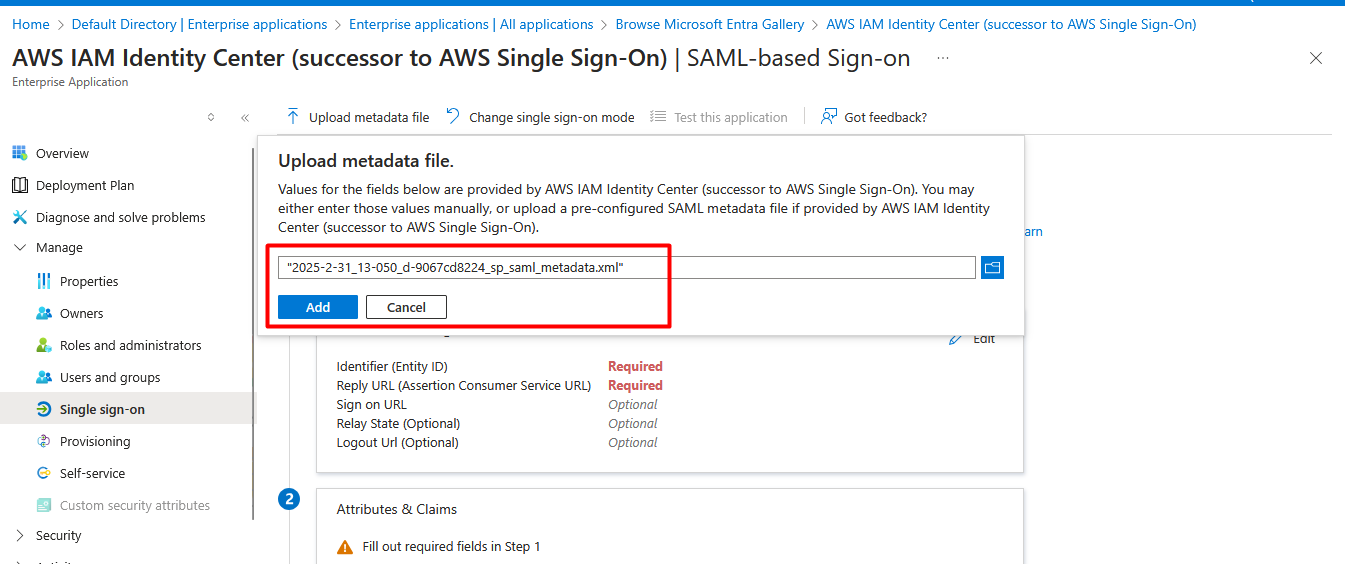
Click Save.
3.3 Download Azure AD Federation Metadata
In the SAML Certificates section, download the Federation Metadata XML file.
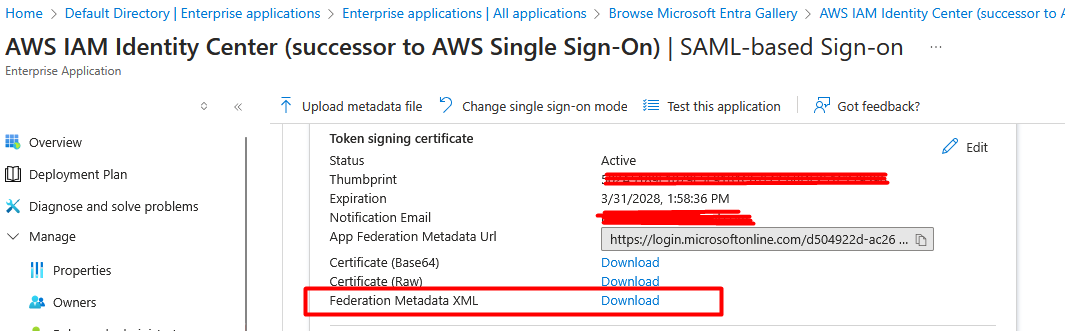
This file will be used in AWS to complete the SAML configuration.
Step 4: Configuring SAML in AWS
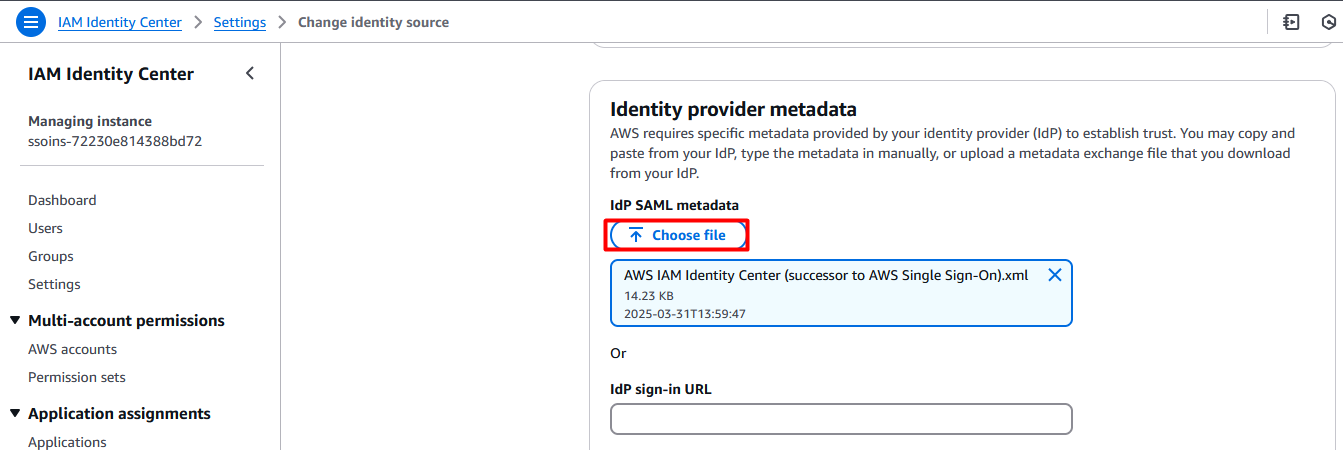
4.1 Upload Azure AD Metadata to AWS
Go back to the AWS IAM Identity Center.
Click Upload IdP SAML Metadata.
Select the Federation Metadata XML file downloaded from Azure.
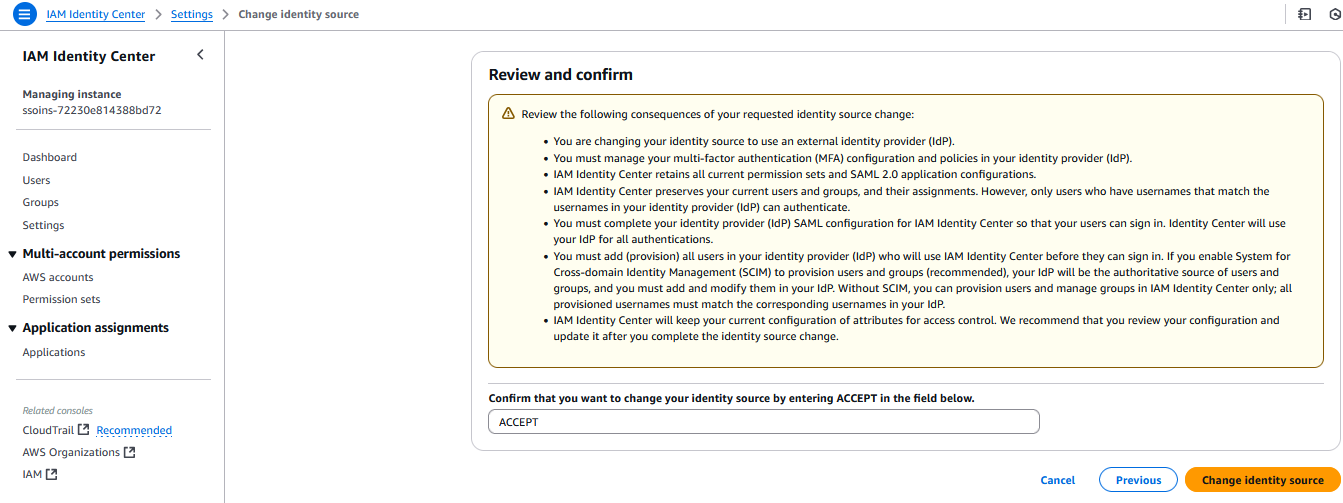
Click Next, review the details, accept the terms, and click Change Identity Source.
Step 5: Enabling Automatic User Provisioning
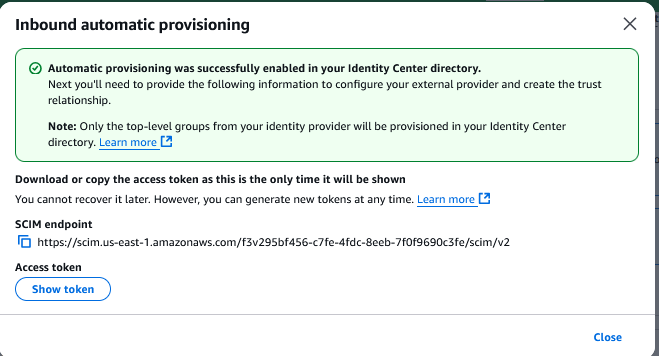
5.1 Retrieve SCIM URL and Token from AWS
In AWS IAM Identity Center, navigate to Settings.
Enable Automatic Provisioning.
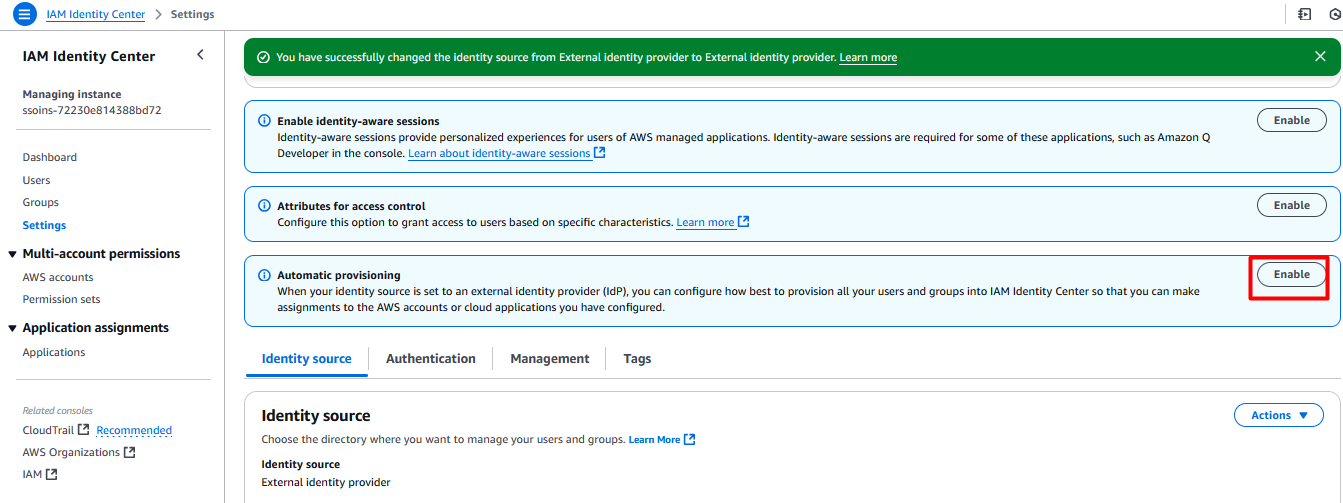
Copy the SCIM Endpoint URL and Access Token.
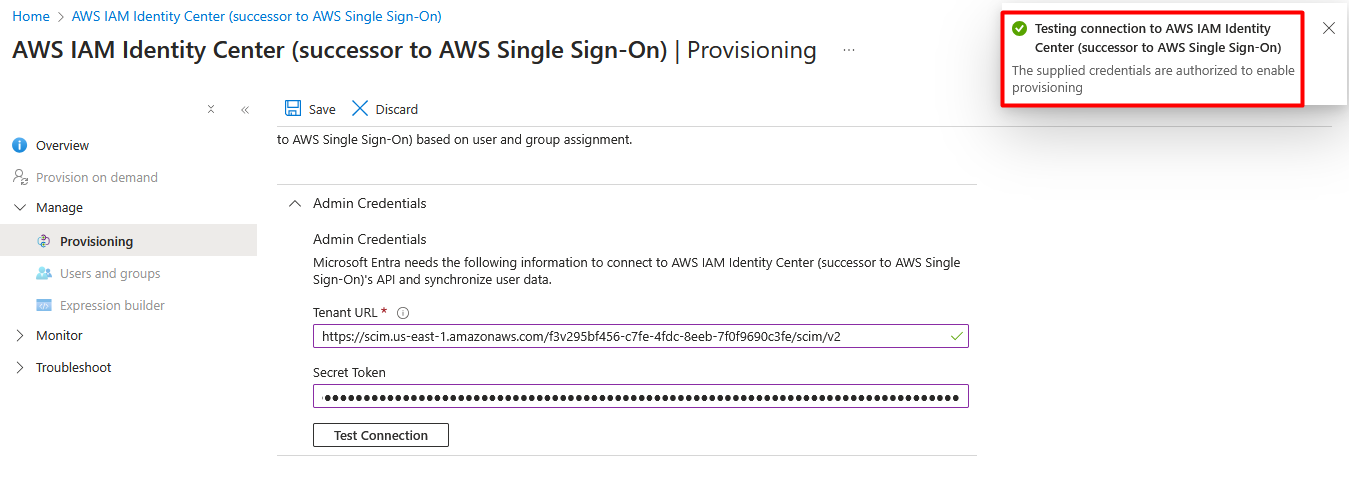
5.2 Configure User Provisioning in Azure AD
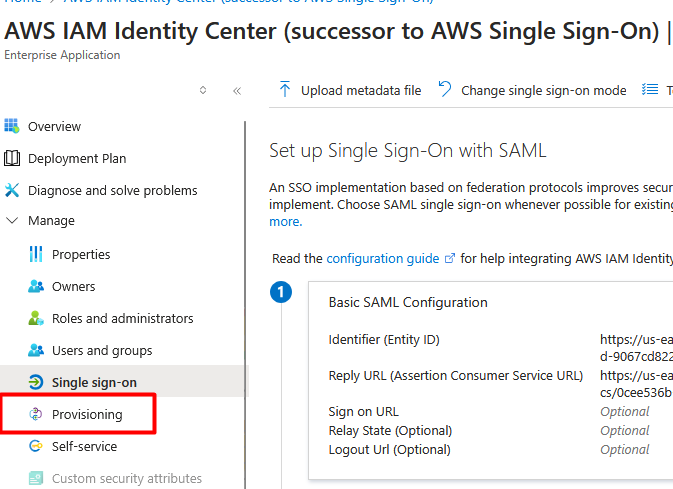
In Azure AD, go to Enterprise Applications → AWS IAM Identity Center.
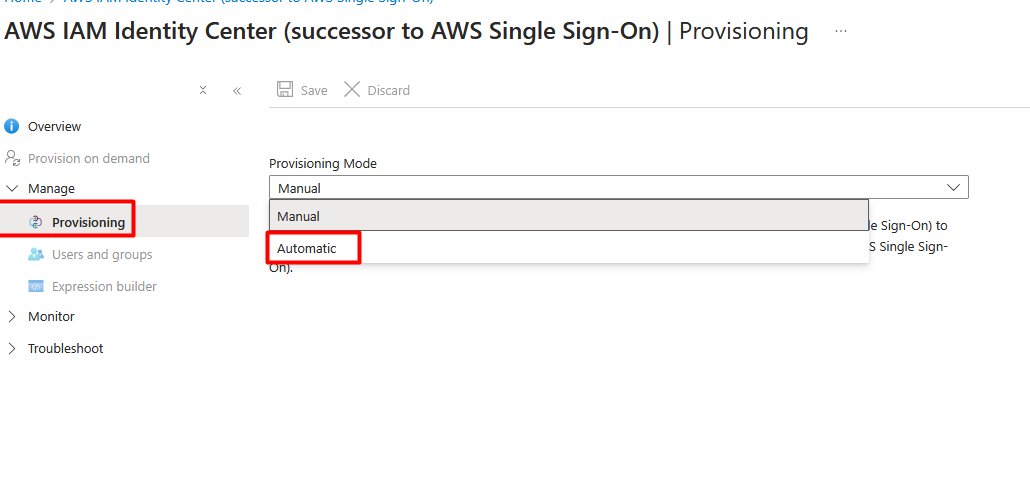
Click on Provisioning → Set Provisioning Mode to Automatic.
Paste the SCIM URL and Access Token.
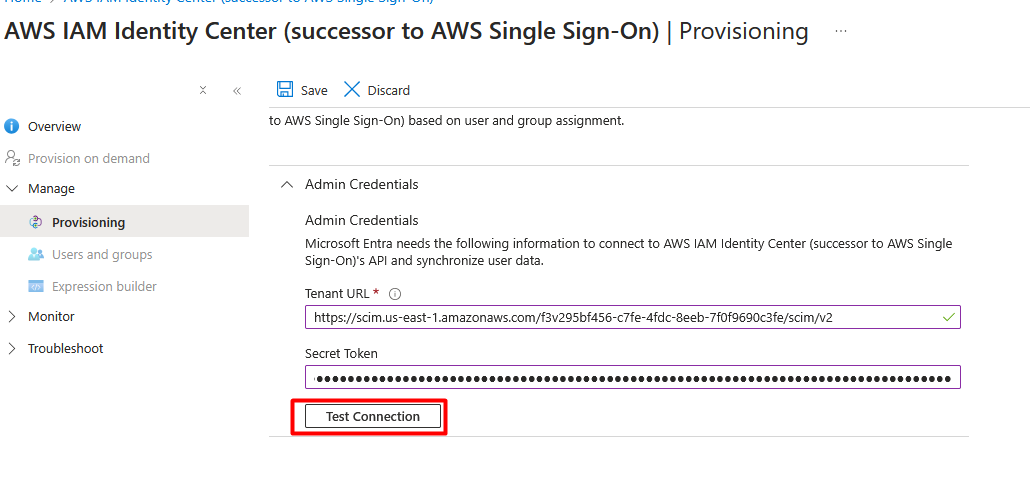
Click Test Connection → If successful, click Save.
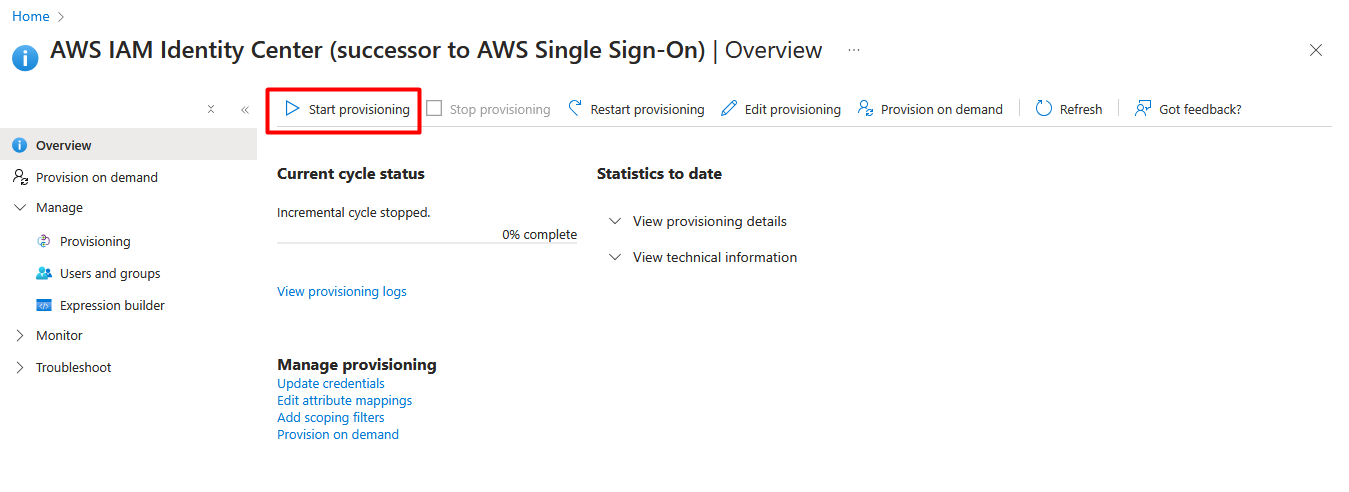
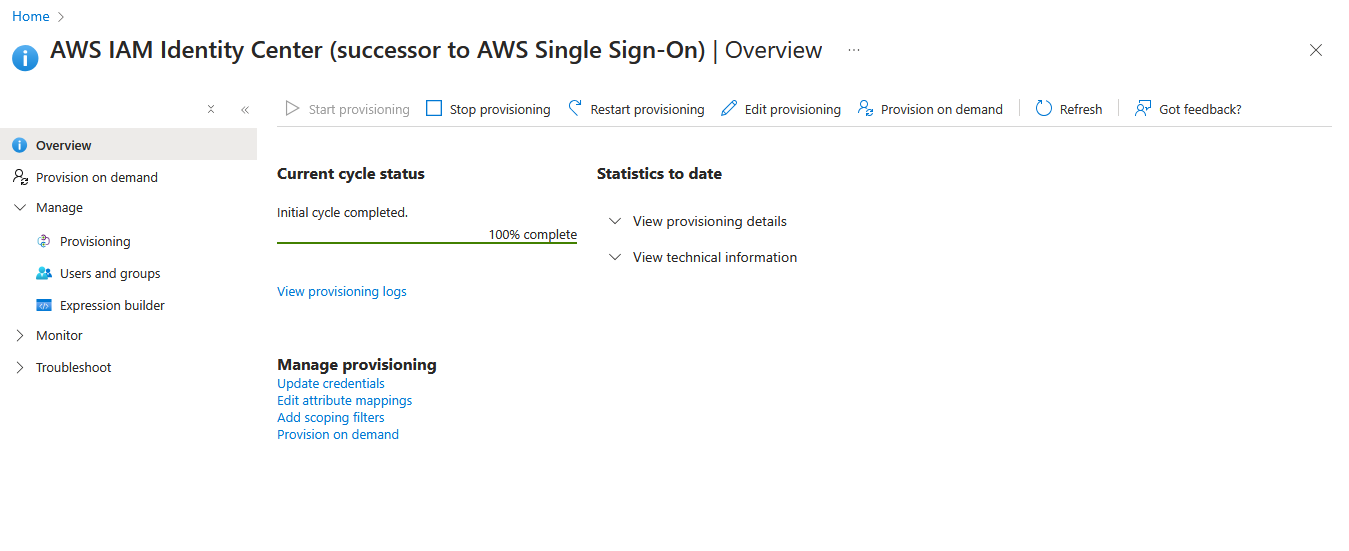
Click Start Provisioning.
Step 6: Assigning Users and Groups in Azure AD
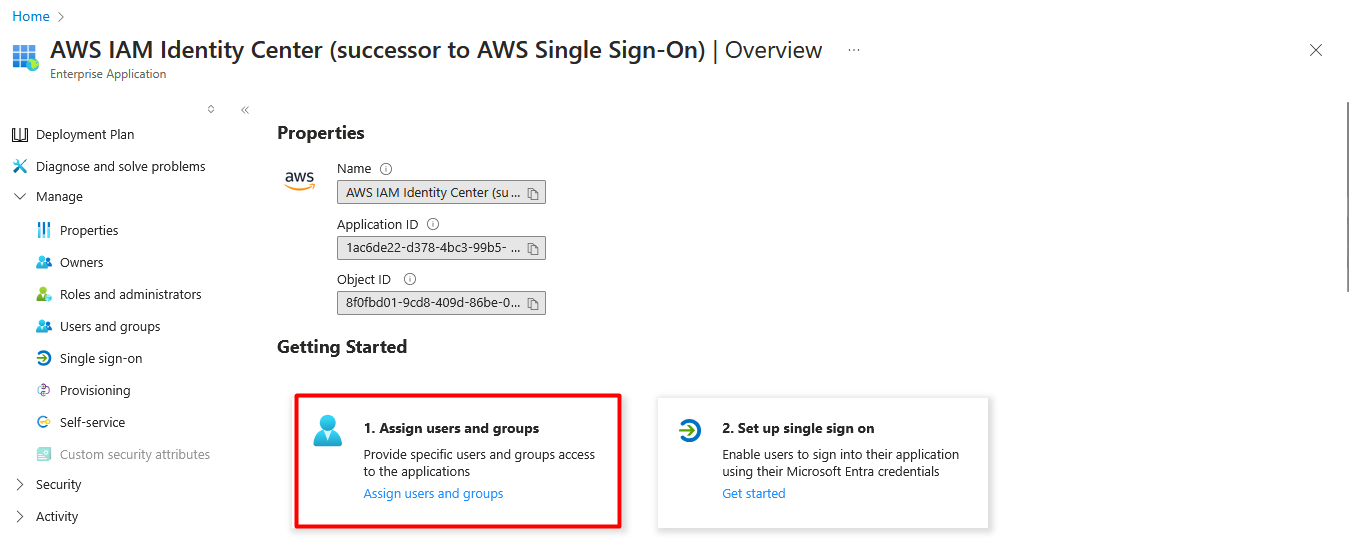
In Azure AD, go to Enterprise Applications → AWS IAM Identity Center.
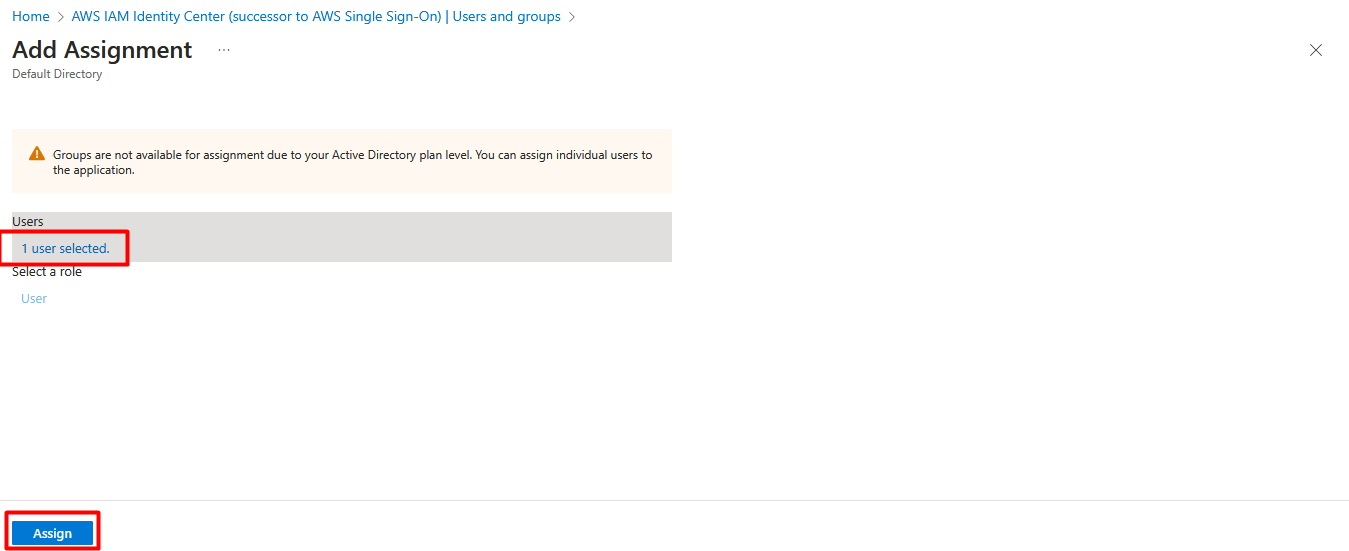
Click Users and Groups → Add User.
Select users to assign AWS access.


Click Assign.
Note: Ensure users have First Name and Last Name attributes populated; otherwise, provisioning may fail.
Verify provisioning status in Azure
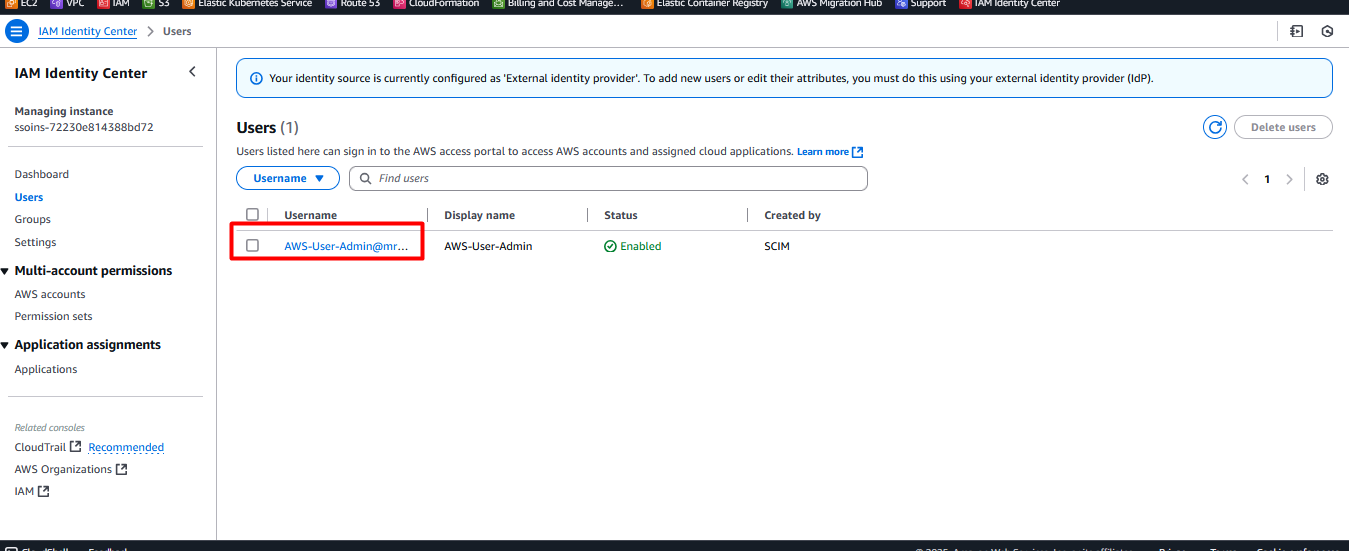
Verify user status in AWS
Step 7: Assigning AWS Permissions to Users
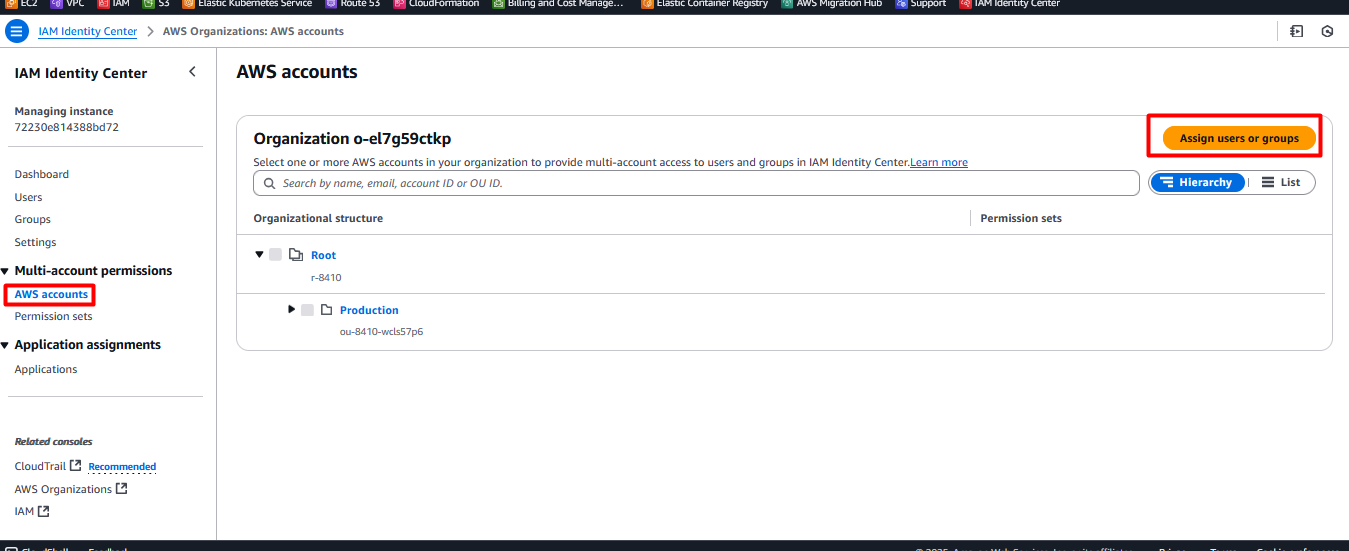
In AWS IAM Identity Center, go to AWS Accounts under Multi-Account Permissions.
Select the account where access is required.
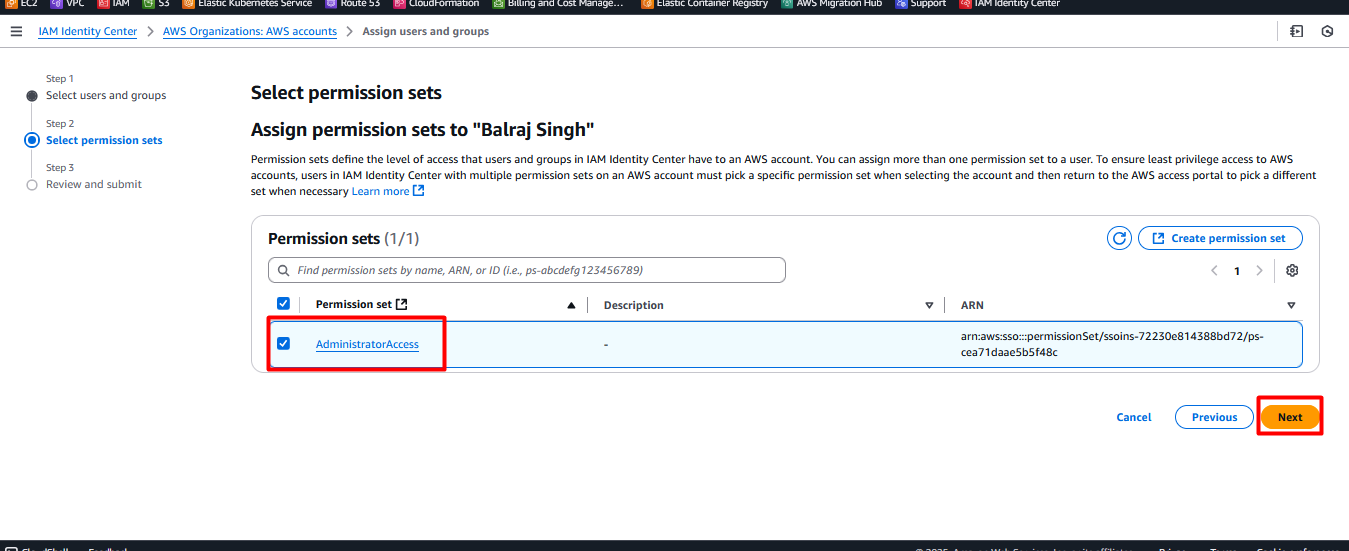
Click Assign Users or Groups.
Select the user provisioned from Azure AD.
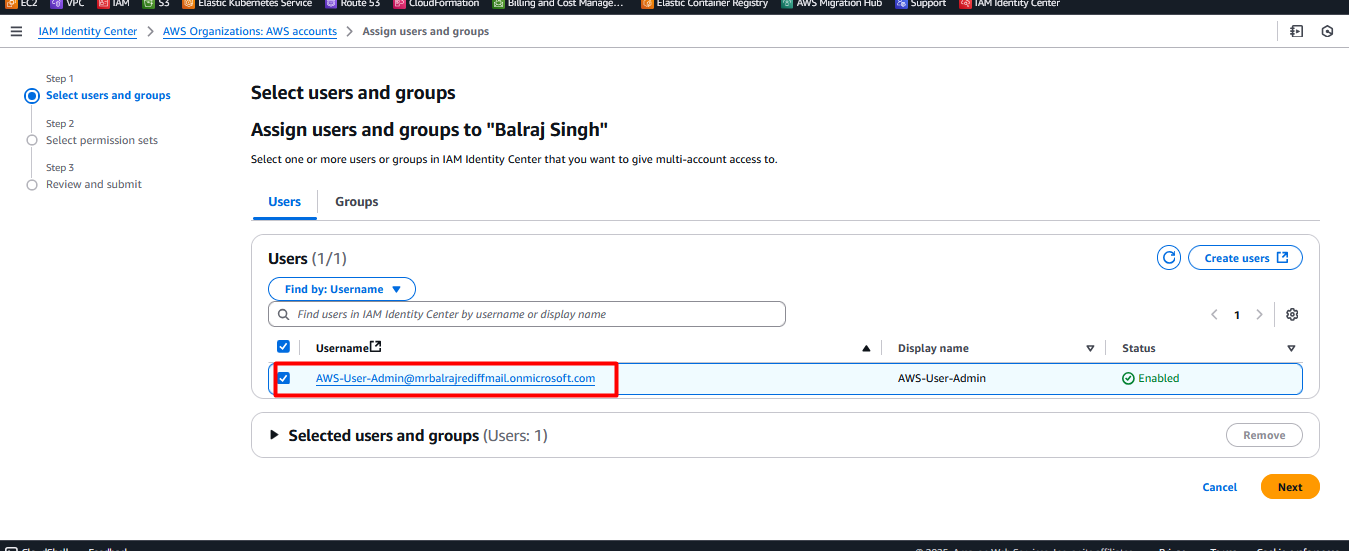
Click Next.
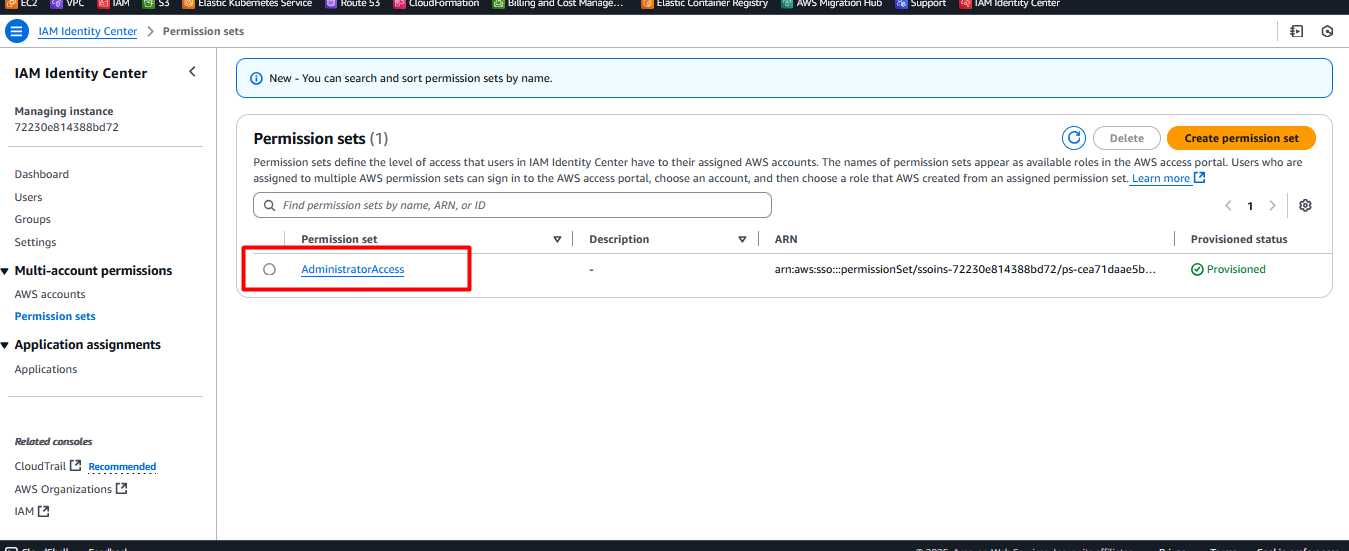
7.1 Create a Permission Set
Click Create Permission Set.
Choose Predefined Permission Set or Custom Permissions.
Select the required permission (e.g., Administrator Access).
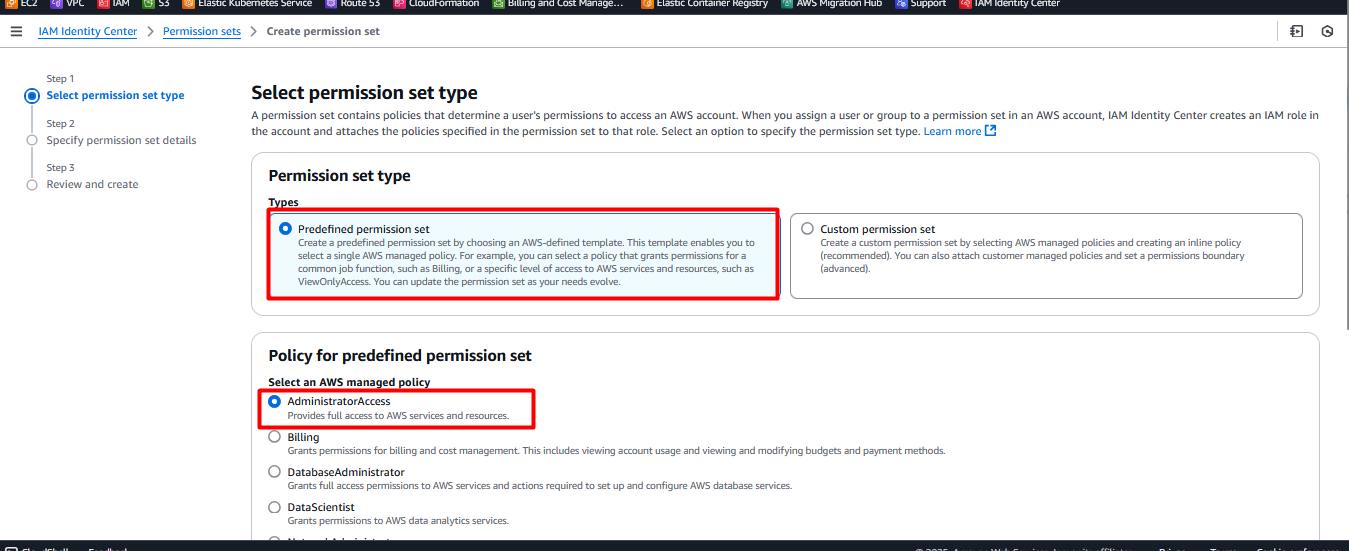
Click Next → Create.
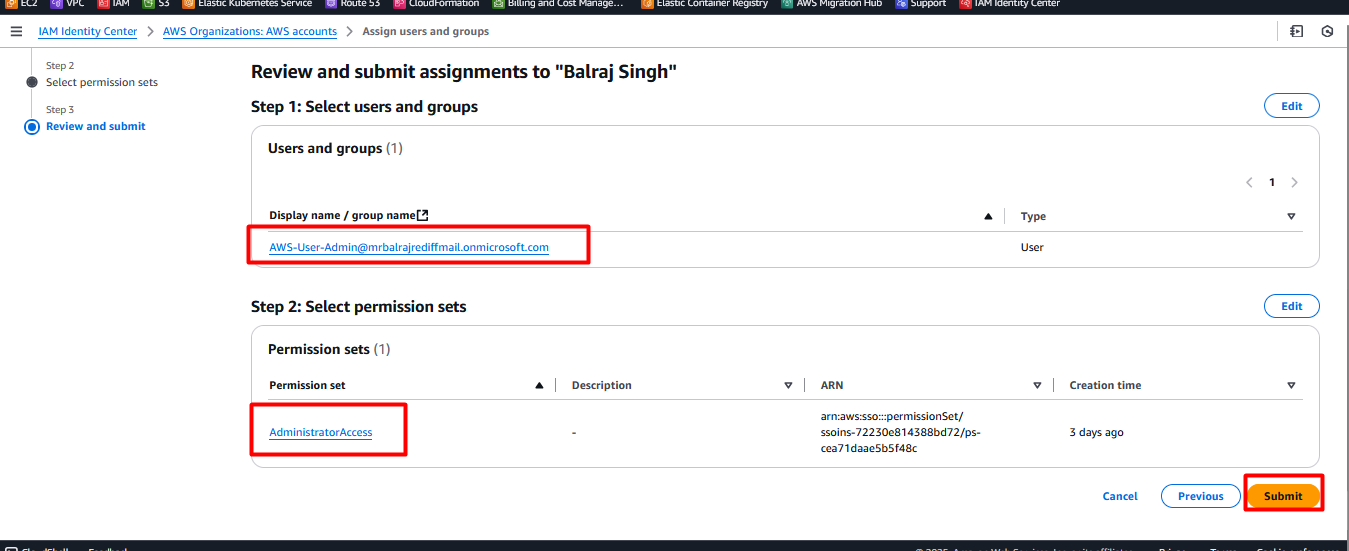
Go back to the previous screen, select the created permission set, and assign it to the user.
Step 8: Verifying Login to AWS Using Azure AD
8.1 Access AWS via Azure AD
In IAM Identity Center, copy the AWS Access Portal URL.
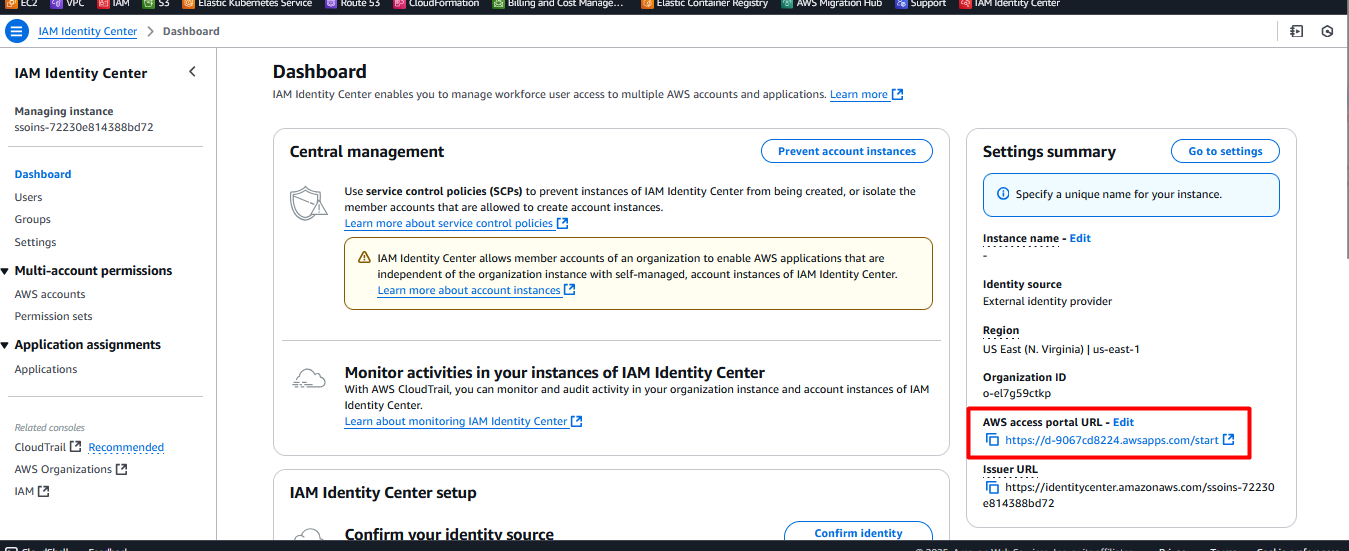
Open an Incognito Window and paste the URL.
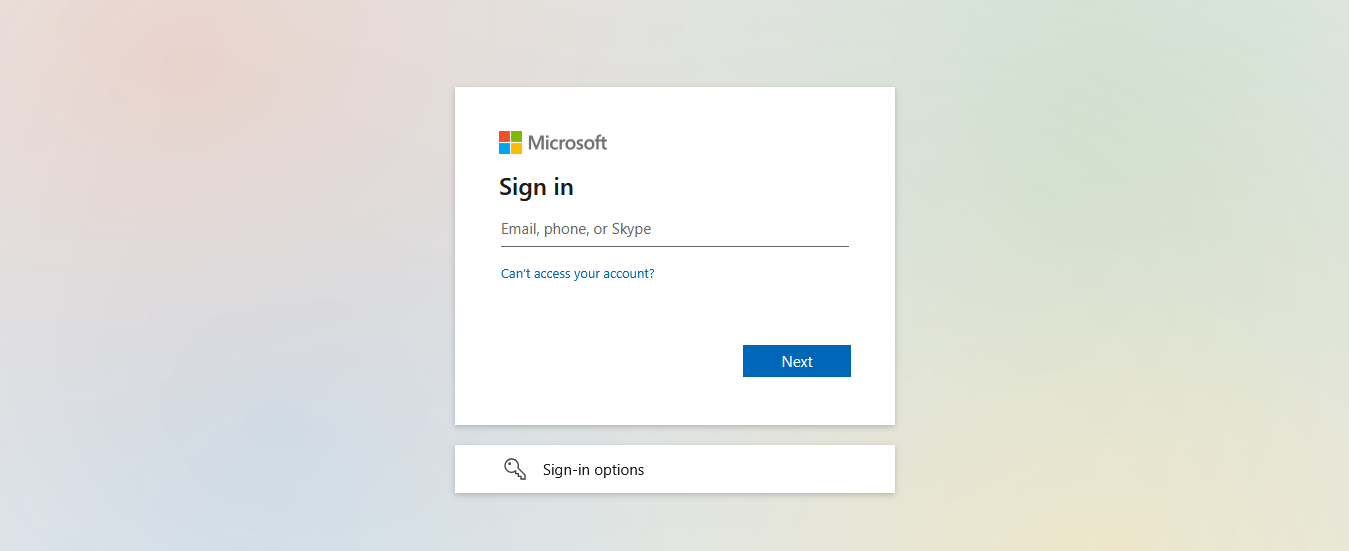
It will redirect to login.microsoftonline.com (Azure AD Login Page).

Enter Azure AD credentials and log in.
Choose the assigned AWS account and click Management Console.
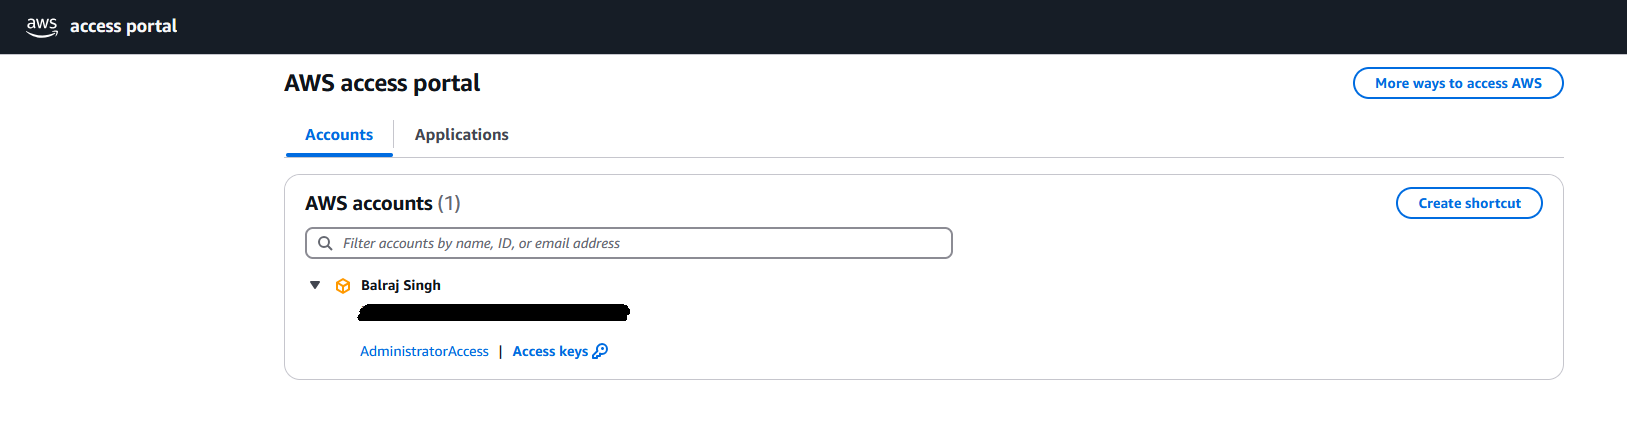
Successfully access AWS using Azure AD authentication.

Conclusion
By integrating Azure AD with AWS, organizations streamline authentication, enhance security, and simplify user management. Azure AD’s Conditional Access Policies further strengthen security, providing a single entity for identity management across cloud platforms.
Ref Link
Subscribe to my newsletter
Read articles from Balraj Singh directly inside your inbox. Subscribe to the newsletter, and don't miss out.
Written by
Balraj Singh
Balraj Singh
Tech enthusiast with 15 years of experience in IT, specializing in server management, VMware, AWS, Azure, and automation. Passionate about DevOps, cloud, and modern infrastructure tools like Terraform, Ansible, Packer, Jenkins, Docker, Kubernetes, and Azure DevOps. Passionate about technology and continuous learning, I enjoy sharing my knowledge and insights through blogging and real-world experiences to help the tech community grow!