Seamlessly Integrate On-Premises Active Directory with Azure AD
 Balraj Singh
Table of contents
- Prerequisites
- Step-by-Step Guide
- Setting Up the Infrastructure
- Inspect the C:\WindowsAzure logs:
- Verify the Installation
- Verify Users, Groups and Service account in Active Directory.
- Verify storage account and blob.
- To disable Internet Explorer Enhanced Security Configuration.
- To Verify TLS Status
- To enable TLS 1.2 on both Client and Server in Windows
- Step 1: Prepare Azure AD
- Step 2: Configure Azure AD Connect
- Step 3: Verify Synchronization
- Step 4: Configure Additional Settings (Optional)
- Error and Troubleshooting.
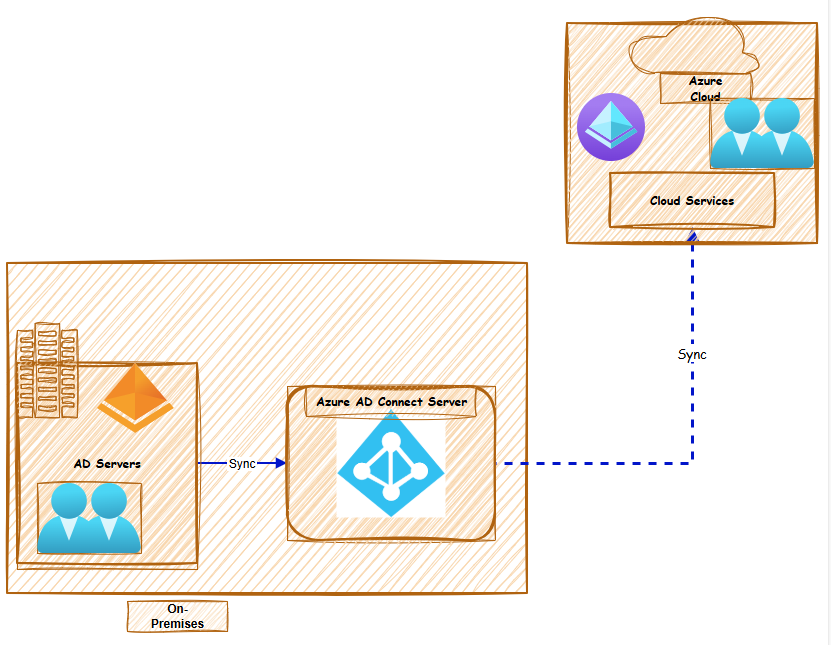
Prerequisites
Azure Subscription: Ensure you have an active Azure subscription.
Azure AD Tenant: Create an Azure AD tenant if you don't have one.
Azure AD Connect: Download and install Azure AD Connect on a server in your on-premises environment.
On-Premises Active Directory: Ensure your on-premises Active Directory domain is functional and accessible.
On-Premises Active Directory: Ensure your on-premises Active Directory domain has .net 4.7.2 and TLS 1.2 version installed
Terraform code for Infra setup
Note: Replace resource names and variables as per your requirement in terraform code
- Update values in
terraform.tfvars
- Update values in
Step-by-Step Guide
Setting Up the Infrastructure
I have created Terraform code to automatically set up Virtual Machines and install Active Directory, along with creating users, groups, and service accounts.
Note--> Virtual Machine will take approx 10 to 15 min to install the all required setup.
⇒ Virtual machines will be created named as
"ad-server"⇒ Active Direcotry install
⇒ Will create users, Groups and Service accounts
⇒ Storage Acccount & Blob Setup
First, we'll create the necessary virtual machines using terraform code.
Below is a terraform Code:
Once you clone repo and run the terraform command.
  $ ls -l
    -rw-r--r-- 1 bsingh 1049089  2309 Mar 26 20:29 Configure-AD-Users.ps1
    -rw-r--r-- 1 bsingh 1049089  7705 Mar 31 12:37 Configure-AD-Users-and-Groups.ps1
    -rw-r--r-- 1 bsingh 1049089  6842 Mar 26 20:29 Install-AD.ps1
    -rw-r--r-- 1 bsingh 1049089  6912 Mar 31 11:31 main.tf
    -rw-r--r-- 1 bsingh 1049089   492 Mar 26 17:14 terraform.tfvars
You need to run the terraform command.
- Run the following command.
    terraform init
    terraform fmt
    terraform validate
    terraform plan
    terraform apply
    # Optional <terraform apply --auto-approve>

Once you run the Terraform command, we will verify the following things to ensure everything is set up correctly through Terraform.
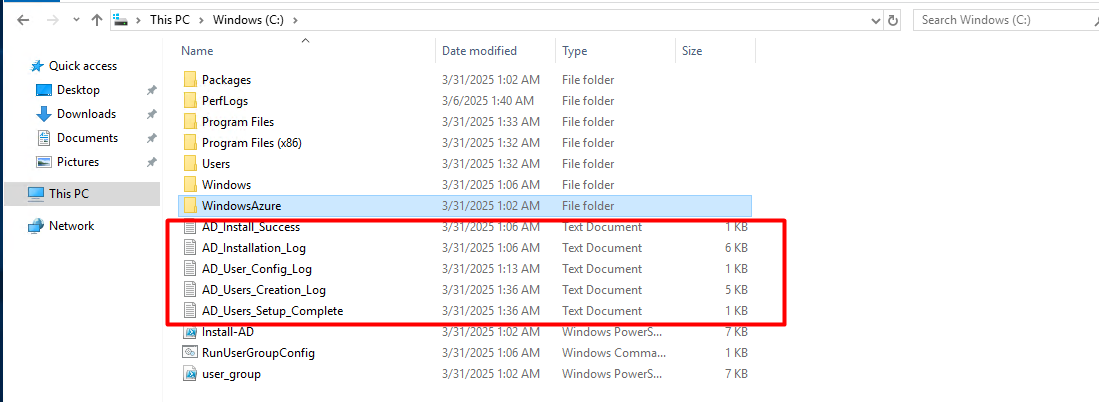
Inspect the C:\WindowsAzure logs:
Once connected to VM then you can check the status of the CustomScript script by inspecting the log files

Verify the Installation
Verify Virtual Machine Status in Azure Console

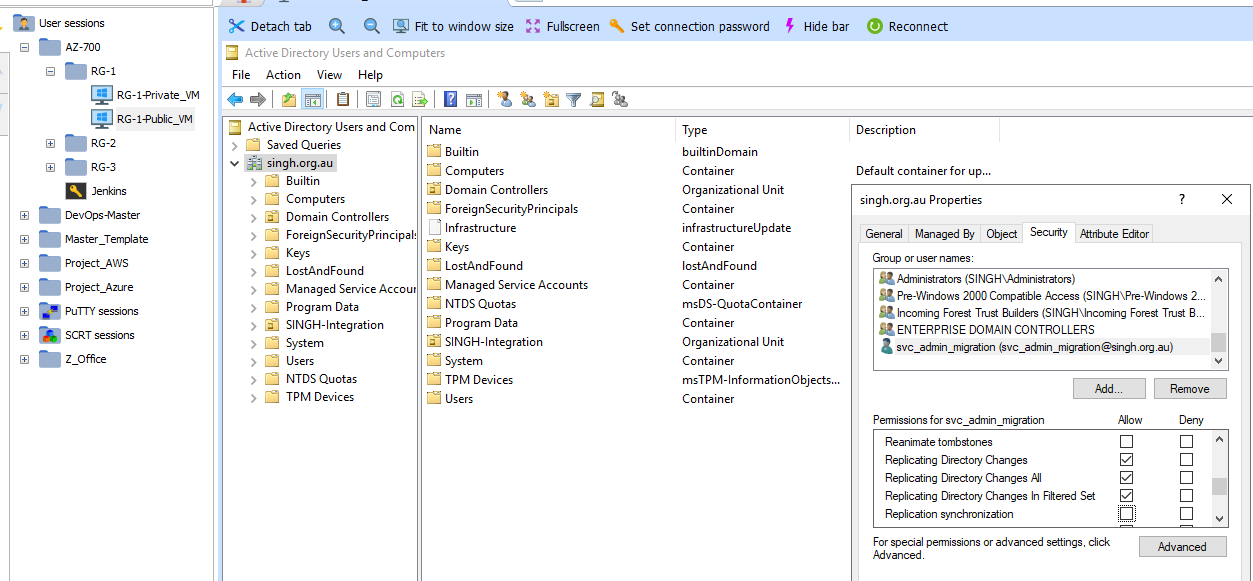
Verify Users, Groups and Service account in Active Directory.

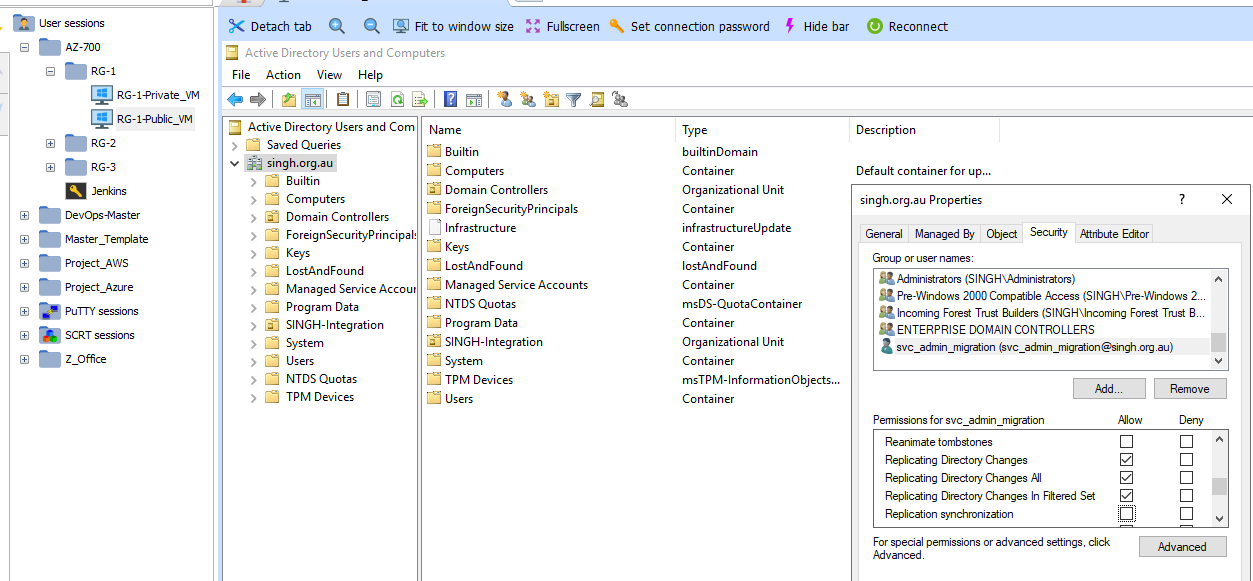
Permission to service account in Active Directory.
Below are the permissions need to assign to service account in Active Directory.
Verify storage account and blob.

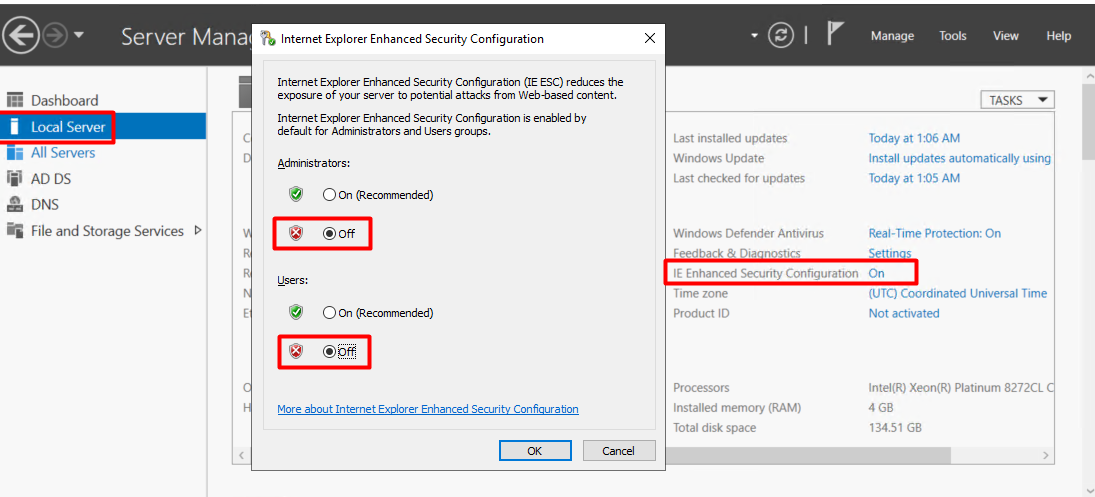
To disable Internet Explorer Enhanced Security Configuration.
To Verify TLS Status
To check whether TLS 1.2 is enabled on a Windows system using PowerShell, you can run the following command:
[Net.ServicePointManager]::SecurityProtocol.HasFlag([Net.SecurityProtocolType]::Tls12)
If TLS 1.2 is enabled, this will return True. Otherwise, it will return False.
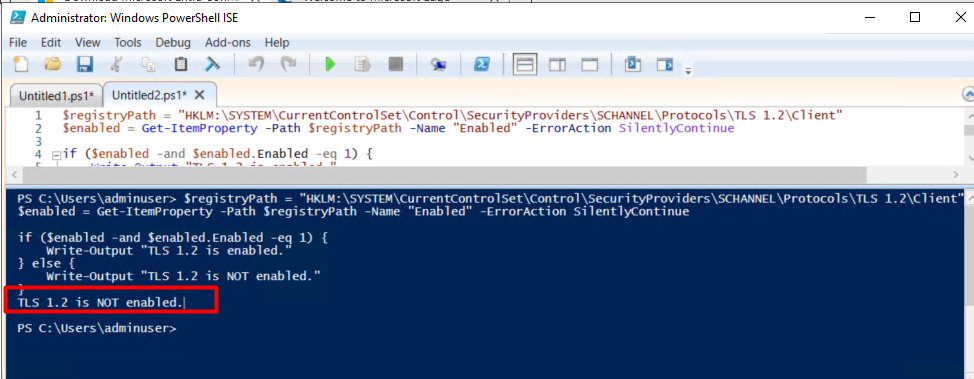
Alternative Method: Checking the Registry
You can also check the Windows registry to see if TLS 1.2 is explicitly enabled:
$registryPath = "HKLM:\SYSTEM\CurrentControlSet\Control\SecurityProviders\SCHANNEL\Protocols\TLS 1.2\Client"
$enabled = Get-ItemProperty -Path $registryPath -Name "Enabled" -ErrorAction SilentlyContinue

if ($enabled -and $enabled.Enabled -eq 1) {
    Write-Output "TLS 1.2 is enabled."
} else {
    Write-Output "TLS 1.2 is NOT enabled."
}
Verified that TLS is not enabled on the Server.
To enable TLS 1.2 on both Client and Server in Windows
To enable TLS 1.2 on both Client and Server in Windows, use the following PowerShell command:
# Enable TLS 1.2 for Client
New-Item -Path "HKLM:\SYSTEM\CurrentControlSet\Control\SecurityProviders\SCHANNEL\Protocols\TLS 1.2\Client" -Force | Out-Null
Set-ItemProperty -Path "HKLM:\SYSTEM\CurrentControlSet\Control\SecurityProviders\SCHANNEL\Protocols\TLS 1.2\Client" -Name "Enabled" -Value 1 -Type DWord
Set-ItemProperty -Path "HKLM:\SYSTEM\CurrentControlSet\Control\SecurityProviders\SCHANNEL\Protocols\TLS 1.2\Client" -Name "DisabledByDefault" -Value 0 -Type DWord

# Enable TLS 1.2 for Server
New-Item -Path "HKLM:\SYSTEM\CurrentControlSet\Control\SecurityProviders\SCHANNEL\Protocols\TLS 1.2\Server" -Force | Out-Null
Set-ItemProperty -Path "HKLM:\SYSTEM\CurrentControlSet\Control\SecurityProviders\SCHANNEL\Protocols\TLS 1.2\Server" -Name "Enabled" -Value 1 -Type DWord
Set-ItemProperty -Path "HKLM:\SYSTEM\CurrentControlSet\Control\SecurityProviders\SCHANNEL\Protocols\TLS 1.2\Server" -Name "DisabledByDefault" -Value 0 -Type DWord

# Enable TLS 1.2 for .NET Framework (for older apps)
New-ItemProperty -Path "HKLM:\SOFTWARE\Microsoft\.NETFramework\v4.0.30319" -Name "SchUseStrongCrypto" -Value 1 -PropertyType DWord -Force | Out-Null
New-ItemProperty -Path "HKLM:\SOFTWARE\Wow6432Node\Microsoft\.NETFramework\v4.0.30319" -Name "SchUseStrongCrypto" -Value 1 -PropertyType DWord -Force | Out-Null

Write-Output "TLS 1.2 has been enabled. A system restart is recommended for changes to take effect."
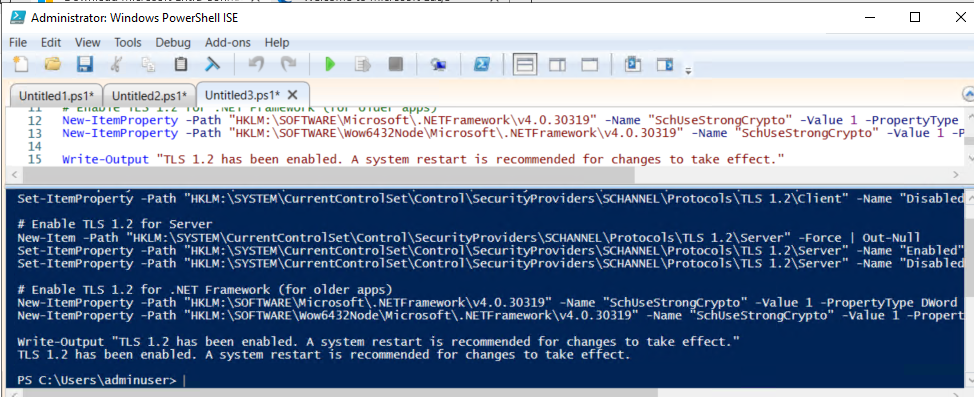
Explanation: *- Enables TLS 1.2 for Client and Server in the SCHANNEL registry settings.
Enables strong cryptography in .NET Framework, so applications use TLS 1.2 by default.
A system restart is required to fully apply the changes.*
Verified that
TLS statuson the Server.
Step 1: Prepare Azure AD
Login to Azure Portal: Go to Azure Portal and log in with your Azure account.
Create Azure AD Tenant:
Navigate to
Microsoft Intra ID>Create a directory.Follow the prompts to create a new directory.
Create a new admin user for migration:
Will create a new user in Azure AD and assign the
global administratorrights.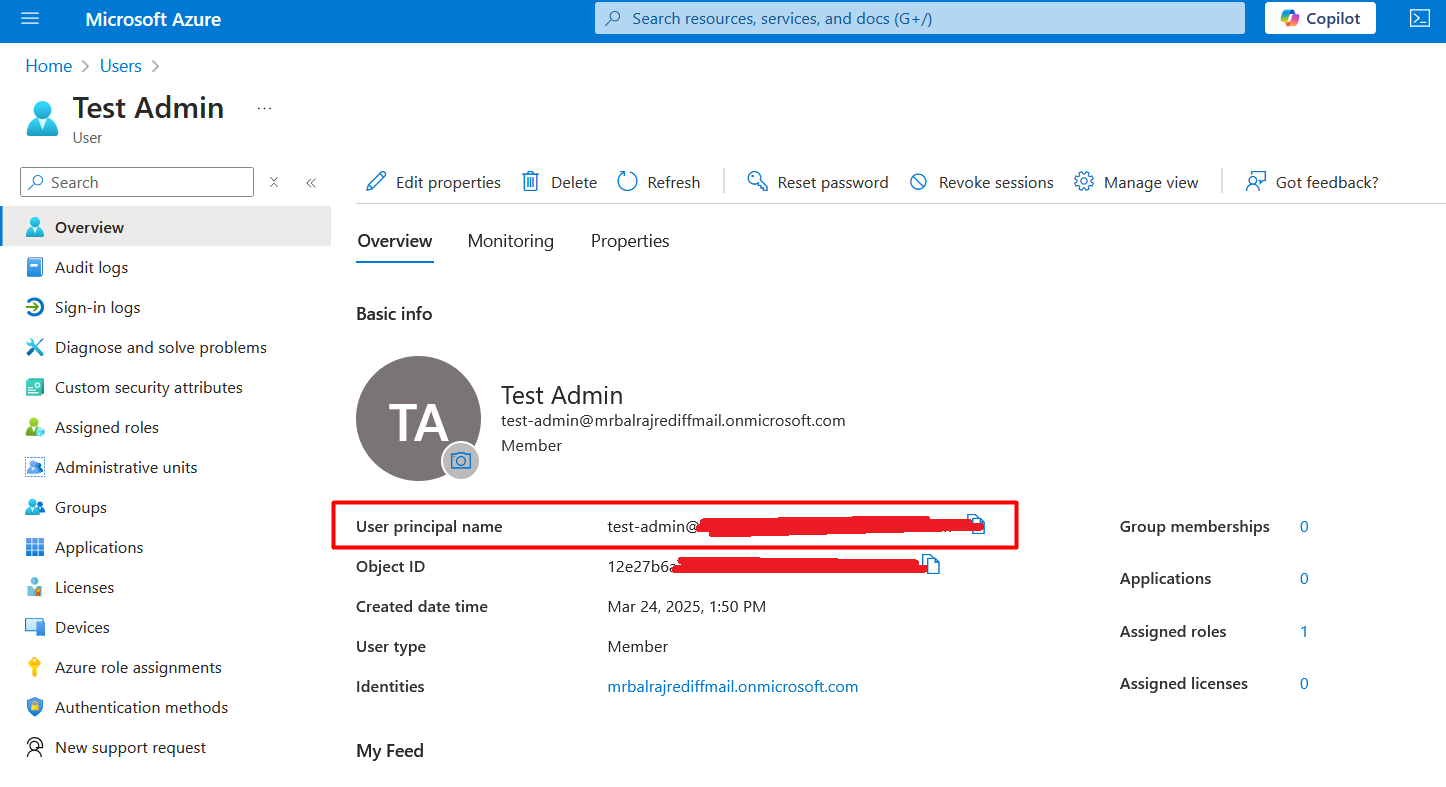

Step 2: Configure Azure AD Connect
Download Azure AD Connect:
- Go to the Azure AD Connect download page and download the latest version.
Install Azure AD Connect:
Run the installer on a server in your on-premises environment.
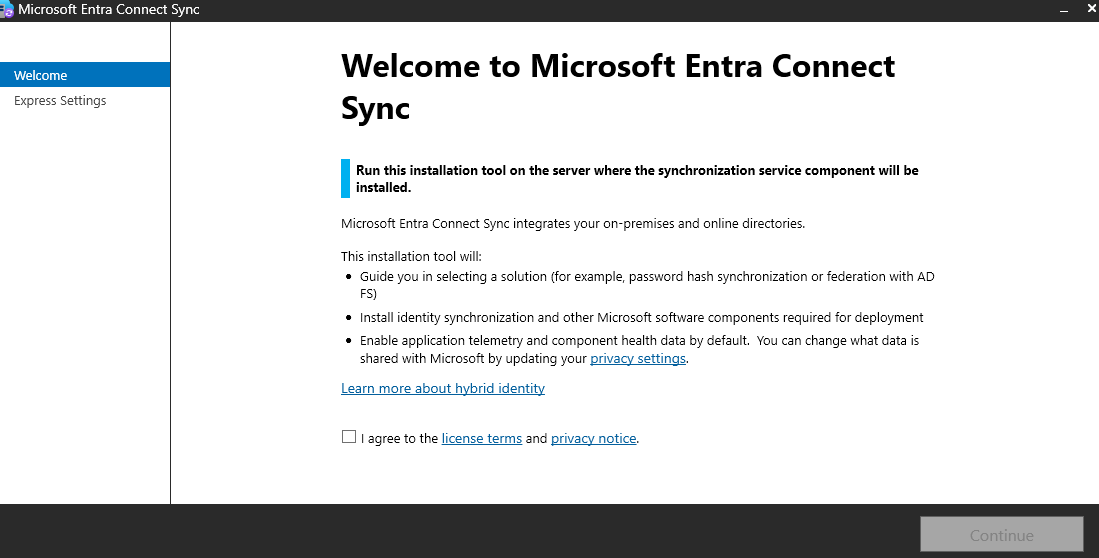
Choose the
Customizeoption for a simple setup.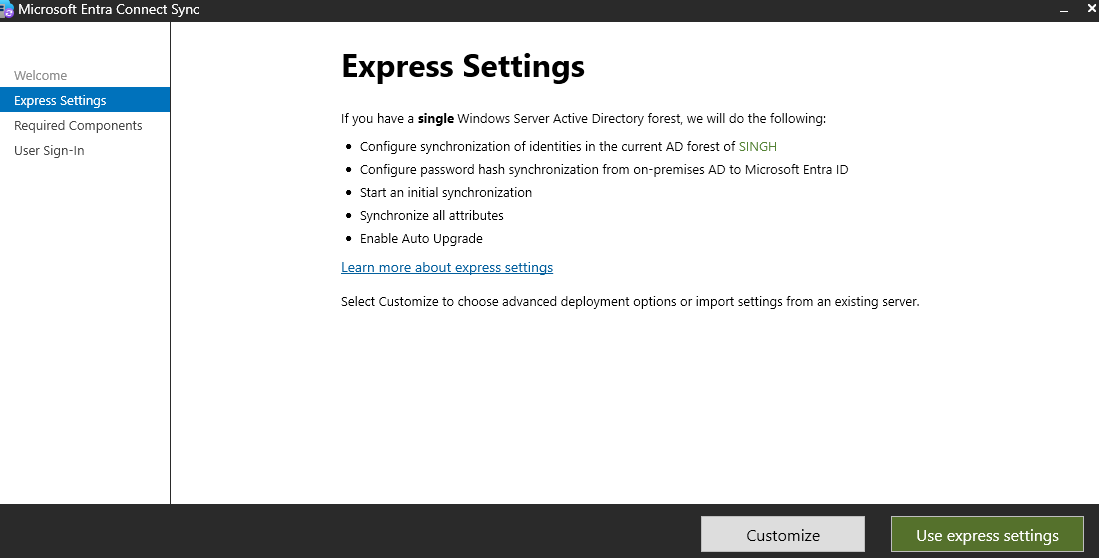
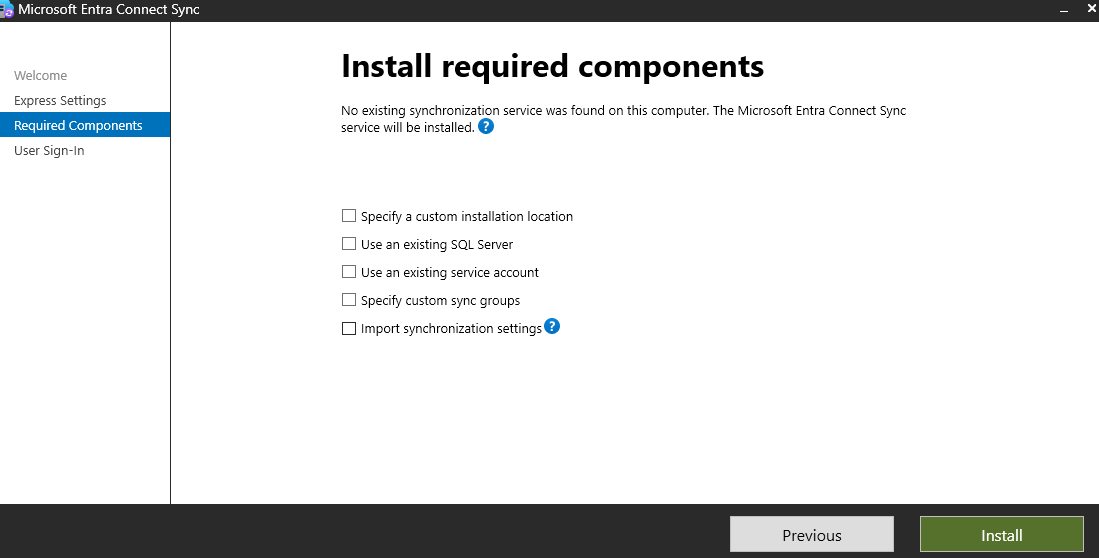
Leave as it is and click on install
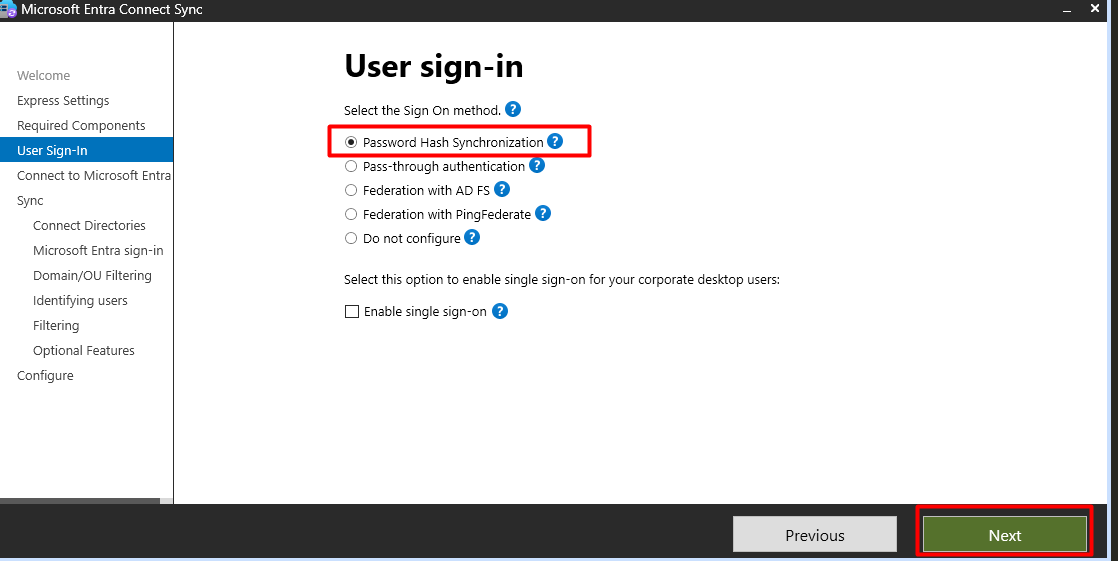
Select the Sign On Method
Configure Azure AD Connect:
During the setup, you will be prompted to enter your Azure AD and on-premises AD credentials.
Type the user which created in Step 1 which has
global administratorrights select the Sign On Method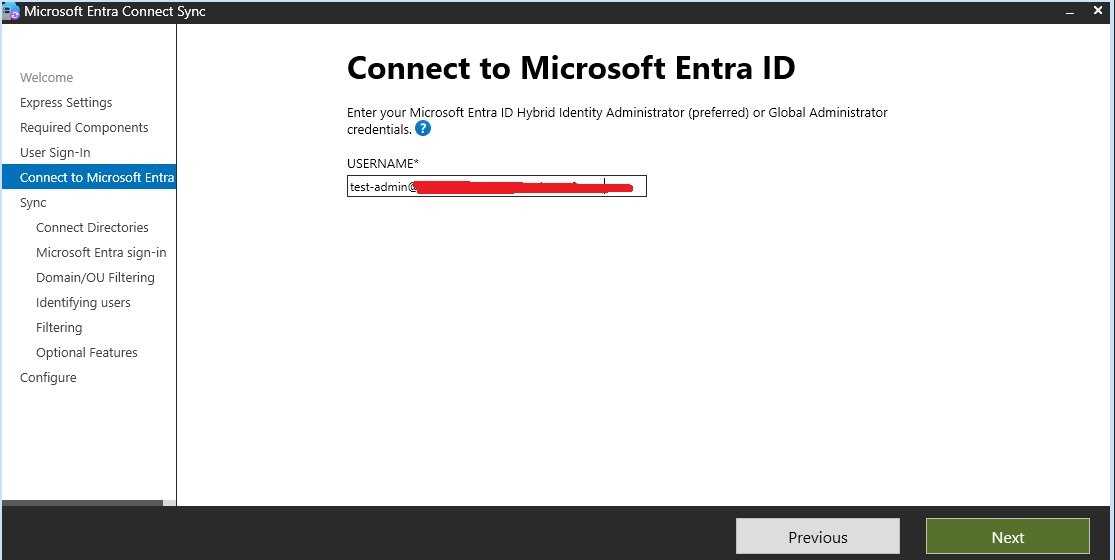
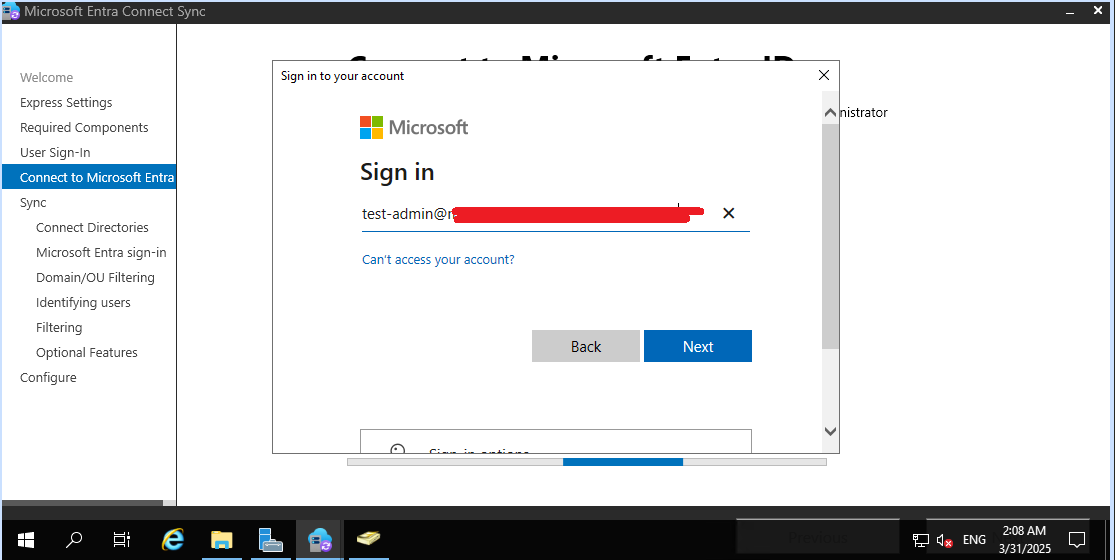
Select the
Singh.org.audomain for synchronization and click on add directory.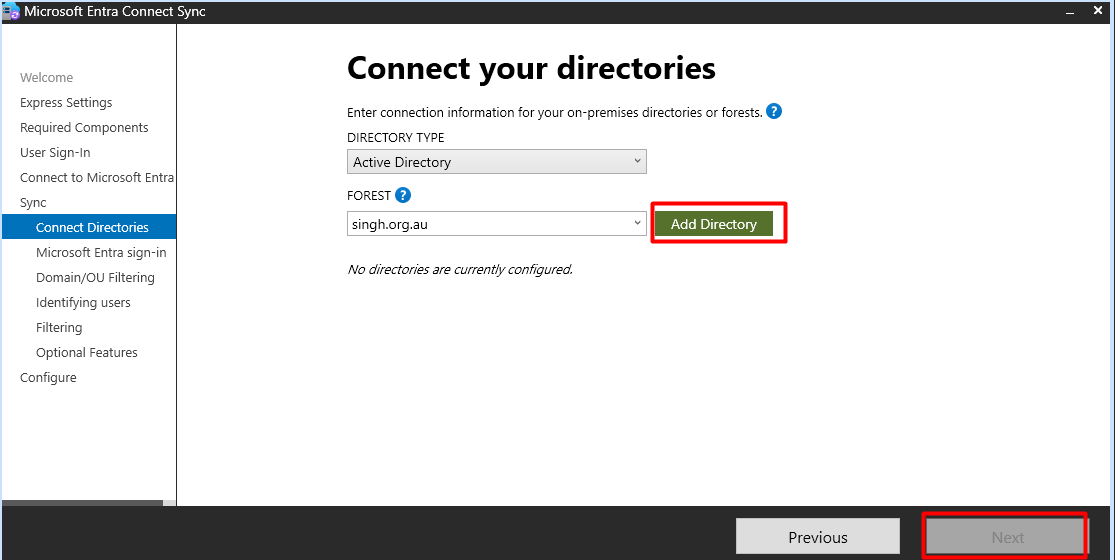
Select
use existing AD Accountand typeservice accountdetails.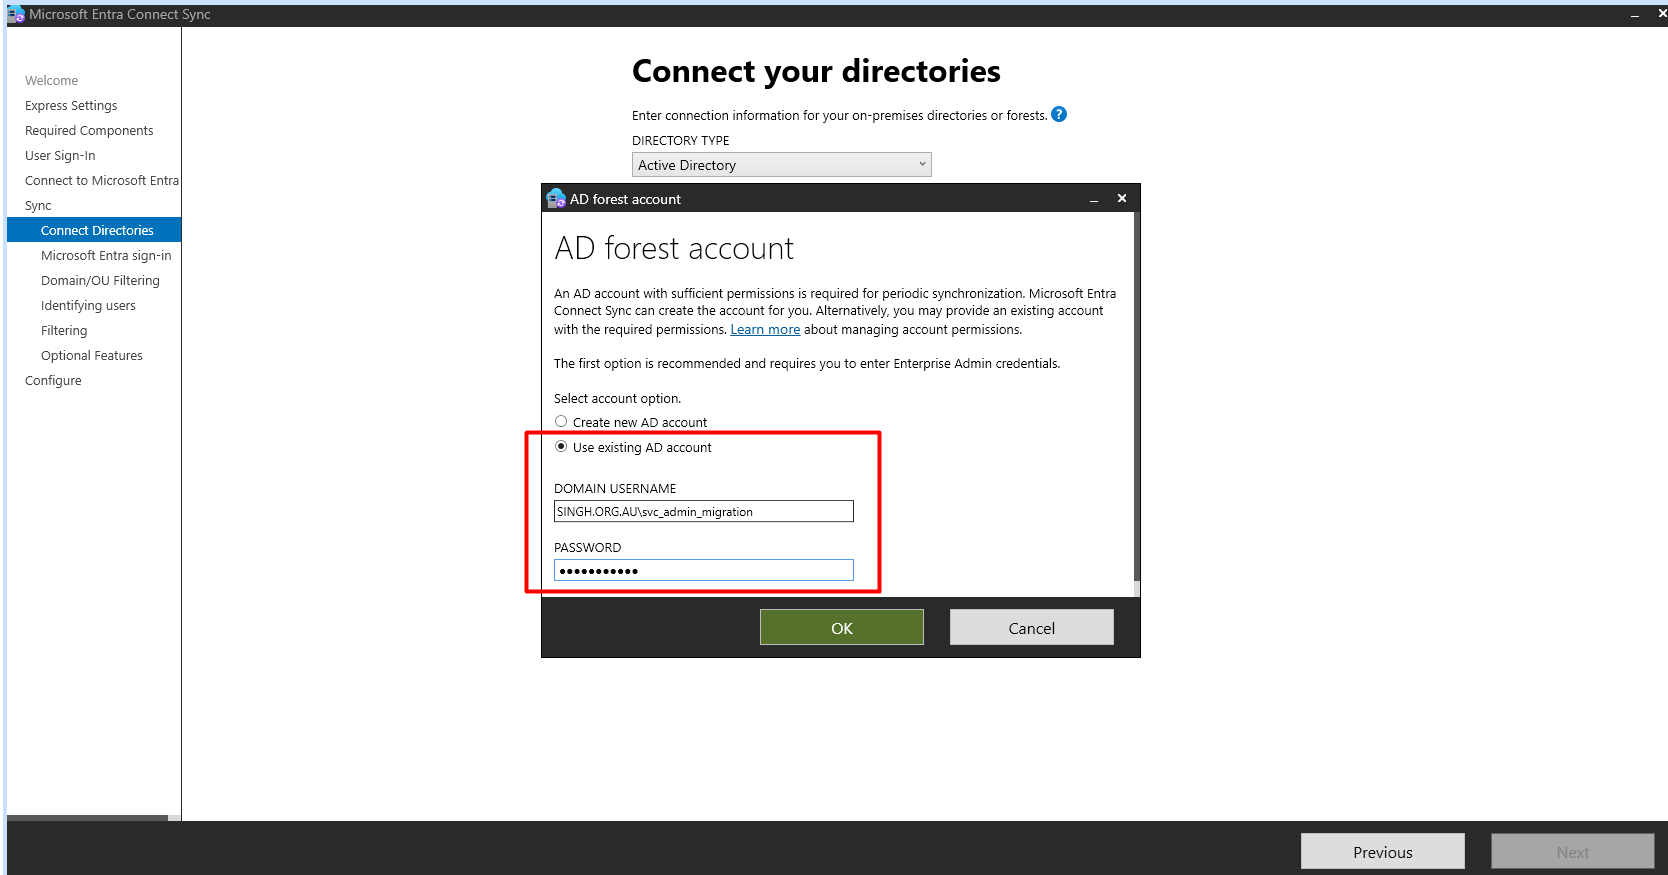
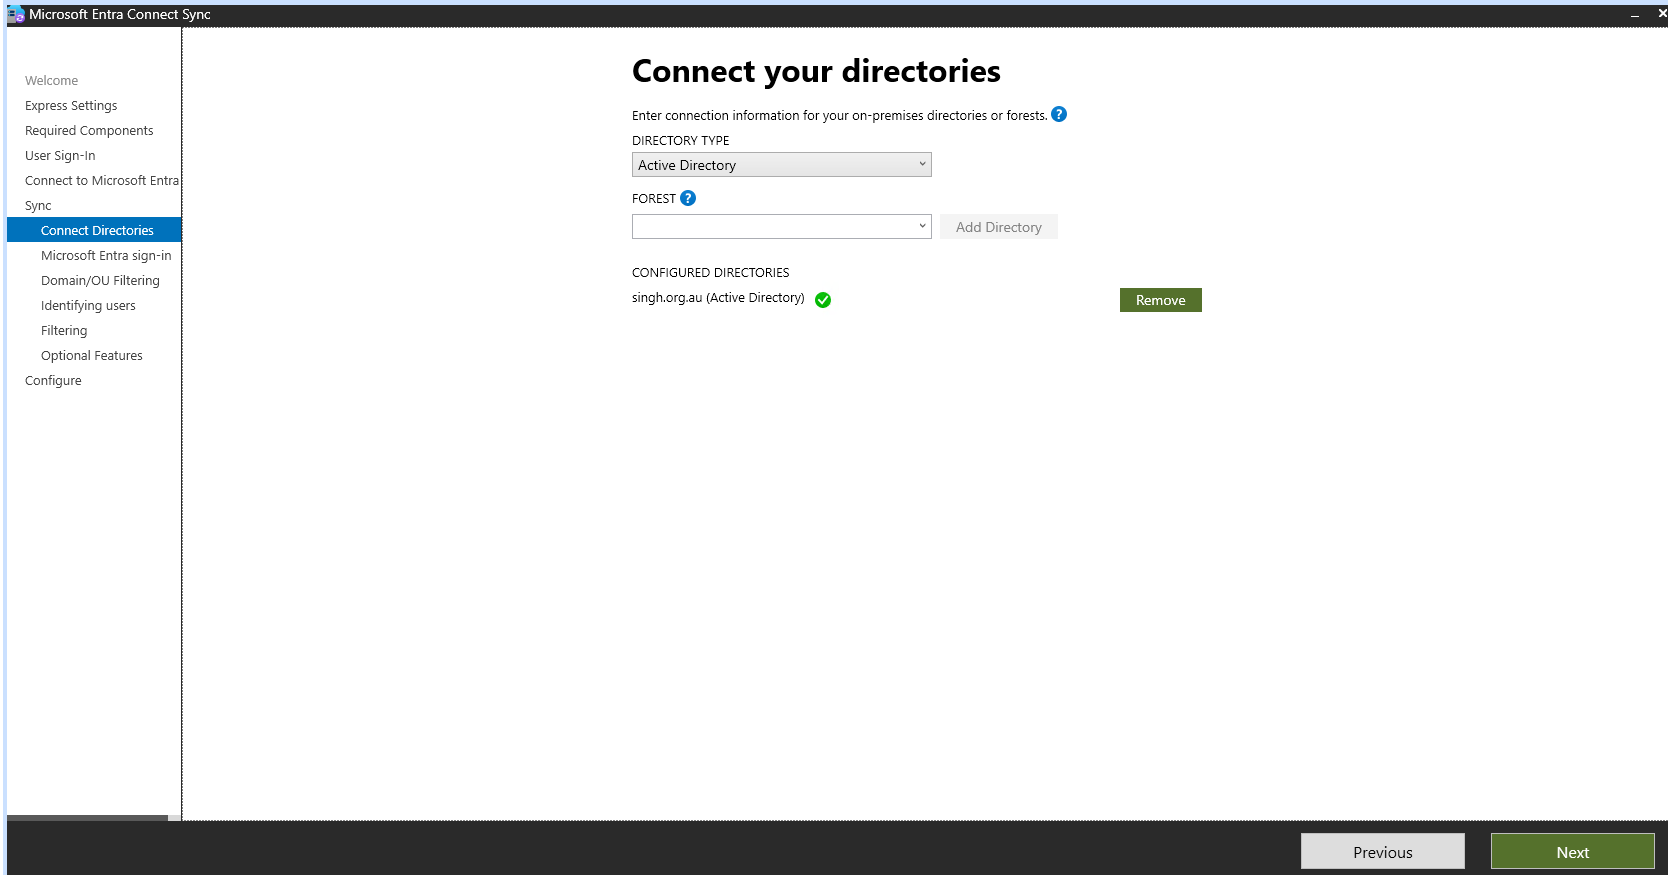
click on
Continue without matching all UPN suffixes to verified domains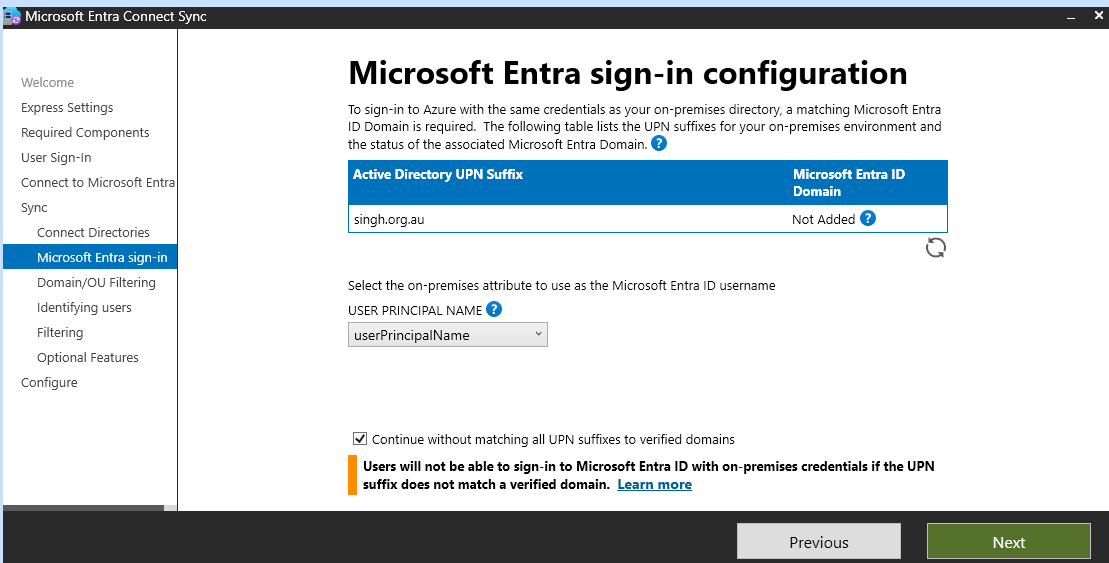
Click on
Sync selected domains and OUs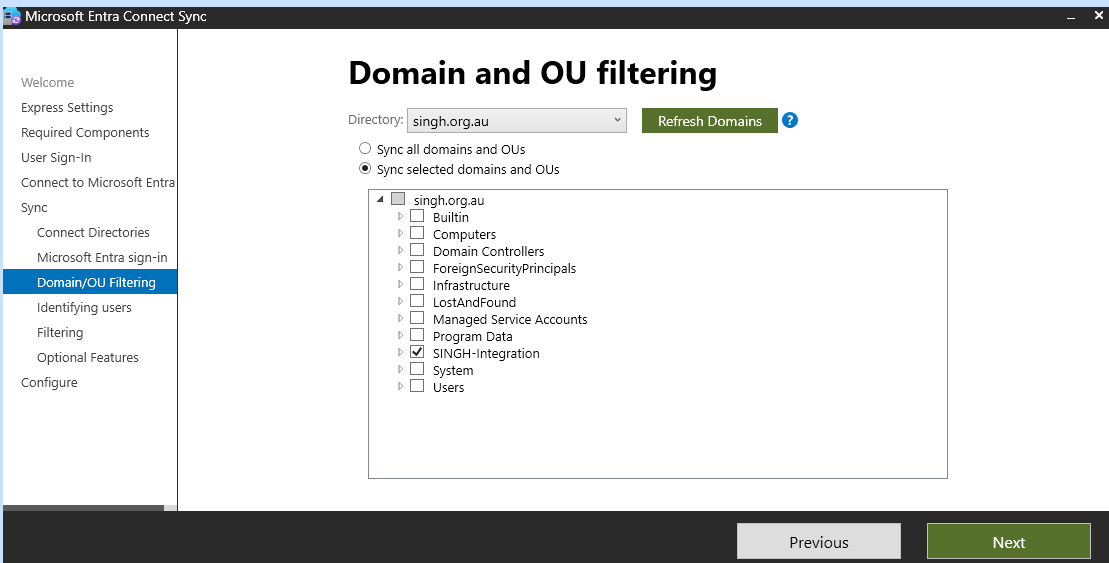
leave the default setting and click next.
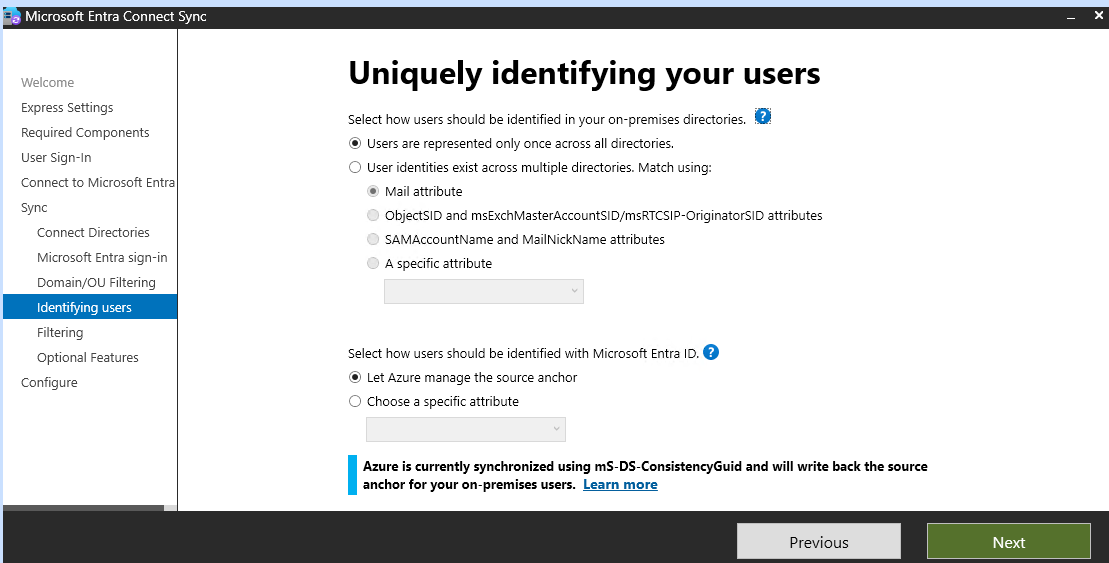
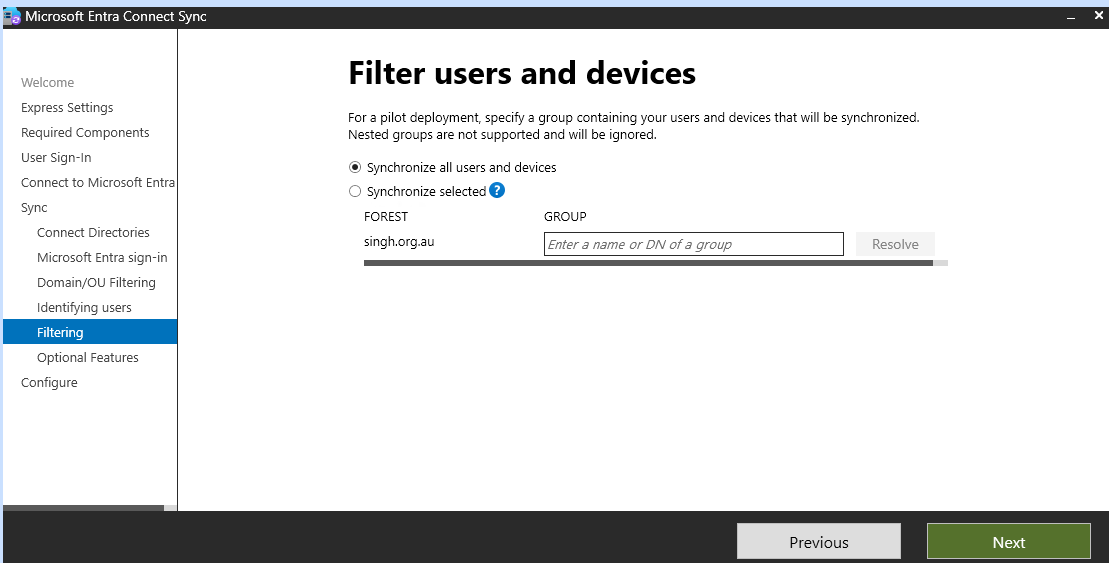
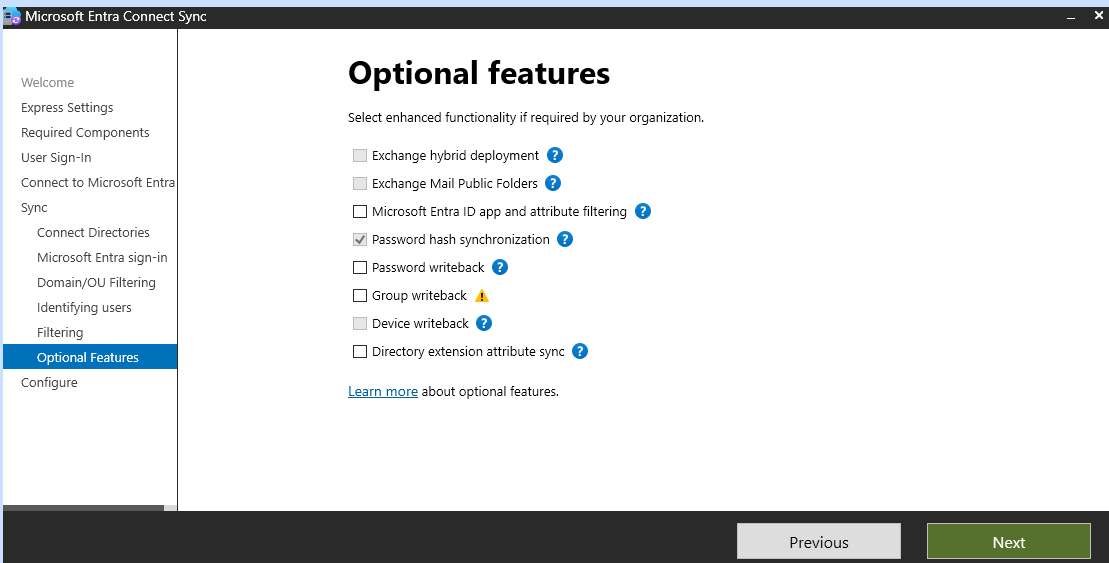
Choose the synchronization options that best fit your environment (e.g., password hash synchronization, pass-through authentication).
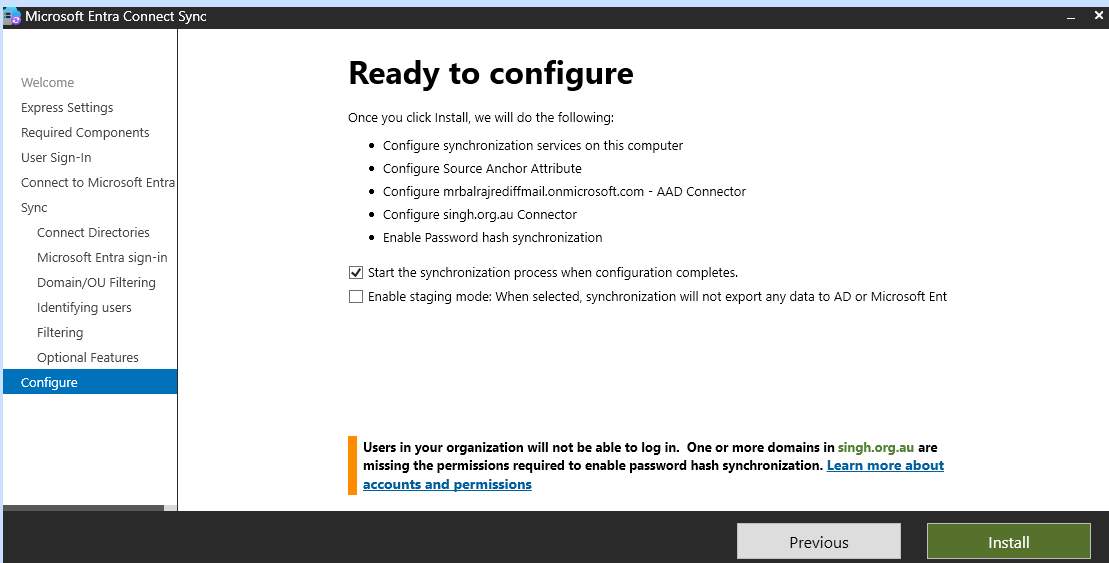
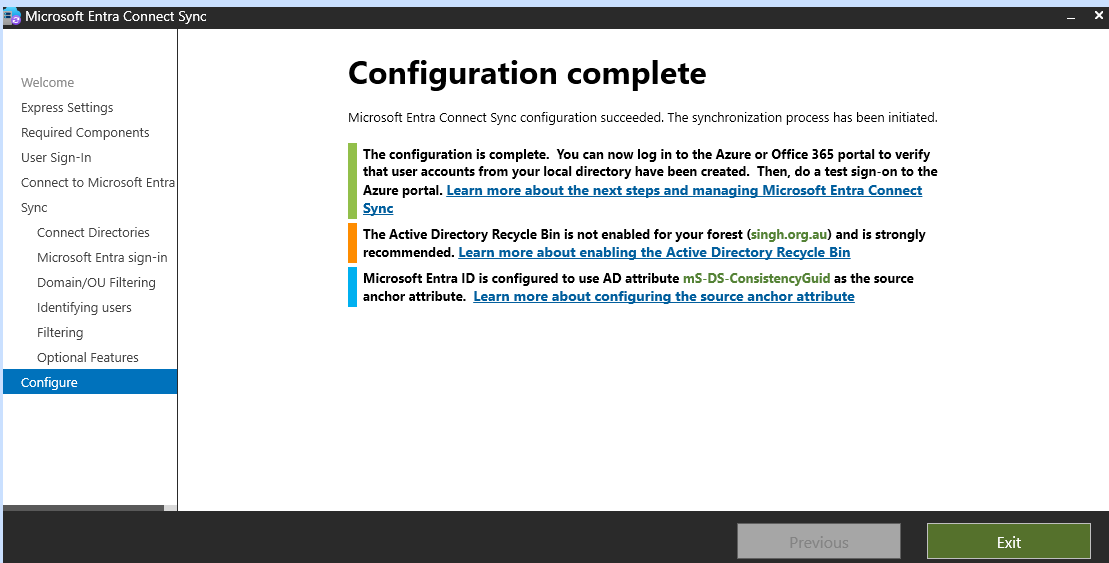
Step 3: Verify Synchronization
Initial Sync:
Once the setup is complete, Azure AD Connect will perform an initial synchronization.
You can monitor the sync status in the Azure AD Connect tool.
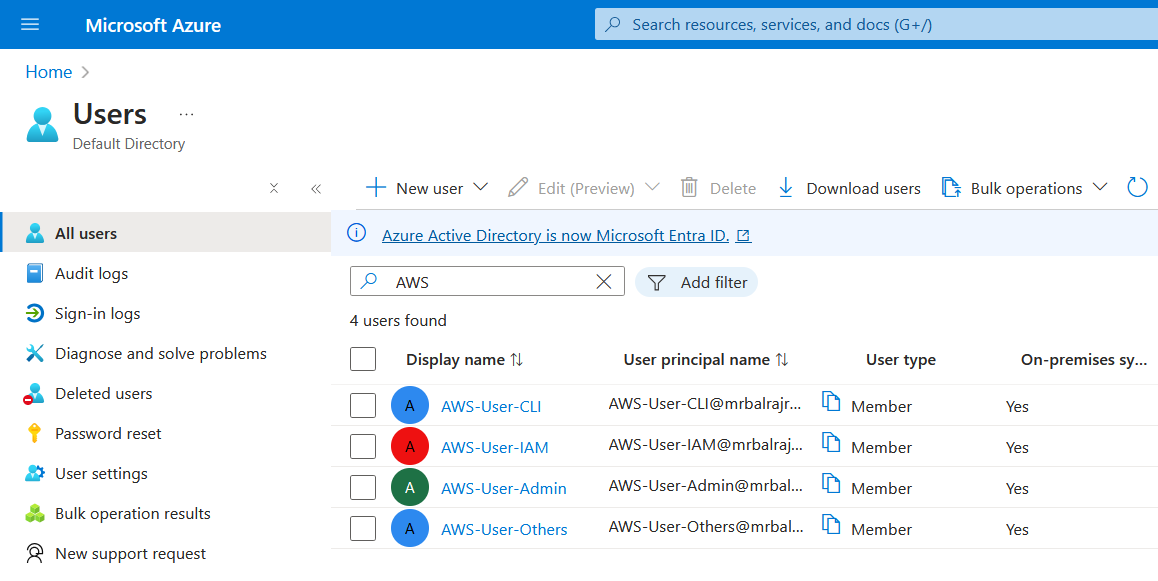
Verify Users in Azure AD:
Go to
Azure Active Directory>Usersin the Azure Portal.Verify that the on-premises AD users are listed in Azure AD.
Users Status
Group Status
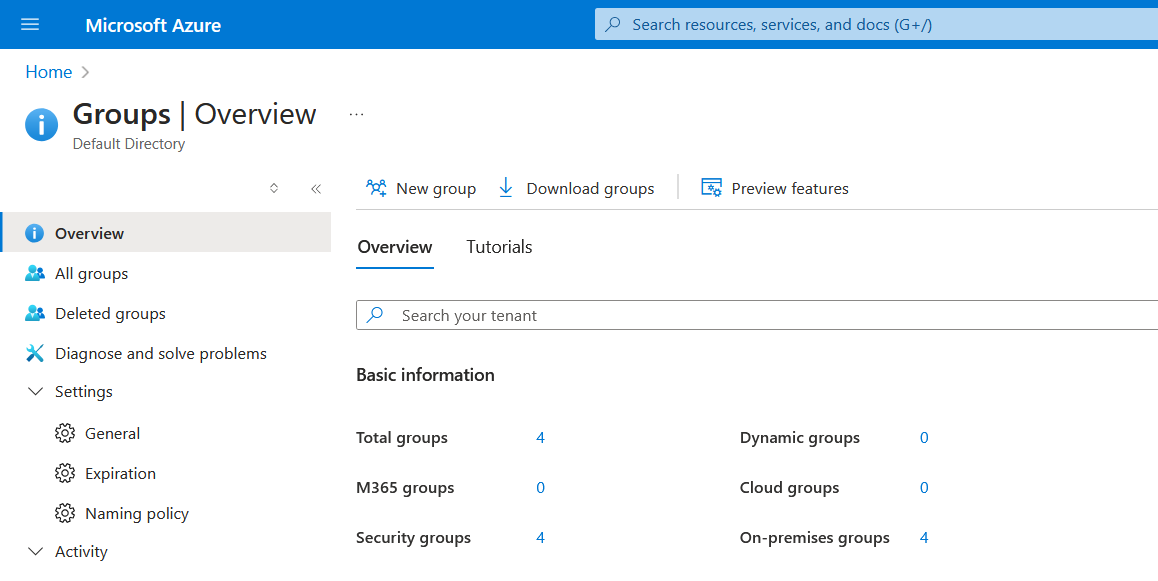
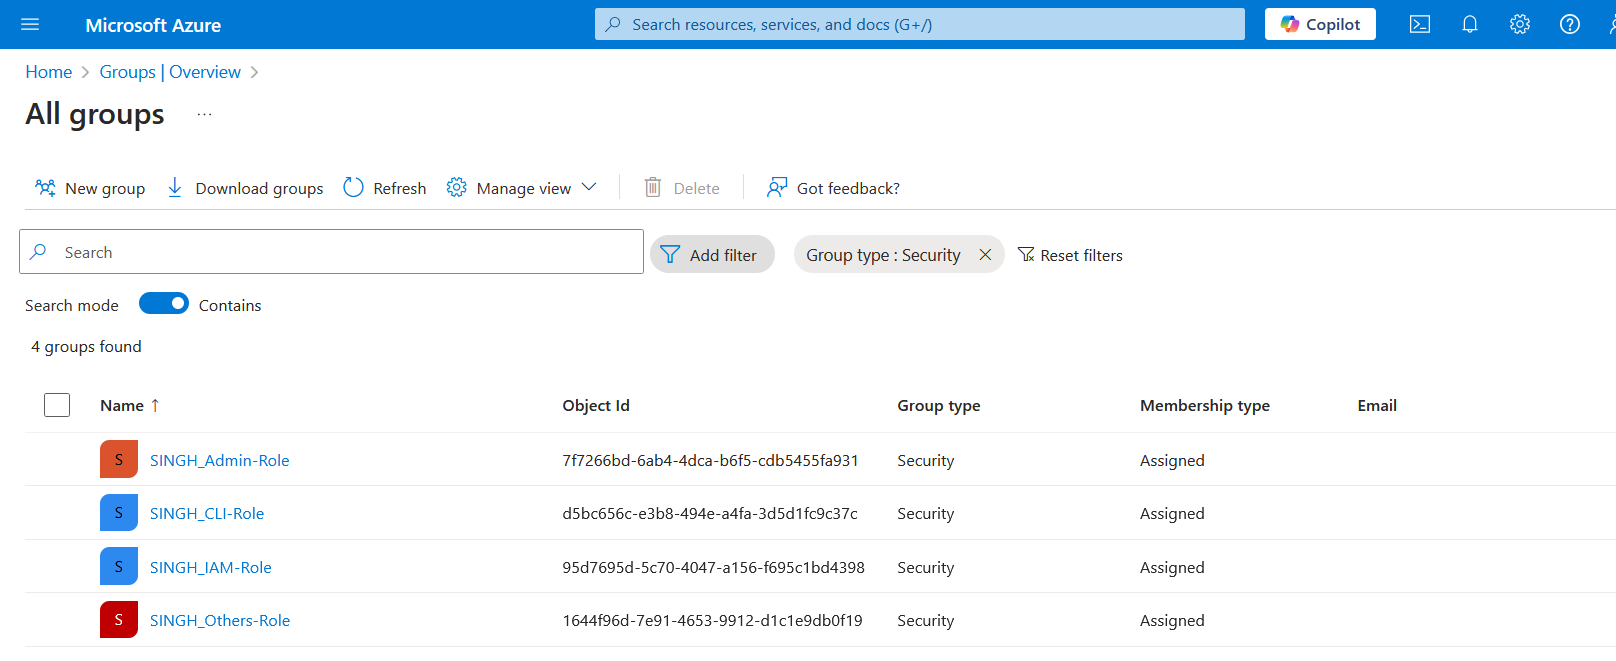
Step 4: Configure Additional Settings (Optional)
Password Writeback:
If you want to enable password writeback, configure it in the Azure AD Connect tool.
This allows users to change their passwords in Azure AD and have them written back to the on-premises AD.
Single Sign-On (SSO):
- Configure SSO to allow users to sign in once and access both on-premises and cloud resources.
Error and Troubleshooting.
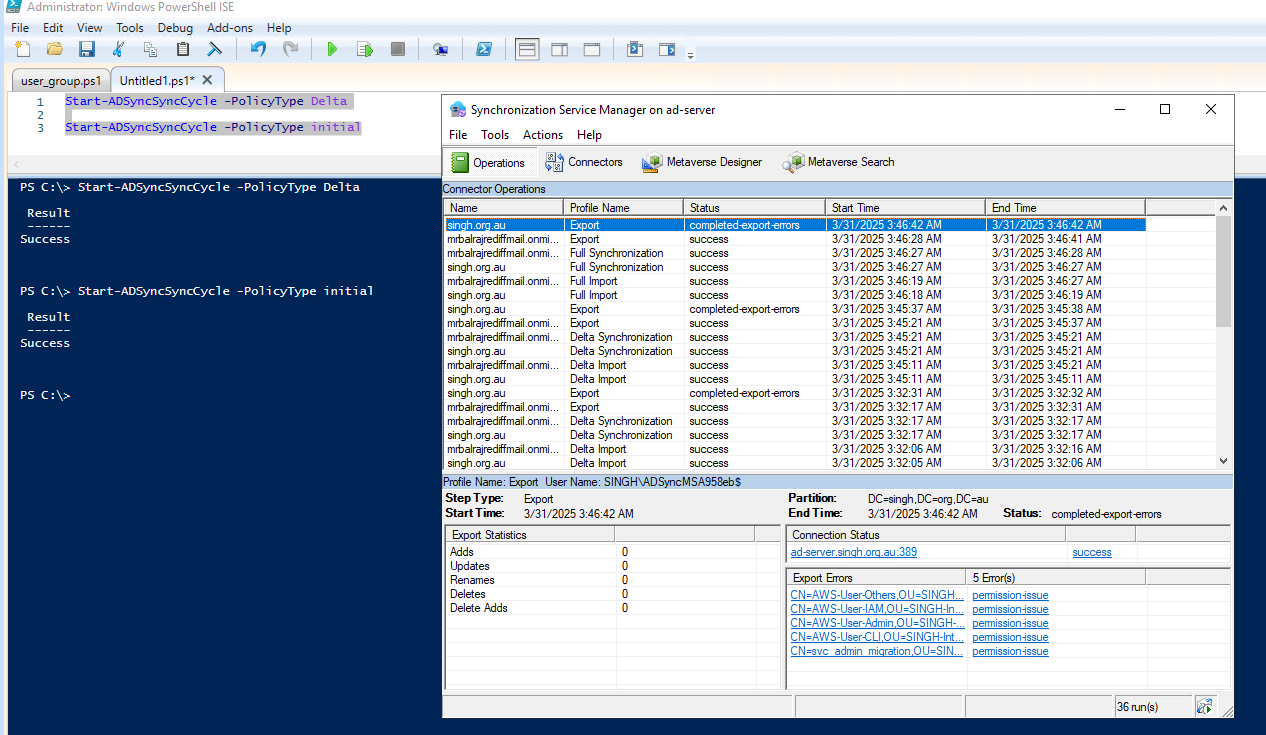
- I could not log in with a user account and noticed that users were getting a permission issue.
Fix
I used a service account to configure the AD migration but didn't give it permission at the domain level. So, I granted the necessary permissions to the service account at the domain level and then ran the following PowerShell command to sync the changes and verify them in the service manager.
Start-ADSyncSyncCycle -PolicyType Delta
Start-ADSyncSyncCycle -PolicyType initial
Delete Azure Security Group (Optional)
az ad group delete --group 'GroupName' --verbose
Conclusion
By following these steps, you will have successfully synchronized your on-premises Active Directory with Azure AD. This setup ensures that your users can access both on-premises and cloud resources with a single set of credentials.
Ref Link
Subscribe to my newsletter
Read articles from Balraj Singh directly inside your inbox. Subscribe to the newsletter, and don't miss out.
Written by

Balraj Singh
Balraj Singh
Tech enthusiast with 15 years of experience in IT, specializing in server management, VMware, AWS, Azure, and automation. Passionate about DevOps, cloud, and modern infrastructure tools like Terraform, Ansible, Packer, Jenkins, Docker, Kubernetes, and Azure DevOps. Passionate about technology and continuous learning, I enjoy sharing my knowledge and insights through blogging and real-world experiences to help the tech community grow!