AWS IAM: Managing Users, Roles, and Policies
 Rajratan Gaikwad
Hey fellas, welcome back to our AWS series! Now that you've set up your AWS account and explored the dashboard, it's time to dive into AWS Identity and Access Management (IAM)—the backbone of security in AWS. IAM controls who can access what, and trust me, mastering it is non-negotiable for any DevOps engineer. So buckle up, stay sharp, and let's ride into one of the most critical topics in AWS security!
Introduction
AWS Identity and Access Management (IAM) is a crucial security service that controls access to AWS resources. As a DevOps engineer, you must ensure that users, services, and applications have only the permissions they need, following the Principle of Least Privilege (PoLP). IAM helps you control who (users) can access what (resources) in your AWS account and how (permissions). It ensures your cloud infrastructure remains secure while allowing team members to do their jobs effectively.
Understanding IAM Core Concepts
Before diving into the practical steps, let's quickly review the core concepts of IAM:
Users: Individual identities for people or services that need access to your AWS resources
Groups: Collections of users that share the same permissions
Roles: Sets of permissions that can be assumed by AWS services or external identities
Policies: Documents that define permissions and specify what actions are allowed or denied
Least Privilege Principle: Giving users only the permissions they need to perform their tasks and nothing more
1. Creating IAM Users and Groups
Why Do We Need IAM Users and Groups?
The root user (the first AWS account owner) has unlimited access by default. Instead of using the root user, you should create IAM users with specific permissions for security reasons.
Step 1: Create an IAM User
Login to AWS Console → Open IAM Dashboard.
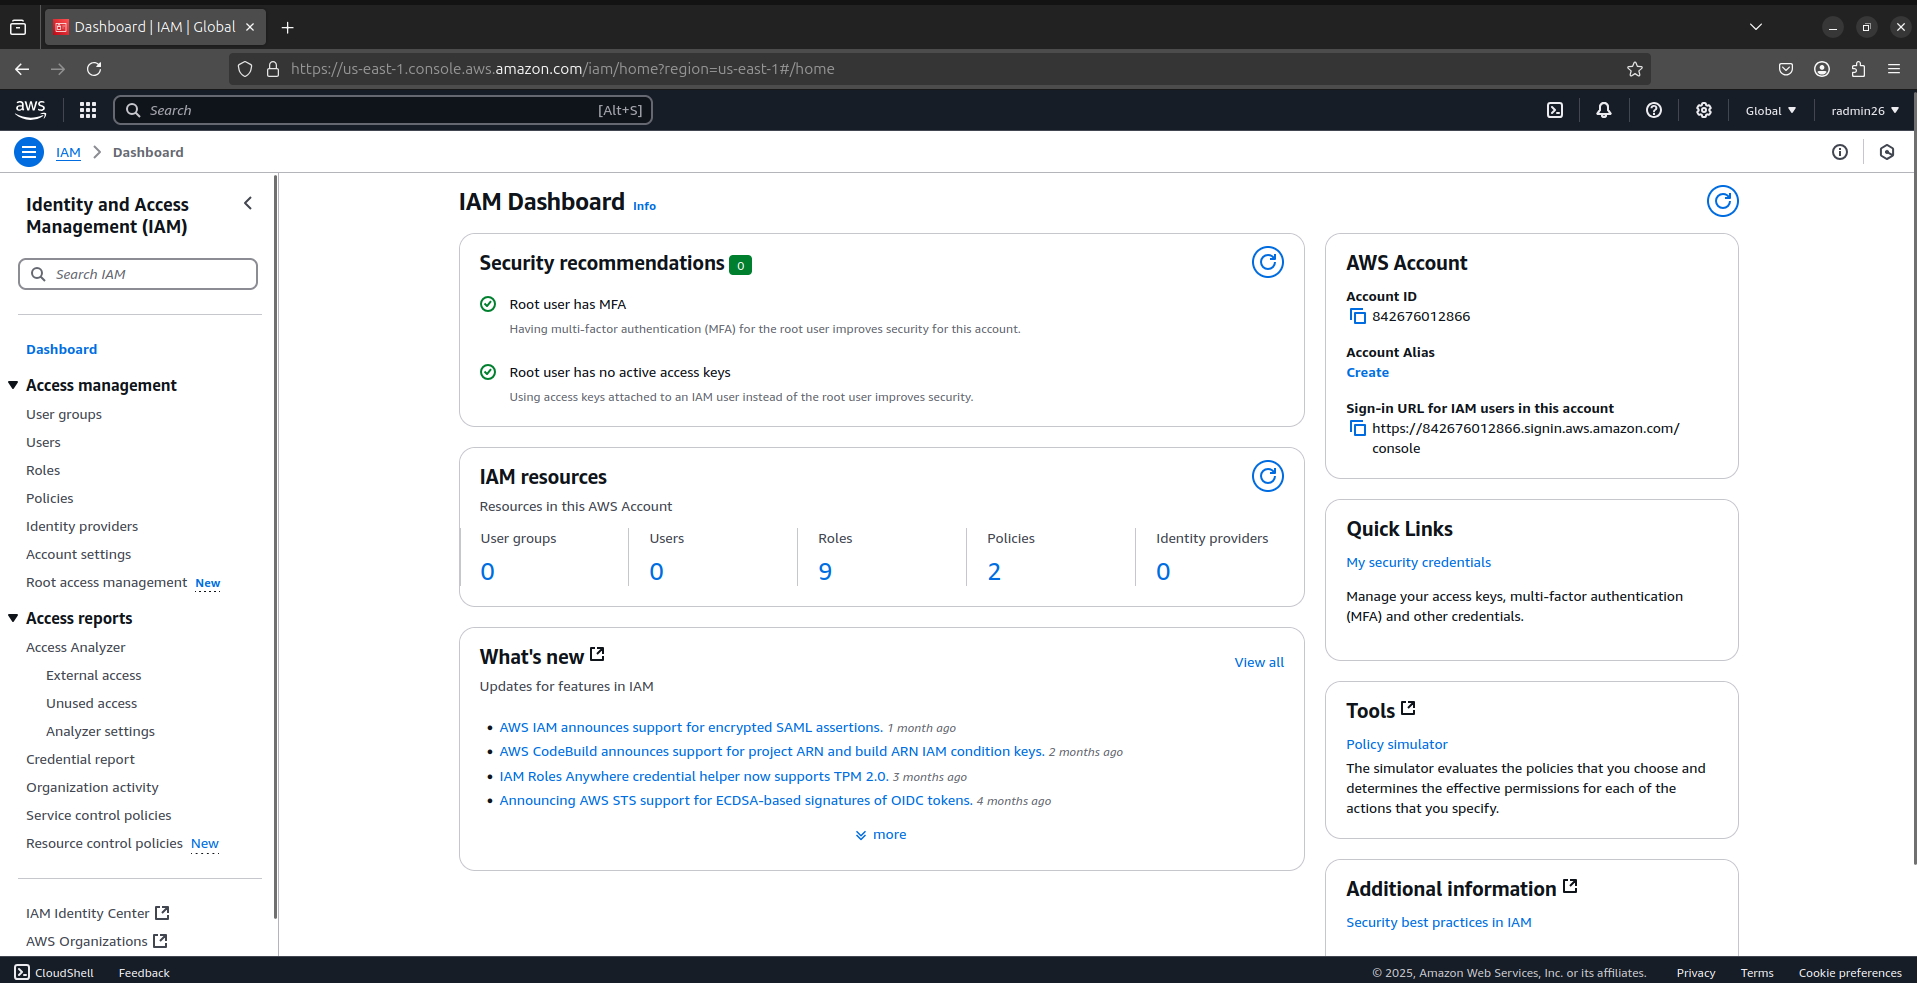
Click Users → Add User.
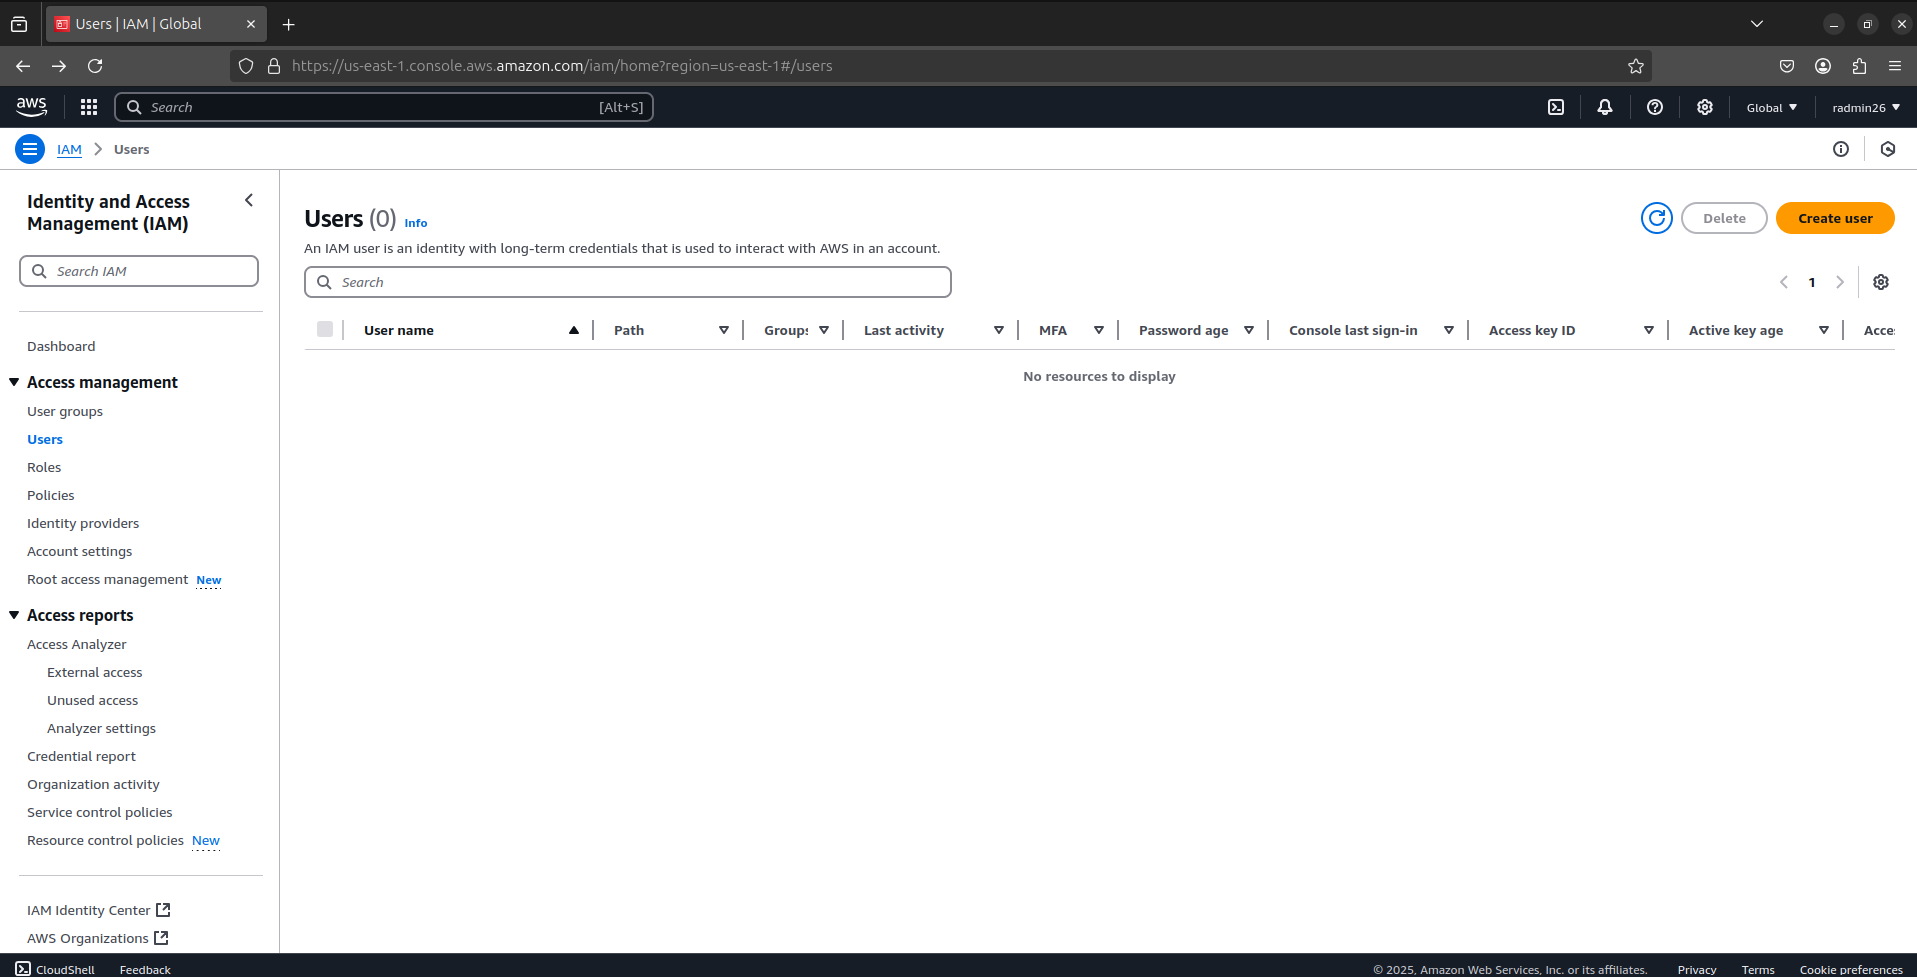
Enter User Name (e.g.,
raj-devops).Select Access Type:
Password - AWS Management Console Access (if the user needs console access(UI access)).
Access key - Programmatic Access (if the user needs to use AWS CLI or APIs).
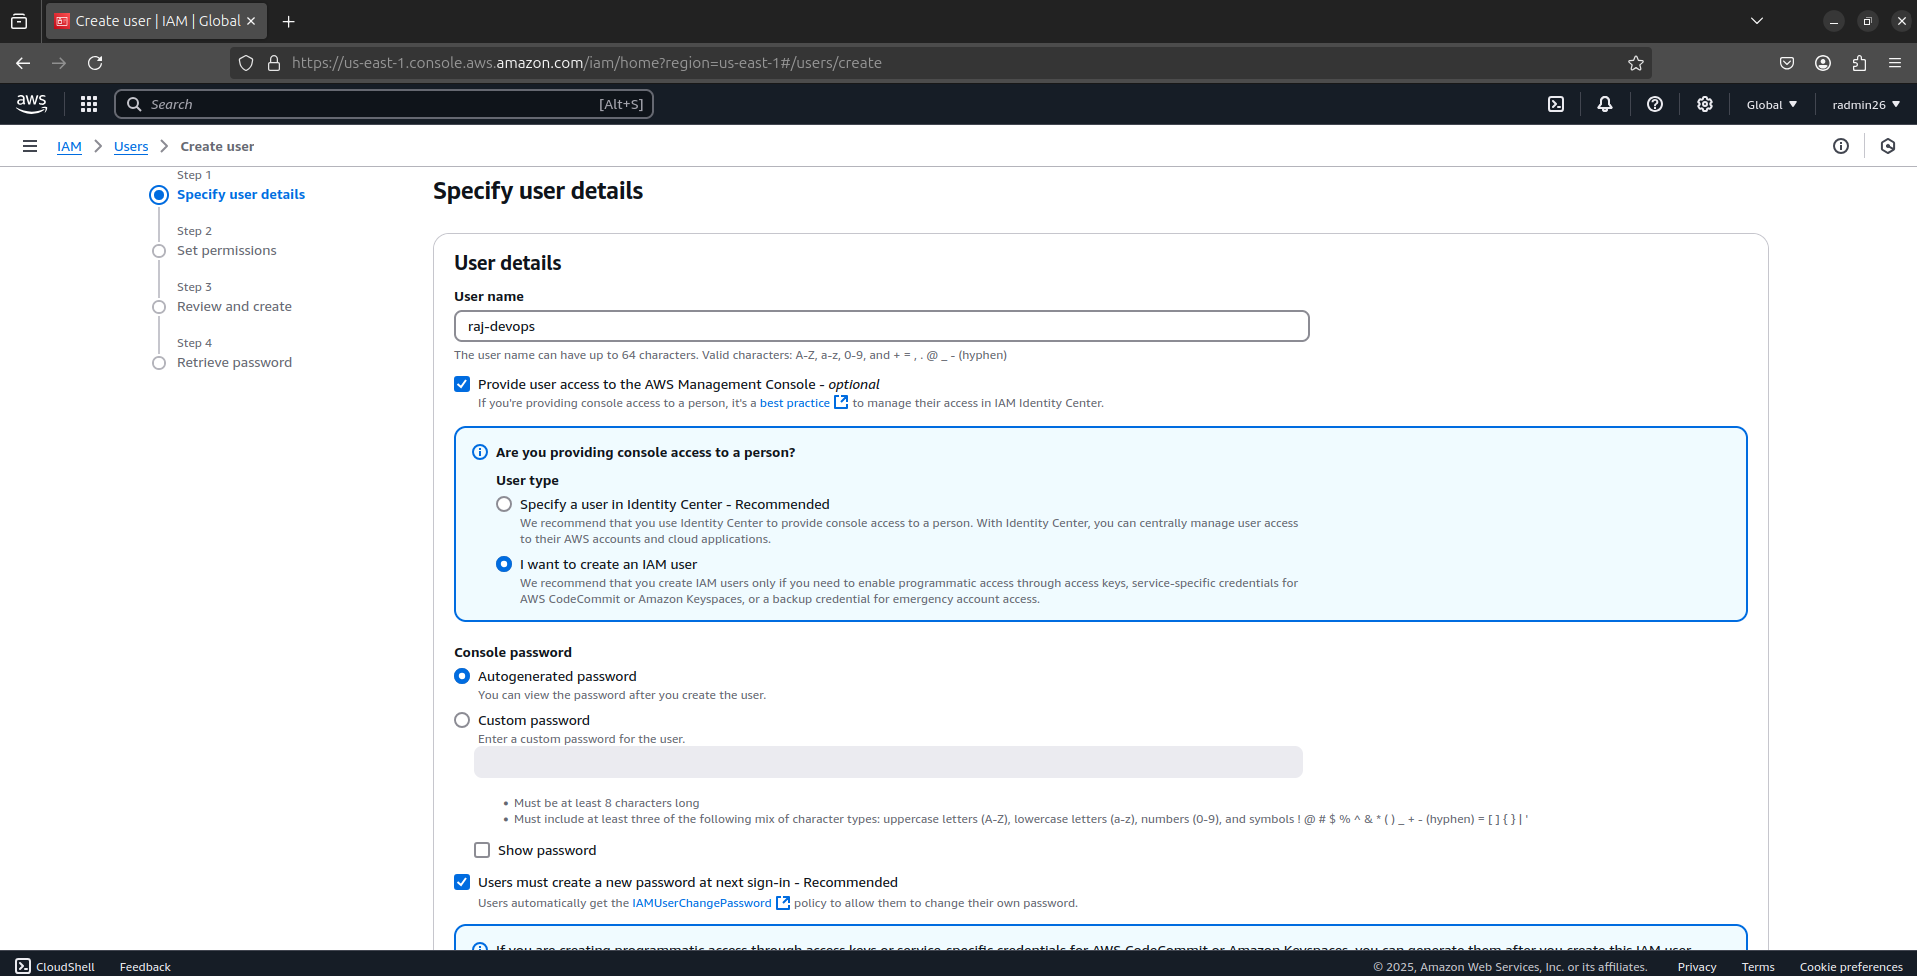
Set permissions via Add User to Group (next step).
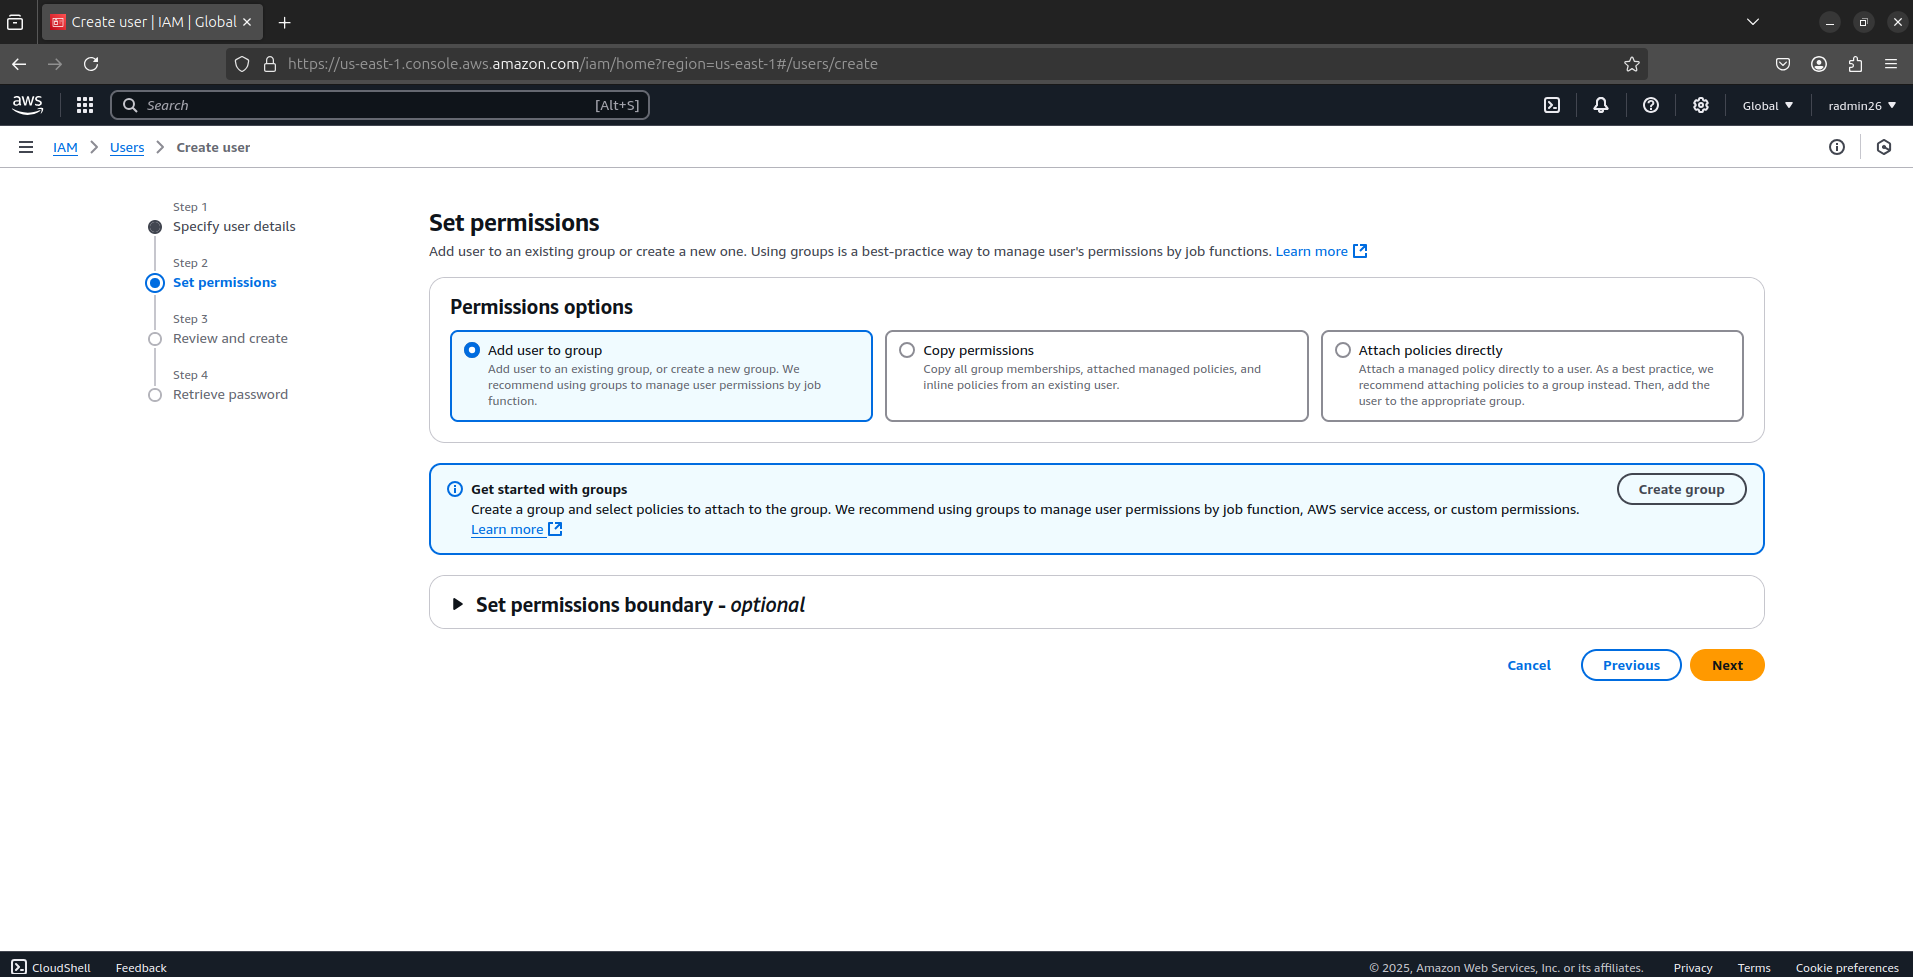
Step 2: Create an IAM Group (Best Practice)
Go to IAM > Groups > Create Group.
Enter a Group Name (e.g.,
DevOpsTeam).Attach policies to grant permissions:
AdministratorAccess(Full access, not recommended).PowerUserAccess(No IAM permissions, safer).ReadOnlyAccess(View-only access).AmazonS3ReadOnlyAccess(read S3 buckets).
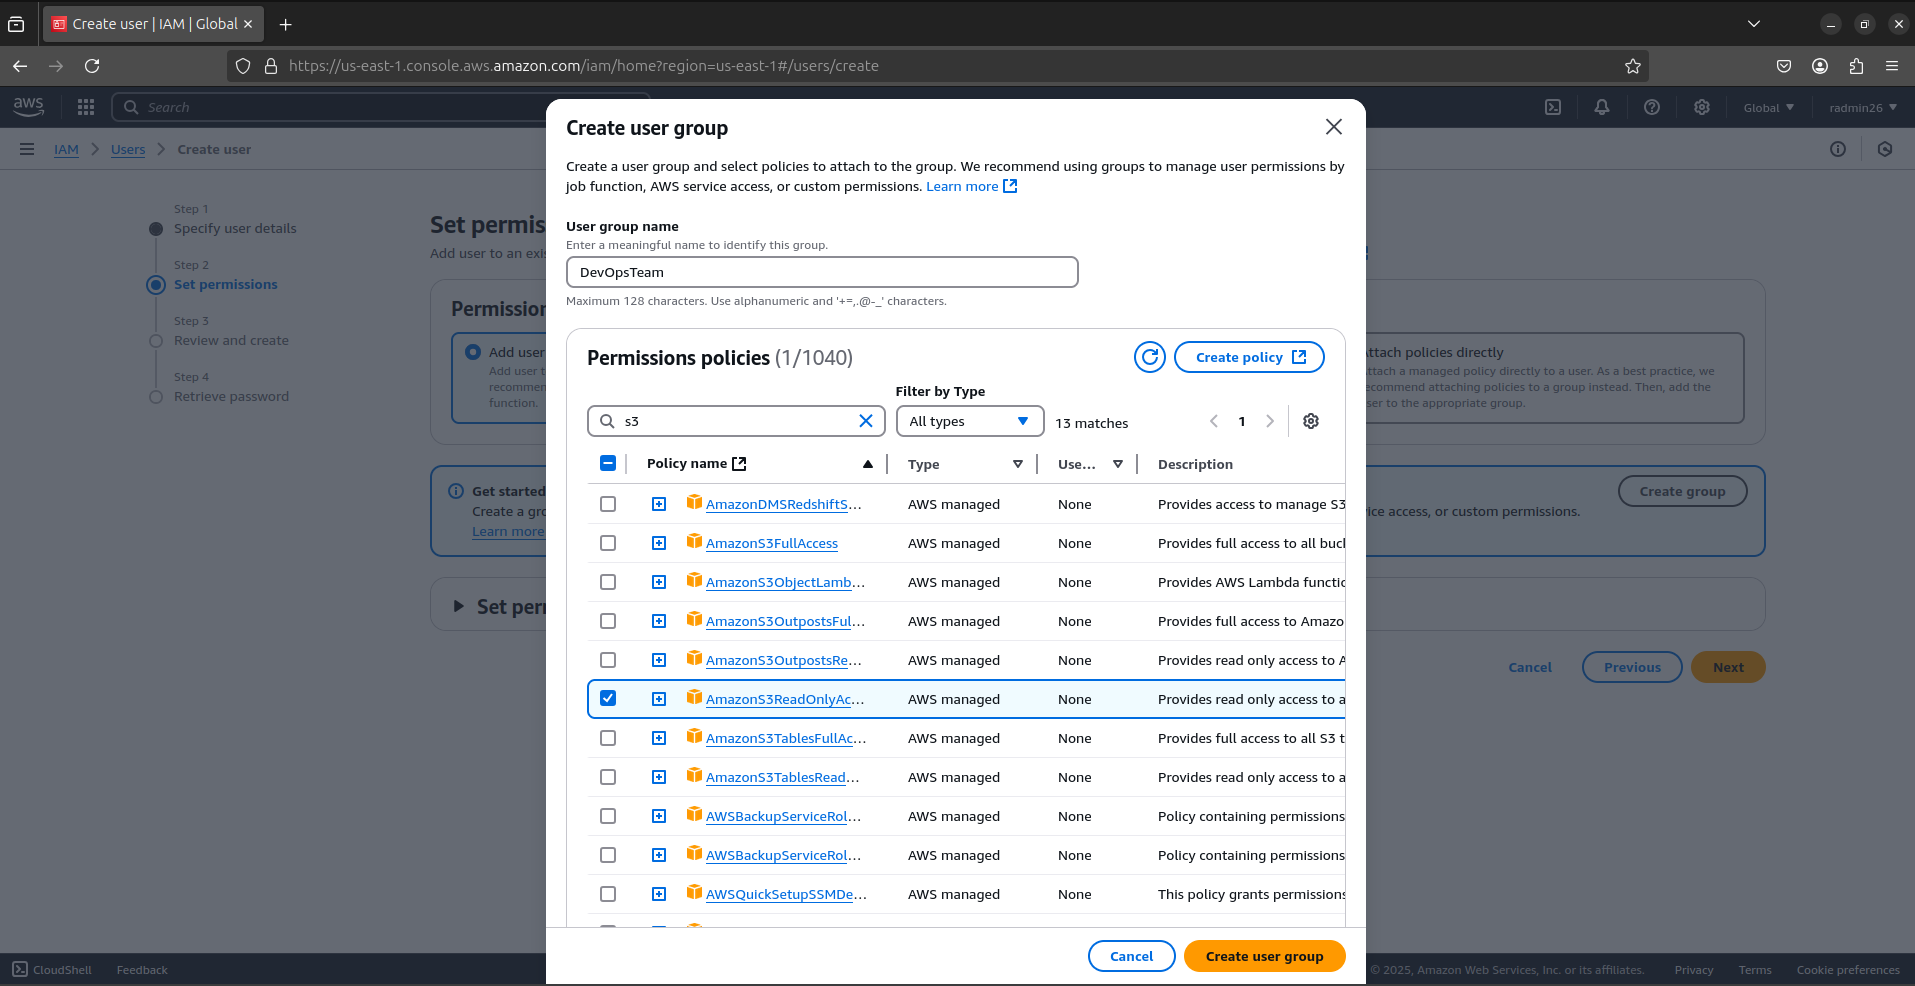
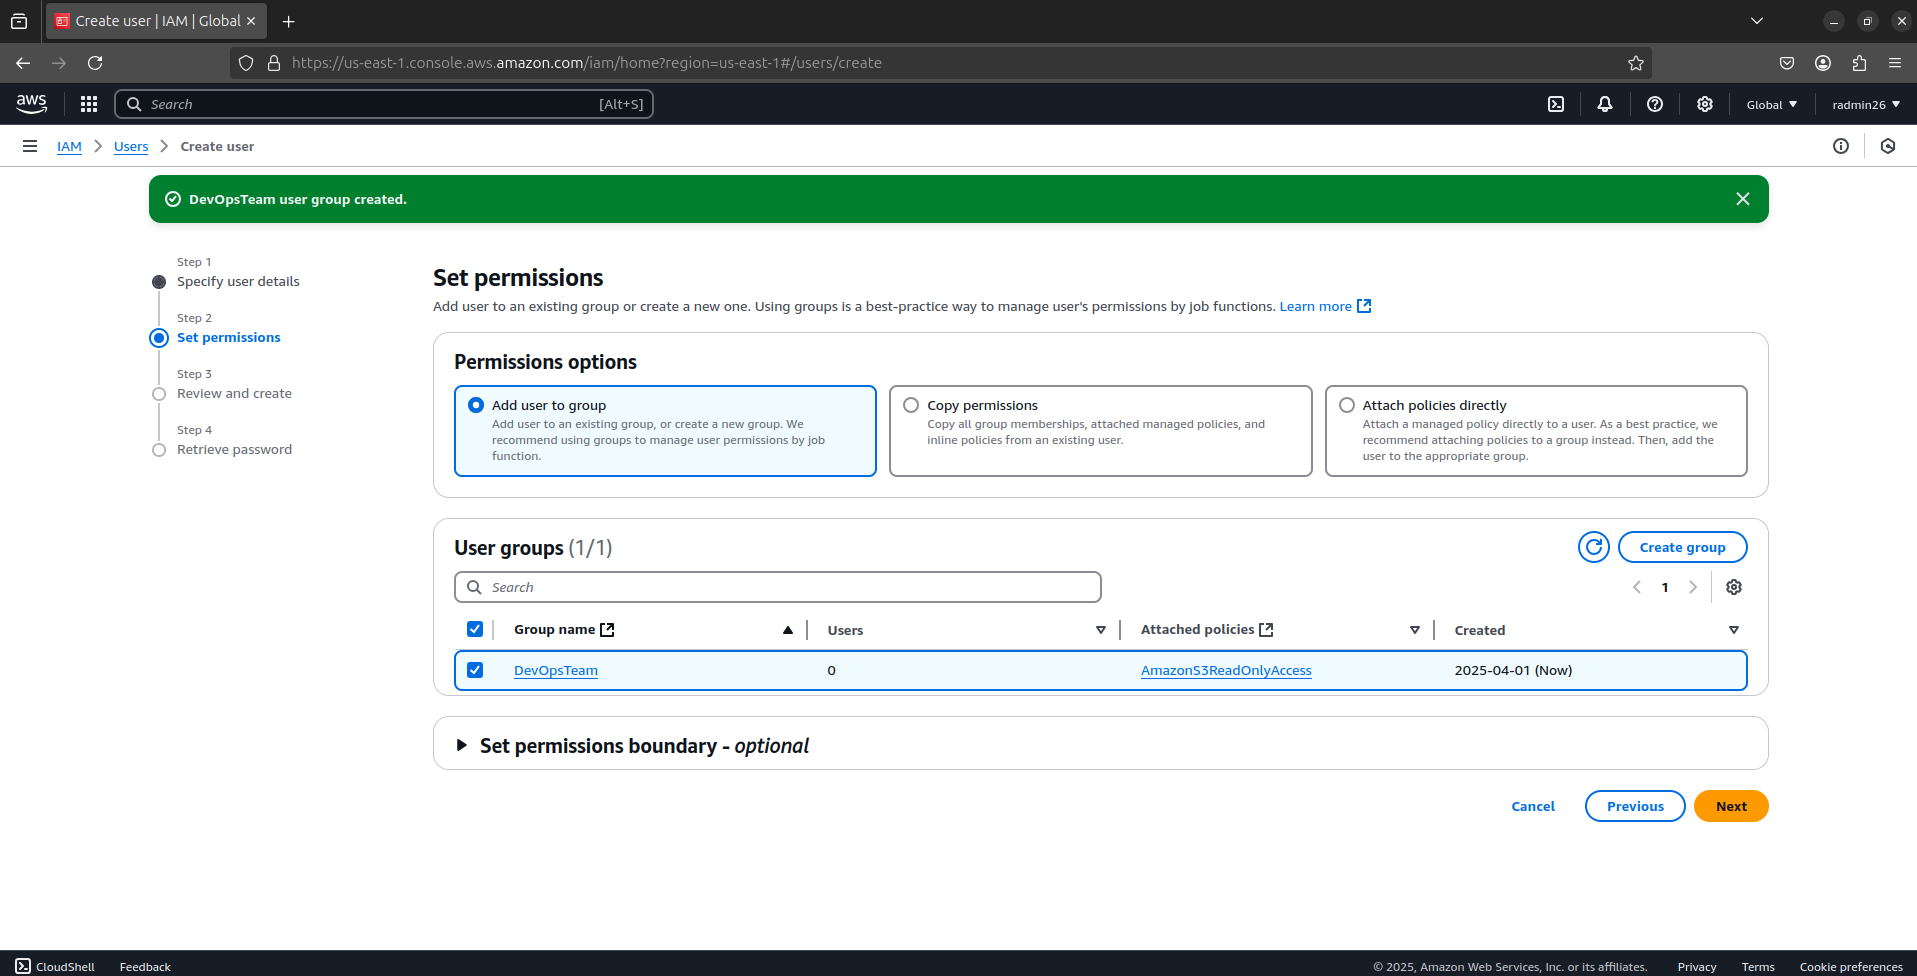
Now, attach the user to the group.
Your IAM user can log in securely with limited permissions.
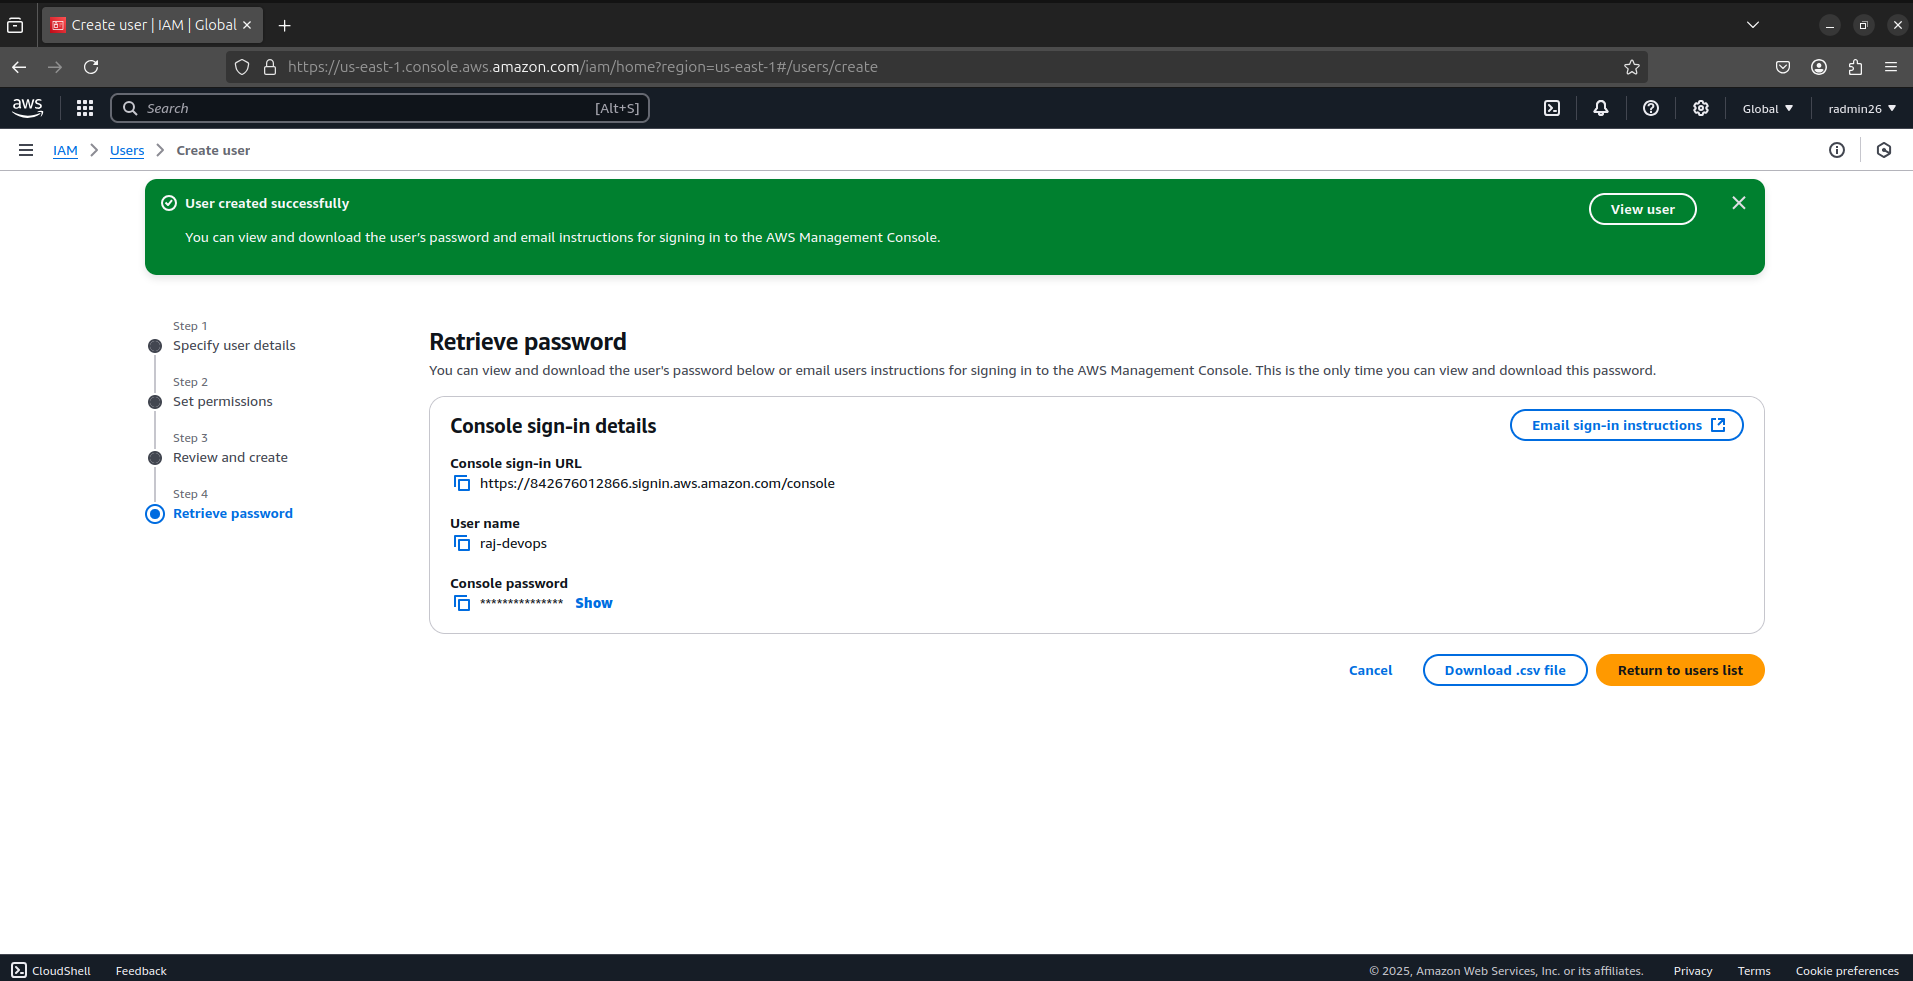
IMPORTANT: Download the .csv file containing the user's credentials or email them. This is your only chance to view the access key and secret!
Test the New User
To ensure the permissions are working correctly:
Open a new browser window in incognito/private mode
Go to the AWS sign-in page using your account's sign-in URL (looks like https://123456789012.signin.aws.amazon.com/console)
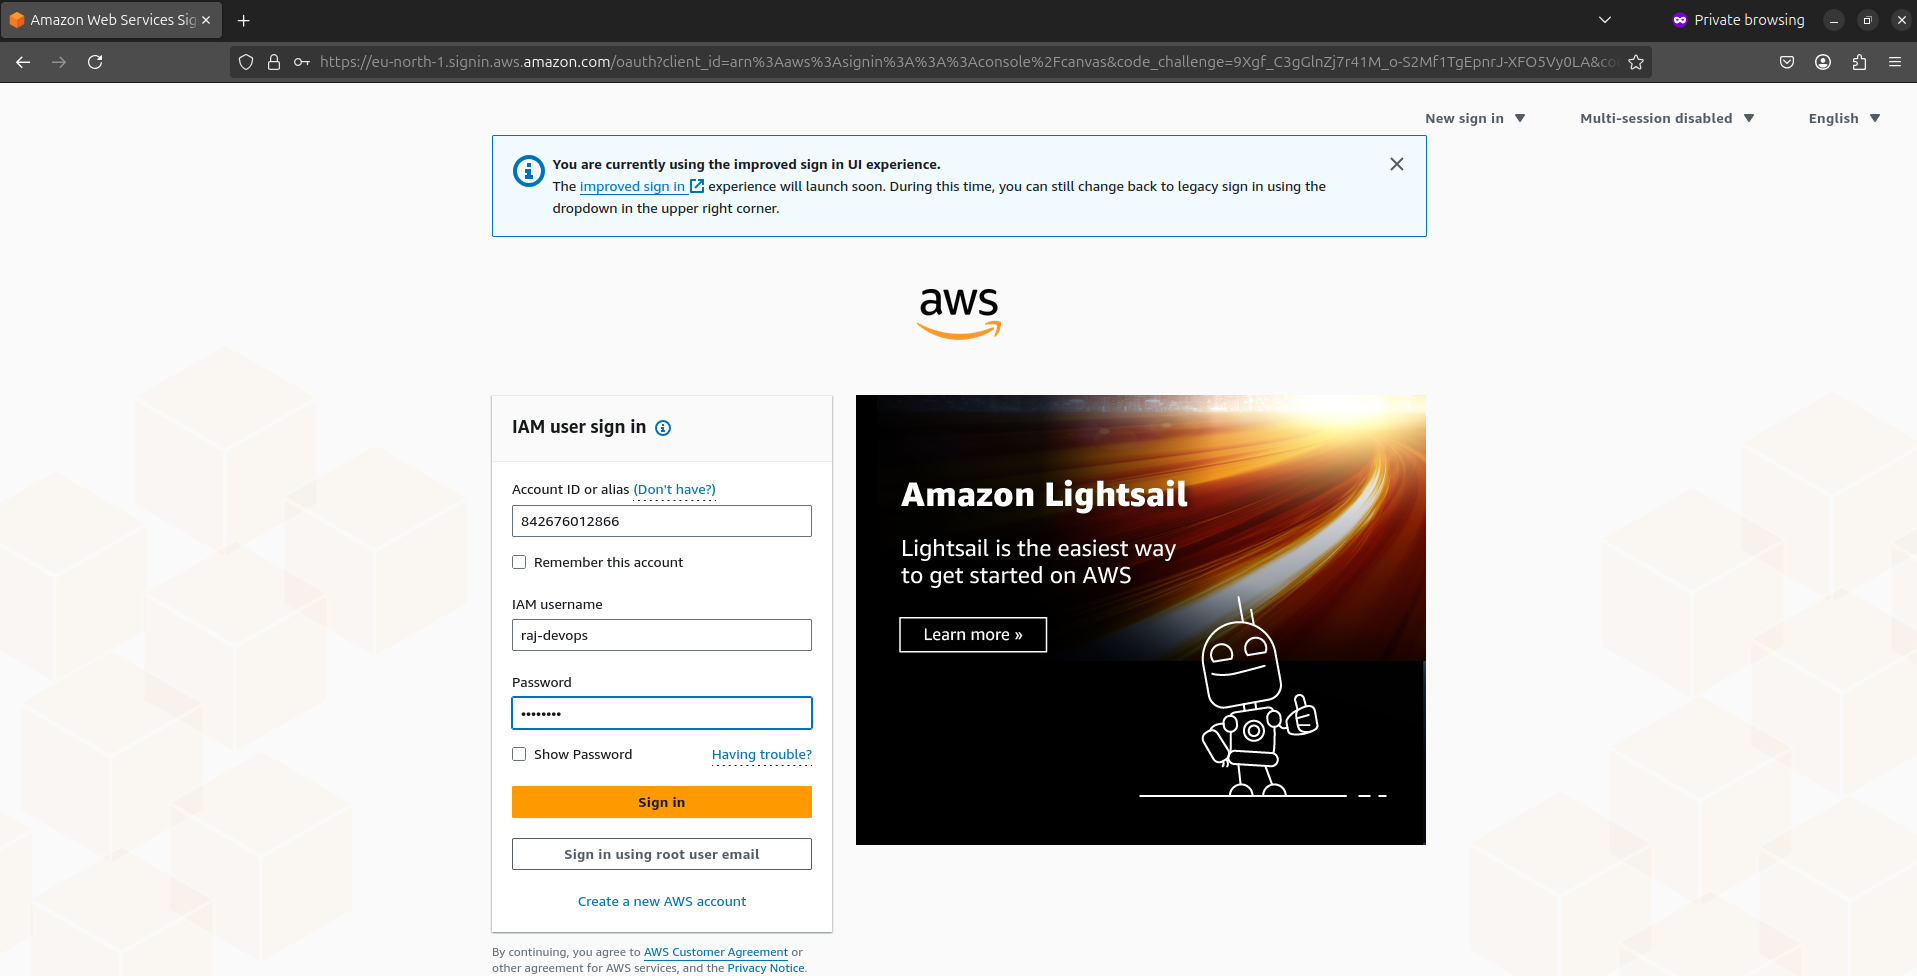
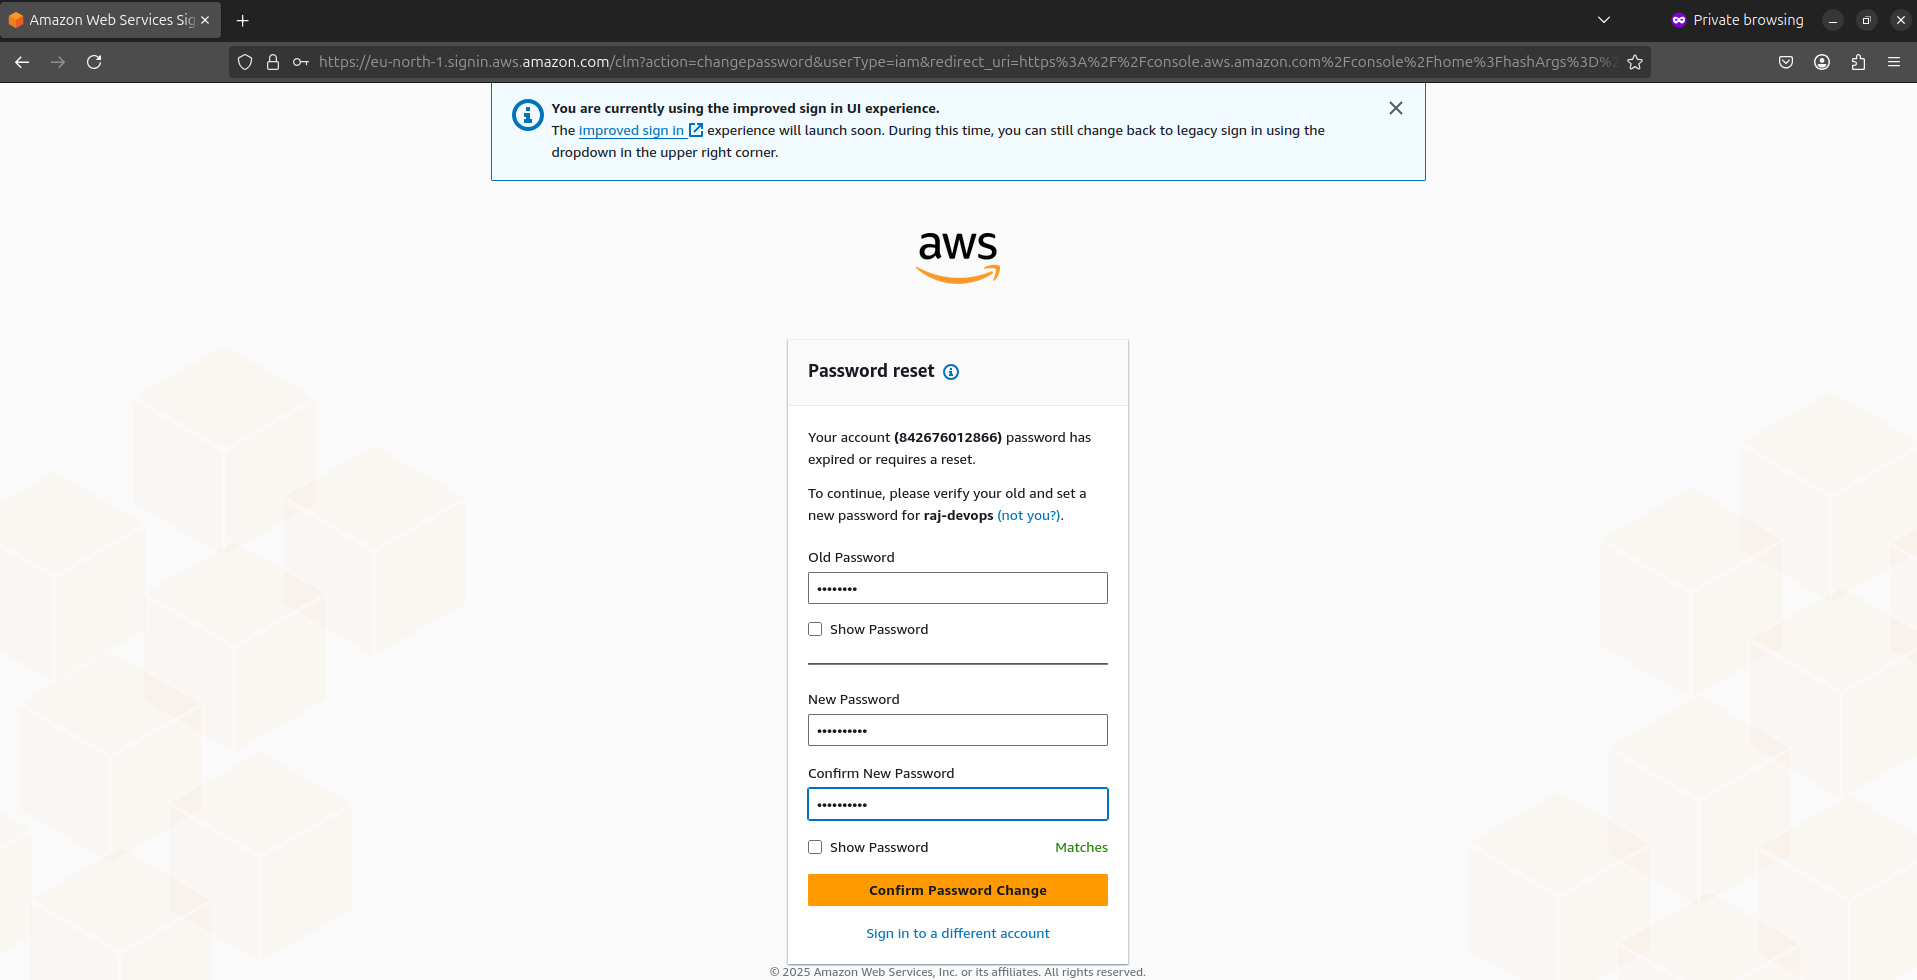
Sign in with the new user's credentials
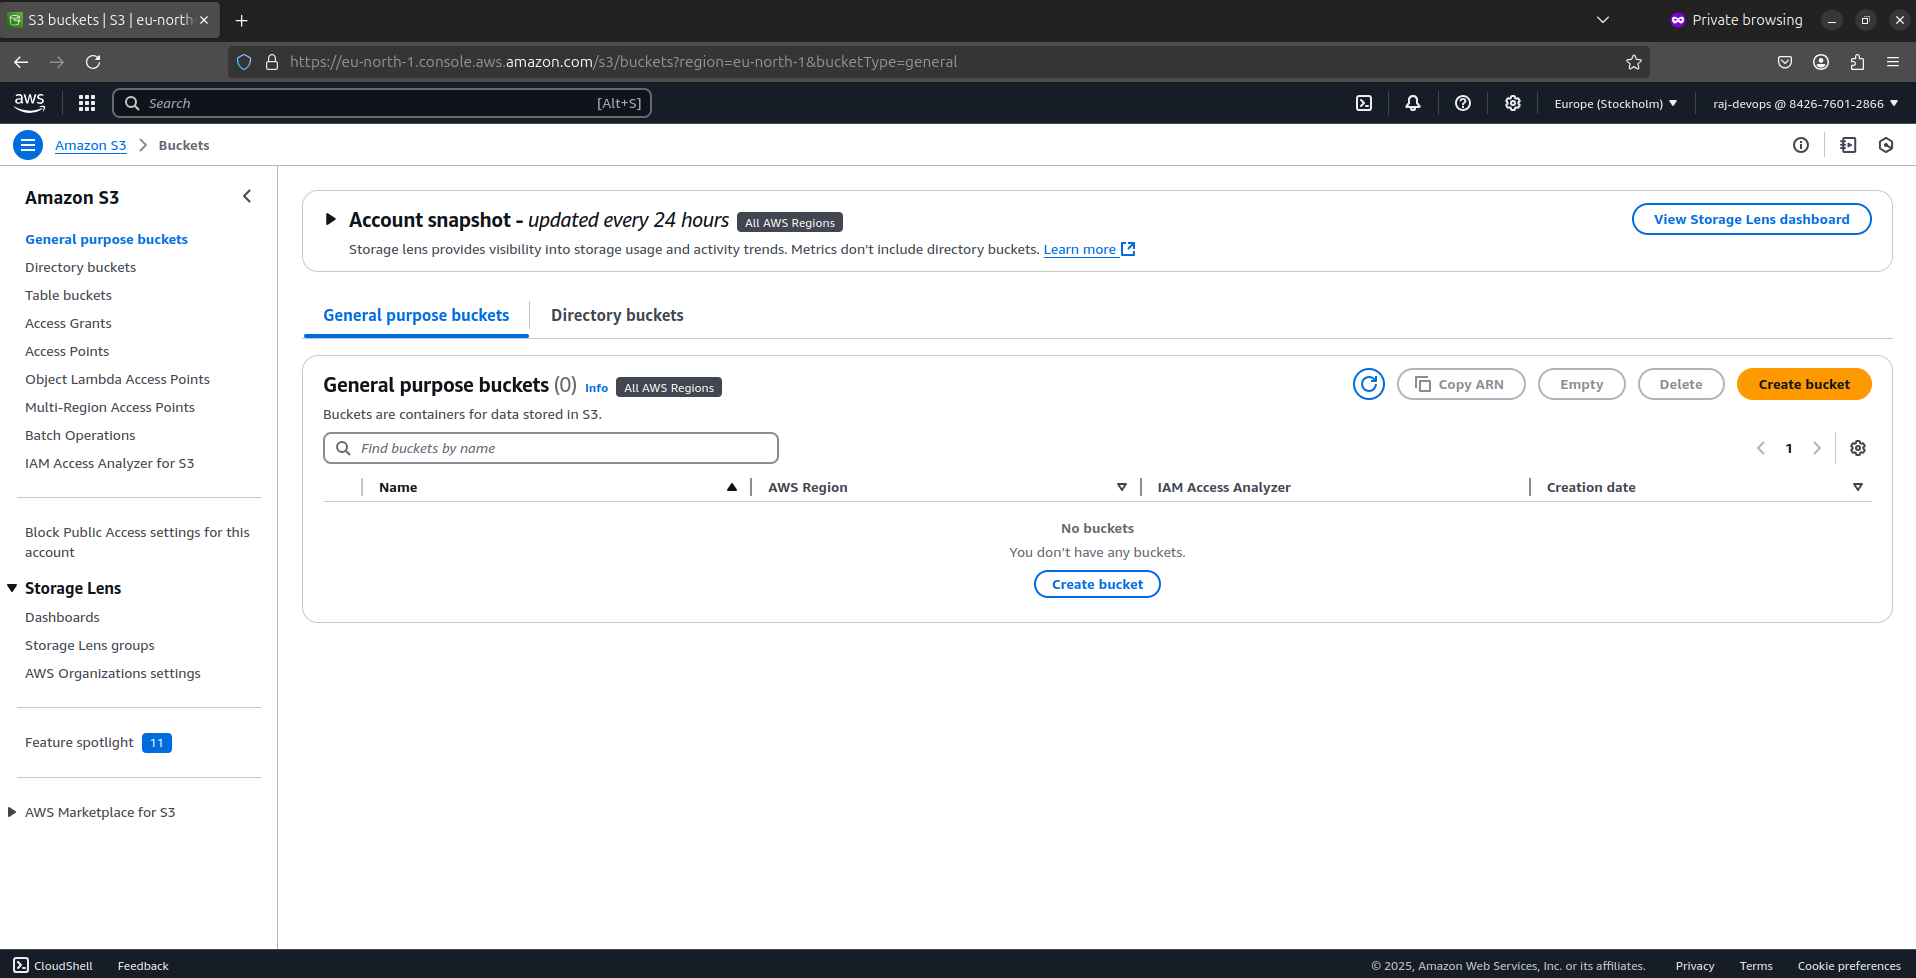
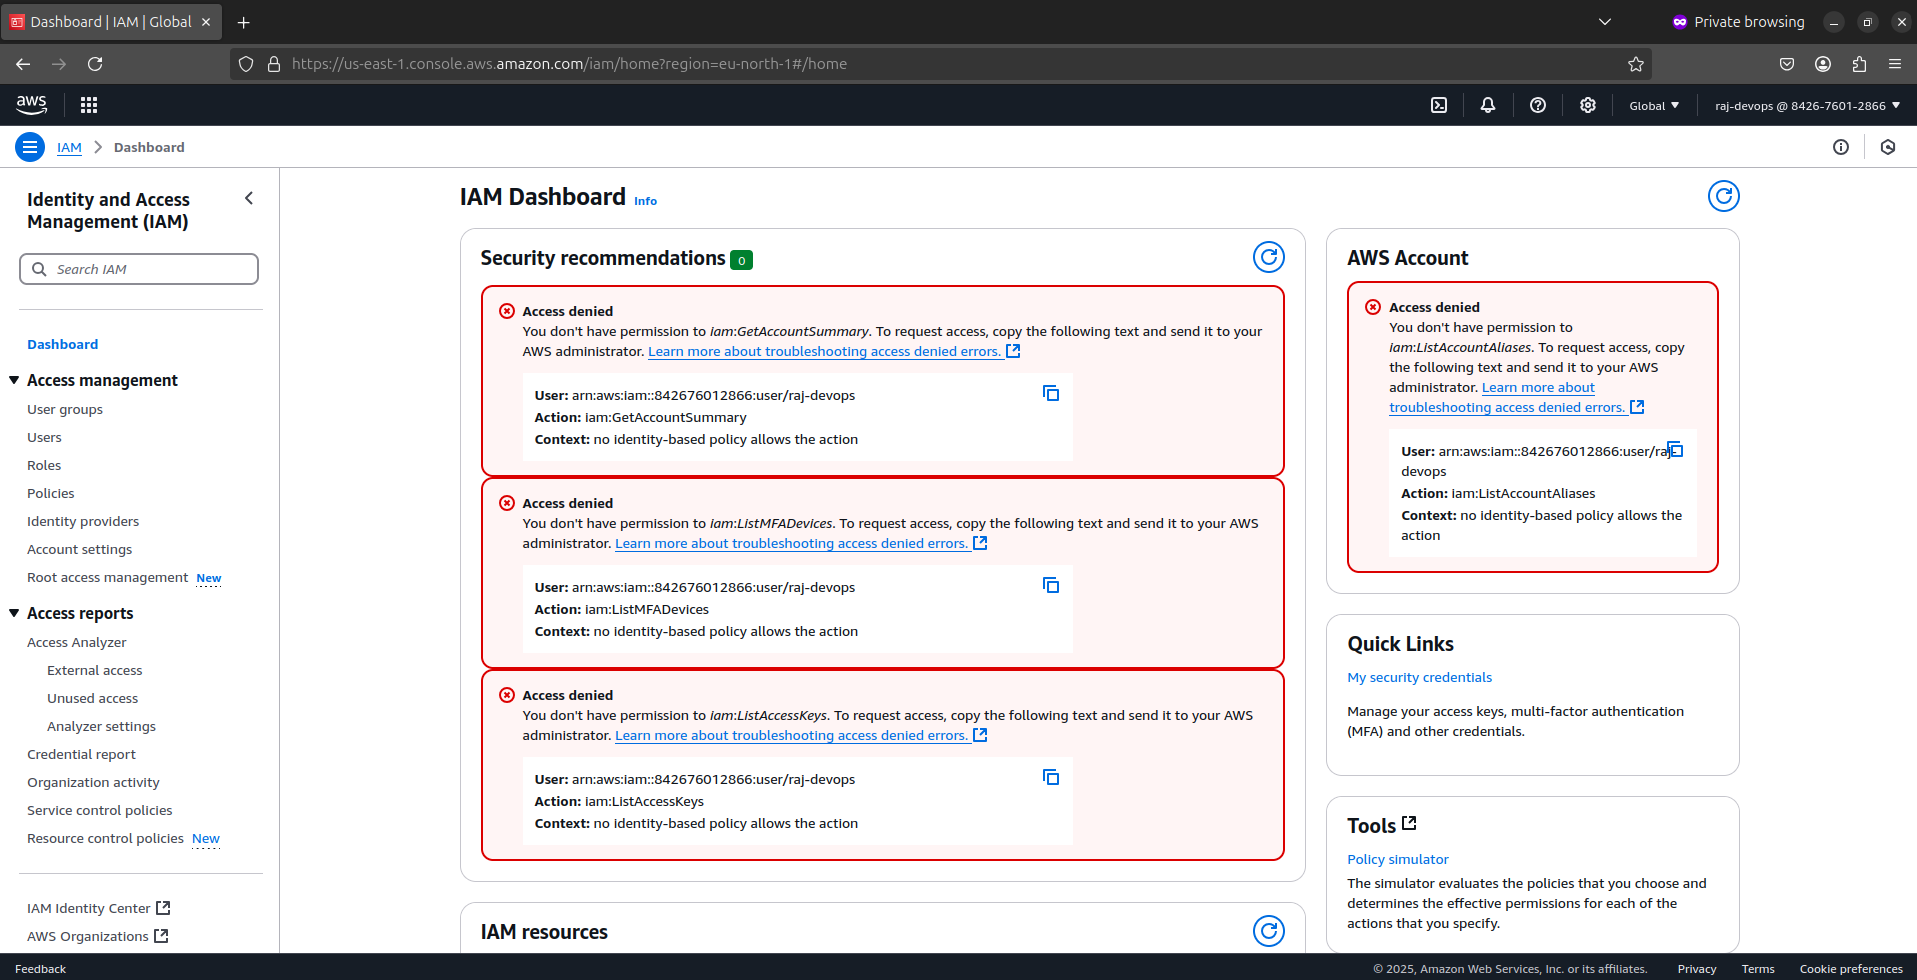
Try accessing allowed services (like viewing S3 buckets) and restricted services (like creating new IAM users)
DevOps Use Case: Managing Multiple Users
👨💻 Scenario:
Your DevOps team has three engineers:
Jordan needs full access to EC2.
Kobe needs read-only access to S3.
LeBron manages IAM roles.
✅ Solution: Create IAM Groups with proper permissions:
EC2AdminGroup →
AmazonEC2FullAccess(for Jordan).S3ReadOnlyGroup →
AmazonS3ReadOnlyAccess(for Kobe).IAMManagerGroup →
IAMFullAccess(for LeBron).
🚀 Now, each team member has only the necessary permissions!
2. Assigning Roles to EC2 Instances
What is an IAM Role?
A role grants permissions to AWS services (e.g., letting an EC2 instance read S3 buckets).
Why Do We Need IAM Roles?
IAM roles are perfect for EC2 instances because they allow them to access AWS services securely without storing their credentials on a server.
Step 1: Create an IAM Role for EC2
Go to IAM Dashboard > Roles > Create Role.
Select Trusted Entity → Choose AWS Service → EC2.
Attach a policy:
For a web server role:
AmazonS3ReadOnlyAccess(to fetch assets from S3).For a DevOps CI/CD server:
AmazonS3FullAccessandAmazonEC2ContainerRegistryFullAccess.
Click "Next: Review”
Enter Role Name (e.g.,
WebServerRole, orJenkinsServerRole).Add a description that explains the role's purpose
Click Create Role.
✅ Now, your IAM role is ready!
Step 2: Attach the IAM Role to an EC2 Instance
For a New EC2 Instance:
Start the EC2 instance creation process
In the "Configure Instance Details" step, find the "IAM role" dropdown
Select the role you created
Complete the instance launch process as normal
For an Existing EC2 Instance:
Go to the EC2 dashboard
Select the EC2 instance → Click Actions > Security > Modify IAM Role.
Select the appropriate role (EC2-S3-Access Role) → Click Update IAM Role.
Now, the EC2 instance can access S3 without storing credentials!
Step 3: Test the Role on the EC2 Instance
Once your EC2 instance is running with the assigned role:
Connect to your instance via SSH:
sudo ssh -i "your-key.pem" ubuntu@your-IPInstall the AWS CLI if it's not already installed:
 sudo apt update
 sudo apt install -y awscli
Try an AWS command without providing credentials:
 aws s3 ls # Should list all buckets
 aws s3 ls s3://your-bucket-name  # Should list your bucket
If the role is working correctly, you'll see a list of your S3 buckets without needing to configure AWS credentials!
DevOps Use Case: Jenkins on EC2 Without Hardcoded Credentials
👨💻 Scenario:
You are deploying Jenkins on EC2, and Jenkins needs to store artifacts in S3.
✅ Solution:
1️⃣ Create an IAM Role with AmazonS3FullAccess.
2️⃣ Attach it to the Jenkins EC2 Instance.
3️⃣ Now, Jenkins can access S3 without AWS access keys.
🚀 More secure and follows best practices!
3. Writing Custom Policies
Why Do We Need Custom Policies?
AWS provides default policies, but in DevOps, you may need custom policies to grant fine-tuned access.
JSON-Based Policies → Define who can access what.
Least Privilege Approach → Only grant necessary permissions.
More Security → Prevent unauthorized access.
Understand Policy Structure
AWS IAM policies are written in JSON format with this basic structure:
{
  "Version": "2012-10-17",
  "Statement": [
    {
      "Effect": "Allow",
      "Action": ["service:Action"],
      "Resource": ["arn:aws:service:region:account-id:resource-type/resource-id"]
    }
  ]
}
Version: Always use "2012-10-17" (current policy language version).
Effect: "Allow" or "Deny".
Action: Services and actions in the format
service:Action.Resource: Amazon Resource Names (ARNs) of the resources the actions apply to.
Step 1: Create a Custom IAM Policy
Go to IAM Dashboard > Policies > Create Policy.
Click JSON and enter the following policy:
 {
     "Version": "2012-10-17",
     "Statement": [
         {
             "Effect": "Allow",
             "Action": [
                 "s3:ListBucket",
                 "s3:GetObject",
                 "s3:PutObject"
             ],
             "Resource": [
                 "arn:aws:s3:::my-devops-bucket",
                 "arn:aws:s3:::my-devops-bucket/*"
             ]
         }
     ]
 }
Click Next > Name the Policy (
S3-DevOps-Access).Add a description explaining the policy's purpose.
Click Create Policy.
Now, you can attach this policy to users, groups, or roles.
Step 2: Attach the Custom Policy
You can attach your custom policy to users, groups, or roles:
Go to "User groups" in the IAM dashboard
Create a new group called "DevOpsEngineers" or select an existing one
Click "Attach policies"
Find and select your custom policy "
S3-DevOps-Access"Click "Attach policy"
Now all members of the DevOpsEngineers group will have these specific permissions!
DevOps Use Case: Secure Code Deployment with IAM Policies
👨💻 Scenario:
A DevOps pipeline stores application artifacts in S3, but developers should only upload files, not delete them.
✅ Solution:
1️⃣ Create a custom policy with only s3:PutObject access.
2️⃣ Attach this policy to the Jenkins IAM role.
🚀 Now, Jenkins can push artifacts to S3, but developers cannot delete them!
4. IAM Best Practices
Enable MFA for Root and IAM Users:
- Users → Security Credentials → Manage MFA Device.
Rotate Access Keys:
- Replace access keys every 90 days via Security Credentials.
Use Roles, Not Keys:
- Avoid hardcoding access keys in EC2 instances (use roles instead).
5. Monitoring and Troubleshooting IAM
Even with careful planning, you might encounter permission issues. Here are some troubleshooting tips:
Check CloudTrail for Access Denied errors:
Go to the CloudTrail console
Look for "Access Denied" errors
Examine the error details to identify the missing permissions
Use the IAM Policy Simulator:
In the IAM console, click on "Users"
Select the user experiencing issues
Click on "Simulate Policy"
Select the actions the user is trying to perform
The simulator will show whether those actions are allowed
Enable IAM Access Analyzer:
Go to IAM > Access Analyzer
Create an analyzer with your account as the trusted zone
Review findings to identify potential security issues
Hope you had a great ride, guys! Remember, strong IAM security practices are your first line of defense in AWS, protecting your infrastructure, applications, and data as you scale. Take the time to get your IAM setup right from the start—it’ll save you major headaches down the road. Now that we’ve locked down our AWS account with proper security, it’s time to move on to the real action! Yeah, this means more fun and an even more exciting journey ahead. So sit tight because things are about to get really interesting.
In our next blog, "AWS EC2 Deep Dive: Deploy Jenkins on AWS," we'll apply these IAM concepts to set up an EC2 instance. You'll learn how to launch and configure EC2, manage security groups, connect to instances, and install Jenkins with the right IAM roles. Get ready—this is where the real DevOps magic begins!
Until next time, keep coding, automating, and advancing in DevOps! 😁
Peace out ✌️
Subscribe to my newsletter
Read articles from Rajratan Gaikwad directly inside your inbox. Subscribe to the newsletter, and don't miss out.
Written by

Rajratan Gaikwad
Rajratan Gaikwad
I write about the art and adventure of DevOps, making complex topics in CI/CD, Cloud Automation, Infrastructure as Code, and Monitoring approachable and fun. Join me on my DevOps Voyage, where each post unpacks real-world challenges, explores best practices, and dives deep into the world of modern DevOps—one journey at a time!