A Beginner's Guide to Setting Up Nuxt.js and Storyblok for Visual Editing
 Abimbola Adedotun Samuel
Introduction
Nuxt.js is a front-end JavaScript framework built on Vue.js. It combines the power of Vue.js with server-side rendering features to make it more powerful.
Storyblok is a headless content management system (CMS). It enables the creation, management, and distribution of content. In this guide, we will create and configure a new Nuxt project with Storyblok
Requirements
Basic understanding of Nuxt.js, Vue.js and Javascript
Code editor, e.g. Virtual studio code
Terminal
An account of Storyblok
Creating your Storyblok Space
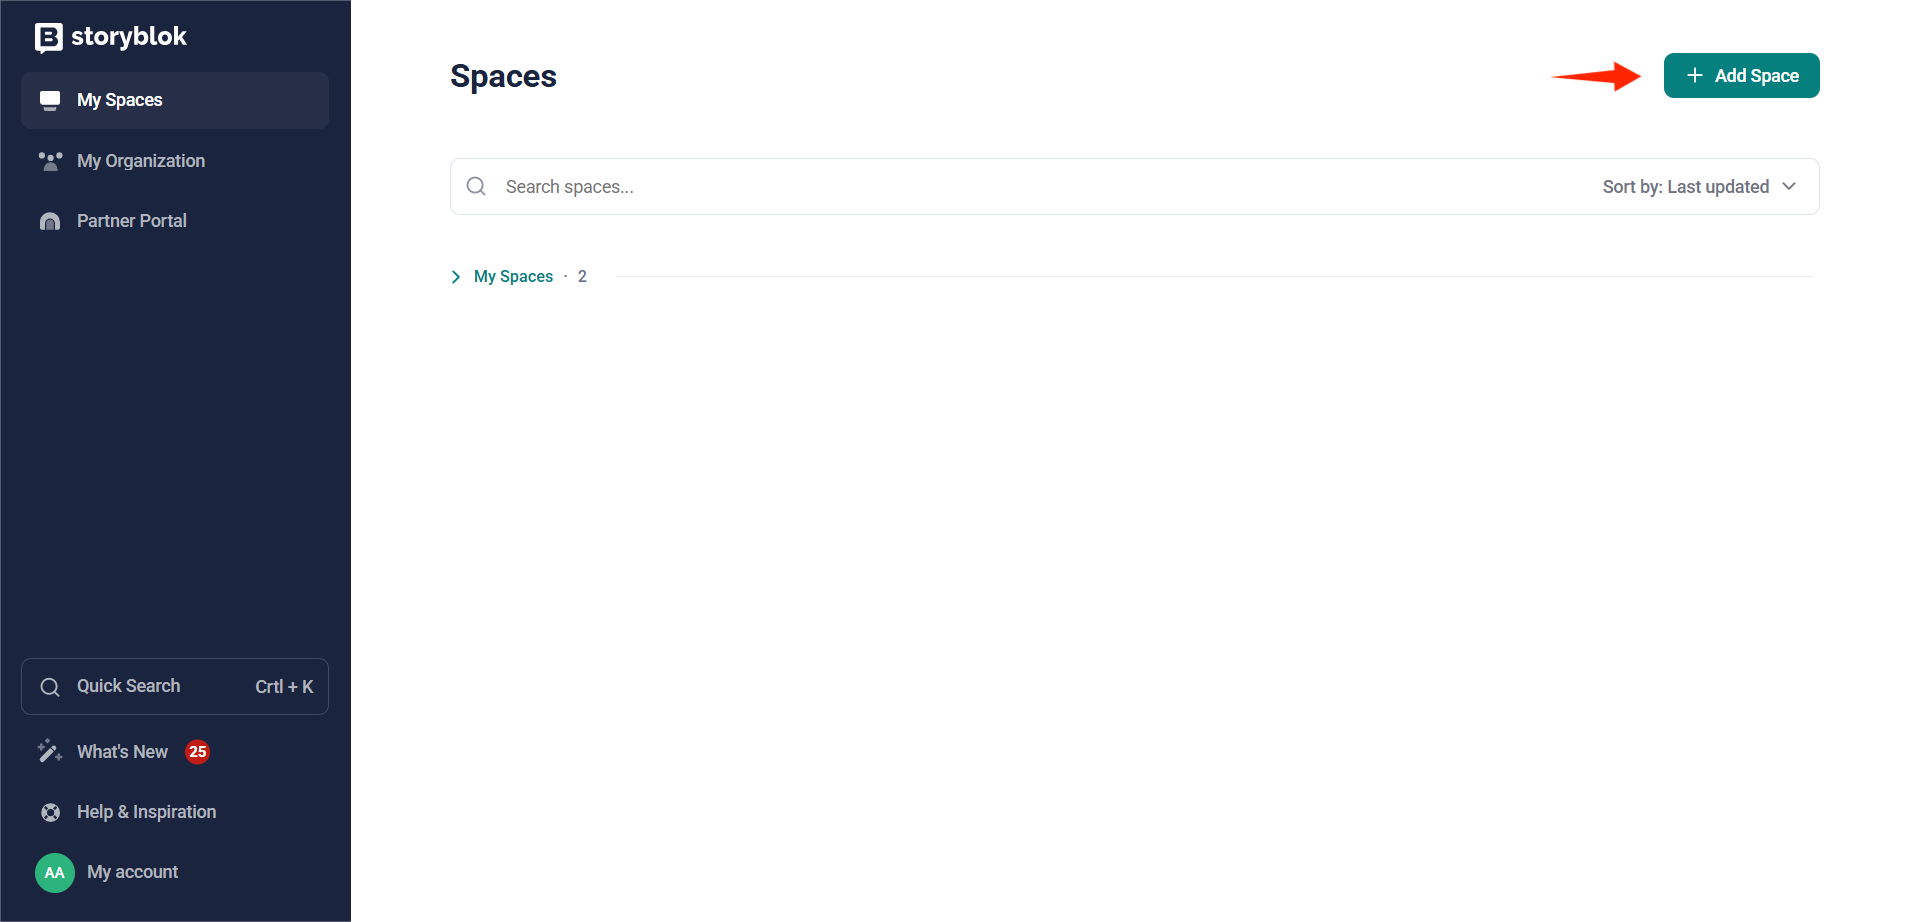
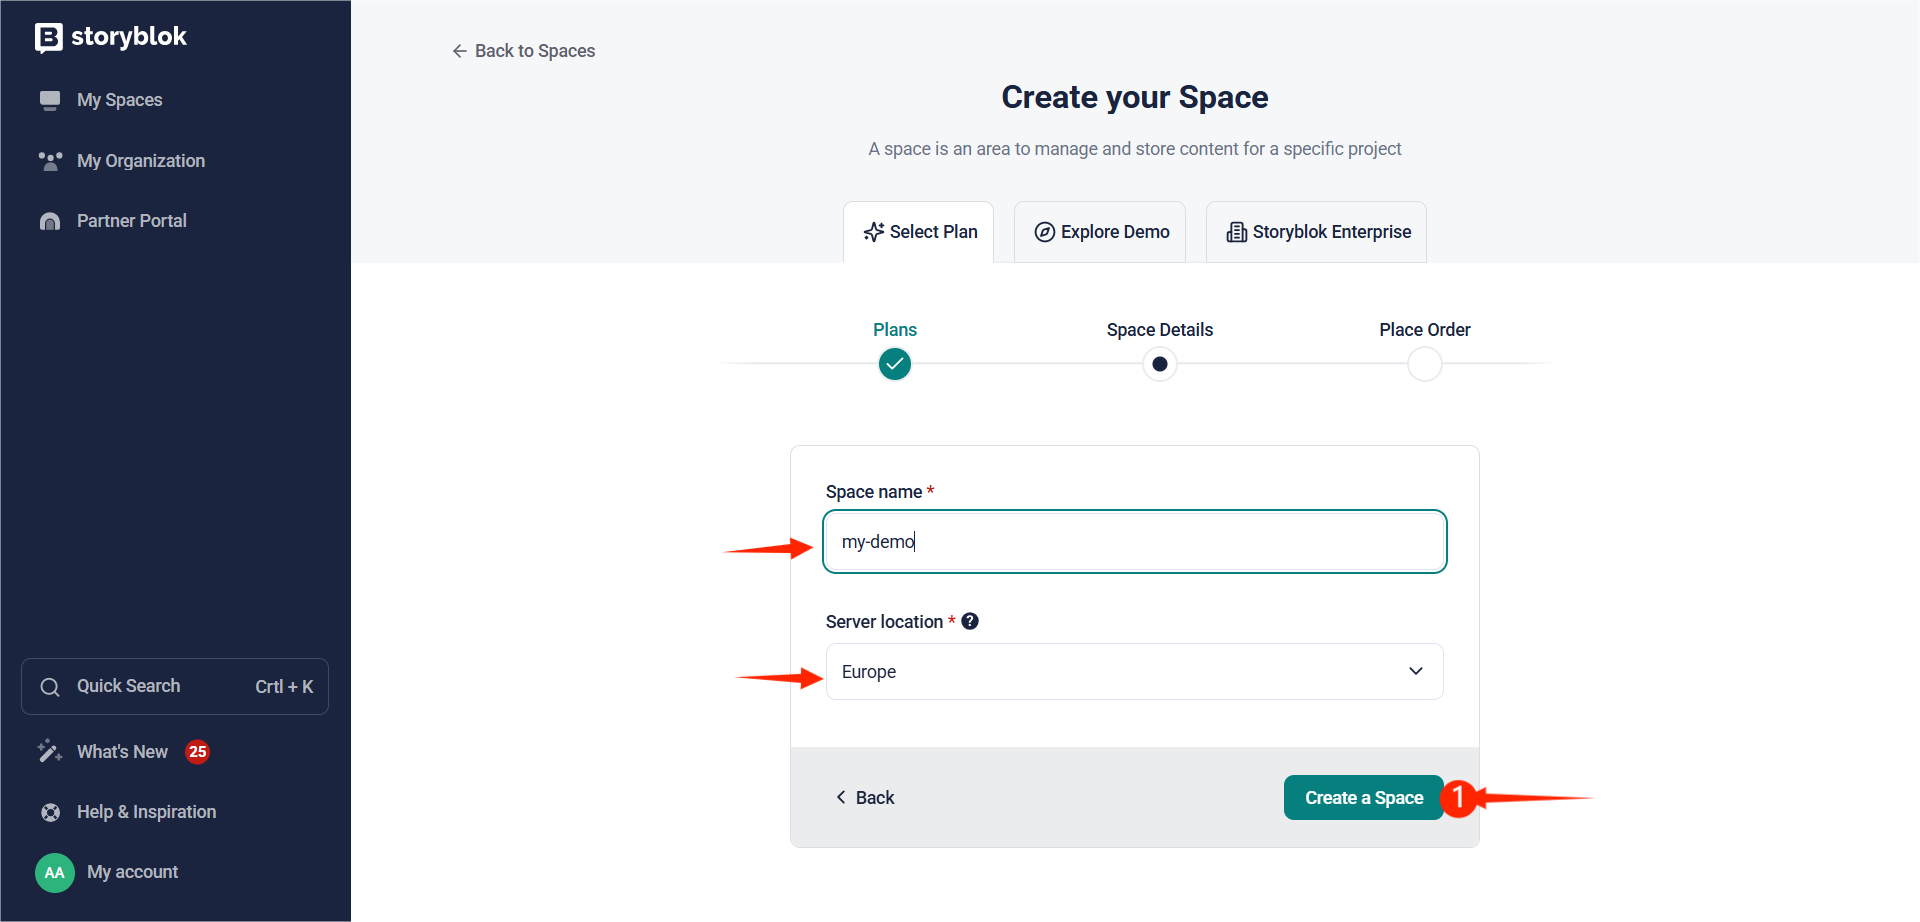
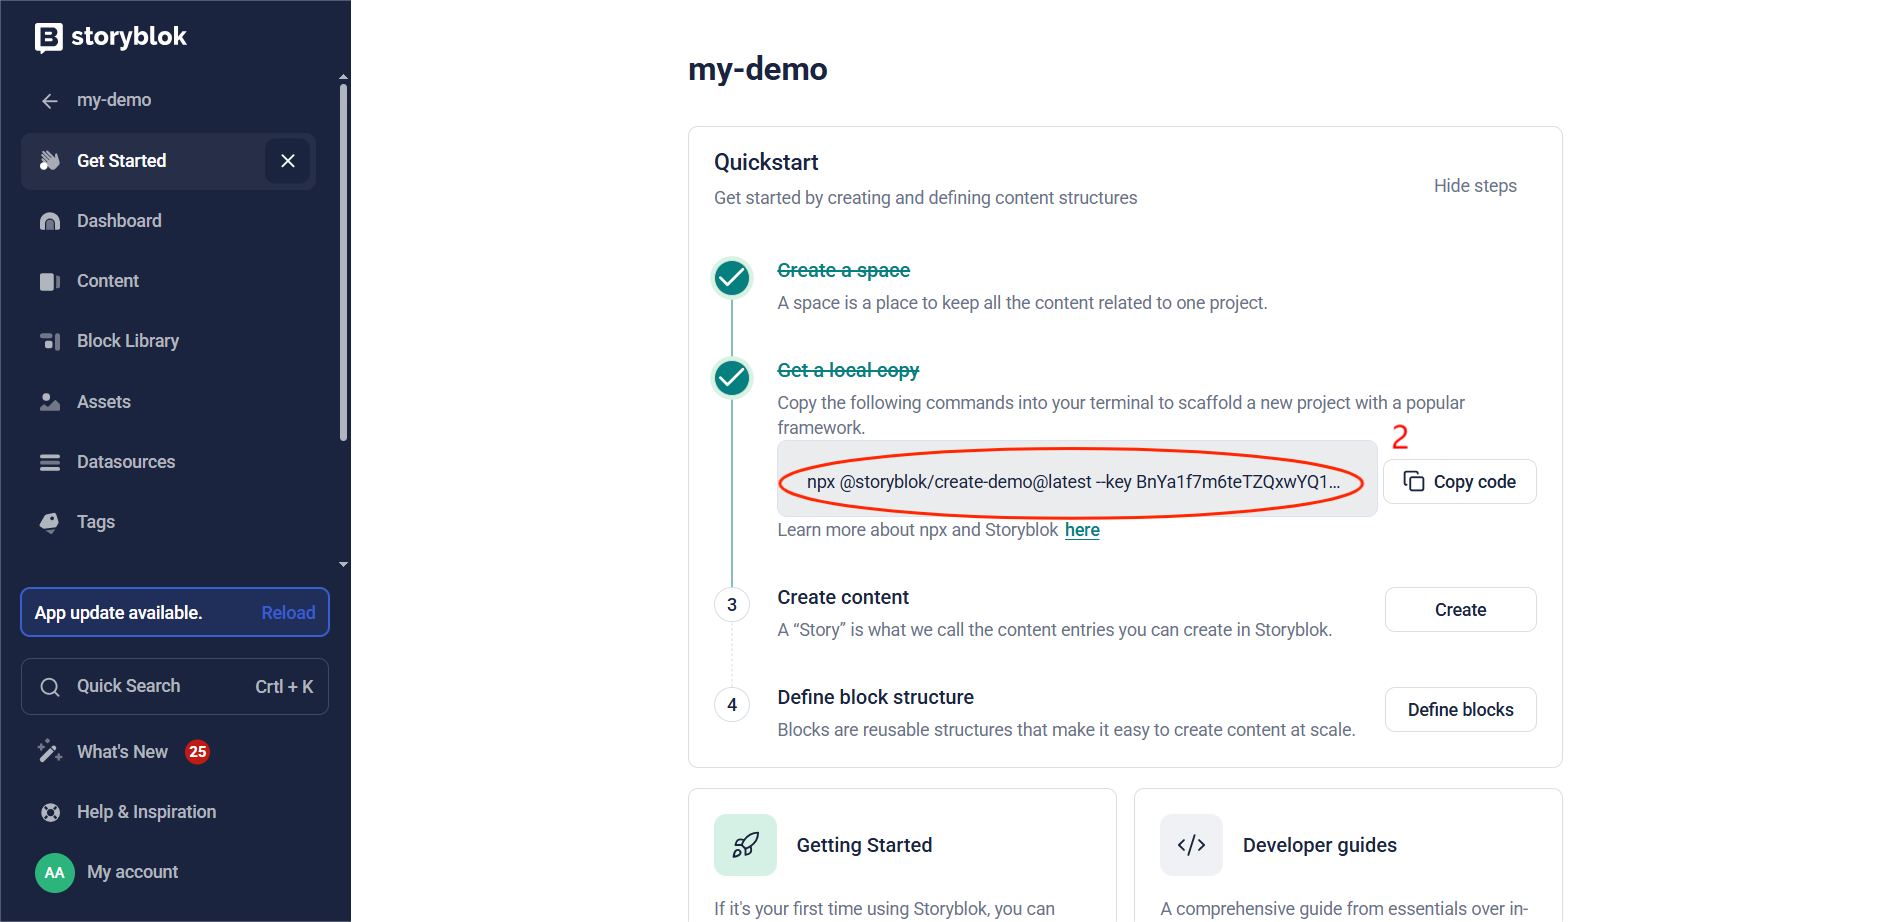
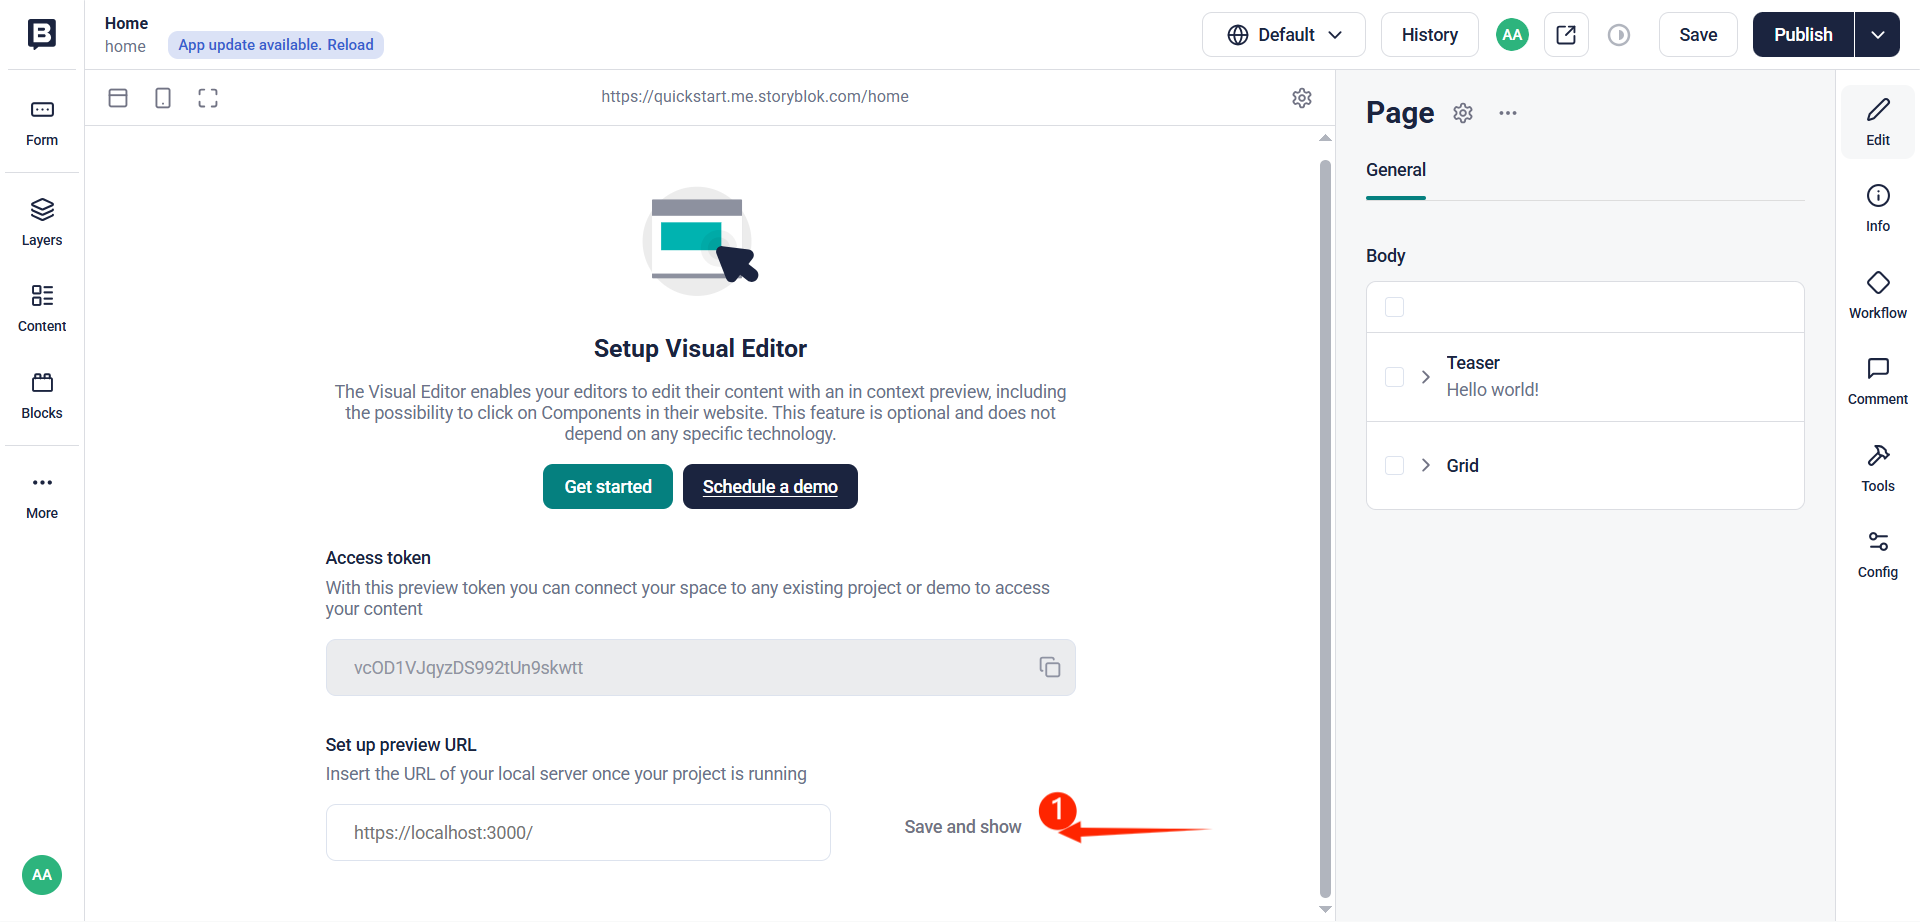
After you create your Storyblok account and navigate to your dashboard, {1} create a story. {2} Create a local copy of the project by copying the command provided and pasting it into your terminal
Generate a Nuxt Project with Storyblok
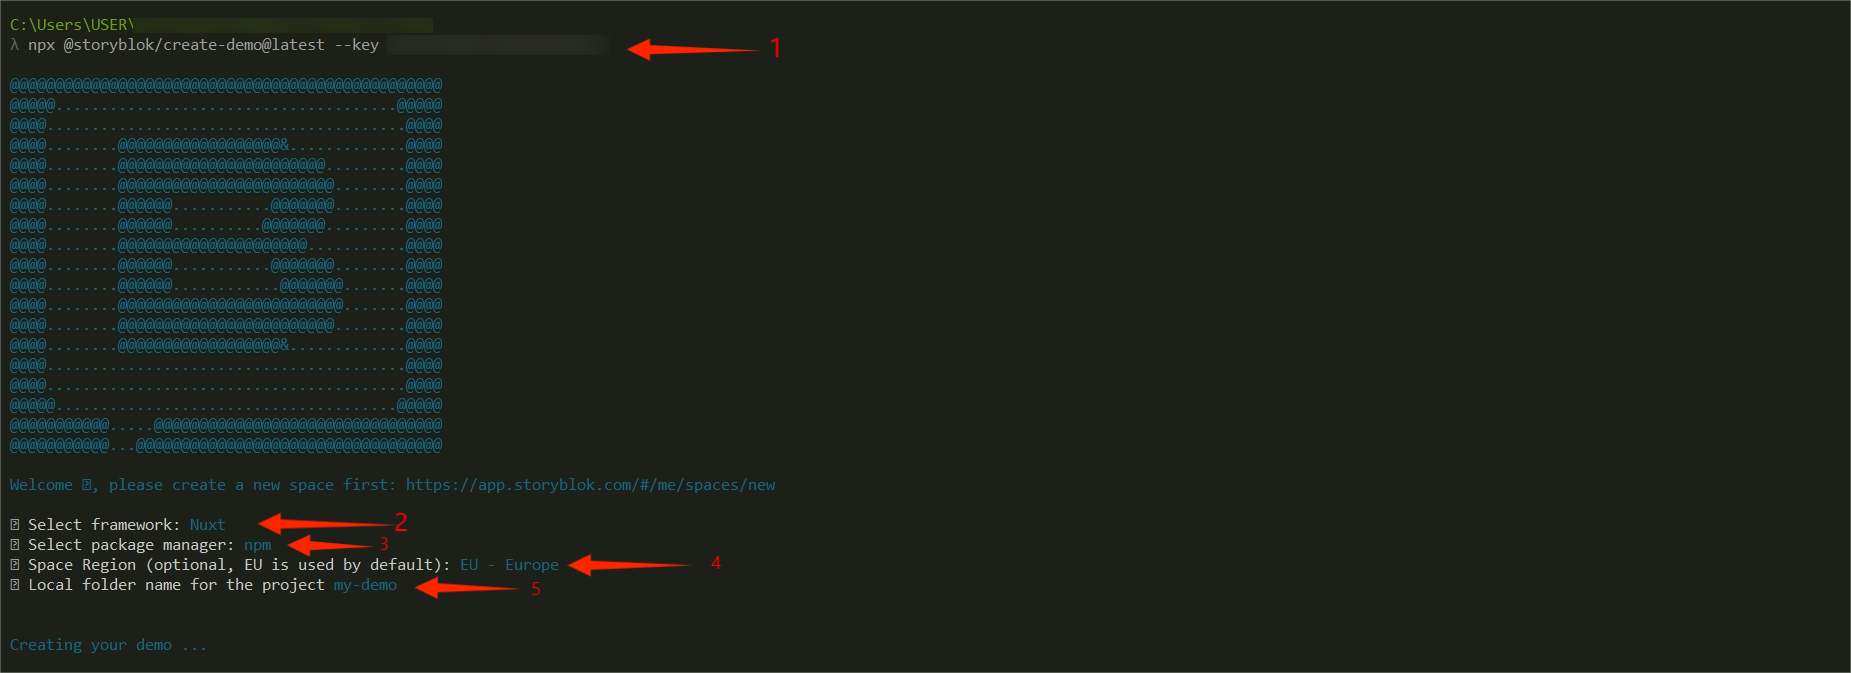
To create a Nuxt project with Storyblok automatically added, {1} run this command in your terminal:npx @storyblok/create-demo@latest --key your-key{2} Choose the framework you want. For this guide, I am going with Nuxt. {3} Select your preferred package manager. I am going with NPM for this guide. {4} The space region you selected when creating your story; select it here. {5} Pick a folder name you prefer.
Setting up the project
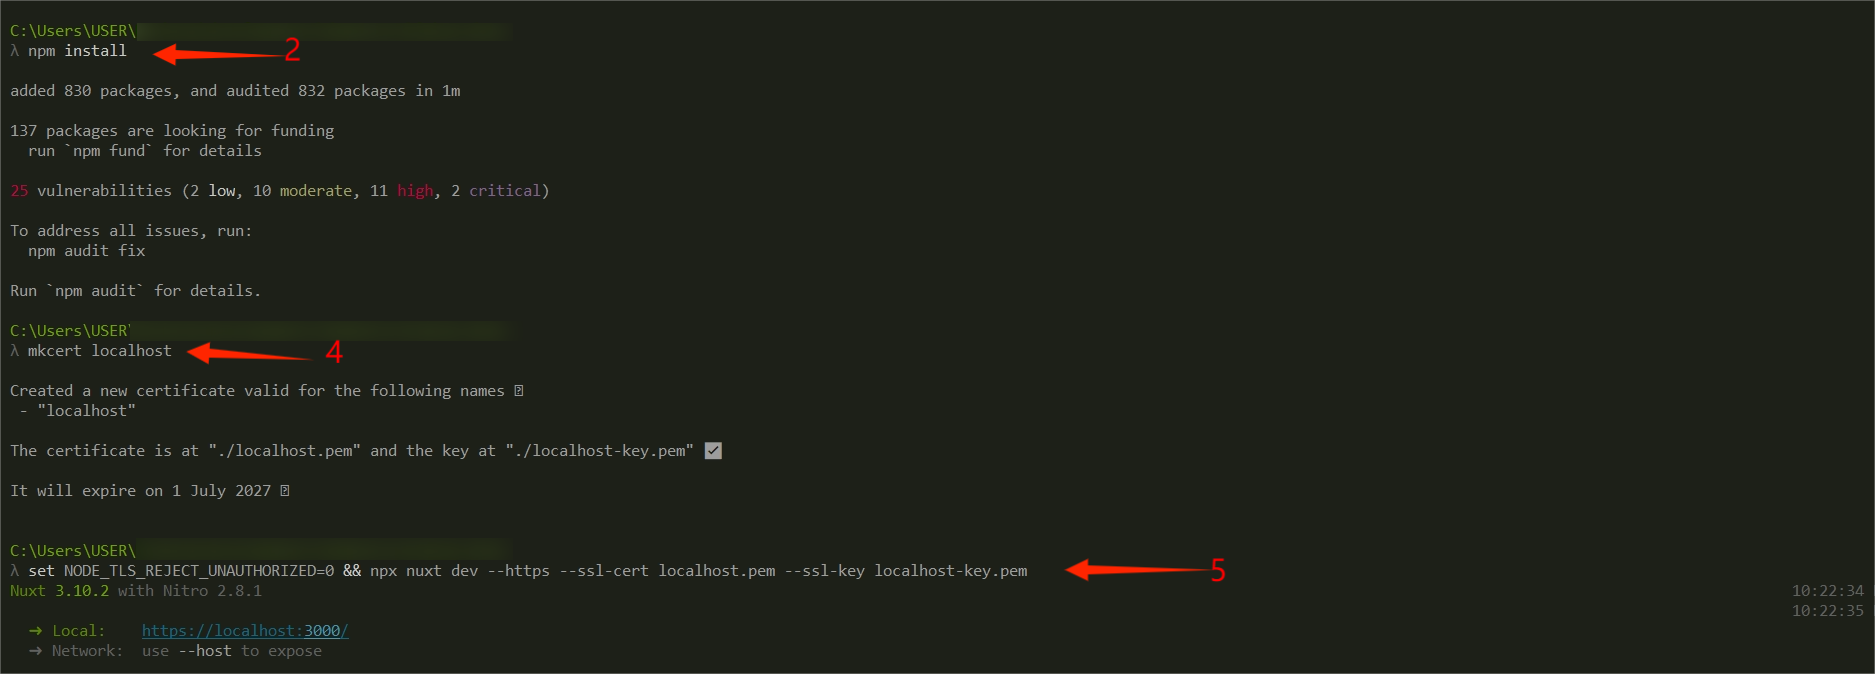
When your project has been created, follow these instructions to set up the project and run it. {1} cd project_nameMove into the project directory created. {2}npm install Install the dependencies. {3} mkcert -installFor Windows users, install a tool that allows you to create locally trusted SSL certificates - mkcert. {4} mkcert localhostto generate an SSL certificate. This will create two files, localhost.pem localhost-key.pem. {5} set NODE_TLS_REJECT_UNAUTHORIZED=0 && npx nuxt dev --https --ssl-cert localhost.pem --ssl-key localhost-key.pem
Connect Storyblok visual editor
Now that your project is running, it will be good to set up your project. {1} Set up the preview URL with the one running locally. If your local server is https://localhost:3000/, make sure it matches the URL you are setting in the preview URL. {2} Configure the route on the page that should show.
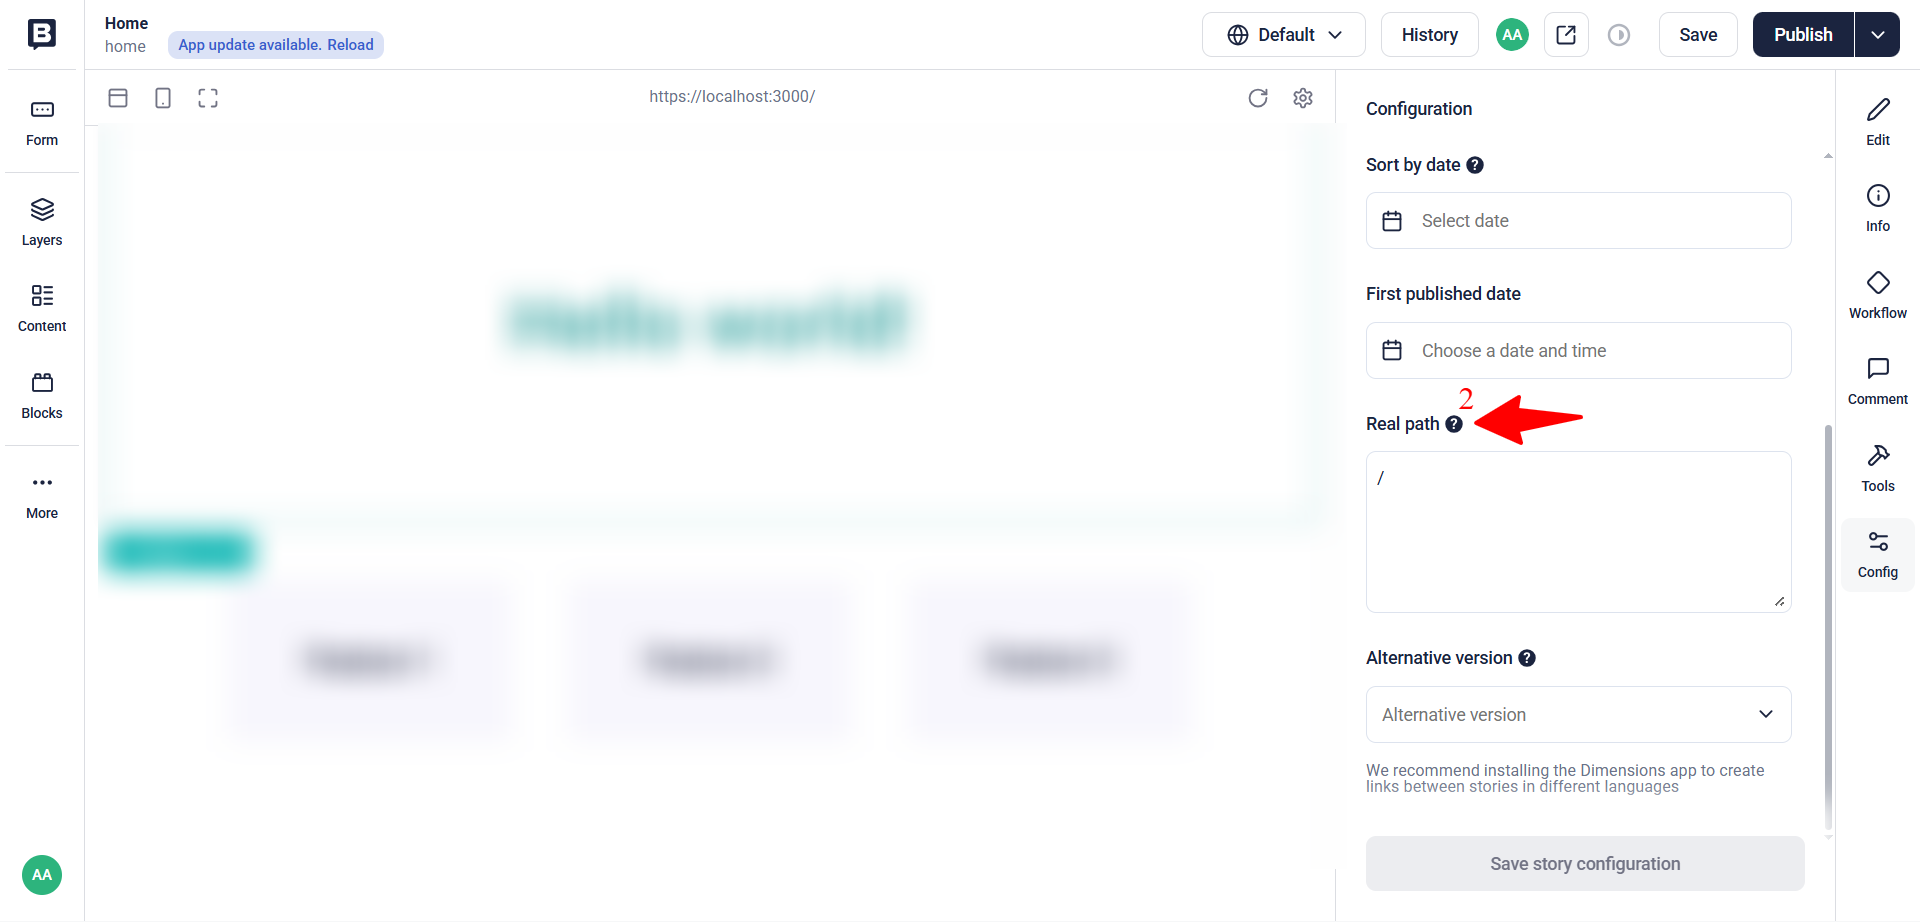
With this setup, you can now take charge of the styling from your local copy and control the contents from the Storyblok CMS.
Conclusion
With your Nuxt project successfully connected to Storyblok, this is the first step to you building powerful, dynamic, and editable websites. You would be able to easily control the structure of your content from Storyblok CMS, while handling the layout and design through your local Nuxt codebase
Subscribe to my newsletter
Read articles from Abimbola Adedotun Samuel directly inside your inbox. Subscribe to the newsletter, and don't miss out.
Written by

Abimbola Adedotun Samuel
Abimbola Adedotun Samuel
I am a front-end developer, tech explorer, loves public speaking, documenting my journey/challenges.