How To Introduce a New API Quickly Using Spring Boot and Maven
 John Vester
In my last post, I wrote about how quick and easy it is to turn an idea into reality. I built a Spring Boot API service using Gradle as my build management tool, and then deployed it to Heroku.
But what about for my readers who have Maven in their toolchain?
In this post, I’ll walk through the same project, but we'll look at how to accomplish the same result with Maven. And we'll see how Heroku makes deploying your Java apps and services seamless, regardless of the build tool you use.
The Motivational Quotes API
In my prior article, I sent the following request to ChatGPT:
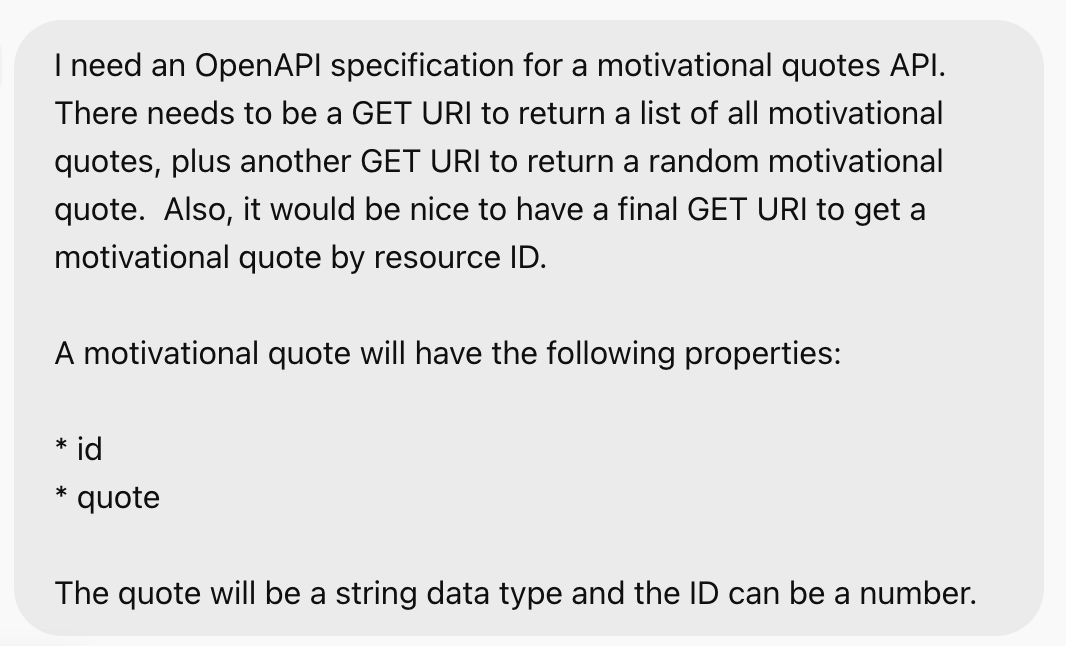
With some minor tweaks, I settled on the following OpenAPI specification in YAML format (saved as openapi.yaml):
openapi: 3.0.0
info:
  title: Motivational Quotes API
  description: An API that provides motivational quotes.
  version: 1.0.0
servers:
  - url: https://api.example.com
    description: Production server
paths:
  /quotes:
    get:
      summary: Get all motivational quotes
      operationId: getAllQuotes
      responses:
        '200':
          description: A list of motivational quotes
          content:
            application/json:
              schema:
                type: array
                items:
                  $ref: '#/components/schemas/Quote'
  /quotes/random:
    get:
      summary: Get a random motivational quote
      operationId: getRandomQuote
      responses:
        '200':
          description: A random motivational quote
          content:
            application/json:
              schema:
                $ref: '#/components/schemas/Quote'
  /quotes/{id}:
    get:
      summary: Get a motivational quote by ID
      operationId: getQuoteById
      parameters:
        - name: id
          in: path
          required: true
          schema:
            type: integer
      responses:
        '200':
          description: A motivational quote
          content:
            application/json:
              schema:
                $ref: '#/components/schemas/Quote'
        '404':
          description: Quote not found
components:
  schemas:
    Quote:
      type: object
      required:
        - id
        - quote
      properties:
        id:
          type: integer
        quote:
          type: string
Assumptions
Like last time, we’re going to keep things simple. We’ll use Java 17 and Spring Boot 3 to create a RESTful API. This time, we’ll use Maven for our build automation. Like before, we won’t worry about adding a persistence layer, and we’ll continue to allow anonymous access to the API.
Building the Spring Boot Service Using API-First
Again, I’ll use the Spring Boot CLI to create a new project. Here’s how you can install the CLI using Homebrew:
$ brew tap spring-io/tap
$ brew install spring-boot
Create a new Spring Boot Service using Maven
We’ll call our new project quotes-maven and create it with the following command:
$ spring init --build=maven \
    --package-name=com.example.quotes \
    --dependencies=web,validation quotes-maven
Notice how we specify the use of Maven for the build system instead of the default, Gradle. I also specify the com.example.quotes package name so that I can simply copy and paste the business code from the Gradle-based service to this service.
Here are the contents of the quotes-maven folder:
$ cd quotes-maven && ls -la

total 72
drwxr-xr-x  10 johnvester    320 Mar 15 10:49 .
drwxrwxrwx  89 root         2848 Mar 15 10:49 ..
-rw-r--r--   1 johnvester     38 Mar 15 10:49 .gitattributes
-rw-r--r--   1 johnvester    395 Mar 15 10:49 .gitignore
drwxr-xr-x   3 johnvester     96 Mar 15 10:49 .mvn
-rw-r--r--   1 johnvester   1601 Mar 15 10:49 HELP.md
-rwxr-xr-x   1 johnvester  10665 Mar 15 10:49 mvnw
-rw-r--r--   1 johnvester   6912 Mar 15 10:49 mvnw.cmd
-rw-r--r--   1 johnvester   1535 Mar 15 10:49 pom.xml
drwxr-xr-x   4 johnvester    128 Mar 15 10:49 src
Next, we edit the pom.xml file to adopt the API-First approach. The resulting file looks like this:
<?xml version="1.0" encoding="UTF-8"?>
<project xmlns="http://maven.apache.org/POM/4.0.0" xmlns:xsi="http://www.w3.org/2001/XMLSchema-instance"
    xsi:schemaLocation="http://maven.apache.org/POM/4.0.0 https://maven.apache.org/xsd/maven-4.0.0.xsd">
    <modelVersion>4.0.0</modelVersion>
    <parent>
        <groupId>org.springframework.boot</groupId>
        <artifactId>spring-boot-starter-parent</artifactId>
        <version>3.4.3</version>
        <relativePath/> <!-- lookup parent from repository -->
    </parent>
    <groupId>com.example</groupId>
    <artifactId>quotes-maven</artifactId>
    <version>0.0.1-SNAPSHOT</version>
    <name>demo</name>
    <description>Demo project for Spring Boot</description>
    <url/>
    <licenses>
        <license/>
    </licenses>
    <developers>
        <developer/>
    </developers>
    <scm>
        <connection/>
        <developerConnection/>
        <tag/>
        <url/>
    </scm>
    <properties>
        <java.version>17</java.version>
    </properties>
    <dependencies>
        <dependency>
            <groupId>org.springframework.boot</groupId>
            <artifactId>spring-boot-starter-web</artifactId>
        </dependency>
        <dependency>
            <groupId>org.springframework.boot</groupId>
            <artifactId>spring-boot-starter-validation</artifactId>
        </dependency>
        <dependency>
            <groupId>org.springdoc</groupId>
            <artifactId>springdoc-openapi-starter-webmvc-ui</artifactId>
            <version>2.8.5</version>
        </dependency>
        <dependency>
            <groupId>org.openapitools</groupId>
            <artifactId>jackson-databind-nullable</artifactId>
            <version>0.2.6</version>
        </dependency>
        <dependency>
            <groupId>org.projectlombok</groupId>
            <artifactId>lombok</artifactId>
        </dependency>

        <dependency>
            <groupId>org.springframework.boot</groupId>
            <artifactId>spring-boot-starter-test</artifactId>
            <scope>test</scope>
        </dependency>
    </dependencies>

    <build>
        <plugins>
            <plugin>
                <groupId>org.springframework.boot</groupId>
                <artifactId>spring-boot-maven-plugin</artifactId>
            </plugin>
            <plugin>
                <groupId>org.openapitools</groupId>
                <artifactId>openapi-generator-maven-plugin</artifactId>
                <version>7.12.0</version> <!-- Use the latest version -->
                <executions>
                    <execution>
                        <goals>
                            <goal>generate</goal>
                        </goals>
                    </execution>
                </executions>
                <configuration>
                    <inputSpec>${project.basedir}/src/main/resources/static/openapi.yaml</inputSpec>
                    <output>${project.build.directory}/generated-sources/openapi</output>
                    <generatorName>spring</generatorName>
                    <apiPackage>com.example.api</apiPackage>
                    <modelPackage>com.example.model</modelPackage>
                    <invokerPackage>com.example.invoker</invokerPackage>
                    <configOptions>
                        <dateLibrary>java8</dateLibrary>
                        <interfaceOnly>true</interfaceOnly>
                        <useSpringBoot3>true</useSpringBoot3>
                        <useBeanValidation>true</useBeanValidation>
                        <skipDefaultInterface>true</skipDefaultInterface>
                    </configOptions>
                </configuration>
            </plugin>
        </plugins>
    </build>

</project>
Then, we place openapi.yaml into the resources/static folder and create a file called application.yaml, placing it in the resources folder:
server:
  port: ${PORT:8080}
spring:
  application:
    name: demo
springdoc:
  swagger-ui:
    path: /swagger-docs
    url: openapi.yaml
Finally, we create the following banner.txt file and place it into the resources folder:
${AnsiColor.BLUE}
                   _
  __ _ _   _  ___ | |_ ___  ___
 / _` | | | |/ _ \| __/ _ \/ __|
| (_| | |_| | (_) | ||  __/\__ \
 \__, |\__,_|\___/ \__\___||___/
    |_|


${AnsiColor.DEFAULT}
:: Running Spring Boot ${AnsiColor.BLUE}${spring-boot.version}${AnsiColor.DEFAULT} :: Port #${AnsiColor.BLUE}${server.port}${AnsiColor.DEFAULT} ::
We can start the Spring Boot service to ensure everything works as expected.

Looks good!
Add the business logic
With the base service ready and already adhering to our OpenAPI contract, we add the business logic to the service. To avoid repeating myself, you can refer to my last article for implementation details. Clone the quotes repository, then copy and paste the controllers, repositories, and services packages into this project. Since we matched the package name from the original project, there should not be any updates required.
We have a fully functional Motivational Quotes API with a small collection of responses.
Now, let’s see how quickly we can deploy our service.
Using Heroku to Finish the Journey
Since Heroku is a great fit for deploying Spring Boot services, I wanted to demonstrate how using the Maven build system is just as easy as using Gradle. Going with Heroku allows me to deploy my services quickly without losing time dealing with infrastructure concerns.
To match the Java version we’re using, we create a system.properties file in the root folder of the project. The file has one line:
java.runtime.version = 17
Then, I create a Procfile in the same location for customizing the deployment behavior. This file also has one line:
web: java -jar target/quotes-maven-0.0.1-SNAPSHOT.jar
It’s time to deploy. With the Heroku CLI, I can deploy the service using a few simple commands. First, I authenticate the CLI and then create a new Heroku app.
$ heroku login
$ heroku create

Creating app... done, polar-caverns-69037
https://polar-caverns-69037-f51c2cc7ef79.herokuapp.com/ | https://git.heroku.com/polar-caverns-69037.git
My Heroku app instance is named polar-caverns-69037, so my service will run at https://polar-caverns-69037-f51c2cc7ef79.herokuapp.com/.
One last thing to do … push the code to Heroku, which deploys the service:
$ git push heroku master
Once this command is complete, we can validate a successful deployment via the Heroku dashboard:
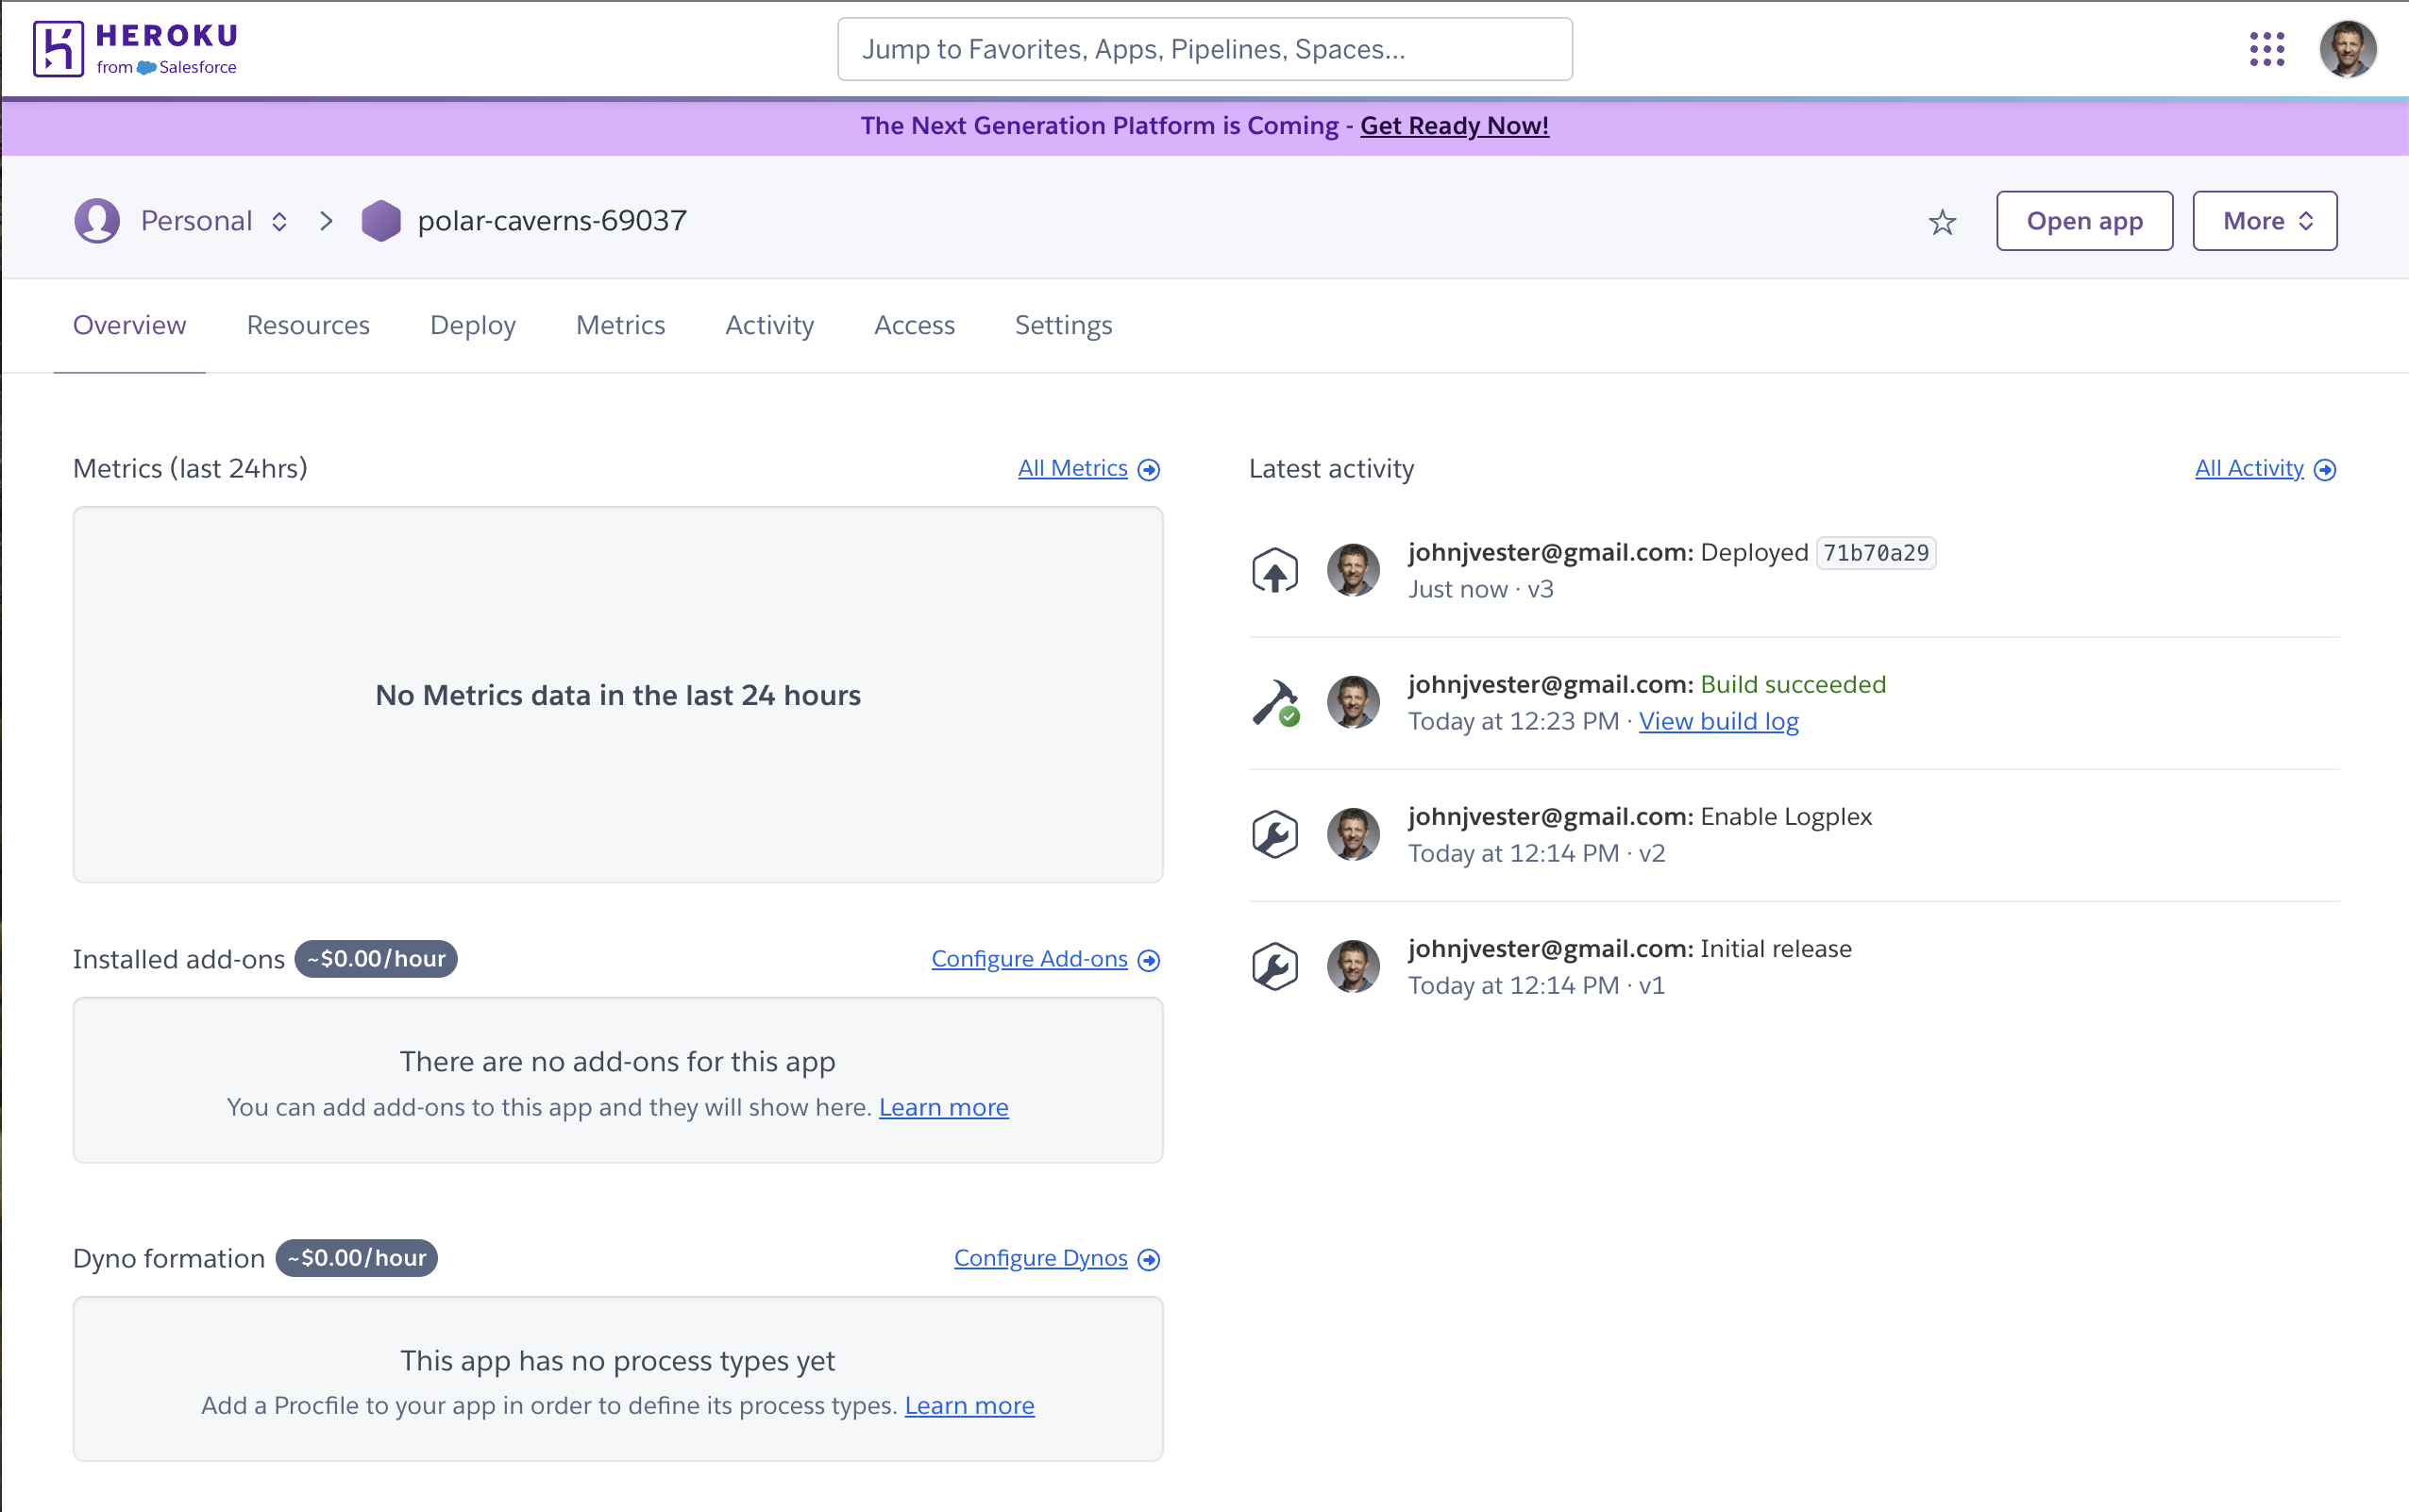
We’re up and running. It’s time to test.
Motivational Quotes in Action
With our service running on Heroku, we can send some curl requests to make sure everything works as expected.
First, we retrieve the list of quotes:
$ curl \
  --location \
  'https://polar-caverns-69037-f51c2cc7ef79.herokuapp.com/quotes'
[
   {
      "id":1,
      "quote":"The greatest glory in living lies not in never falling, but in rising every time we fall."
   },
   {
      "id":2,
      "quote":"The way to get started is to quit talking and begin doing."
   },
   {
      "id":3,
      "quote":"Your time is limited, so don't waste it living someone else's life."
   },
   {
      "id":4,
      "quote":"If life were predictable it would cease to be life, and be without flavor."
   },
   {
      "id":5,
      "quote":"If you set your goals ridiculously high and it's a failure, you will fail above everyone else's success."
   }
]
We can retrieve a single quote by its ID:
$ curl \
  --location \
  'https://polar-caverns-69037-f51c2cc7ef79.herokuapp.com/quotes/3'
{
   "id":3,
   "quote":"Your time is limited, so don't waste it living someone else's life."
}
We can retrieve a random motivational quote:
$ curl --location \
  'https://polar-caverns-69037-f51c2cc7ef79.herokuapp.com/quotes/random'
{
   "id":4,
   "quote":"If life were predictable it would cease to be life, and be without flavor."
}
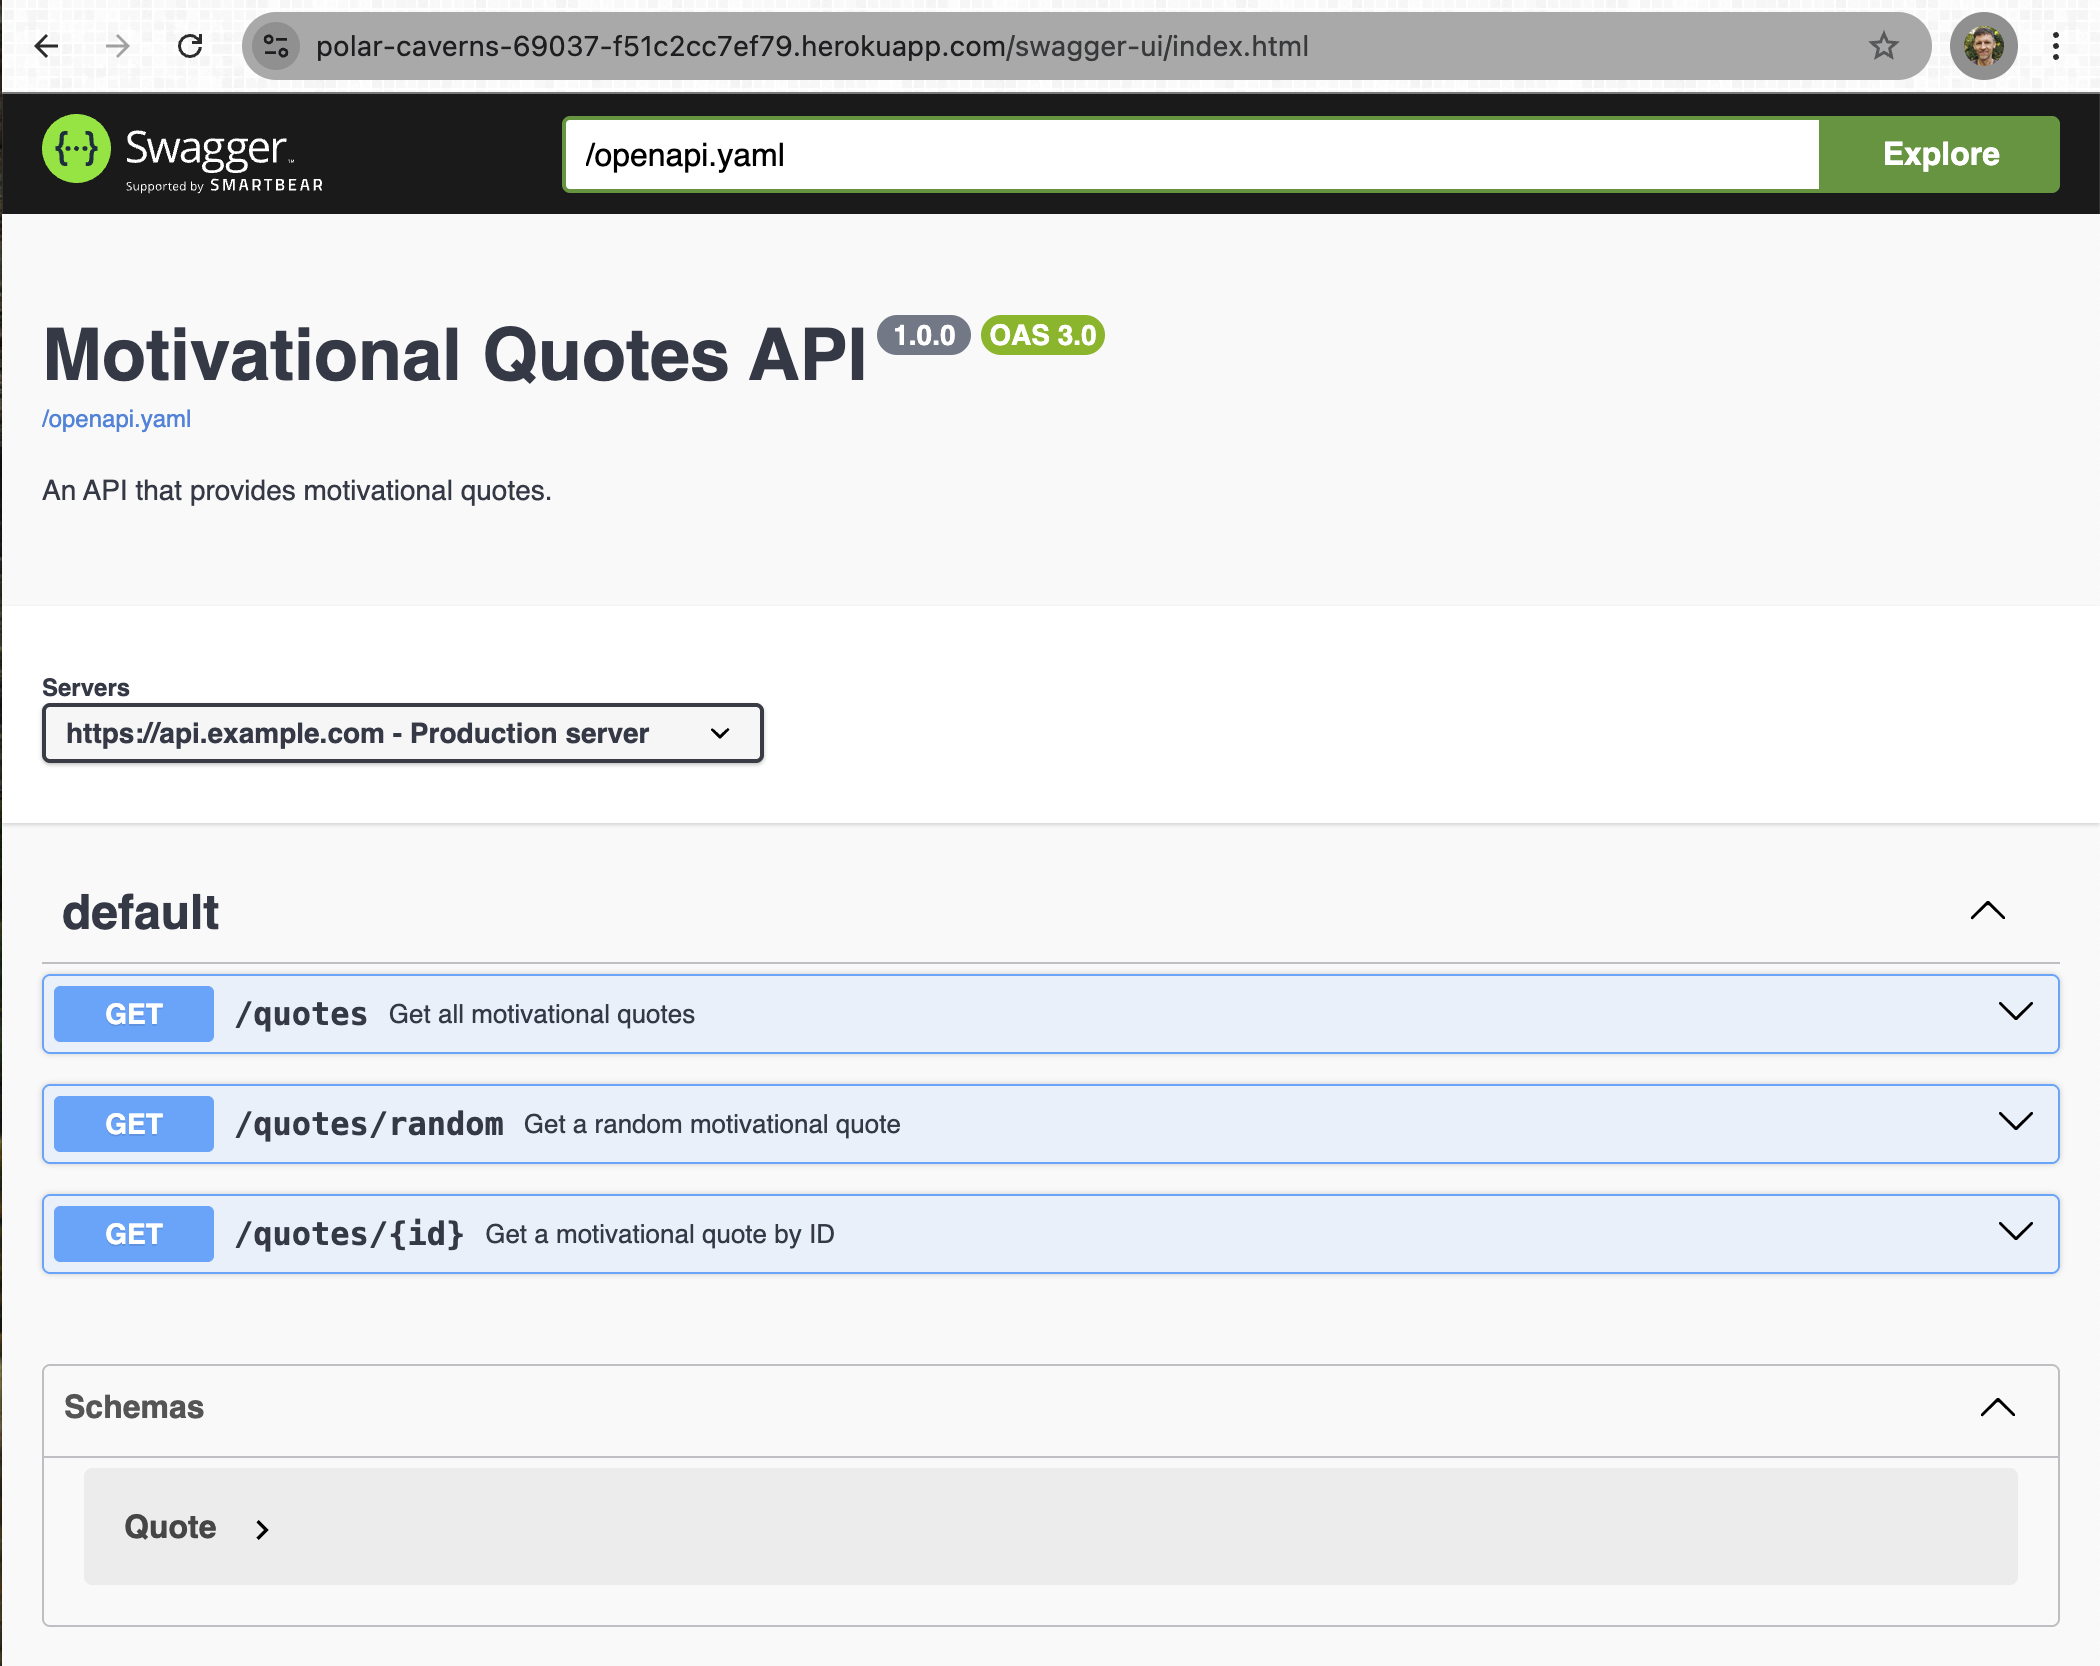
We can even browse the Swagger Docs too:
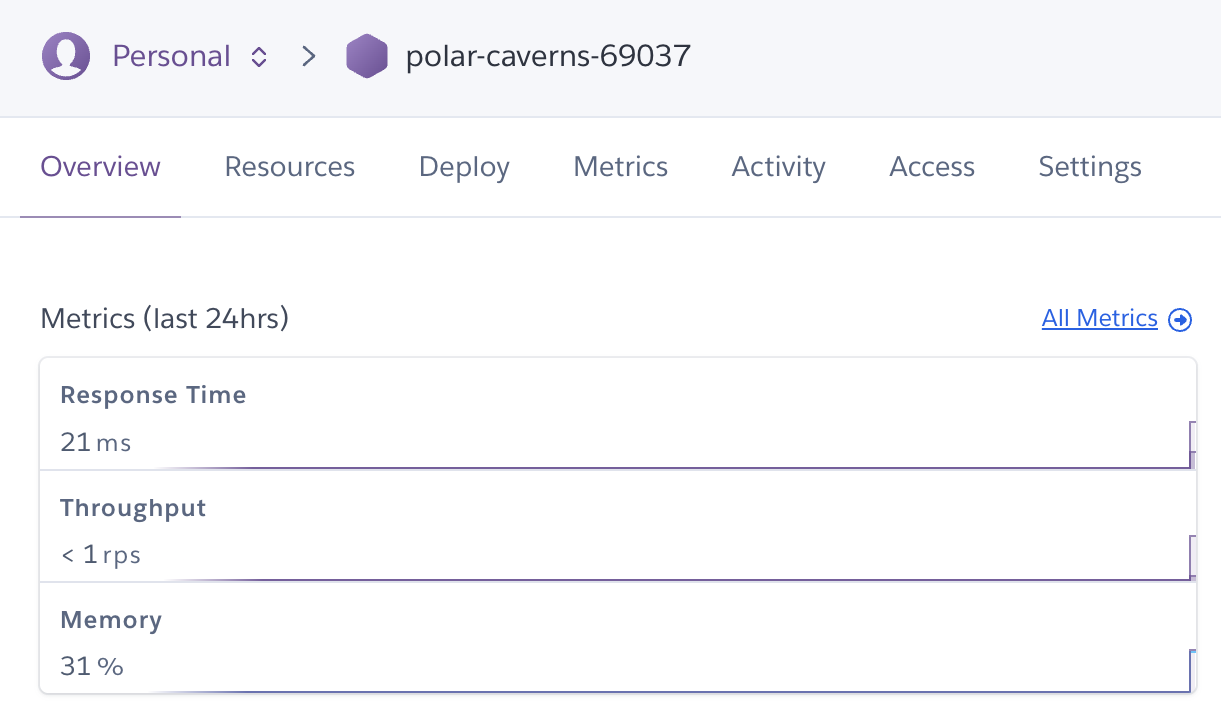
Returning to the Heroku dashboard, we see some activity on our new service:
Gradle Versus Maven
Using either Gradle or Maven, we quickly established a brand new RESTful API and deployed it to Heroku. But which one should you use? Which is a better fit for your project?
To answer this question, I asked ChatGPT again. Just like when I asked for an OpenAPI specification, I received a pretty impressive summary:
Gradle is great for fast builds, flexibility, and managing multi-projects or polyglot environments. It's ideal for modern workflows and when you need high customization.
Maven is better for standardized builds, simplicity, and when you need stable, long-term support with strong dependency management.
I found this article from Better Projects Faster, which was published in early 2024 and focused on Java build tools with respect to job descriptions, Google searches, and Stack Overflow postings. While this information is a bit dated, it shows users continue to prefer (worldwide) Maven over Gradle:
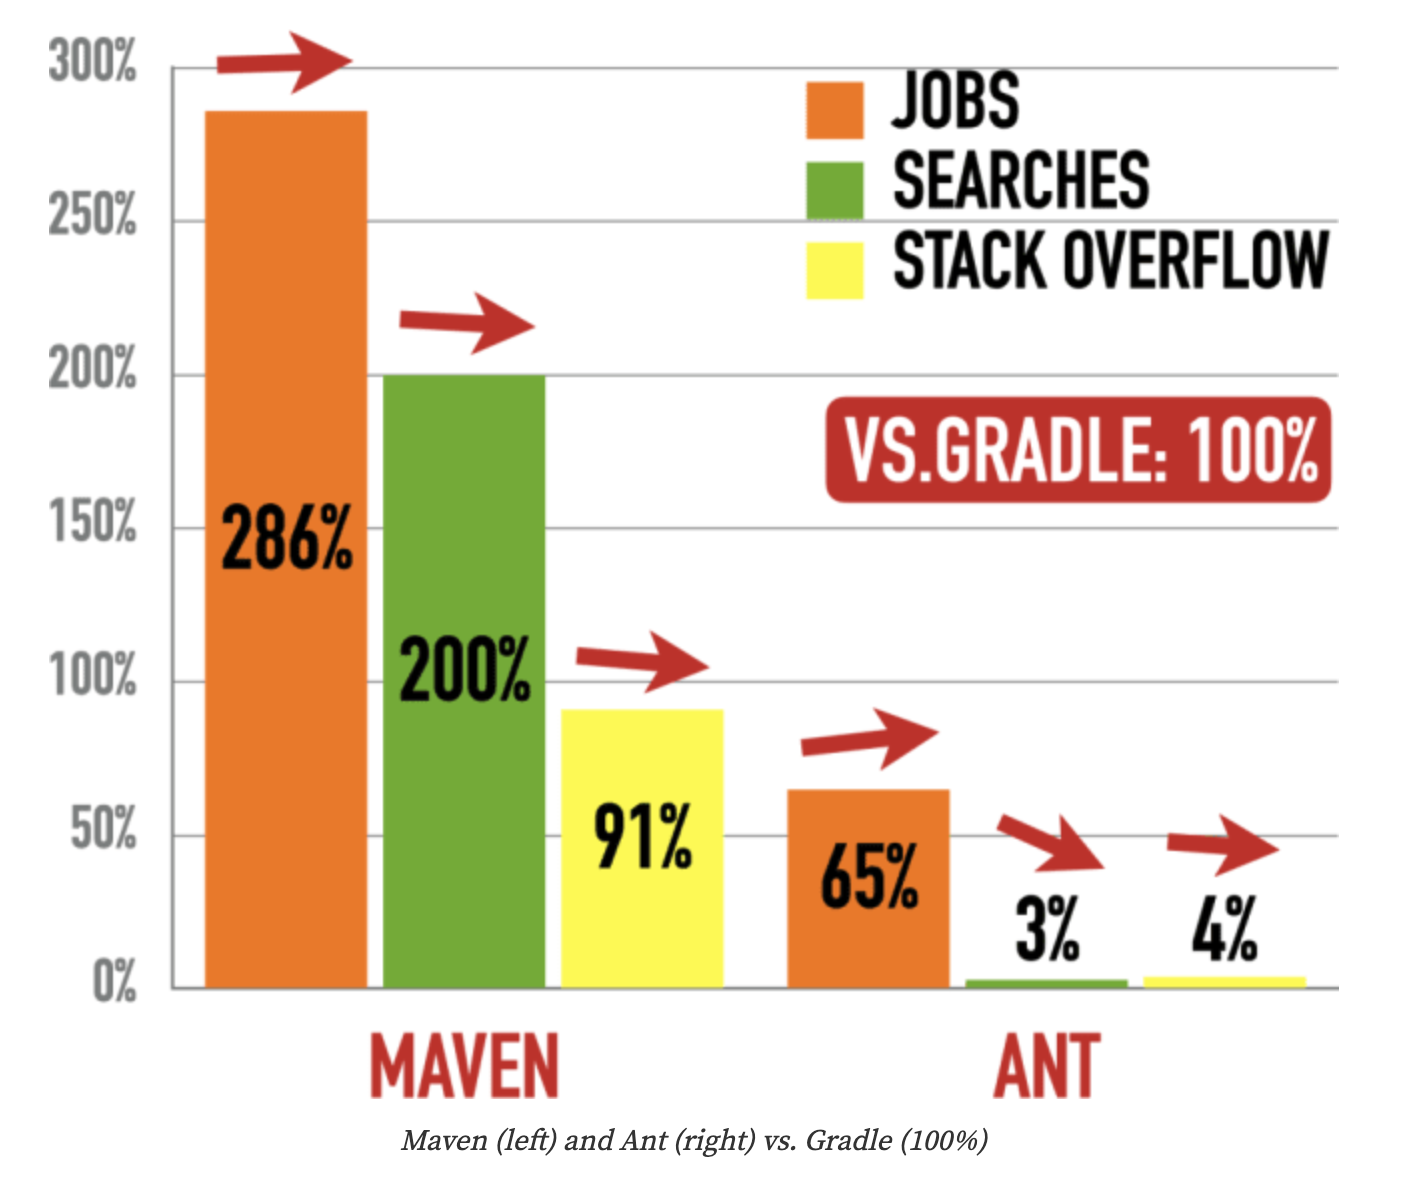
Over my career, I’ve been fortunate to use both build management tools, and this has helped minimize the learning curve associated with a new project. Even now, I find my team at Marqeta using both Gradle and Maven (nearly a 50/50 split) in our GitHub organization.
Conclusion
My readers may recall my personal mission statement, which I feel can apply to any IT professional:
“Focus your time on delivering features/functionality that extends the value of your intellectual property. Leverage frameworks, products, and services for everything else.” — J. Vester
In this article, we saw how Spring Boot handled everything required to implement a RESTful API using the Maven build management tool. Once our code was ready, we realized our idea quickly by deploying to Heroku with just a few CLI commands.
Spring Boot, Maven, and Heroku provided the frameworks and services so that I could remain focused on realizing my idea, not distracted by infrastructure and setup. Having chosen the right tools, I could deliver my idea quickly.
If you’re interested, the source code for this article can be found on GitLab.
Have a really great day!
Subscribe to my newsletter
Read articles from John Vester directly inside your inbox. Subscribe to the newsletter, and don't miss out.
Written by

John Vester
John Vester
Information Technology professional with 30+ years expertise in application design and architecture, feature development, project management, system administration and team supervision. Currently focusing on enterprise architecture/application design utilizing object-oriented programming languages and frameworks.