🚀Making Docker Containers Production-Ready
 Pratik Bapat
Initial Tasks:
✅ Task 1: Learn about multi-stage builds and why they are crucial for production.
✅ Task 2: Write a basic Dockerfile for a simple Python or Node.js app and analyze its size using:
docker images
✅ Task 4: Check Container logs using Docker logging:
docker logs <container_id>
By default, Docker logs everything in /var/lib/docker/containers/<container_id>/ as JSON
{
  "log-driver": "json-file",
  "log-opts": {
    "max-size": "10m",
    "max-file": "3"
  }
}
🔥 Challenge 1: Convert an existing Dockerfile into a multi-stage build and compare image sizes.
Why Multi-Stage Builds?
✅ Reduce image size
✅ Remove unnecessary build dependencies
✅ Optimize deployment
Step 1: Traditional Dockerfile (Without Multi-Stage)
FROM python:3.9
WORKDIR /app
COPY requirements.txt .
RUN pip install --no-cache-dir -r requirements.txt
COPY . .
EXPOSE 5000
CMD ["python", "app.py"]
echo "flask" > requirements.txt
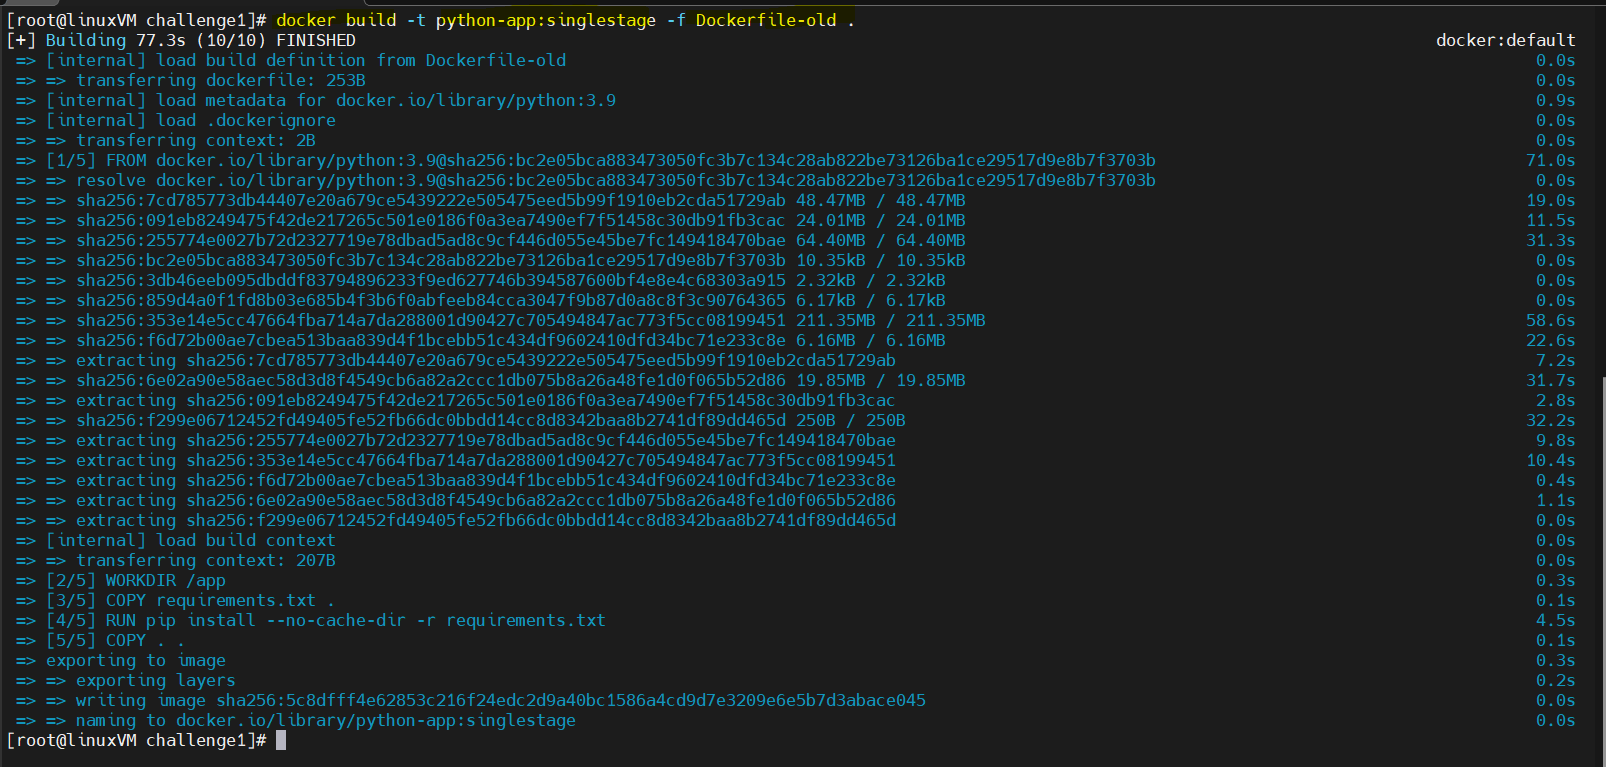
docker build -t python-app:singlestage -f Dockerfile-old .
👉 Image Size: ~1GB+
Step 2: Optimized Multi-Stage Build
# First stage - Builder
FROM python:3.9-slim AS builder
WORKDIR /app
COPY requirements.txt .
RUN pip install --upgrade pip  # Upgrade pip
RUN pip install --no-cache-dir --user -r requirements.txt  # Install dependencies

# Second stage - Final Image
FROM python:3.9-slim
WORKDIR /app
COPY --from=builder /root/.local /root/.local
COPY . .
ENV PATH="/root/.local/bin:$PATH"
EXPOSE 5000
CMD ["python", "app.py"]
echo "flask" > requirements.txt
👉 Image Size: ~100MB+
Step 3: Build & Compare Image Sizes
- Build the Multi-Stage Image
docker build --no-cache -t python-app:multistage .

- Compare Image Sizes
docker images | grep "python-app"

✅ Outcome: Multi-stage build significantly reduces image size.
🔥 Challenge 2: Run a lightweight Alpine-based container (python:3.9-alpine or node:14-alpine).
Step 1: Modify Dockerfile
FROM python:3.9-alpine
WORKDIR /app
COPY requirements.txt .
RUN pip install --no-cache-dir -r requirements.txt
COPY . .
EXPOSE 5000
CMD ["python", "app.py"]
echo "flask" > requirements.txt
Step 2: Build and Compare
docker build -t python-app:alpine .
docker images | grep "python-app"
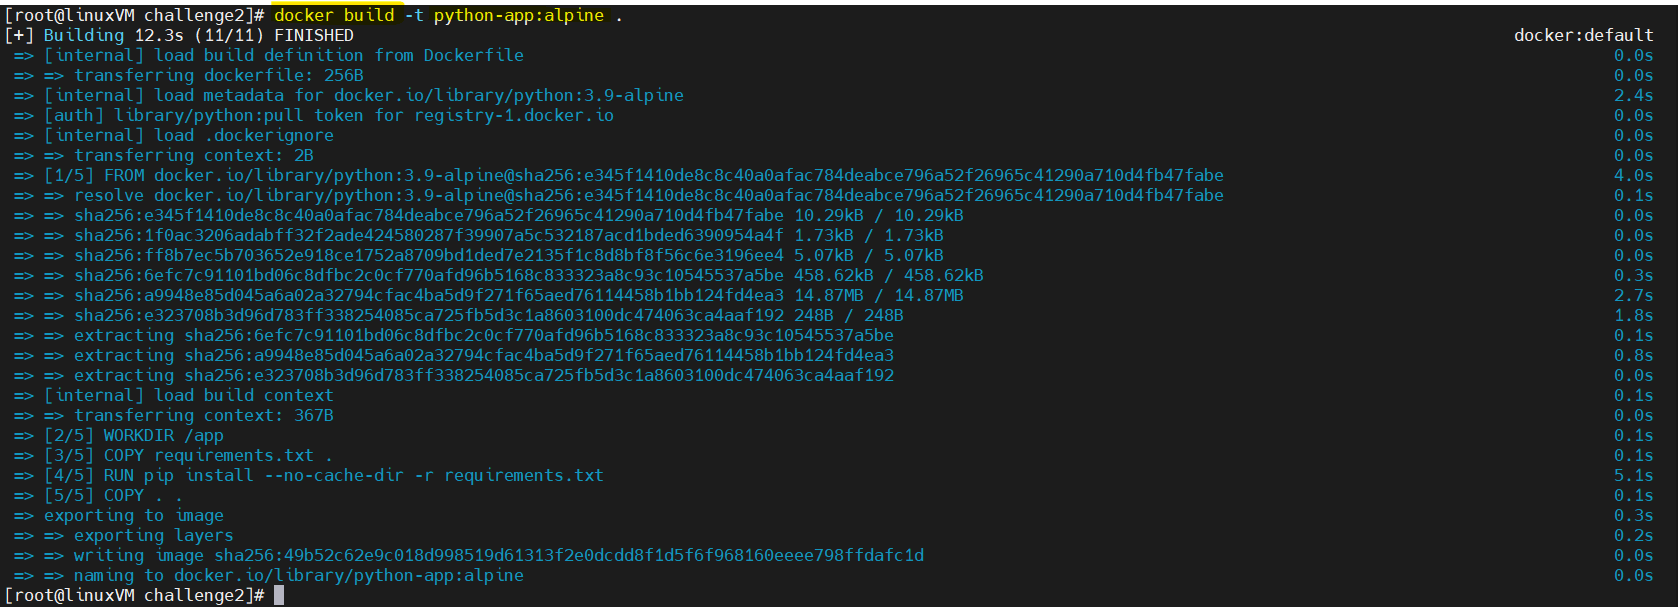

✅ Outcome: Reduces image size to ~50MB.
🔥 Challenge 3: Add a HEALTHCHECK in a Dockerfile for a web application (curl or wget).
Step 1: Modify Dockerfile
FROM python:3.9-alpine

WORKDIR /app

# Install curl for healthcheck
RUN apk add --no-cache curl

# Copy and install dependencies
COPY requirements.txt .
RUN pip install --no-cache-dir -r requirements.txt

# Copy application files
COPY . .

EXPOSE 5000

# Healthcheck for Flask app
HEALTHCHECK --interval=30s --timeout=10s --retries=3 \
  CMD curl --fail http://localhost:5000/ || exit 1

CMD ["python", "app.py"]
echo "flask" > requirements.txt
- Create a file named app.py
# app.py
from flask import Flask

app = Flask(__name__)

@app.route('/')
def home():
    return "Hello, Docker!"

if __name__ == '__main__':
    app.run(host='0.0.0.0', port=5000)
Step 2: Build and Run
docker build -t python-app:healthcheck .
docker images | grep "python-app"
docker run -d --name python-app -p 5000:5000 python-app:healthcheck
docker ps


Step 3: Check Container Health
docker inspect <container_id> | grep -i health

Step 4: Check app running or not
curl -s http://localhost:5000

✅ Outcome: Docker continuously checks if the app is running correctly.
🔥 Challenge 4: Run a container without root privileges and ensure the app runs correctly.
Step 1: Modify Dockerfile
FROM python:3.9-alpine
WORKDIR /app
RUN addgroup -S appgroup && adduser -S appuser -G appgroup
USER appuser
COPY requirements.txt .
RUN pip install --no-cache-dir -r requirements.txt
COPY . .
EXPOSE 6000
CMD ["python", "app.py"]
echo "flask" > requirements.txt
- Create a file named app.py
# app.py
from flask import Flask

app = Flask(__name__)

@app.route('/')
def home():
    return "Hello, Docker! Running without root"

if __name__ == '__main__':
    app.run(host='0.0.0.0', port=6000)
Step2: Build and Run
docker build -t python-app:nonroot .
docker run -d --name python-appuser -p 6000:6000 python-app:nonroot
docker ps


Step 3: Checkout app
curl -s http://localhost:6000

✅ Outcome: The container runs without root privileges, improving security.
🔥 Challenge 5: Scan your Docker image using docker scan or Trivy, and fix vulnerabilities.
Step 1: Scan the Image Using Trivy (More Detailed)
- Install Trivy:
rpm -ivh https://github.com/aquasecurity/trivy/releases/download/v0.61.0/trivy_0.61.0_Linux-64bit.rpm

- Run the security scan
trivy image python-app:nonroot

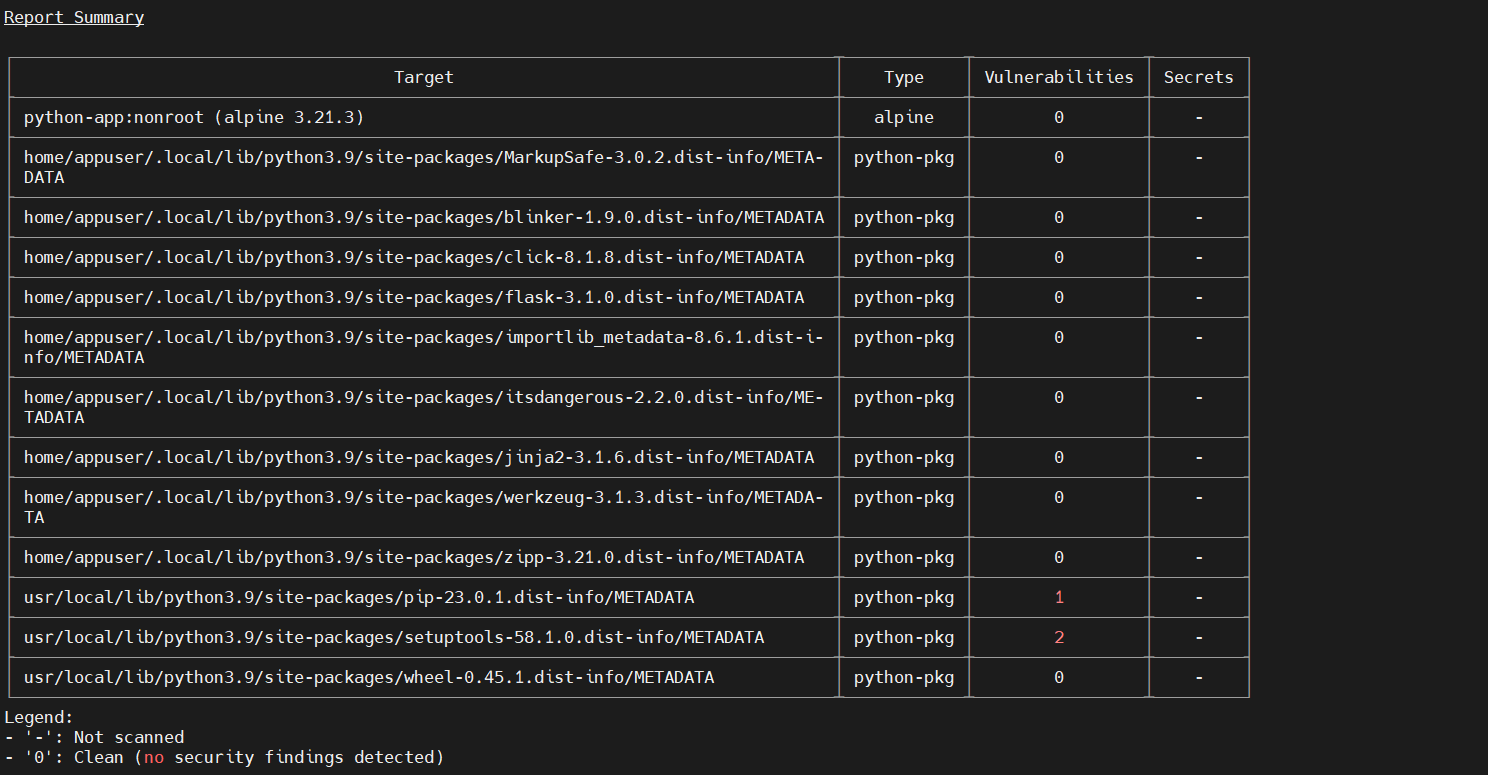

✅ Outcome: Use an updated base image and remove unnecessary dependencies.
🔥 Challenge 6: Implement log management by redirecting container logs to a file.
Step 1: Modify Docker Daemon Config (/etc/docker/daemon.json)
{
  "log-driver": "json-file",
  "log-opts": {
    "max-size": "10m",
    "max-file": "3"
  }
}
systemctl daemon-reload
sudo systemctl restart docker
Step 2: Redirect Logs to a File
docker run -d --name python-app2\
  --log-driver=json-file \
  --log-opt max-size=10m --log-opt max-file=3 \
  python-app:nonroot
docker ps -a

Use Docker's Default Log File Location
- Docker logs are stored by default in:
cat /var/lib/docker/containers/<container_id>/<container_id>-json.log

✅ Outcome: Logs are now stored efficiently with rotation.
🔥 Challenge 7: Set up resource limits (memory, CPU) for a container using --memory and --cpus.
Step 1: Run the Container with CPU & Memory Limits
- You can limit memory and CPU usage using:
docker run -d --name python-app3 \
  --memory=256m --cpus=0.5 \
  python-app:nonroot
docker ps
Explanation of Flags
--memory="256m" → Limits the container to 256MB of RAM.
--cpus="0.5" → Restricts the container to 50% of a single CPU core.

Step 2: Verify Resource Limits
- Check Container Stats in Real-Time
docker stats python-app3

- Inspect the Container’s Resource Settings
docker inspect python-app3 | grep -i '"memory"\|"cpu"'

✅ Outcome: Prevents excessive resource consumption.
🔥 Challenge 8: Use docker build --progress=plain to analyze layer caching and optimize the build process.
Step 1: Modify Your Dockerfile for Layer Optimization
FROM python:3.9
WORKDIR /app
# Copy only requirements first (Optimizes caching)
COPY requirements.txt .
# Install dependencies first (Ensures better caching)
RUN pip install --no-cache-dir -r requirements.txt
# Now copy the rest of the application files
COPY . .
EXPOSE 5000
CMD ["python", "app.py"]
echo "flask" > requirements.txt
Step 2: Build the Docker Image with Plain Progress Output
- Run the build command with --progress=plain to analyze the build process:
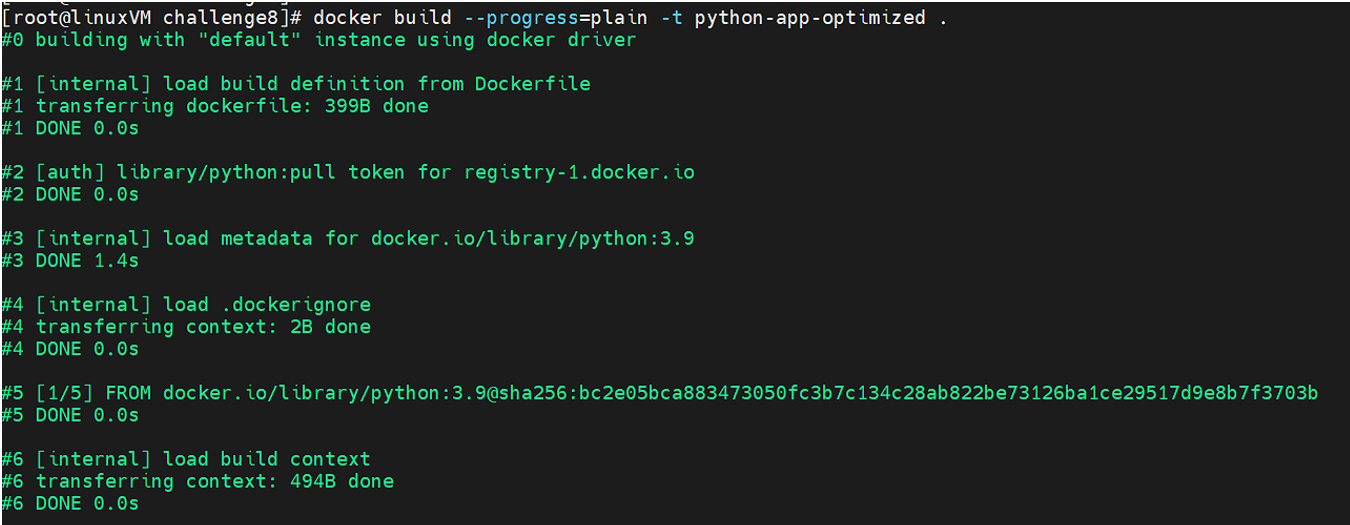
docker build --progress=plain -t python-app-optimized .
This copies all files early, causing the dependency installation to run every time.
This reuses cached layers, making the build significantly faster when only app files change.


Step 3: Rebuild and Compare Build Times
- Rebuilding the image:
docker build --progress=plain -t python-app-optimized .
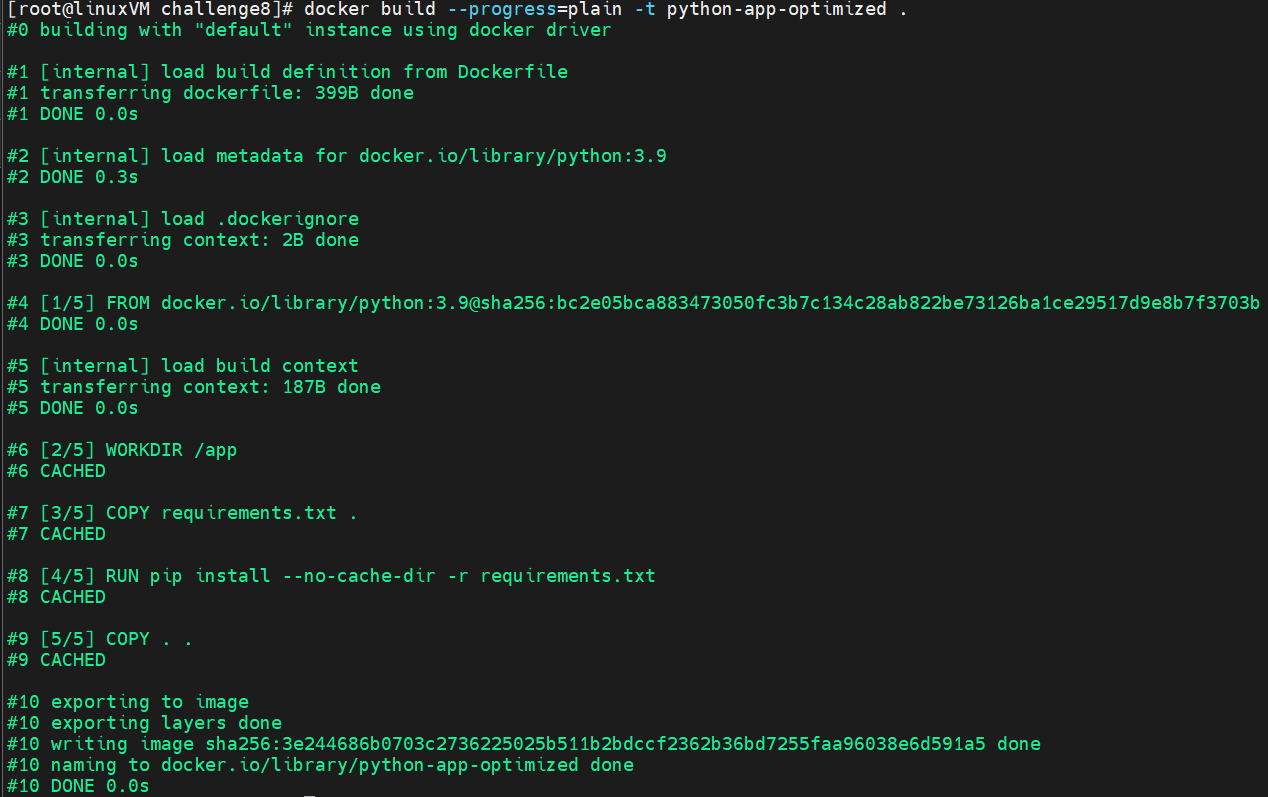
Note: The dependency installation step (pip install) should be skipped because it uses layer caching.
✅ Outcome: Dependencies rarely change, so they remain cached, speeding up builds.
Subscribe to my newsletter
Read articles from Pratik Bapat directly inside your inbox. Subscribe to the newsletter, and don't miss out.
Written by
