Hosting Static Websites on Azure Blob Storage: A Beginner's Guide
 Damilola Linda Olowookere
Do you need a personal portfolio, a documentation site, or a business landing page? Azure offers a reliable solution without the need for managing servers! Hosting static websites on the cloud has never been easier, and Azure Blob Storage provides a simple, scalable, and cost-effective way to do it.
With just a few steps, you can upload your HTML, CSS, and JavaScript files and have your website live in no time. This tutorial will walk you through the entire process, from setting up your Azure Storage Account to configuring static website hosting and making your site accessible to users worldwide.
Let’s dive in and get your site online!
Step 1: Create your storage account & enable static website hosting.
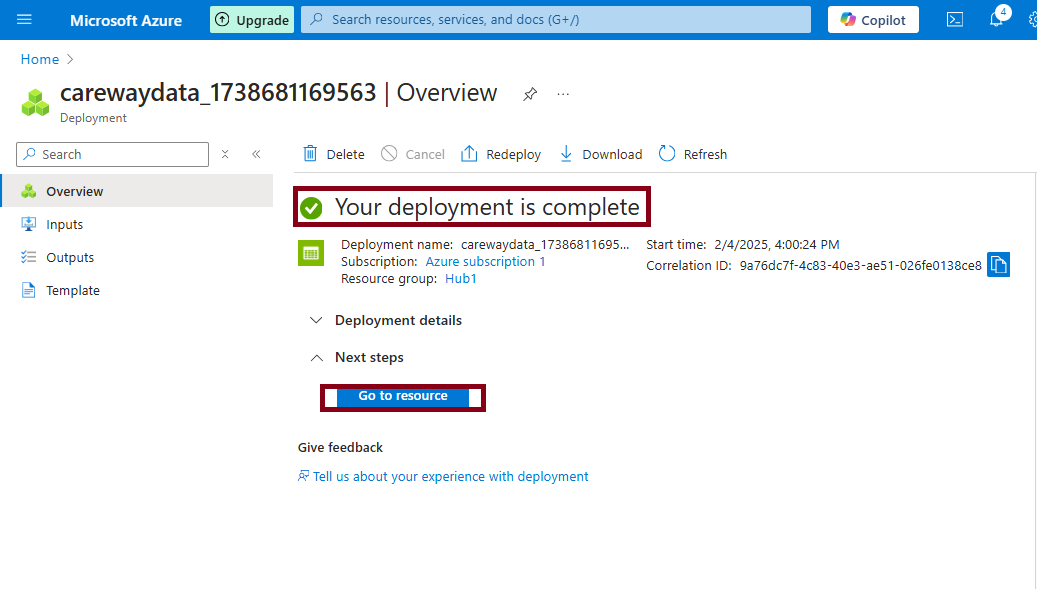
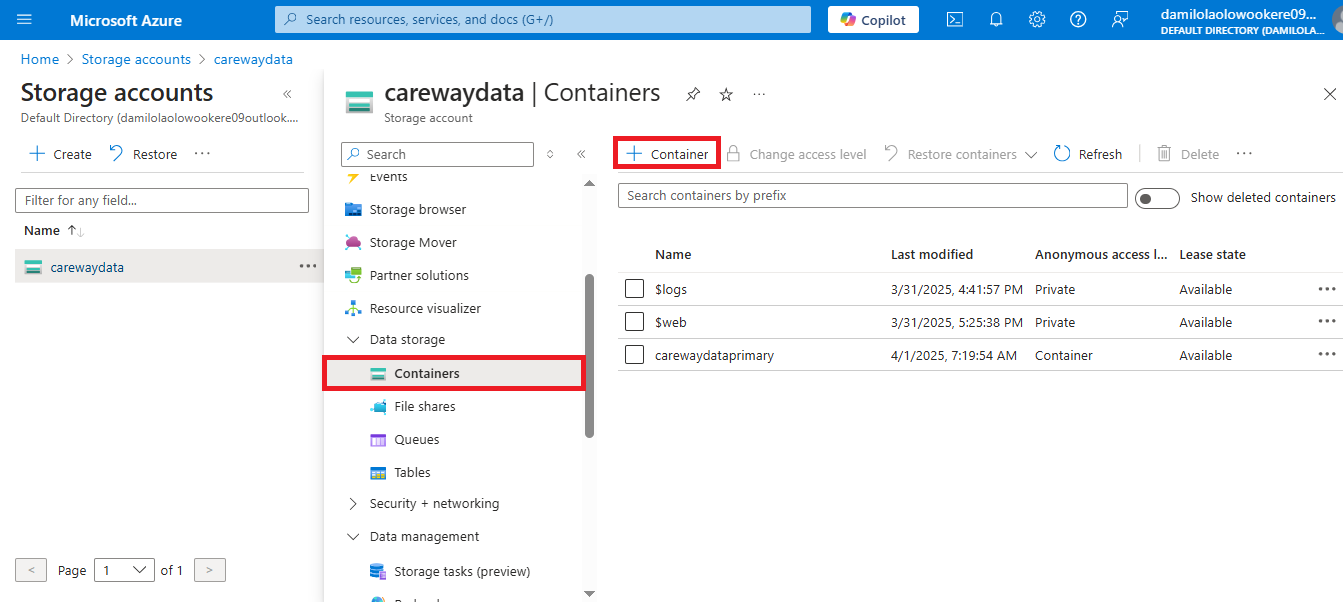
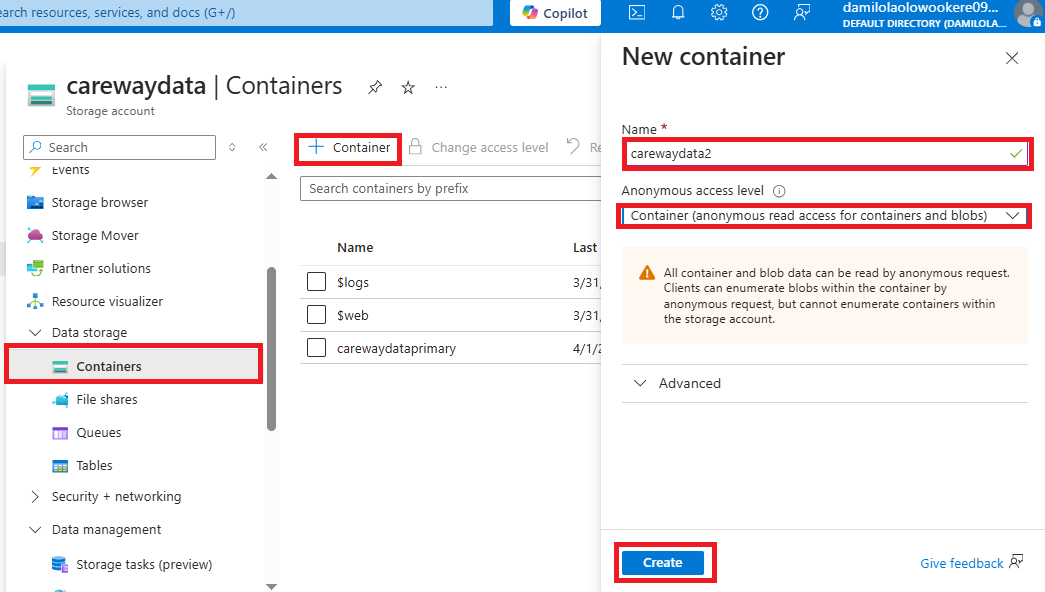
I. Yes, to host a static website on Azure Blob Storage, you first need to create a storage account. For a step-by-step guide on setting up a storage account and creating a container, refer to my article, “How to Share Confidential Files in Azure Without Compromising Security.” The image below shows that our storage account has been successfully deployed and is ready for use. Click on “Go to Resource”, then proceed to add a container within it.
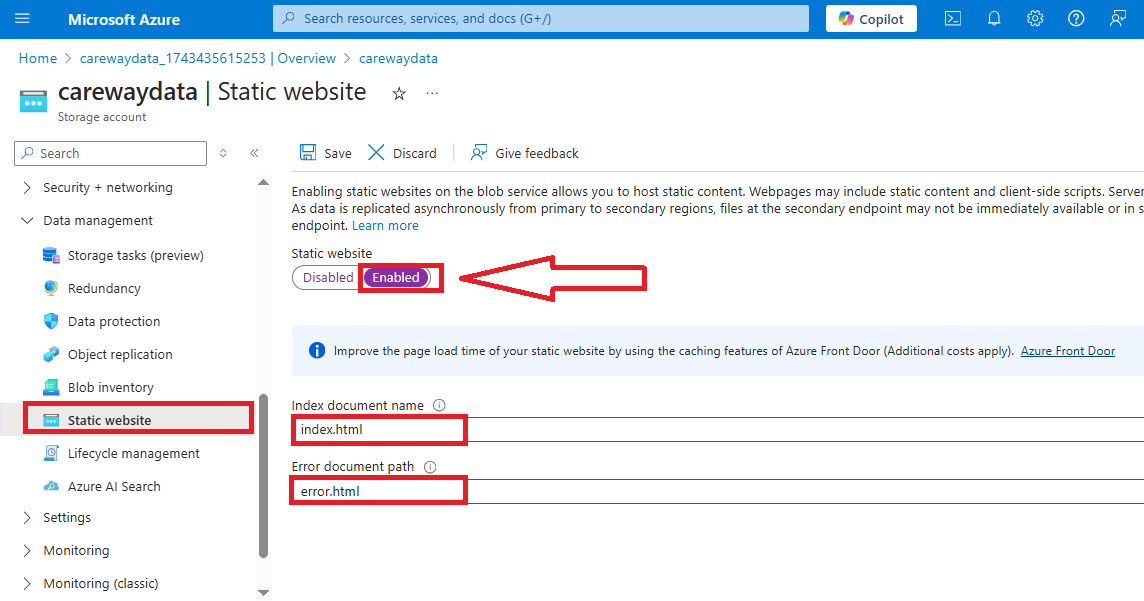
II. From the left pane, go to Data management > Static website, click to enable Static website. Type in your Index document name as “index.html” and also your Error Document name as “error.html”.
Step 2: Edit your website files in VS Code (optional).
I. For this tutorial, we’ll use a free static website template that includes HTML, CSS, and JavaScript files. Download the free template from a website that offers it, then extract the files. Note: To extract, right-click on the downloaded file in your File Manager, then select "Extract".

II. In VS Code, install the Azure Tools extension by clicking on the Extensions icon in the left vertical pane and searching for "Azure Tools." Click Install to add it. Next, navigate to the Explorer (first icon on the left pane) and select "Add Folder to Workspace." Choose the extracted folder that contains your website files. Refer to the images below for further clarification.
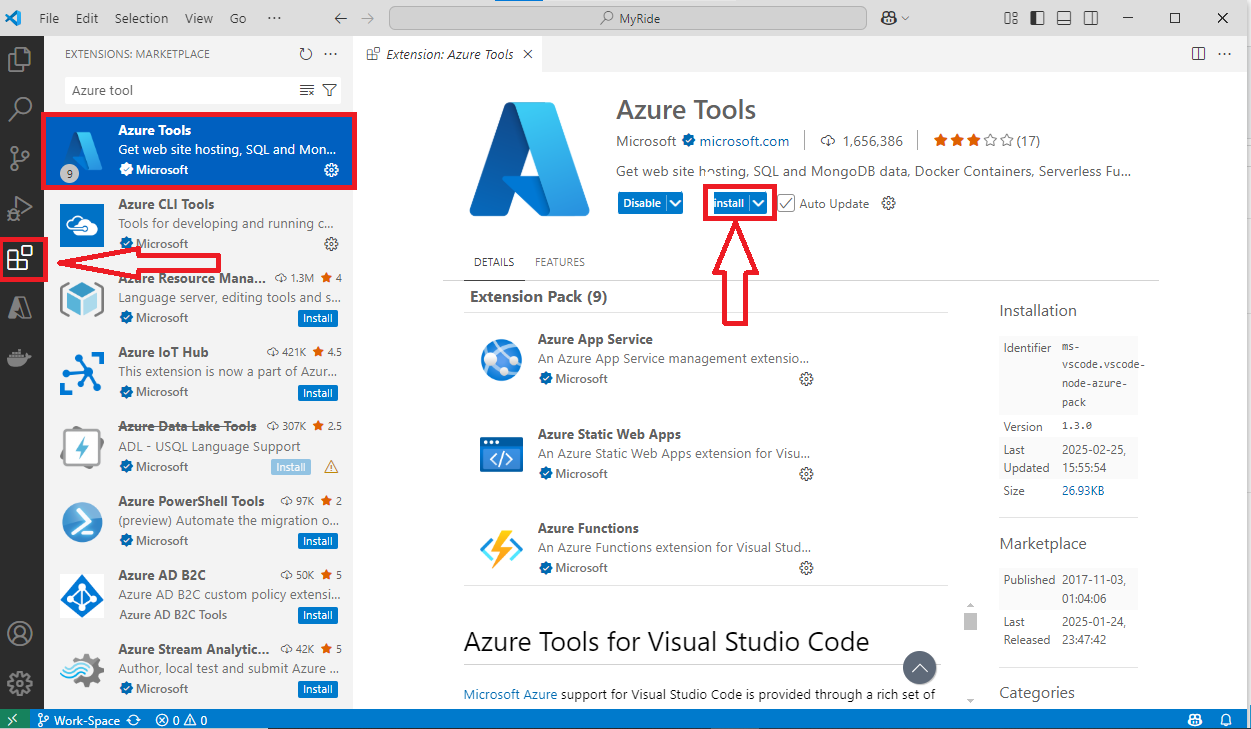
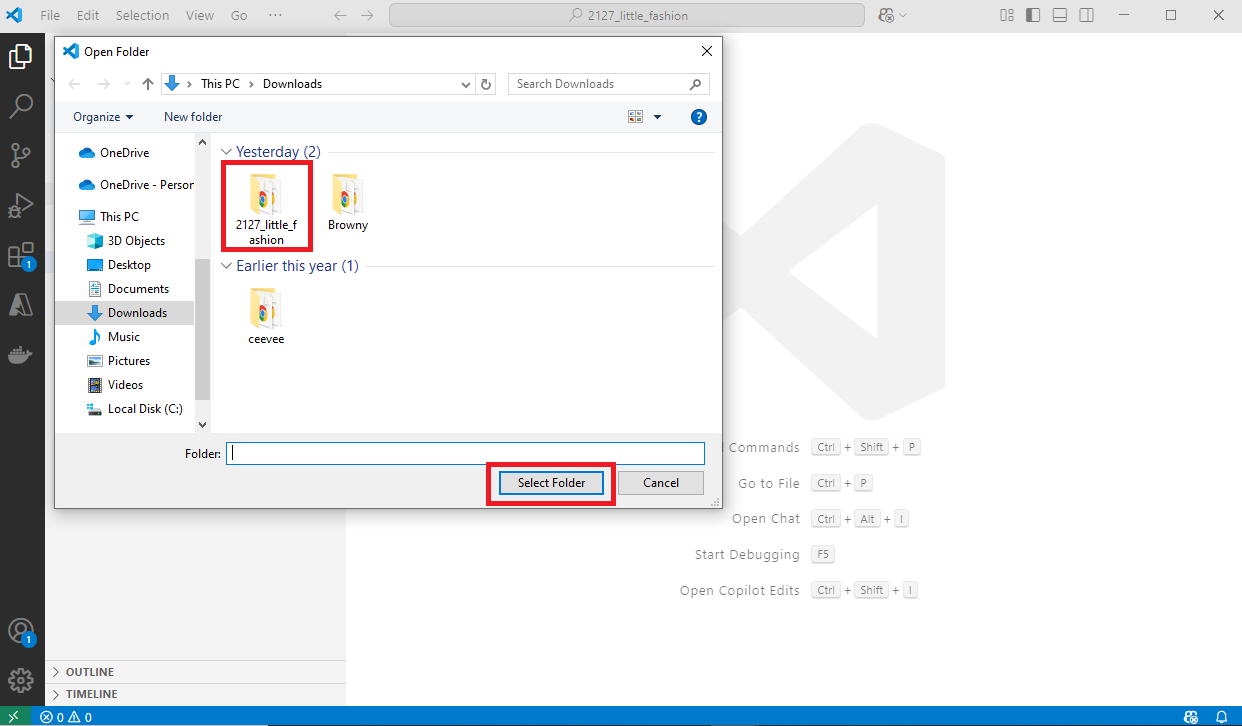
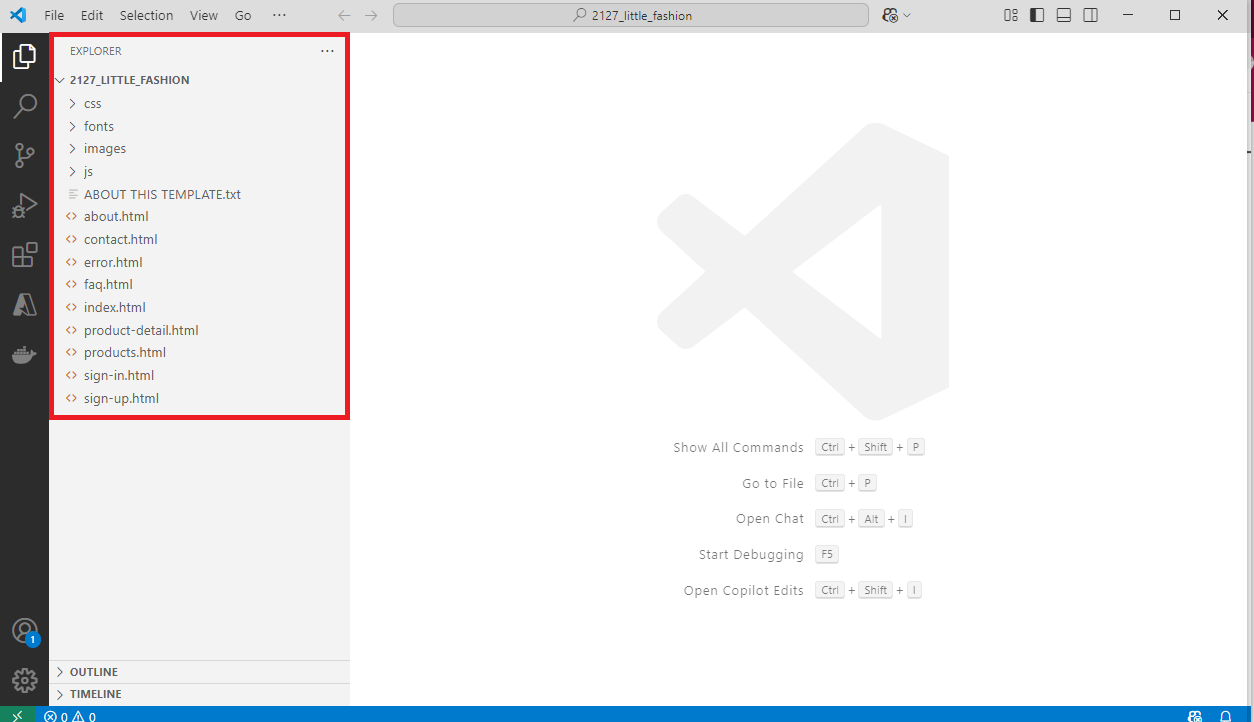
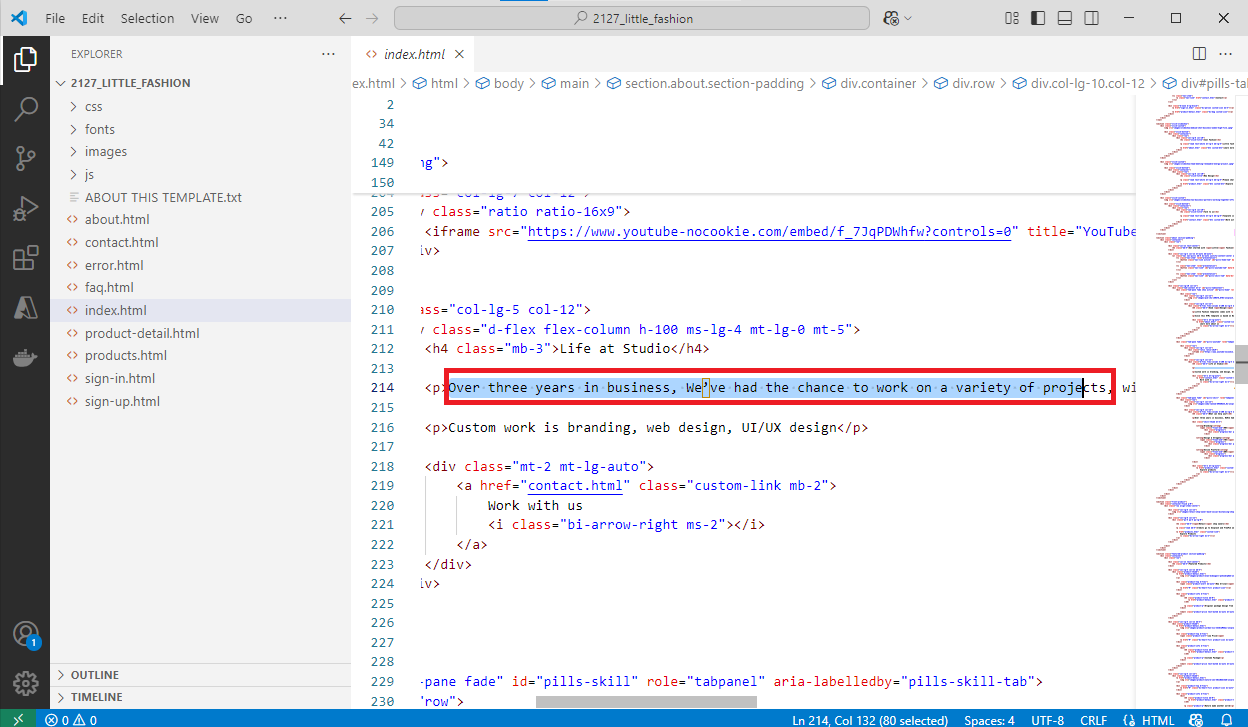
III. The images below shows the content of the index.html file. You can make changes to the codes to suit your preference.
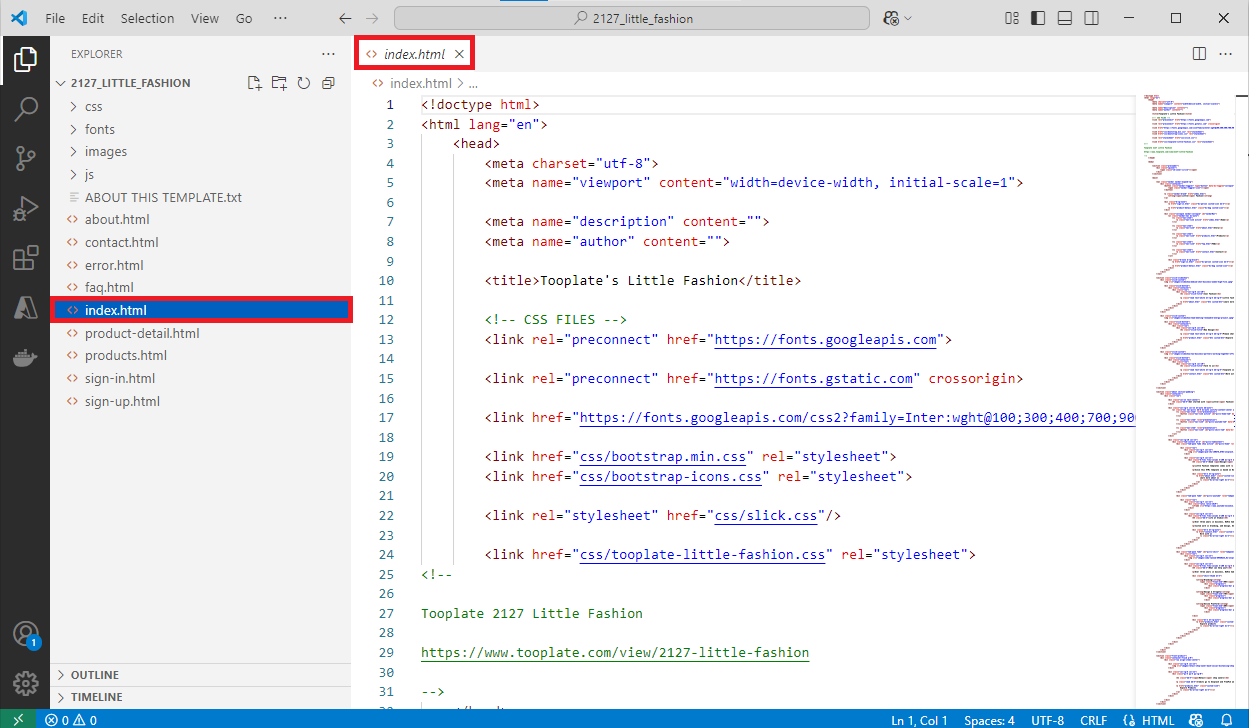
Step 3: Upload your codes to Azure Blob Storage
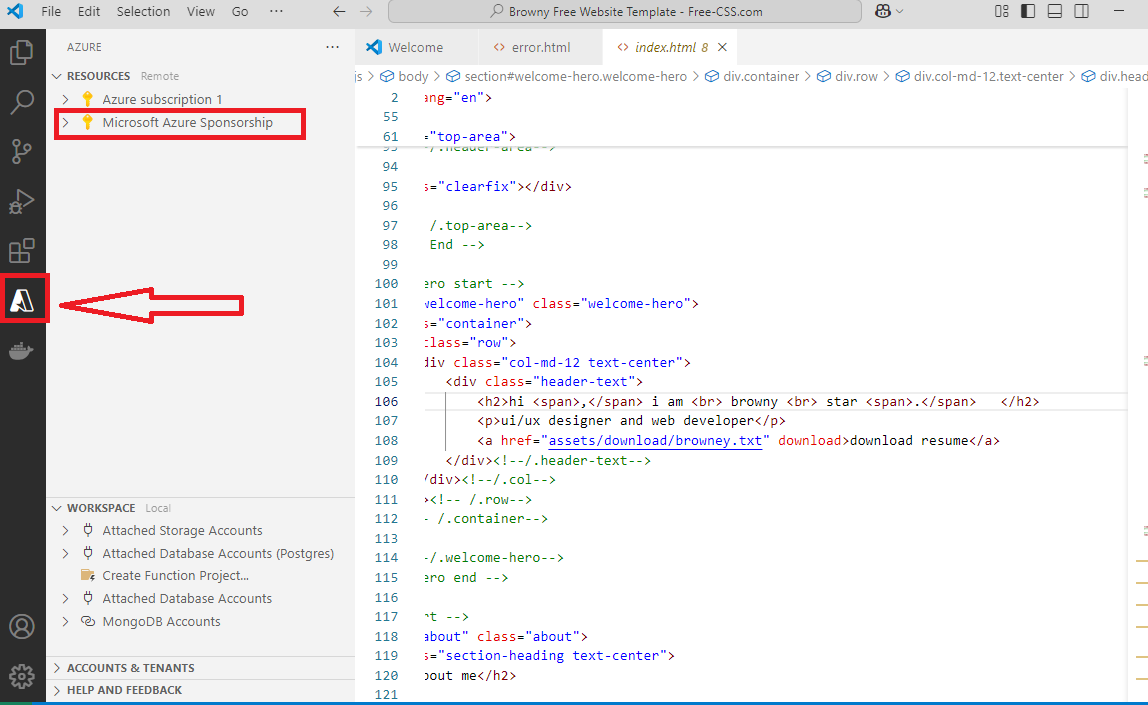
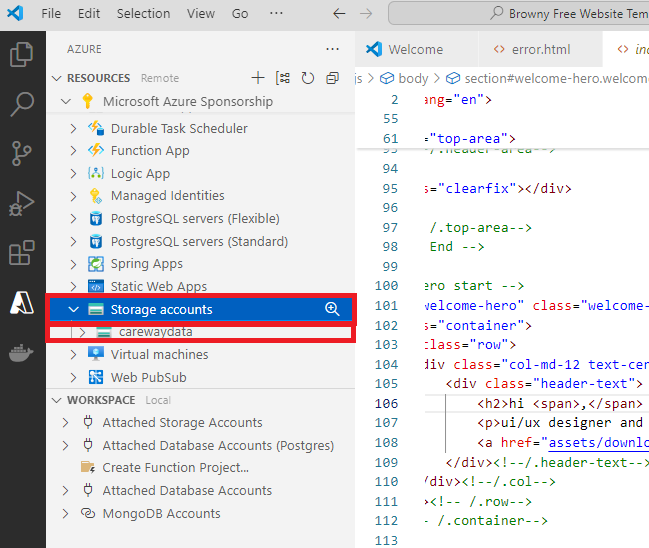
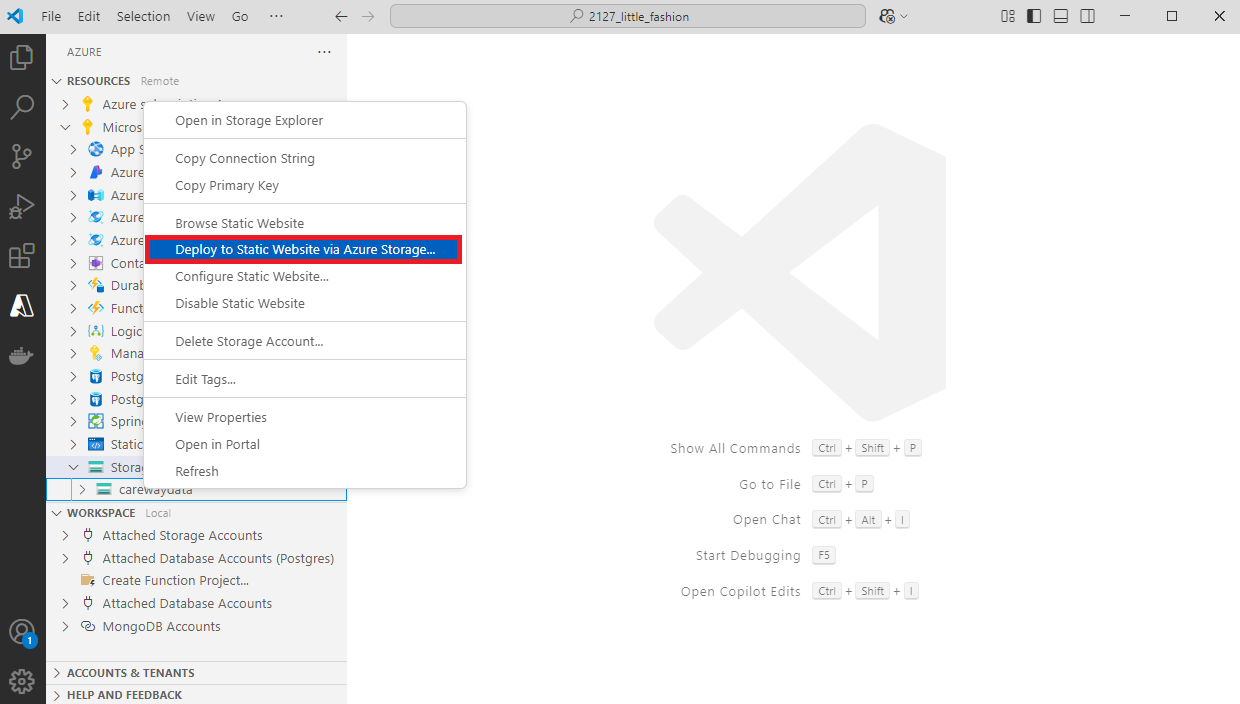
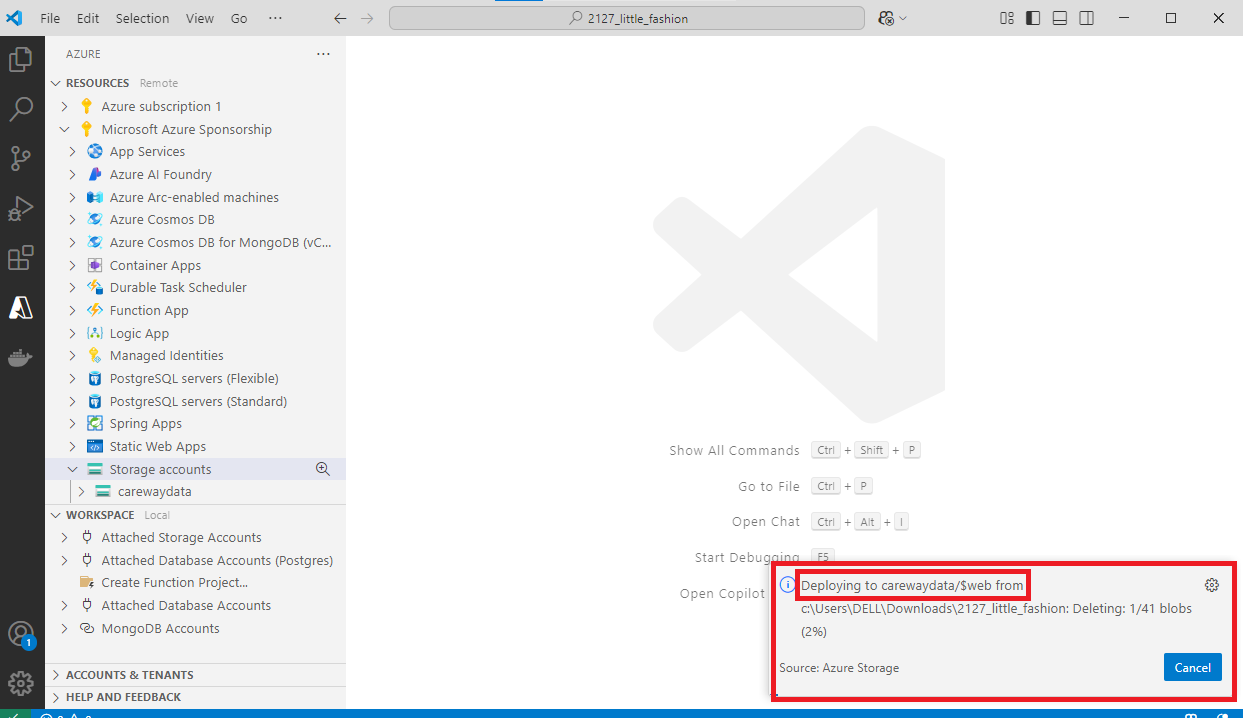
I. In VS Code, navigate to the Azure Tools extension on the left pane. Sign in to your Azure account. If you're already signed in, your active subscriptions will be visible. Select the subscription associated with your project. In the drop-down menu, right-click on the storage account you created and choose "Deploy to Static Website via Azure Storage." A drop-down menu will appear at the top of VS Code, prompting you to select the folder containing your website files. Choose the appropriate folder, and voilà! Your static website is now live on Azure Blob Storage!

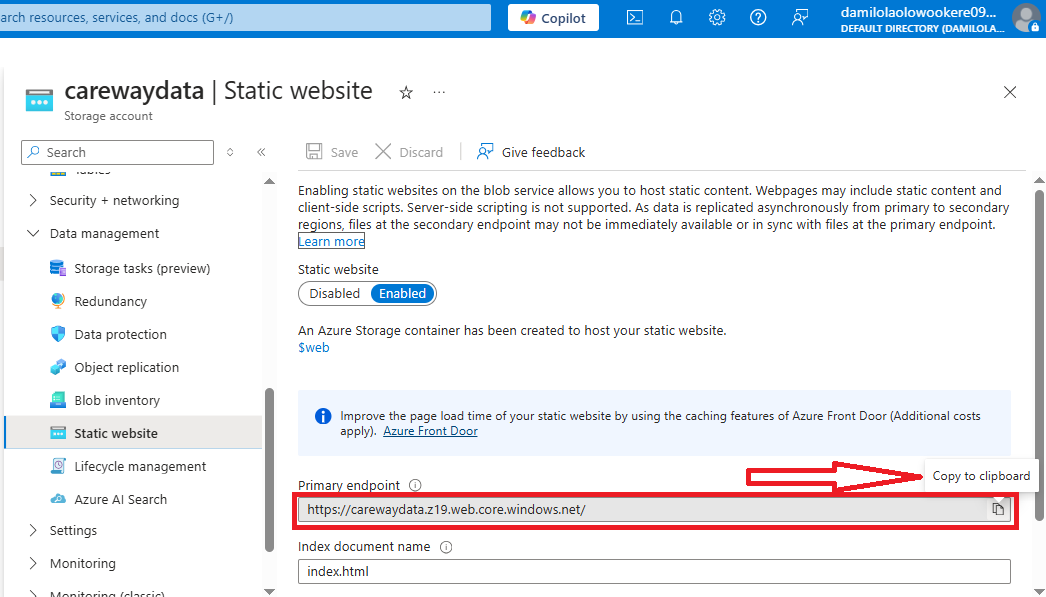
II. To view your website, go to your Azure portal, open your storage account, and navigate to the 'Static website' section. Copy the endpoint URL, and paste it into your browser to view your website.

Hosting a static website on Azure Blob Storage is a cost-effective and scalable solution that simplifies web deployment. With just a few steps, uploading your files, enabling static website hosting, and configuring access, you can have your site live in no time. Azure’s reliability ensures smooth performance, making it a great choice for deploying static sites.
If you found this tutorial helpful, don’t forget to like, comment, and share! Feel free to ask any questions, I’d love to help. Happy hosting!
Subscribe to my newsletter
Read articles from Damilola Linda Olowookere directly inside your inbox. Subscribe to the newsletter, and don't miss out.
Written by
