How to launch and configure an EC2 instance with web server (Apache)
 Sabashini Rajamanohar
Introduction:
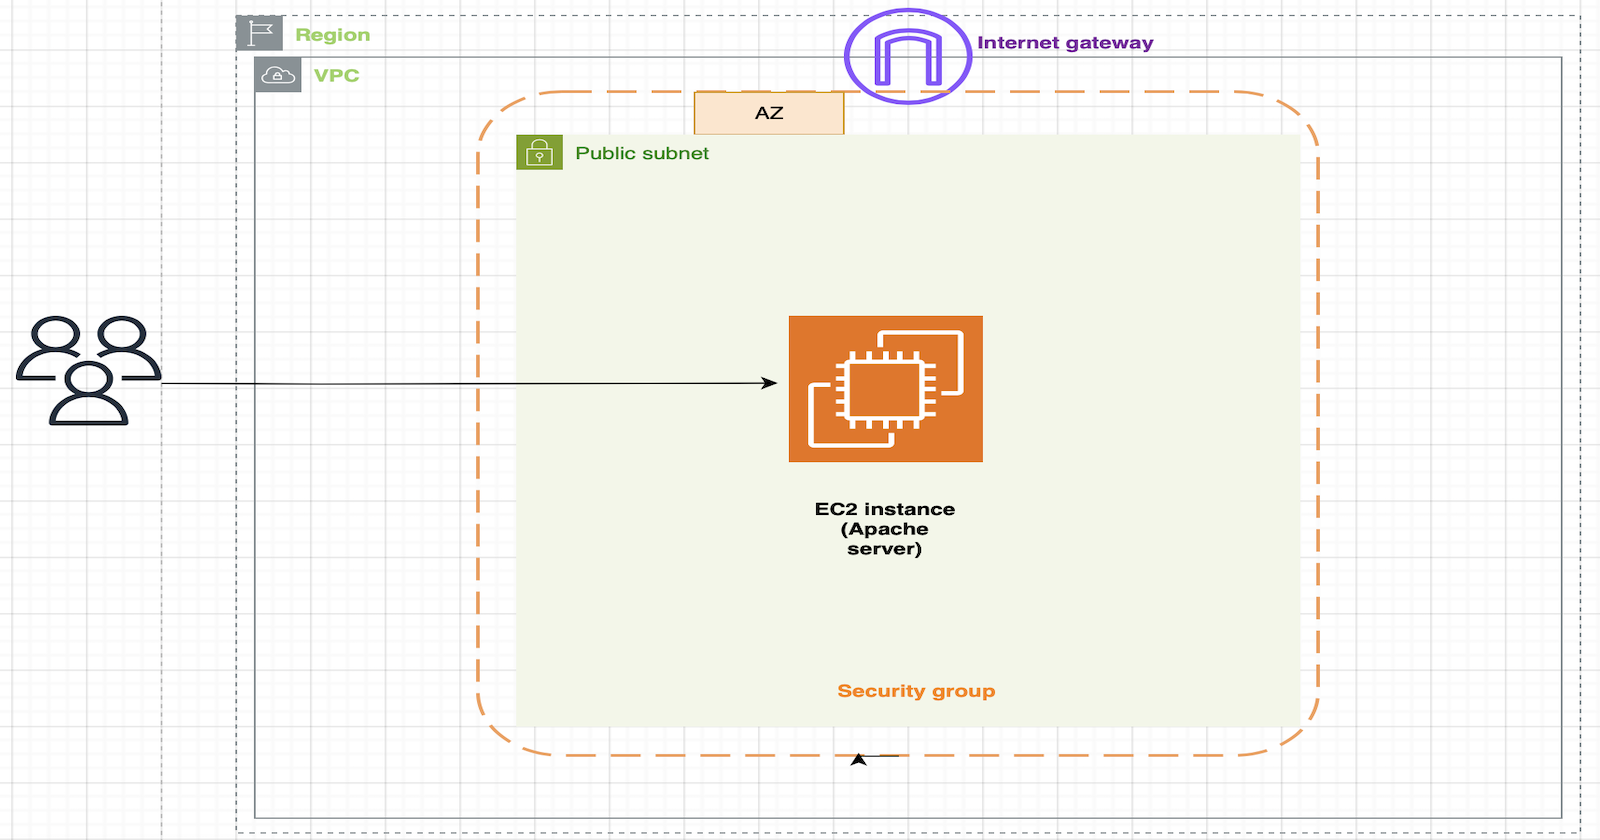
In this guide, we will walk through the process of launching an EC2 instance on AWS, configuring a web server like Apache , and making sure it serves a basic webpage. This tutorial will give you hands-on experience with EC2 configuration, security groups, SSH and web server setup.
Prerequisities:
An Active AWS account
Basic understanding of AWS EC2 and SSH
Familiarity with Linux Commands (if using Amazon Linux or ubuntu).
Step1: Launch an EC2 Instance
Log into AWS Console.
Go to the AWS Management console and log into your account.
Navigate to the EC2 dashboard
In the AWS console, search for EC2 and click on EC2 dashboard.
Launch a new EC2 Instance
Click on Launch Instance. This will take you to the instance creation Wizard.

Choose an Amazon Machine Image(AMI)
For this example, select Amazon Linux 2 AMI or Ubuntu if you’re familiar with Ubuntu. Both are free-tier eligible and commonly used for web server deployments.

Select Instance Type
Choose the instance type. For a basic web server, t2.micro is sufficient.

Configure Instance Details
Leave the default settings, unless you want to configure advanced options
Select Key pair
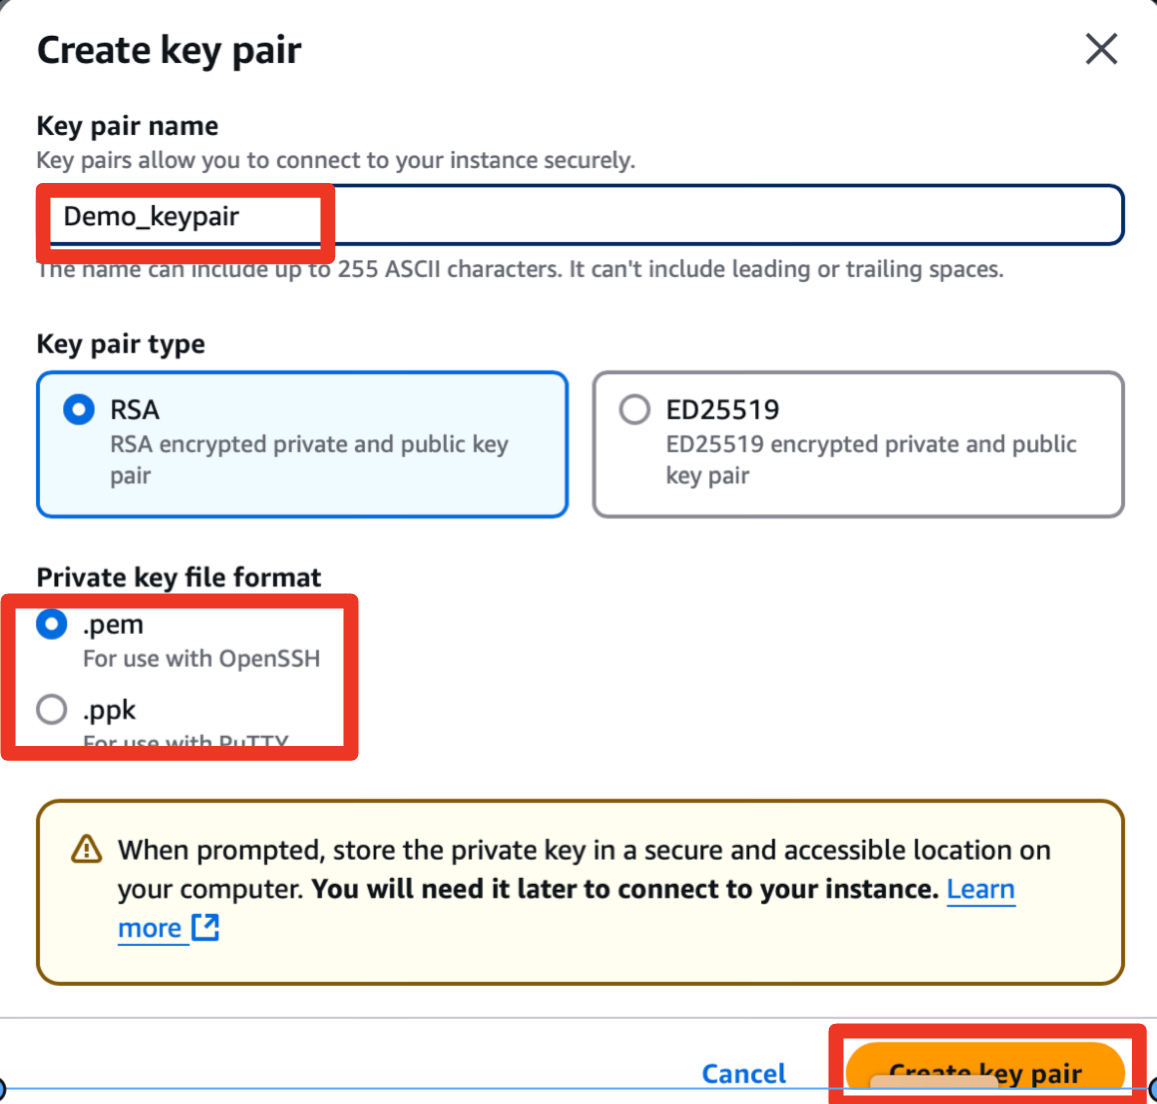
When launching your EC2 instances, you need to associate a key pair for secure SSH access. AWS uses a Key pair to authenticate SSH access to your instances.
7.1 Create a new Key Pair if you don’t have one.
7.2 Give it a name.
7.3 Download the .ppk file, which will be used to securely connect to your instance Via SSH
7.4 Important: Save the .ppk file in a secure location, as you will not be able to download it again.

Configure Security Groups
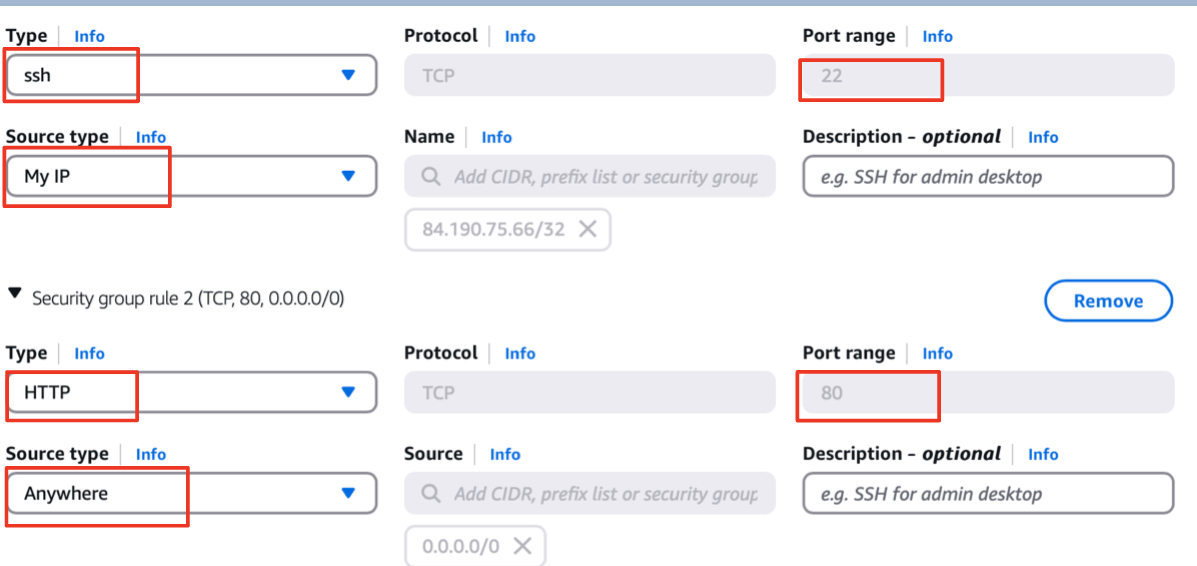
To create a new security group to allow HTTP(port 80) and SSH (port 22) access.
Add the following rules.
8.1 Type: SSH , port range: 22,
Source: My IP(for secure access)
8.2 Type: HTTP, port range(80),
Source: Anywhere (0.0.0.0/0).
Add Storage
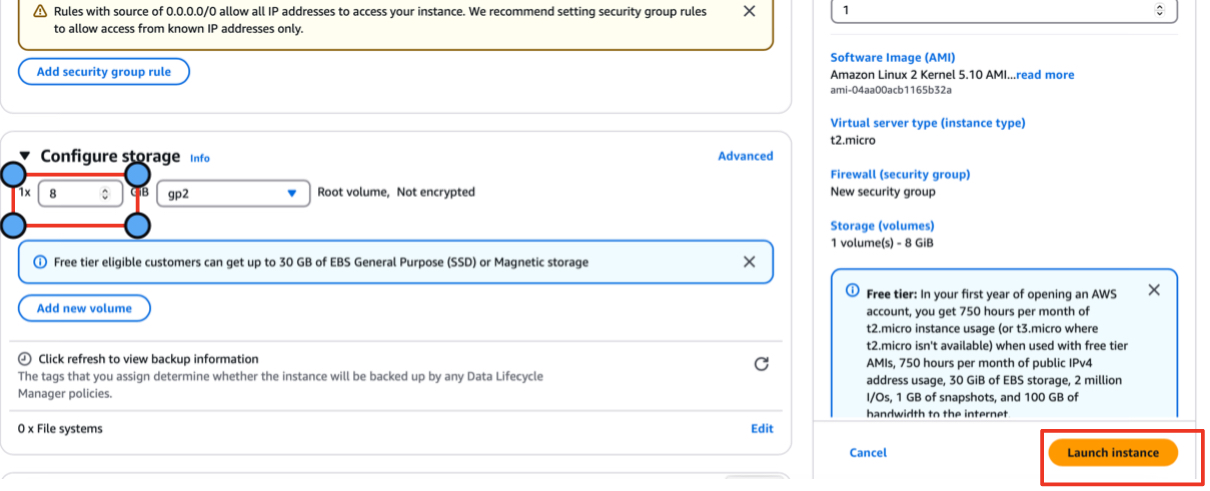
The default storage size is typically sufficient for small web servers.
Review and launch
Review the configurations, and click Launch
Step2: Connect to your EC2 instance via SSH
Find the public IP of your instance via SSH
After your instance is launched, navigate to the Instances section in the EC2 dashboard. Select your instance and find the public IP address.

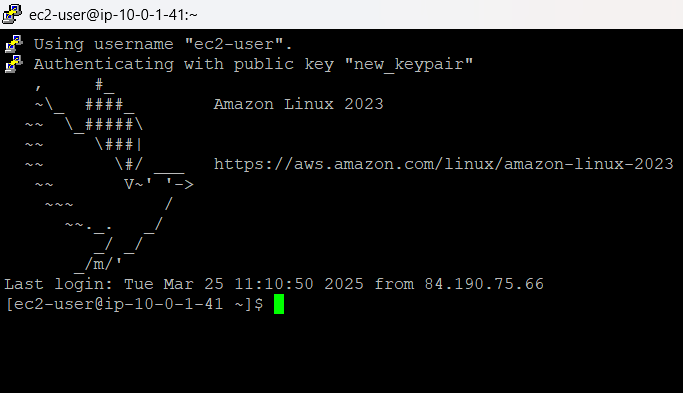
Connect using SSH, open your terminal and use the following command to connect to your EC2 instance
If you are using Ubuntu, then replace the ec2-user user with Ubuntu.
Accept the connection
The first time you connect, you’ll be asked to accept the SSH . Type yes to continue
Step3: Install Apache
For Apache web server:
update the system
Run the following command to ensure your system is up-to-date:
Sudo yum update -y

Install Apache
Install Apache by running:
Sudo yum install httpd -y

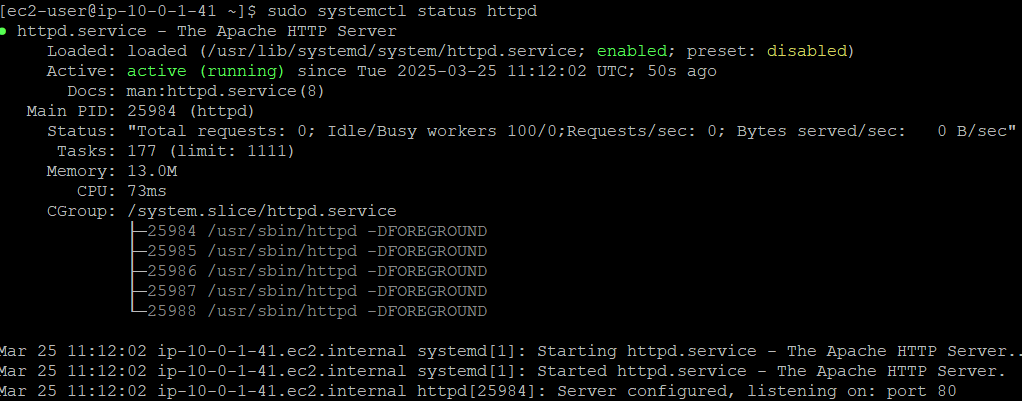
Start Apache
Once installed, start Apache
Sudo systemctl start httpd

4. Enable Apache on Boot to ensure Apache starts automatically when the system reboots:
sudo systemctl enable httpd

Step 4 create a basic web page
once your web server is installed, you can create a simple HTML page to verify everything is working.
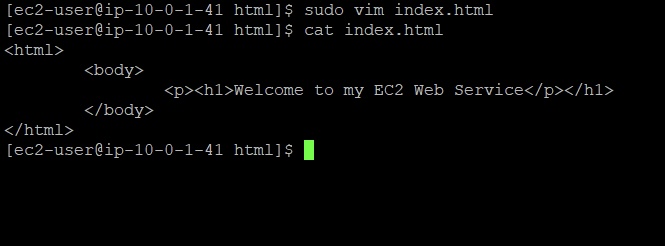
Navigate to the web Root directory for Apache go to
cd /var/www/html
create the index.html file

use the following command to create a simple HTML page
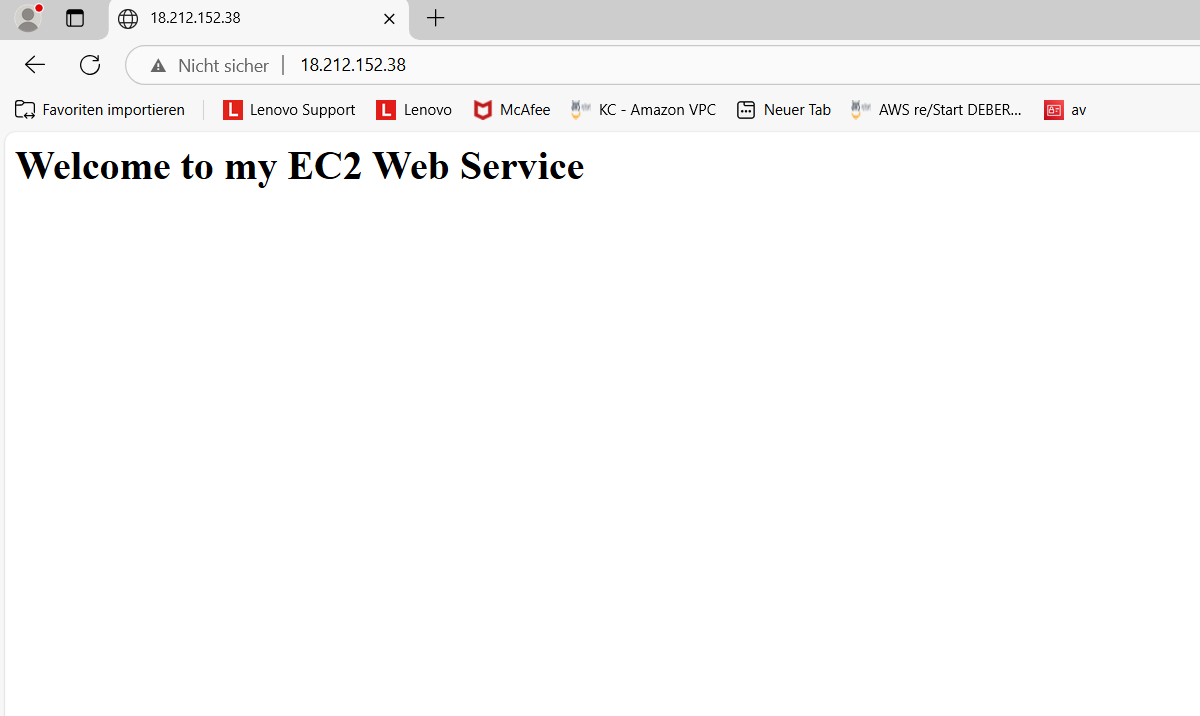
verify web server Access , open your web browser and enter the public ip of your EC2 instance(e.g http://your-ec2-public-ip). you should see the message:
“Welcome to My EC2 web server”
Skill Gained:
EC2 Configurations - launching and configuring an Ec2 instance
Security groups - setting up inbound rules for HTTP and SSH access
SSH Access - connecting securely to an EC2 Instance using a key pair.
Web server setup - Installing Apache setting up a basic web page
Subscribe to my newsletter
Read articles from Sabashini Rajamanohar directly inside your inbox. Subscribe to the newsletter, and don't miss out.
Written by
