Part 3: From Outages to Autoscaling — Mastering HPA & Cluster Autoscaler on AWS EKS with Terraform
 Neamul Kabir Emon
Welcome to the third chapter of the Amazon EKS Production-Ready Series—where I turn real production pain into a scalable solution you can deploy today.
In this article, I’m sharing a real-world challenge I faced during Kubernetes operations and how I solved it by implementing Horizontal Pod Autoscaler (HPA) and Cluster Autoscaler on my EKS cluster using Terraform + Helm.
This guide is not just theory—it’s what actually helped me build a scalable, cost-effective infrastructure that could handle production traffic without manual intervention. And now, you can do it too. 💡
👉 If you haven’t followed Part 1 & 2, start here:
Let's clone the repositories and start the tutorial.
⚠️ The Problem I Faced
I deployed an application to my EKS cluster and began performance testing. During traffic spikes, my pods couldn’t keep up:
Requests were getting throttled
CPU usage was maxed out
Manual scaling wasn’t sustainable
Despite allocating a decent number of nodes, the app still failed under load because pod replicas weren’t adjusting dynamically.
This is where autoscaling came to the rescue.
✅ The Solution: Autoscaling in Two Parts
To make the system resilient and responsive, I implemented:
Horizontal Pod Autoscaler (HPA) – Automatically scales the number of pods based on CPU/memory usage.
Cluster Autoscaler – Automatically scales the number of worker nodes in the EKS cluster depending on pod resource demands.
Let’s walk through how to implement both.
🔐 Step 0: Authenticate Helm Provider to Use with EKS
Add this to your Terraform config before any Helm releases:
data "aws_eks_cluster" "eks" {
  name = aws_eks_cluster.eks.name
}

data "aws_eks_cluster_auth" "eks" {
  name = aws_eks_cluster.eks.name
}

provider "helm" {
  kubernetes {
    host                   = data.aws_eks_cluster.eks.endpoint
    token                  = data.aws_eks_cluster_auth.eks.token
    cluster_ca_certificate = base64decode(data.aws_eks_cluster.eks.certificate_authority[0].data)
  }
}
🔧 Step 1: Install Metrics Server (for HPA)
Before Kubernetes can scale pods based on CPU or memory usage, it needs metrics. That’s where the metrics-server comes in. Let’s install it using Helm through Terraform.
12-metrics-server.tf
resource "helm_release" "metrics_server" {
  name       = "metrics-server"
  repository = "https://kubernetes-sigs.github.io/metrics-server/"
  chart      = "metrics-server"
  namespace  = "kube-system"
  version    = "3.12.1"

  values = [file("${path.module}/values/metrics-server.yaml")]

  depends_on = [aws_eks_node_group.general]
}
Now let’s define the custom values for the Helm chart.
📁 values/metrics-server.yaml
---
defaultArgs:
  - --cert-dir=/tmp
  - --kubelet-preferred-address-types=InternalIP,ExternalIP,Hostname
  - --kubelet-use-node-status-port
  - --metric-resolution=15s
  - --secure-port=10250
💡 Why these values?
--kubelet-preferred-address-types: Ensures the server communicates correctly with nodes regardless of internal/external IPs.--metric-resolution=15s: Sets metric resolution interval.--secure-port: Ensures metrics are fetched over a secure connection.
✅ Now, we need to create the metrics-server.yaml file in the values/ folder. To do this, navigate to the folder:
🛠️ Deploy the Metrics Server
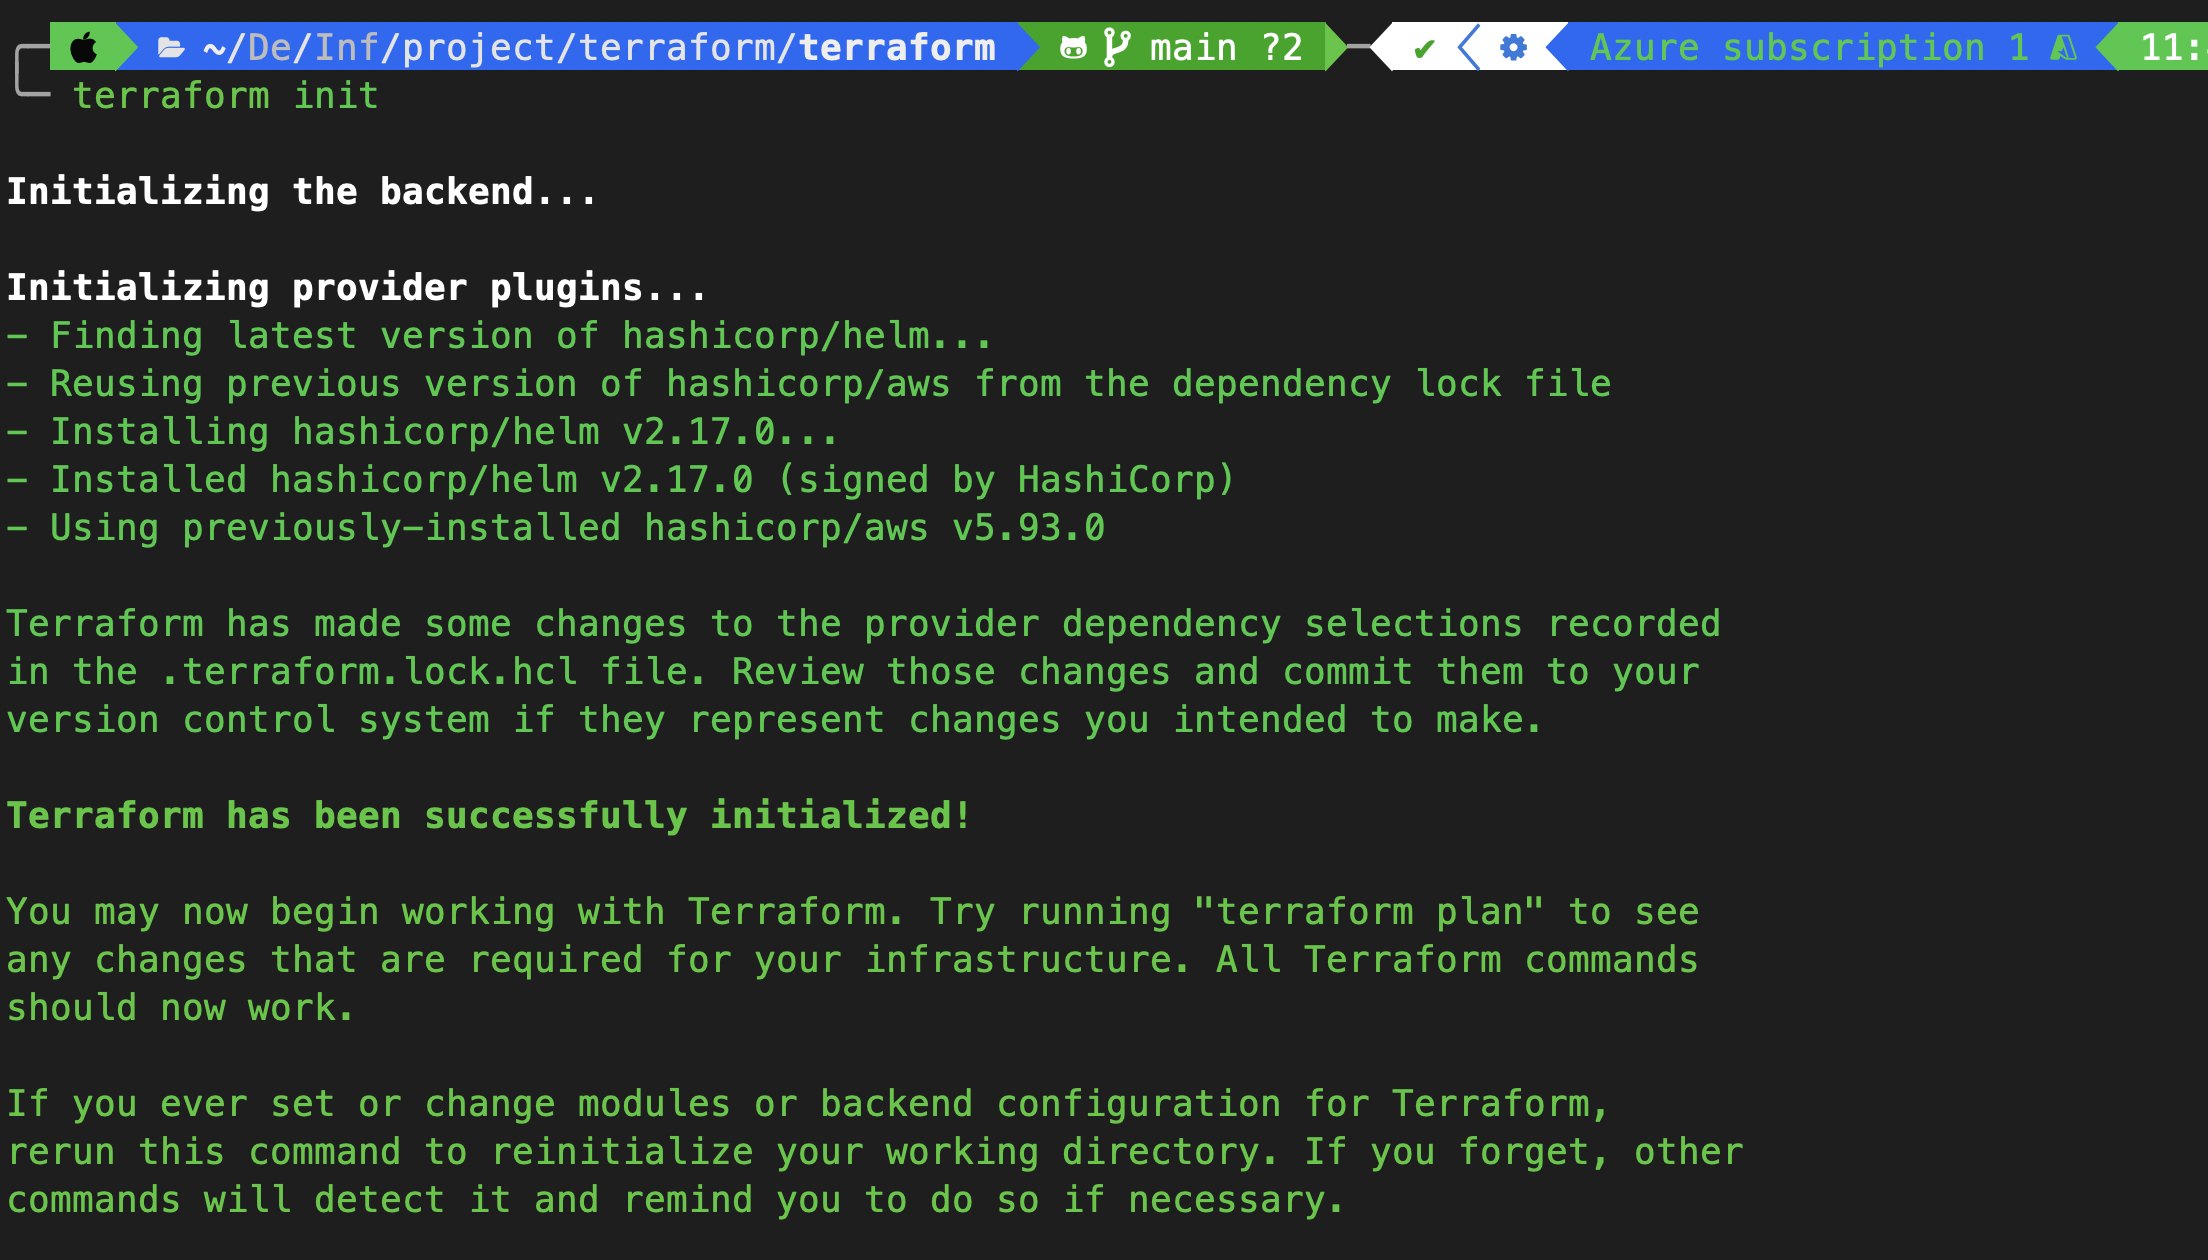
Since we’ve added a new Helm provider, let’s initialize and apply the configuration.
✅ Init:
terraform init
✅ Apply:
terraform apply -auto-approve
✅ Verify Metrics Server
Check if the metrics server pod is up:
kubectl get pods -n kube-system

Check if metrics are being collected:
kubectl get --raw "/apis/metrics.k8s.io/v1beta1/nodes" | jq
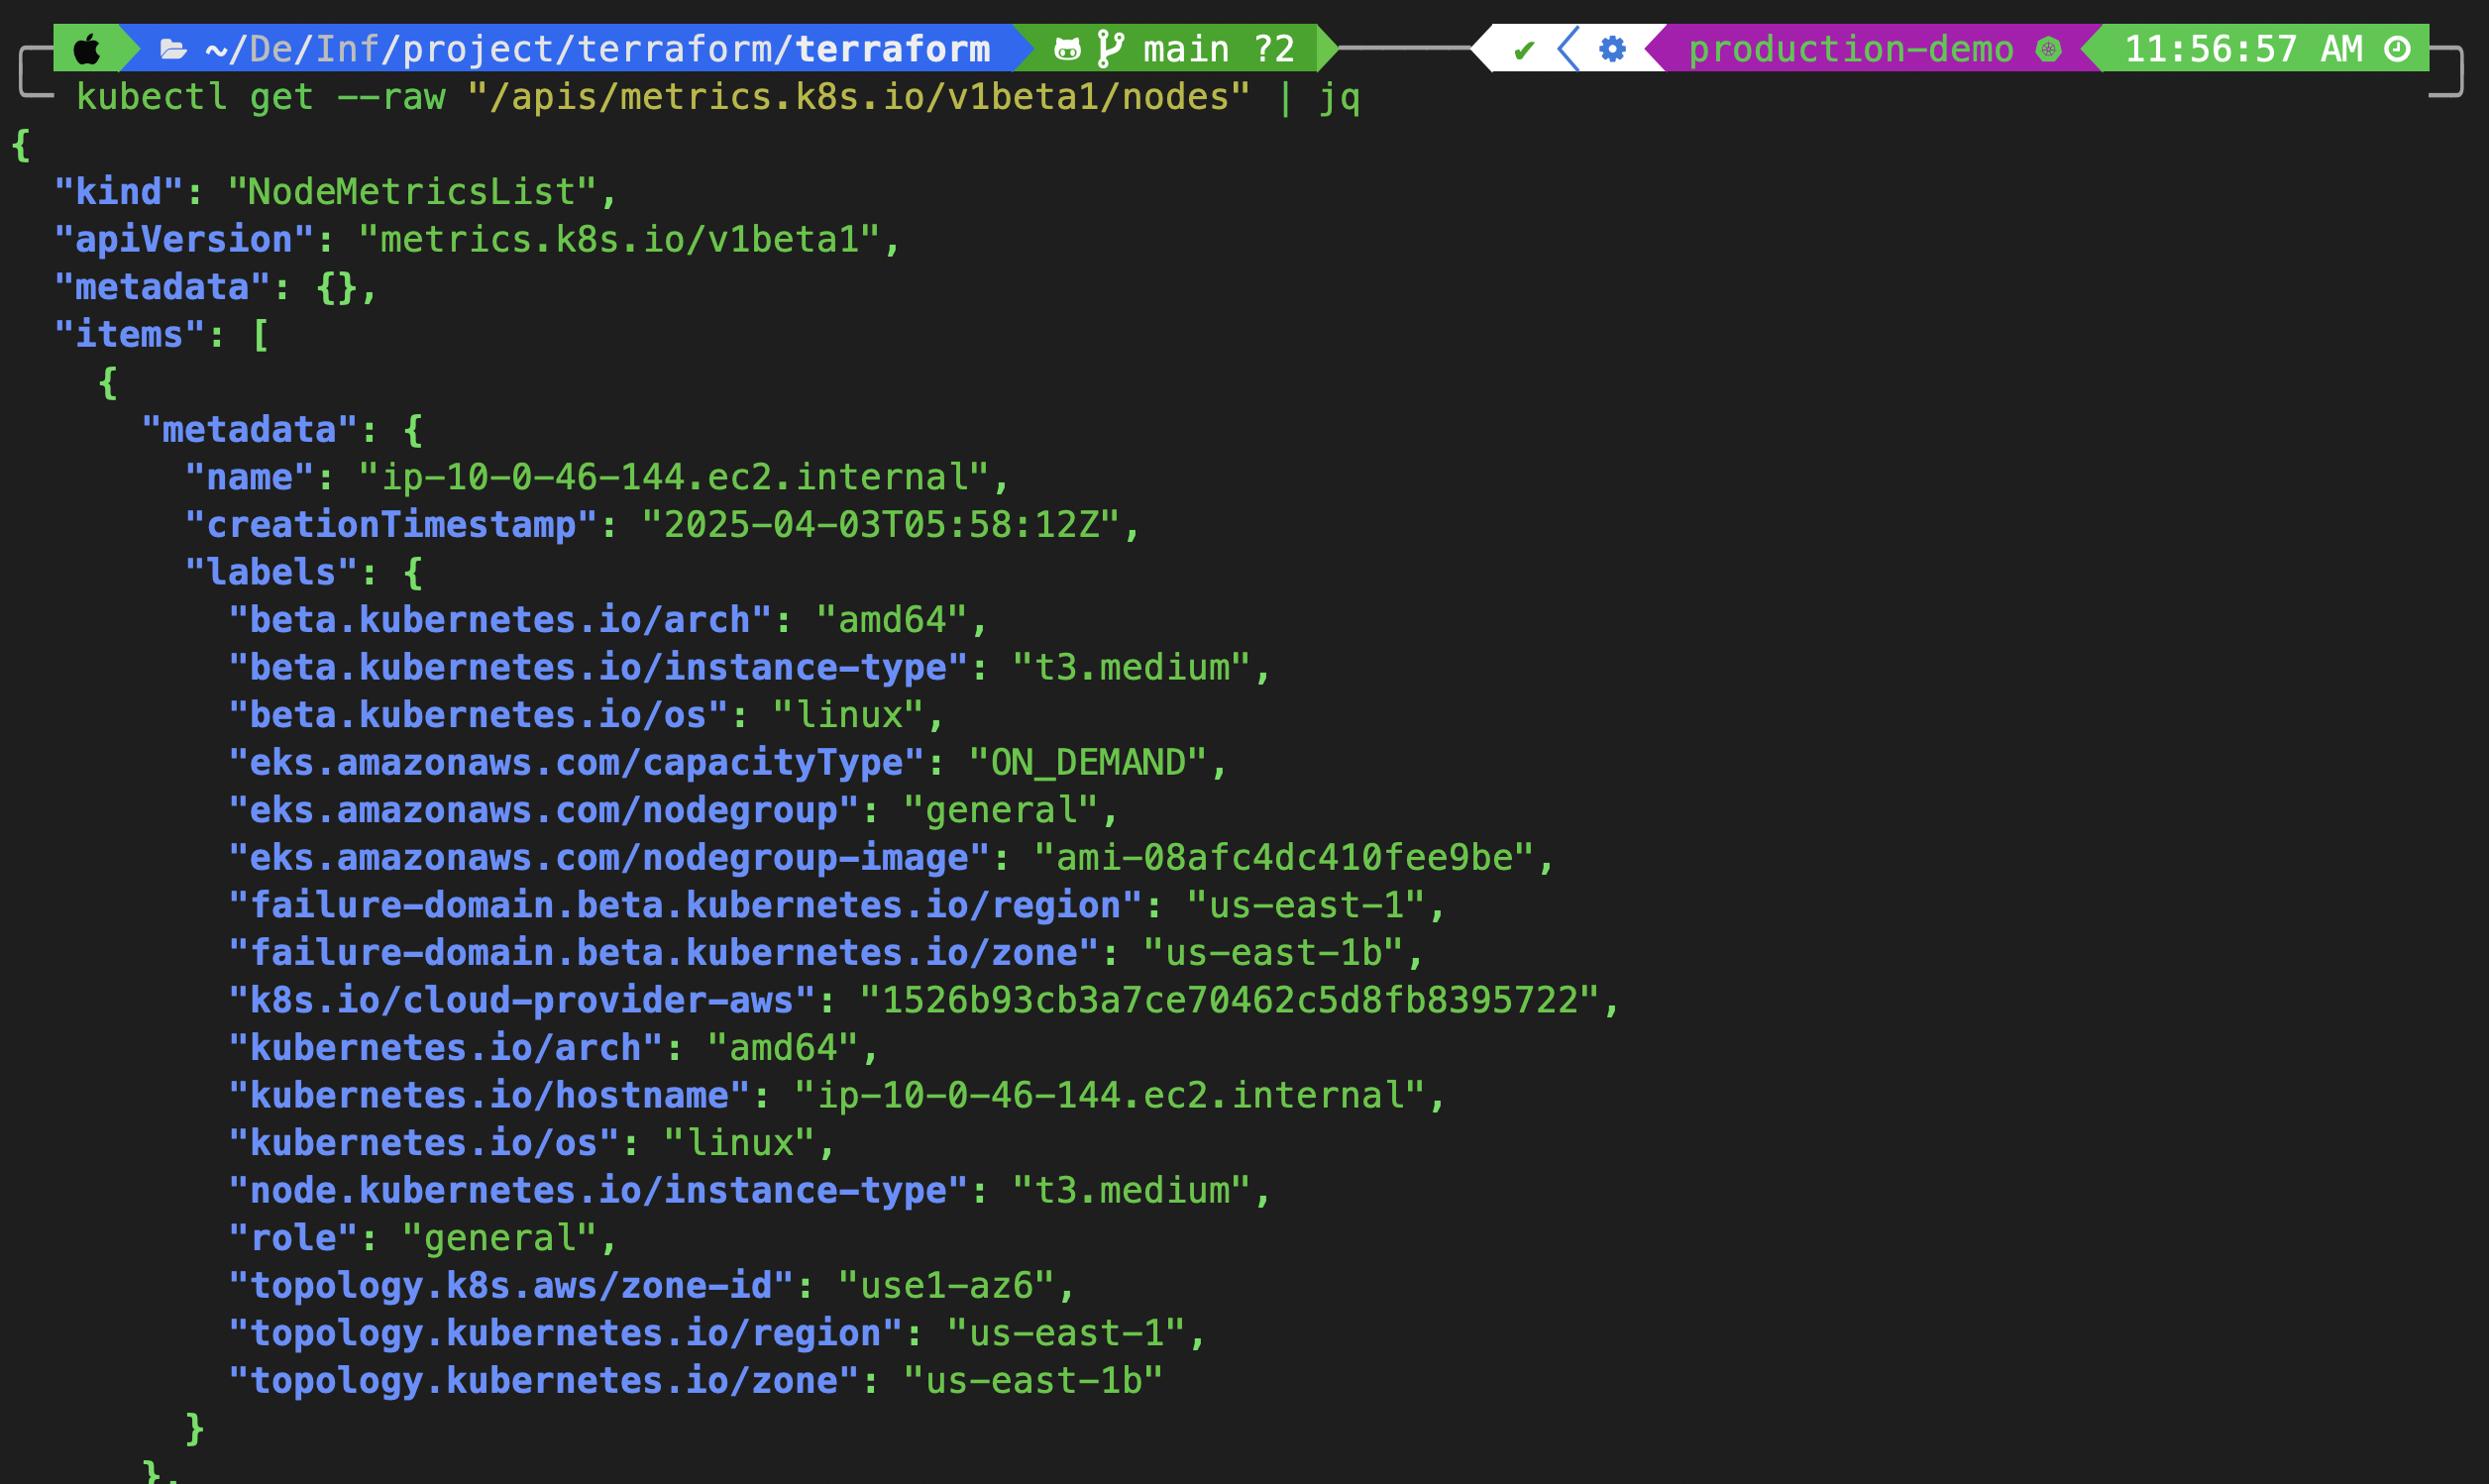
The matrics successfully fatched
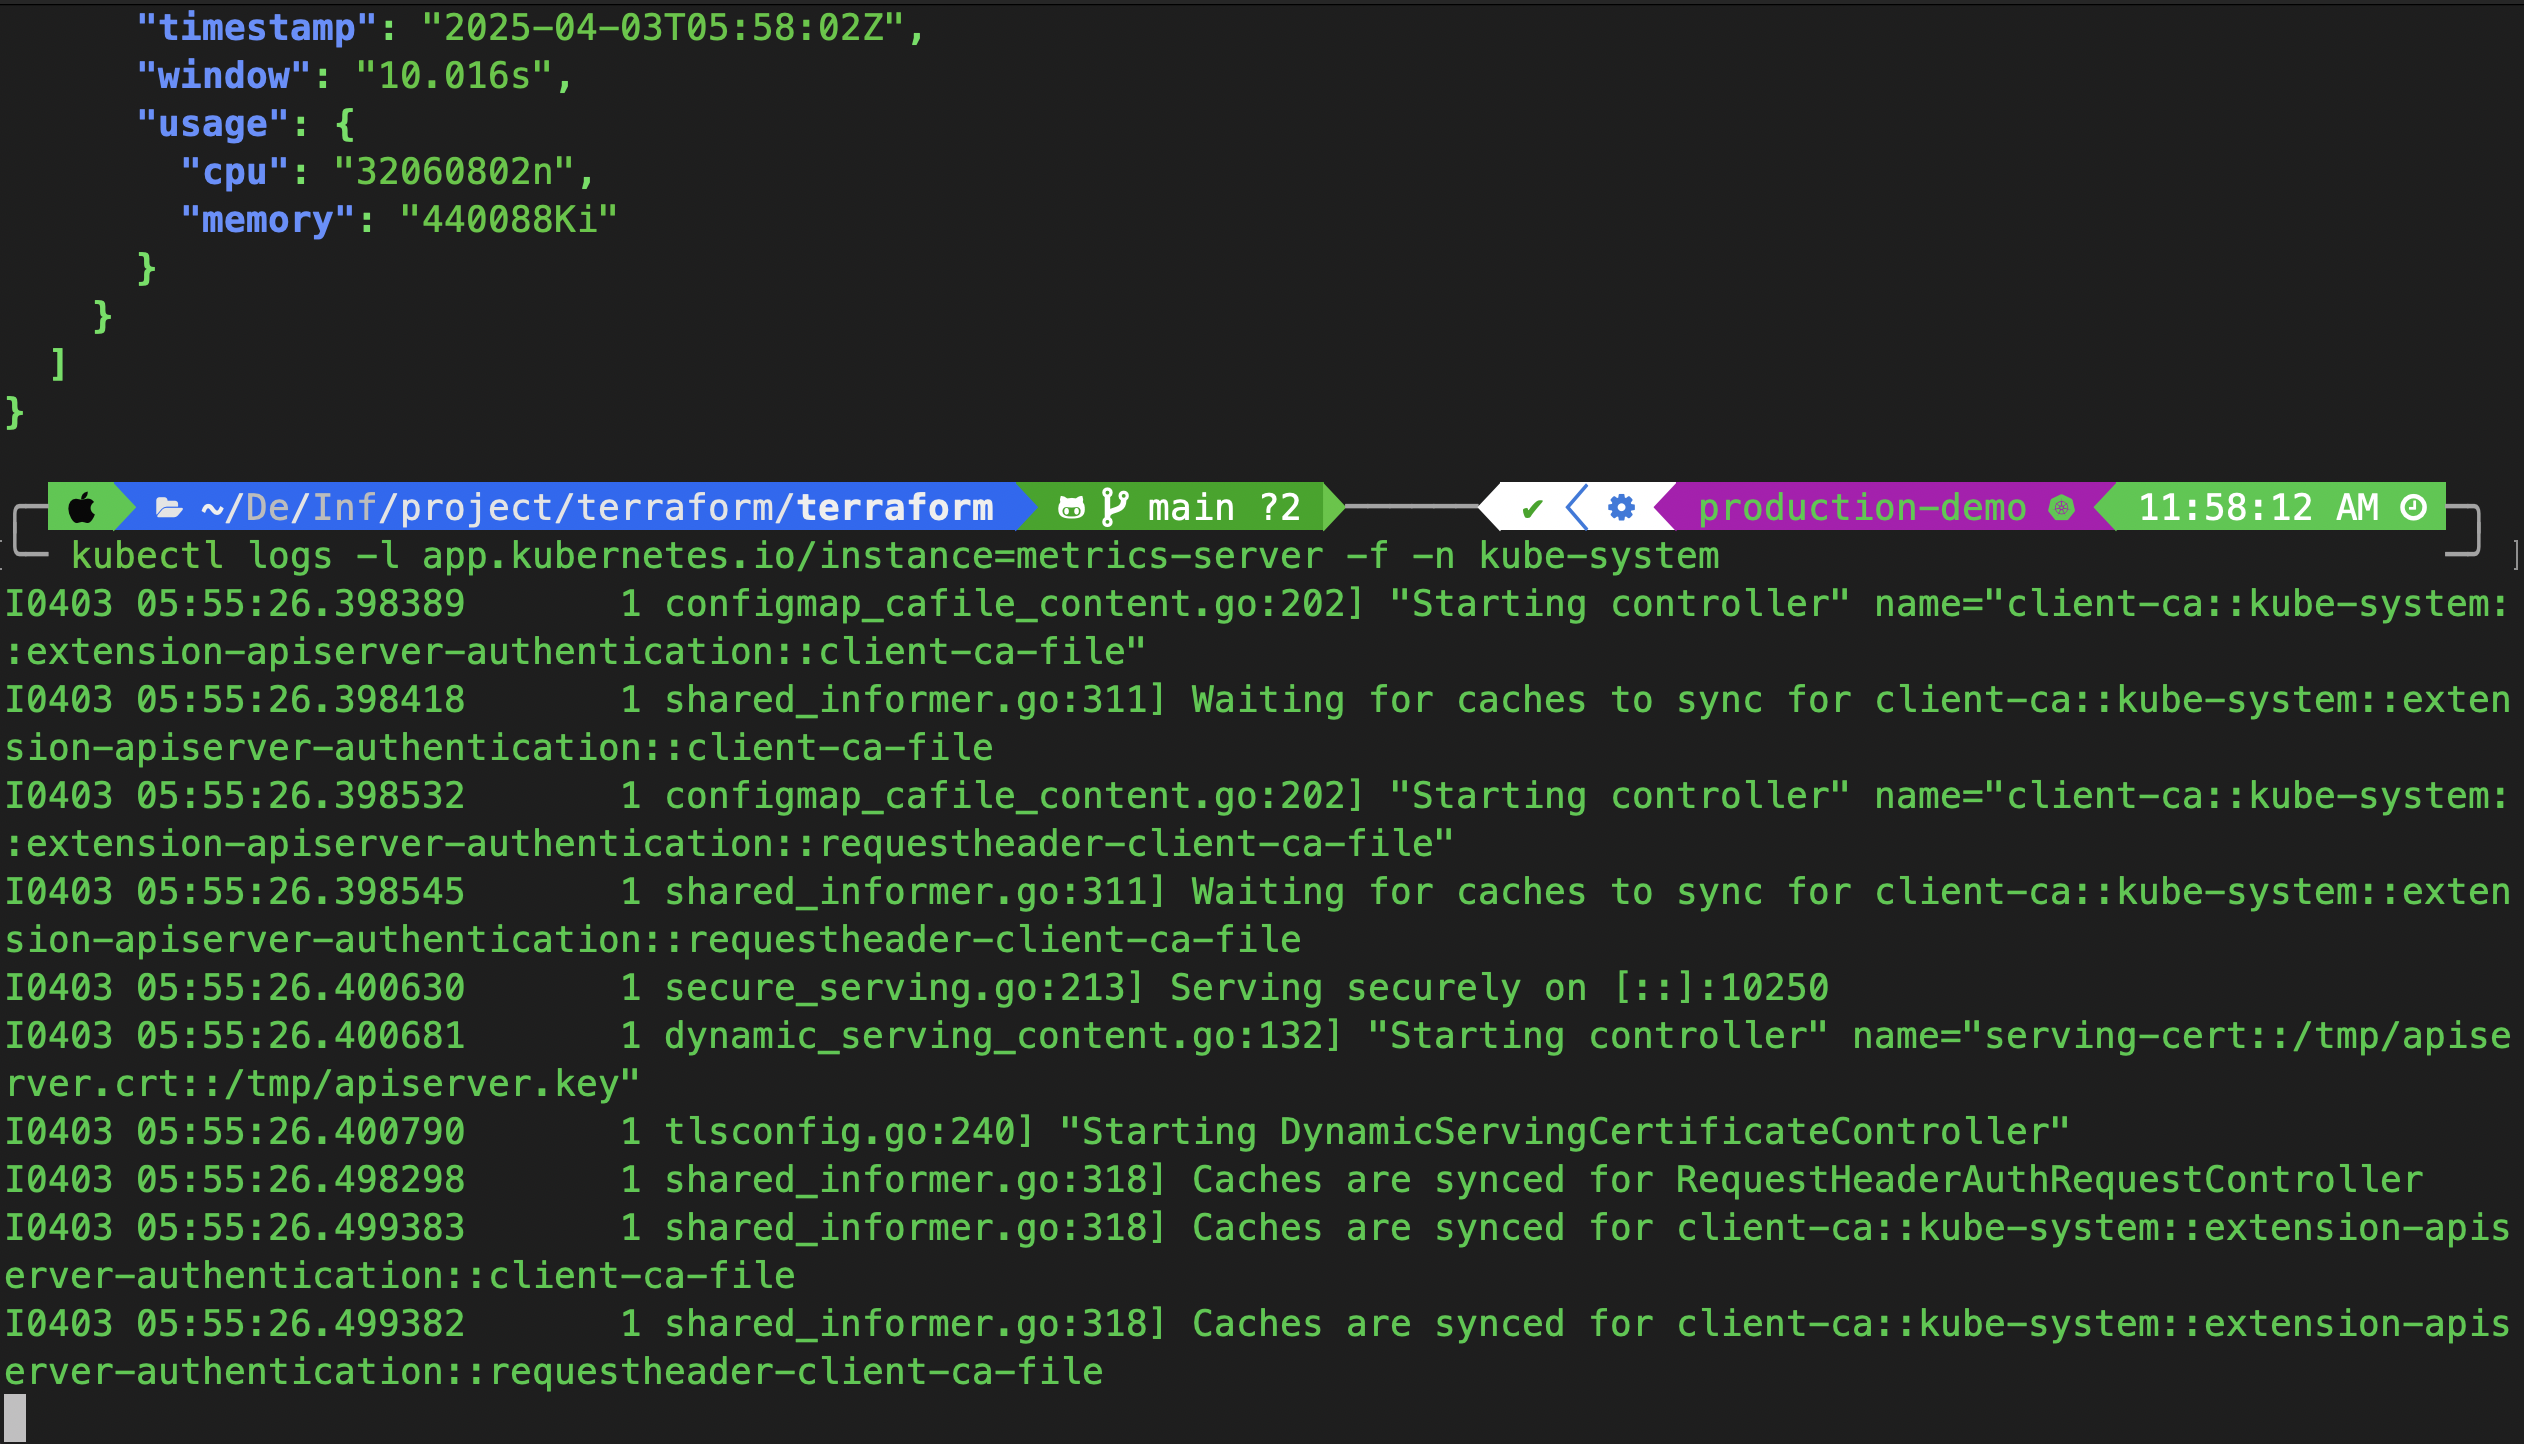
Check logs for any errors:
bashCopyEdit
kubectl logs -l app.kubernetes.io/instance=metrics-server -f -n kube-system
Try fetching live metrics using:
kubectl top pods -n kube-system

Once metrics are flowing correctly—you’re ready to set up autoscaling!
📈 Step 2: Deploy Horizontal Pod Autoscaler
Now that we’ve confirmed the metrics server is running and collecting data successfully, it’s time to test Kubernetes' Horizontal Pod Autoscaler (HPA) in action.
We’ll deploy a lightweight sample application with CPU and memory requests/limits, expose it via a Kubernetes Service, and attach an HPA object that automatically scales pods based on resource utilization.
Navigate to the root of your Terraform project and create a new directory for the sample app:
mkdir 03-myapp-deployment-hpa
ci 03-myapp-deployment-hpa
📄 0-namespace.yaml – Create a Dedicated Namespace
---
apiVersion: v1
kind: Namespace
metadata:
  name: 3-example
📄 1-deployment.yaml – Deploy the Application
---
apiVersion: apps/v1
kind: Deployment
metadata:
  name: myapp
  namespace: 3-example
spec:
  selector:
    matchLabels:
      app: myapp
  template:
    metadata:
      labels:
        app: myapp
    spec:
      containers:
        - name: myapp
          image: aputra/myapp-195:v2
          ports:
            - name: http
              containerPort: 8080
          resources:
            requests:
              memory: 256Mi
              cpu: 100m
            limits:
              memory: 256Mi
              cpu: 100m
This app has fixed CPU/memory resource limits, making it ideal for triggering autoscaling events.
📄 2-service.yaml – Expose the App Internally
---
apiVersion: v1
kind: Service
metadata:
  name: myapp
  namespace: 3-example
spec:
  ports:
    - port: 8080
      targetPort: http
  selector:
    app: myapp
The service makes the app accessible to the HPA controller and other internal workloads.
📄 3-hpa.yaml – Configure HPA Rules
---
apiVersion: autoscaling/v2
kind: HorizontalPodAutoscaler
metadata:
  name: myapp
  namespace: 3-example
spec:
  scaleTargetRef:
    apiVersion: apps/v1
    kind: Deployment
    name: myapp
  minReplicas: 1
  maxReplicas: 5
  metrics:
    - type: Resource
      resource:
        name: cpu
        target:
          type: Utilization
          averageUtilization: 80
    - type: Resource
      resource:
        name: memory
        target:
          type: Utilization
          averageUtilization: 70
Deploy All Resources
With all the manifests ready, it's time to deploy your application and see the Horizontal Pod Autoscaler (HPA) in action.
Move back to the root of your project and apply the entire HPA deployment folder:
cd ..
kubectl apply -f 03-myapp-deployment-hpa

This command will:
Create the namespace
3-exampleDeploy your application
Expose it via a service
Attach the HPA for autoscaling
📊 Monitor Pod and HPA Behavior in Real-Time
Use the following commands to watch how the deployment scales over time based on load:
watch -t kubectl get pods -n 3-example
watch -t kubectl get hpa -n 3-example
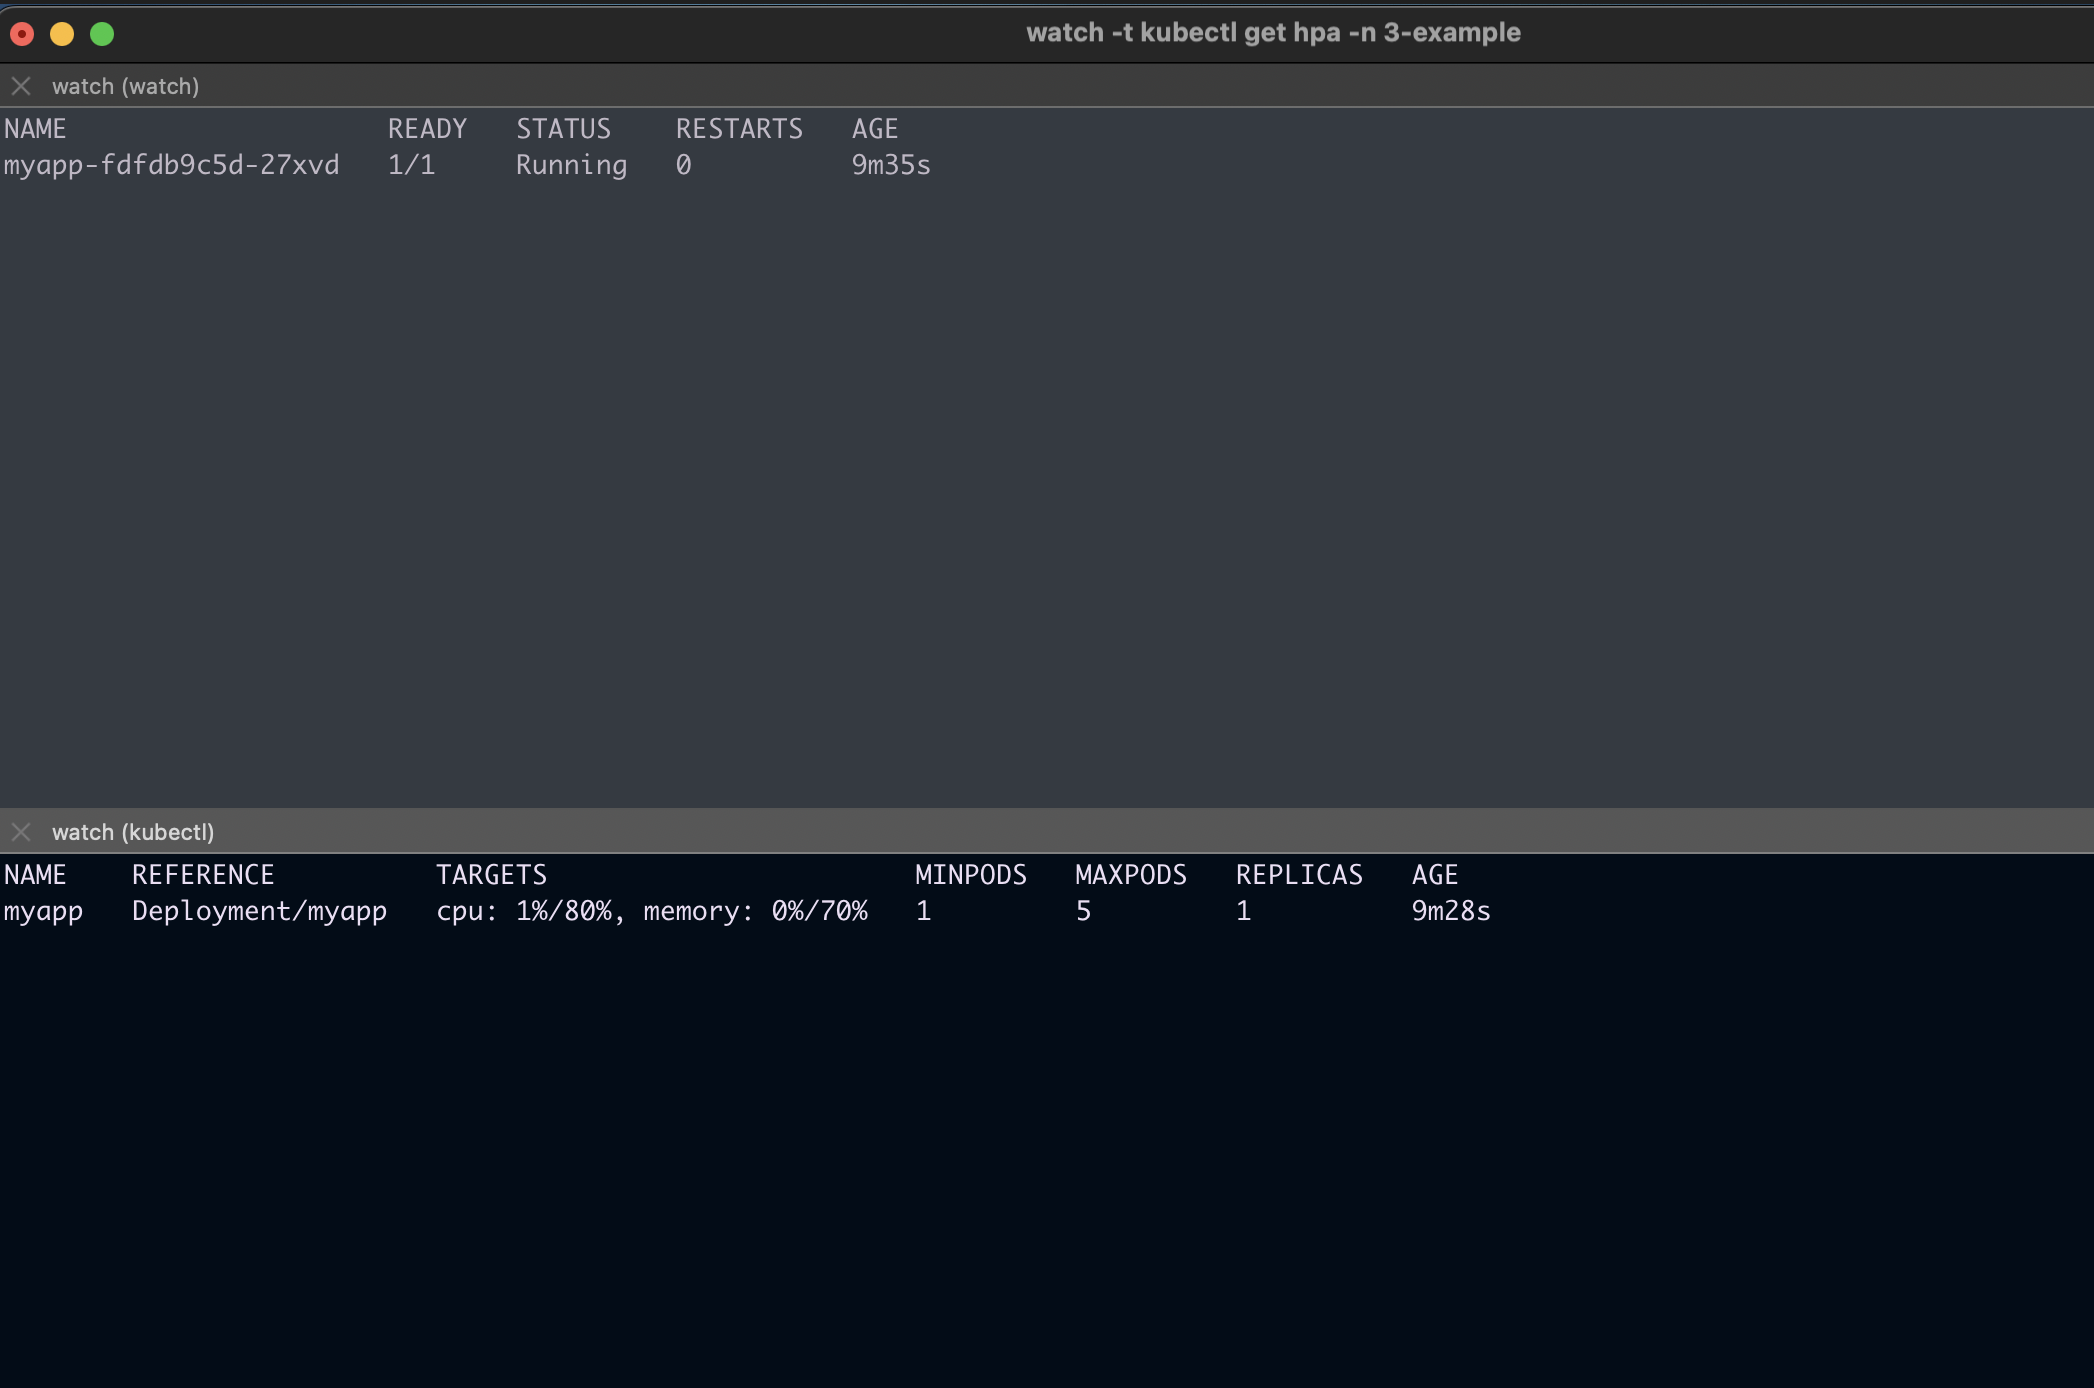
You’ll be able to see how the number of pods adjusts dynamically when resource usage crosses the defined thresholds.
Simulate Load & Trigger Scaling
Now let’s simulate CPU stress to trigger autoscaling:
- Forward the service port to localhost:
kubectl port-forward svc/myapp 8080 -n 3-example
- Trigger a CPU-intensive operation using
curlor brawser:
curl "http://localhost:8080/api/cpu?index=44"
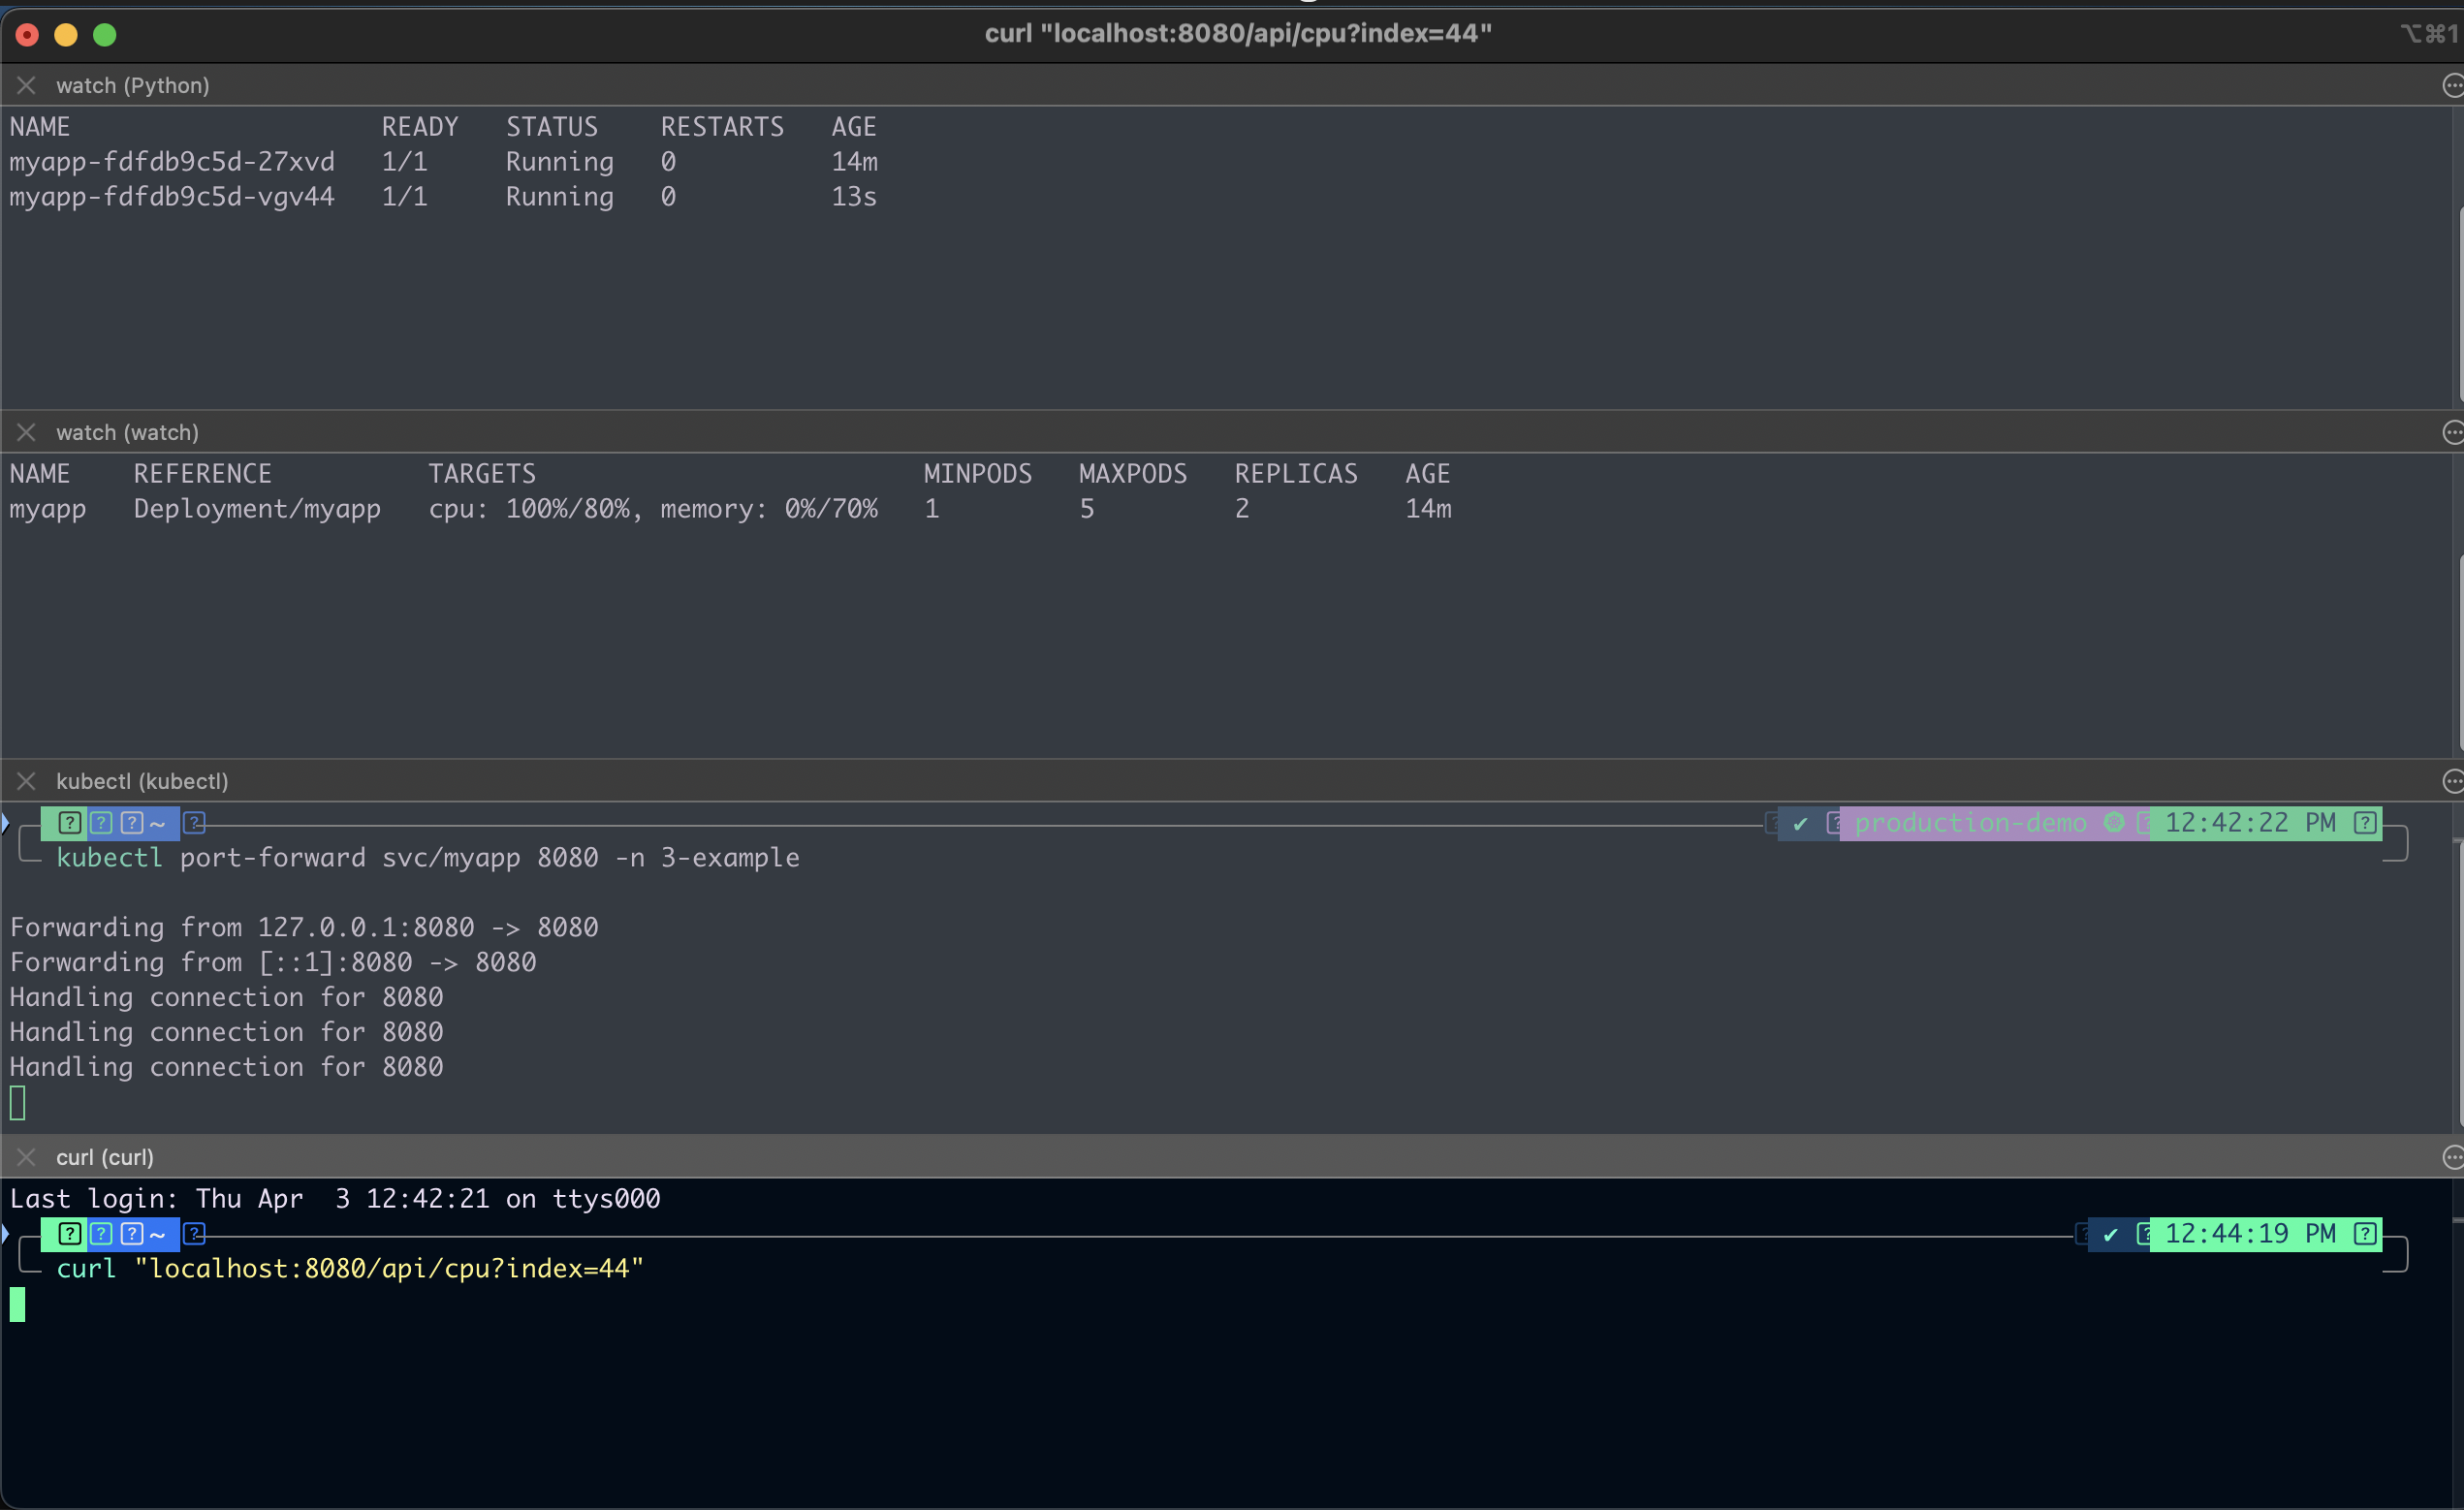
This endpoint runs a CPU-heavy task inside the container, simulating a production-like load. As you can see, the autoscaler has already created a new pod when there is a load, using 100% CPU to distribute the load.
🎉 Watch Autoscaling in Action
As the CPU usage spikes beyond 80%, Kubernetes will automatically:
Detect the increased load via the metrics server
Scale up the number of pods (up to the defined max of 5)
Distribute the traffic load across the new pods
You’ll start to see new pods being created automatically to handle the pressure — no manual intervention required!
This demonstrates that your HPA setup is fully operational and ready to adapt to real-world workloads.
🧠 Step 3: Cluster Autoscaler and EKS Pod Identity
To allow dynamic node scaling in your EKS cluster, we’ll now configure the Cluster Autoscaler using AWS EKS Pod Identity.
The Cluster Autoscaler is a Kubernetes component that automatically adjusts the number of nodes in your cluster based on pending pods. This is essential when your pods request more resources than available nodes can provide.
First: Deploy the Pod Identity Agent Add-on
Before installing the Cluster Autoscaler, we must enable the EKS Pod Identity Agent. This allows EKS-managed service accounts to assume IAM roles without using kube2iam or IRSA.
resource "aws_eks_addon" "pod_identity" {
  cluster_name  = aws_eks_cluster.eks.name
  addon_name    = "eks-pod-identity-agent"
  addon_version = "v1.2.0-eksbuild.1"
}
Step 4: Install the Cluster Autoscaler via Helm
Next, we’ll define the IAM Role, Policy, and Helm Chart configuration to install and integrate the Cluster Autoscaler with your EKS cluster.
resource "aws_iam_role" "cluster_autoscaler" {
  name = "${aws_eks_cluster.eks.name}-cluster-autoscaler"

  assume_role_policy = jsonencode({
    Version = "2012-10-17"
    Statement = [
      {
        Effect = "Allow"
        Action = [
          "sts:AssumeRole",
          "sts:TagSession"
        ]
        Principal = {
          Service = "pods.eks.amazonaws.com"
        }
      }
    ]
  })
}

resource "aws_iam_policy" "cluster_autoscaler" {
  name = "${aws_eks_cluster.eks.name}-cluster-autoscaler"

  policy = jsonencode({
    Version = "2012-10-17"
    Statement = [
      {
        Effect = "Allow"
        Action = [
          "autoscaling:DescribeAutoScalingGroups",
          "autoscaling:DescribeAutoScalingInstances",
          "autoscaling:DescribeLaunchConfigurations",
          "autoscaling:DescribeScalingActivities",
          "autoscaling:DescribeTags",
          "ec2:DescribeImages",
          "ec2:DescribeInstanceTypes",
          "ec2:DescribeLaunchTemplateVersions",
          "ec2:GetInstanceTypesFromInstanceRequirements",
          "eks:DescribeNodegroup"
        ]
        Resource = "*"
      },
      {
        Effect = "Allow"
        Action = [
          "autoscaling:SetDesiredCapacity",
          "autoscaling:TerminateInstanceInAutoScalingGroup"
        ]
        Resource = "*"
      },
    ]
  })
}

resource "aws_iam_role_policy_attachment" "cluster_autoscaler" {
  policy_arn = aws_iam_policy.cluster_autoscaler.arn
  role       = aws_iam_role.cluster_autoscaler.name
}

resource "aws_eks_pod_identity_association" "cluster_autoscaler" {
  cluster_name    = aws_eks_cluster.eks.name
  namespace       = "kube-system"
  service_account = "cluster-autoscaler"
  role_arn        = aws_iam_role.cluster_autoscaler.arn
}

resource "helm_release" "cluster_autoscaler" {
  name = "autoscaler"

  repository = "https://kubernetes.github.io/autoscaler"
  chart      = "cluster-autoscaler"
  namespace  = "kube-system"
  version    = "9.37.0"

  set {
    name  = "rbac.serviceAccount.name"
    value = "cluster-autoscaler"
  }

  set {
    name  = "autoDiscovery.clusterName"
    value = aws_eks_cluster.eks.name
  }

  # MUST be updated to match your region
  set {
    name  = "awsRegion"
    value = "us-east-1"
  }

  depends_on = [helm_release.metrics_server]
}
✅ Apply the Configuration
Run the following command to deploy the Cluster Autoscaler:
terraform apply -auto-approve
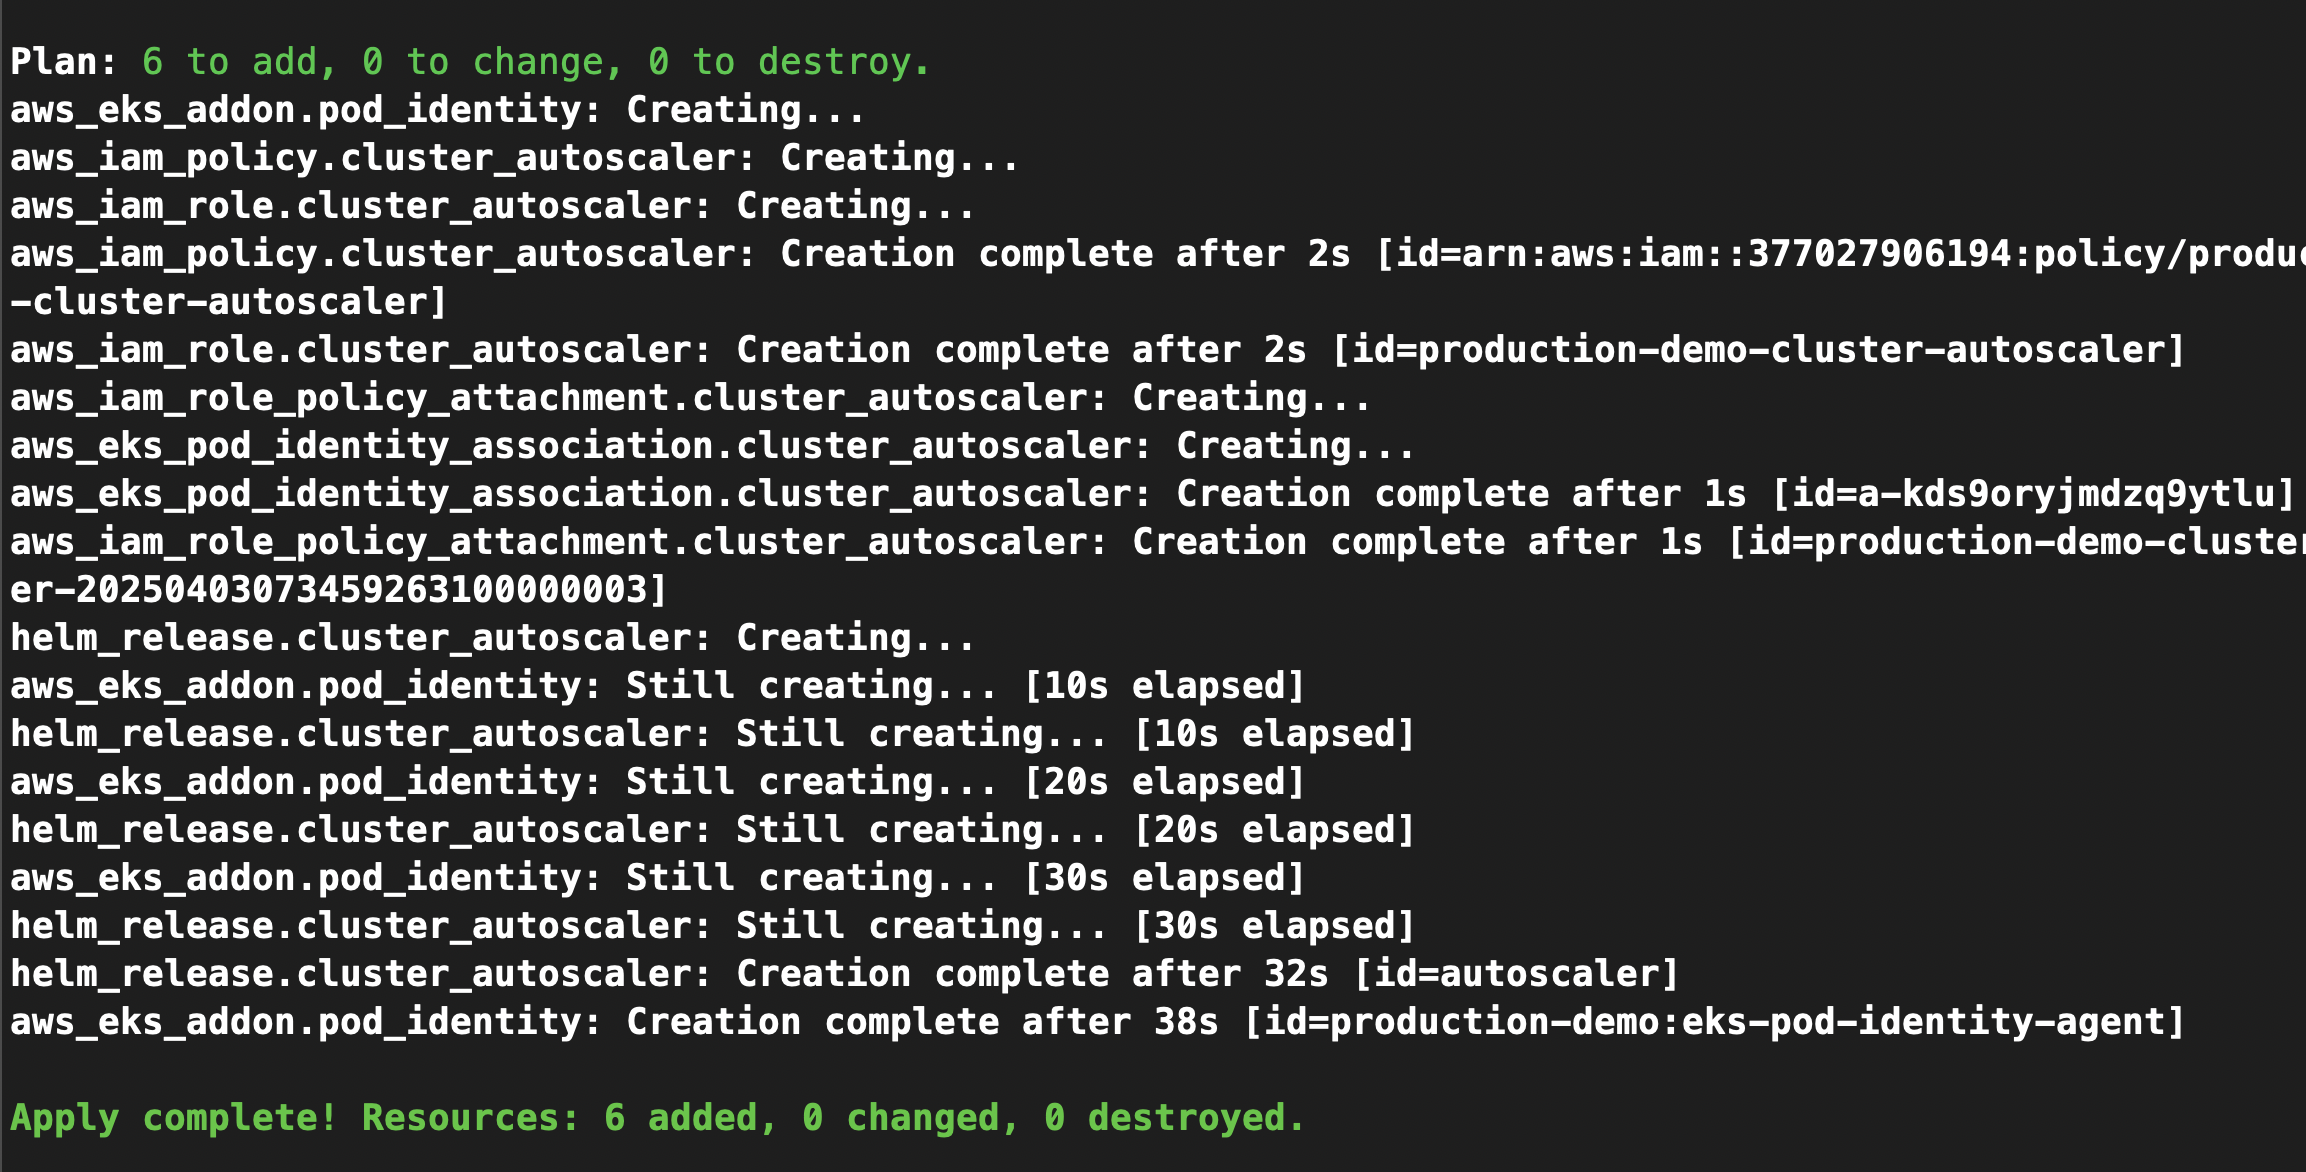
After the resources are provisioned, the Cluster Autoscaler will monitor your pod scheduling and automatically:
Scale up the number of nodes if there aren’t enough to schedule new pods.
Scale down the cluster during low usage to reduce costs
Verifying Cluster Autoscaler Functionality
Now that the Cluster Autoscaler is deployed, let’s verify it's running correctly and observe it in action.
✅ Check Autoscaler Pod Status:
kubectl get pods -n kube-system

You should see the cluster-autoscaler pod in a Running state within the kube-system namespace.
✅ Inspect Logs for Autoscaler Behavior: To understand how the autoscaler works or debug any issues, check the logs:
kubectl logs -l app.kubernetes.io/instance=autoscaler -f -n kube-system
This will provide real-time insights into decisions the autoscaler makes—such as scaling up or down based on unschedulable pods.
Simulate Node Scaling with a Resource-Heavy Deployment
To test the Cluster Autoscaler, we’ll intentionally deploy an app with resource requests that exceed the current node capacity. The autoscaler will detect the pending pods and trigger a new node to be provisioned.
📁 Create a new test app directory:
mkdir 04-deployment-scaled-manual-resources && cd 04-deployment-scaled-manual-resources
📝 0-namespace.yaml
---
apiVersion: v1
kind: Namespace
metadata:
  name: 4-example
📝 1-deployment.yaml
---
apiVersion: apps/v1
kind: Deployment
metadata:
  name: myapp
  namespace: 4-example
spec:
  replicas: 5
  selector:
    matchLabels:
      app: myapp
  template:
    metadata:
      labels:
        app: myapp
    spec:
      containers:
        - name: myapp
          image: aputra/myapp-195:v2
          ports:
            - name: http
              containerPort: 8080
          resources:
            requests:
              memory: 512Mi
              cpu: 500m
            limits:
              memory: 512Mi
              cpu: 500m
Deploy and Observe Scaling Behavior
Now, monitor the current node count and the app's pods, then deploy the app:
watch -t kubectl get nodes

watch -t kubectl get pods -n 4-example

kubectl apply -f 04-deployment-scaled-manual-resources
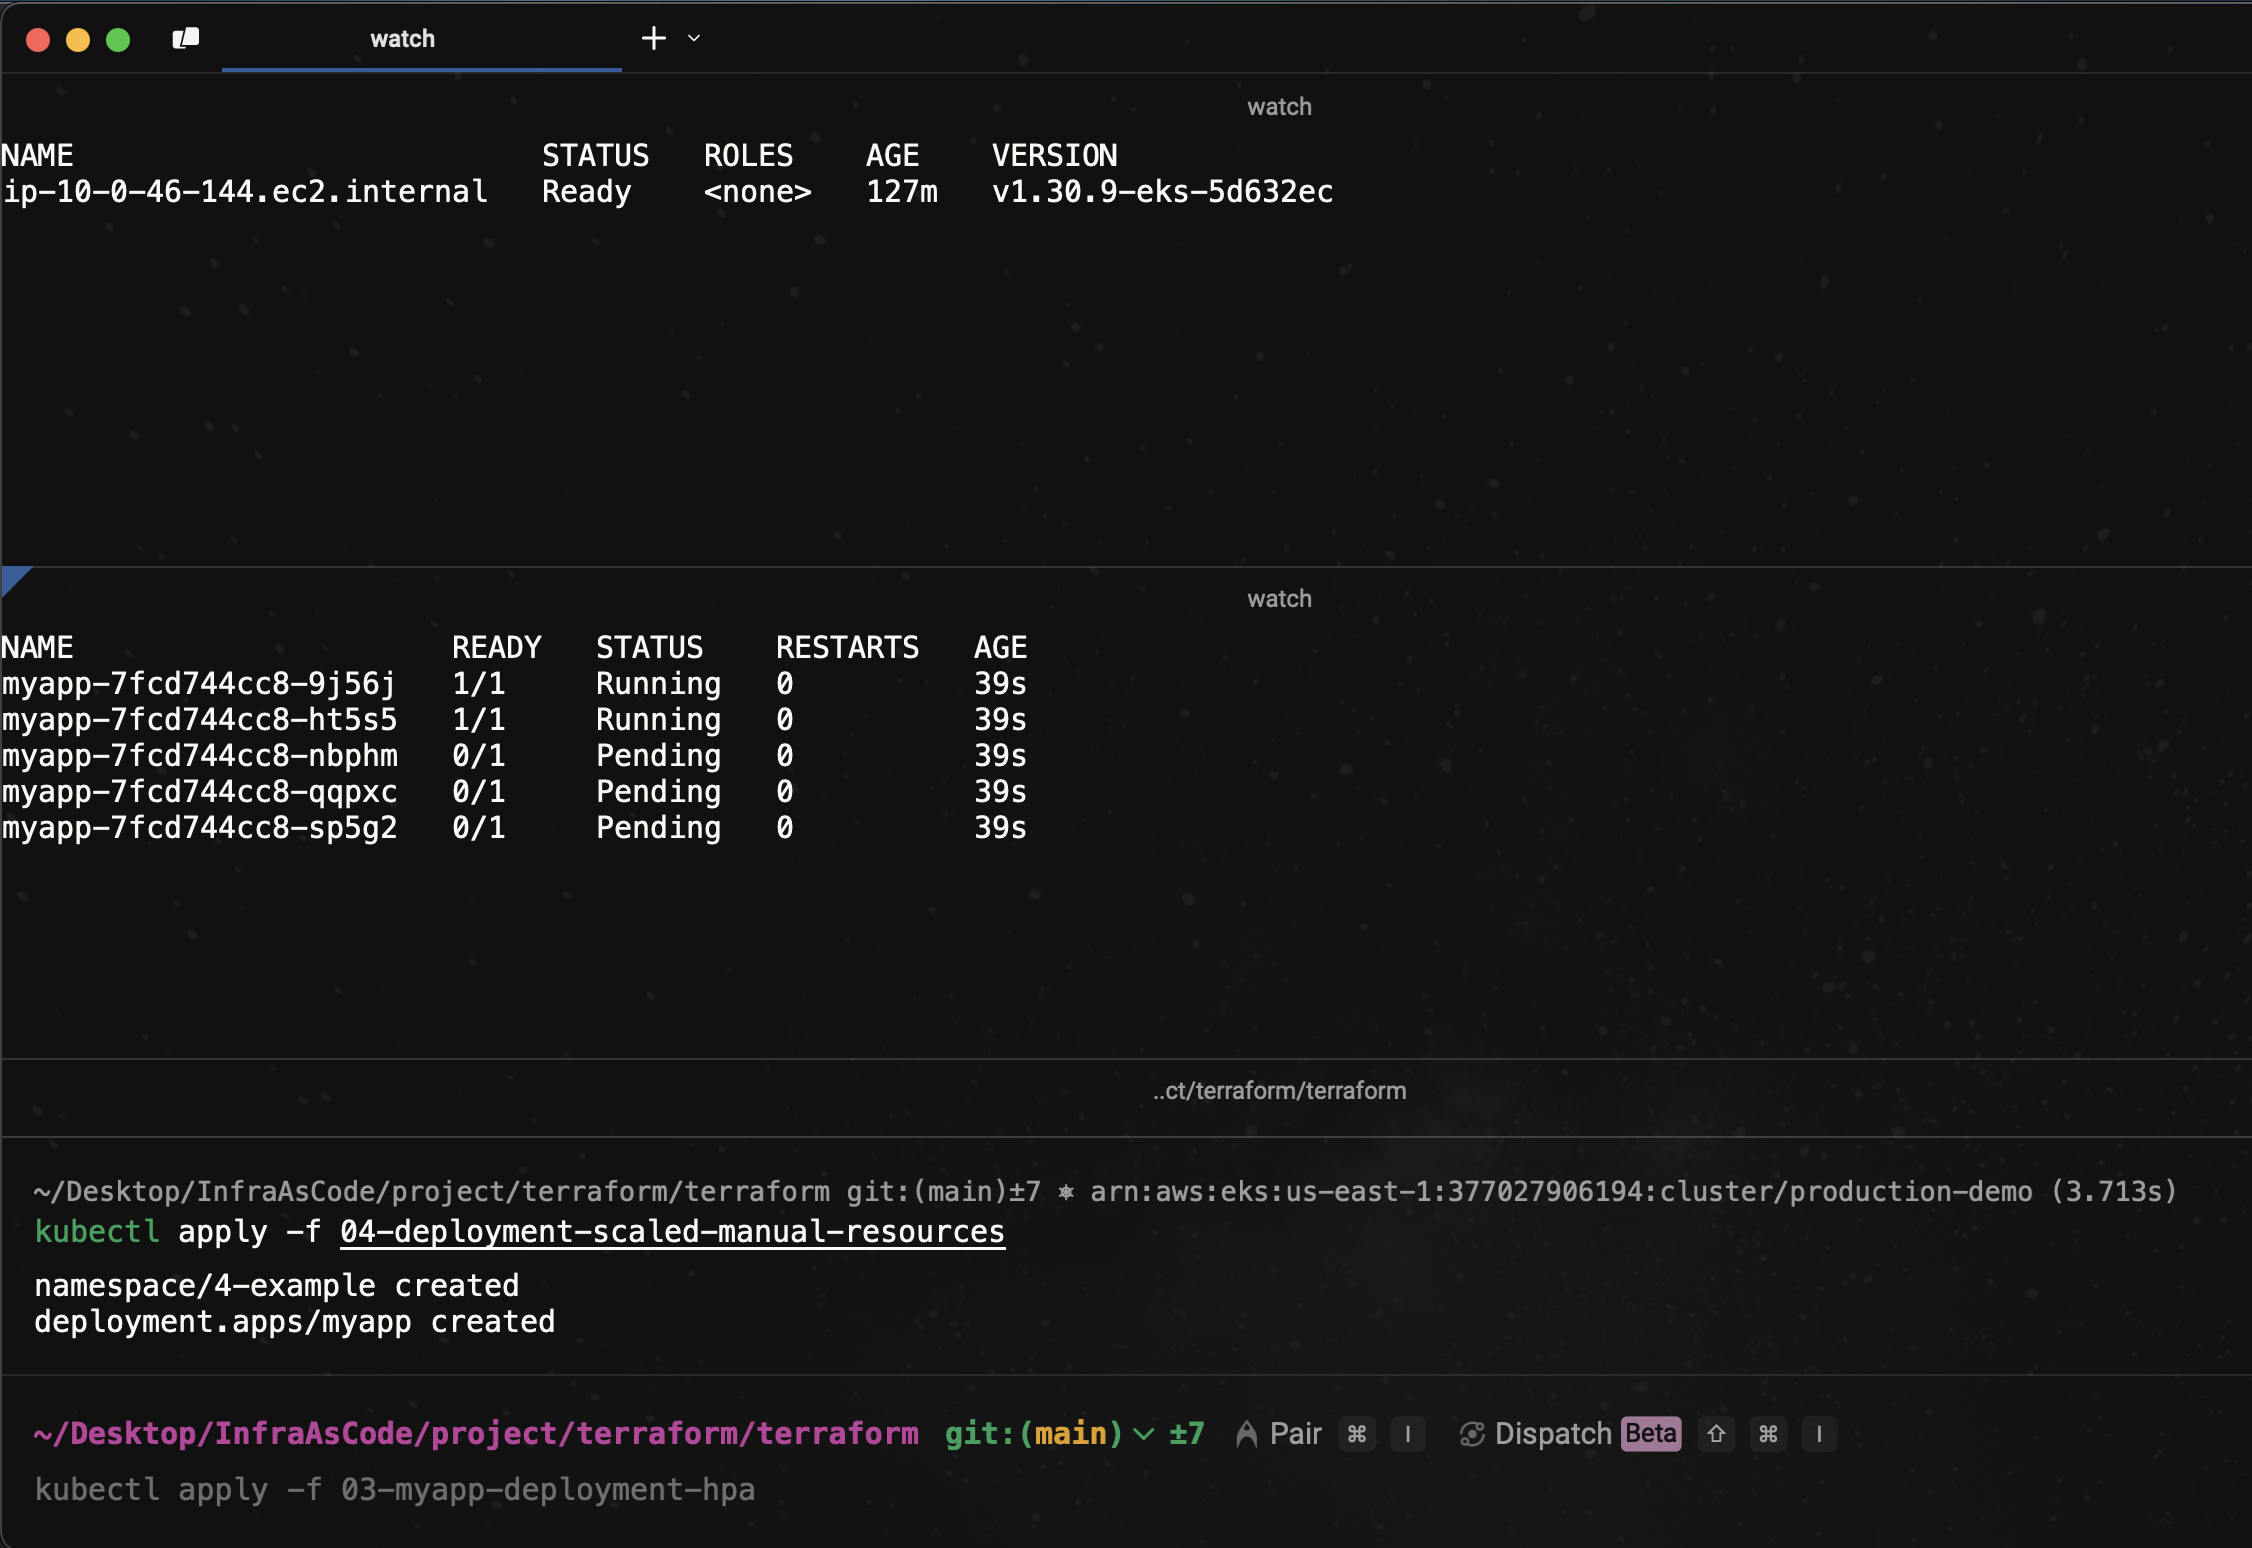
Immediately after deployment, some pods will be in a Pending state due to insufficient resources. This is expected.
⏳ Wait a few seconds… The Cluster Autoscaler will kick in, detect the unschedulable pods, and provision a new node. Once the new node is added, the pending pods will transition to Running, demonstrating successful autoscaling at the node level.
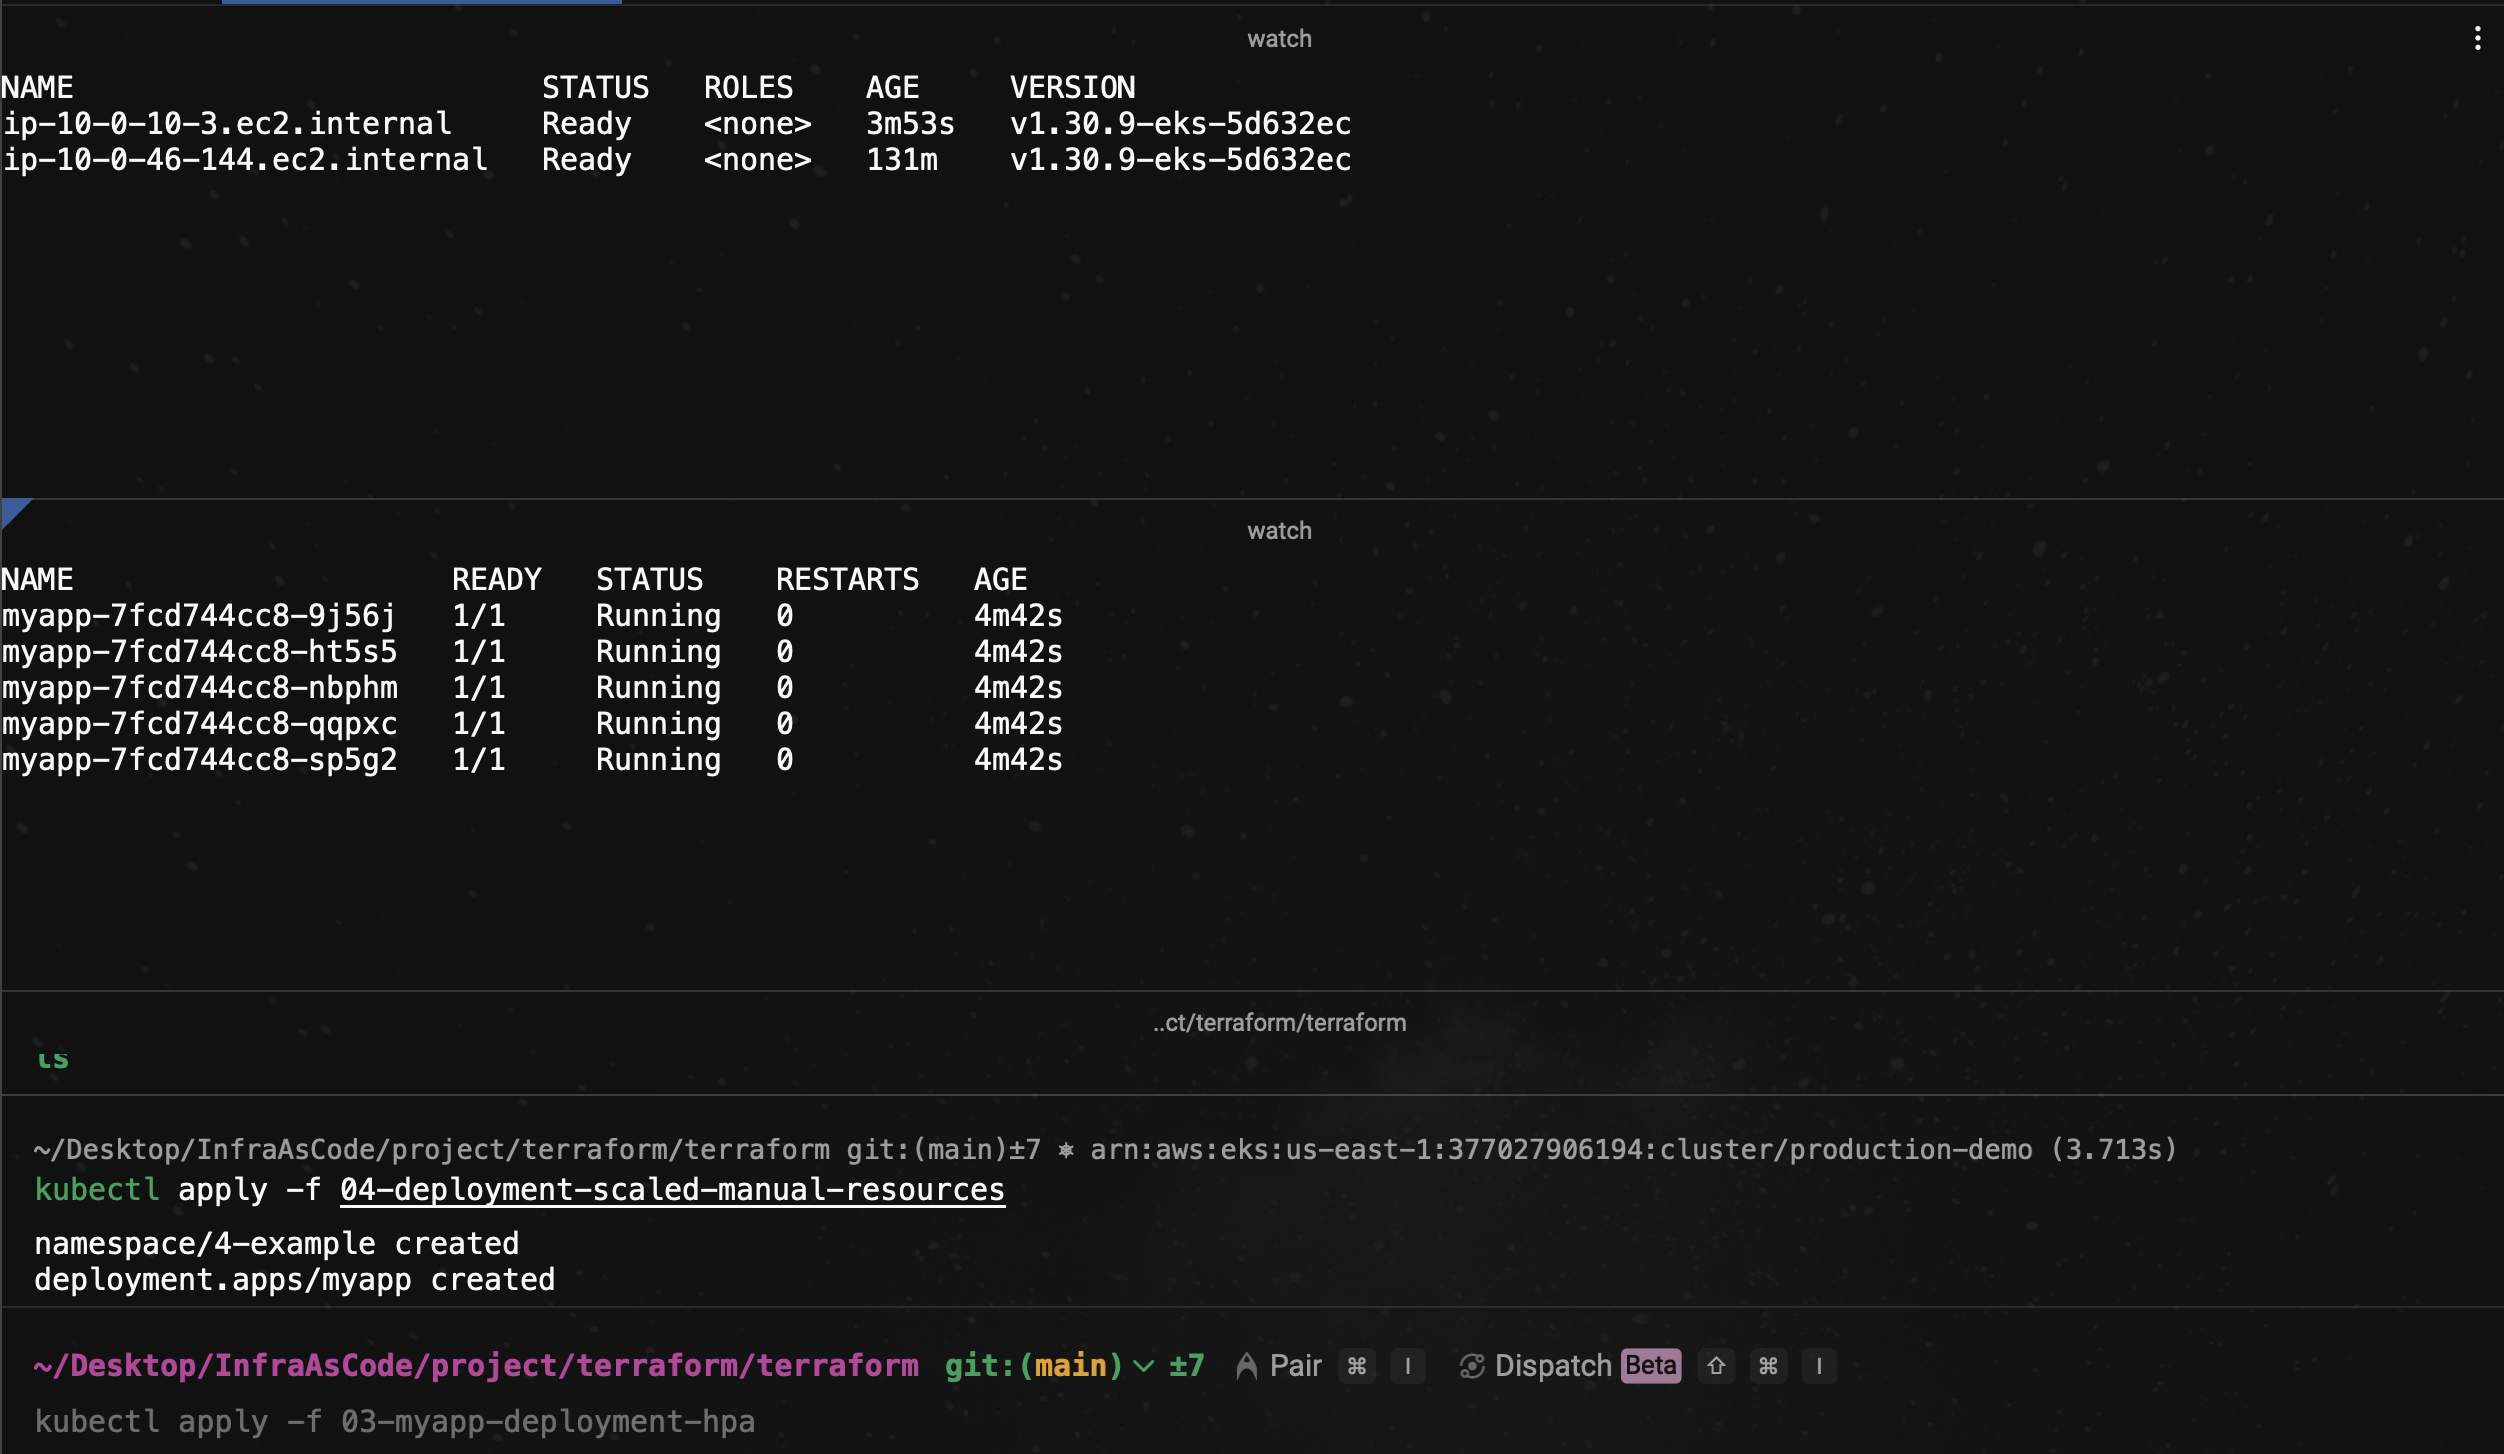
Now, as you can see, the cluster autoscaler is functioning. It has created new nodes, and the deployment pod is now running.
📊 How Autoscaling Transformed My Workflow
After implementing both Horizontal Pod Autoscaler (HPA) and Cluster Autoscaler in my EKS setup:
My app handled traffic spikes without manual intervention or downtime.
I reduced costs by scaling down unused resources automatically.
The infrastructure became self-healing, elastic, and resilient under dynamic workloads.
No more babysitting the cluster—Terraform and Kubernetes handled everything with automation and precision
✅ Summary: What You’ve Achieved
In this article, you’ve successfully:
✔️ Authenticated Helm with EKS
✔️ Deployed the metrics-server
✔️ Configured Horizontal Pod Autoscaler (HPA) for CPU & memory metrics
✔️ Installed Cluster Autoscaler with Pod Identity and IAM roles
✔️ Validated both pod and node-level autoscaling in action
You now have a fully automated scaling mechanism that keeps your EKS cluster efficient and production-ready.
⏭️ What’s Coming Next?
In Part 4 of the series, we’ll move to networking and external traffic routing:
✅ Deploy the AWS ALB Ingress Controller
✅ Set up the NGINX LoadBalancer
✅ Expose your apps to the internet securely
✅ Automate TLS/SSL with Cert-Manager
💬 Have you implemented autoscaling in your Kubernetes workloads? Drop your thoughts, challenges, or questions in the comments—I'd love to hear your experience!
👉 Follow me on LinkedIn for more DevOps & cloud tips like this!
#EKS #Terraform #Kubernetes #AWS #Autoscaling #HPA #ClusterAutoscaler #DevOps #IaC #CloudEngineering #K8s #Observability #Scalability
Subscribe to my newsletter
Read articles from Neamul Kabir Emon directly inside your inbox. Subscribe to the newsletter, and don't miss out.
Written by

Neamul Kabir Emon
Neamul Kabir Emon
Hi! I'm a highly motivated Security and DevOps professional with 7+ years of combined experience. My expertise bridges penetration testing and DevOps engineering, allowing me to deliver a comprehensive security approach.