Creating Aesthetic Screenshots for your Portfolio Using Chrome Dev Tools and Figma
 Faith Gaiciumia
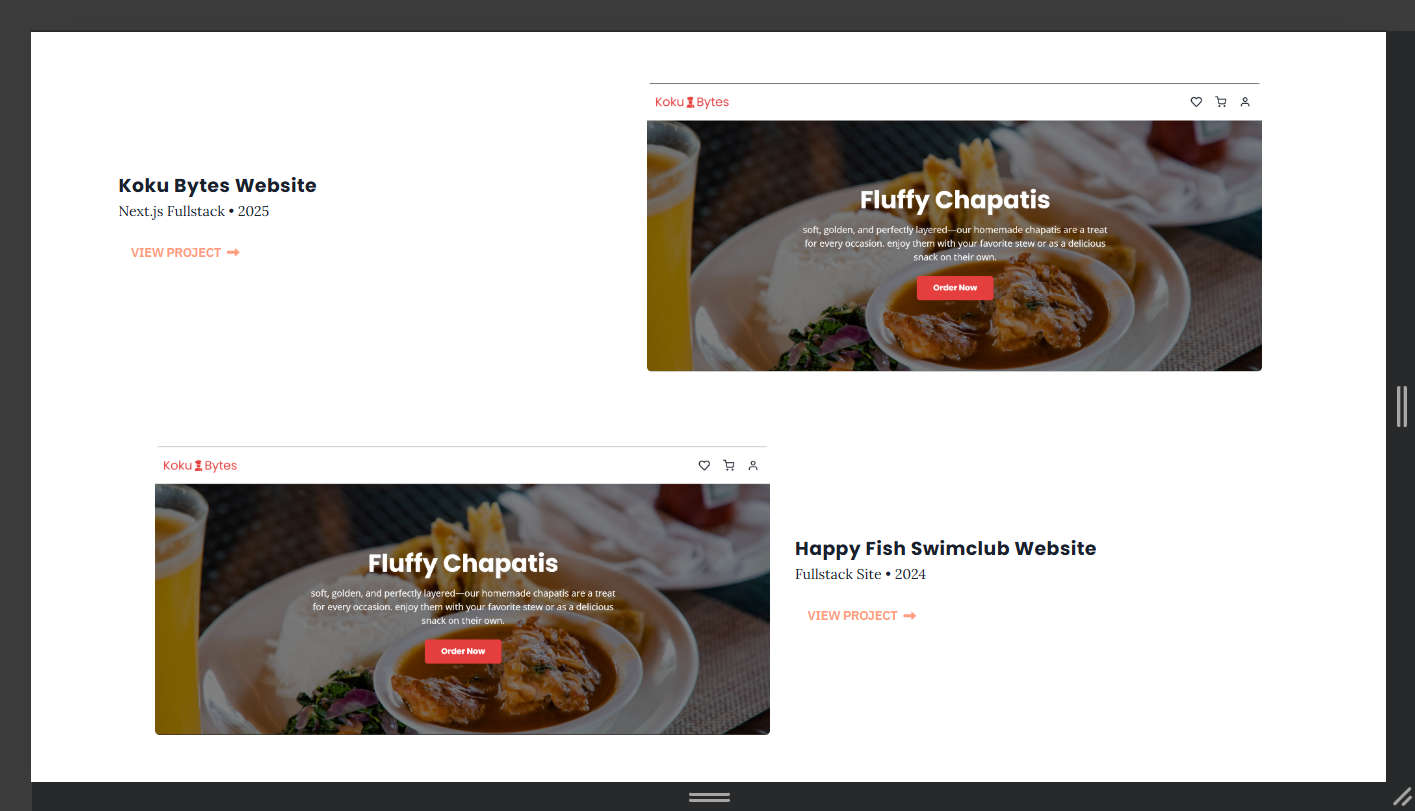
As a frontend developer, having a well-designed portfolio site is essential for showcasing my projects to potential clients. However, I encountered a frustrating challenge: adding high-quality screenshots in different orientations. Some images were too small, others lacked borders, and some were so large that important details, like text, became unreadable. Below is an example of how the screenshots looked like initially:

My Initial Attempts
To fix this, I explored a few options:
Using a third-party screenshot API – but it didn’t offer the flexibility I needed for different screen sizes and would take too long to load images.
Manually capturing images with the Snipping Tool – this method worked but was inconsistent across mobile, tablet, and desktop views.
Adjusting image sizes manually – this still resulted in poor resolution and formatting issues.
None of these methods provided the professional, clean look I wanted for my portfolio.
The Solution: Chrome x Figma
After extensive trial and error, I found a simple yet effective solution: Using Chrome DevTools and Figma. This method allowed me to generate polished, device-specific screenshots effortlessly – giving my portfolio a literal facelift!
Step-by-Step Guide: How You Can Do It
If you’re facing a similar issue, follow these steps to create high-quality screenshots for your portfolio:
Open your project in Chrome.
Use Chrome DevTools to preview different screen sizes:
Right-click on your page and select Inspect (or press
Ctrl + Shift + I).Click on the Device Toolbar (the phone/tablet icon in the top-left of DevTools).
Choose different viewport sizes like mobile, tablet, and desktop.
Capture high-resolution screenshots:
In DevTools, press
Ctrl + Shift + P(orCmd + Shift + Pon Mac) or click on the overflow menu icon on the right to open the Command Palette .Select "Capture full-size screenshot".
Chrome will save and download the screenshot into your downloads folder.
Enhance with Figma:
Open Figma and install the free plugin "A Little Bit Mockup".
Select a light or dark frame then on the right toolbar select the device you’d like
Insert your screenshot into the frame. Quick Tip: Checkout the inner frames width and height and use the same dimensions in Chrome to generate a more fitting screenshot.
Adjust borders and positioning for a polished look.
Export the final images as PNGs for use in your portfolio.
The Result
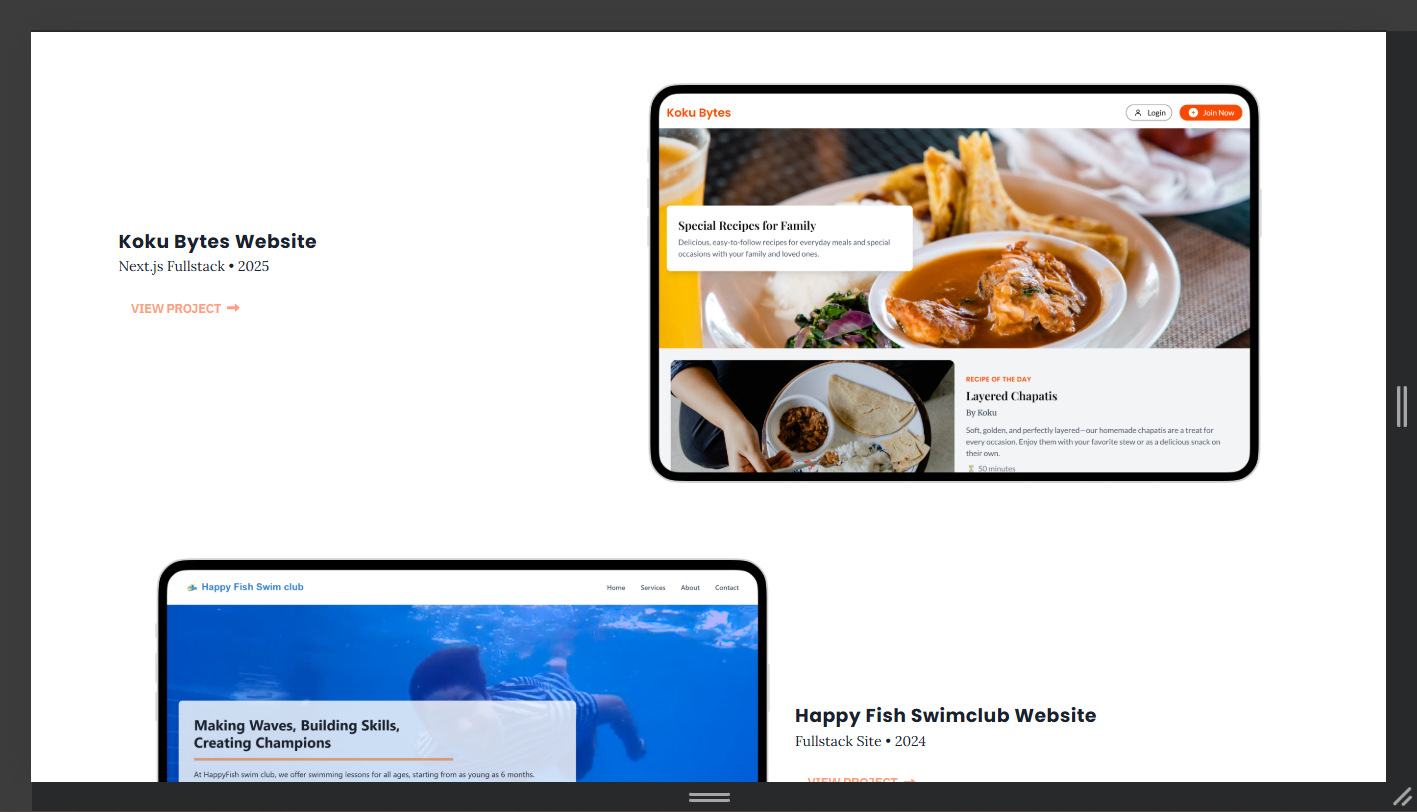
With this method, I was able to create visually appealing, properly scaled screenshots for my portfolio, making my projects look professional and easy to view on any device.
Checkout my portfolio’s after:

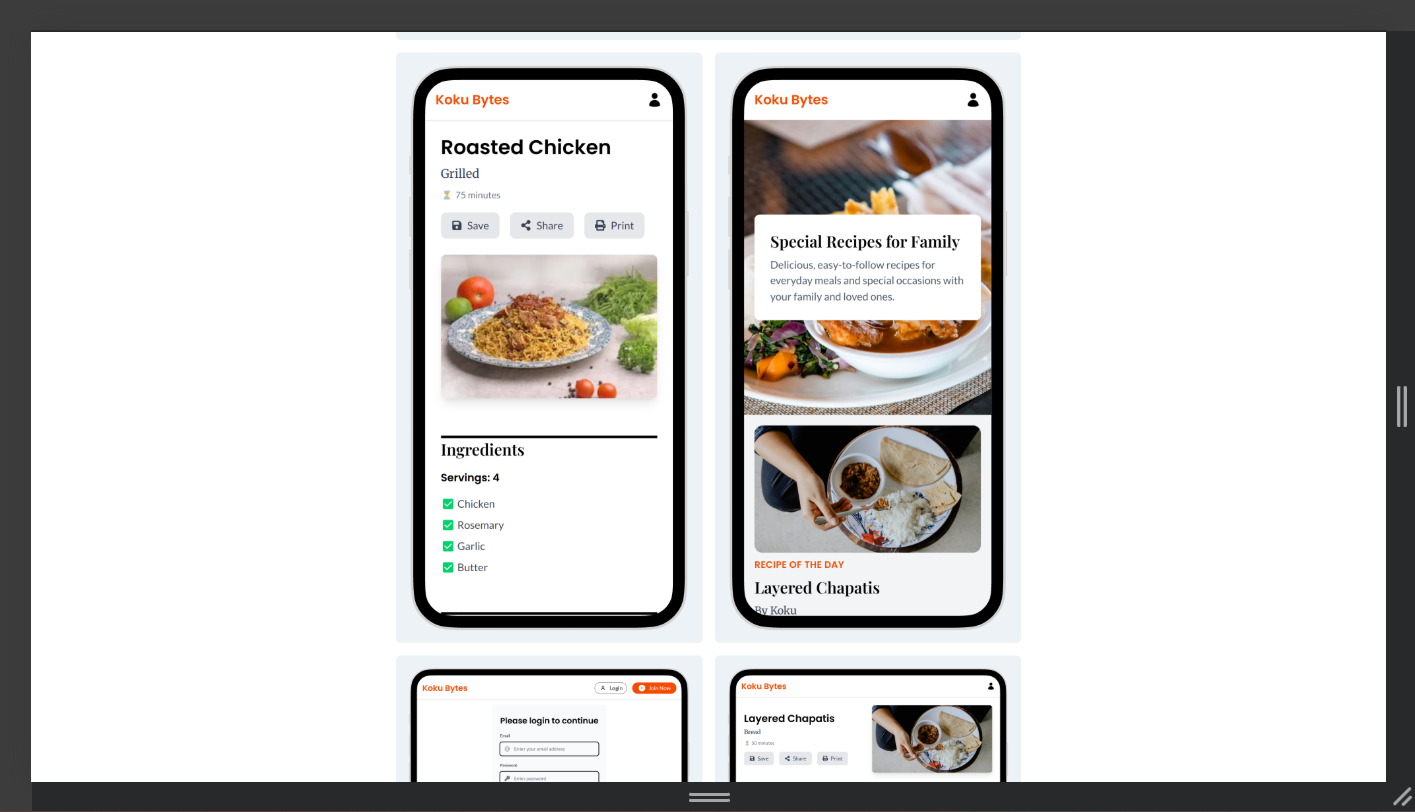
More Screenshots on Project Details:

If you're struggling with the same issue, try this approach—I hope it helps!
Subscribe to my newsletter
Read articles from Faith Gaiciumia directly inside your inbox. Subscribe to the newsletter, and don't miss out.
Written by

Faith Gaiciumia
Faith Gaiciumia
Web Dev - Nairobi, Kenya