Multibranch Pipeline in Jenkins: A Complete Guide
 Sayantan Manna
Introduction
Jenkins' Multibranch Pipeline feature allows us to automate CI/CD workflows for repositories with multiple branches. It dynamically discovers, manages, and executes pipelines for each branch within a project, ensuring that each branch gets built and tested independently.
In this guide, we will walk through the process of setting up a Multibranch Pipeline in Jenkins, from configuring webhooks to handling pull requests and merging changes.
Getting Started
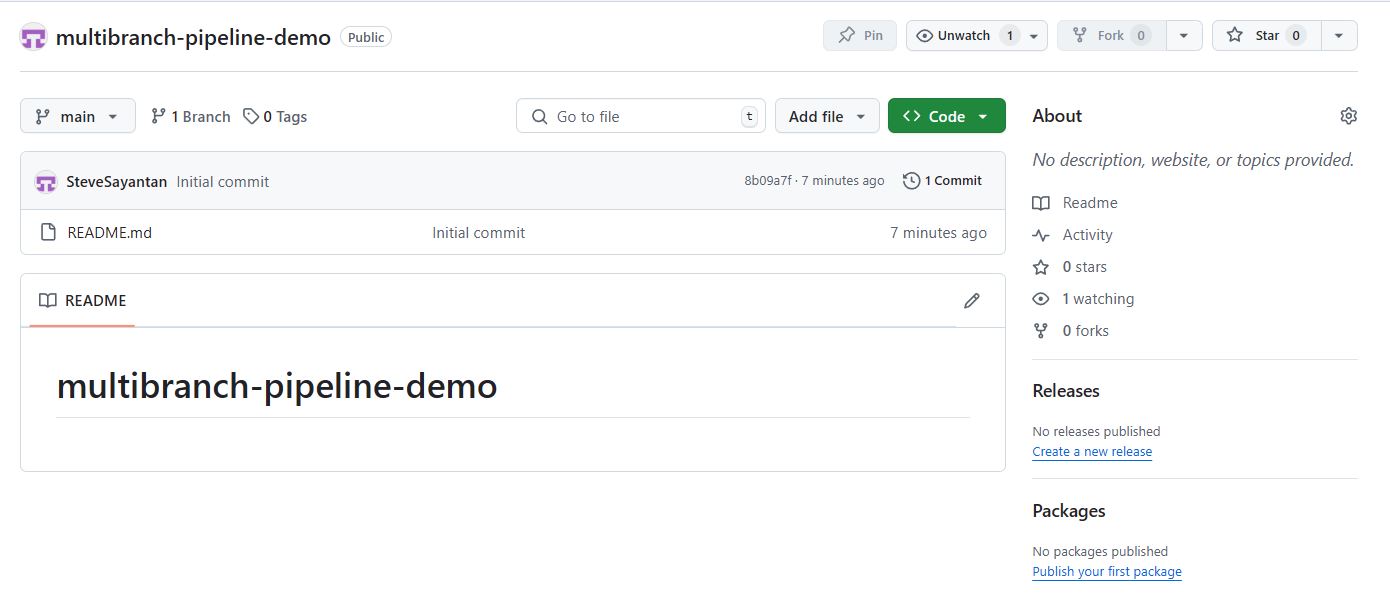
Before diving into the Multibranch Pipeline setup, let's take a look at the repository structure.
Initially, our GitHub repository consists of:
A single branch: main
A README.md file
Setting up GitHub Webhook
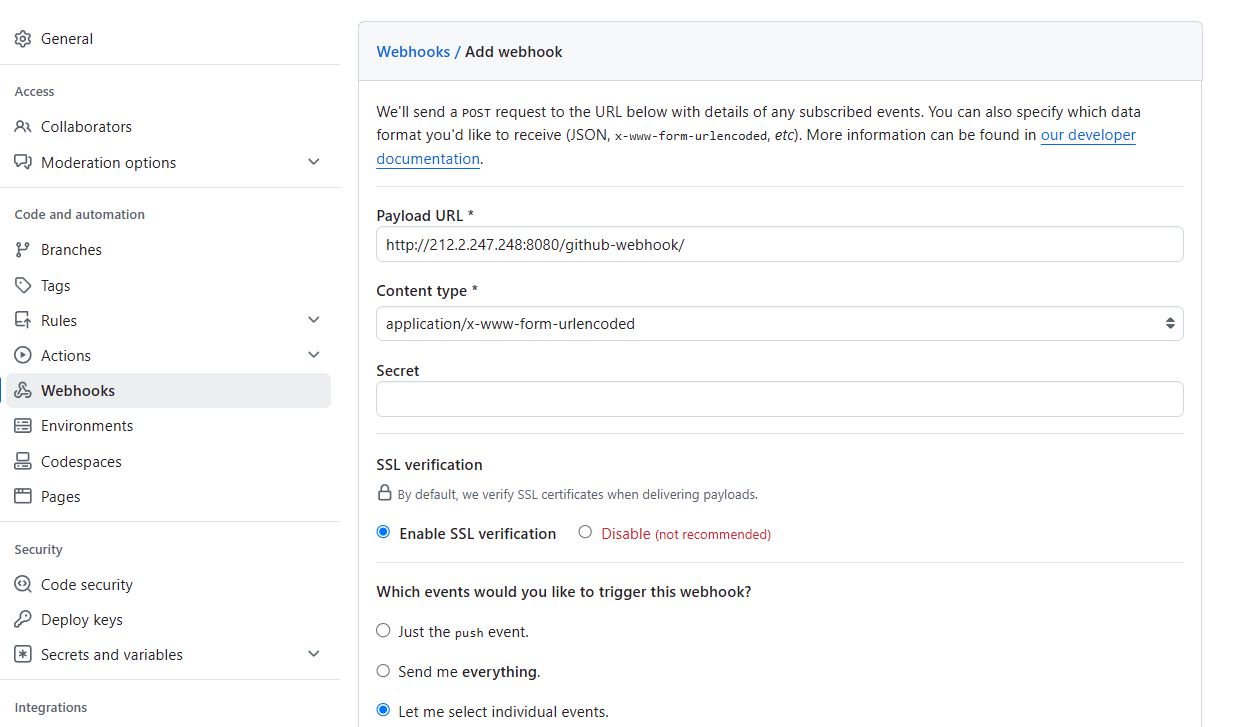
To allow Jenkins to automatically detect changes in the repository, we need to configure a GitHub Webhook.
Steps to Configure GitHub Webhook
Navigate to Settings in your GitHub repository
Click on Webhooks > Add webhook
Under Payload URL, enter your Jenkins URL followed by
/github-webhook/For example,
http://52.135.234.453:8080/github-webhook/Select Let me select individual events and check the following events:
Branch or tag creation
Branch or tag deletion
Push
Pull requests
Click Save webhook.
Creating a Multibranch Pipeline Job in Jenkins
Once the webhook is set up, we can create a Multibranch Pipeline job in Jenkins.
Steps to Configure a Multibranch Pipeline
Open Jenkins and click New Item.
Select Multibranch Pipeline and enter a name for the job.
Under Branch Source, select GitHub and provide the repository URL.
Add credentials if required.
Click Save.
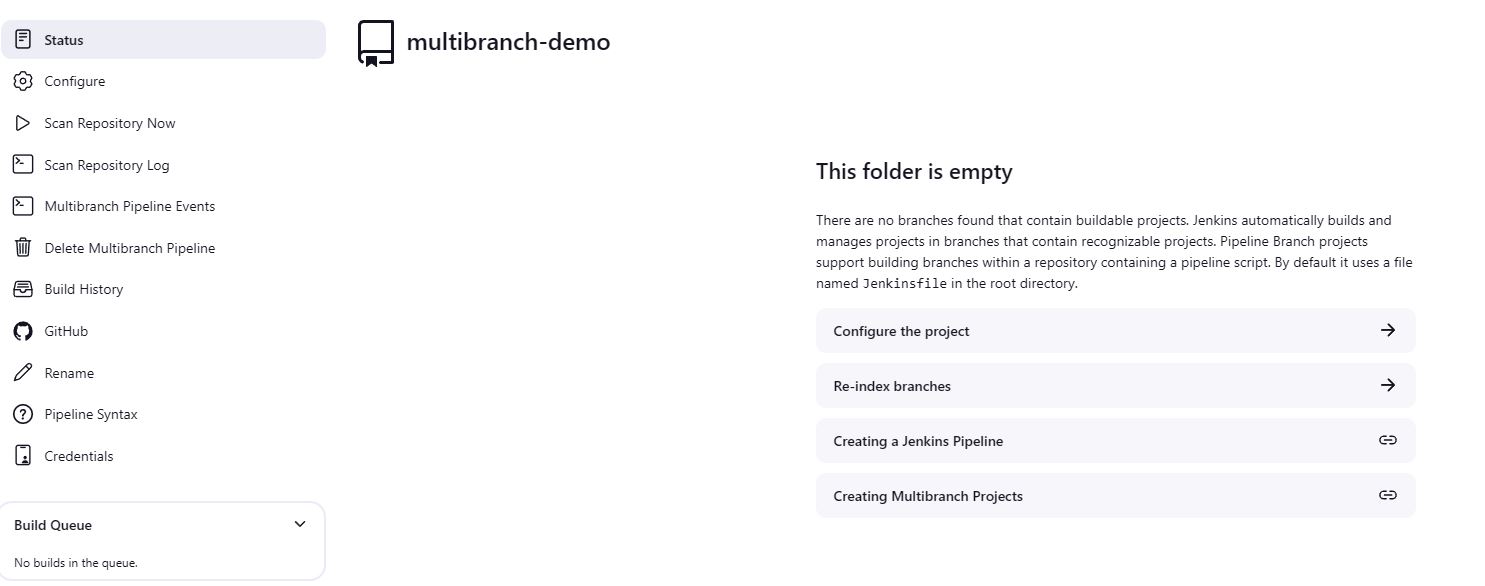
When we navigate back to the job, we might notice that Jenkins hasn't detected any pipeline yet. This happens because our repository does not contain a Jenkinsfile.
Adding a Jenkinsfile
To define our pipeline, we create a Jenkinsfile and commit it to the repository.
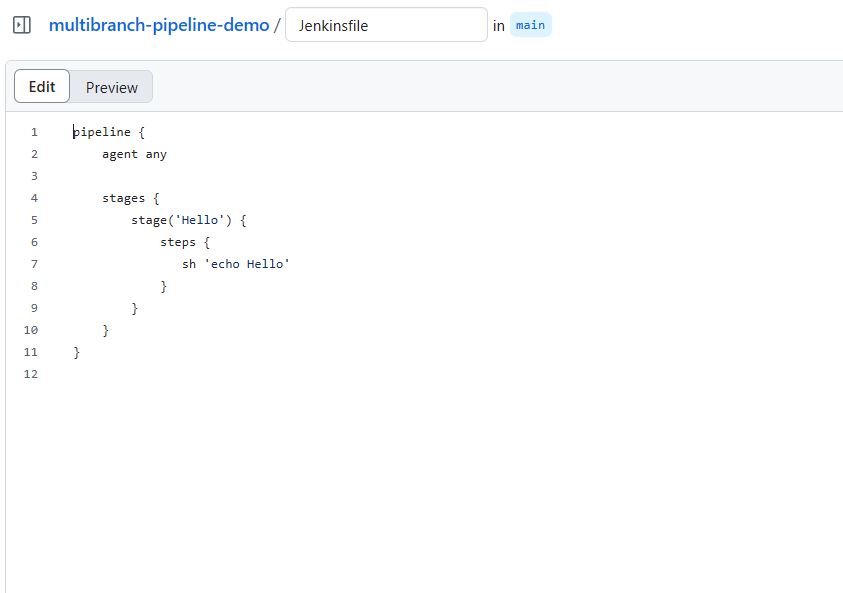
Once committed, Jenkins will detect the file and trigger a build automatically, thanks to the webhook integration 🎉🥳
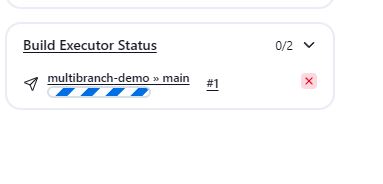
At this point, our multibranch pipeline is now active, with Jenkins successfully scanning and creating a pipeline for the main branch.

Creating a New Branch in GitHub
Till now, we’ve been working with a single branch. Let’s create another one called fix-123 .
Now, if we take a look at our pipeline, we would see a new job corresponding to fix-123 has been added automatically :

This is the true power of a Multibranch Pipeline 🚀
Now, let’s edit the Jenkinsfile in the fix-123 branch and commit the changes.
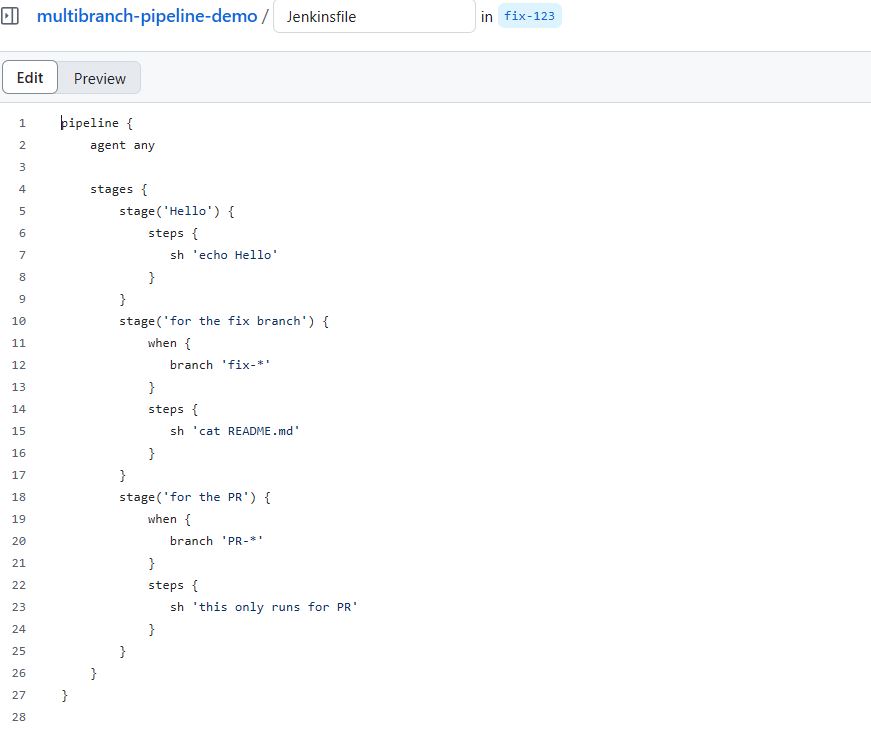
Once done, Jenkins will trigger a build for fix-123 automatically.
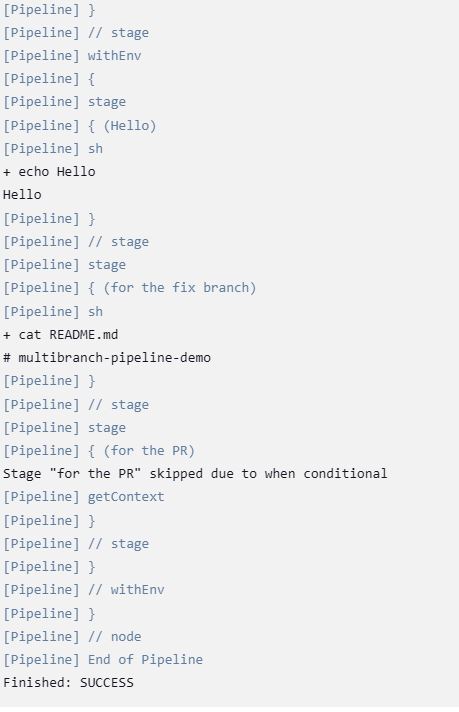
On checking the build output, we notice that the for the PR stage is skipped since the when condition in our pipeline wasn’t met.
Creating a Pull request
Let’s create a pull request from fix-123 to main in GitHub.
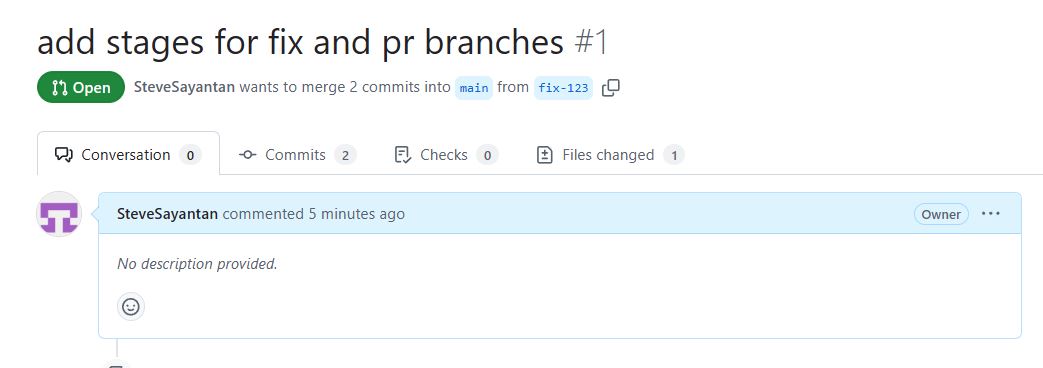
Once the PR is opened, Jenkins will:
Automatically create a new job for the PR.
Trigger a new build for the PR branch.

BRANCH_NAME environment variable in Jenkins is set to something like PR-24. You can check more details at http://<YOUR-JENKINS-URL>/env-vars.htmlThe build output will look like:
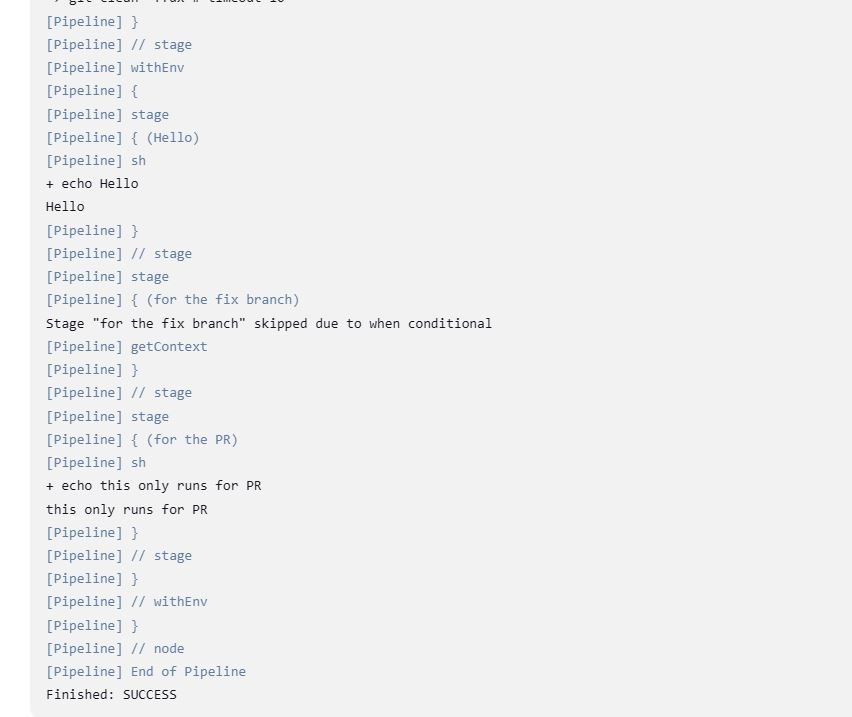
We observe that for the fix branch stage is skipped. This is because Jenkins intelligently differentiates between branch builds and PR builds based on our pipeline configuration.
Merging the Pull Request
Once we merge the pull request and delete the branch fix-123, Jenkins updates the pipeline by:
Striking throughthe jobs for the deleted branch and pull request.Automatically removing them when we click on Scan Repository Now.
Triggering a final build on
maindue to the merge.

The build output will look like
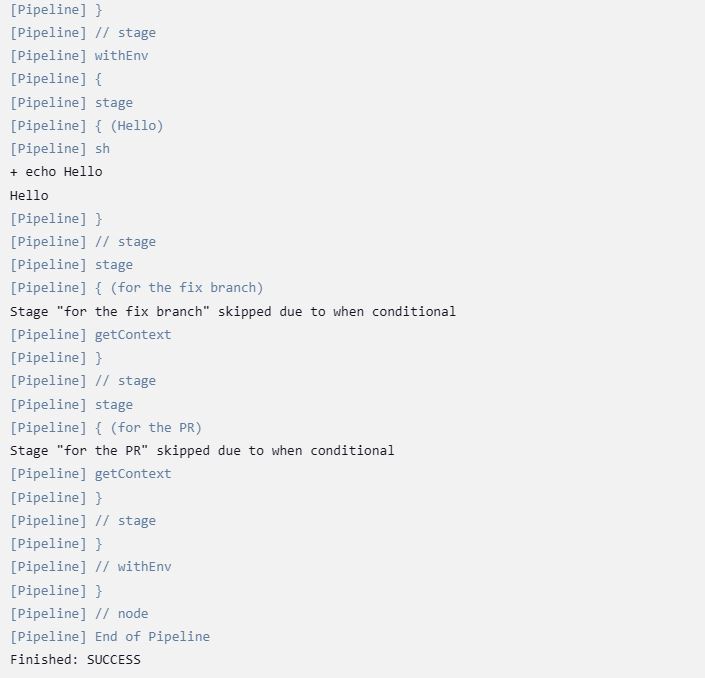
Here, both for the fix branch and for the PR are skipped, as expected.
Troubleshooting
Unthrottling GitHub API Usage
GitHub limits the number of API calls that an account can make within a particular time frame, also known as the "rate limit". This sometimes cause Jenkins jobs to wait due to exceeding the allowed requests.

The GitHub Branch Source plugin tracks the rate limit and lets administrators specify a strategy for apportioning their API call budget. To configure a different rate limit strategy (for example, to have Jenkins attempt to evenly distribute GitHub API requests),
Navigate to Manage Jenkins > Configure System.
Under GitHub API usage, locate Github API usage rate limiting strategy.
Switch Normalize API requests to Throttle at/near rate limit .
Select Save.
Conclusion
Jenkins' Multibranch Pipeline provides a seamless way to automate CI/CD for multiple branches, ensuring that:
✅ Every branch gets tested independently.
✅ Pull requests trigger separate builds.
✅ Merged branches are automatically cleaned up.
Are you willing to use Multibranch Pipelines in your projects?
Let me know in the comments below! 💬
Subscribe to my newsletter
Read articles from Sayantan Manna directly inside your inbox. Subscribe to the newsletter, and don't miss out.
Written by
