Basic and Advance Linux Commands:
 Raj Nandgaonkar
Content of blog:
To view what’s written in a file.
To change the access permissions of files.
To check which commands you have run till now.
To remove a directory/ Folder.
To create a fruits.txt file and to view the content. And add content in devops.txt (One in each line) — Apple, Mango, Banana, Cherry, Kiwi, Orange, Guava.
To Show only top three fruits from the file and To Show only bottom three fruits from the file.
To create another file Colors.txt and to view the content. And add content in Colors.txt (One in each line) — Red, Pink, White, Black, Blue, Orange, Purple, Grey.
To find the difference between fruits.txt and Colors.txt file.
To check the present working directory (as per windows to check the folder location).
To create multiple directory:
To create multiple directory hierarchies and create multiple files in one of the directories at the same time.
Create user and assign passwd and modified user permissions, change default shell from sh to bash.
To check which shells are available :
To change the shell:
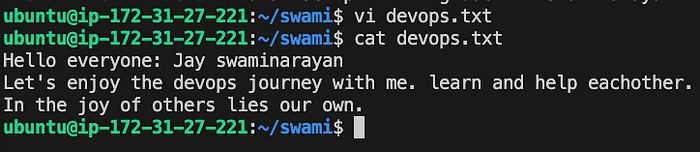
1. To view what’s written in a file.
Cat: command is use to view what is written in the file.
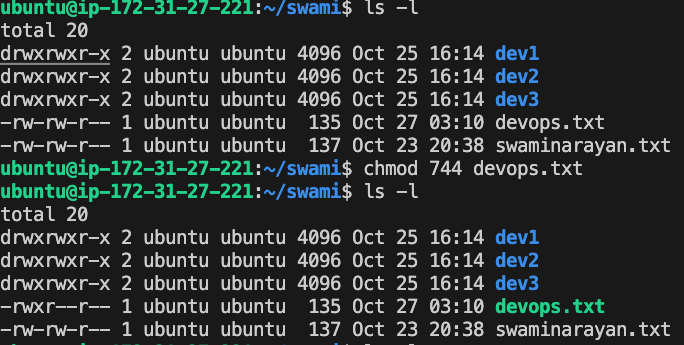
2. To change the access permissions of files.
chmod: This command is used to change the permissions of a file/directory.
3. To check which commands you have run till now.
history: This command is used to see all previously executed commands.
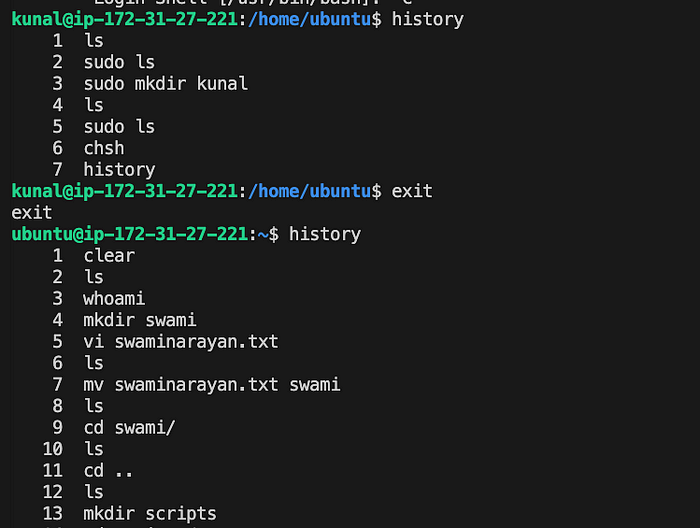
Here in this session you can see history command run by two different users
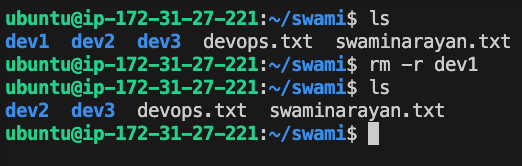
4. To remove a directory/ Folder.
rm and rm -r: these commands are used to remove a file and directory respectively.
5. To create a fruits.txt file and add content in devops.txt (One in each line) — Apple, Mango, Banana, Cherry, Kiwi, Orange, Guava. and to view the content in fruit.txt.
touch: This command is used to create empty files.
cat: This command is used to read the content of the created files.
echo: This command can be used to enter a content in the file as shown in the below screenshot. And to create the content in each new line we need to use \n.

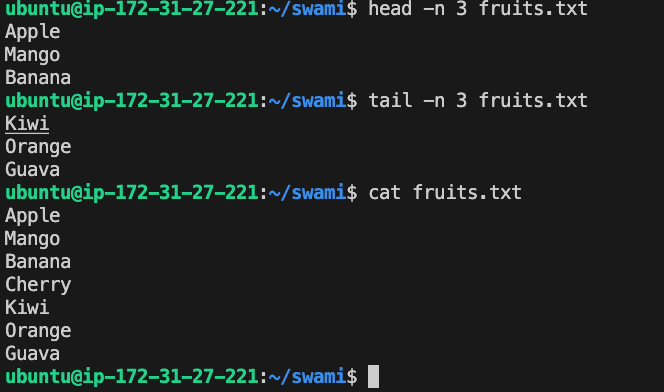
6. To Show only top three fruits from the file and To Show only bottom three fruits from the file.
head -n filename: This command is used to view the content from the top.
tail -n filename: This command is used to view the content from the bottom.
7. To create another file Colors.txt and add content in Colors.txt (One in each line) — Red, Pink, White, Black, Blue, Orange, Purple, Grey. To view the content.
we have seen how we can create file with touch command and add content with the touch command here is another and mostly used method with which we can create and directly added content to it.
**
vi or vim or nano editor: This is used to create the files and edit the files.**
i — to insert something in a file.
w — to save all the changes.
q! — to quit the file without saving changes.
wq- to save content and quit the file.

vi command to create and write file.
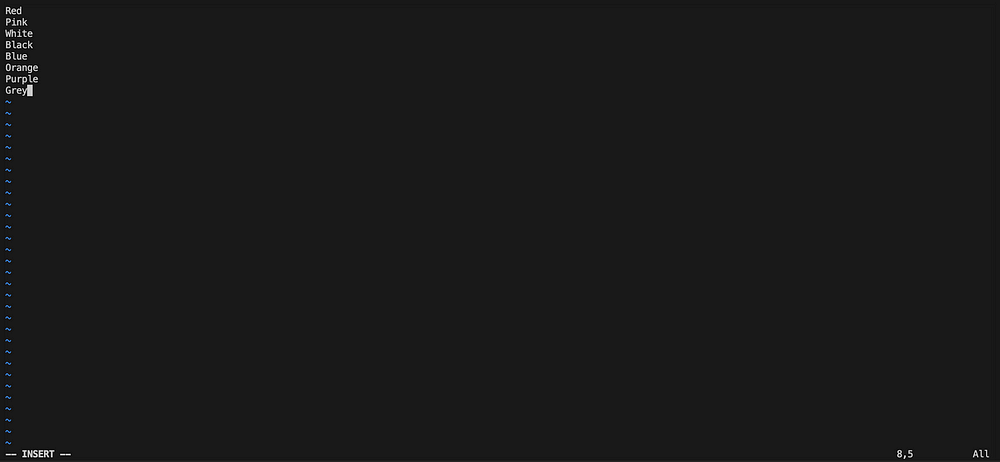
In vi editor you need to write the content by pressing i you can start writing the content.
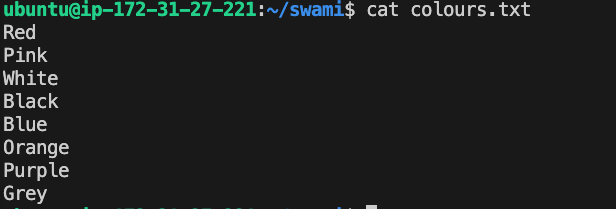
cat command to view the content of the file
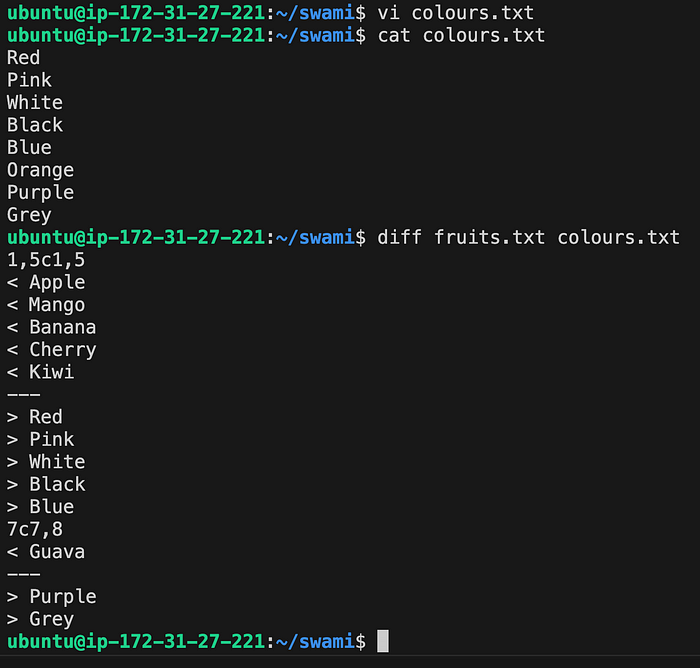
8. To find the difference between fruits.txt and Colors.txt file.
diff: command is used to check the difference between two files. In the below screen shot we can see that.
\=====Lines 1–5 (1,5c1,5):=====
“Lines 1–5” indicates that the following changes apply to lines 1 through 5 in both files.
“(1,5c1,5)” further specifies the range of lines being compared. The c in the middle indicates a change. So, it’s saying that there are changes from line 1 to line 5 in the first file to line 1 to line 5 in the second file.
\=====Lines 7–8 (7c7,8):=====
“Lines 7–8” indicates that the following changes apply to lines 7 and 8 in both files.
“(7c7,8)” specifies the range of lines being compared. Again, the c indicates a change, and it’s saying there is a change from line 7 in the first file to lines 7 and 8 in the second file.
So, fruits in fruits.txt needs to replace with colors in colors.txt. Apple, Mango, Banana, Cherry, and Kiwi will be replace with Red, Pink, White, Black, and Blue. Additionally, Guava has will be replaced with Purple, and there’s an addition of Grey in colors.txt.
9. To check the present working directory (as per windows to check the folder location).
pwd: is the command to check the current directory

10. To create multiple directory:
mkdir dir1 dir2 dir3: This command attempts to create three separate directories: dir1, dir2, and dir3. If any of these directories have a parent directory that doesn’t exist, the command will fail.

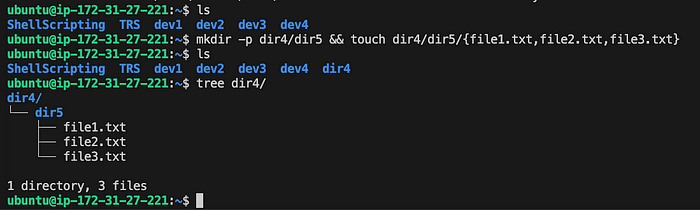
11. To create multiple directory hierarchies and create multiple files in one of the directories at the same time.
mkdir -p dir4/dir5 && touch dir4/dir5/{file1.txt,file2.txt,file3.txt} : This command creates the entire directory path dir4/dir5 and ensures that all the parent directories (dir4 and dir5) exist. If the parent directories don’t exist, the -p option automatically creates them. && command used to give second command which is touch. It will create the file1.txt, file2.txt, file3.txt in the dir5 location.
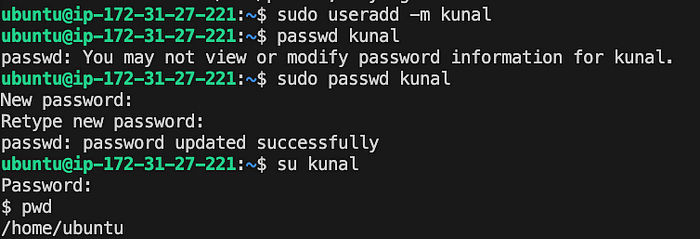
12. Create user and assign passwd and modified user permissions, change default shell from sh to bash.
to add user : sudo useradd -m username
to create the password for user : passwd username
assign sudo permission to the user : sudo usermod -aG sudo username
where -a: Appends the user to the supplementary group(s) without removing them from other groups.
-G: Specifies the group(s) to which the user is added.
In below screenshot user kunal got added to the sudo group so he can access and execute commands with elevated privileges using sudo.


13. To check which shells are available :
command : cat /etc/shells
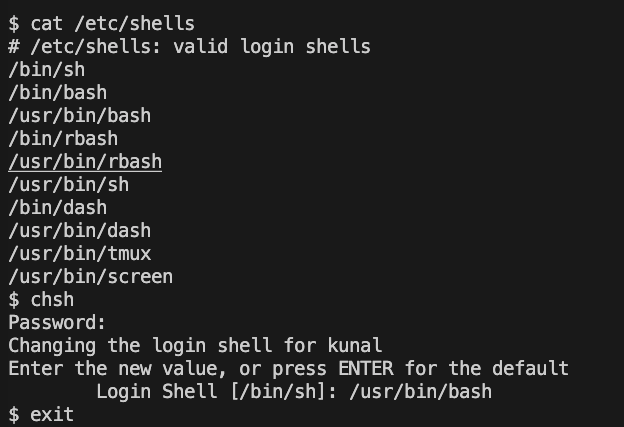
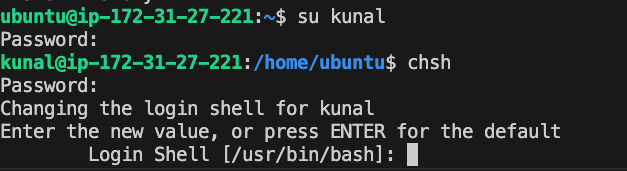
14. To change the shell:
command : chsh
after chsh it will ask the password, after giving the password and it will ask to give which shell you want to use: as here we can add the value at the === Login Shell [/usr/bin/bash]: value bin/sh === to change the shell.
connect me here
Connect me here linkedin.com/in/raj-nandgaonkar-555848157
Thankyou.
Subscribe to my newsletter
Read articles from Raj Nandgaonkar directly inside your inbox. Subscribe to the newsletter, and don't miss out.
Written by
Raj Nandgaonkar
Raj Nandgaonkar
AWS Engineer | Cloud Solutions Architect | DevOps Enthusiast Hi there! I’m Raj Nandgaonkar, an AWS Engineer with a passion for building scalable, efficient, and cost-effective cloud solutions. With experience in cloud architecture, infrastructure automation, and DevOps practices, I specialize in leveraging Amazon Web Services (AWS) to deliver high-performance applications and systems. I’ve had the privilege of working on a variety of projects, from designing serverless architectures to implementing secure cloud-native applications. My expertise includes EC2, Lambda, S3, CloudFormation, and many other AWS services. I’m also a strong advocate for infrastructure-as-code and love using tools like Terraform and AWS CloudFormation to streamline the deployment process. Through this blog, I aim to share insights, tutorials, and best practices to help you navigate the AWS ecosystem and make the most of its powerful services. Whether you're a beginner looking to get started or an experienced developer seeking advanced cloud strategies, there's something here for you. Let’s connect and learn together as we explore the ever-evolving world of AWS! connect me on https://www.linkedin.com/in/raj-nandgaonkar-555848157/