Upgrade Kie Server to Kogito
 Tuanhdotnet
11 min read
Source: Upgrade Kie Server to Kogito
1. Setting Up Your Development Environment
First, you'll need to set up the required tools and dependencies. Since Kogito can run on Quarkus or Spring Boot, you need to choose the framework that suits your use case.
Install Required Tools:
- Java 11+: Ensure you have JDK 11 or later installed.
- Maven/Gradle: Depending on your preference, set up your project with either Maven or Gradle.
- Quarkus CLI (Optional): If you choose Quarkus, install the Quarkus CLI to make development easier.
I had sample repo at https://github.com/kanetran/kogito-test
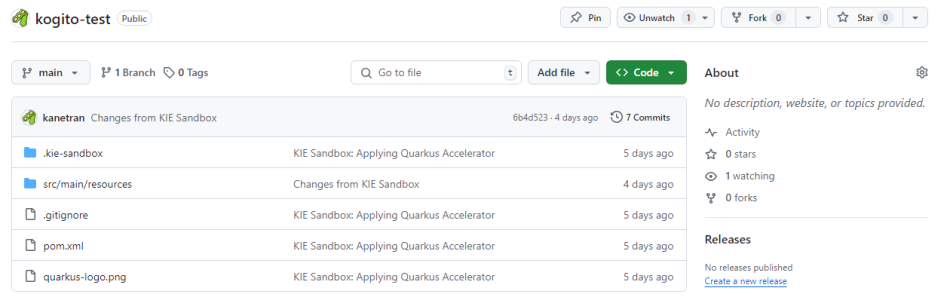
You guys can clone it for example.
2. Set up Sandbox for rule changing
In Drools 7, we use KIE Server and KIE Workbench, with business rule modifications done through the Business Central (also known as KIE Workbench). However, when upgrading to Drools 8, both KIE Server and Business Central have been deprecated.

Since Kogito is a replacement for KIE Server, this also means we need a tool to replace the KIE Workbench. You can choice between 2 way bellow.
2.1 Visual code
Visual Studio Code is a powerful editor for managing source code within a project. In this context, using Visual Studio Code simplifies the creation and modification of business rules by allowing us to visually design, drag, and delete components through the UI, rather than manually defining XML files.
To edit rule files in Visual Studio Code, we need the following extensions:
- Language Support for Java(TM) by Red Hat 1.16
- Kogito Bundle 0.30
- Code Runner
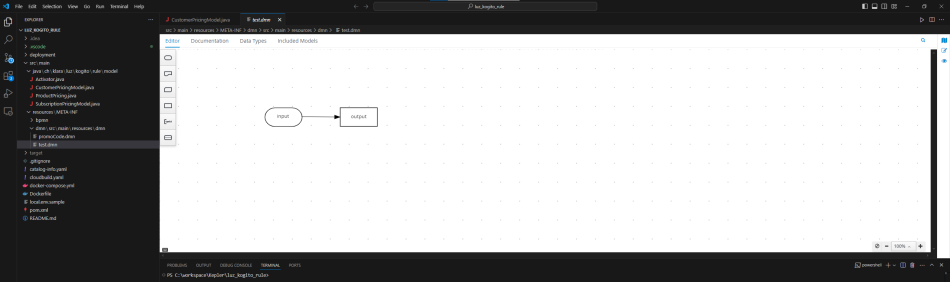
Once the installation is complete, you can create a *.dmn file and perform various actions related to rule creation on the UI as follows:
For migrate exist rule, I have the following existing rule:
rule "productive test"
salience -999
 when
    $pp : ProductPricing(promotionCode == "ABC")
    then
    $pp.setPrice(0.00B);
    $pp.setDiscount( "100%" );
end
Analysis: If the promotionCode is ABC, then the Price and Discount will be set to 0 and "100%", respectively.
ProductPricing is a model defined in the following Java file:
/*
  This class was automatically generated by the data modeler tool.
 */

public class ProductPricing implements java.io.Serializable {

    static final long serialVersionUID = 1L;

    private String productCode;
    private int volume;
    private String pricePlan;
    private java.math.BigDecimal price;
    private int klaraPoints;
    private String testingDuration;
    private java.util.Date requestDate;
    private java.math.BigDecimal vatRate;
...
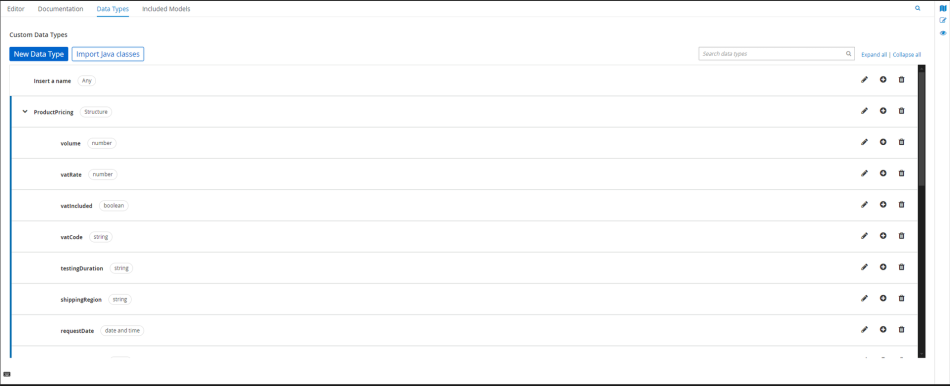
To write the rule above, we need to have a data type structure of ProductPricing and its fields. To import this data type, we proceed as follows:
Select the Data Type tab.
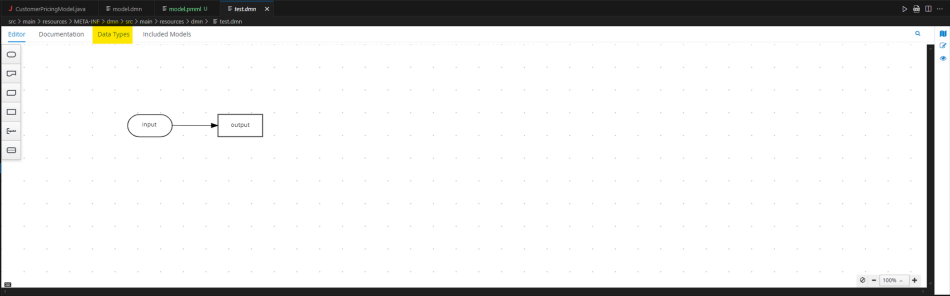
Select Add custom Data Type
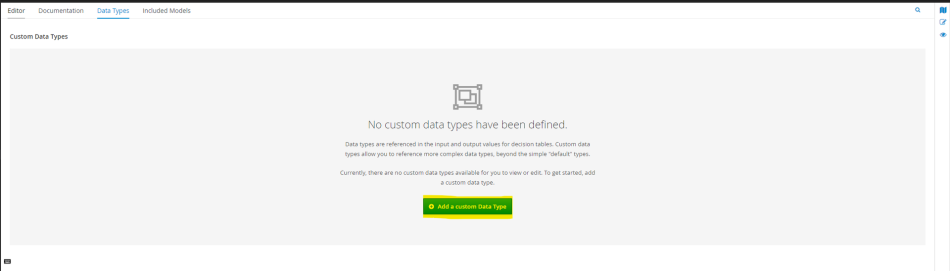
Select Import Java Classes
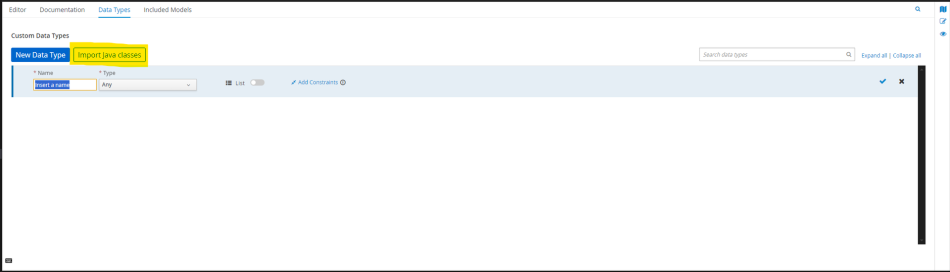
Type name of Classes you want to import
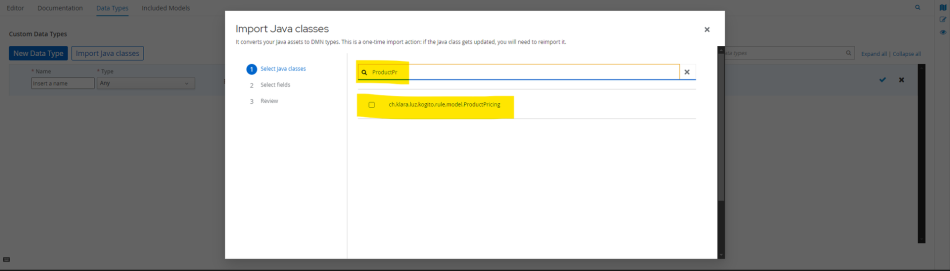
Choice next and finish
If Import java classes is disable
There are two reasons why the Import Java Classes button may be disabled:
You haven't installed all the necessary libraries, or your libraries are incompatible with each other. Ensure you have the following libraries installed with the specified versions:
- Language Support for Java(TM) by Red Hat: 1.16
- Kogito Bundle: 0.30
- Code Runner: 0.12.0
You may be missing the KieActivator class. If that's the case, create a Java file named KieActivator.java with the following content:
import org.kie.api.project.KieActivator;

@KieActivator
public class Activator {
}
You can refer to the link for more information: https://github.com/apache/incubator-kie-tools/issues/2110
2. Kie Sandbox
To use Kie Sandbox, you should access this link https://sandbox.kie.org/
This is the main interface of KIE Sandbox.
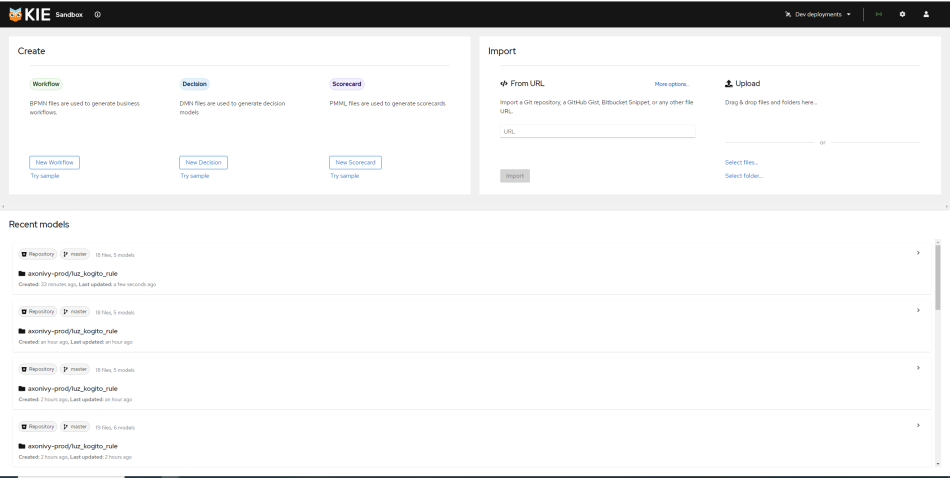
Enter the Git source into From URL to select the project you want to import.
Alternatively, if your project is private, the Git tool will not be able to find it.
Proceed to log in by clicking on the user icon located at the far right.

Add an account belonging to the provider where your source code is stored;
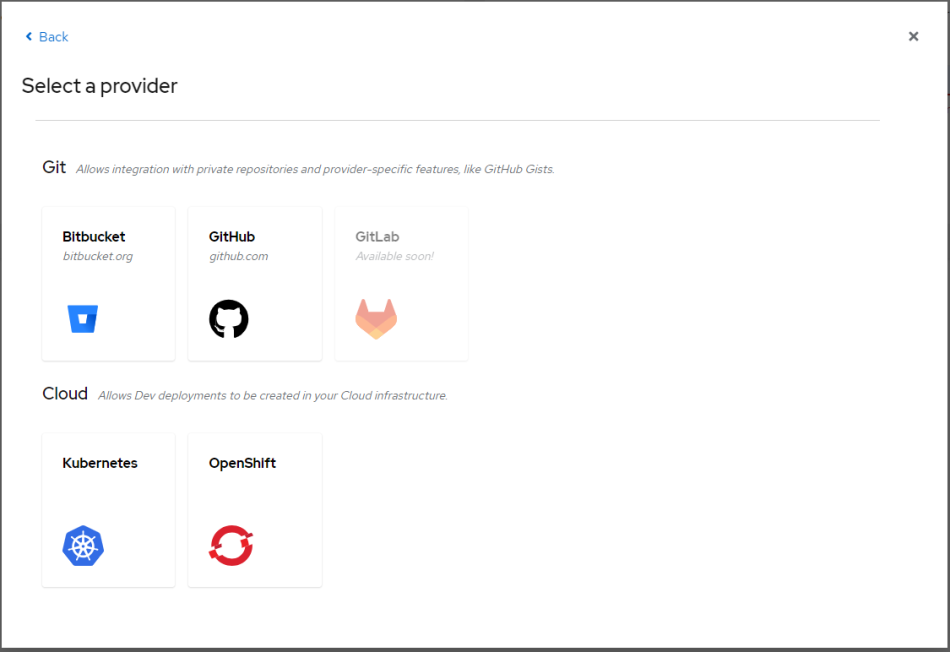
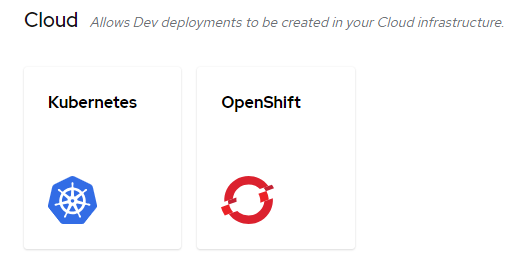
The Cloud section below will help you deploy your rules to the corresponding sandbox systems to test whether your rules have been written correctly.
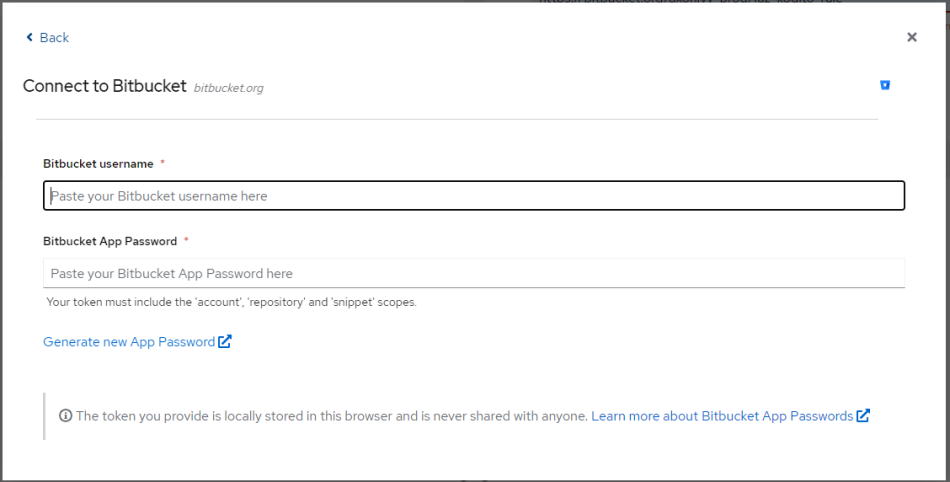
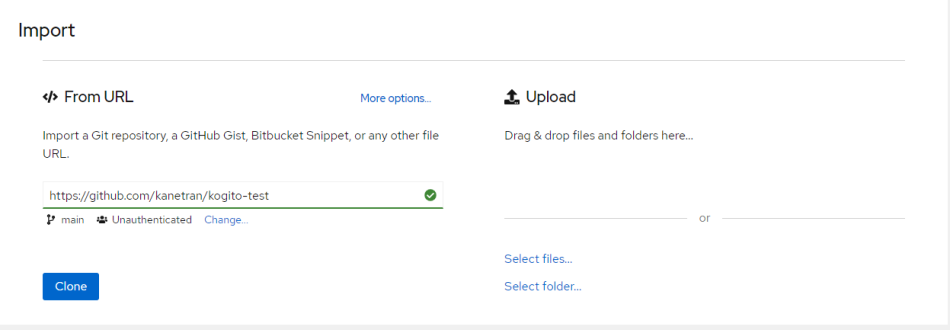
Enter your username and app password. After a successful login, you will see an interface like this.

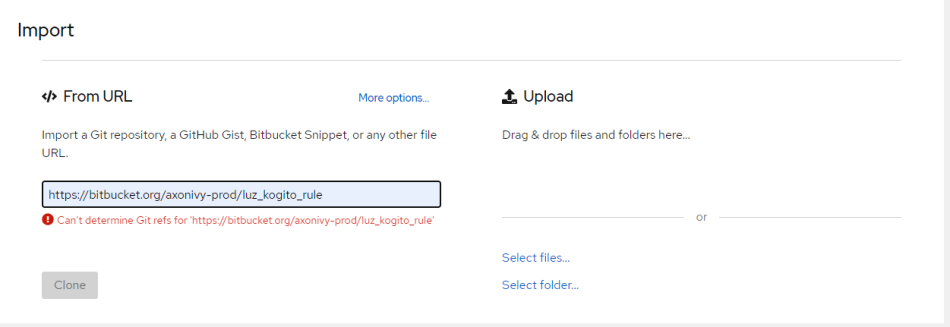
Enter the URL of the source code that you want to edit the rules for.
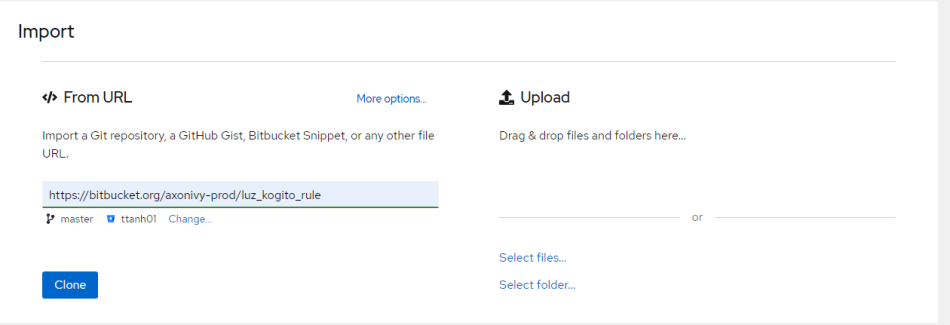
You can freely choose the branch you want to edit.
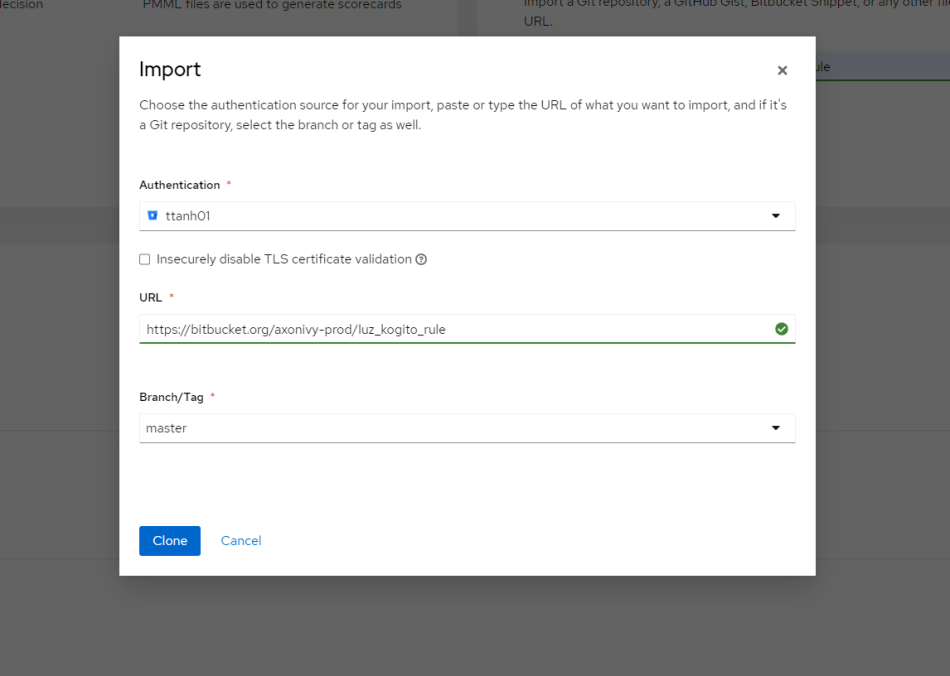
Click clone and proceed to edit.
To use the sandbox environment tools to test your rules, you need to set up two things:
- KIE Sandbox Extended Services
- Deployment Environment
You can download KIE Sandbox Extended Services from the link below.
After downloading, when you want to use KIE Sandbox, make sure to enable it during use; it will provide the necessary APIs for your local environment to perform tests in the sandbox.
For the deployment environment, we have two options as initially mentioned:
3. Change rule and test
When using Business Central, every time a business rule was saved, it would be stored as a *.gdst file. However, after upgrading to Kogito, we need to migrate those rules into DMN files so that Kogito can display them and expose them as endpoints for other services.
I have an existing rule as follows:
rule "productive test"
salience -999
 when
    $pp : ProductPricing(promotionCode == "luz1ntern")
    then
    $pp.setPrice(0.00B);
    $pp.setDiscount( "100%" );
end
For the rule above, we have two actions to take. If the promotionCode is luz1ntern, we will set the Price to 0 and the Discount to 100%. If it is not luz1ntern, we will keep the values unchanged.
Here, we have the following input and output:
| Input | Output |
| ProductPricing | ProductPricing |
The process of modifying rules in Visual Studio Code is quite similar to making changes in the KIE Sandbox. However, in this article, I'll demonstrate the steps using the KIE Sandbox UI, which offers a few distinct features that set it apart. After showcasing the process, I'll highlight those key differences and explain why they matter.
3.1 Create DMN file
A DMN file (Decision Model and Notation file) is a standard format used to define decision rules and business logic in a structured way. DMN is designed to provide a common language for modeling decisions, allowing business analysts and developers to work together more effectively.
DMN files typically consist of decision tables, decision requirements diagrams, and other constructs that define how decisions are made based on input data. They are often used in conjunction with business process models and can be executed by rule engines to automate decision-making processes.
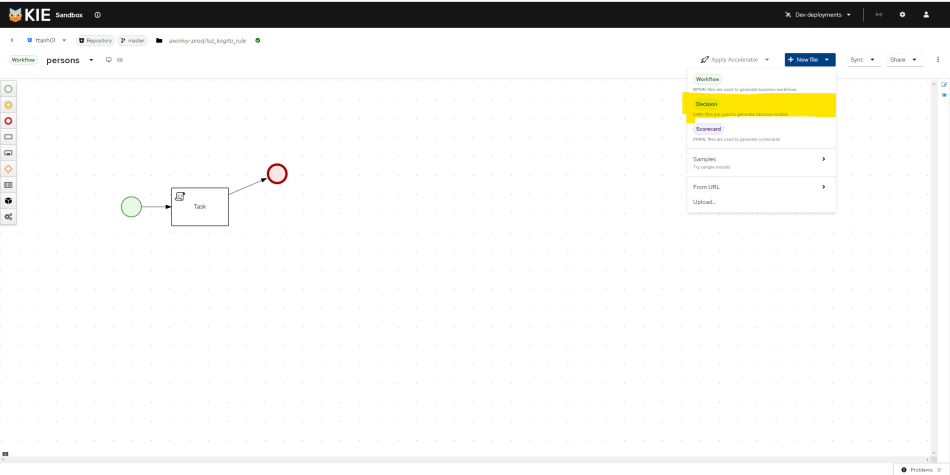
Edit name of rule as you want
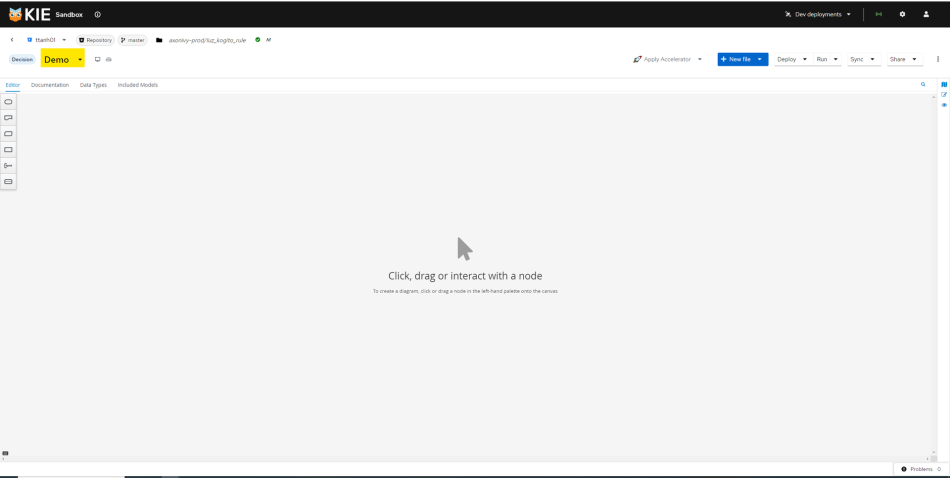
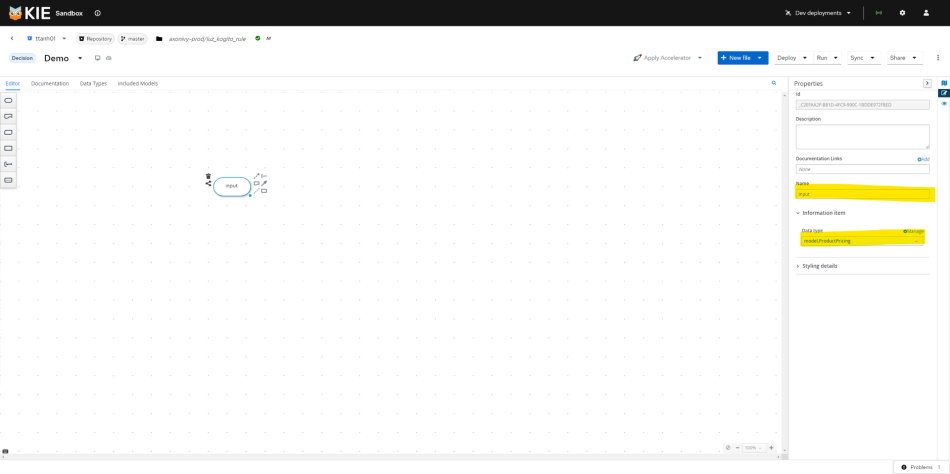
3.2 Create the input
Create the input by selecting the DMN input data shape (oval) and clicking on the canvas. Modify its name and select the desired data type for the input.
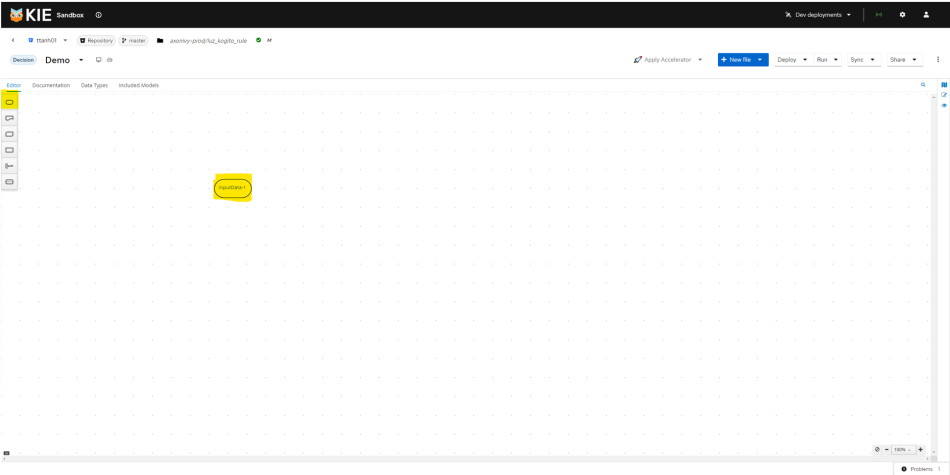
Choice input and click here for change properties
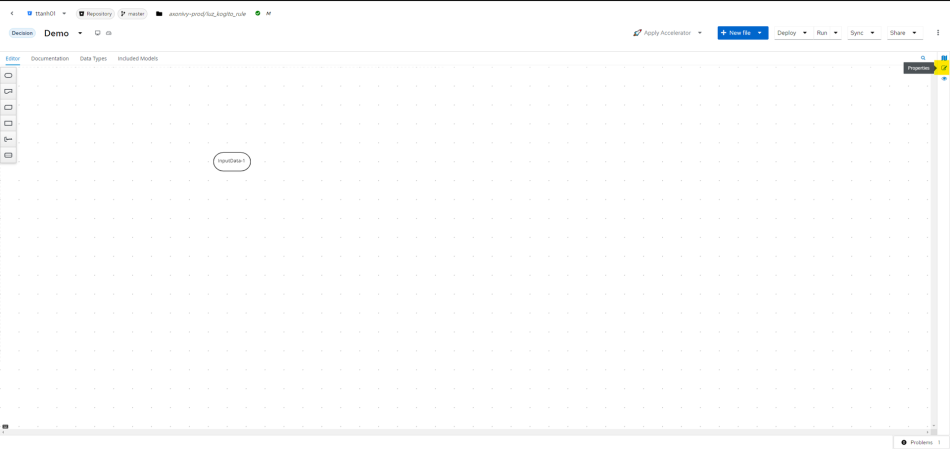
Edit input as expectation
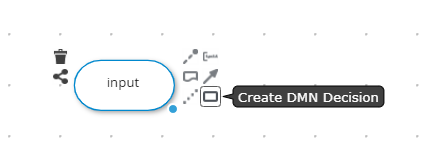
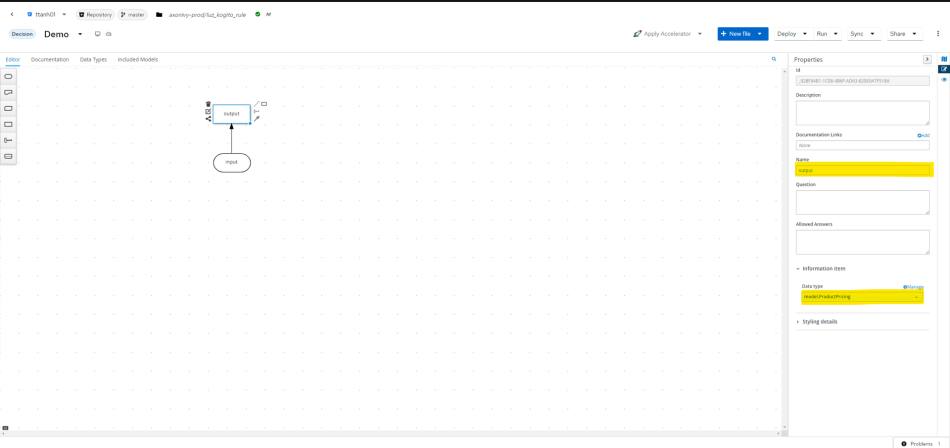
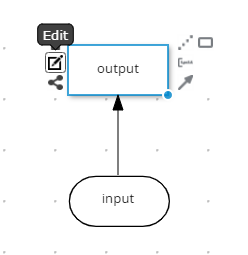
3.3 Create output
The input offers many features for us to choose from. Hover over and click the Create DMN Decision option.
Change name and type same as we doing with input.
3.4 Create decision table
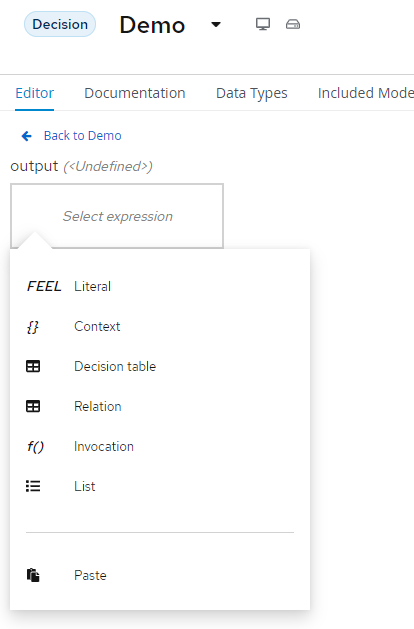
Select Decision Table
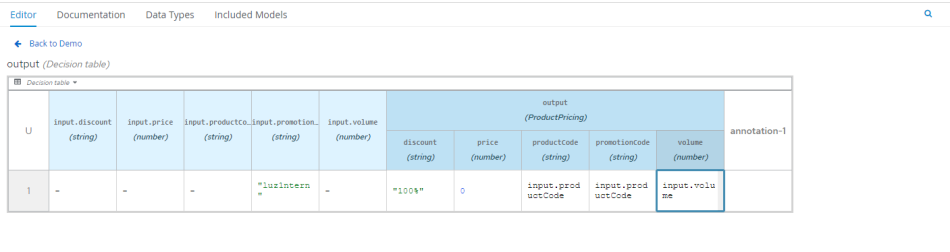
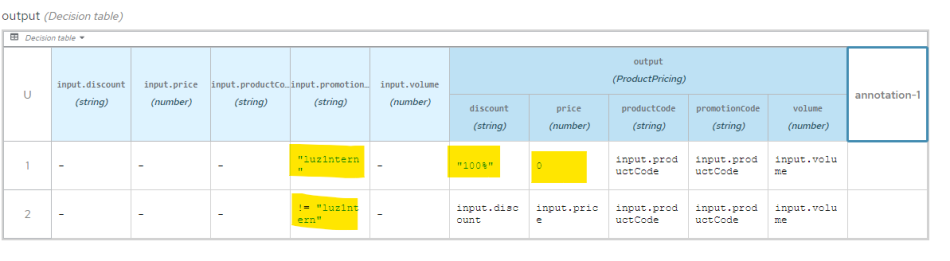
For the first case, when the promotionCode is luz1ntern, we write luz1ntern in the promotionCode column of the input. We can write input["column_name"] in the columns where we want to retain the original values without setting new values. Here are all the columns except for the two columns, Price and Discount, which need to be set to 0 and 100%, respectively.
Case 2, for all remaining cases, if the promotionCode is different from luz1ntern, simply keep the input values as the output.
3.5 Test
Before running the test, to ensure that the new rule has been applied in the sandbox environment, please click deploy and select the sandbox you want to test.
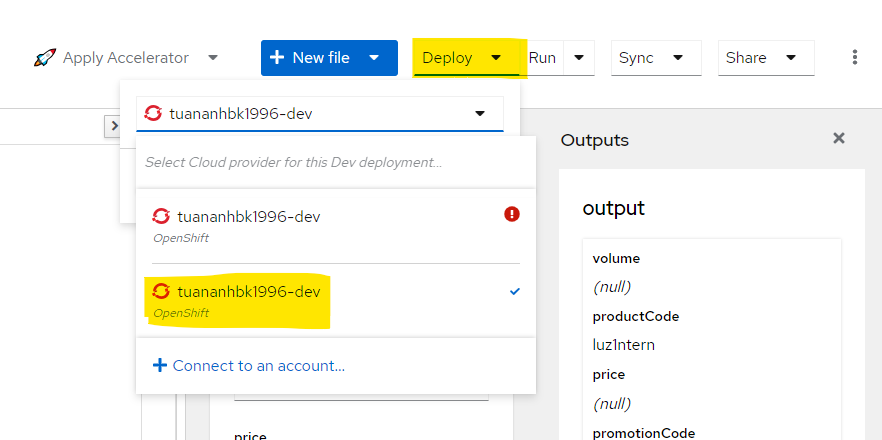
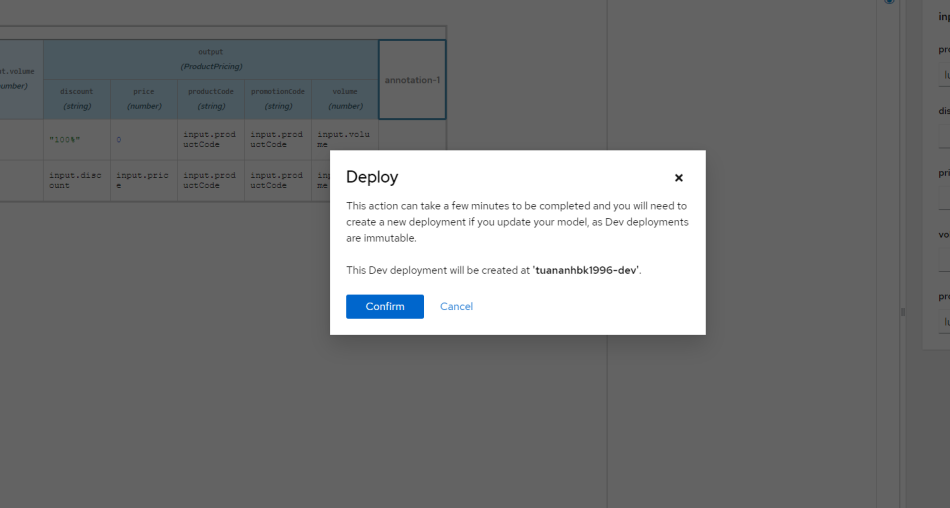
Wait a few seconds, and press run for test


4. Note
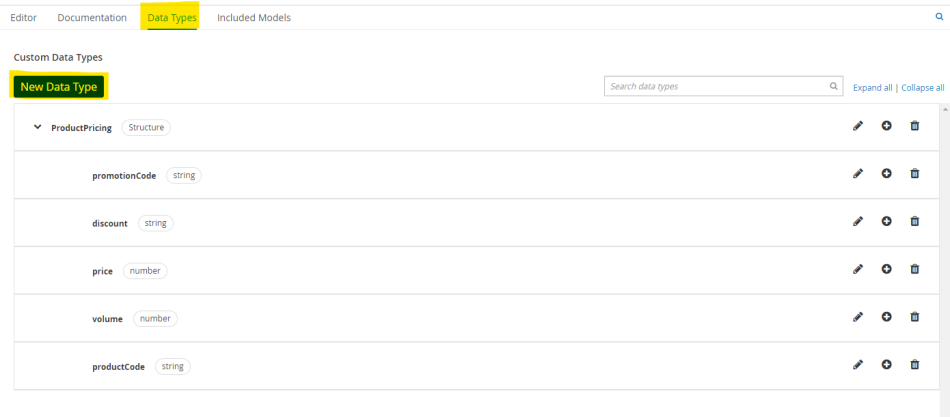
4.1 Struct Data type
With Visual Studio Code, you can easily add a data type struct from a Java object by using Import Java Classes. However, with KIE Sandbox, it does not provide that capability, so to use a data struct for a rule, you have no choice but to create it manually.
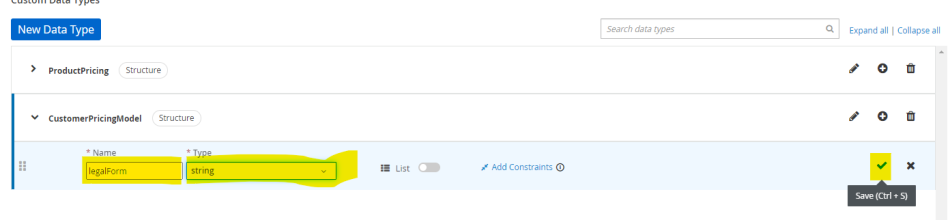
Below is a method that helps you create a data struct.
If you want to re-use any model create before


4.2 Config Kie Sandbox on Our K8s Cluster
Build a KIE Sandbox from scratch for editing business rules.
The necessary ingredients:
- quay.io/kie-tools/kie-sandbox-image:0.32.0:
It allows developers to build, test, and run business rules and decision models using DMN (Decision Model and Notation) in a simplified and integrated environment. - quay.io/kie-tools/kie-sandbox-extended-services-image:0.32.0: It enables users to deploy, test, and manage business rules and decision models more effectively within the KIE ecosystem.
- quay.io/kie-tools/dmn-dev-deployment-base-image:0.32.0: It provides the necessary environment and dependencies for running DMN engines and executing decision models.
- quay.io/bamoe/git-cors-proxy:9.0.1: Help with fetching and pushing code in a Git environment.
Create Dockerfiles for each module.
FROM quay.io/bamoe/git-cors-proxy:9.0.1
FROM quay.io/kie-tools/dmn-dev-deployment-base-image:0.32.0
FROM quay.io/kie-tools/kie-sandbox-extended-services-image:0.32.0
FROM quay.io/kie-tools/kie-sandbox-image:0.32.0
ENV KIE_SANDBOX_APP_NAME kogito-sanbox
ENV KIE_SANDBOX_CORS_PROXY_URL http://luz-kogito-baomoe-git-proxy:8080
ENV KIE_SANDBOX_DMN_DEV_DEPLOYMENT_BASE_IMAGE_URL http://luz-kogito-dmn:8080
ENV KIE_SANDBOX_EXTENDED_SERVICES_URL http://luz-kie-sandbox-extended:21345
ENV KIE_SANDBOX_VERSION 0.32.0
Create YAML files to apply these images to the Kubernetes environment.
Note: Other services run on port 8080 by default, but the luz-kie-sandbox-extended runs on port 21345 by default.
Example
apiVersion: apps/v1
kind: Deployment
metadata:
  name: luz-kie-sandbox-extended
  labels:
    klara.ch/module: luz-kogito
spec:
  replicas: 1
  selector:
    matchLabels:
      app: luz-kie-sandbox-extended
  template:
    metadata:
      labels:
        app: luz-kie-sandbox-extended
    spec:
      containers:
        - name: luz-kie-sandbox-extended
          image: quay.io/kie-tools/kie-sandbox-extended-services-image:0.32.0
          ports:
            - containerPort: 21345
---
apiVersion: v1
kind: Service
metadata:
  name: luz-kie-sandbox-extended
  labels:
    klara.ch/module: luz-kogito
spec:
  selector:
    app: luz-kie-sandbox-extended
  ports:
    - protocol: TCP
      port: 21345
      targetPort: 21345
      name: http
  type: NodePort
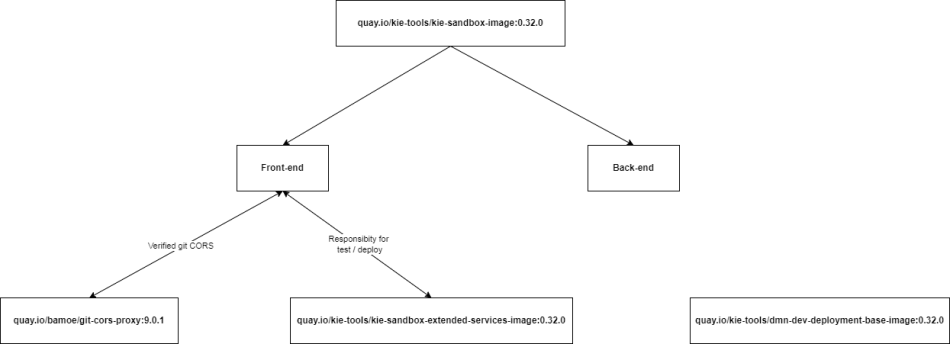
Git CORS and extended services are not invoked from the backend of KIE Sandbox but rather from its frontend. Therefore, they need to be exposed externally so that the frontend can access and call them.
After completing all the configurations, when you access the port where the kie-sandbox-image is deployed, you'll see an interface similar to the one at https://sandbox.kie.org/.
4. Conclusion
In the previous section, I walked you through transitioning from a traditional business rule engine to using DMN in Kogito. Of course, you can take it a step further by implementing CI/CD pipelines. This way, whenever you commit code in Visual Studio Code or sync changes in KIE Sandbox, it can automatically trigger the deployment of your Kogito project. No article would be complete without covering these key aspects. If you're intrigued by this topic or have any suggestions, feel free to leave a comment below!
Read more at : Upgrade Kie Server to Kogito
0
Subscribe to my newsletter
Read articles from Tuanhdotnet directly inside your inbox. Subscribe to the newsletter, and don't miss out.
Written by
Tuanhdotnet
Tuanhdotnet
I am Tuanh.net. As of 2024, I have accumulated 8 years of experience in backend programming. I am delighted to connect and share my knowledge with everyone.