Visual Regression Testing with Percy using Cypress:
 NonStop io Technologies
Every tester has to check the UI manually. The tester has to have a keen eye, to point out the tiny alignment changes at the front-end elements. It’s a test case that misses the test automation scope as it is impossible to do with regular test automation aspects. To address this problem, visual testing came up with Image Processing!
What is Visual Regression Testing?
Visual Regression Testing applies the same logic but confines testing to the visual aspects of the software. In other words, it checks that code changes do not break any aspect of the software’s visual interface.
A visual regression test checks what the user will see after any code changes have been executed by comparing screenshots taken before and after code changes. This is why visual regression tests are also sometimes called visual snapshot tests.
Visual Regression Testing Using PERCY Plugins: Percy helps teams automate visual testing. It captures screenshots, compares them against the baseline, and highlights visual changes. With increased visual coverage, teams can deploy code changes with confidence with every commit.
Setting up Percy Plugin for Visual Testing in Cypress: Step 1: Create a free account on https://percy.io/. When you create an account on Percy, you can create a new project to obtain a Percy token.
Step 2: Install Percy dependencies
Install the components required to establish the integration environment for your test suite.
To install the dependencies, run the following command:
npm install --save-dev @percy/cli @percy/cypress
Step 3: Import the Percy library to use the method and attributes required to take screenshots.
In order to add Percy snapshots to your Cypress tests, you have to first import the @percy/cypress package into your cypress/support/e2e.js file:
import '@percy/cypress';
Step 4: Now you can add visual tests in your existing suite.
describe('Test with visual testing', function() {
    it('homepage', function() {
      // visit website
      cy.visit('https://www.jotform.com/build/233102362321439?s=templates&salesforceTemplate=1');
      cy.wait(5000)
      // Take a snapshot for visual difference
      cy.percySnapshot();
    });
  });
Step 5: Now to run the Percy copy the Token and run the given below command to set PERCY_TOKEN as an environment variable:
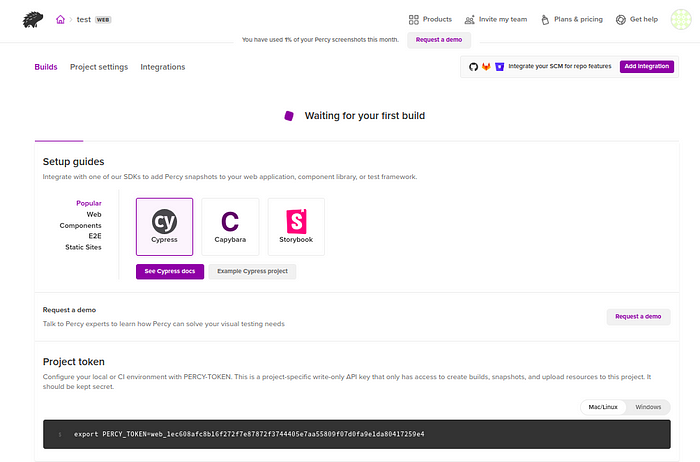
export PERCY_TOKEN="<your token here>"
Step 6: Run Percy
Run your tests using the percy exec command as shown below:
npx percy exec -- cypress run
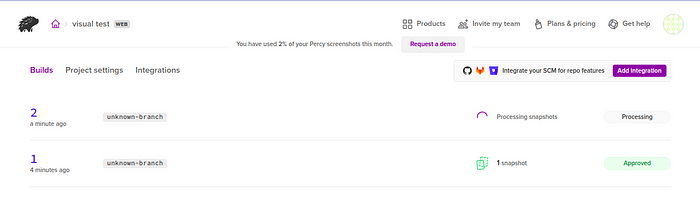
Step 7: After starting Percy, navigate to the Percy dashboard and refresh the page. You’ll find your build status in the ‘Builds’ section.
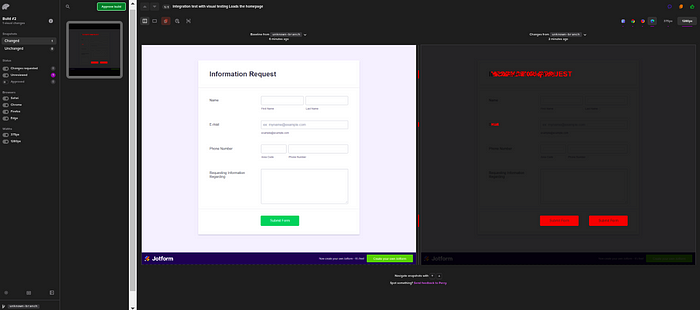
Step 8: Now open the build to access and review the screenshots or snapshots. When you approve a snapshot, it becomes part of the baseline. This baseline serves as a reference point for future comparisons.

Step 9: When you open the second build, you will see the difference between the two snapshots will be clearly highlighted when you make changes and run tests using Percy.
Subscribe to my newsletter
Read articles from NonStop io Technologies directly inside your inbox. Subscribe to the newsletter, and don't miss out.
Written by
NonStop io Technologies
NonStop io Technologies
Product Development as an Expertise Since 2015 Founded in August 2015, we are a USA-based Bespoke Engineering Studio providing Product Development as an Expertise. With 80+ satisfied clients worldwide, we serve startups and enterprises across San Francisco, Seattle, New York, London, Pune, Bangalore, Tokyo and other prominent technology hubs.