Deploy Django Application on Windows IIS Server
 NonStop io Technologies
Hello geek,
This blog is basically focused on deploying the Django application, on Windows Server and IIS as the production environment.
Sometimes client requirement is they are more comfortable with Windows rather than Linux OS.
Step 1: Create VM
We need a Windows server on which we can host our Django server. for that Either we can create a virtual machine or host on Cloud or can use a bare-metal server.
reference URL: https://medium.com/@sagar.gadewar/create-and-integrate-s3-and-rds-with-ec2-in-aws-47015743fe88
recommended: Windows server 2019
Step 2: Download the Python 3 Installer
To get started working with Python 3, you’ll need to have access to the Python interpreter.
Open a browser window and navigate to the Download page for Windows at python.org.
Underneath the heading at the top that says Python Releases for Windows, click on the link for the Latest Python 3 Release — Python 3.x.x. (As of this writing, the latest in Python 3.6.5.)
Scroll to the bottom and select either Windows x86–64 executable installer for 64-bit or Windows x86 executable installer for 32-bit. (See below.)
Once you have chosen and downloaded an installer, simply run it by double-clicking on the downloaded file. A dialog should appear that looks something like this:
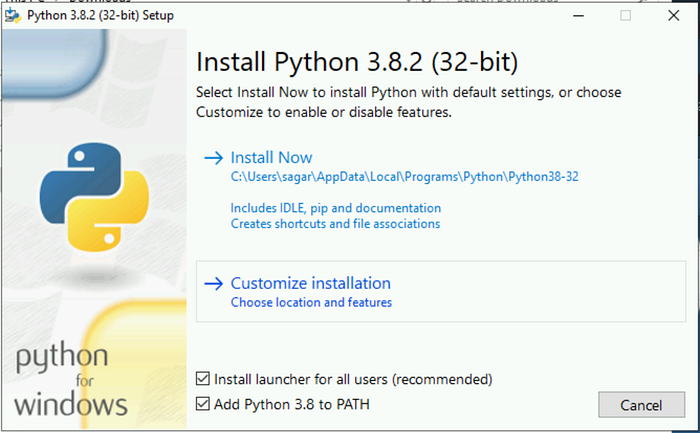
5. In the Python Setup dialog that appears, click “Customize Installation”.
6. Make sure Add Python 3.8 to the path checkbox selected.
[Optional]
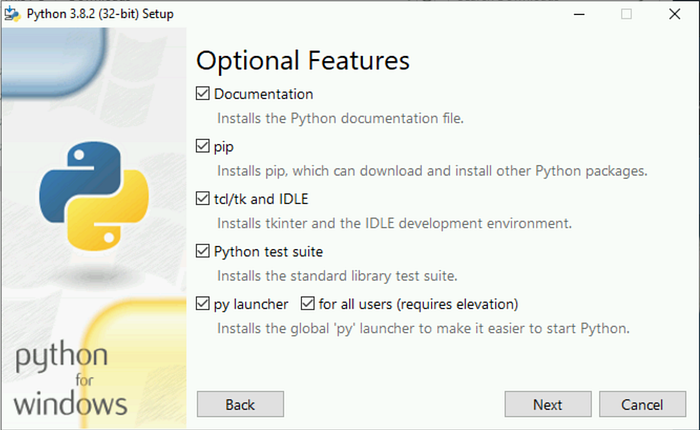
7. On the Optional Features step, leave the default settings and click “Next”.
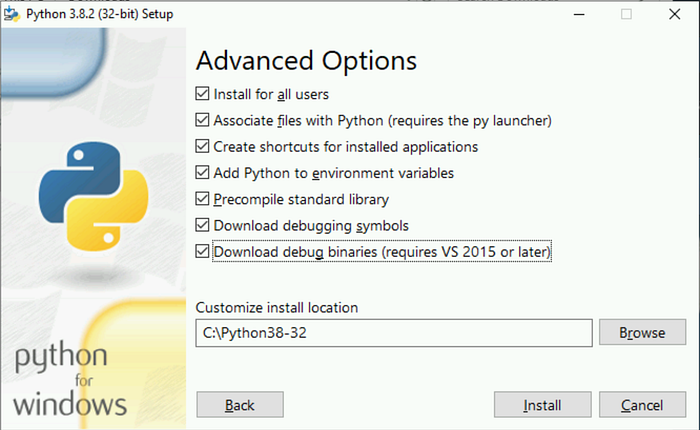
8. On the Advanced Options step, make the following changes:
Check the “Install for all users” box (note that this will also check the “Precompile standard library” box).
Check “Add Python to environment variables”.
In the input box below “Customize install location” change the value to the following: C:\Python<Version>.
9. Click “Install”
10. When the installation is complete, click the Close button.
Verify Python Installation
Open a new Command Prompt. Note that if you already had a command prompt open you will need to close and reopen it, as the Python installation process added new environment variables and any open command prompts will not have the new environment variables available.
Type python and press Enter. This should open a Python interpreter:
c:\>  python
>>>
>>> exit()
If instead of seeing the Python interpreter you see the error “‘python’ is not recognized as an internal or external command …” this likely means the “Add Python to environment variables” box was not checked on the Advanced Options step of the installation process. If this occurs you can uninstall and reinstall Python and make sure to check the “Add Python to environment variables” checkbox, or add the following to the System environment “Path” variable:
C:\Python38;C:\Python38\Scripts
Step 3: Git for Windows stand-alone installer
Download the latest Git for Windows installer.
When you’ve successfully started the installer, you should see the Git Setup wizard screen. Follow the Next and Finish prompts to complete the installation. The default options are pretty sensible for most users.
Open a Command Prompt (or Git Bash if during installation you elected not to use Git from the Windows Command Prompt).
Run the following commands to configure your Git username and email using the following commands, replacing Emma’s name with your own. These details will be associated with any commits that you create:
$ git config --global user.name "Sagar Gadewar"
$ git config --global user.email "eparis@atlassian.com"
Step 4: Configure Database
To configure Database on bare metal (on Windows Server)
Refer URL: https://www.postgresqltutorial.com/install-postgresql/
To configure RDS
Refer URL: https://aws.amazon.com/getting-started/tutorials/create-connect-postgresql-db/
Step 5: Configure Python Virtual Environment
venv (for Python 3) and virtualenv (for Python 2) allow you to manage separate package installations for different projects. They essentially allow you to create a “virtual” isolated Python installation and install packages into that virtual installation. When you switch projects, you can simply create a new virtual environment and not have to worry about breaking the packages installed in other environments. It is always recommended to use a virtual environment while developing Python applications.
1. Open a command prompt and run the following commands
c:\Users\sagar>  cd C:\c:\>  mkdir pyvirtualenvc:\>  cd pyenvc:\pyenv>  python -m venv Ericc:\pyenv>  cd C:\pyvirtualenv\EricC:\pyenv\Eric>  Scripts\activate.bat(Eric) C:\pyenv\Eric>  python -m pip install --upgrade pip
Collecting pip
Downloading
https://files.pythonhosted.org/packages/54/0c/d01aa759fdc501a58f431eb594a17495f15b88da1
42ce14b5845662c13f3/pip-20.0.2-py2.py3-none-any.whl (1.4MB)|████████████████████████████████| 1.4MB 6.8MB/s
Installing collected packages: pip
Found existing installation: pip 19.2.3Uninstalling pip-19.2.3:
Successfully uninstalled pip-19.2.3
Successfully installed pip-20.0.2(Eric) C:\pyenv\Eric>  cd ..(Eric) C:\pyenv>  git clone <django project repository url>(Eric) c:\pyenv>  cd <django-project>(Eric) c:\pyenv\<django-project>>  pip install wfastcgi(Eric) c:\pyenv\<django-project>>  pip install -r requirement.txt(Eric) c:\pyenv\<django-project>> python  manage.py makemigrations(Eric) c:\pyenv\<django-project>> python  manage.py migrate(Eric) c:\pyenv\<django-project>> python  manage.py collectstatic(Eric) c:\pyenv\<django-project>> python  manage.py createsuperuser
admin: <admin name>
email:
password: <password>
Make sure in setting.py file under your project folder you do:
1. DEBUG = False
2. ALLOWED_HOSTS= [‘localhost’,’server ip’]
Step 6: Install IIS
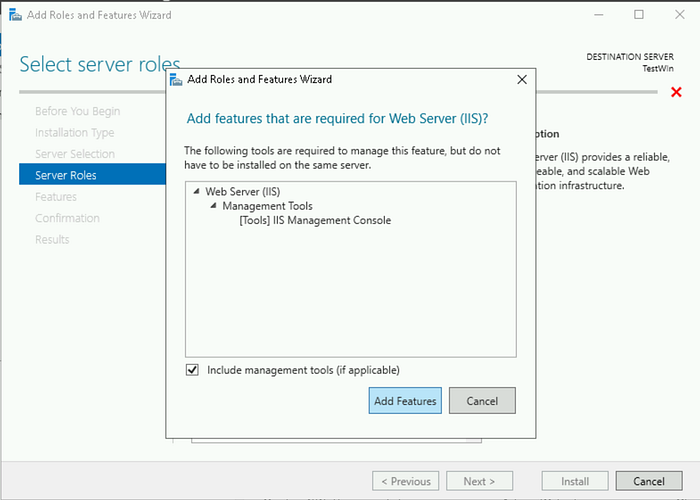
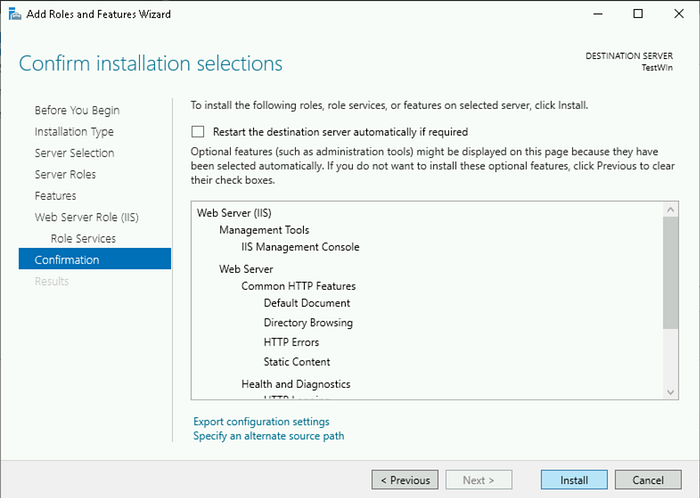
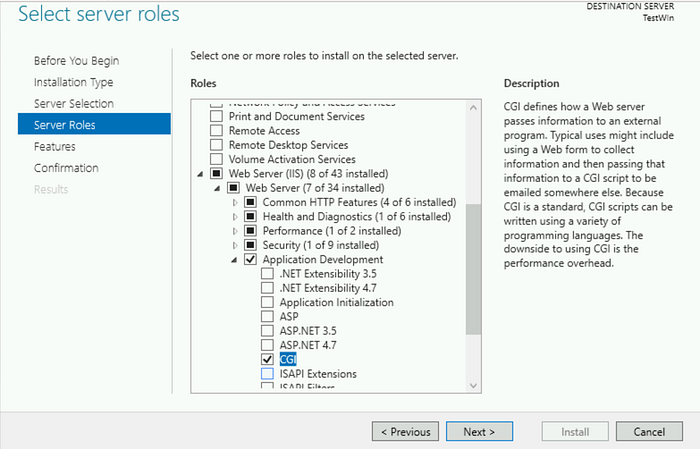
Even if you already have IIS installed, you may need to go through these steps to install the CGI feature if it wasn’t installed as part of the original IIS installation.
- Open the Control Panel

In the search box in the top right, type “windows features” (without the quotes)
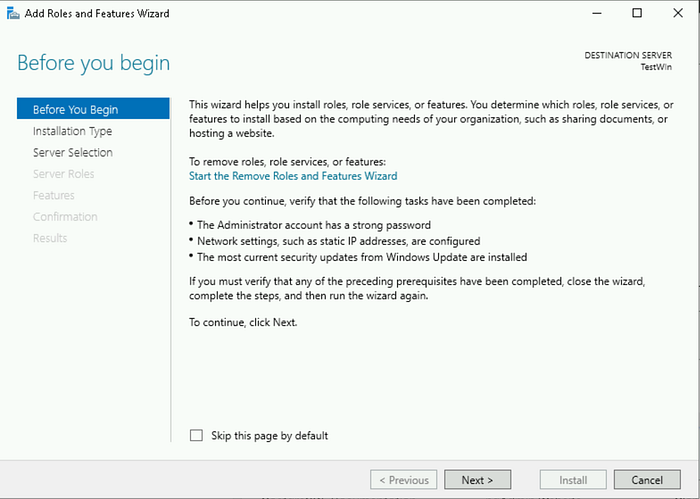
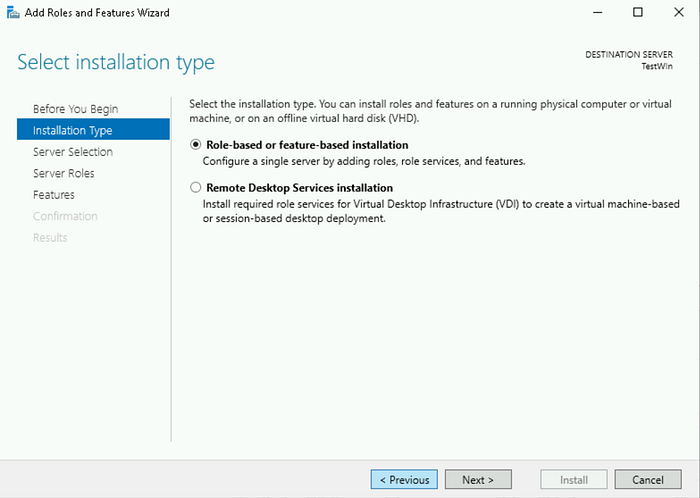
In the search results under “Programs and Features” click “Turn Windows features on or off” This launches the Add Roles and Features Wizard.


Verify the IIS Installation
Open a web browser on the server.
Enter http://localhost/ in the address bar and press Enter. You should see the default IIS page.
- If you don’t see the default IIS page:
1. Open Control Panel
2. Type “services” in the search box
3. Under “Administrative Tools” click “View local services”
- Scroll to the bottom of the list and ensure you see “World Wide Web Publishing Service” listed, and that the status is “Running”.
Step 7: Configure IIS
Configure FastCGI in IIS
Open the IIS Manager by clicking the Windows button, clicking on Administrative Tools, and double-clicking Internet Information Services (IIS) Manager
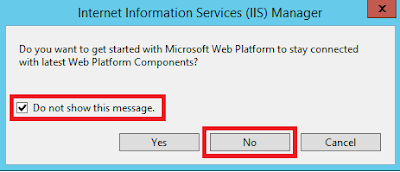
Click on the name of the server in the list on the left. If you see the following dialog box, check the box “Do not show this message” and click “No.” (You can always get to this later if necessary by clicking “Get New Web Platform Components” under “Actions” on the right-hand side of IIS Manager.)
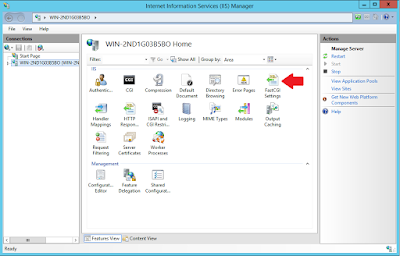
3. Double-click the “FastCGI Settings” icon
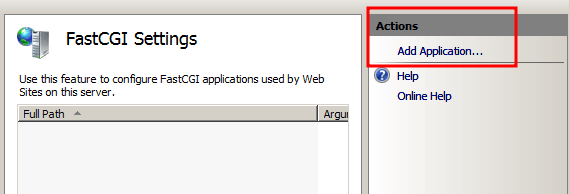
4. Under “Actions” on the right-hand side click “Add application …”
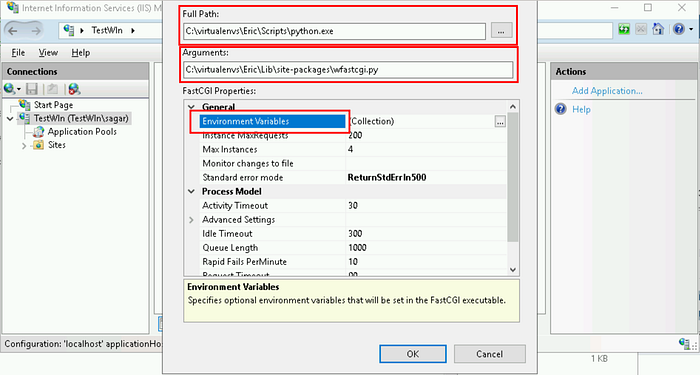
5. In the Add FastCGI Application dialog, in the “Full Path” box, type the path to the Python executable for the application’s virtual environment:
C:\virtualenvs\Eric\Scripts\python.exe
6. In the Arguments input box, type the path to the wfastcgi.py file in the application’s virtual environment:
C:\virtualenvs\Eric\Lib\site-packages\wfastcgi.py
7. At this point your settings in the Add FastCGI Application dialog should look like this:
8. With the Add FastCGI Application dialog box still open, under the “General” section, click on the “Environment Variables” line, then click the gray “…” button that appears next to (Collection) on the right-hand side of the line. This opens the Environment Variables Collection Editor dialog.
9. In the Environment Variables Collection Editor dialog, click “Add”
10. In the “Name properties” section on the right, click the input box to the right of “Name,” remove the “Name” text that is already in the input box and enter DJANGO_SETTINGS_MODULE (note that this MUST be entered in ALL CAPS)
11. Click the input box to the right of “Value” and enter Ericsson.settings
12. Click “Add” again and enter the following:
Name: PYTHONPATH
Value: C:\User_details\Ericsson
13. Click “Add” again and enter the following:
Name: WSGI_HANDLER
Value: Ericsson.wsgi.application
14. At this point you will have three environment variables:
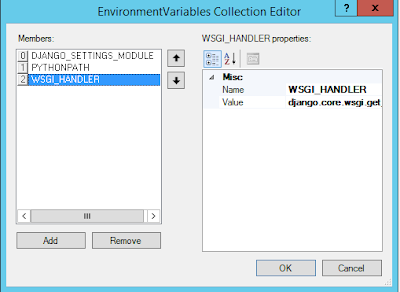
NOTE: All of these settings are CASE-SENSITIVE. They must be entered with exactly the case indicated here in order to work.
Click “OK” to close the EnviromentVariables Collection Editor.
Click “OK” to close the Add FastCGI Application dialog.
Step 8: Create and Configure a New IIS Web Site
Next, we need to create a new website in IIS for the Django application and add a Handler Mapping to the newly created website so that requests coming to the IIS website are passed off to the Django application for processing.
Open IIS Manager
On the left-hand side under Connections, expand the tree under the server name by clicking on the arrow to the left of the server name
Right-click on the Sites folder and click “Add Website …”
For the site, name enter Ericsson
For the physical path, type the following: C:\User_details\Ericsson
For the purposes of this example configuration, change the Port to 81, since the Default site is running on port 80. For a real-world application, you’ll likely want to use name-based virtual hosting by adding bindings and run the site on port 80.
Under the Binding section, the IP address parameter dropdown selects the private IP address.
You may leave the “Hostname” blank. At this pIn short:
Step 1:oint the Add Website dialog should look like this:
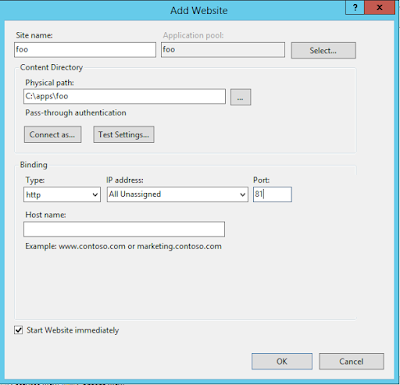
- Click “OK”
Next, we’ll add a FastCGI handler mapping to this site so the requests coming into the site will be processed by the Django application.
In IIS Manager, expand the Sites folder on the left-hand side and click on the site
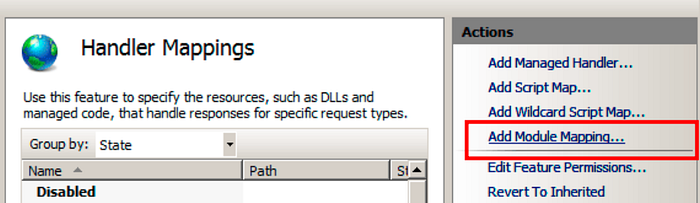
On the right, double-click “Handler Mappings”
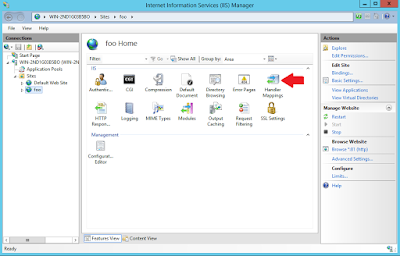
On the right, under “Actions,” click “Add Module Mapping”
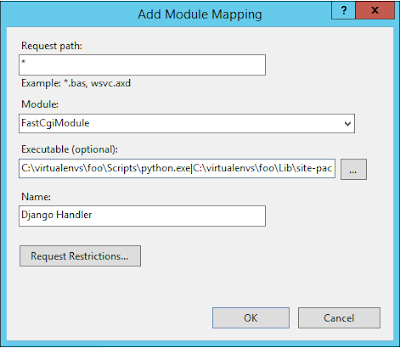
In the “Request path” box enter an asterisk: *
Click the arrow on the right-hand side of the “Module” box and select “FastCgi Module”
NOTE: Make sure to select FastCgi Module*, NOT CgiModule*
- In the “Executable” box, enter the following:
C:\virtualenvs\Eric\Scripts\python.exe|C:\virtualenvs\Eric\Lib\site-packages\wfastcgi.py
Note that the character after python.exe is a pipe (|), which is entered by pressing Shift-\ on your keyboard
In the “Name” box, enter Django Handler (you can call this whatever you want; it’s merely a friendly name for the module mapping)
The Add Module Mapping dialog should now look like this:
Click the “Request Restrictions” button and uncheck the “Invoke handler only if the request is mapped to the” checkbox
Click “OK” to close the Request Restrictions dialog
Click “OK” to close the Add Module Mapping dialog
When prompted “Do you want to create a FastCGI application for this executable?” click “No” since we created the application earlier.
Note that you CAN have it create the FastCGI application for you from the module mapping, but the settings seem to be different and the end result isn’t fully editable. I also detailed how to create the FastCGI application to be as thorough as possible with all the various pieces involved.
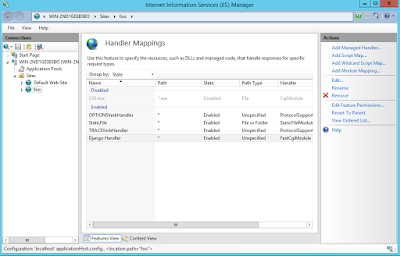
- You will now see the Django Handler listed in the Handler Mappings for the foo website:
At this point everything should be working, so verify by loading the application in a browser.
Open a browser on the server
Browse to http://localhost:8000/
Step 9: Configure the Windows Firewall
Navigate to Control Panel, System and Security, and Windows Firewall.
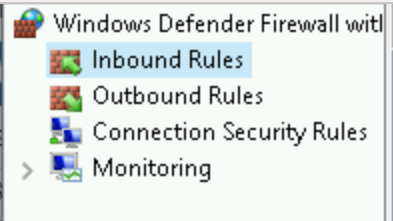
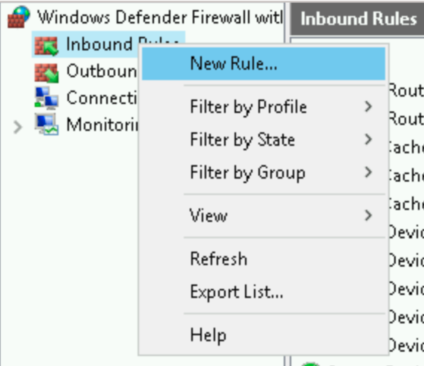
Select Advanced settings and highlight Inbound Rules in the left pane.
Right-click Inbound Rules and select New Rule.
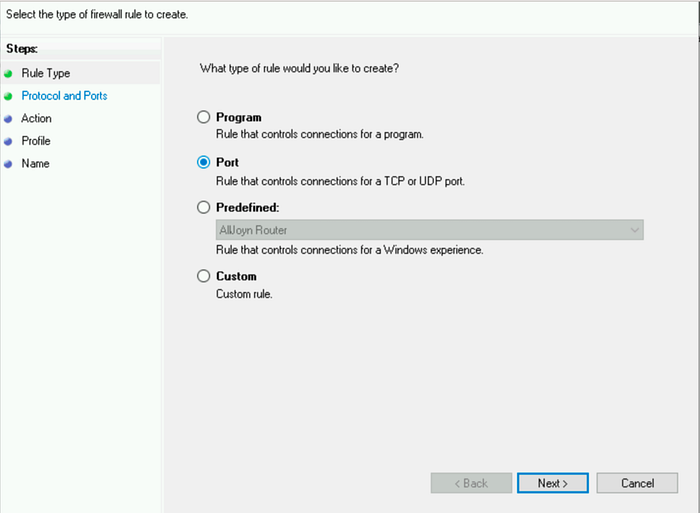
Add the port you need to open and click Next.
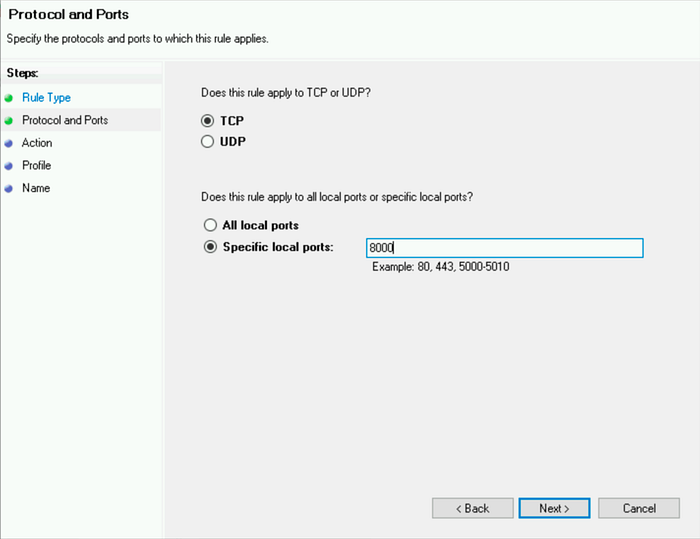
Add the protocol (TCP or UDP) and the port number into the next window and click Next.
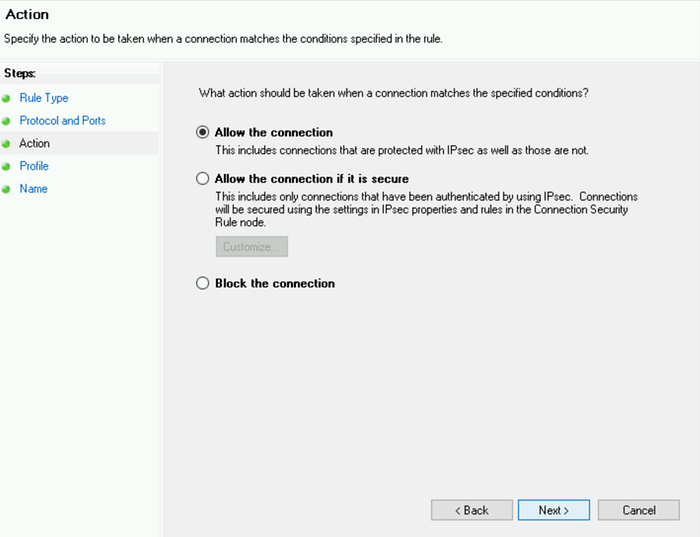
Select Allow the connection in the next window and hit Next.
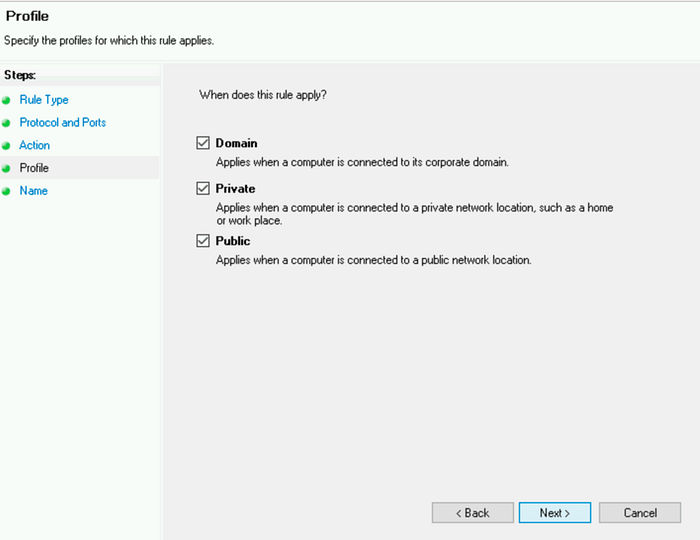
Select the network type as you see fit and click Next.
Under the profile section, selects all checkboxes (Domain, Private & Public).
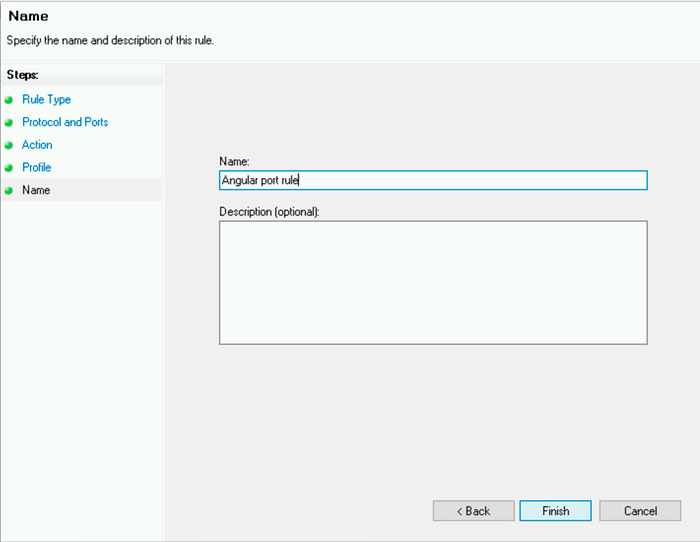
Name the rule something meaningful and click Finish.
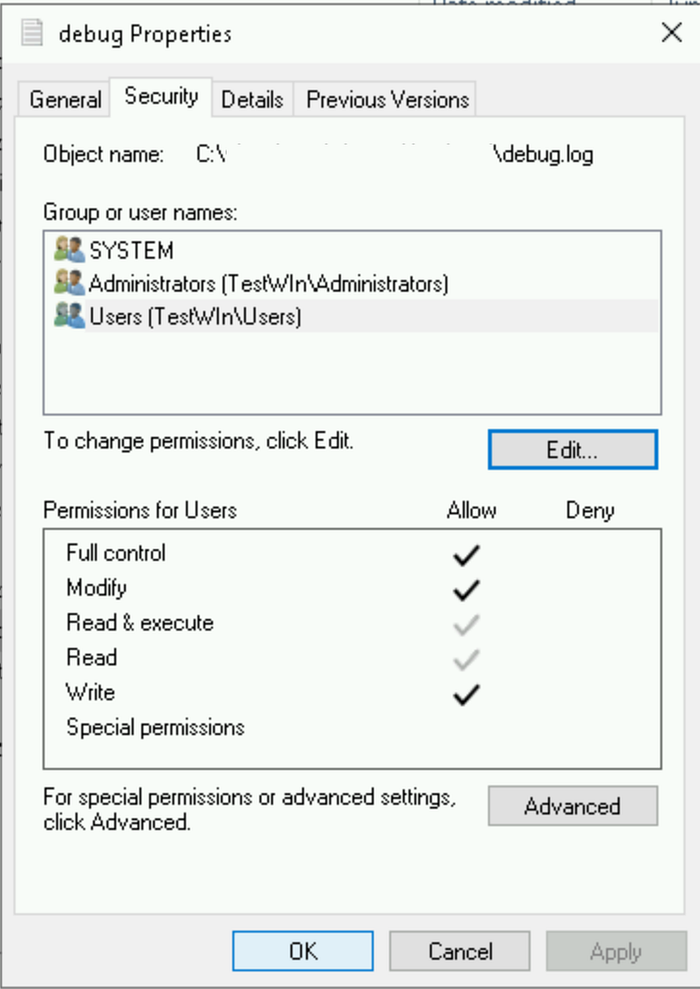
Make sure Users should have access to read/write access on the debug.log file in the Django project.
Step 10: Create static applications for serving static content
On left side expand sites website
Right Click on main Django applications select Edit bindings
make sure you selected private IP
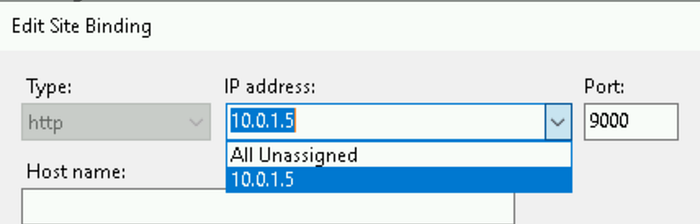
Right-click on static folder select convert into the application
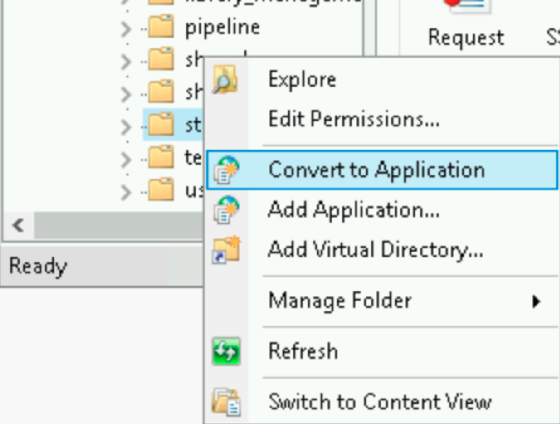
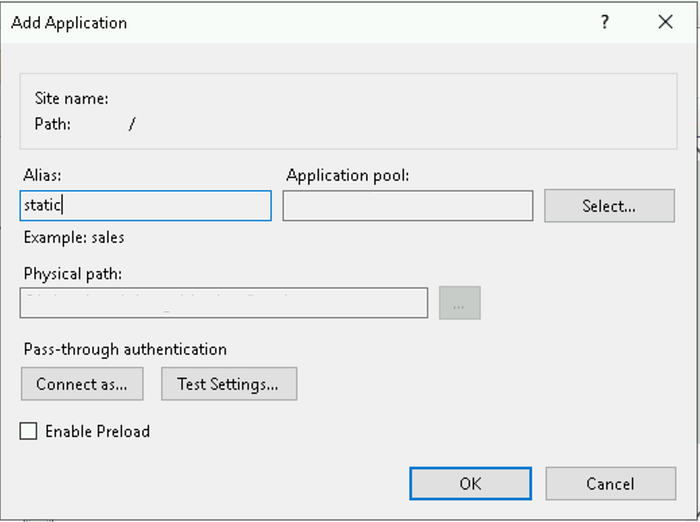
Fill out Add Application form with the
Site name(Project Name), Application pool(Project Name), Physical path(Absolute path of static folder)
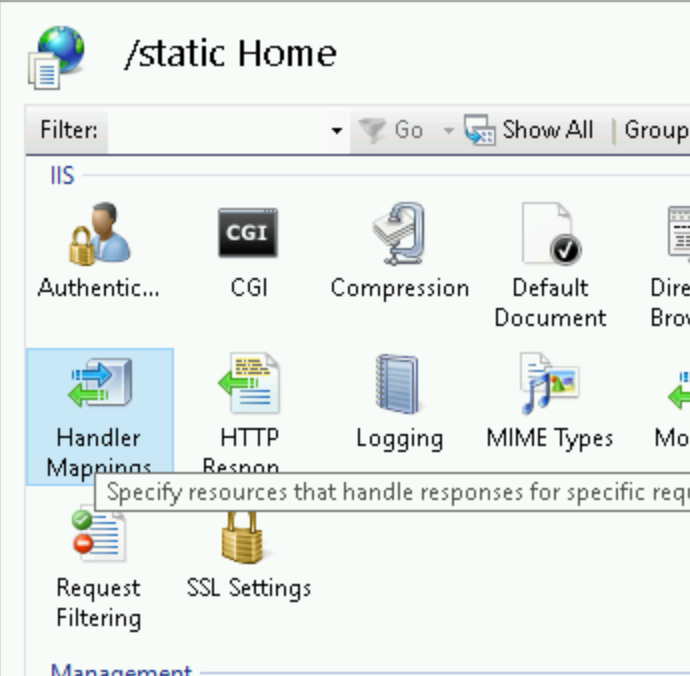
After static application converted into an application. Choose the static application and Open Static Home Handler Mappings.
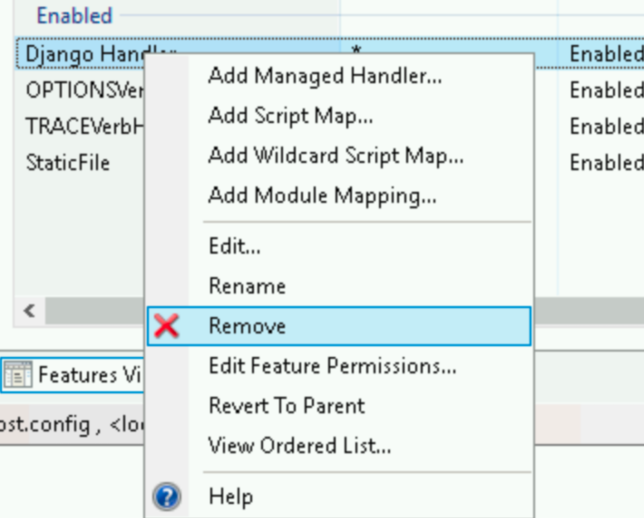
Remove Django Handler for static application
Right-click Django Handler entry select Remove
I hope this blog is helpful to you……..
Subscribe to my newsletter
Read articles from NonStop io Technologies directly inside your inbox. Subscribe to the newsletter, and don't miss out.
Written by
NonStop io Technologies
NonStop io Technologies
Product Development as an Expertise Since 2015 Founded in August 2015, we are a USA-based Bespoke Engineering Studio providing Product Development as an Expertise. With 80+ satisfied clients worldwide, we serve startups and enterprises across San Francisco, Seattle, New York, London, Pune, Bangalore, Tokyo and other prominent technology hubs.