Step-by-Step Guide to Create Azure Free Account
 Siddhesh Prabhugaonkar
Microsoft Azure offers a Free Trial subscription with ₹14,500/$200 worth of credits for 30 days, which is perfect for learning and exploring cloud services.
Let's walk through the steps to create an Azure account and activate the Free Trial subscription.
Important Note for Learners
When you sign up for an Azure Free Trial:
You get $200 (around ₹14,500) worth of Azure credits.
The Free Trial subscription is valid for 30 days, or until the credit is exhausted — whichever happens first.
After 30 days or credit exhaustion:
Your subscription is automatically disabled.
You will not be charged unless you manually upgrade to a Pay-As-You-Go subscription.
Azure ensures there are no hidden charges during or after the trial period.
You can continue learning by upgrading or using services under the always-free tier.
Note: Azure Account vs. Azure Subscription
It's important to understand the distinction between an Azure account and an Azure subscription:
Azure Account:
This refers to your identity in Azure, usually linked to an email address (Microsoft account or organizational account). It gives you access to the Azure portal and allows you to manage subscriptions and resources.Azure Subscription:
A subscription defines how your Azure services are billed. It is a billing mechanism for resources created in Azure (like VMs, databases, storage, etc.).
You can have:Multiple subscriptions under one Azure account.
Different access controls and billing settings per subscription.
Example:
You might use one Azure account (your email) to manage:
A Free Trial subscription for personal learning.
A Pay-As-You-Go subscription for a production project.
A Student subscription through your university.
Prerequisites:
A valid email address (preferably not used earlier for Azure).
A mobile number for verification.
A debit/credit card (₹2 will be charged temporarily for verification).
Step by step instructions
Step 1: Visit Azure Free Trial Page
Go to: https://azure.microsoft.com/en-in/free/
Click on Try Azure for free

Step 2: Sign in or Create a Microsoft Account
If you already have a Microsoft account, sign in.
Otherwise, click Create one! and follow the instructions.

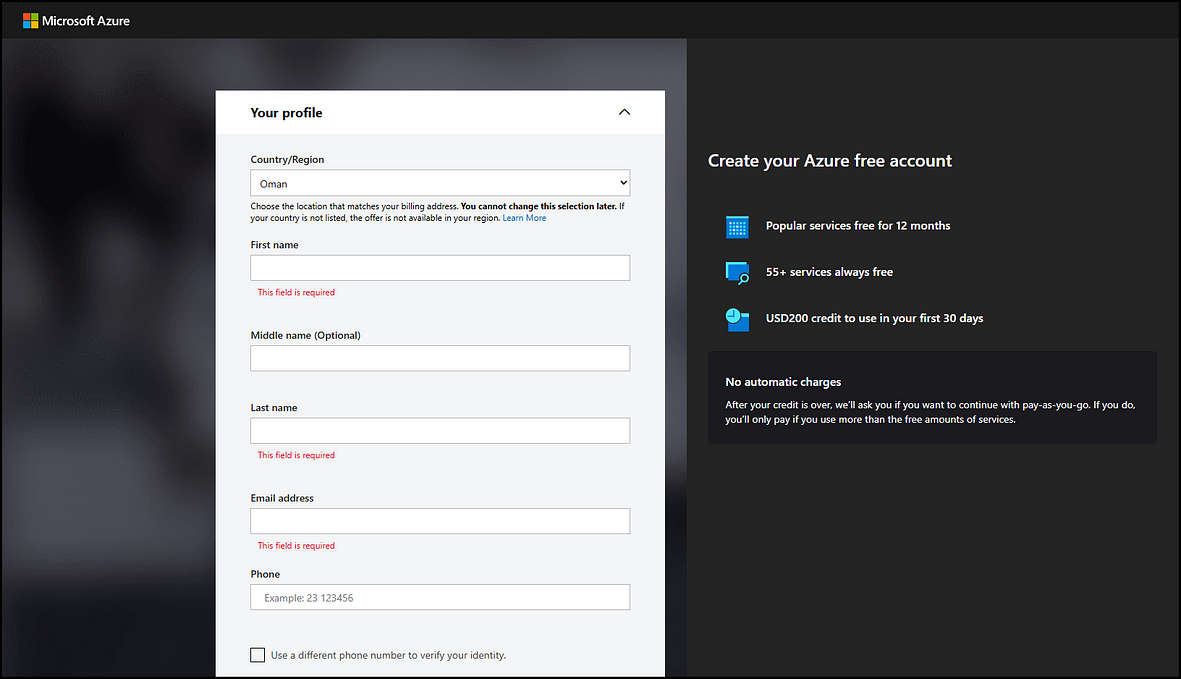
Step 3: Add profile details
Enter your address, state postal code and other details
Step 4: Identity Verification by Phone
Select your country and enter your phone number.
Choose Text me or Call me for OTP verification.

Step 5: Identity Verification by Card
Enter your card details for identity confirmation. Make sure you have a Credit card and international payments should be enabled.
✔ Don’t worry — ₹2 or $1 is just a verification charge and will be refunded.
✔ Debit cards may work; Credit cards are more reliable.

Step 6: Accept Agreement and Start
✔ Review the Microsoft Azure Agreement and Privacy Statement.
✔ Check the required checkboxes.
✔ Click Sign up.

Step 7: Azure Portal Dashboard
You’ll now be redirected to the Azure Portal:
https://portal.azure.com
You’ll also see a banner showing your ₹14,500/$200 free credit balance.

Tips for Learners
Free services include Linux/Windows VMs, App Services, Azure SQL, Azure Functions, and Blob Storage.
Track your credit usage under Cost Management + Billing.
After the trial, either upgrade or continue using always-free services.
Subscribe to my newsletter
Read articles from Siddhesh Prabhugaonkar directly inside your inbox. Subscribe to the newsletter, and don't miss out.
Written by
Siddhesh Prabhugaonkar
Siddhesh Prabhugaonkar
I'm Siddhesh, a Microsoft Certified Trainer and cloud architect. As an instructor at Pluralsight, I'm dedicated to providing top-notch educational content. I share my expertise in Microsoft .NET, Azure, cloud technologies, certifications, and the latest in the tech world through various channels, including YouTube, online courses, blogs, and newsletters. Stay informed and up-to-date by subscribing to my newsletter at Cloud Authority.