Capstone DevOps Project: Enterprise-Grade CI/CD Pipeline with Kubernetes on AWS, Jenkins, Helm, Ingress, and Monitoring
 Praduman Prajapati
Table of contents
- Introduction 🚀
- Architecture Diagram of the Project
- 📌 Source Code & Project Repositories
- 🔒 Configure AWS Security Group
- Create EC2 Instances for Required Tools
- 🔗 Connecting to EC2 Instances via SSH
- Configure each server
- Configure Jenkins Plugins and Docker
- Create and Configure Jenkins Pipeline
- Step 1: Create a New Pipeline
- Step 2: Install Trivy on Jenkins Server
- Step 3: Add SonarQube Credentials in Jenkins
- Step 4: Configure SonarQube Server in Jenkins
- Write Your Pipeline Script
- Implement Quality Gate Check
- Update pom.xml with Nexus Repositories
- Configure Nexus Credentials in Jenkins via settings.xml
- Add DockerHub Credentials in Jenkins
- Add Jenkins User to Docker Group
- Update the pipeline Script
- Automating Jenkins Pipeline Trigger with GitHub Webhook
- Setting Up CD Pipeline
- Add GitHub Credentials to Jenkins
- Configure Email Notifications in Jenkins
- Add the Email notification script in the CI pipeline
- 🚀 Configure the InfraServer
- 🔐 Configure RBAC (Role-Based Access Control)
- Grant Jenkins Access to Kubernetes for Deployments
- Setting Up the CD Pipeline in Jenkins
- Verifying Kubernetes Resources & Enabling HTTPS with Custom Domain
- Setup Monitoring with Prometheus & Grafana on EKS
- ✅ Conclusion

Introduction 🚀
In today’s fast-paced software development world, automating the process of building, testing, and deploying applications is essential for delivering features quickly and reliably. That’s where CI/CD pipelines come into play.
In this project, I’ve built a complete, production-grade CI/CD pipeline using Jenkins, Kubernetes (EKS), and various open-source DevOps tools — all deployed on AWS. This setup not only automates the deployment of applications but also integrates monitoring (with Prometheus & Grafana) and secure ingress access with HTTPS using Nginx Ingress Controller and Cert-Manager.
Whether you're a DevOps beginner looking to understand real-world pipelines or a professional aiming to implement enterprise-grade CI/CD systems, this blog will walk you through every step — from infrastructure setup to continuous delivery and monitoring.
By the end of this guide, you'll have a fully functional, cloud-native CI/CD pipeline with all the essential components configured, deployed, and running on Kubernetes.
Architecture Diagram of the Project

📌 Source Code & Project Repositories
To keep things simple and organized, I’ve divided the entire project into three separate repositories, each focusing on a different part of the DevSecOps workflow:
🔧 Project Repository (CI Repo)
🚀 CD Repository
☁️ Infrastructure as Code (IaC) — Terraform for EKS
🔒 Configure AWS Security Group
A Security Group in AWS acts like a virtual firewall. It controls what kind of traffic can come into or go out of your EC2 instances or services—keeping your infrastructure secure.
For this project, we'll either create a new security group or update an existing one with the required rules.
📌 Essential Security Group Rules for Kubernetes Cluster
| Port(s) | Purpose | Why It’s Needed |
587 | SMTP (Email Notifications) | To allow tools like Jenkins to send email notifications |
22 | SSH Access | For secure shell access to EC2 instances (use with caution) |
80 and 443 | HTTP & HTTPS | For serving web traffic (Ingress, Jenkins, ArgoCD UI, etc.) |
3000 - 11000 | App-Specific Ports | For apps like Grafana (3000), Prometheus, and others |

✅ Best Practices for Security Group Setup
🔐 Follow Least Privilege
Only open the ports that your application actually needs. Avoid exposing everything “just in case.”🛑 Restrict SSH Access (Port 22)
Limit SSH access to your IP or admin IPs only. Never leave it open to the entire internet (0.0.0.0/0)—this is a big security risk. (I have done this for demo purpose only).
Create EC2 Instances for Required Tools
To run essential DevOps tools like Nexus, SonarQube, Jenkins, and manage infrastructure, you'll need to create four separate EC2 instances on AWS.
📋 What You’ll Be Creating:
| Instance Name | Purpose |
Nexus | Artifact repository to store JAR files, and other build artifacts |
SonarQube | Static code analysis and code quality scanning |
Jenkins | CI/CD automation server for building, testing, and triggering deployments |
InfraServer | Used to provision the EKS cluster and manage infrastructure via Terraform |
🔧 Step 1: Launch EC2 Instances
Go to the AWS EC2 Dashboard

Click “Launch Instance”
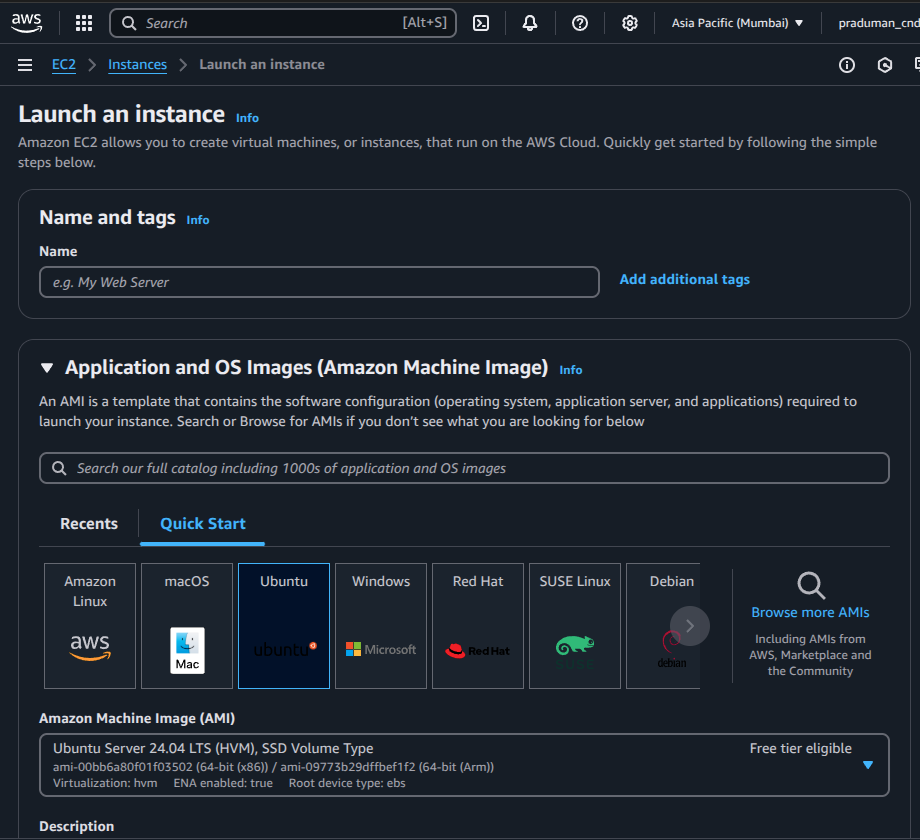
⚙️ Step 2: Configure Instance
Set the number of instances to 4

AMI (Amazon Machine Image): Select the latest Ubuntu (e.g., Ubuntu 22.04 LTS)

Instance Type: Choose
t2.large(2 vCPU, 8 GB RAM)
Key Pair: Select an existing key pair or create a new one to access your instances via SSH

Storage: Set root volume to at least 25 GB

Security Group: Use the security group you configured earlier (with necessary ports open)

Click Launch Instance

Tags: Add a Name tag to each instance to identify them easily

🔗 Connecting to EC2 Instances via SSH
Once your EC2 instances are up and running, you can connect to them securely using SSH (Secure Shell) from your local terminal.
🧩 What You Need:
The
.pemfile (private key) you downloaded or created while launching the EC2 instancesThe public IP address of each EC2 instance (you’ll find it in the EC2 dashboard)
💻 SSH Command
ssh -i <path-to-pem-file> ubuntu@<public-ip>
Replace
<path-to-pem-file>with the path to your.pemfileReplace
<public-ip>with the public IP of the instance you want to access

Repeat this for each instance:
Nexus
SonarQube
Jenkins
InfraServer
ssh -i <path-to-pem-file> ubuntu@<public-ip-of-SonarQube>
ssh -i <path-to-pem-file> ubuntu@<public-ip-of-Nexus>
ssh -i <path-to-pem-file> ubuntu@<public-ip-of-Jenkins>
ssh -i <path-to-pem-file> ubuntu@<public-ip-of-InfraServer>
Configure each server
To ensure your server is up to date, run the following command:
sudo apt update
This will refresh the package list and update any outdated software.
Configure the Infrastructure Server
Now, we need to make sure that the server has the necessary permissions to create resources on AWS.
Create an IAM Role in AWS:
Go to the AWS Management Console.
In the navigation bar, search for IAM and select Roles.
Click on Create role.
Set the Trusted Entity:
Trusted Entity Type: Select AWS service.
Use Case: Select EC2 (this allows EC2 instances to assume this role).

Attach Policies:
Click Next: Permissions.
In the search bar, search for AdministratorAccess.
Check the box next to AdministratorAccess to give the EC2 instance full permissions.

Assign a Role Name:
Choose a role name
Click Create role to finish creating the IAM role.

Attach the IAM Role to the EC2 Instance
Now that your IAM role is created, it’s time to attach it to your EC2 instance.
Go to the EC2 Dashboard in AWS.
Find the InfraServer instance and click on it to open the instance details.
Click Actions → Security → Modify IAM Role.
Under the IAM role section, select the role you just created.

Click Update IAM role to apply the changes.
InfraServer now has the necessary permissions to create AWS resources. 🚀
Install AWS CLI on the Infra Server
To manage AWS resources from your server, you need to install the AWS Command Line Interface (CLI).
Download AWS CLI: Run the following command to download the AWS CLI installation package:
curl "https://awscli.amazonaws.com/awscli-exe-linux-x86_64.zip" -o "awscliv2.zip"Install
unzip(if not already installed):sudo apt install unzip -yUnzip the AWS CLI package:
unzip awscliv2.zipInstall AWS CLI:
sudo ./aws/install
Verify AWS CLI Installation
To ensure AWS CLI is installed correctly, run:
aws --version
This should display the installed version of AWS CLI.

Configure AWS CLI
Set the AWS region globally so that the AWS CLI knows where to create resources. Use the following command:
aws configure set region us-east-1
Replace
us-east-1with your preferred AWS region if needed.
Install Terraform
To use Terraform, follow these steps to install it on your InfraServer:
Update the server and install required dependencies:
sudo apt-get update && sudo apt-get install -y gnupg software-properties-commonDownload the HashiCorp GPG key:
 wget -O- https://apt.releases.hashicorp.com/gpg | \
 gpg --dearmor | \
 sudo tee /usr/share/keyrings/hashicorp-archive-keyring.gpg > /dev/null
Verify the GPG key:
 gpg --no-default-keyring \
 --keyring /usr/share/keyrings/hashicorp-archive-keyring.gpg \
 --fingerprint
Add the HashiCorp repository:
 echo "deb [signed-by=/usr/share/keyrings/hashicorp-archive-keyring.gpg] \
 https://apt.releases.hashicorp.com $(lsb_release -cs) main" | \
 sudo tee /etc/apt/sources.list.d/hashicorp.list
Update the package list:
sudo apt updateInstall Terraform:
sudo apt-get install terraform
Verify Terraform Installation
To confirm that Terraform is installed, run:
terraform -version
This will display the installed version of Terraform.
Clone the Infrastructure as Code (IaC) Repository
Clone GitHub repository to the InfraServer where the Terraform configuration files are stored.
Clone the repository:
git clone https://github.com/praduman8435/EKS-Terraform.git
Navigate into the repository directory:
cd EKS-Terraform
Create Resources on AWS Using Terraform
Initialize Terraform:
Before applying the configuration, you need to initialize the Terraform working directory:
terraform init
Check the Resources Terraform Will Create:
Run the following command to see a preview of the resources Terraform will create:
terraform plan

Apply the Terraform Configuration:
Once you’re ready to create the resources, apply the configuration:
terraform apply --auto-approveThis command will automatically approve the changes without prompting for confirmation.
Now, sit back and relax for approximately 10 minutes as Terraform creates the resources in AWS. You can monitor the progress in the terminal.

Set Up the Jenkins Server
Now infrastructure is ready, let's set up Jenkins server. Jenkins will be the core tool for automating our CI/CD pipeline.
Step 1: Install Java
Jenkins requires Java to run. We’ll install OpenJDK 17 (a stable, widely-used version):
sudo apt install openjdk-17-jre-headless -y

Step 2: Install Jenkins
Add the Jenkins repository key:
 sudo wget -O /usr/share/keyrings/jenkins-keyring.asc \
 https://pkg.jenkins.io/debian-stable/jenkins.io-2023.key
Add the Jenkins repository to your system:
 echo "deb [signed-by=/usr/share/keyrings/jenkins-keyring.asc] \
 https://pkg.jenkins.io/debian-stable binary/" | sudo tee \
 /etc/apt/sources.list.d/jenkins.list > /dev/null
Update your package list:
sudo apt-get updateInstall Jenkins:
sudo apt-get install jenkins -y

Step 3: Access Jenkins Web UI
Get the Jenkins Server’s Public IP from the AWS EC2 dashboard.
In your browser, go to:
http://<public-ip-of-your-Jenkins-server>:8080
Important: Make sure port 8080 is open in the security group attached to your Jenkins EC2 instance.
Go to EC2 → Security Groups → Edit inbound rules.
Add a rule to allow TCP traffic on port 8080 from your IP or anywhere (0.0.0.0/0) for testing.
Unlock Jenkins
On the Jenkins setup page, it will ask for the initial admin password.
Run this command on your server to get it:
sudo cat /var/lib/jenkins/secrets/initialAdminPassword
Copy the password and paste it into the browser.
Step 5: Install Plugins & Create Admin User
Click "Install Suggested Plugins" when prompted.


Once the plugins are installed, create your admin user (username, password, email).

Click "Save and Continue".

Then click "Save and Finish".

🎉 Jenkins is Ready!
You’ve successfully installed and configured Jenkins! You can now start creating jobs and automating your CI/CD pipeline.

Set Up the SonarQube Server
SonarQube is a powerful tool for continuously inspecting code quality and security. In this step, we’ll install Docker and run SonarQube as a container on our server.
Step 1: Update the Server
Let’s start by updating the system packages:
sudo apt update
Step 2: Install Docker on the Server
To run SonarQube as a container, we first need Docker installed.
Install required dependencies:
sudo apt-get install ca-certificates curl -yAdd Docker’s official GPG key:
 sudo install -m 0755 -d /etc/apt/keyrings
 sudo curl -fsSL https://download.docker.com/linux/ubuntu/gpg -o /etc/apt/keyrings/docker.asc
 sudo chmod a+r /etc/apt/keyrings/docker.asc
Add the Docker repository:
 echo \
 "deb [arch=$(dpkg --print-architecture) signed-by=/etc/apt/keyrings/docker.asc] \
 https://download.docker.com/linux/ubuntu \
 $(. /etc/os-release && echo "${UBUNTU_CODENAME:-$VERSION_CODENAME}") stable" | \
 sudo tee /etc/apt/sources.list.d/docker.list > /dev/null
Update your package index again:
sudo apt-get update
Install Docker Engine and tools:
sudo apt-get install docker-ce docker-ce-cli containerd.io docker-buildx-plugin docker-compose-plugin -y
Step 3: Enable Docker for Your User (Optional, but recommended)
To run Docker without sudo every time:
sudo usermod -aG docker $USER
⚠️ Important: You need to log out and log back in after running this command for the changes to take effect.
Step 4: Run SonarQube in a Docker Container
Now that Docker is ready, let’s launch SonarQube:
docker run -d --name sonarqube -p 9000:9000 sonarqube:lts

This command will:
Download the latest LTS (Long-Term Support) version of SonarQube.
Start it in a detached container.
Expose it on port 9000.
Step 5: Access SonarQube Web UI
Open your browser and go to:
http://<public-ip-of-sonarqube>:9000

Make sure port 9000 is allowed in the EC2 security group.
Step 6: Login and Change Default Password
Use the default credentials to log in:
Username:
adminPassword:
admin

You’ll be prompted to change the password on your first login.

🎉 SonarQube is now up and running on your server!
Set Up the Nexus Server
Nexus is a repository manager where we can store and manage build artifacts like Docker images, Maven packages, and more. We’ll install and run Nexus in a Docker container.
Step 1: Update the System
Start by updating all the packages:
sudo apt update
Step 2: Install Docker
If Docker isn’t already installed on this server, follow these steps:
Install required packages:
sudo apt-get install ca-certificates curl -yAdd Docker’s GPG key:
 sudo install -m 0755 -d /etc/apt/keyrings
 sudo curl -fsSL https://download.docker.com/linux/ubuntu/gpg -o /etc/apt/keyrings/docker.asc
 sudo chmod a+r /etc/apt/keyrings/docker.asc
Add the Docker repository:
 echo \
 "deb [arch=$(dpkg --print-architecture) signed-by=/etc/apt/keyrings/docker.asc] \
 https://download.docker.com/linux/ubuntu \
 $(. /etc/os-release && echo "${UBUNTU_CODENAME:-$VERSION_CODENAME}") stable" | \
 sudo tee /etc/apt/sources.list.d/docker.list > /dev/null
Update package index:
sudo apt-get update
Install Docker:
sudo apt-get install docker-ce docker-ce-cli containerd.io docker-buildx-plugin docker-compose-plugin -y
Step 3: Run Docker Without sudo (Optional)
To avoid typing sudo before every Docker command:
sudo usermod -aG docker $USER
🔁 Log out and log back in to apply this change.
Step 4: Run Nexus in a Docker Container
Now that Docker is ready, let’s launch the Nexus container:
docker run -d --name nexus -p 8081:8081 sonatype/nexus3:latest

This runs Nexus in the background.
The web interface will be available on port 8081.
Step 5: Access Nexus Web Interface
In your browser, go to:
http://<public-ip-of-nexus>:8081
Make sure port 8081 is allowed in your EC2 instance’s Security Group.
Step 6: Retrieve the Admin Password
To sign in, you need the initial admin password which is stored inside the container.
Here’s how to get it:
Find the container ID:
docker psAccess the container shell:
docker exec -it <container-id> /bin/bashPrint the password:
cat /nexus-data/admin.passwordCopy the password and go back to the Nexus UI.
Step 7: Login & Set a New Password
Username:
adminPassword: (paste the password you retrieved)
After login, it will ask you to set a new admin password.

🎉 That’s it! Your Nexus repository manager is now ready to use.
Configure Jenkins Plugins and Docker
Now that Jenkins is up and running, let’s install the required plugins and set up Docker on the Jenkins server to enable full CI/CD functionality.
Step 1: Install Required Jenkins Plugins
Go to Jenkins Dashboard
→ Click Manage Jenkins
→ Click Manage Plugins
→ Go to the Available tab
Search and install the following plugins (you can select multiple at once):
Pipeline Stage ViewDocker PipelineSonarQube ScannerConfig File ProviderMaven IntegrationPipeline Maven IntegrationKubernetesKubernetes CLIKubernetes Client APIKubernetes CredentialsKubernetes Credentials Provider

Click Install without restart and wait for all plugins to be installed.

Once done, restart Jenkins to apply all changes
Step 2: Install Docker on Jenkins Server
We’ll now install Docker so Jenkins jobs can build Docker images directly.
Update and install required packages:
 sudo apt-get update
 sudo apt-get install ca-certificates curl -y
Add Docker's GPG key:
 sudo install -m 0755 -d /etc/apt/keyrings
 sudo curl -fsSL https://download.docker.com/linux/ubuntu/gpg -o /etc/apt/keyrings/docker.asc
 sudo chmod a+r /etc/apt/keyrings/docker.asc
Add the Docker repository:
 echo \
 "deb [arch=$(dpkg --print-architecture) signed-by=/etc/apt/keyrings/docker.asc] \
 https://download.docker.com/linux/ubuntu \
 $(. /etc/os-release && echo "${UBUNTU_CODENAME:-$VERSION_CODENAME}") stable" | \
 sudo tee /etc/apt/sources.list.d/docker.list > /dev/null
Install Docker:
 sudo apt-get update
 sudo apt-get install docker-ce docker-ce-cli containerd.io docker-buildx-plugin docker-compose-plugin -y
Step 3: Allow Jenkins User to Run Docker
To allow Jenkins to run Docker without needing sudo every time:
sudo usermod -aG docker $USER
🔁 Log out and log back in (or reboot) for the group change to take effect.
Step 4: Configure Maven and Sonar Scanner in Jenkins
Go to Jenkins Dashboard → Manage Jenkins → Global Tool Configuration
Scroll down to the Maven section:
Click Add Maven
Name it:
maven3
Choose “Install automatically” (Jenkins will download it)
Scroll to the SonarQube Scanner section:
Click Add SonarQube Scanner
Name it:
sonar-scanner
Enable “Install automatically”
Click Save or Apply to finish.
🎉 Done! Jenkins is now fully equipped with all the tools you need to build, analyze, and deploy your applications in a modern DevOps workflow.
Create and Configure Jenkins Pipeline
Step 1: Create a New Pipeline
Go to Jenkins Dashboard
Click New Item
Enter a name
Choose Pipeline as the item type

Click OK
Under Build Discarder:
Check Discard Old Builds
Set Max # of builds to keep =
3
(Keeps Jenkins light and fast)

Step 2: Install Trivy on Jenkins Server
Trivy is used for container vulnerability scanning.
Run the following commands on your Jenkins server:
sudo apt-get install wget apt-transport-https gnupg lsb-release -y

wget -qO - https://aquasecurity.github.io/trivy-repo/deb/public.key | \
gpg --dearmor | sudo tee /usr/share/keyrings/trivy.gpg > /dev/null

echo "deb [signed-by=/usr/share/keyrings/trivy.gpg] \
https://aquasecurity.github.io/trivy-repo/deb $(lsb_release -sc) main" | \
sudo tee -a /etc/apt/sources.list.d/trivy.list

sudo apt-get update
sudo apt-get install trivy -y

Check if Trivy is working:
trivy --version
Step 3: Add SonarQube Credentials in Jenkins
Go to SonarQube UI → Click on Administration → Security → Users

Generate a new token

Now, add the token in Jenkins:
Go to Jenkins Dashboard → Manage Jenkins → Credentials

Click on (global) → Add Credentials

Fill the form:
Kind:
Secret TextSecret: (Paste the token copied from SonarQube)
ID:
sonar-token(We'll refer to this in the pipeline)

Click Create

Step 4: Configure SonarQube Server in Jenkins
Go to Jenkins Dashboard → Manage Jenkins → Configure System
Scroll to SonarQube servers section

Click Add SonarQube
Fill the details:
Name:
sonarServer Authentication Token: Choose
sonar-tokenServer URL:
http://<public-ip-of-sonarqube>:9000

- Click Save
Write Your Pipeline Script
You’re now ready to write your pipeline script under Pipeline → Pipeline Script section of the job.
pipeline {
    agent any

    tools{
        maven 'maven3'
    }
    environment {
        SCANNER_HOME= tool 'sonar-scanner'
    }

    stages {
        stage('Git Checkout') {
            steps {
                git branch: 'main', url: 'https://github.com/praduman8435/Capstone-Mega-DevOps-Project.git'
            }
        }
        stage('Compilation') {
            steps {
                sh 'mvn compile'
            }
        }
        stage('Testing') {
            steps {
                sh 'mvn test -DskipTests=true'
            }
        }
        stage('Trivy FS Scan') {
            steps {
                sh 'trivy fs --format table -o fs-report.html .'
            }
        }
        stage('Code Quality Analysis') {
            steps {
                withSonarQubeEnv('sonar') {
                    sh ''' $SCANNER_HOME/bin/sonar-scanner -Dsonar-projectName=GCBank -Dsonar.projectKey=GCBank \
                            -Dsonar.java.binaries=target '''
                }
            }
        }
    }
}
Now, try to build pipeline and check till now everything works fine


Here, everything works as expected now move forward and add some more scripts inside pipeline
Implement Quality Gate Check
In SonarQube:

Go to:
Administration → Configuration → Webhooks

Create New Webhook
Name:
sonarqube-webhookURL:
http://<jenkins-public-ip>:8080/sonarqube-webhook/

- Click Create

This webhook will notify Jenkins once the SonarQube analysis is complete and the Quality Gate status is available.
Your Jenkins server should be publicly accessible (or at least reachable by the SonarQube server) on that webhook URL.
Update pom.xml with Nexus Repositories
In Nexus UI:

Browse → Select
maven-releasesandmaven-snapshots
Copy both URLs (you’ll use them in
pom.xml)
In your pom.xml: Search for <distributionManagement> block and update it like this:
<distributionManagement>
    <repository>
        <id>maven-releases</id>
        <url>http://<nexus-ip>:8081/repository/maven-releases/</url>
    </repository>
    <snapshotRepository>
        <id>maven-snapshots</id>
        <url>http://<nexus-ip>:8081/repository/maven-snapshots/</url>
    </snapshotRepository>
</distributionManagement>

💡 Don’t forget to:
Replace
<nexus-ip>with your actual Nexus IPCommit and push the change to GitHub
Configure Nexus Credentials in Jenkins via settings.xml
In Jenkins:
Go to:
Manage Jenkins → Managed Files → Add a new Config File
Type:
Global Maven settings.xmlID:
Capstone
click on
nextNow, Inside
Contentgenerated find the<servers>section
📄 In the <servers> section, add:
<servers>
  <server>
    <id>maven-releases</id>
    <username>admin</username>
    <password>heyitsme</password>
  </server>

  <server>
    <id>maven-snapshots</id>
    <username>admin</username>
    <password>heyitsme</password>
  </server>
</servers>

- Submit the changes
🔐 This ensures your Maven builds can authenticate with Nexus to deploy artifacts.
Add DockerHub Credentials in Jenkins
Go to:
Manage Jenkins → Credentials → Global → Add Credentials

Kind:
Username and PasswordID:
docker-credUsername: Your DockerHub username
Password: Your DockerHub password

💡 You’ll reference this ID in your pipeline when logging in to DockerHub.
Add Jenkins User to Docker Group
Run this on Jenkins server:
sudo usermod -aG docker jenkins
Then restart the server or run:
sudo systemctl restart jenkins
So Jenkins can access Docker without sudo
Update the pipeline Script
pipeline {
    agent any

    tools{
        maven 'maven3'
    }
    environment {
        SCANNER_HOME= tool 'sonar-scanner'
        IMAGE_TAG= "v${BUILD_NUMBER}"
    }

    stages {
        stage('Git Checkout') {
            steps {
                git branch: 'main', url: 'https://github.com/praduman8435/Capstone-Mega-DevOps-Project.git'
            }
        }
        stage('Compilation') {
            steps {
                sh 'mvn compile'
            }
        }
        stage('Testing') {
            steps {
                sh 'mvn test -DskipTests=true'
            }
        }
        stage('Trivy FS Scan') {
            steps {
                sh 'trivy fs --format table -o fs-report.html .'
            }
        }
        stage('Code Quality Analysis') {
            steps {
                withSonarQubeEnv('sonar') {
                    sh ''' $SCANNER_HOME/bin/sonar-scanner -Dsonar-projectName=GCBank -Dsonar.projectKey=GCBank \
                            -Dsonar.java.binaries=target '''
                }
            }
        }
        stage('Quality Gate Check'){
            steps{
                waitForQualityGate abortPipeline: false, credentialsId: 'sonar-token'
            }
        }
        stage('Build the Application'){
            steps{
                sh 'mvn package -DskipTests'
            }
        }
        stage('Push Artifacts to Nexus'){
            steps{
                withMaven(globalMavenSettingsConfig: 'Capstone', jdk: '', maven: 'maven3', mavenSettingsConfig: '', traceability: true) {
                    sh 'mvn clean deploy -DskipTests'
                }
            }
        }
        stage('Build & Tag Docker Image'){
            steps{
                script{
                    withDockerRegistry(credentialsId: 'docker-cred') {
                        sh 'docker build -t thepraduman/bankapp:$IMAGE_TAG .'
                    }
                }
            }
        }
        stage('Docker Image Scan') {
            steps {
                sh 'trivy image --format table -o image-report.html thepraduman/bankapp:$IMAGE_TAG'
            }
        }
        stage('Push Docker Image') {
            steps {
                script{
                    withDockerRegistry(credentialsId: 'docker-cred') {
                        sh 'docker push thepraduman/bankapp:$IMAGE_TAG'
                    }
                }
            }
        }
    }
}
Click on Build Now To check the pipeline successfully triggered or not


Automating Jenkins Pipeline Trigger with GitHub Webhook
Now that the CI pipeline is ready, let’s automate it so that it runs automatically every time new code is pushed to the GitHub repository. We’ll use the Generic Webhook Trigger plugin in Jenkins for this.
Install Generic Webhook Trigger Plugin
Go to Jenkins Dashboard → Manage Jenkins → Plugins
Under the Available plugins tab, search for Generic Webhook Trigger

Select it and click on Install
Restart Jenkins once the installation is complete
Configure Webhook Trigger in Your Pipeline
Go back to the Jenkins dashboard and open your pipeline job (
capstone_CI)
Click on Configure
Scroll down to the Build Triggers section and check the box for Generic Webhook Trigger

Under Post content parameters, add:
Variable:
refExpression:
$.refContent-Type:
JSONPath

Add a token:
- Token Name:
capstone
- Token Name:
(Optional) Add a filter to trigger the pipeline only for changes on the
mainbranch:Expression:
refs/heads/mainText:
$ref

- Click Save
Once saved, you’ll see a webhook URL under the token section, something like:
http://<your-jenkins-ip>:8080/generic-webhook-trigger/invoke?token=capstone
Configure GitHub Webhook
Go to your GitHub repository (the one used in the pipeline)

Click on Settings → Webhooks → Add Webhook


Fill out the form as follows:
Payload URL: Paste the webhook URL from Jenkins
Content Type:
application/jsonLeave the secret field blank (or add one and configure Jenkins accordingly)
Choose Just the push event

Click on Add Webhook

That’s it! 🎉 Now, every time a new commit is pushed to the
mainbranch, Jenkins will automatically trigger the pipeline.
Setting Up CD Pipeline
With our CI pipeline automated, it’s time to set up the CD pipeline. The first step is ensuring we can update the Docker image tag in the Kubernetes deployment every time a new image is built by the CI pipeline.
We’ll start by granting Jenkins access to CD GitHub repository and setting up email notifications so that you receive updates when your pipeline fails or succeeds.
Add GitHub Credentials to Jenkins
This will allow Jenkins to clone or push changes to your GitHub CD repository.
Go to Jenkins Dashboard → Manage Jenkins → Credentials
Click on (global)

Click on Add Credentials
Fill in the following:
Kind: Username with password
Scope: Global
Username: Your GitHub username
Password: Your GitHub password or personal access token (recommended)
ID:
github-cred

Click on Create

Configure Email Notifications in Jenkins
Generate Gmail App Password
To securely send emails from Jenkins, we’ll use a Gmail App Password instead of your actual Gmail password.
Log in to your Google account
Navigate to Security
Enable 2-Step Verification if it’s not already enabled

Scroll down to App Passwords
Generate a new app password:
- App name:
capstone
- App name:

- Copy the generated token (you’ll need it in the next step)
Add Gmail Credentials to Jenkins
Go to Jenkins Dashboard → Manage Jenkins → Credentials
Click on (global) and then Add Credentials
Fill in the following:
Kind: Username with password
Scope: Global
Username: Your Gmail address
Password: The generated Gmail app password
ID:
mail-cred

- Click Create
Configure Jenkins Mail Server
Go to Manage Jenkins → Configure System
Scroll to Extended E-mail Notification and fill out:
SMTP Server:
smtp.gmail.comSMTP Port:
465Credentials: Select
mail-credCheck Use SSL

Scroll to E-mail Notification section:
SMTP Server:
smtp.gmail.comUse SMTP Authentication: ✅
Username: Your Gmail address
Password: Your Gmail App Password (recently generated)
SMTP Port:
465Use SSL: ✅

- Click Save
🛡️ Make sure ports 465 and 587 are open in the Jenkins server’s security group to allow email traffic.
✅ Test the Email Setup
In the Extended E-mail Notification section, click on Test configuration by sending a test e-mail
Enter a recipient email address
Click Test Configuration

If everything is set up correctly, you should receive an email confirming that the Jenkins email notification system is working! 🎉
Add the Email notification script in the CI pipeline
Add this inside the
pipelinebut outside thestagesblock
post {
    always {
        script {
            def jobName = env.JOB_NAME
            def buildNumber = env.BUILD_NUMBER
            def pipelineStatus = currentBuild.result ?: 'UNKNOWN'
            def bannerColor = pipelineStatus.toUpperCase() == 'SUCCESS' ? 'green' : 'red'

            def body = """
                <html>
                    <body>
                        <div style="border: 4px solid ${bannerColor}; padding: 10px;">
                            <h2>${jobName} - Build #${buildNumber}</h2>
                            <div style="background-color: ${bannerColor}; padding: 10px;">
                                <h3 style="color: white;">Pipeline Status: ${pipelineStatus.toUpperCase()}</h3>
                            </div>
                            <p>Check the <a href="${env.BUILD_URL}">Console Output</a> for more details.</p>
                        </div>
                    </body>
                </html>
            """

            emailext(
                subject: "${jobName} - Build #${buildNumber} - ${pipelineStatus.toUpperCase()}",
                body: body,
                to: 'praduman.cnd@gmail.com',
                from: 'praduman.8435@gmail.com',
                replyTo: 'praduman.8435@gmail.com',
                mimeType: 'text/html',
                attachmentsPattern: 'fs-report.html'
            )
        }
    }
}
Now, The email successfully configured and sets up
🚀 Configure the InfraServer
Install Kubectl
curl -LO "https://dl.k8s.io/release/$(curl -L -s https://dl.k8s.io/release/stable.txt)/bin/linux/amd64/kubectl"

curl -LO "https://dl.k8s.io/release/$(curl -L -s https://dl.k8s.io/release/stable.txt)/bin/linux/amd64/kubectl.sha256"

sudo install -o root -g root -m 0755 kubectl /usr/local/bin/kubectl

kubectl version --client

Update the Kubeconfig File
Connect your Jenkins server to the EKS cluster:
aws eks update-kubeconfig \
  --region us-east-1 \
  --name capstone-cluster

Install eksctl
eksctl is a CLI tool that simplifies EKS cluster operations.
curl -sLO "https://github.com/weaveworks/eksctl/releases/latest/download/eksctl_$(uname -s)_amd64.tar.gz"
tar -xzf eksctl_$(uname -s)_amd64.tar.gz
sudo mv eksctl /usr/local/bin

# Verify the installation
eksctl version

Install Helm
Helm is used for managing Kubernetes applications using Helm charts.
sudo apt update && sudo apt upgrade -y
curl https://raw.githubusercontent.com/helm/helm/main/scripts/get-helm-3 | bash
Associate IAM OIDC Provider with the Cluster
This step is needed to create service accounts with IAM roles.
eksctl utils associate-iam-oidc-provider \
  --cluster capstone-cluster \
  --region us-east-1 \
  --approve

Create IAM Service Account for EBS CSI Driver
This enables your cluster to dynamically provision EBS volumes.
eksctl create iamserviceaccount \
  --name ebs-csi-controller-sa \
  --namespace kube-system \
  --cluster capstone-cluster \
  --region us-east-1 \
  --attach-policy-arn arn:aws:iam::aws:policy/service-role/AmazonEBSCSIDriverPolicy \
  --approve \
  --override-existing-serviceaccounts

Deploy EBS CSI Driver
kubectl apply -k "github.com/kubernetes-sigs/aws-ebs-csi-driver/deploy/kubernetes/overlays/stable/ecr/?ref=release-1.30"

Install NGINX Ingress Controller
This is required for routing external traffic to your services inside Kubernetes:
kubectl apply -f https://raw.githubusercontent.com/kubernetes/ingress-nginx/main/deploy/static/provider/cloud/deploy.yaml

Install Cert-Manager (for TLS Certificates)
Cert-manager helps you manage SSL certificates inside Kubernetes:
kubectl apply -f https://github.com/cert-manager/cert-manager/releases/download/v1.14.4/cert-manager.yaml

🔐 Configure RBAC (Role-Based Access Control)
To manage access control and permissions properly in your Kubernetes cluster, we’ll start by creating a dedicated namespace and then apply RBAC policies.
Create a namespace with name
webappskubectl create ns webapps
Create a Service Account
vim service-account.yamladd the yaml file & save it
  apiVersion: v1
  kind: ServiceAccount
  metadata:
    name: jenkins
    namespace: webapps
kubectl apply -f service-account.yamlCreate a Role
vim role.yamladd the yaml file & save it
  apiVersion: rbac.authorization.k8s.io/v1
  kind: Role
  metadata:
    name: jenkins-role
    namespace: webapps
  rules:
    - apiGroups:
          - ""
          - apps
          - networking.k8s.io
          - autoscaling
      resources:
        - secrets
        - configmaps
        - persistentvolumeclaims
        - services
        - pods
        - deployments
        - replicasets
        - ingresses
        - horizontalpodautoscalers
      verbs: ["get", "list", "watch", "create", "update", "patch", "delete"]
kubectl apply -f role.yamlBind the role to service account
vim role-binding.yamladd the yaml file & save it
  apiVersion: rbac.authorization.k8s.io/v1
  kind: RoleBinding
  metadata:
    name: jenkins-rolebinding
    namespace: webapps
  roleRef:
    apiGroup: rbac.authorization.k8s.io
    kind: Role
    name: jenkins-role
  subjects:
  - namespace: webapps
    kind: ServiceAccount
    name: jenkins
kubectl apply -f role-binding.yamlCreate Cluster role
vim cluster-role.yamladd the yaml file & save it
  apiVersion: rbac.authorization.k8s.io/v1
  kind: ClusterRole
  metadata:
    name: jenkins-cluster-role
  rules:
  - apiGroups: [""]
    resources:
       - persistentvolumes
    verbs: ["get", "list", "watch", "create", "update", "patch", "delete"]
  - apiGroups: ["storage.k8s.io"]
    resources:
       - storageclasses
    verbs: ["get", "list", "watch", "create", "update", "patch", "delete"]
  - apiGroups: ["cert-manager.io"]
    resources:
       - clusterissuers
    verbs: ["get", "list", "watch", "create", "update", "patch", "delete"]
kubectl apply -f cluster-role.yamlBind cluster role to Service Account
vim cluster-role-binding.yamladd the yaml file & save it
  apiVersion: rbac.authorization.k8s.io/v1
  kind: ClusterRoleBinding
  metadata:
    name: jenkins-cluster-rolebinding
  subjects:
  - kind: ServiceAccount
    name: jenkins
    namespace: webapps
  roleRef:
    kind: ClusterRole
    name: jenkins-cluster-role
    apiGroup: rbac.authorization.k8s.io
kubectl apply -f cluster-role-binding.yaml
Grant Jenkins Access to Kubernetes for Deployments
To allow Jenkins to deploy applications to your EKS cluster, we need to create a service account token and configure it in Jenkins.
Create a Kubernetes Token for Jenkins
Create a secret token that Jenkins will use to authenticate with your Kubernetes cluster.
Run the following command to create and open a token manifest:
vim token.yaml
Paste the following YAML content into the file:
apiVersion: v1
kind: Secret
type: kubernetes.io/service-account-token
metadata:
  name: jenkins-secret
  annotations:
    kubernetes.io/service-account.name: jenkins
Apply the secret to the webapps namespace:
kubectl apply -f token.yaml -n webapps
Now, retrieve the token using:
kubectl describe secret jenkins-secret -n webapps | grep token

Copy the generated token.
Add Kubernetes Token to Jenkins
Go to your Jenkins Dashboard → Manage Jenkins → Credentials.

Select the (global) domain and click Add Credentials.

Fill in the fields as follows:
Kind: Secret text
Secret: Paste the copied Kubernetes token
ID:
k8s-cred

Click Create.

Install kubectl on Jenkins Server
To let Jenkins execute Kubernetes commands, install kubectl on the Jenkins machine:
curl -LO "https://dl.k8s.io/release/$(curl -L -s https://dl.k8s.io/release/stable.txt)/bin/linux/amd64/kubectl"

curl -LO "https://dl.k8s.io/release/$(curl -L -s https://dl.k8s.io/release/stable.txt)/bin/linux/amd64/kubectl.sha256"

sudo install -o root -g root -m 0755 kubectl /usr/local/bin/kubectl
Verify installation:
kubectl version --client

Setting Up the CD Pipeline in Jenkins
Now that CI is complete, let’s configure the Capstone Continuous Deployment (CD) Pipeline to automatically deploy your application to the Kubernetes cluster.
Step 1: Create a New Pipeline Job
Go to Jenkins Dashboard → New Item

Provide the following details:
Name:
capstone_CDItem Type: Select Pipeline
Click OK
Step 2: Configure Build Retention
Check the box "Discard old builds"
Set Max # of builds to keep to
3
This helps conserve resources by keeping only the latest builds.
Step 3: Add the Deployment Pipeline Script
Scroll down to the Pipeline section and paste the following script:
groovyCopyEditpipeline {
    agent any

    stages {
        stage('Git Checkout') {
            steps {
                git branch: 'main', url: 'https://github.com/praduman8435/Capstone-Mega-CD-Pipeline.git'
            }
        }

        stage('Deploy to Kubernetes') {
            steps {
                withKubeConfig(
                    credentialsId: 'k8s-cred',
                    clusterName: 'capstone-cluster',
                    namespace: 'webapps',
                    restrictKubeConfigAccess: false,
                    serverUrl: 'https://D133D06C5103AE18A950F2047A8EB7DE.gr7.us-east-1.eks.amazonaws.com'
                ) {
                    sh 'kubectl apply -f kubernetes/Manifest.yaml -n webapps'
                    sh 'kubectl apply -f kubernetes/HPA.yaml'
                    sleep 30
                    sh 'kubectl get pods -n webapps'
                    sh 'kubectl get svc -n webapps'
                }
            }
        }
    }

    post {
        always {
            echo "Pipeline execution completed."
        }
    }
}
Step 4: Save & Run
Click Save

Click Build Now to trigger the pipeline

If everything is set up correctly, Jenkins will pull the deployment manifests from the CD GitHub repository and deploy your app to the webapps namespace in the EKS cluster.
Verifying Kubernetes Resources & Enabling HTTPS with Custom Domain
After setting up the CI/CD pipeline, it’s time to make sure everything is working perfectly and your application is accessible securely over HTTPS with a custom domain.
Step 1: Verify All Resources in the Cluster
On your Infra Server, run:
kubectl get all -n webapps

You should see all your application pods, services, and other resources running successfully. If everything looks good, proceed to the next step.
Step 2: Create a ClusterIssuer Resource for Let’s Encrypt
We'll use Cert-Manager to automatically provision SSL certificates from Let’s Encrypt.
- Create a file called
cluster-issuer.yaml:
vim cluster-issuer.yaml
- Paste the following configuration:
apiVersion: cert-manager.io/v1
kind: ClusterIssuer
metadata:
  name: letsencrypt-prod
spec:
  acme:
    server: https://acme-v02.api.letsencrypt.org/directory
    email: praduman.cnd@gmail.com
    privateKeySecretRef:
      name: letsencrypt-prod
    solvers:
    - http01:
        ingress:
          class: nginx
- Apply the ClusterIssuer:
kubectl apply -f cluster-issuer.yaml

Step 3: Create an Ingress Resource for Your Application
- Create an Ingress configuration file:
vim ingress.yaml
- Paste the following content:
apiVersion: networking.k8s.io/v1
kind: Ingress
metadata:
  name: bankapp-ingress
  namespace: webapps
  annotations:
    nginx.ingress.kubernetes.io/rewrite-target: /
    nginx.ingress.kubernetes.io/force-ssl-redirect: "true"
    nginx.ingress.kubernetes.io/ssl-redirect: "true"
    cert-manager.io/cluster-issuer: letsencrypt-prod
spec:
  ingressClassName: nginx
  tls:
  - hosts:
    - www.capstonebankapp.in
    secretName: bankapp-tls-secret
  rules:
  - host: www.capstonebankapp.in
    http:
      paths:
      - path: /
        pathType: Prefix
        backend:
          service:
            name: bankapp-service
            port:
              number: 80
- Apply the ingress resource:
kubectl apply -f ingress.yaml
- Check the status:
kubectl get ing -n webapps

Wait for a few moments, then run the command again. You’ll notice an external load balancer address (usually an AWS ELB) under the ADDRESS column.

Copy the bankapp ingress loadbalancer address
Step 4: Configure Your Custom Domain on GoDaddy
Log in to your GoDaddy account.

Navigate to My Products → DNS Settings for your domain (
capstonebankapp.in).Look for a CNAME record with name
wwwand edit it.
In the Value field, paste the Load Balancer URL you got from the Ingress.

Save the changes.
⏳ Wait a few minutes for the DNS changes to propagate.
Step 5: Access Your Application
Open your browser and visit:
https://www.capstonebankapp.in/login
If everything was configured correctly, your application will now load securely over HTTPS with a valid Let’s Encrypt certificate.

Setup Monitoring with Prometheus & Grafana on EKS
After deploying your application, it's essential to monitor its health, performance, and resource usage. Let’s integrate Prometheus and Grafana into your Kubernetes cluster using Helm.
Add Prometheus Helm Repo
On your Infra Server, add the official Prometheus Community Helm chart repository:
helm repo add prometheus-community https://prometheus-community.github.io/helm-charts
helm repo update


Create values.yaml for Custom Configuration
We'll define how Prometheus and Grafana should be deployed, what metrics to scrape, and how to expose the services.
- Create a file called
values.yaml:
vi values.yaml
- Paste the following configuration:
# values.yaml for kube-prometheus-stack

alertmanager:
  enabled: false

prometheus:
  prometheusSpec:
    service:
      type: LoadBalancer
    storageSpec:
      volumeClaimTemplate:
        spec:
          accessModes:
            - ReadWriteOnce
          resources:
            requests:
              storage: 5Gi
  additionalScrapeConfigs:
    - job_name: node-exporter
      static_configs:
        - targets:
            - node-exporter:9100
    - job_name: kube-state-metrics
      static_configs:
        - targets:
            - kube-state-metrics:8080

grafana:
  enabled: true
  service:
    type: LoadBalancer
  adminUser: admin
  adminPassword: admin123

prometheus-node-exporter:
  service:
    type: LoadBalancer

kube-state-metrics:
  enabled: true
  service:
    type: LoadBalancer
Save and exit the file.
Install Monitoring Stack with Helm
helm upgrade --install monitoring prometheus-community/kube-prometheus-stack -f values.yaml -n monitoring --create-namespace

Patch Services to Use LoadBalancer
(Optional if already configured in values.yaml, but ensures services are exposed)
kubectl patch svc monitoring-kube-prometheus-prometheus -n monitoring -p '{"spec": {"type": "LoadBalancer"}}'
kubectl patch svc monitoring-kube-state-metrics -n monitoring -p '{"spec": {"type": "LoadBalancer"}}'
kubectl patch svc monitoring-prometheus-node-exporter -n monitoring -p '{"spec": {"type": "LoadBalancer"}}'

Check Services & Access Grafana
Get all resources in the monitoring namespace:
kubectl get all -n monitoring
kubectl get svc -n monitoring


You’ll find External IPs assigned to services like Grafana and Prometheus.
➤ Access Grafana
URL:
http://<grafana-external-ip>
Username:
adminPassword:
admin123

➤ Access Prometheus
URL:
http://<prometheus-external-ip>:9090
Go to Status → Targets to see what’s being monitored.

Configure Grafana Dashboard
Open the Grafana dashboard.

Go to Connections → Data Sources → Add new.

Search for
Prometheusand select it.In the URL, enter your Prometheus service URL (e.g.,
http://<prometheus-external-ip>:9090).
Click Save & Test.

🎯 View Dashboards
Go to Dashboards → Browse.

Explore default dashboards for Node Exporter, Kubernetes metrics, and more.


Now you have real-time observability into your EKS cluster!
✅ Conclusion
In this project, I've successfully built an enterprise-grade CI/CD pipeline from scratch using Jenkins, Kubernetes (EKS), Docker, GitHub, and other DevOps tools, all running on AWS.
I automated the entire workflow:
From building and pushing Docker images in the CI pipeline
To continuously deploying them into a secure, production-ready Kubernetes cluster via CD
With proper ingress routing, TLS certificates, and monitoring in place using Prometheus and Grafana
This setup demonstrates how modern DevOps practices can streamline software delivery and infrastructure management. It not only improves deployment speed but also ensures reliability, scalability, and observability of applications.
💡 Let’s connect and discuss DevOps, cloud automation, and cutting-edge technology
Subscribe to my newsletter
Read articles from Praduman Prajapati directly inside your inbox. Subscribe to the newsletter, and don't miss out.
Written by
Praduman Prajapati
Praduman Prajapati
Bridging the gap between development and operations. Hey there! I’m a DevOps Engineer passionate about automation, cloud technologies, and making infrastructure scalable and efficient. I specialize in CI/CD, cloud automation, and infrastructure optimization, working with tools like AWS, Kubernetes, Terraform, Docker, Jenkins, and Ansible to streamline development and deployment processes. I also love sharing my knowledge through blogs on DevOps, Kubernetes, and cloud technologies—breaking down complex topics into easy-to-understand insights. Let’s connect and talk all things DevOps!