Building A Simple MCP Server For Operating Systems With Python
 Paul Fruitful
The Model Context Protocol (MCP) is one of the most exciting concepts in AI engineering right now. It has made it virtually effortless to integrate LLMs into any system or application and it showcases just how powerful standardization can be.
In today’s post, we’re ditching theory and getting our hands dirty.
We’ll build a simple MCP server that interacts with your operating system. Yup, we’re talking about agents that don’t just chat , they act.
If you’re new to the MCP ecosystem, I highly recommend starting with my intro article: Model Context Protocol: The API Standard AI Has Been Waiting For | by Paul Fruitful | Mar, 2025 | Medium
Building A Simple Operating System MCP Server Step by Step With Python
We would be building an MCP server that has a tool called save_information that saves info on our local machine
To build our MCP server, we’ll use uv, a fast and modern Python package manager built in Rust.
You might be wondering why uv and not pip?
Well, uv offers speed, project isolation, and smoother handling of dependencies, making it a great fit for AI-driven development workflows.
Let’s start by installing it.
Step 1: Installing UV
You can install uv in two ways: via pip, or by downloading the executable.
While I personally prefer the executable (it feels cleaner and faster), I’ll show both methods so you can pick what works for you.
Option 1: Using pip
pip install uv
Option 2: Using the executable
🖥️ For Windows:
powershell -ExecutionPolicy ByPass -c "irm https://astral.sh/uv/install.ps1 | iex"
🍎 🐧 For macOS / Linux:
curl -LsSf https://astral.sh/uv/install.sh | sh
Step 2: Initialize The Project
uv has been successfully installed on your local machine the next step is getting the MCP server project initialized and we would be using uv to manage this project.
To initialize this project with uv run this command:
uv init os-mcp
Next move into the folder created by running this command:
cd os-mcp
The project has been setup successfully!
You find out that uvscaffolded the project with base files:
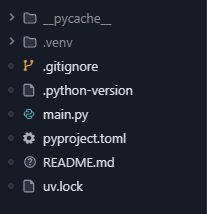
That’s the beauty of using uv as a package manager, it makes everything easier to organize
Now brace yourself for the next step, that’s where things get messy 😬
Step 3: Installing MCP
To install MCP, you need to run this command on the project:
uv add mcp["cli"]
Before we dive in, I want you to know that MCP is made up of three major concepts:
🔧 Tools
These are Python functions you expose to an AI agent through the MCP server. Think of them like “skills” the AI can call. Once decorated with @mcp.tool(), they become accessible to the agent.
✉️ Prompts
Prompts are like instruction templates for using tools. They define how tools are described to the AI model. You won’t need to manually define prompts right now MCP auto-generates them from your function docstrings!
🧠 Resources
Resources are shared state objects that multiple tools can use. These are useful for more advanced workflows, like manipulating an open file across multiple tools. We’ll keep things simple for now, so no resources yet.
Step 4: Making Your First Tool
Open up the main.py file, clear it up and let’s begin the process of making the MCP server.
Now, paste this code into your main.py file. This is your operating system tool, simple, useful, and agent-ready:
from mcp.server.fastmcp import FastMCP
mcp = FastMCP('OS-Tools')

@mcp.tool()
def save_information(info: str, name: str):
    """
    Saves information to a file and uses the name as the filename.
    """
    with open(name, 'w') as f:
        f.write(info)
    return f"Information saved to {name} Successfully"

if __name__ == "__main__":
    mcp.run(transport="stdio")
🧠 What’s Actually Happening in This Code?
Let’s break this down line by line so you understand what’s going on under the hood:
from mcp.server.fastmcp import FastMCP
This imports FastMCP, the class that helps you quickly set up a local MCP server. It's part of the mcp package you installed earlier.
mcp = FastMCP('OS-Tools')
Creates a new MCP server instance named ”OS-Tools”. This is what your AI assistant will see as the name of the toolset.
@mcp.tool()
This line is critical. It turns the function below it into a callable “tool” that AI models like Claude can discover and execute.
👉 Note: Every @mcp.tool() must have a proper docstring. The docstring is what gets shown to the model to understand what your tool does and how to use it.
   """
    Saves information to a file and uses the name as the filename.
    """
This is the docstring and it’s super important. It acts like the “tool description” for the AI.
The MCP framework will read this and generate the appropriate prompt/skill card for Claude to understand the purpose and inputs of your function.
with open(name, 'w') as f:
    f.write(info)
This opens a file with the given name in write mode (`’w’`), writes the info content into it, and then closes the file automatically.
return f"Information saved to {name} Successfully"
Sends a success message back helpful for debugging or confirmation within the Claude interface.
if name == "main":
   mcp.run(transport="stdio")
This tells Python to run the server when the file is executed directly (not imported).
It also starts the MCP server using stdio (standard input/output), which is c
ompatible with Claude Desktop and other local agents.
You just exposed a native Python function as a callable tool to Claude and all you needed was a docstring and a decorator. That’s the magic of MCP.
To start the inspect and test the tools, run:
uv run mcp dev main.py
It will return this
Starting MCP inspector…
⚙️ Proxy server listening on port 6277
🔍 MCP Inspector is up and running at http://127.0.0.1:6274 🚀
Which will start a UI interface like a Postman for testing your MCP tools
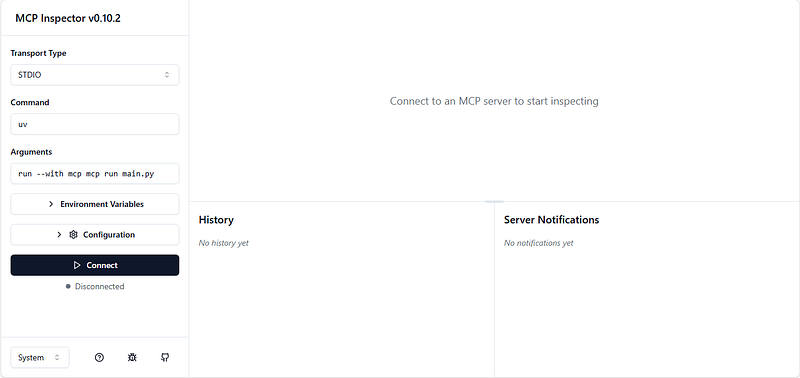
MCP Inspector before MCP server connected
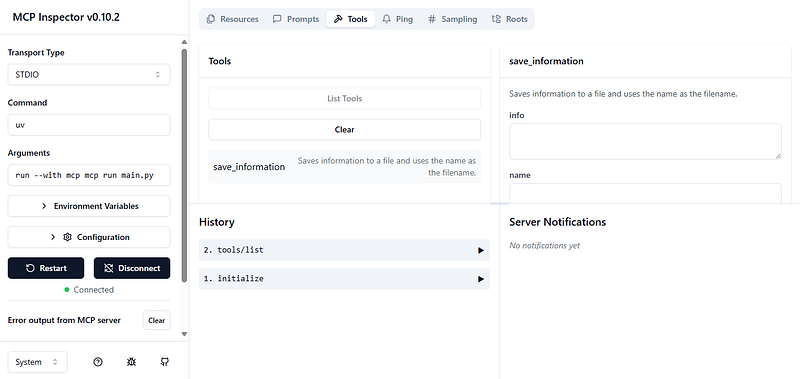
MCP Inspector testing the connected mcp server
And just like that, your MCP server is alive! 🎉
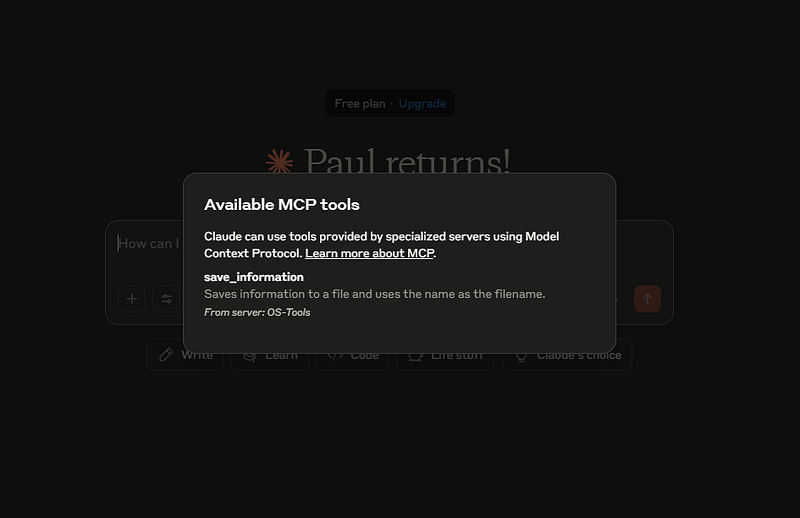
Now connect your MCP server to your Claude desktop app to watch it in action.
To connect it to your Claude application you need to edit the claude_desktop_config.json file, to make this file easy to find run this command:
For Windows:code $env:AppData\Claude\claude_desktop_config.json
For Mac/Linux:
code ~/Library/Application\ Support/Claude/claude_desktop_config.json
When the file loads up replace it with the properties with the values of your server:
{
    "mcpServers": {
        "weather": {
            "command": "uv",
            "args": [
                "--directory",
                "/ABSOLUTE/PATH/TO/PARENT/FOLDER/weather",
                "run",
                "main.py"
            ]
        }
    }
}
And you are good to test your MCP tool on Claude 😁
For more guide and for further learning here’s the the link to the Github Repo
You’ve just built a working operating system-integrated MCP server using Python.
In the next part of this MCP series, we’ll:
Add more OS tools like
read_file,delete_file, and maybelist_filesExplore prompts and resources in more detail
Learn how to make your tools more secure and robust
You’re not just coding anymore you’re engineering AI-native agents that can interact with real-world systems.
See you on Day 50 🚀
👋 Don’t forget to follow the series here on Hashnode and subscribe to my newsletter to never miss an update.
Subscribe to my newsletter
Read articles from Paul Fruitful directly inside your inbox. Subscribe to the newsletter, and don't miss out.
Written by
Paul Fruitful
Paul Fruitful
Skilled and results-oriented Software Developer with more than 5 years of experience working in a variety of environments with a breadth of programs and technologies. I am open and enthusiastic about ideas, solutions and problems. I am proficient with PHP, JavaScript and Python and I am well vast in a lot of programming and computing paradigms.