Don’t Let Refresh Ruin Your Work - Why and How to Use Redux Persist Solution
 NonStop io Technologies
Redux Persist is a solution for data loss in web applications when a user refreshes the page. It’s particularly useful when you want to ensure that your application’s state remains intact even after the user refreshes the page or closes and reopens the app.
I have created a to-do list project for example.
Step 1: Set Up the Project and required packages
1. npx create-react-app redux-persist-todo
2. cd redux-persist-todo
3. npm install redux react-redux redux-persist
Step 2: Create Redux Types and Actions
Create a folder actions and create files types.js and todoActiosn.js in it.
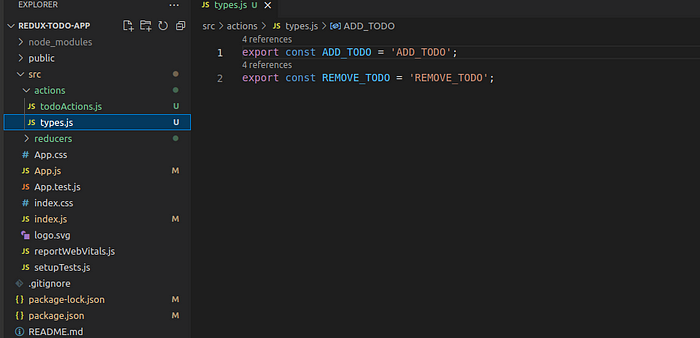
types.js
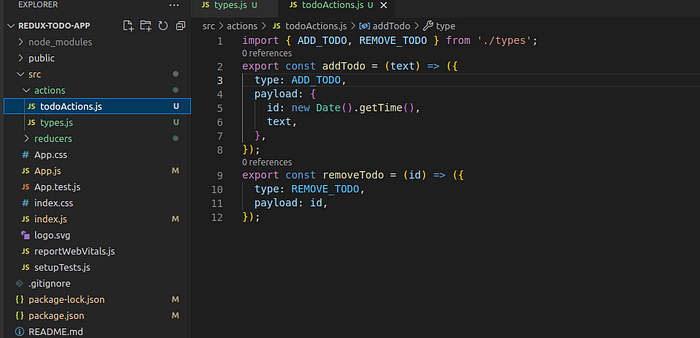
todoActions.js
Step 3: Create Redux Reducers
Create a folder called Reducers and create files index.js and todoReducer.js in it.
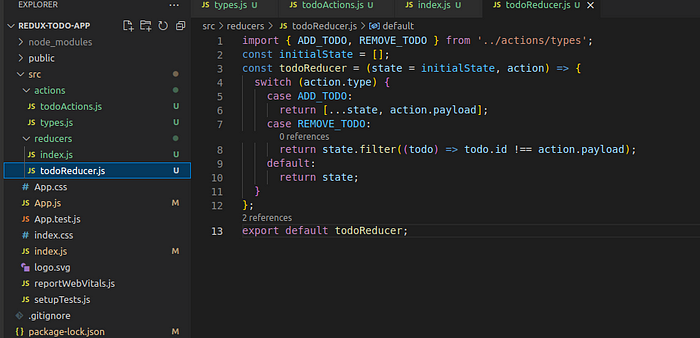
todoReducer.js
create a reducer for add todo and remove todo and export the reducer(todoReducer) and import it in the index.js file. Combines all your individual reducers using combineReducers In index.js. combineReducers allows you to create multiple reducers and then combine them into a single root reducer that represents your app’s complete state.
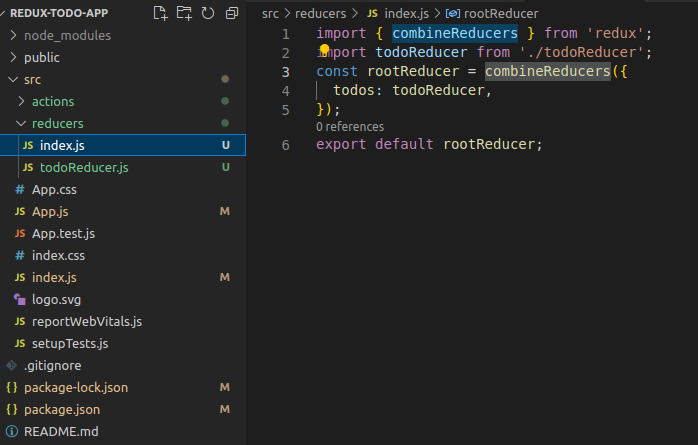
reducers/index.js
Step 4: Create the App Component
Create the main app component that allows users to add and remove tasks.
import React, { useState } from 'react';
import { useSelector, useDispatch } from 'react-redux';
import { addTodo, removeTodo } from './actions/todoActions';
function App() {
  const todos = useSelector((state) => state.todos);
  const dispatch = useDispatch();
  const [newTodo, setNewTodo] = useState('');
  const handleAddTodo = () => {
    if (newTodo.trim() !== '') {
      dispatch(addTodo(newTodo));
      setNewTodo('');
    }
  };
  const handleRemoveTodo = (id) => {
    dispatch(removeTodo(id));
  };
  return (
    <div className="App">
      <h1>To-Do List</h1>
      <div>
        <input
          type="text"
          value={newTodo}
          onChange={(e) => setNewTodo(e.target.value)}
          placeholder="Enter a new task"
        />
        <button onClick={handleAddTodo}>Add</button>
      </div>
      <ul>
        {todos.map((todo) => (
          <li key={todo.id}>
            {todo.text}
            <button onClick={() => handleRemoveTodo(todo.id)}>Remove</button>
          </li>
        ))}
      </ul>
    </div>
  );
}
export default App;
Step 5: Wrap the App with Redux Provider and PersistGate
Import Provider and PersistGate from react-redux and redux-persist.
Create the Redux store using your root reducer.
Use persistStore to create a persistor for state persistence.
Wrap the App component in Provider and PersistGate, passing in the store and persistor.
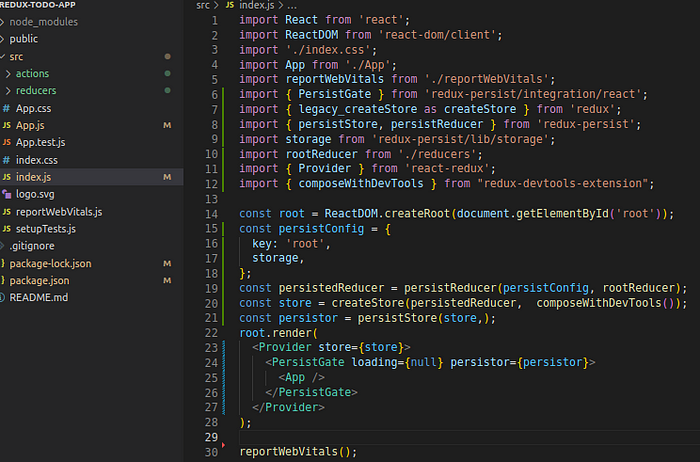
src/index.js
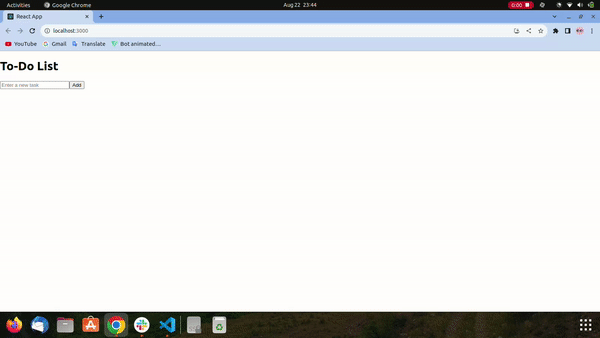
Step 6: Output
Subscribe to my newsletter
Read articles from NonStop io Technologies directly inside your inbox. Subscribe to the newsletter, and don't miss out.
Written by
NonStop io Technologies
NonStop io Technologies
Product Development as an Expertise Since 2015 Founded in August 2015, we are a USA-based Bespoke Engineering Studio providing Product Development as an Expertise. With 80+ satisfied clients worldwide, we serve startups and enterprises across San Francisco, Seattle, New York, London, Pune, Bangalore, Tokyo and other prominent technology hubs.