🌐 Static Website Hosting on AWS S3 Using Terraform 🚀
 Biswanath Sah
Are you ready to bring your static website online? 🌍 In this guide, I'll walk you through deploying a static website to AWS using Terraform - an awesome tool that lets you manage your infrastructure as code!
In this project, we'll deploy a static website to Amazon S3 using Terraform. We'll start by creating and configuring an S3 bucket for static website hosting. Then, we'll enable public access, set the hosting properties, and upload our website files like HTML, CSS, JavaScript, and images. Once everything is set up, AWS will provide a public URL for the website. This automated process makes hosting a static site simple, efficient, and fully managed through Terraform’s code-based approach.
Let's dive in! 🏊♂️
🛠️ Tools and Technologies Needed
Terraform: Think of it as your infrastructure assistant. 🧑💻 With Terraform, you can easily create, change, and version your infrastructure using simple configuration files.
Essential Commands:
terraform init: Prepares your workspace to run Terraform by setting up the environment. 🛠️terraform plan: Gives you a sneak peek 👀 of the changes Terraform will make, so you can confirm before applying.terraform apply: Executes your configuration and makes your infrastructure live. 🎉
Amazon S3: Amazon S3 (Simple Storage Service) is a scalable, durable, and secure cloud storage solution from AWS (Amazon Web Services). It was introduced in March 2006 and has become one of the most popular object storage services worldwide.
With flexible storage options, strong security features, and pay-as-you-go pricing, S3 is perfect for uses like data backup, static website hosting, and content distribution.
📋Prerequisites
Terraform is Installed
Terraform is connected to AWS
📜 Step-by-Step Guide
Initialize Your Terraform Environment 🔄
- Start by running
terraform initin your project directory. This command sets up Terraform by downloading necessary plugins and modules, making your environment ready for the next steps.
- Start by running
Set Up Your Terraform Configuration Files 📂
Now, create three essential files:
main.tf: This file contains the definitions for your AWS resources, like the S3 bucket and access policies.provider.tf: Here, you specify the AWS provider and the region you’ll be using.variables.tf: This file allows you to define variables to make your code more modular and easier to update in the future.
Configure Your S3 Bucket 🪣
- In
main.tf, define your S3 bucket resource and set up public access. You’ll also enable static website hosting and specify yourindex.htmlas the entry point.
- In
Upload Your Website Content 🖼️
- Now, upload your HTML, JavaScript, CSS files, images and any other static assets to the S3 bucket. You can automate this with Terraform or use the AWS CLI for quick uploads.
Plan and Apply with Terraform 🔍➡️🚀
Run
terraform planto review the changes Terraform will make in your AWS account. This is a good way to double-check before deploying.Then, run
terraform apply -auto-approveto make your website live! 🌐

Visit Your New Website 🎉
- In the AWS S3 console, navigate to your S3 bucket, go to Properties, and find the Static website hosting URL.
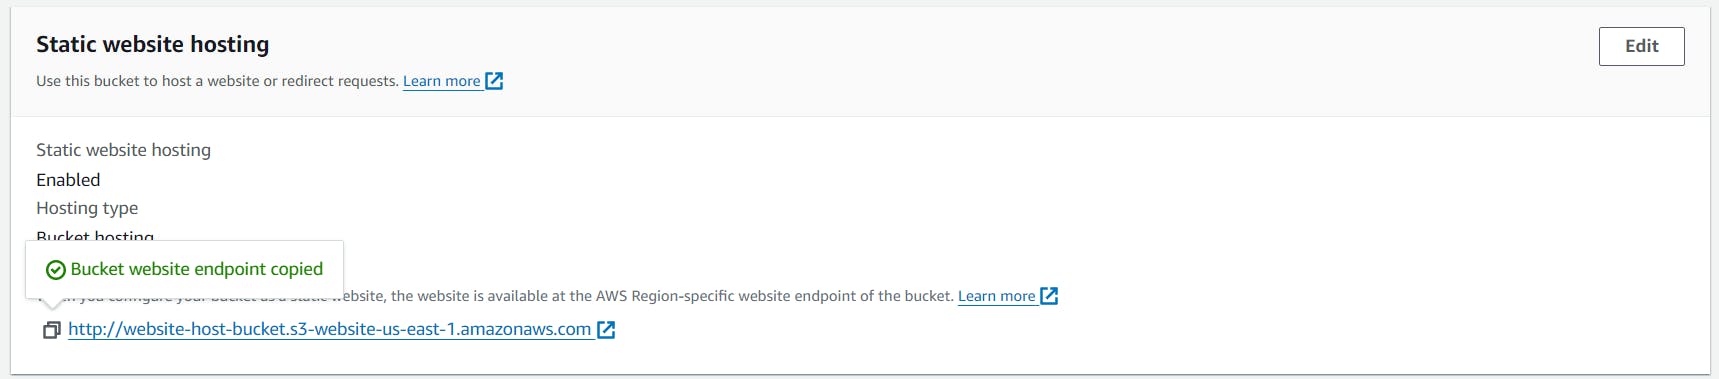
Open the URL in your browser, and voilà — your website is now live on AWS!". 🎊

💡 Wrapping Up
With Terraform, you’ve not only deployed a static website but also adopted a modern, efficient way of managing infrastructure. 🔥 Next time, try expanding your Terraform configurations or integrating additional AWS services to make our project even more powerful.
Subscribe to my newsletter
Read articles from Biswanath Sah directly inside your inbox. Subscribe to the newsletter, and don't miss out.
Written by