How to Connect Etsy Listings to Instagram and Facebook Shops Seamlessly
 The Lean Ecommerce
Connecting your Etsy listings to Instagram and Facebook shops can supercharge your online presence, making it easier for your audience to discover and purchase your products. This integration eliminates the need for manual uploads, aligning with the latest e-commerce marketing best practices. Here’s how you can achieve this effortlessly using the Catalog Generator app.
Why Connect Etsy Listings to Instagram and Facebook?
Taking advantage of the synergy between Etsy, Instagram, and Facebook can lead to significant benefits:
- Increased Visibility: Reaching a broader audience by showcasing your Etsy products directly on social media platforms.
- Seamless Shopping Experience: Allowing users to browse and purchase without leaving their favorite platforms.
- Automated Syncing: Using tools like the Catalog Generator to keep listings updated automatically.
Getting Started: Linking Your Accounts
To begin, create a Facebook Business account if you haven't already. This will allow you to manage all your business integrations from one place.
Step 1: Set Up Your Facebook Business Account
- Visit business.facebook.com and create an account.
- Link your Instagram account and Facebook page to the business account.
- Switch your Instagram account from personal to business to access additional features.
Step 2: Verify Your Etsy Domain
- Navigate to the Business Settings section in Facebook Business Manager.
- Go to the Domains tab and add your domain by typing your shop name followed by
.etsy.com. - Copy the Meta Tag provided by Facebook and paste it into your Etsy Shop Manager under Settings > Facebook Shops.
- Click Verify in Facebook Business Manager.
Using the Catalog Generator App
Now that your domain is verified, it's time to use the Catalog Generator app to automate your product listings:
- Download and log in to the Catalog Generator app.
- Connect your Etsy shop to the app for seamless access to your listings.
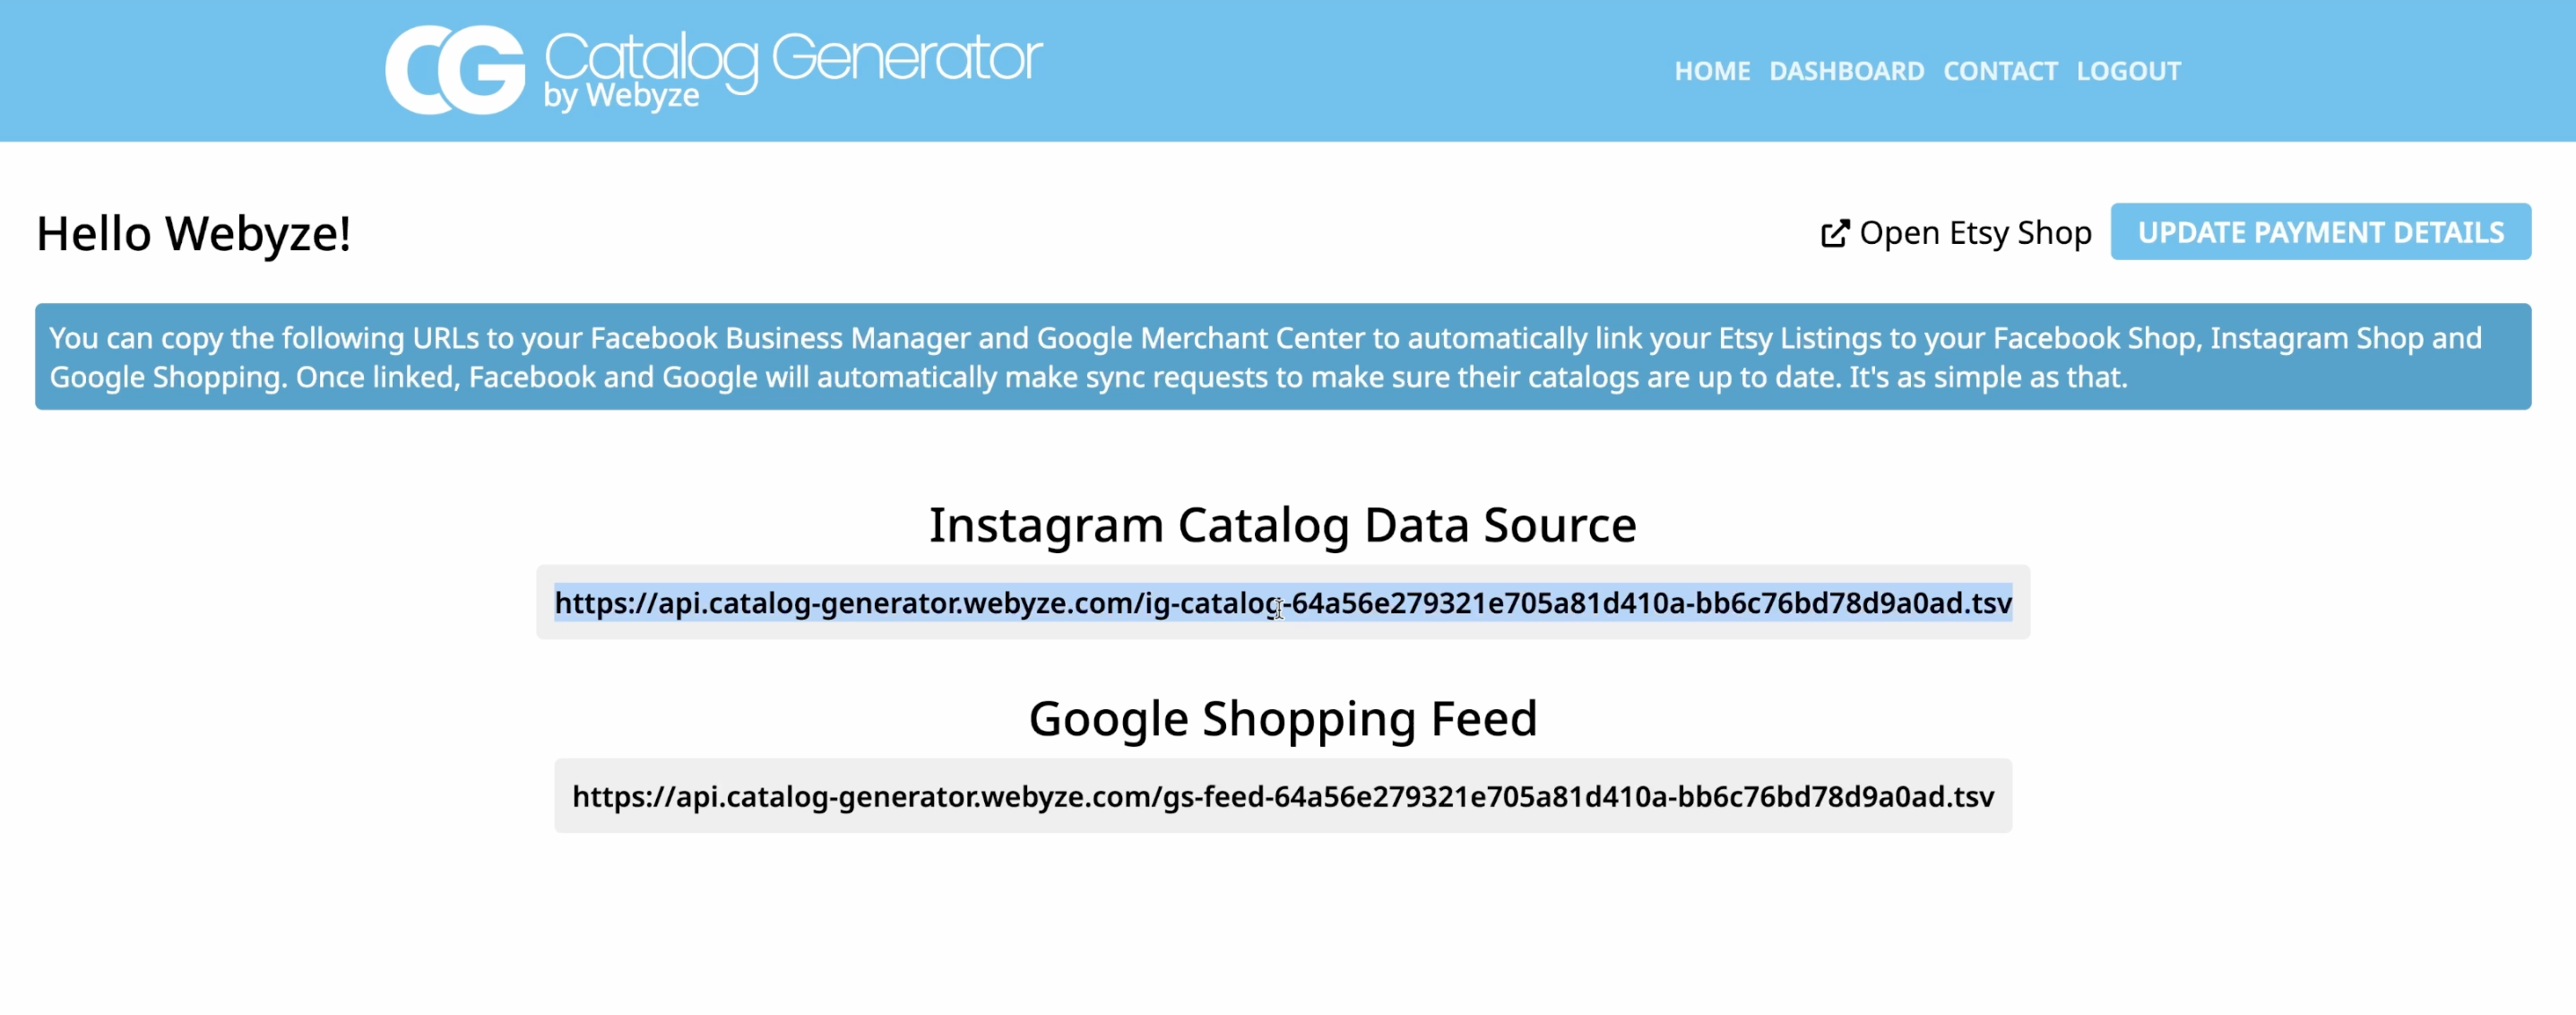
- Copy the URL provided by the app. This will serve as your data feed for Facebook's Commerce Manager.
Step 3: Create Your Catalog in Commerce Manager
- Open Facebook Commerce Manager and navigate to the Catalog section.
- Add Items and choose Data Feed as the method.
- Paste the URL from the Catalog Generator into the Data Feed URL field.

- Set a Schedule for daily updates to ensure your catalog is always current.
Final Steps & Best Practices
- Submit your domain for approval in Facebook Commerce Manager.
- Once approved, begin tagging your products in posts for enhanced engagement.
- Encourage customers to tag your products in their content for organic reach expansion.
Recap & Extra Tips:
- Integrate your Etsy domain with your business account.
- Use the Catalog Generator app for automatic listing updates.
- Submit for approval to increase traffic seamlessly.
For a comprehensive walkthrough, check out this video guide.
By following these steps, you ensure your Etsy products are always up-to-date on Instagram and Facebook, driving more traffic and conversions effortlessly. If you encounter any issues, don't hesitate to reach out for support. We're here to help!
Some images in this article were generated via AI tools and the article itself was proof-read with AI.
Subscribe to my newsletter
Read articles from The Lean Ecommerce directly inside your inbox. Subscribe to the newsletter, and don't miss out.
Written by