Html Forms and Inputs
 Ashu Suhail
HTML forms are used to collect user input, and input elements within forms allow users to enter various types of data. The <form> element acts as a container for different input fields, and the <input> element is the primary way to create interactive controls for data entry.
The <form> element is a container for different types of input elements, such as: text fields, checkboxes, radio buttons, submit buttons, etc.
All the different form elements are covered in this chapter: HTML Form Elements.
The <input> Element :
The HTML <input> element is the most used form element.
An <input> element can be displayed in many ways, depending on the type attribute.
| Type | Description |
| <input type="text"> | Displays a single-line text input field |
| <input type="radio"> | Displays a radio button (for selecting one of many choices) |
| <input type="checkbox"> | Displays a checkbox (for selecting zero or more of many choices) |
| <input type="submit"> | Displays a submit button (for submitting the form) |
| <input type="button"> | Displays a clickable button |
The <input type="text"> defines a single-line input field for text input.
Example:
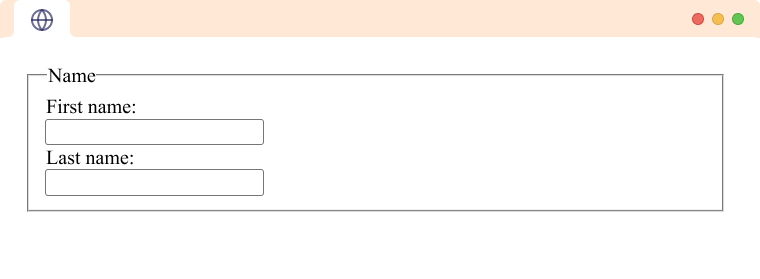
<form>
<label for="fname">First name:</label><br>
<input type="text" id="fname" name="fname"><br>
<label for="lname">Last name:</label><br>
<input type="text" id="lname" name="lname">
</form>
This is how the HTML code above will be displayed in a browser:
The <label> Element :
Notice the use of the <label> element in the example above.
The <label> tag defines a label for many form elements.
The <label> element is useful for screen-reader users, because the screen-reader will read out loud the label when the user focuses on the input element.
The <label> element also helps users who have difficulty clicking on very small regions (such as radio buttons or checkboxes) - because when the user clicks the text within the <label> element, it toggles the radio button/checkbox.
The for attribute of the <label> tag should be equal to the id attribute of the <input> element to bind them together.
Radio Buttons :
The <input type="radio"> defines a radio button.
Radio buttons let a user select ONE of a limited number of choices.
Example
A form with radio buttons:
<p>Choose your favorite Web language:</p>
<form>
<input type="radio" id="html" name="fav_language" value="HTML">
<label for="html">HTML</label><br>
<input type="radio" id="css" name="fav_language" value="CSS">
<label for="css">CSS</label><br>
<input type="radio" id="javascript" name="fav_language" value="JavaScript">
<label for="javascript">JavaScript</label>
</form>

Checkboxes :
The <input type="checkbox"> defines a checkbox.
Checkboxes let a user select ZERO or MORE options of a limited number of choices.
Example
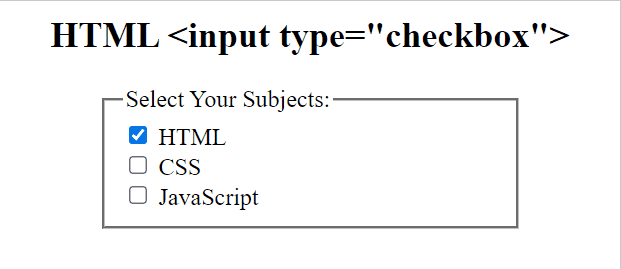
A form with checkboxes:
<form>
<input type="checkbox" id="html" name="HTML" value="HTML">
<label for="html"> this is html</label><br>
<input type="checkbox" id="css" name="CSS" value="CSS">
<label for="css"> this is CSS</label><br>
<input type="checkbox" id="javascript" name="JavaScript" value="Boat">
<label for="javascript"> this is JavaScript</label>
</form>
This is how the HTML code above will be displayed in a browser:
The Submit Button
The <input type="submit"> defines a button for submitting the form data to a form-handler.
The form-handler is typically a file on the server with a script for processing input data.
The form-handler is specified in the form's action attribute.
Example
A form with a submit button:
<form action="/action_page.php">
<label for="fname">First name:</label><br>
<input type="text" id="fname" name="fname" value="John"><br>
<label for="lname">Last name:</label><br>
<input type="text" id="lname" name="lname" value="Doe"><br><br>
<input type="submit" value="Submit">
</form>
This is how the HTML code above will be displayed in a browser:

Subscribe to my newsletter
Read articles from Ashu Suhail directly inside your inbox. Subscribe to the newsletter, and don't miss out.
Written by