🚀 CI/CD Project with Azure DevOps + GitOps using ArgoCD – Step-by-Step Guide
 Mayur Panchale
In today's fast-paced development landscape, automation is not a luxury—it’s a necessity. To make software delivery faster, more reliable, and scalable, I recently completed a full-fledged DevOps pipeline implementation using Azure DevOps, ArgoCD, and Azure Kubernetes Service (AKS).
This project simplifies how we build, test, and deploy microservices, replacing manual work with automation through CI/CD pipelines and a GitOps deployment model.
🔧 Project Phases & Highlights
Phase 1: Continuous Integration (CI) on Azure DevOps
We kicked off by automating the process of building and pushing Docker images to Azure Container Registry (ACR):
✅ Set up Azure Repos and imported our GitHub codebase
✅ Configured Azure Pipelines with Docker templates
✅ Created a Self-Hosted Agent Pool on an Azure VM
✅ Built and pushed three microservices: vote, worker, and result
Each pipeline follows a clean two-stage process:
Build → Push to ACR, triggered by file-specific changes (thanks to smart use of triggers).
Phase 2: Continuous Deployment (CD) via GitOps using ArgoCD
Instead of traditional push-based deployments, I used ArgoCD for pull-based GitOps deployments. This ensured that our Kubernetes manifests stayed as the single source of truth.
🔹 Set up an AKS Cluster
🔹 Installed and exposed ArgoCD via NodePort
🔹 Connected private Azure Repos securely using Personal Access Tokens
🔹 Deployed the application from manifests stored in the k8s-specifications directory
🔹 Opened required ports for external access via Azure portal
This phase enabled real-time monitoring and rollback with ArgoCD's visual UI.
Phase 3: CI/CD Automation with Shell Script Integration
To fully automate the image deployment flow:
📝 Created a custom Bash script (updateK8sManifests.sh)
⚙️ Integrated the script into an Update stage in our CI pipeline
🧠 Used it to auto-update Kubernetes deployment YAMLs with new Docker image tags
🔁 ArgoCD then detected the manifest change and auto-synced the new deployment
We also handled private image pulls by creating Kubernetes secrets linked to ACR credentials.
🔍 Final Outcome
💡 Now, any code change in the vote app:
Triggers the pipeline
Builds and pushes a new Docker image
Updates the K8s manifest
Syncs and deploys automatically via ArgoCD
End-to-end automation from code commit to production deployment—done with zero manual effort!
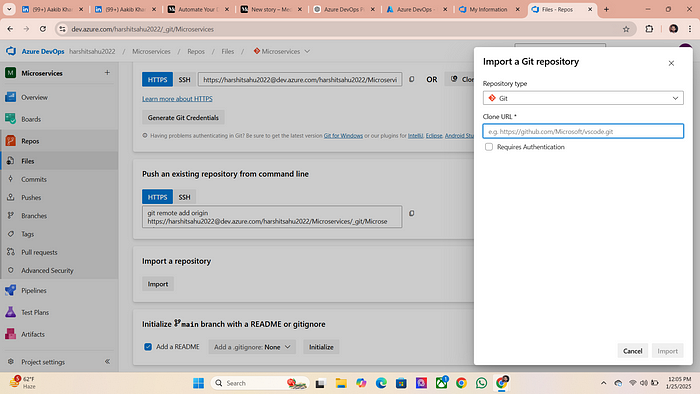
Step 1 : Setup Azure Repos
Go to your Azure portel and search for devops organization and create a new organization


2. click on Azure Repos and then click on Import option
3. Paste the github project repo link
https://github.com/MayurPanchale/voting-app.git
4. Provide the github project repo URL and then click on Import
5. It will fetch all the Files and may fetch branches from github

6. Now you have to set main branch as default branch
Now, go to Branches on the left menu
Click the three dots next to the
mainbranch and select Set as default
7. The main branch should be default because it will always have the latest code.

Step 2 : Set up Azure Container Registry (ACR)
What is Azure Container Registries → It is central repositories in azure for storing docker images just like Docker hub
- Go to azure portal and search for container registries
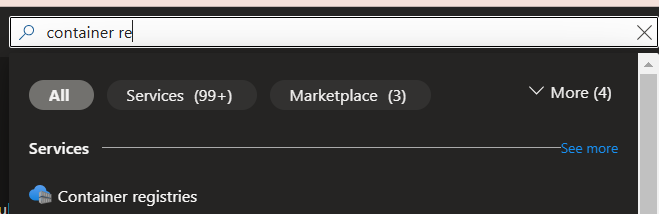
2. Create a new container registry

Your central repository for docker images is ready to use
Step 3: Create Azure Pipelines
What is Azure Pipelines → It helps you automatically build, test, and deploy your code just like Jenkins. It’s like a robot that takes your code, checks if it works correctly, and sends it to where it needs to be (like a website or app store) without you doing it manually every time
- Click on Pipelines Option present in the left menu
click on pipelines
2. In our case we fetch the code from github and store it in Azure Repos so we have to select Azure repos from options given below
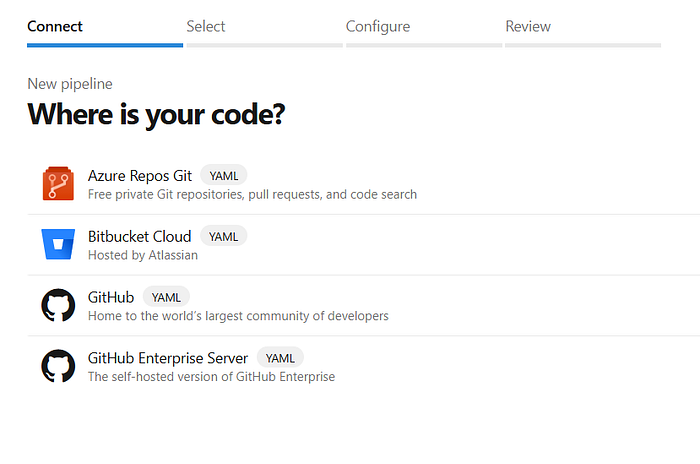
Select the Project

These are the pre templates of your pipeline code in our case we are using docker for building and pushing the image to ACR
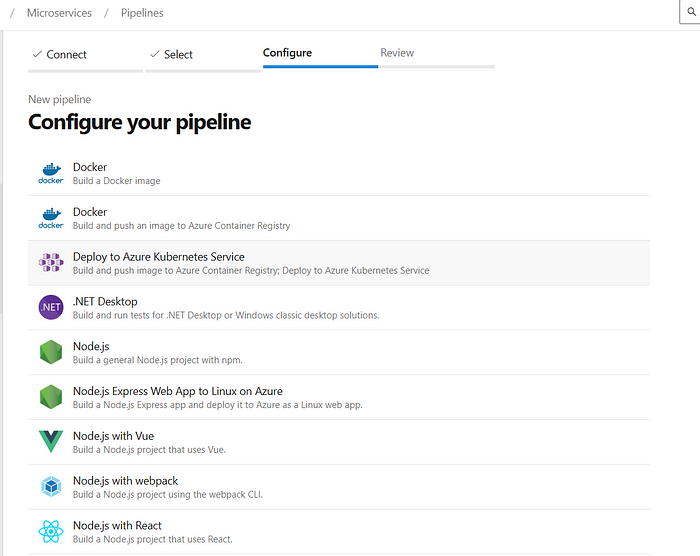
click on 2nd option of docker
4. Select the subscription I only have pay as you go type so i need to chose this

5. Select the container registry we made earlier in the blog

change the Image name accordingly
6. It will provide a pre template of pipeline code now we have to make some changes
# Docker
# Build and push an image to Azure Container Registry
# https://docs.microsoft.com/azure/devops/pipelines/languages/docker

trigger: #This option will only trigger a pipeline when you only make any change in the result folder
 paths:
   include:
     - result/*

resources:
- repo: self

variables:
  # Container registry service connection established during pipeline creation
  dockerRegistryServiceConnection: '65e48cb1-bd24-469e-976a-dfd595c8b830'
  imageRepository: 'resultapp'
  containerRegistry: 'mayurazurecicd.azurecr.io'
  dockerfilePath: '$(Build.SourcesDirectory)/result/Dockerfile'
  tag: '$(Build.BuildId)'

pool:
  name: 'azureagent'

stages:
- stage: Build
  displayName: Build
  jobs:
  - job: Build
    displayName: Build
    steps:
    - task: Docker@2
      displayName: Build the image
      inputs:
        containerRegistry: '$(dockerRegistryServiceConnection)'
        repository: '$(imageRepository)'
        command: 'build'
        Dockerfile: 'result/Dockerfile'
        tags: '$(tag)'

- stage: Push
  displayName: Push
  jobs:
  - job: Push
    displayName: Push
    steps:
    - task: Docker@2
      displayName: Push the image
      inputs:
        containerRegistry: '$(dockerRegistryServiceConnection)'
        repository: '$(imageRepository)'
        command: 'push'
        tags: '$(tag)'
1. Trigger
trigger:
  paths:
    include:
      - result/*
- This tells Azure Pipelines to only trigger this pipeline when you make a change to files in the
resultfolder.
For example, if we updateresult/Dockerfile, the pipeline will run. If you change something outside this folder, it won't trigger.
2. resources
resources:
- repo: self
- This tells the pipeline to use the same repository (
self) where this YAML file is stored.
3. variables
variables:
  # Container registry service connection established during pipeline creation
  dockerRegistryServiceConnection: '65e48cb1-bd24-469e-976a-dfd595c8b830'
  imageRepository: 'resultapp'
  containerRegistry: 'mayurazurecicd.azurecr.io'
  dockerfilePath: '$(Build.SourcesDirectory)/result/Dockerfile'
  tag: '$(Build.BuildId)'
- These are reusable values (variables) used later in the pipeline:
dockerRegistryServiceConnection: Refers to the Azure service connection that allows the pipeline to communicate with the Azure Container Registry (ACR). This is the unique ID of the service connection.imageRepository: The name of the repository in the container registry where the image will be stored. Here, it’s calledresultapp.containerRegistry: The URL of our Azure Container Registry (mayurazurecicd.azurecr.io).dockerfilePath: The path to the Dockerfile.$(Build.SourcesDirectory)is a predefined variable pointing to the root of the source code.tag: A unique identifier for the Docker image, generated automatically for each pipeline run.$(Build.BuildId)is a unique number provided by Azure Pipelines for each build.
4. pool
pool:
  name: 'azureagent'
- Specifies the pool of agents (virtual machines) to run the pipeline. Here, we’re using the
azureagentpool provided by Azure.
5. stages
This section defines the pipeline’s main stages. we have two stages: Build and Push.


This error occurs because the agent pool specified in your pipeline (azureagent) Does not exist there is no agent pool with the name azureagent in our Azure DevOps organization. so we need to setup agent pool for azureagent
Step 4: Setup agent pool
An agent pool in Azure DevOps is like a group of workers (computers or virtual machines) that run your pipeline tasks — like building, testing, and deploying your code.
🔧 How It Works:
When you run a pipeline, Azure DevOps looks for an available agent (a worker) in the agent pool.
Each agent handles one job at a time.
You can group agents into different pools and assign them to specific pipelines or projects.
🧠 Why Use Agent Pools?
Organized Resource Management: Group and control which agents run which pipelines.
Flexibility: You can use Microsoft-hosted or your own self-hosted machines.
🖥️ Types of Agent Pools:
- Microsoft-Hosted Agent Pool:
Provided by Azure DevOps.
Comes with pre-installed tools (Windows, Linux, macOS).
You don’t need to maintain or set up anything just use it.
2. Self-Hosted Agent Pool:
Machines that you set up and maintain (your own servers or VMs).
Gives more control (install custom software, avoid Microsoft-hosted limits).
✅ In our project, we’re using a Self-Hosted Agent Pool.
First we need to create Virtual Machine in which our agent is being hosted
- Go to VM section and click on create

Set the Configuration as it is mentioned


Creating a Virtual Machine for Self hosted agent
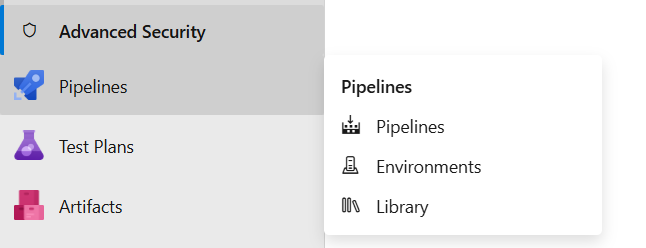
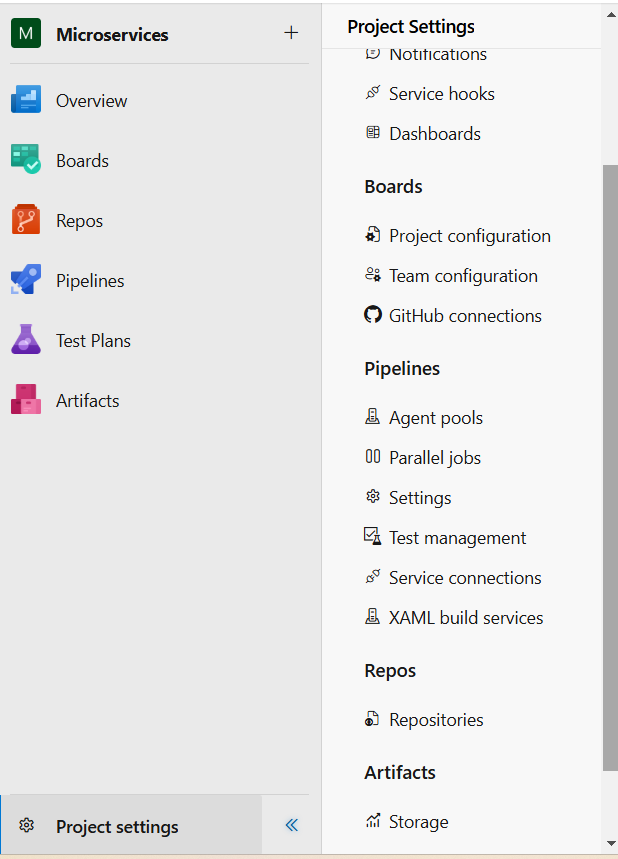
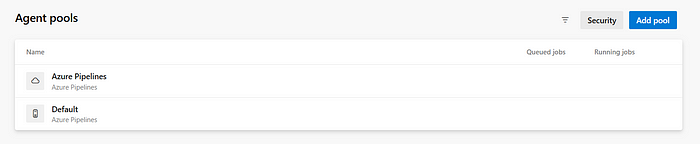
2. Now click on Agent pools option under project setting option
3. Click on Add pool
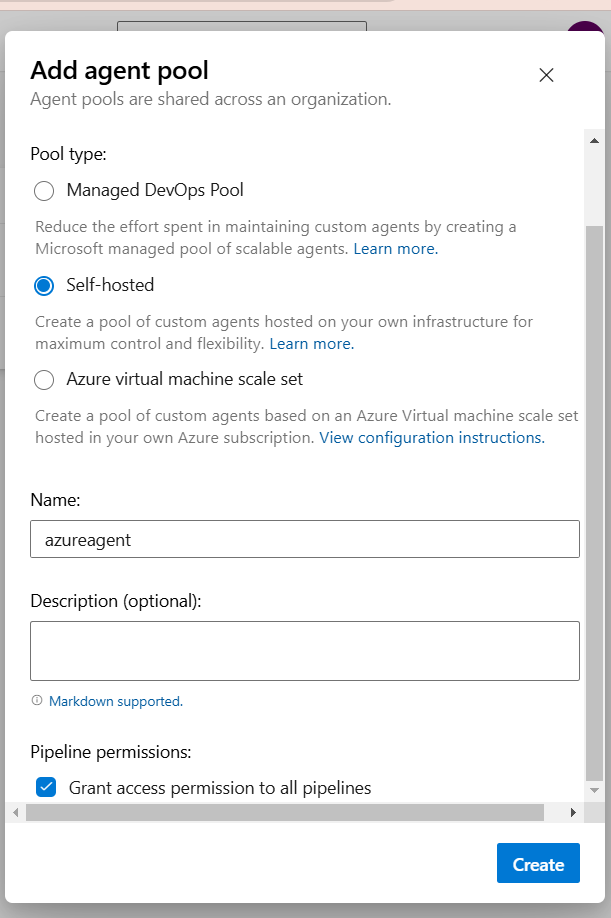
4. Select self hosted from the options and provide a name to your agent pool and right tick on grant access permission on all pipelines

5. You have provided with certain command to run on your VM that setup your agent

6. Set Up the Agent on the VM
Copy the command Azure provides to install the agent.
Get the public IP of your VM.
- SSH into the VM:
for ssh you need to run (please ensure that your .pem file must be present in that particular location)
ssh -i <.pem_file> azureuser@<public_ip>


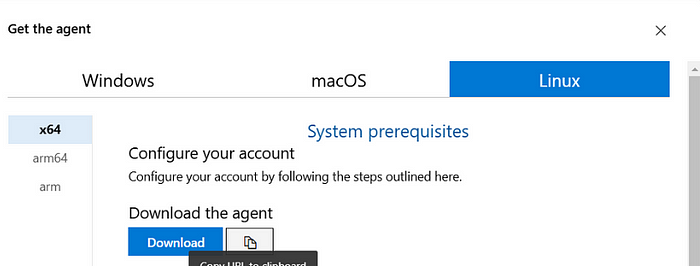
copy the Download the agent link as shown above
- Now Run the following commands
wget <paste_the_copied_link>
apt update

- Extract the downloaded file:
tar zxvf vsts-agent-linux-x64-4.248.0.tar.gz
- now Configure the agent:
/.config.sh
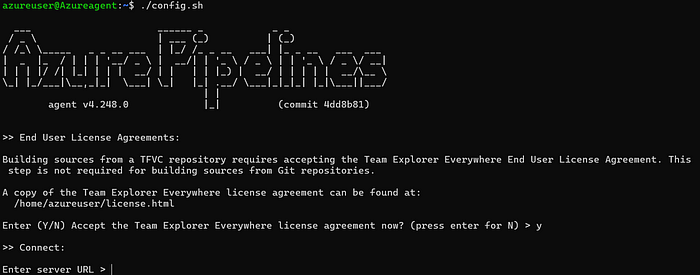
Enter Configuration Details:
you have to provide server URL which you can get from the documentation self-hosted Linux agents on azure.

- Update the organization name in the URL.
Enter your Personal Access Token (PAT):
- Go to User Settings > Personal Access Tokens.
14. On the agents tab click on setting > personal access tokens
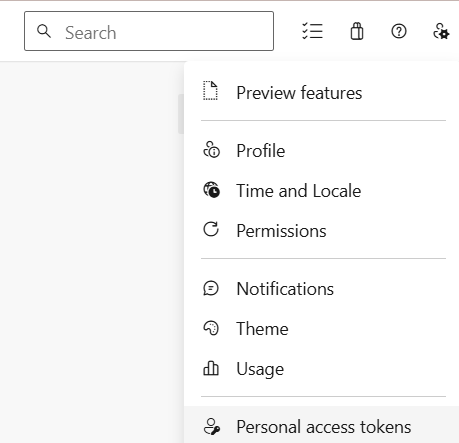
Provide a name to your token select your organization and also provide full authorization access to your token. click on create
Copy Your token and paste it on terminal
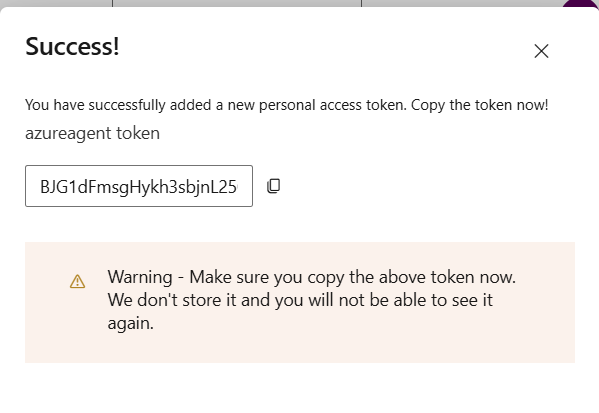
first you need to press enter and then provide your token.
Now enter your agent pool name that we created earlier.
type azureagent in name section.

- As you see your agent is offline to make it available for our use we need to install docker and provide necessary permission to docker

sudo apt install docker.io
sudo usermod -aG docker azureuser
sudo systemctl restart docker
./run.sh

19. Your agent is now online is ready to use

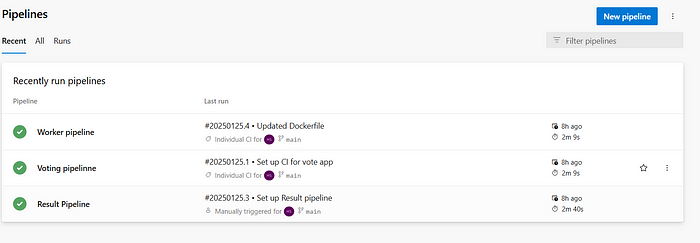
20. If you are Going to pipeline section you will see your pipeline is automatically triggered by the agent

click on Build to see the terminal interface
Now everything is setup you all need to make two more pipelines for voting and worker microservices
Step 5: Setup Pipelines for Voting and worker microservices
Voting Microservice Pipeline
Navigate to the Pipelines section in Azure DevOps and select Azure Repos as your code repository.
Choose the Docker pre-template and select your subscription.
Pipeline code for Voting Service
# Docker
# Build and push an image to Azure Container Registry
# https://docs.microsoft.com/azure/devops/pipelines/languages/docker

trigger:
  paths:
    include:
      - vote/*

resources:
- repo: self

variables:
  dockerRegistryServiceConnection: '2dd1d207-da70-4222-bf84-1957a9116775'
  imageRepository: 'votingapp'
  containerRegistry: 'mayurazurecicd.azurecr.io'
  dockerfilePath: '$(Build.SourcesDirectory)/result/Dockerfile'
  tag: '$(Build.BuildId)'

pool:
  name: 'azureagent'

stages:
- stage: Build
  displayName: Build
  jobs:
  - job: Build
    displayName: Build
    steps:
    - task: Docker@2
      displayName: Build the image
      inputs:
        containerRegistry: '$(dockerRegistryServiceConnection)'
        repository: '$(imageRepository)'
        command: 'build'
        Dockerfile: 'vote/Dockerfile'
        tags: '$(tag)'

- stage: Push
  displayName: Push
  jobs:
  - job: Push
    displayName: Push
    steps:
    - task: Docker@2
      displayName: Push the image
      inputs:
        containerRegistry: '$(dockerRegistryServiceConnection)'
        repository: '$(imageRepository)'
        command: 'push'
        tags: '$(tag)'

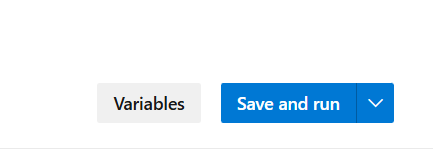
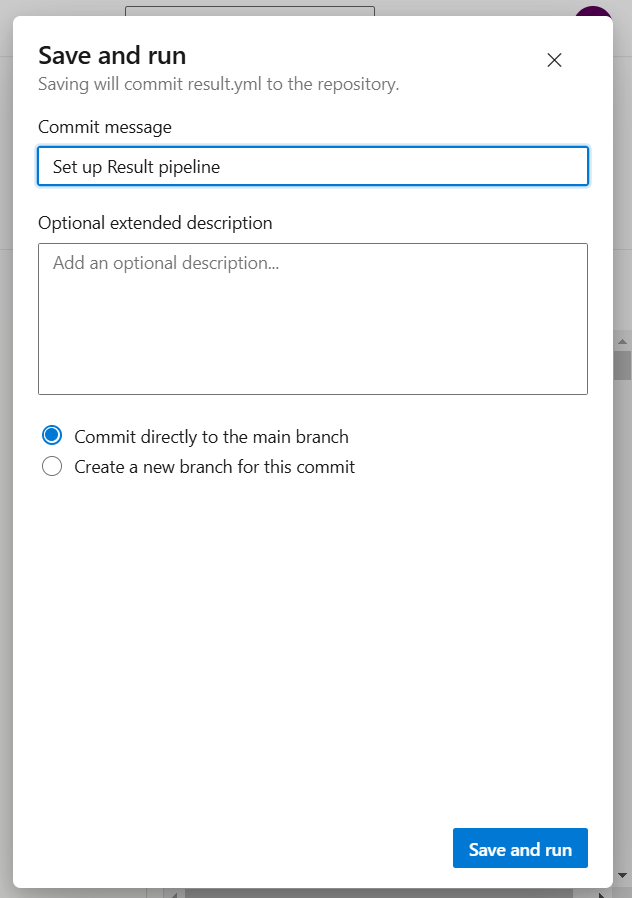
- Save and run the pipeline.
Worker Microservice Pipeline
Similar to the voting pipeline, navigate to the Pipelines section, select Azure Repos, and choose the Docker template.
trigger:
 paths:
   include:
     - worker/*

resources:
- repo: self

variables:
  # Container registry service connection established during pipeline creation
  dockerRegistryServiceConnection: '7a51f2ae-3683-43f0-a949-9b7eed8e9d83'
  imageRepository: 'votingapp'
  containerRegistry: 'mayurazurecicd.azurecr.io'
  dockerfilePath: '$(Build.SourcesDirectory)/result/Dockerfile'
  tag: '$(Build.BuildId)'

pool:
 name: 'azureagent'

stages:
- stage: Build
  displayName: Build
  jobs:
  - job: Build
    displayName: Build
    steps:
    - task: Docker@2
      displayName: Build the image
      inputs:
        containerRegistry: '$(dockerRegistryServiceConnection)'
        repository: '$(imageRepository)'
        command: 'buildAndPush'
        Dockerfile: 'worker/Dockerfile'
        tags: '$(tag)'

- Save and run the pipeline.
Azure Container Registry (ACR)
At this point, you’ve successfully created three pipelines that build and push Docker images to Azure Container Registries. This concludes Phase 1: Continuous Integration (CI).

Now, let’s move on to Phase 2: Continuous Deployment (CD).
Phase 2 : Continuous Deployment
Step 1: Kubernetes Cluster Creation using Azure Kubernetes Service (AKS)
In the Azure Portal, search for Kubernetes Service
click on create Kubernetes cluster from the dropdown
Configure the cluster according to the desired settings and keep everything as shown in the image.
Click on NodePool to update the number of instances for autoscaling.
What is NodePool →A node pool in Azure Kubernetes Service (AKS) is simply a group of virtual machines (VMs) that act as the workers for your Kubernetes cluster. These VMs are where your applications run. Each node pool contains multiple VMs called nodes and each of these nodes has the tools Kubernetes needs to manage and run your applications
- Once created, the cluster is ready to orchestrate your application.

6. your Cluster is now Ready to orchestrate
Step 2: Set Up Azure CLI
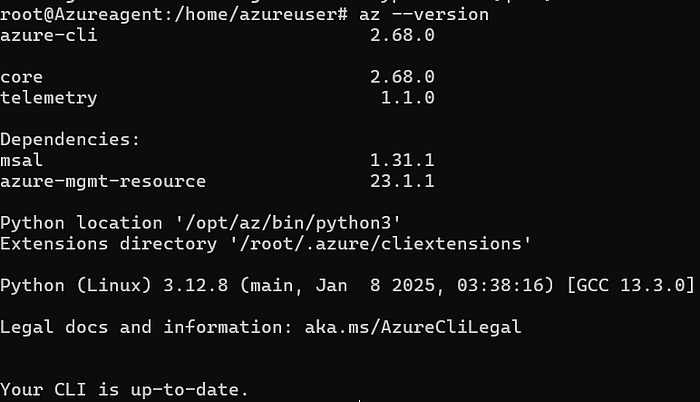
- Open your terminal and run the following commands to install Azure CLI:
curl -sL https://aka.ms/InstallAzureCLIDeb | sudo bash
az --version
2. Now for login run —
az login
3. It will Redirect you to web browser

Copy the code shown in this image
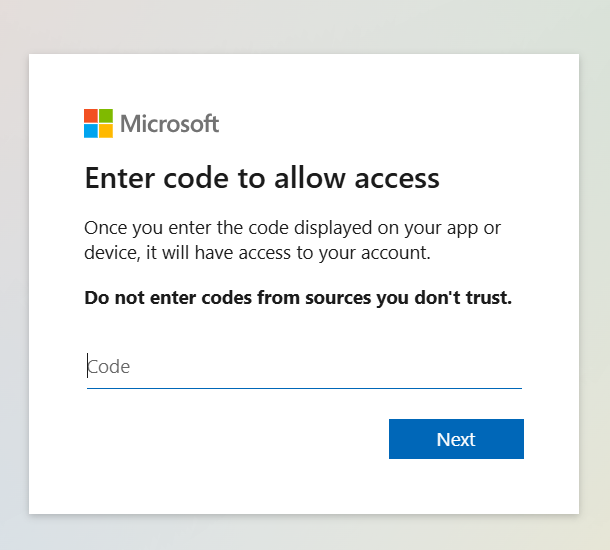
paste your copied code here
Follow the prompts to authenticate via the browser.
- Once logged in, verify with:
az account show


Step 3: Install and configure Argo-CD
- On your terminal run the following command to Get credentials for the AKS cluster:
az aks get-credentials --name AzureDevops --overwrite-existing --resource-group Demo-RG
This command fetches the access credentials for your Azure Kubernetes Service (AKS) cluster, so you can connect to it and manage it using kubectl
--name AzureDevops: This specifies the name of your AKS cluster. In this case, the cluster is namedAzureDevops.--resource-group Demo-RG: This tells Azure which resource group your cluster is in--overwrite-existing: If your current configuration already has credentials for a cluster with the same name, this option replaces them with the new credentials you’re fetching. This avoids confusion or conflicts if you were previously connected to another cluster

2. Install of Kubectl
Run the following command to install kubectl on your VM
sudo apt update
sudo apt install curl -y
curl -LO https://dl.k8s.io/release/$(curl -L -s https://dl.k8s.io/release/stable.txt)/bin/linux/amd64/kubectl
sudo install -o root -g root -m 0755 kubectl /usr/local/bin/kubectl
kubectl version --client
3. Create a namespace for argocd
kubectl create namespace argocd
kubectl apply -n argocd -f https://raw.githubusercontent.com/argoproj/argo-cd/stable/manifests/install.yaml
4. Above command will downloads the install.yaml file from the Argo CD GitHub repository.
The file contains a predefined set of instructions to install Argo CD into your Kubernetes cluster.
Kubernetes will create all the necessary resources (like Deployments, Services, Pods, etc.) required to run Argo CD in the
argocdnamespace
Kubectl get pods -n argocd

5. To access the UI of ArgoCD we need credentials that is stored as secret.
kubectl get secrets -n argocd
kubectl edit secrets argocd-initial-admin-secret -n argocd
6. Open the yaml file for admin secret
kubectl edit secrets argocd-initial-admin-secret -n argocd
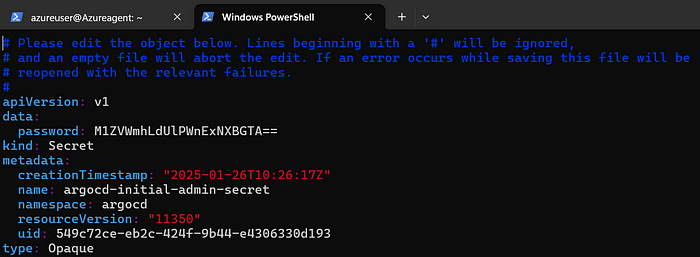
7. Copy the password
8. Initially it is base64 encoded and we need to decode the password
#run the following command to encode the secret
echo <encoded_password> |base64 --decode
Base64 encoding is a way to convert data (like text, images, or files) into a format that can be safely transmitted or stored as plain text
Why it’s called “Base64”: There are 64 characters in the Base64 encoding scheme (A-Z, a-z, 0–9, +, /). These are used to represent the data
If you want to encode the word “Cat”:
Convert the text into its binary format:
Catbecomes01000011 01100001 01110100.Split it into chunks and encode each part using Base64 rules. The result:
Q2F0.
So, the Base64 encoding of “Cat” is Q2F0

9. Copy the decoded password and paste it in notepad
kubectl get svc -n argocd
10. Checkout service for the argocd-server


expose argocd-server from ClusterIp to nodeport
11. As we see the argocd server expose as ClusterIP we need to change this to NodePort
If you want to open Argo CD’s UI in your web browser or interact with its API from outside the cluster, ClusterIP won’t work. Switching to NodePort exposes it so you can reach it via <Node IP>:<NodePort>
For example:
ClusterIP: Accessible only inside Kubernetes (e.g.,
http://argocd-server:8080).NodePort: Accessible outside (e.g.,
http://<NodeIP>:32000).
Think of ClusterIP as a private door that can only be opened from inside your house (the cluster). Changing it to NodePort adds a public door that anyone outside your house (the cluster) can use, so you can easily access Argo CD from your browser or tools
11. Run the Following command to edit the argocd-server manifest
kubectl edit svc argocd-server -n argocd
12. Look for type and change It to NodePort
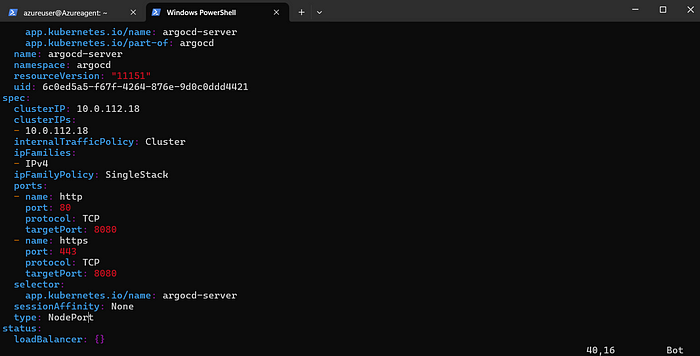
esc+:wq → to save and exit from file
kubectl get svc -n argocd

you need to open the port no. 31546
13. Go to your azure portal type vmss
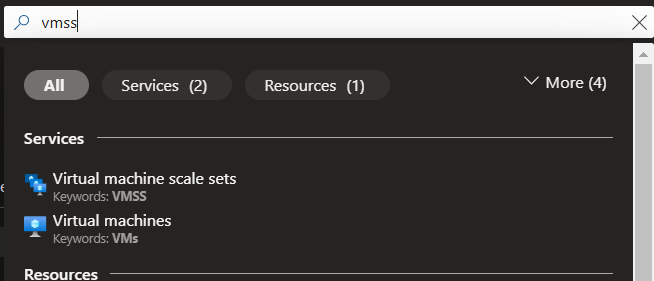
14. click on agent pool>networking
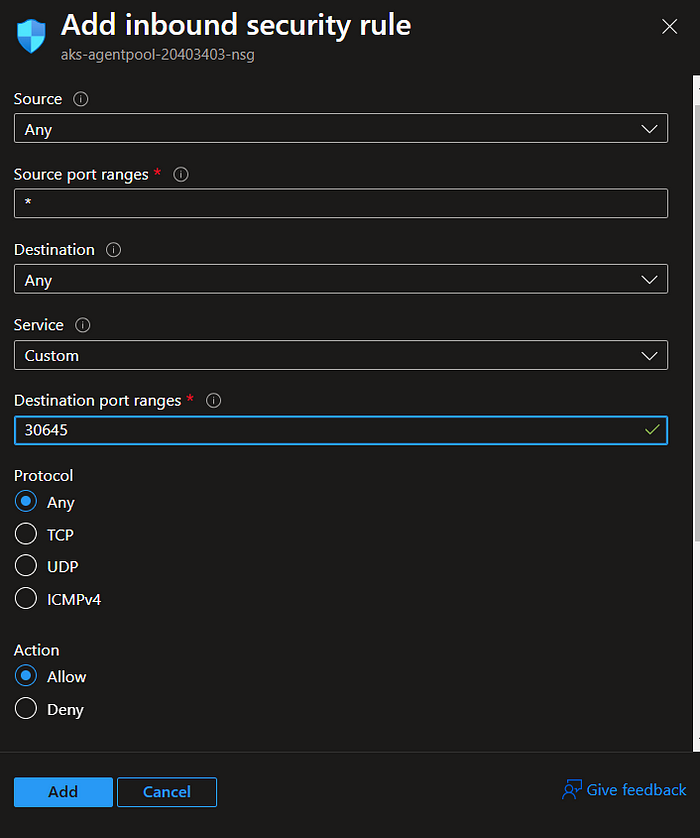
example:
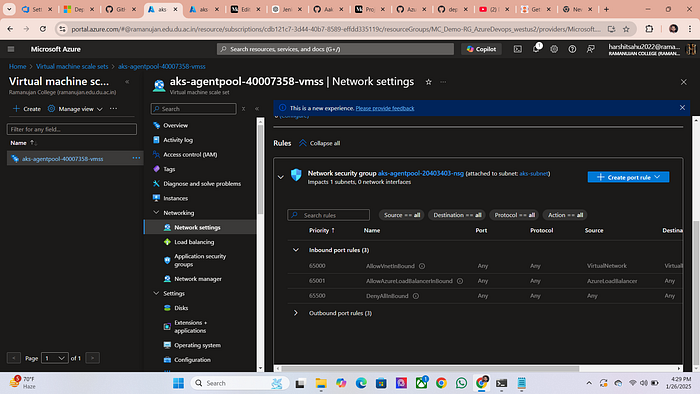
15. Create a New port rule and open the port no. 31546 that is our argocd port
16. Go back to your terminal
# this command will provide the external ip of node
kubectl get nodes -o wide

17. copy the external ip and go to your browser type http://<public_ip>:<port_no.>
18. Now go back to browser and proceed to advanced

19. username = admin password is what you decoded earlier in the blog
Step 4: Deploy Application via Argo-CD
1. Connect Azure Repos to Argo-CD:
First you need to conned the Azure repo which contain the source code
click on setting>repositories

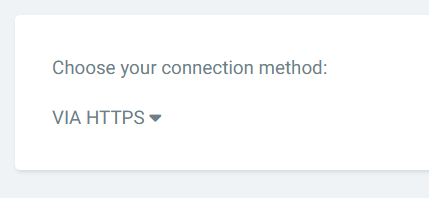
3. Change the connection method to HTTPS
4. For repository url go to azure repos and then click on clone
copy the repo url
5. Paste in the URL section
6. As it is a private repo so we need to token that we had generated earlier for connection paste your token here
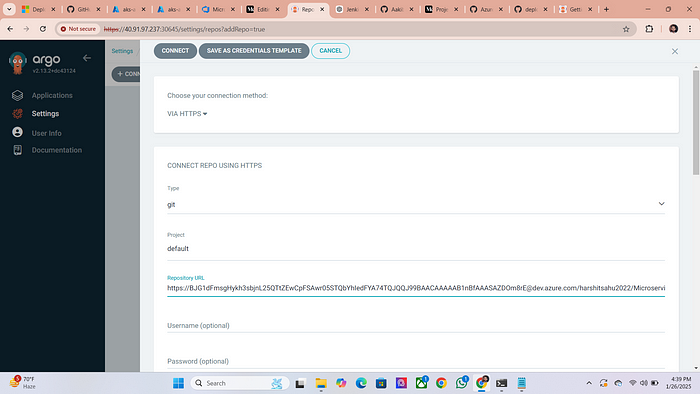
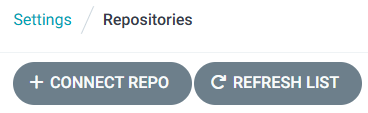
click on connect repo

Your connection is now successful
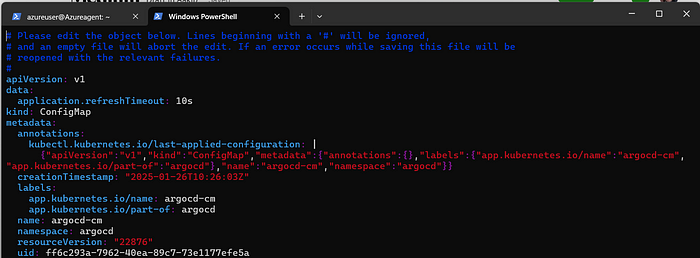
- We need to change the Application refresh timout to 10 sec by default it is 3 min. So we need to edit the config file of argocd and add the section of application refresh timeout
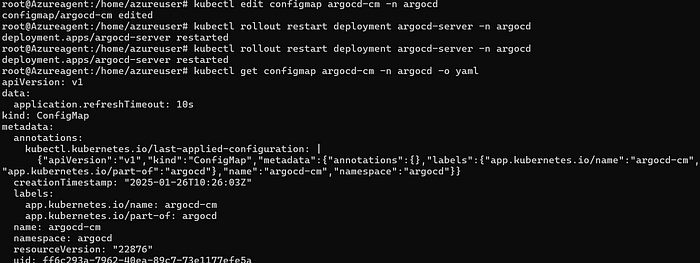
kubectl edit configmap argocd-cm -n argocd
#Restart the argocd server
kubectl rollout restart deployment argocd-server -n argocd
2. Create a new Application
- Click on New app section on argocd

2. Keep all the details as it shown in the below images
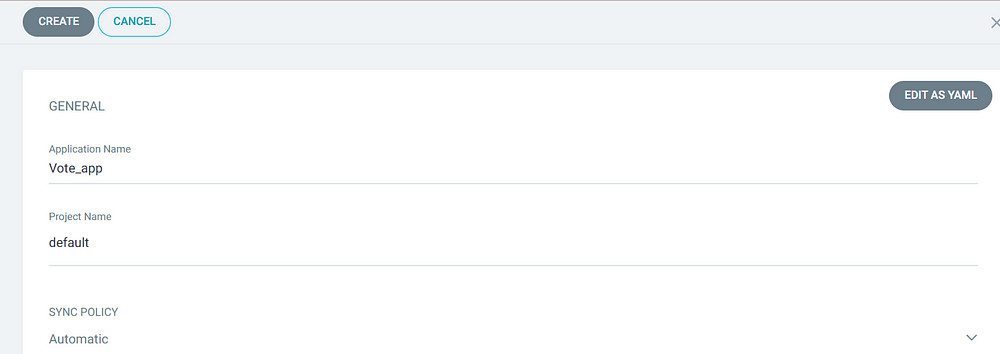
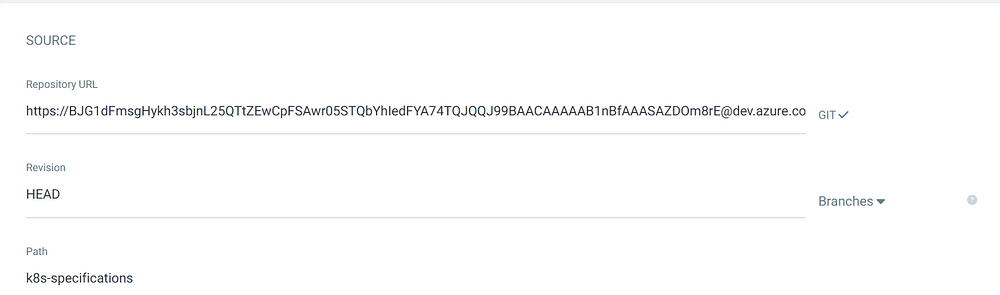
Repository URL along with the token
3. In the path section provide the manifest location. All the manifest is stored in k8s-specification folder
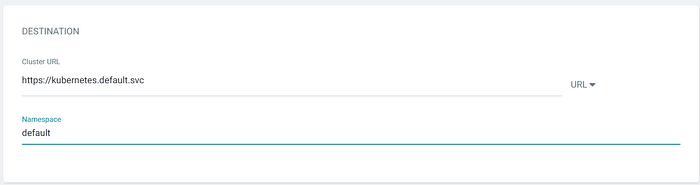

4. Your Application is now deployed on Azure Kubernetes Cluster via Argo-cd

5. Go to your terminal check for the pods and services and open the no. in which your services is running
kubectl get pods
kubectl get svc

6. go to your azure portal and search for vmss>nodepool and open the 31000,31001 port that is for vote app

7. collect the node external ip and again for to your web browser type http://<node_ip>:<port_no.>
kubectl get nodes -o wide

copy any of the node ip

Voting Microservice

Result Microservice
Here we done Continuous Deployment Part of our Application using GitOps Approach
Phase 3: Automating CI/CD part
Step 1: Creating a shell script
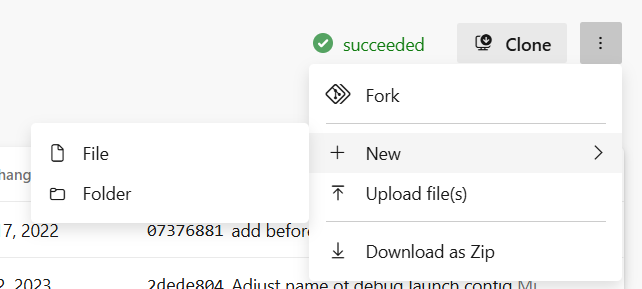
Go to Azure repos click on three dots and make a new repository
folder name==
scripts, file name ==updateK8sManifests.sh
folder name==scripts , file name ==updateK8sManifests.sh
3. Paste the Following code in the .sh file
#!/bin/bash
set -x
# Set the repository URL
REPO_URL="https://<ACCESS-TOKEN>@dev.azure.com/<AZURE-DEVOPS-ORG-NAME>/voting-app/_git/voting-app"
# Clone the git repository into the /tmp directory
git clone "$REPO_URL" /tmp/temp_repo
# Navigate into the cloned repository directory
cd /tmp/temp_repo
# Make changes to the Kubernetes manifest file(s)
# For example, let's say you want to change the image tag in a deployment.yaml file
sed -i "s|image:.*|image: <ACR-REGISTRY-NAME>/$2:$3|g" k8s-specifications/$1-deployment.yaml
# Add the modified files
git add .
# Commit the changes
git commit -m "Update Kubernetes manifest"
# Push the changes back to the repository
git push
# Cleanup: remove the temporary directory
rm -rf /tmp/temp_repo
Don’t forget to change the token name , ACR name and your organization name
What Does This Script Do?
Clones a Git repository from Azure DevOps into a temporary directory.
Modifies a Kubernetes deployment YAML file to update the image tag.
Commits and pushes the changes back to the repository.
Cleans up by deleting the temporary directory

Step 2 : Added a new stage in pipeline
- Go to Voting pipeline and edit a new stage Update
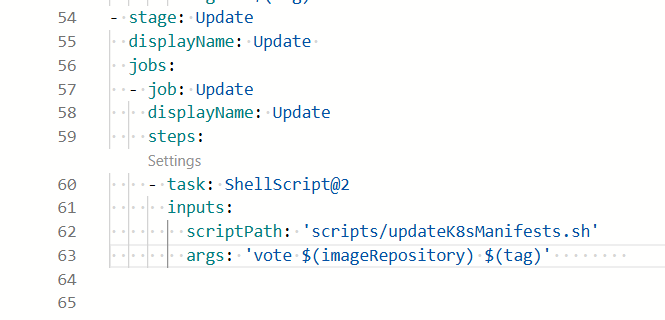
What does this stage do → This stage will run the script that we created earliar
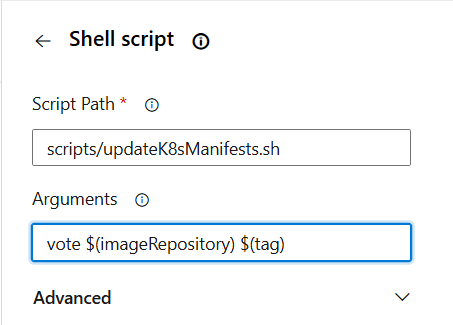
# $1=vote $2=repository_name=votetapp $3=latest tag of the image these arguments
# will used in the script we created or at the line given below
sed -i "s|image:.*|image: <ACR-REGISTRY-NAME>/$2:$3|g" k8s-specifications/$1-deployment.yaml
#THE above line will change the image tag to the lastest one
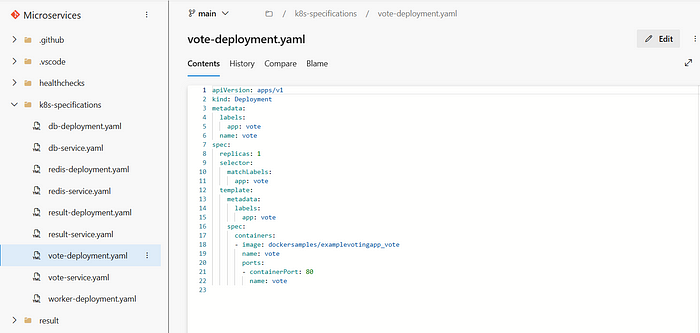
2. when the Update stage is completed the changes will reflect in the vote-deployment.yaml file

3. Let’s make a change in app.py that will trigger a new pipeline

Change the option to winter and summer

Here new pipeline is triggered
4. Push Stage will push the image into ACR with the latest tag
5. Then update stage will run the script that update the image name in the deployment.yaml with the latest tag
6. Argo-cd will look for a change in k8s-specifications folder and found a new image as the tag was changed to latest one
7. As this change in the k8s-specifications folder will evoke the argo-cd to change application according to new image
8. But how argo-cd will fetch these changes from private container registries for this we need to create secrets
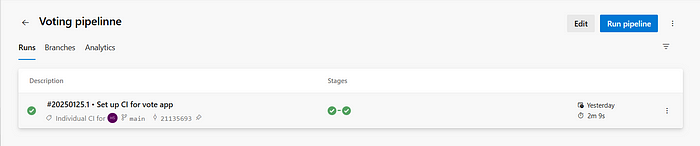
Run the pipeline
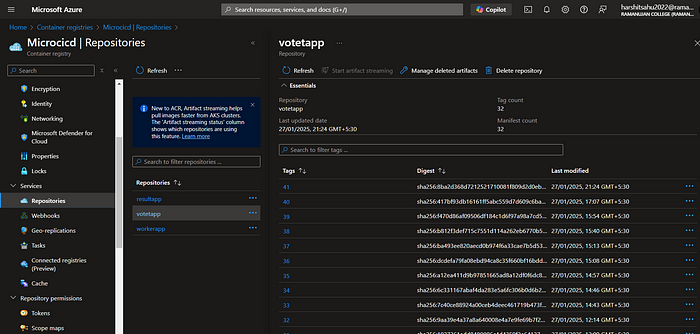
This is our old tag let’s see if this is changing or not after we run update stage
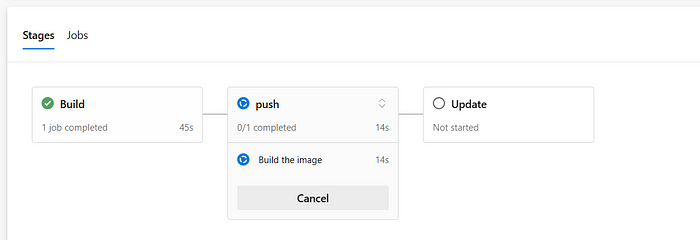

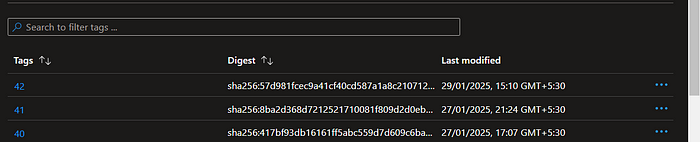
image is updated with the new tag

It is synced but not able to pull image from ACR
9. For this to resolve we need to create secrets that allow argocd to pull images from private repos

This is the error we are getting
10. Go to ACR > Access keys and click on generate and copy the username and password and go back to your terminal

11. Copy the below command and make the accordingly
service-principal-id == username of your ACR
Service-principal-password == Password you copied
kubectl create secret docker-registry <secret-name> \
  --namespace argocd \
  --docker-server=<your-acr-name>.azurecr.io \
  --docker-username=<your-acr-username> \
  --docker-password=<your-acr-password> \
  --docker-email=<your-email>

12. Go to your Vote-deployment.yaml and add the follwing line
imagePullSecrets:
- name: acr-secret

13. Now Again go to your vote/app.py to make changes that will triggerd the pipeline again


Pipeline is triggered again

tag is changed to latest
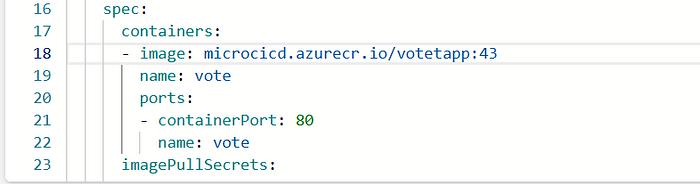
image tag is updated to latest by update stage
argo-cd evoke as it founds the change in vote-deployment.yaml
Go to your Web browser and and check for the change

Subscribe to my newsletter
Read articles from Mayur Panchale directly inside your inbox. Subscribe to the newsletter, and don't miss out.
Written by
Mayur Panchale
Mayur Panchale
"DevOps Engineer Passionate About Cloud, Automation, and Continuous Delivery | AWS | Jenkins | Docker | Kubernetes | CI/CD | Let's Build Reliable, Scalable Systems Together!"