Integrate BoldSign API in MAUI Mobile App for smooth eSign
 BoldSign
It’s not a secret that we’ve entered a digital era where almost every aspect of our lives has been modernized by technology. The innovation of e-signatures has revolutionized how paperwork is handled. They eliminate physical work and enable remote collaboration. E-signatures save time and resources, enhance security, and ensure compliance with regulations.
E-signatures are versatile. They work effortlessly across platforms, allowing users to sign documents anytime, anywhere. This flexibility is especially powerful when paired with the tool most of us rely on daily—our smartphones. Over 61.5% of global internet traffic comes from mobile devices.
With this in mind and considering the growing user expectation for on-the-go document signing, e-signature capabilities are no longer a luxury for developers. They’re a necessity.
The BoldSign API can be integrated into a MAUI application, enabling effortless e-signature workflows.
Let’s get started!
Why consider BoldSign?

BoldSign stands out as a powerful e-signature solution. Here’s why it should be your go-to tool:
Affordability: Our free plan offers 25 signature requests per month for one user, and we offer unlimited signatures for five users at $20 a month.
Developer-friendly API: Our API allows uploading documents, dynamically assigning signature fields, and sending the document out for signatures. Our single API call has a low response time of 200 milliseconds
Dedicate data centers: We have two primary data centers—a United States and a European data center.
If you want to learn more, check out the BoldSign website.
Introduction to .NET MAUI
.NET MAUI, is a framework for crafting native cross-platform apps with a single C# and XAML codebase. The platforms that the framework covers are:
Android
iOS
MacOS
Windows
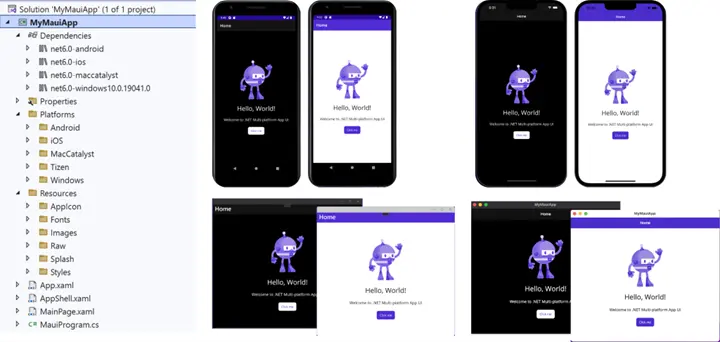
_source:_ [_https://devblogs.microsoft.com/dotnet/dotnet-maui-visualstudio-2022-release/_](https://devblogs.microsoft.com/dotnet/dotnet-maui-visualstudio-2022-release/)
Why should you consider it in the first place?
Unified development: Using .NET MAUI eliminates the need for platform-specific code and allows the possibility to customize when necessary. This enables complete code sharing across platforms—from business logic to UI components and everything in between.
Native experience and performance: Unlike hybrid frameworks like Cordova, MAUI ensures high performance by compiling to native platform controls. Platform-specific APIs like GeoLocation and Bluetooth are also leveraged from the Microsoft.Maui.Essentials library.
If you’ve used Xamarin.Forms or Windows forms, MAUI will feel familiar. Let’s take a look at integrating .NET MAUI and BoldSign.
Prerequisites
To follow along, you’ll need:
Visual Studio 2022 or Rider, which is free for noncommercial use
Installed MAUI features for Visual Studio or Rider
We’ll be using Visual Studio in this example, but there’s not much difference if you use Rider, so choose based on your preference.
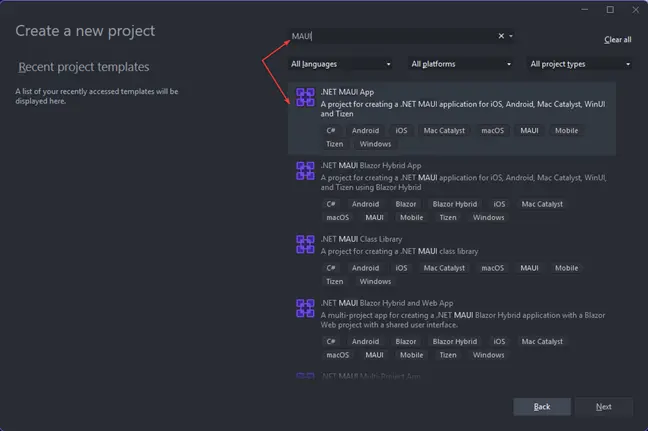
Setting up a MAUI application
Open Visual Studio and enter MAUI in the template search bar. Select the first option, .NET MAUI App.
Enter a meaningful name, select the folder location, and select **Next**.
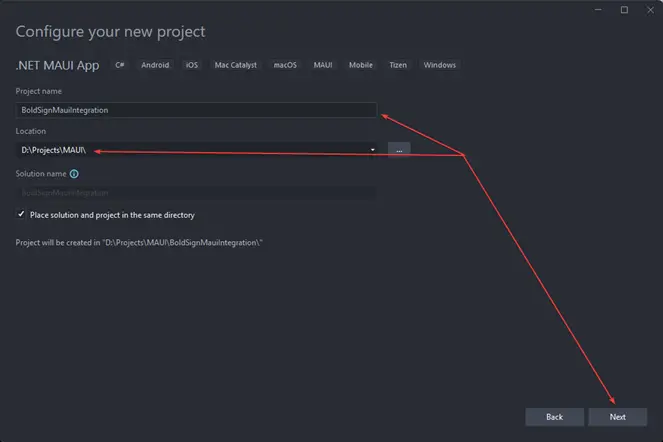
Select .NET 9.
Almost every MAUI application utilizes the Model-View-ViewModel (MVVM) pattern. You can think of it as the Model-View-Controller for mobile. It consists of three components:
Model: Contains business logic
ViewModel: The “connector” between view and model
View: User interface
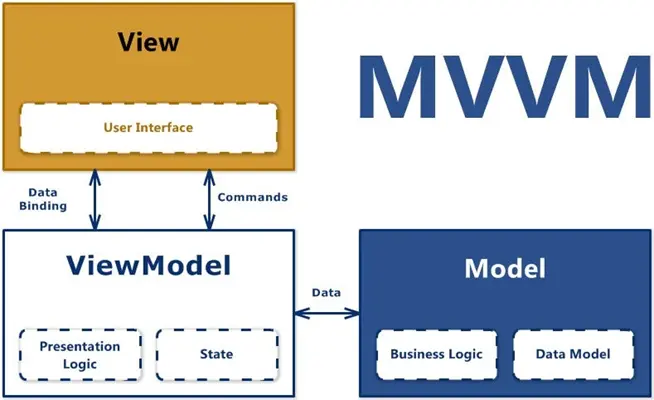
I’ll use the .NET Community Toolkit, and if you’re curious, learn more about MVVM here.
Add the CommunityToolkit.Mvvm package to your solution.

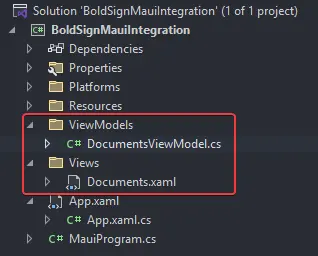
The next step is to remove the AppShell, MainPage.xaml, and MainPage.xaml.cs files since we don’t need them right now. Then, add two folders:
1. ViewModels with the DocumentsViewModel.cs file
2. Views with the Documents.xaml file
Now, let’s register the ViewModel and the view into the dependency injection container and make Documents.xaml the main page.
Registration is done in MauiProgram.cs.
    public static MauiApp CreateMauiApp()

    {

    var builder = MauiApp.CreateBuilder();


    builder

    .UseMauiApp()

    .ConfigureFonts(fonts =>

    {

    fonts.AddFont("OpenSans-Regular.ttf", "OpenSansRegular");

    fonts.AddFont("OpenSans-Semibold.ttf", "OpenSansSemibold");

    });


    #if DEBUG

    builder.Logging.AddDebug();


    // Documents

    builder.Services.AddTransient();

    builder.Services.AddTransient();

    #endif

    return builder.Build();

    }

    }
Making Documents.xaml the main page is done in App.xaml.cs.
    public partial class App : Application

    {

    public App() => InitializeComponent();


    protected override Window CreateWindow(IActivationState? activationState) => new(new Documents(new ViewModels.DocumentsViewModel()));

    }
Now, let’s set up BoldSign.
Install the BoldSign.API NuGet package.

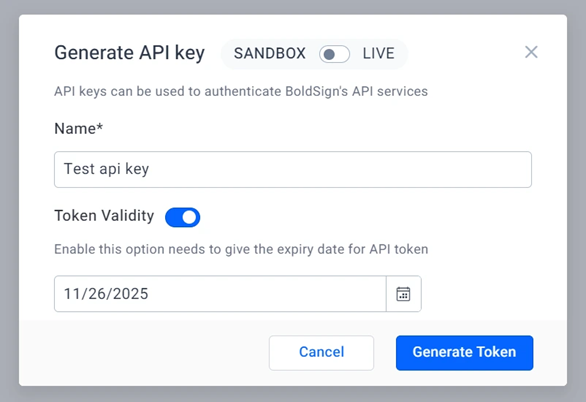
In order to consume the BoldSign API, you’ll need the API key that’s generated in the portal. Once there, go to API > API Key > Generate API Key.

In the pop-up, you’ll need to enter a token name and expiration date. Give it whatever name you want, set validity for a year, generate a token, and copy it.
Return to the project, create a static class called Constants, and paste the API key inside a constant variable.
    public class Constants
    {
          ///
         /// Copy and paste your BoldSign API key from your BoldSign dashboard
        ///
         public const string BOLDSIGN_API_KEY =
    }
You’re done with setup. Let’s implement some workflows!
Workflow implementation: Create and send a document for signing
Let’s implement a workflow to send documents for signing. The BoldSign API provides REST endpoints with rich documentation to help you get started. First let’s generate a PDF file to sign with the help of aPDF, a free PDF API. You can find an HTML template for the file here.
Upon registration, update Constants.cs file with the values listed here:
        ///
        /// Copy and paste your BoldSign API URL
        ///
        public const string BOLDSIGN_BASE_URL = "https://api.boldsign.com";

        ///
        /// Set the authorization scheme for aPDF
        ///
        public const string aPDF_AUTHORIZATION_SCHEME = "Bearer";

        ///
        /// Copy and paste your aPDF API token
        ///
        public const string aPDF_TOKEN =

        ///
        /// Copy and paste your aPDF API endpoint for creating a PDF
        ///
        public const string aPDF_CREATE_PDF_ENDPOINT = "https://apdf.io/api/pdf/file/create";

        ///
        /// Copy and paste your aPDF template HTML
        ///
        public const string aPDF_TEMPLATE_HTML =  HTML template for the file here
Then, let’s create an HttpClient service that will call aPDF endpoints and generate a file.
    private static async Task GetGeneratedPDFDownloadLinkAsync()
    {
        HttpClient httpClient = new();

        httpClient.DefaultRequestHeaders.Authorization = new AuthenticationHeaderValue(Constants.aPDF_AUTHORIZATION_SCHEME, Constants.aPDF_TOKEN);

        FormUrlEncodedContent requestData = new(
        [
            new KeyValuePair("html", Constants.aPDF_TEMPLATE_HTML)
        ]);

        HttpResponseMessage response = await httpClient.PostAsync(Constants.aPDF_CREATE_PDF_ENDPOINT, requestData);

        PDFResponse? deserializedResponse = JsonSerializer.Deserialize(await response.Content.ReadAsStreamAsync());

        (bool isValid, string correctedUrl)? isUrlValid = deserializedResponse?.File.ValidateAndCorrectUrl();

        if (isUrlValid.Value.isValid)
        {
            var path = await DownloadAndSaveFile(isUrlValid.Value.correctedUrl, "Freelance-contract.pdf");

            return path;
        }

        return string.Empty;
    }
This code will attach a Bearer token from the aPDF site and hit the POST endpoint with a body containing the file’s HTML template.
Also add record to deserialize API response to strongly typed result in same folder where ApiClient is:
    public record PDFResponse(
        [property: JsonPropertyName("file")] string File,
        [property: JsonPropertyName("expiration")] DateTime Expiration,
        [property: JsonPropertyName("pages")] int Pages,
        [property: JsonPropertyName("size")] int Size
    );
When a file is created, we’ll get a PDFResponse that will have a few response properties, but we’ll focus on the file property that holds the download link. For security, I’ve created an extension method that will check if the download URL is valid:
    public static (bool isValid, string correctedUrl) ValidateAndCorrectUrl(this string url)
    {
        if (Uri.IsWellFormedUriString(url, UriKind.Absolute))
        {
            return (true, url);
        }

        string corrected = url.Replace(@"\/", "/");

        if (Uri.IsWellFormedUriString(corrected, UriKind.Absolute))
        {
            return (true, corrected);
        }

        var s3Pattern = new Regex(@"^https:\\/\\/[\w\-]+\.s3\.[\w\-]+\.amazonaws\.com\\/[\w\-\.]+$");

        if (s3Pattern.IsMatch(url))
        {
            string s3Corrected = url.Replace(@"\", "");
            if (Uri.IsWellFormedUriString(s3Corrected, UriKind.Absolute))
            {
                return (true, s3Corrected);
            }
        }

        return (false, url);
    }
After the validation, let’s download and save a file inside the application to be able to send it to be signed.
    private static async Task DownloadAndSaveFile(string fileUrl, string fileName)
    {
        string downloadsPath = FileSystem.AppDataDirectory;

        string filePath = Path.Combine(downloadsPath, fileName);

        HttpClient httpClient = new();

        byte[] fileBytes = await httpClient.GetByteArrayAsync(fileUrl);

        await File.WriteAllBytesAsync(filePath, fileBytes);

        return filePath;
    }
First, this code gets the AppDirectory path from the chosen platform, which you’ll combine with the file path. Then, we’ll download a file from the provided URL and store it at the constructed location.
Let’s create a method that will consume the endpoint for document signature next. This code will use an already created document and add a signature field in the given coordinates. It will also prepare an email template with a message and title alongside signer metadata.
     public static async Task SignDocumentAsync(string name, string email)
    {
        ApiClient apiClient = new(Constants.BOLDSIGN_BASE_URL, Constants.BOLDSIGN_API_KEY);

        DocumentClient documentClient = new(apiClient);

        string filePath = await GetGeneratedPDFDownloadLinkAsync();

        DocumentFilePath documentFilePath = new()
        {
            ContentType = "application/pdf",
            FilePath = filePath
        };

        FormField signatureField = new(
        id: "signature",
        isRequired: true,
        type: FieldType.Signature,
        pageNumber: 1,
        bounds: new Rectangle(570, 855, 150, 50));

        List formFields = [signatureField];

        DocumentSigner signer = new()
        {
            Name = name,
            EmailAddress = email,
            FormFields = formFields
        };

        SendForSign sendForSign = new()
        {
            Message = "Please sign this document",
            Title = "Freelance Contract",
            Signers = [signer],
            Files = [documentFilePath]
        };

        DocumentCreated response = await documentClient.SendDocumentAsync(sendForSign);

        return response.DocumentId;
    }
Next, we’ll adjust the View model. Copy this code into DocumentsViewModel*.*
    public partial class DocumentsViewModel : ObservableObject
    {
        public DocumentsViewModel() => SignDocumentCommand = new AsyncRelayCommand(SignDocumentAsync);

        [ObservableProperty]
        private string _documentSinged;

        [ObservableProperty]
        private string _name;

        [ObservableProperty]
        private string _email;

        [ObservableProperty]
        private string _statusMessage;

        [ObservableProperty]
        private bool _isStatusVisible;

        public IAsyncRelayCommand SignDocumentCommand { get; }

        private async Task SignDocumentAsync()
        {
            IsStatusVisible = false;

            string result = string.Empty;

            if (string.IsNullOrWhiteSpace(Name) || string.IsNullOrWhiteSpace(Email))
            {
                StatusMessage = "Please fill in all fields";

                IsStatusVisible = true;

                return string.Empty;
            }

            try
            {
                result = await BoldSignApiClient.SignDocumentAsync(Name, Email);

                StatusMessage = "Document signed successfully!";

                IsStatusVisible = true;
            }
            catch (Exception ex)
            {
                StatusMessage = $"Error: {ex.Message}";

                IsStatusVisible = true;
            }

            return result;
        }
    }
This ViewModel will call methods we implemented before and update labels on the view. Let’s adjust the view, too. It will have one button and one label.
    <VerticalStackLayout
         Spacing="20"
         Padding="25"
         VerticalOptions="Center">

         <Entry x:Name="NameEntry"
                Placeholder="Name"
                Text="{Binding Name}" />

         <Entry x:Name="EmailEntry"
                Placeholder="Email"
                Keyboard="Email"
                Text="{Binding Email}" />

         <Button Text="Submit"
                 Command="{Binding SignDocumentCommand}"
                 HorizontalOptions="Fill" />

         <Label Text="{Binding StatusMessage}"
                IsVisible="{Binding IsStatusVisible}"
                HorizontalOptions="Center" />
    </VerticalStackLayout>
Now run the application, provide necessary data and click on the Submit button.
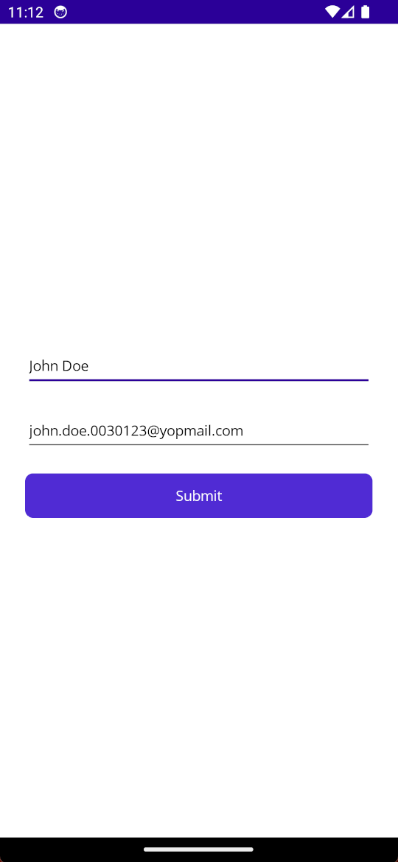
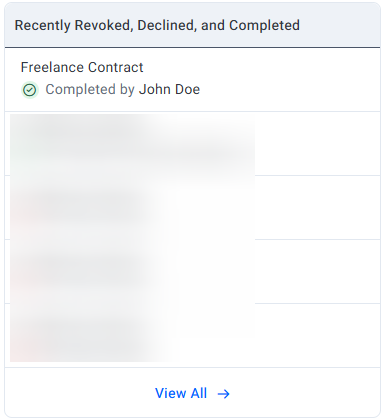
Select Sign Document, and you should receive an email request to sign the document.
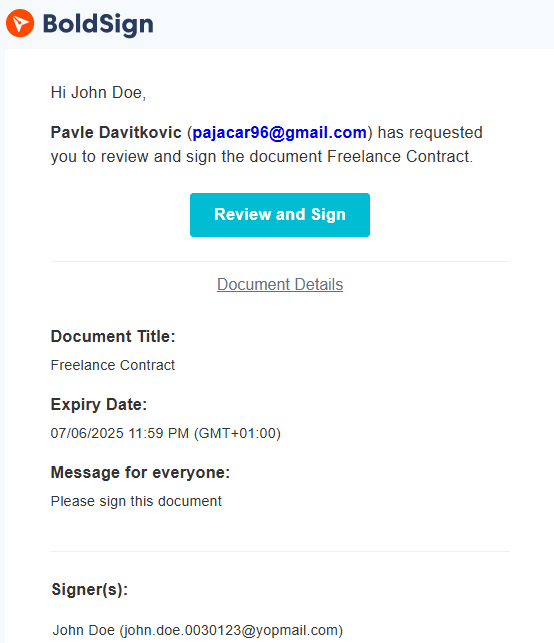
Upon selecting Review and Sign, you will be taken to the BoldSign portal to complete the signature.
Add your signature in the yellow rectangle and select Finish.
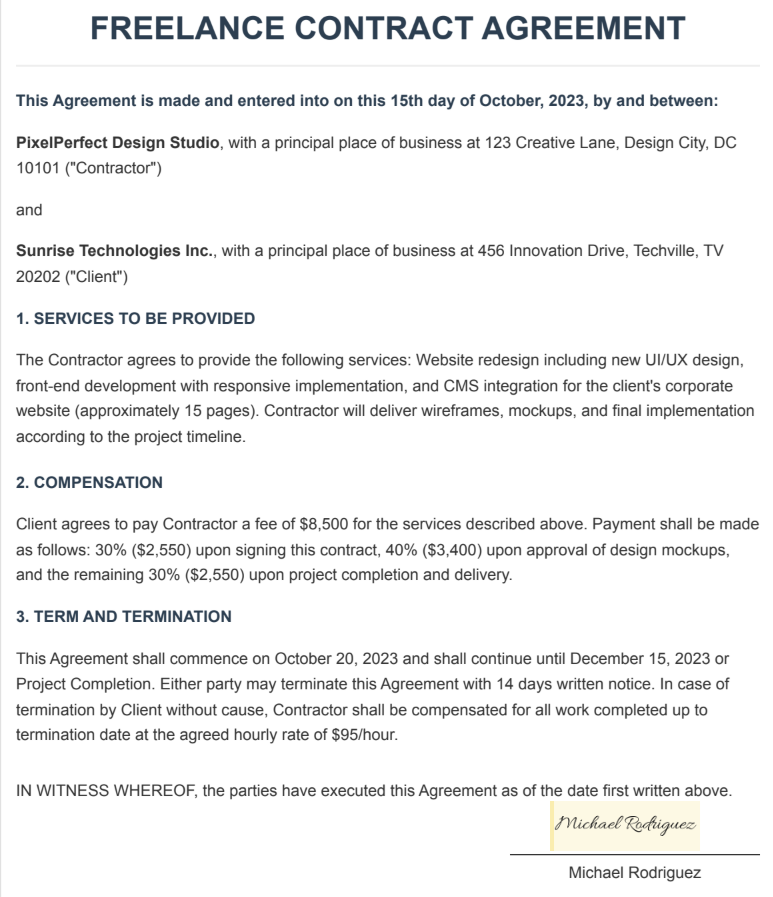
Congratulations! You’ve successfully signed a document from your MAUI app!
To explore the complete implementation covered in this article, download the sample code from our GitHub repository.
Conclusion
At the beginning, I mentioned how much traffic is going through mobile phones, and then you learned how to leverage this fact to make document signature pieces of cake. By using a framework like .NET MAUI that supports multiple platforms and seamless integration with BoldSign, the possibilities are endless.
If you’re not a BoldSign user yet, consider signing up for a free trial to experience these features firsthand.
Related blogs
Note: This blog was originally published at boldsign.com
Subscribe to my newsletter
Read articles from BoldSign directly inside your inbox. Subscribe to the newsletter, and don't miss out.
Written by
BoldSign
BoldSign
BoldSign is a secure, legally compliant e-signature solution for businesses and individuals. It simplifies document signing with a user-friendly platform and powerful API & SDK for easy integration. Send, sign, and manage contracts effortlessly.