Make a console application in .NET Core 8.0 to get list of Queues of IBM MQ using username & password
 Ronak Padaliya
To see how IBM MQ works, you will be guided through creating and configuring a queue manager. Then, you will connect an application to it.
Reference Document: https://developer.ibm.com/tutorials/mq-connect-app-queue-manager-windows
Learning objectives
After completing this tutorial, you will understand a bit about these concepts:
IBM MQ queue managers
IBM MQ queues
Point-to-point messaging
Prerequisites
The tutorial steps will have you download and install each of these prerequisites:
A Windows 10 machine with admin privileges
IBM MQ Advanced for Developers
IBM MQ configuration (MQSC) script
Estimated time
This tutorial should take about 30-45 minutes.
Steps
Step 1. Download and install IBM MQ on a Windows machine
Follow this article: https://ronakpadaliya.hashnode.dev/install-ibm-mq-on-windows-10
Step 2. Create and start a queue manager
You need a queue in order to start putting and getting your messages. Queues live on queue managers, so you need to create a queue manager first. On your command line, type:
crtmqm QM1
You should see output like this:

The queue manager is created but not started. Start your queue manager:
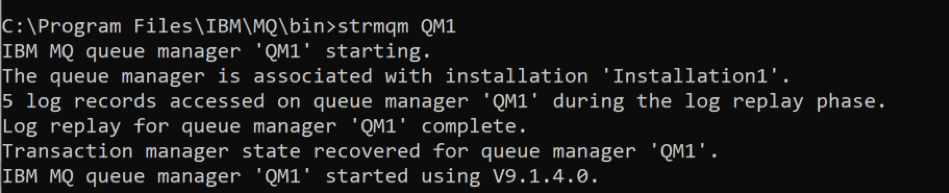
strmqm QM1
You should see output like this:
Step 3. Configure your queue manager
We've provided a script to help you create the MQ objects for your queue manager. We'll get this script from GitHub by using a curl command. Make sure you run this command from a folder where you have write permissions, such as your home directory.
curl -o mq-dev-config.mqsc https://raw.githubusercontent.com/ibm-messaging/mq-dev-samples/master/gettingStarted/mqsc/mq-dev-config.mqsc
Run this command to create the MQ objects and add the location where you saved the script file, for example:
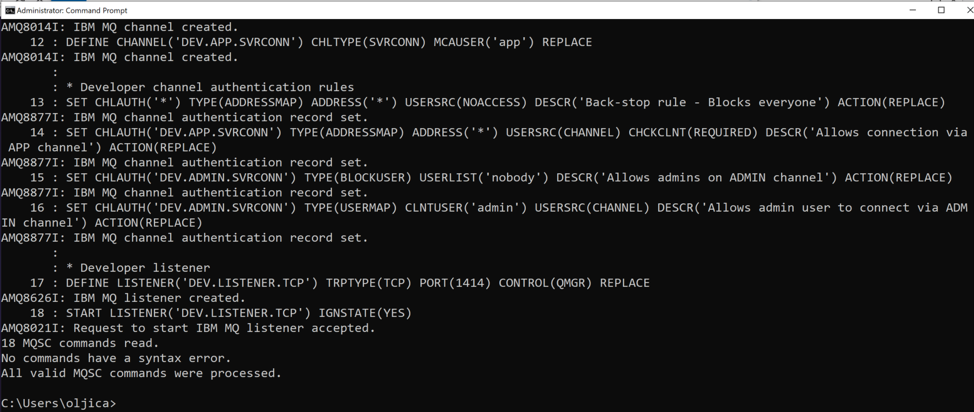
runmqsc QM1<"C:\Users\user\Downloads\mq-dev-config.mqsc"
When it's done, you should see output like this:
Step 4. Create a user and group for running MQ client applications
The role of a user is defined through the groups they belong to. We usually want MQ applications to be run from an account without admin privileges. Your user account is an MQ admin account.
Client applications need to be authorized to perform actions like opening and closing queues, putting and getting messages etc. The client connects to the queue manager through a channel. To do this, it needs to connect from a user account that belongs to a group whose members are authorized to use the channel.
In your Windows Computer Management tool, under Local Users and Groups,
Create a Windows group
mqclientCreate a Windows user
appwho is the member of themqclientgroup. Set the password topassw0rd. The user will change this password the next time they log on.
You can then add authority to the mqclient group so that its members can connect to the queue manager and put and get messages to and from a queue.
Run below commands:
setmqaut -m QM1 -t qmgr -g mqclient +connect +inq +dsp
setmqaut -m QM1 -n DEV.** -t queue -g mqclient +put +get +browse +inq
setmqaut -m QM1 -n SYSTEM.** -t queue -g mqclient +put +get +browse +inq
When it's done, you should see output like this:

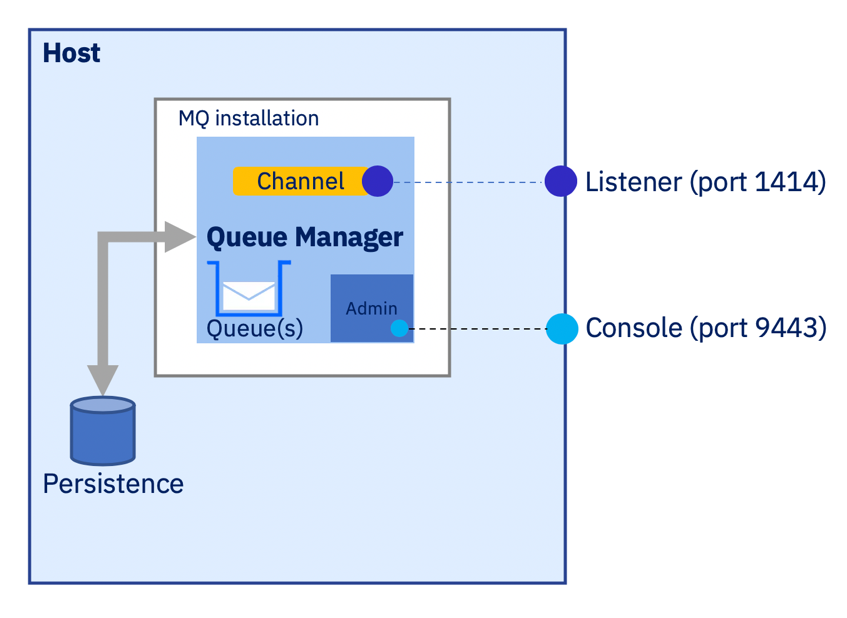
What you've done so far
You installed IBM MQ on your Windows PC, created a queue manager and ran an MQSC script to create MQ objects. Now you are ready to create and run MQ applications. MQ is using your host computer resources and connectivity.
The following objects and permissions set:
Queue manager:
QM1Queue:
EV.QUEUE.1Channel:
DEV.APP.SVRCONNListener:
SYSTEM.LISTENER.TCP.1on port 1414
User app, who is a member of the group mqclient is permitted to use the channel DEV.APP.SVRCONN to connect to the queue manager QM1. User/app can put and get messages to and from the queue DEV.QUEUE.1.
Step 5. Create a console application to get the list of queues
Create a Visual Studio console application project with .NET 8.0 target framework.
Install the nuget package named IBMMQDotnetClient v4.9.2
Create Program.cs file and write the below code into it,
using IBM.WMQ;
using IBM.WMQ.PCF;
using System.Collections;
using System.Globalization;

namespace IBM_MQ_Testing
{
    public class Program
    {
        public static void Main(string[] args)
        {
            string queueManagerName = "QM1";

            Hashtable connectionProperties = new Hashtable
            {
                { MQC.HOST_NAME_PROPERTY, "localhost" },
                { MQC.PORT_PROPERTY, 1414 },
                { MQC.CHANNEL_PROPERTY, "DEV.APP.SVRCONN" },
                { MQC.TRANSPORT_PROPERTY, MQC.TRANSPORT_MQSERIES_MANAGED },
                //{ MQC.TRANSPORT_PROPERTY, MQC.TRANSPORT_MQSERIES },
                //{ MQC.TRANSPORT_PROPERTY, MQC.TRANSPORT_MQSERIES_BINDINGS }, // Not Supported in .NET 8.0
                //{ MQC.TRANSPORT_PROPERTY, MQC.TRANSPORT_MQSERIES_XACLIENT }, // Not Supported in .NET 8.0
                //{ MQC.TRANSPORT_PROPERTY, MQC.TRANSPORT_MQSERIES_CLIENT }, // Not Supported in .NET 8.0

                //Optional authentication if required
                { MQC.USER_ID_PROPERTY, "app" },
                { MQC.PASSWORD_PROPERTY, "passw0rd" }
            };

            try
            {
                MQQueueManager queueManager = new MQQueueManager(queueManagerName, connectionProperties);
                Console.WriteLine($"Connected to Queue Manager: {queueManager.Name}");

                // Create PCF message agent
                IBM.WMQ.PCF.MQCFH header = new IBM.WMQ.PCF.MQCFH(IBM.WMQ.PCF.CMQCFC.MQCFC_LAST, IBM.WMQ.PCF.CMQCFC.MQCMD_INQUIRE_Q_NAMES);
                IBM.WMQ.PCF.PCFMessageAgent agent = new IBM.WMQ.PCF.PCFMessageAgent(queueManager);

                // Create PCF request
                IBM.WMQ.PCF.PCFMessage request = new IBM.WMQ.PCF.PCFMessage(IBM.WMQ.PCF.CMQCFC.MQCMD_INQUIRE_Q_NAMES);
                request.AddParameter(MQC.MQCA_Q_NAME, "*"); // Wildcard for all queues

                // Send PCF request
                IBM.WMQ.PCF.PCFMessage[] responses = agent.Send(request);

                if (responses == null) throw new ApplicationException("Exception occurred calling MQ PCF function.");
                else
                {
                    if (responses[0].GetCompCode() == MQC.MQCC_OK)
                    {
                        PCFParameter[] p = responses[0].GetParameters();

                        if ((p != null) && (p.Length > 0))
                        {
                            string[] queueNames = (string[])p[0].GetValue();
                            ArrayList arrayNames = new ArrayList();

                            // exclude all system queues
                            IEnumerator enumerator = queueNames.GetEnumerator();
                            while (enumerator.MoveNext())
                            {
                                if (!enumerator.Current.ToString().StartsWith("SYSTEM.", StringComparison.CurrentCulture) &&
                                    !enumerator.Current.ToString().StartsWith("AMQ.", StringComparison.CurrentCulture) &&
                                    !enumerator.Current.ToString().StartsWith("MQAI.", StringComparison.CurrentCulture))
                                {
                                    // add to new string array
                                    arrayNames.Add(enumerator.Current.ToString());

                                }
                            }
                            // return
                            var names = (string[])arrayNames.ToArray(typeof(string));

                            foreach (var name in names)
                            {
                                Console.WriteLine("Queue: " + name.Trim());
                            }

                            // clean up
                            queueNames = null;
                            arrayNames.Clear();
                            arrayNames = null;
                        }
                        p = null;
                    }
                    else
                    {
                        throw new ApplicationException("Querying queue list failed with GetCompCode of " + responses[0].GetCompCode().ToString(CultureInfo.InvariantCulture));
                    }
                }

                queueManager.Disconnect();
            }
            catch (MQException mqe)
            {
                Console.WriteLine($"MQ Exception: {mqe.Message}, Reason Code: {mqe.ReasonCode}");
                if (mqe.InnerException != null)
                    Console.WriteLine($"Inner Exception: {mqe.InnerException.Message}");
            }
            catch (Exception ex)
            {
                Console.WriteLine("Error: " + ex.Message);
            }

            Console.ReadLine();
        }
    }
}
After that when you run it shows output like below,

To get and send messages using the Console Application you must refer to Step 6. of this article https://developer.ibm.com/tutorials/mq-connect-app-queue-manager-windows
Summary
In this tutorial, you configured the queue manager running on your Windows machine for incoming client connections.
In IBM MQ, the queue manager is effectively the server part of the system, and applications that connect to it are clients.
Usually it is the administrators that look after the MQ server where all the MQ objects are defined and the routing of messages happens. Client applications are created by developers and IBM MQ provides client libraries that developers must include in their applications. These libraries, also called MQ clients, address and use the MQ objects that admins have set up on the MQ server side. In more complex scenarios, the MQ libraries do most of the heavy messaging work for you, so you just have to learn how to use them.
Configuration is needed on both the server and the client sides for the messaging to work.
When you first start developing MQ client applications, it helps to have access to your own queue manager and a queue, for testing your client application against. Installing IBM MQ on your Windows machine gives you access to a queue manager and many options for configuring MQ objects as you begin developing your client application.
Subscribe to my newsletter
Read articles from Ronak Padaliya directly inside your inbox. Subscribe to the newsletter, and don't miss out.
Written by