Internet Of Things
 LIKHITHA N
IOT
Table of contents :
Introduction to IOT: List of IOT devices in all sectors,Comparision of usage of IOT devices,a brief history of IOT,Career opportunities in field of IOT.
Example: Explanation of IoT using an Agricultural irrigation system as a real-world example,How it works and difference of embedded and iot in that example
Embedded System : Key characteristics,Examples,Components and its types ,Role of Embedded System in IoT-Based Irrigation
IOT : What is IOT,Common IoT Platforms & Tools,Why it is important,Core Components of an IoT System,Advantages,Disadvantages,Characteristics
Difference between M-2-M and IOT,M2M Gateway,Neccesity,IOT Architecture ,Need of iot architecture,Types of Different Architecture (3,4,5,7),Some of the most popular IoT protocols:
Internet,History of the Internet,Impact of Internet,Internet protocol,Need of Internet protocol,Different types of internet protocol ,What is IP Addressing?
TCP/IP Protocol,What it does,its layers ,Difference Between TCP and IP,UDP PROTOCOL,what it does,key points,How It Works,Difference between TCP/UDP
What is an Embedded Operating System,Key features,Difference: Embedded OS vs Desktop OS,Advantages,Disadvantes,Microprocessors,Microcontrollers,Difference between them,Types,Applications
Arduino ,what it is,key features,Arduino UNO and its features,Arduino IDE ,Demonstration of these Arduino functions like setup(), loop(), pinMode(), digitalWrite(), digitalRead(), analogWrite(), and analogRead() ,delay() — including syntax, what they connect to, their status (like input/output), Number of arguments.
TinkerCad : Simulator,Serial monitor,Serial Functions & Syntax,begin(),print(),println(),read(),Why Use the Serial Monitor?,map(),photoresistor(LDR),Typical applications,pwm pins,servo motor,L293D,L293N,Difference between them,LCD(LIQUID CRYSTAL DISPLAY)
NodeMCU,key features,Common uses,Difference in NodeMCU and ARDUINO,ESP8266 VS ESP32,key difference,conclusion
Interrupts,How Interrupts Work,Types of Interrupts in NodeMCU (ESP8266/ESP32),delay() ,millis()
Ultrasonic Sensor (e.g., HC-SR04), Soil Moisture Sensor,DHT Sensor (e.g., DHT11 or DHT22),Servo Motor (e.g., SG90),bluetooth module,RELAY Module ,examples,WIFI
THINGSPEAK, what it is,how it works,key features,How MATLAB Works with ThingSpeak,ESP32-CAM,Types of Content You Can Do in ThingSpeak with ESP32-CAM.
MQTT,what it is,How it forms,Advantage,Disadvantage,why it is used ,key concepts,MQTT Process Flow,MQTT packets types ,Popular MQTT brokers,MQTT IOT protocol
Raspberry pi ,Introduction,Node red,Key Features of Node-RED,Application,Benefits, Industrial Internet of Things (IIoT)
Introduction to AWS,Steps to Use AWS IoT,monitoring and data upload Conclusion and Future Learning
DAY 1
📖List of IoT (Internet of Things) devices used across various sectors:
1. Agriculture
🌟Trimble’s Agricultural Division
🌟Soil moisture sensors
🌟Livestock monitoring collars
🌟Drones for crop monitoring
🌟Weather monitoring stations
🌟Automated tractors and harvesters
2. Healthcare
🌟Wearable health trackers (e.g., Fitbit, Apple Watch)
🌟Remote patient monitoring systems
🌟Smart inhalers
🌟Connected insulin pens
🌟Smart beds in hospitals
🌟Pill dispensers with reminders
3. Industrial / Manufacturing
🌟Predictive maintenance sensors
🌟Smart meters for utilities
🌟Asset tracking devices
🌟Environmental condition monitors (temperature, humidity)
🌟Connected robotics
��Machine vision systems
4. Homes
🌟Smart thermostats (Nest, Ecobee)
🌟Smart lights (Philips Hue)
🌟Smart locks and doorbells (Ring, August)
🌟Voice assistants (Alexa, Google Home)
🌟Security cameras
🌟Smart appliances (fridge, oven, washing machines)
5. Transportation & Automotive
🌟Connected cars (e.g., Tesla autopilot sensors)
🌟GPS trackers
🌟Vehicle diagnostics sensors (OBD II)
🌟Smart traffic lights
🌟Fleet management systems
🌟Smart parking sensors
6. Energy & Utilities
🌟Smart meters (electricity, gas, water)
🌟Grid monitoring sensors
🌟Renewable energy system monitors (solar panels, wind turbines)
🌟Smart streetlights
��Leak detection systems
7. Retail
��Smart shelves (inventory tracking)
🌟RFID tags
🌟Customer heatmaps and foot traffic analysis sensors
🌟Automated checkout systems
🌟Smart vending machines
8. Smart Cities
🌟Waste management sensors
🌟Smart streetlights
🌟Noise pollution sensors
🌟Parking sensors
🌟Traffic flow monitors
9. Education
🌟Attendance tracking systems
🌟Smart ID cards
🌟Environmental sensors in classrooms
10. Military & Defense
🌟Surveillance drones
🌟Wearable health monitors for soldiers
🌟Battlefield asset tracking
🌟Smart uniforms
🌟Perimeter intrusion detection

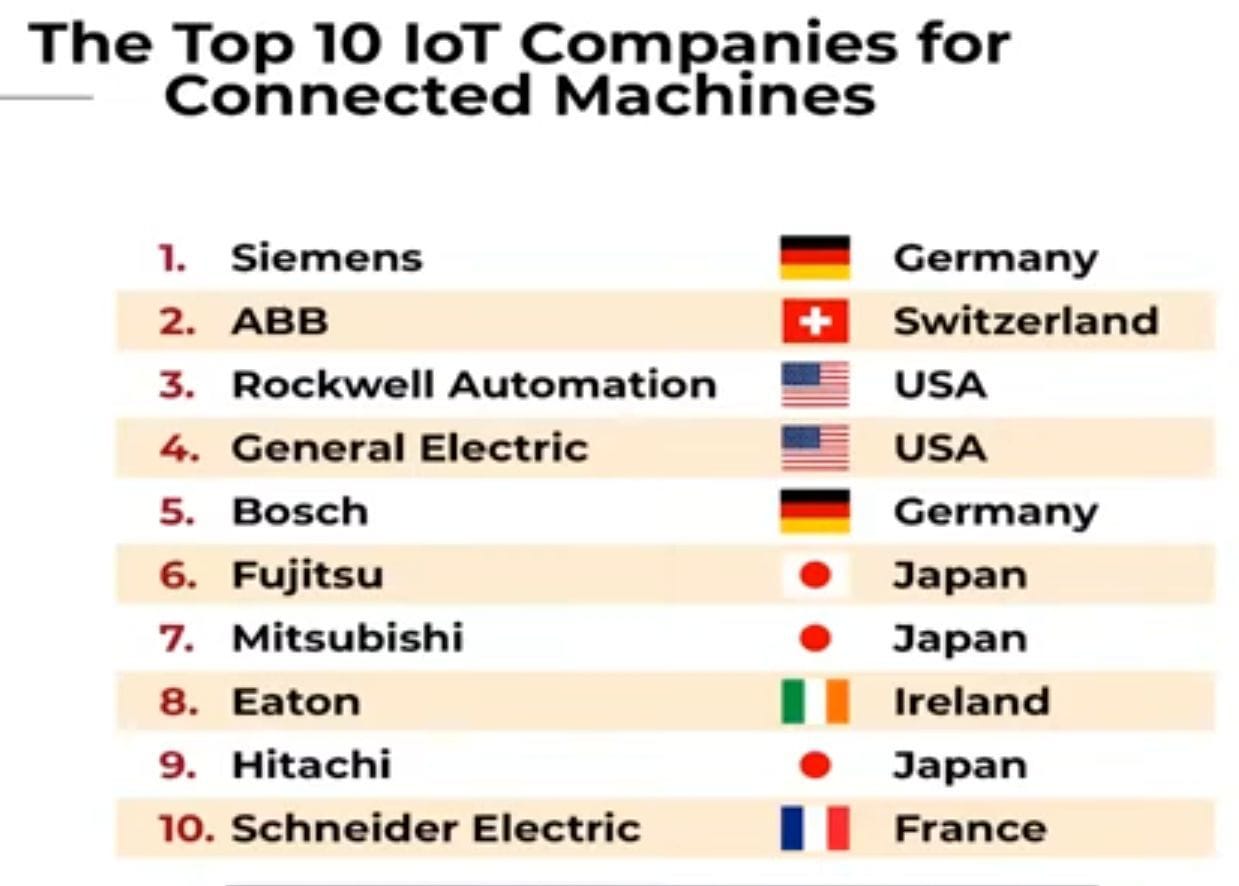
Leading iot software companies. The comparision between the years in terms of growth
🖥️A brief history of the Internet of Things (IoT):
1. The Idea Emerges (1980s–1990s)🌐
📖1982: A Coca-Cola vending machine at Carnegie Mellon University became the first internet-connected appliance. It could report inventory and if newly loaded drinks were cold.
📖1990: John Romkey connected a toaster to the internet — an early example of IoT.
📖1999: The term “Internet of Things” was coined by Kevin Ashton, a British technologist, during his work at Procter & Gamble. He envisioned RFID tags to track products through a supply chain.
2. Early Developments (2000–2010)🌐
📖2000: LG announced the first internet-connected refrigerator.
📖2003–2004: RFID adoption grew, especially in the retail and logistics sectors.
📖2008: The number of connected devices exceeded the global human population.
📖2010: China declared IoT a key strategic initiative in its national policy.
3. Rapid Growth (2010–2020)🌐
Smartphones became common IoT hubs.
📖2011: Gartner added IoT to its Hype Cycle.
📖2014–2016: Tech giants like Google (Nest), Amazon (Alexa), and Apple (HomeKit) entered the IoT space.
Industrial IoT (IIoT) and smart home devices exploded in popularity.Security concerns also rose due to cyber-attacks on smart devices.
4. Present Day (2020–Now)🌐
Billions of IoT devices exist across homes, cities, factories, and farms.5G technology has accelerated IoT capabilities.Integration with AI and machine learning makes devices smarter.IoT is foundational to smart cities, wearable tech, autonomous vehicles, and predictive maintenance in industries.
🎇Career Opportunities in IOT
1. IoT Developer / Engineer
Skills: Embedded systems, C/C++, Python, JavaScript, IoT platforms (AWS IoT, Azure IoT)
Role: Develop and maintain software for IoT devices
2. Embedded Systems Engineer
Skills: Microcontrollers (ARM, AVR), RTOS, circuit design, C/C++
Role: Design and program the hardware and firmware for IoT devices
3. IoT Architect
Skills: Cloud infrastructure, networking, security, system design
Role: Design the complete architecture for an IoT solution
4. IoT Data Analyst / Data Scientist
Skills: Python, R, machine learning, data visualization tools (Tableau, Power BI)
Role: Analyze data from IoT devices to extract useful insights
5. Network Engineer (IoT focus)
Skills: IoT protocols (MQTT, CoAP), network configuration, cybersecurity
Role: Ensure secure and reliable communication between devices
6. IoT Security Expert
Skills: Cybersecurity, ethical hacking, encryption, secure firmware updates
Role: Secure IoT networks, devices, and data
7. Cloud Engineer (IoT Platforms)
Skills: AWS IoT, Azure IoT Hub, Google Cloud IoT
Role: Manage the backend infrastructure for IoT ecosystems
8. UI/UX Designer for IoT Apps
Skills: Mobile/web app design, user flow for IoT dashboards
Role: Design user-friendly interfaces for controlling and monitoring IoT devices
9. Product Manager (IoT)
Skills: Market research, tech understanding, team collaboration
Role: Lead the development and strategy of IoT products
10. Robotics & Automation Engineer
Skills: IoT integration, control systems, PLC, SCADA
Role: Use IoT to improve automation in industries and robotics
DAY 2
📸Example: Explanation of IoT using an Agricultural irrigation system as a real-world example.
IoT in Agriculture: Smart Irrigation System
To optimize water usage and improve crop health by automatically controlling irrigation based on real-time data.
🖥️Components of the IoT-Based Irrigation System:
A. Sensors
Soil Moisture Sensor: Measures the amount of water in the soil.
Temperature Sensor: Detects ambient temperature, affecting evaporation and water needs.
Humidity Sensor: Measures the humidity of the air.
Light Sensor (LDR): Tracks sunlight levels to optimize watering times.
Rain Sensor: Prevents watering during or after rainfall.
B. Controller (Microcontroller)
Devices like Arduino, Raspberry Pi, or ESP32 collect data from sensors and make decisions. Connected to actuators like water pumps, valves, or sprinklers.
C. Communication Module
Wi-Fi, GSM, LoRa, or Zigbee modules send data to the cloud or mobile app.
Example: ESP8266 for Wi-Fi or SIM800L for GSM.
D. Cloud Platform / IoT Dashboard
Stores data, analyzes trends, and displays real-time status.
Examples: ThingSpeak, Blynk, AWS IoT, or Google Firebase.
E. Mobile App or Web Interface
Farmers can monitor and control irrigation remotely.
Get alerts and reports about soil status, water usage, and system health.
🖥️How It Works (Step-by-Step):
Step 1: Data Collection
Sensors in the field continuously measure soil moisture, temperature, humidity, and other conditions.
Step 2: Decision-Making
If soil moisture drops below a set threshold and there’s no rain detected:
The microcontroller decides to turn ON the water pump.
If soil is wet or rain is detected:
The system skips watering, saving water.
Step 3: Actuation
The system activates a relay to power the water pump or opens a solenoid valve to irrigate crops.
Step 4: Data Transmission
Real-time data is sent to the cloud using Wi-Fi or GSM.
A dashboard updates the farmer with current soil conditions and irrigation status.
Step 5: Remote Monitoring and Control
The farmer receives alerts like:
“Soil moisture low — Irrigation started.”
“Rain detected — Irrigation postponed.”
They can also manually start/stop irrigation via the app.
→ A farmer in a remote area installs a smart irrigation system with sensors and ESP32. When the soil moisture drops below 30%, the system automatically turns on a motor. If it rains, the rain sensor cancels watering. All this is visible in real-time on the farmer’s smartphone dashboard.
🌐REAL-WORLD DIFFERENCE EXAMPLE
Embedded Only:
A farmer installs an automated irrigation controller with no internet.
It waters crops when soil is dry, based on local sensor input.
IoT System:
Same system, but with Wi-Fi or GSM module added.
The farmer can check soil data from a mobile app, get alerts, or control the pump remotely.
Embedded System = the engine.
IoT = the engine + network + cloud + data + remote control.
In an IoT irrigation system, the embedded system acts like the nervous system — processing inputs, making decisions, and sending out commands. Without it, the IoT device is just a bunch of disconnected sensors and gadgets.
🤖Embedded System
What is an Embedded System?
→ An embedded system is a dedicated computer system (hardware + software) designed to perform a specific task in a given time. It’s “embedded” into a larger system — like a washing machine, pacemaker, or, in this case, an IoT irrigation device.
→ An Embedded System is a computer system designed to perform a specific task or function within a larger system. Unlike general-purpose computers, embedded systems are specialized, efficient, and often operate in real-time.
✨Key Characteristics of Embedded Systems:
1. Task-Specific: Designed for one or a few dedicated functions (e.g., a washing machine controller).
2. Real-Time Operation: Often need to respond quickly to inputs or events (e.g., airbags in cars).
3. Compact & Efficient: Built to be small, low power, and cost-effective.
4. Embedded in Hardware: Integrated within the device it controls.
5. Reliable & Stable: Operates continuously without user intervention.
🎉Examples of Embedded Systems:
Microwave oven (controls heating cycles)
Smartphones (with embedded GPS, camera control, etc.)
Medical devices (like heart monitors or insulin pumps)
Automobiles (airbag systems, ABS, infotainment systems)
Smart TVs, washing machines, industrial robots, etc.
💎Components of an Embedded System:
Microcontroller or Microprocessor (the brain)
Memory (RAM/ROM)
Input/Output Interfaces (sensors, switches, displays)
Software/Firmware (written for specific control tasks)
🎗️Types of Embedded Systems:
1. Standalone Embedded System: Works independently (e.g., digital camera).
2. Real-Time Embedded System: Responds instantly (e.g., medical monitoring).
3. Networked Embedded System: Connected to a network (e.g., smart thermostats).
4. Mobile Embedded System: Found in portable devices (e.g., smartphones).
☝️Role of Embedded System in IoT-Based Irrigation
1. The Brain of the System
The embedded system is typically the microcontroller or microprocessor, such as:Arduino,ESP32 / ESP8266,Raspberry Pi (in some cases).It collects sensor data, processes it, makes decisions, and controls the actuators.
2. Functions Handled by the Embedded System:
A. Sensor Interface
Reads data from soil moisture, temperature, humidity, and rain sensors.
Uses analog or digital pins to collect data continuously.
B. Data Processing
Compares sensor values with preset thresholds (e.g., soil moisture < 30%).
Decides whether to turn ON/OFF the irrigation pump.
C. Actuator Control
Relay modules to turn on water pumps.
Solenoid valves to open/close water flow.
D. Connectivity
Manages communication modules like Wi-Fi (ESP8266) or GSM (SIM800L).
Sends/receives data to/from the cloud or user’s app.
E. Real-Time Operation
Runs software (firmware) written in C/C++ or Python to handle tasks in real-time.
Ensures reliability and continuous performance.
🌐What is IoT (Internet of Things)?
IoT refers to a network of physical devices that are connected to the internet and can collect, share, and act on data. These devices include sensors, actuators, appliances, vehicles, and more.
System integrated with Hardware and Software + cloud for doing a specific tasks.
✨Common IoT Platforms & Tools:
🎗️Hardware: Arduino, Raspberry Pi, ESP8266, ESP32.
🎗️Software: Node-RED, Blynk, ThingSpeak, MQTT protocol.
🎗️Cloud Platforms: AWS IoT, Google Cloud IoT, Microsoft Azure IoT.
🖥️We need IoT (Internet of Things) because it makes our world smarter, more efficient, and connected. Here’s why it’s important:
1. Automation & Convenience:
IoT enables devices to communicate and act without human intervention. For example, smart homes can automatically adjust lighting, temperature, or security systems.
2. Data Collection & Insights:
IoT devices collect real-time data which helps in better decision-making — from weather sensors to health trackers to smart cities.
3. Efficiency & Cost Reduction:
In industries, IoT improves operations by predicting equipment failures, reducing downtime, and optimizing energy use.
4. Improved Quality of Life:
In healthcare, wearable devices monitor patients 24/7. In agriculture, smart irrigation systems save water and boost crop yield.
5. Enhanced Safety & Security:
IoT-powered surveillance, alarms, and sensors improve personal, industrial, and public safety.
In short, IoT connects the physical world to the digital one, making everything around us more responsive, intelligent, and optimized.
✨Core Components of an IoT System:
1. Sensors/Devices :Collect data from the environment (e.g., temperature, motion, light).Examples: DHT11 sensor (temperature/humidity), PIR sensor (motion).
2. Connectivity:Devices connect to the cloud or a local server through Wi-Fi, Bluetooth, Zigbee, cellular networks, or LoRa.
3. Data Processing:The collected data is processed using cloud platforms (like AWS, Azure IoT, Google Cloud) or edge devices (local processing).
4. User Interface (UI):A web or mobile app to monitor and control the system remotely.
5. Actuators (optional):Take action based on processed data (e.g., turn on a fan when temperature is high).
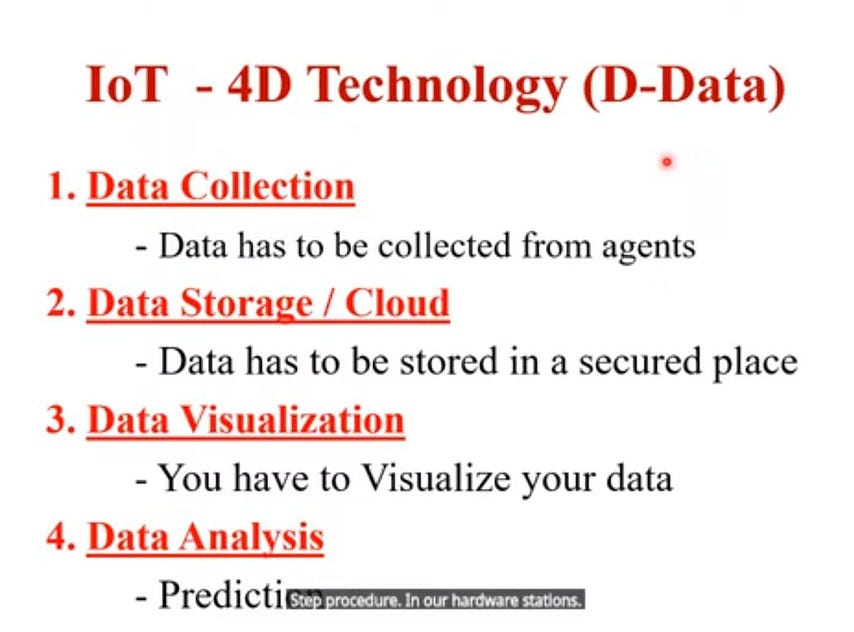
IOT — 4D TECHNOLOGY
DAY 3
🎇Advantages of IoT
1. Automation and Control : IoT enables devices to communicate and operate automatically with minimal human input.Example: Smart lights turning off when no one is in the room.
2. Efficient Resource Utilization: Real-time monitoring helps optimize energy, water, and fuel usage.Example: Smart irrigation systems use only the water needed.
3. Improved Decision Making : Continuous data collection and analytics provide valuable insights.Example: Businesses can predict equipment failures before they happen (predictive maintenance).
4. Time and Cost Saving : Automation reduces manual work and errors, saving time and labor costs.Example: Smart factories can run 24/7 with minimal human intervention.
5. Enhanced Quality of Life: In healthcare, wearable devices monitor health conditions and send alerts.
🎇 Disadvantages of IoT systems:
1. Security and Privacy Issues : IoT devices are often vulnerable to cyberattacks.Sensitive personal data can be intercepted or leaked if not properly secured.Many devices lack strong encryption or regular security updates.
2. Complex Integration: Integrating different devices, platforms, and standards can be challenging.Compatibility issues between devices from different manufacturers.
3. High Initial Cost: Setting up a full IoT system (sensors, connectivity, cloud services) can be expensive.Maintenance and upgrades also add to long-term costs.
4. Dependence on Internet Connectivity: Most IoT devices need stable internet connections to function.In areas with poor connectivity, IoT systems may fail or provide inaccurate data.
5. Limited Battery Life:Many IoT devices run on small batteries and need frequent recharging or replacement.Energy-efficient designs are improving but still a concern.
6. Data Overload: IoT systems generate large volumes of data.Managing, analyzing, and storing this data requires robust infrastructure.
7. Ethical and Legal Issues: Who owns the data? How is it used?Lack of clear regulations can lead to misuse or unethical applications.
✨Charactersitics of IOT
1. Connectivity : Fundamental to IoT; enables devices to connect and communicate over the internet or local networks.
2. Sensing & Perception: Devices gather data from the environment using sensors,actuators (e.g., temperature, motion, light).
3. Dynamic & Self-Adapting:IoT systems can automatically adjust to changes in the environment or system status.
4. Self-Configuring:Devices can configure themselves with minimal human intervention after being added to the network.
5. Interoperable Communication Protocol:Uses standard communication protocols to ensure devices from different vendors can work together.(wifi,blutooth,ethernet,IPV4,TCP,HTTP)
6. Unique Identity : Each device has a unique ID (like an IP address) to distinguish it within the network.
7. Heterogeneity:IoT involves a variety of devices with different hardware, software, and communication methods.
8. Integrated into Information Network : IoT systems are part of larger information systems and can be integrated with cloud platforms, analytics, etc.
9. Scalability: Can easily scale up by adding more devices without affecting performance.
10. Security & Privacy: Essential to protect data and devices from unauthorized access, hacking, and breaches.
11. Automation & Control: Devices can be controlled automatically or remotely, enabling intelligent actions without human involvement.
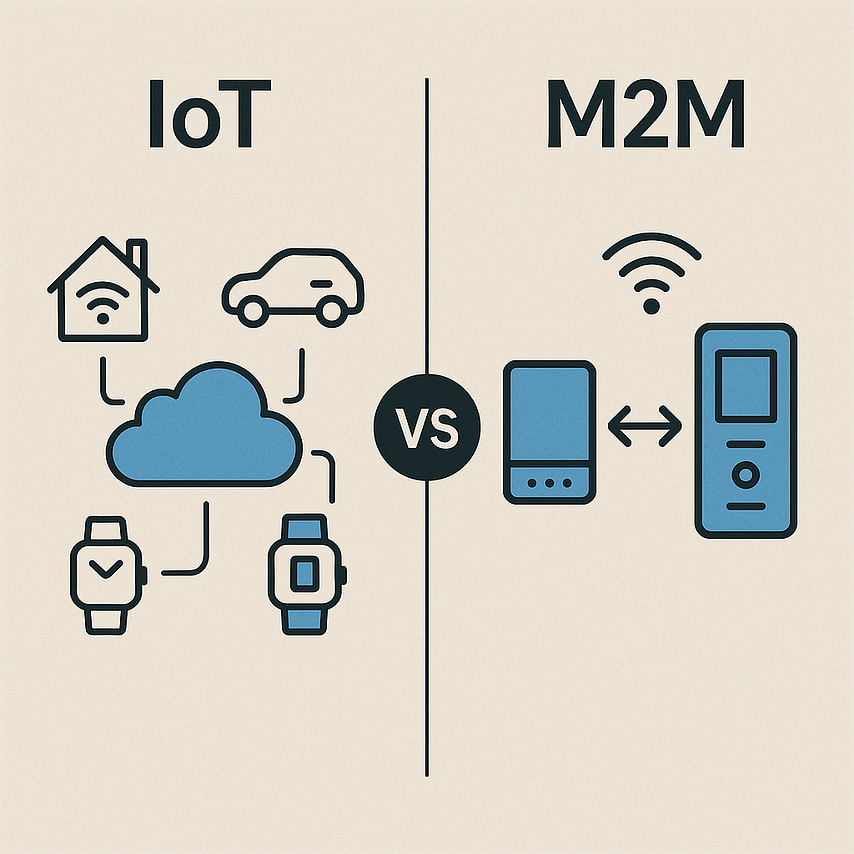
🎗️Difference between M-2-M and IOT

M-2-M v/s IOT
🌟In short:
→ M2M is like a walkie-talkie between two machines.
→ IoT is like a smart city of devices talking to each other, the cloud, and to humans.
IOT V/S M2M
🌐What is an M2M Gateway?
An M2M Gateway is a bridge that connects multiple devices (machines, sensors, etc.) to the internet or a central management system. It collects, processes, and transmits data between machines and backend systems.
M2M Gateway — Purpose & Necessity (Simple Points)
1. Connects different devices using various communication methods.
2. Changes device signals into a common format for easy communication.
3. Collects data from many devices and sends it to the server or cloud.
4. Keeps data safe with security features like encryption.
5. Helps devices talk to the internet even if they can’t do it directly.
6. Allows remote control and monitoring of devices.
7. Processes data locally to reduce internet usage and speed up actions.
8. Makes it easy to add more devices in the future.
9. Reduces load on the main system by doing small tasks on the gateway itself.
10. Keeps things working smoothly even if internet is slow or down.
📚IOT ARCHITECTURE
IoT architecture refers to the structured layout or framework that defines how IoT (Internet of Things) systems operate, including how devices interact, process data, and communicate with each other and the cloud.
☝️Need of IOT architecture:
→ How is data transported? How is it connected? How is it analyzed?
→ IoT is a very complex system with many “things”.
→ It involves multiple technologies and multiple devices.
→ It uses various sensors, network technologies, cloud technology, applications, protocols, hardware, software, etc.
→ All of these need a well-planned and overall architecture.
→It is all about the protocol stack, which provides the relationship between the physical layer technologies and the applications.
🌟Types of Different Architecture
3-Layer Architecture
This is the basic model for IoT systems.
1. Perception Layer — Sensors collect data.
2. Network Layer — Transfers data to processing units.
3. Application Layer — Delivers services to the end user.
4-Layer Architecture
Adds a processing layer to the 3-layer model.
1. Perception Layer
3. Processing Layer — Stores and analyzes data (Edge/Cloud computing).
4. Application Layer
5-Layer Architecture
A more detailed version, showing full data flow and business logic.
1. Perception Layer
3. Middleware Layer — Manages services and resources.
4. Application Layer
5. Business Layer — Handles data interpretation, decision-making, and user privacy.
7 layer architecture
1. Perception Layer
3. Data Processing Layer
4. Service Layer
7-Layer IoT Architecture (Cisco Model)
1. Physical Devices and Controllers
What it is: The actual “things” in the Internet of Things.
Components:
Sensors: Measure physical parameters (temperature, motion, etc.).
Actuators: Take actions based on data (turning on a fan, unlocking a door).
Controllers/Microcontrollers: Process basic inputs and outputs (e.g., Arduino, Raspberry Pi).
Role: Data generation and initial control at the device level.
2. Connectivity
What it is: The layer that transfers data from devices to the edge or cloud.
Technologies:
Wired: Ethernet, RS-232
Wireless: Wi-Fi, Zigbee, LoRaWAN, 4G/5G, NB-IoT, Bluetooth
Role: Reliable, fast, and secure transmission of data.
3. Edge (Fog) Computing
What it is: Processing data near the source, at the network edge.
Components:
\ Edge ga*teways
\ Loca*l processing units
Functions: Filtering, preprocessing, and real-time analytics
Reducing latency and bandwidth load
Example: A smart camera identifying license plates before sending the result to the cloud.
4. Data Accumulation
What it is: Collects and stores data before it’s processed further.
Tools:
Databases
Role:
Converts data streams into organized storage.
Handles data buffering, formatting, and initial tagging.
5. Data Abstraction
What it is: Makes raw data meaningful and usable.
Functions:
Data aggregation, filtering, compression
Ensures consistency across sources
Applies metadata and tagging
Tools: ETL tools, data normalization algorithms, API gateways.
6. Application
What it is: Interface between users and the IoT system.
Examples:
Mobile apps for smart homes
Web dashboards for factory monitoring
Alerts and reports generation
Role: Transforms processed data into usable insights for human decision-making.
7. Collaboration and Processes
What it is: Business logic and integration with external systems.
Functions:
Automating actions (e.g., ordering parts when stock is low)
Enabling cross-organization collaboration
Decision-making and policy enforcement
Examples: ERP systems, supply chain platforms, CRM, automated workflows.
📗Some of the most popular IoT protocols:
1. MQTT (Message Queuing Telemetry Transport)
2. CoAP (Constrained Application Protocol)
3. HTTP/HTTPS (HyperText Transfer Protocol)
4. AMQP (Advanced Message Queuing Protocol)
5. LoRaWAN (Long Range Wide Area Network)
6. ZigBee
- Bluetooth/BLE (Bluetooth Low Energy)
8. NB-IoT (Narrowband IoT)
9. 6LoWPAN (IPv6 over Low-Power Wireless Personal Area Networks)
10. DDS (Data Distribution Service)
DAY 4
🌐What is Internet?
The Internet is a global network of interconnected computers and devices that communicate with each other using standardized protocols, primarily TCP/IP. It allows people to access and share information, communicate, and use services like websites, email, social media, and streaming platforms from anywhere in the world.
In short:
The Internet is a worldwide system that connects millions of devices to share data and services.
📗History of the Internet:
1. 1960s — ARPANET:
Developed by the U.S. Department of Defense as a military communication project.
First message sent in 1969.
2. 1970s — TCP/IP Protocol:
Introduced by Vint Cerf and Bob Kahn.
Became the standard protocol in 1983.
3. 1980s — Expansion to Universities:
Networks like NSFNET connected research and academic institutions.
4. 1990s — Birth of the World Wide Web (WWW):
Invented by Tim Berners-Lee in 1989; made public in 1991.
Led to browsers and websites, making the internet accessible to all.
5. 2000s — Broadband and Social Media Era:
High-speed internet, rise of platforms like Facebook, YouTube, etc.
6. 2010s — Mobile and Cloud Revolution:
Smartphones and cloud computing transformed internet usage.
7. 2020s — IoT, AI, and 5G:
Internet connects not just people, but devices; data-driven, smart world.
🎇Impact of the Internet:
1. Communication:
Instant messaging, video calls, and emails revolutionized personal and professional communication.
2. Education:
Access to vast resources, online courses, and global learning.
3. Business & Economy:
E-commerce, remote work, digital banking, and global trade growth.
4. Social Interaction:
Social media platforms created new ways to connect and share.
5. Innovation & Research:
Accelerated development in science, technology, and medicine.
6. Entertainment:
Streaming, gaming, and content creation became massive industries.
7. Challenges:
Cybersecurity, privacy issues, digital divide, misinformation.
🖥️INTERNET PROTOCOL
Internet Protocol is a set of rules that governs how data is sent and received over the internet. It ensures that data packets are delivered to the correct destination.
🎉Need for Internet Protocol:
To uniquely identify each device on a network
To route data between sender and receiver
To ensure reliable communication over the internet
To break large data into smaller packets and reassemble them
What is IP Addressing?
IP Addressing is the process of assigning a unique address (called an IP address) to each device on a network so it can be identified and communicated with.
Example of an IP address: 192.168.1.1
🎗️Types of Internet Protocols:
A. Based on Function:
1. IP (Internet Protocol) — Core protocol for routing data
2. TCP (Transmission Control Protocol) — Ensures reliable delivery
3. UDP (User Datagram Protocol) — Fast, connectionless data transfer
4. HTTP/HTTPS (HyperText Transfer Protocol) — For web data
5. FTP (File Transfer Protocol) — For transferring files
6. SMTP (Simple Mail Transfer Protocol) — For sending emails
7. DNS (Domain Name System) — Resolves domain names to IP addresses
B. Based on IP Version:
1. IPv4 (Internet Protocol version 4) — 32-bit address, like 192.0.2.1
2. IPv6 (Internet Protocol version 6) — 128-bit address, like 2001:0db8:85a3::8a2e:0370:7334
💎TCP/IP PROTOCOL
TCP/IP Model (Transmission Control Protocol/Internet Protocol Model)
The TCP/IP model is a 4-layer network communication model used to design and implement network systems. It is the foundation of the Internet.
Layers of TCP/IP Model:
1. Application Layer
→ Protocols: HTTP, FTP, SMTP, DNS, etc.
→ Function: User interface and application services (web, email, file transfer)
2. Transport Layer
→ Function: End-to-end communication, data flow control, error handling
3. Internet Layer
→ Protocols: IP (IPv4, IPv6), ICMP, ARP
→ Function: Logical addressing and routing of packets across networks
4. Network Access Layer (Link Layer)
→ Protocols: Ethernet, Wi-Fi, ARP
→ Function: Physical transmission of data over the medium (hardware level)
✨The TCP/IP model (Transmission Control Protocol/Internet Protocol model) is a set of communication protocols used to interconnect network devices on the internet. It outlines how data should be packetized, addressed, transmitted, routed, and received.
What TCP/IP Model Does:
→ Provides a standardized framework for data transmission over networks.
→ Ensures end-to-end communication between devices.
→ Allows interoperability between different hardware and software systems.
→ Divides communication tasks into layers:
🎗️Difference Between TCP and IP:
In simple terms:
IP is like a postal system that finds the destination address.
TCP is like a delivery service that ensures the message is delivered completely and correctly.
🖥️UDP PROTOCOL
UDP (User Datagram Protocol) is a communication protocol used for sending data across the internet quickly and efficiently without establishing a connection between sender and receiver.
What is UDP?
UDP is part of the Transport Layer in the TCP/IP model. It sends data in small packets called datagrams, but unlike TCP, it doesn’t check if the packets are received correctly.
Key Points:
Connectionless: No connection setup between devices.
Unreliable: Doesn’t guarantee delivery, order, or error checking.
Fast and Efficient: Lower overhead makes it ideal for real-time applications.
Lightweight: Uses less system resources compared to TCP.
How It Works:
1. Sender sends data (datagrams) to the receiver’s IP and port.
2. Receiver accepts the data if it arrives.
3. No feedback or confirmation is sent back.
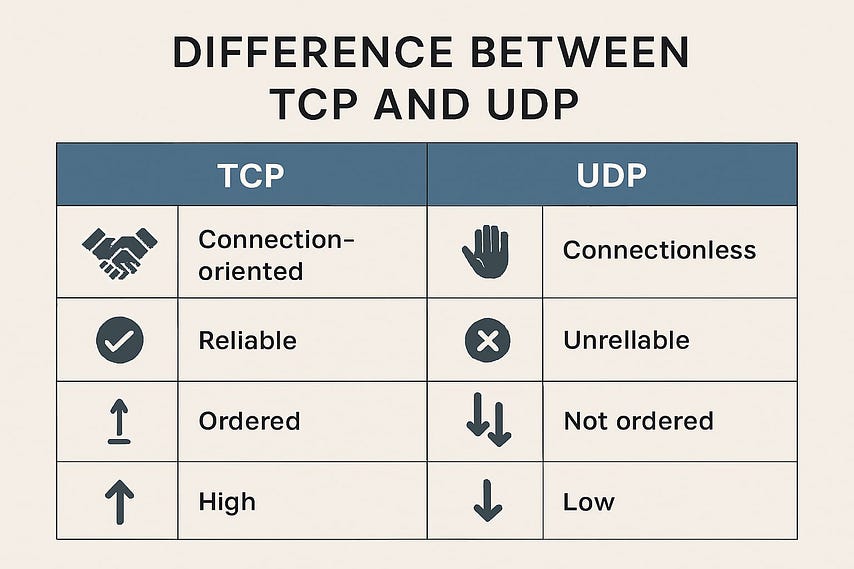
DIFFERENCE BETWEEN TCP/UDP
🖥️EMBEDDED OPERATING SYSTEM
What is an Embedded Operating System?
An embedded operating system is a specialized OS designed to run on embedded systems — devices that are not general-purpose computers but are built for a specific function. These systems are usually part of a larger device (like a washing machine, car, router, or microwave).
→ Key Features of Embedded OS:
Lightweight: Uses minimal system resources (CPU, RAM, storage).
Real-time: Often supports real-time operations (RTOS).
Reliable & Stable: Designed to run continuously without failure.
Dedicated Task: Built for specific applications or devices.
Limited User Interface: Often no or minimal GUI.
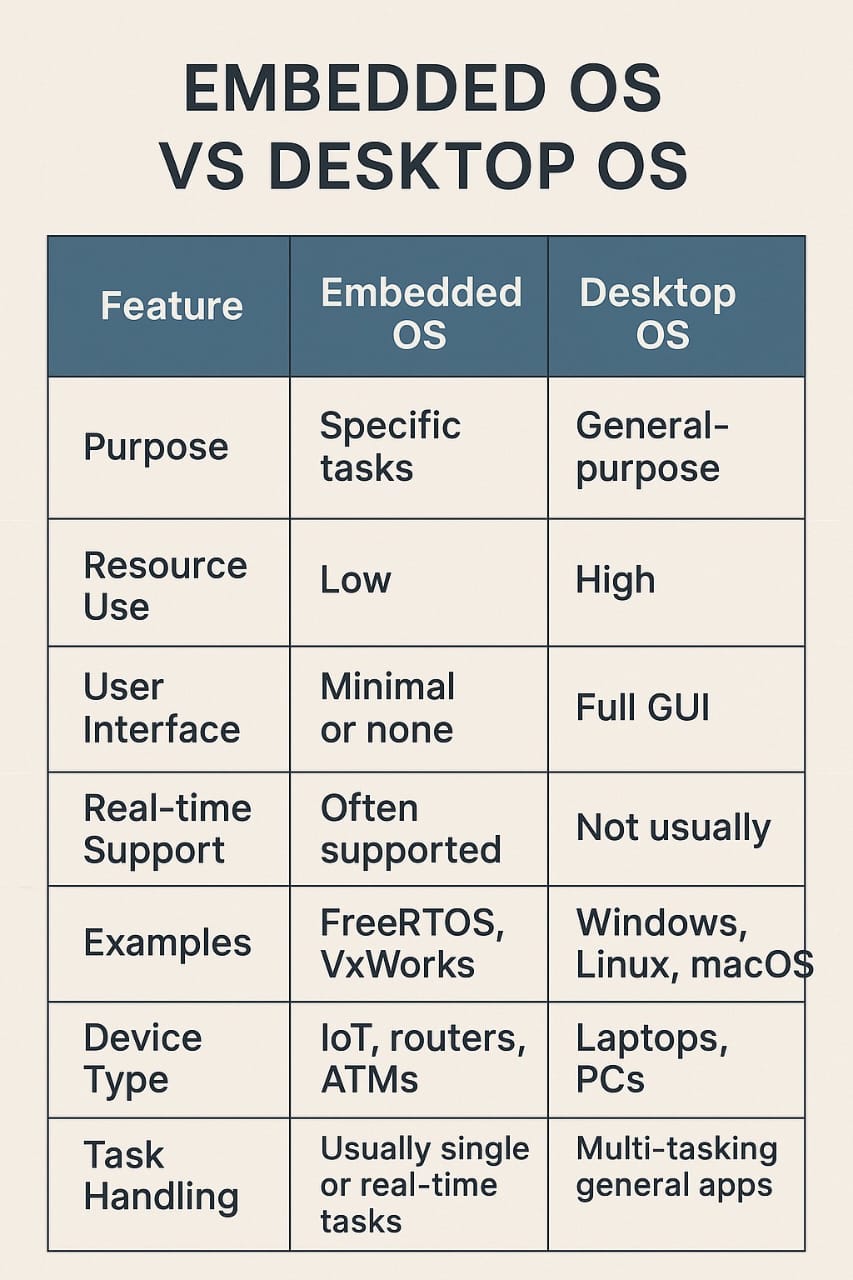
Difference: Embedded OS vs Desktop OS
🎇Advantages:
It is small in size and faster to load.
It is low cost.
Provides higher reliability.
Provides some interconnection.
Has low power consumption.
Helps to increase the product quality.
🎇Disadvantages:
The troubleshooting is harder.
It has limited resources for memory.
It isn’t easy to take a backup of the embedded OS system once it has been developed.
If any problem occurs, you need to reset the settings.
Its hardware is limited.
🤖Microprocessor (MPU):
A microprocessor is the central processing unit (CPU) of a computer on a single chip. It performs computations and logic operations and needs external components like memory and input/output devices to work.
🤖Microcontroller (MCU):
A microcontroller is an integrated chip that contains a CPU, memory (RAM/ROM), and I/O ports on a single chip. It’s designed to perform specific tasks in embedded systems.
🌟Difference Between Microprocessor and Microcontroller:
Microprocessor:
→ It is the CPU (Central Processing Unit) on a single chip.
→ Requires external memory (RAM, ROM) and input/output devices to function.
→ Mainly used in general-purpose computing like laptops, desktops, and servers.
→ Focused on high-speed data processing and complex tasks.
→ Consumes more power and is relatively expensive.
→ Offers flexibility and high performance.
→ Not ideal for specific, fixed tasks without additional components.
Microcontroller:
→ It is an integrated chip that includes CPU, RAM, ROM, and I/O ports in one unit.
→ Does not need many external components to operate.
→ Used in embedded systems for specific control tasks (e.g., home appliances, medical devices).
→ Focused on low power consumption and dedicated functionality.
→ More cost-effective and compact.
→ Suitable for real-time applications and automation.
→ Limited in processing power compared to microprocessors.
Microprocessor Types:
1. CISC (Complex Instruction Set Computer) — e.g., Intel x86
2. RISC (Reduced Instruction Set Computer) — e.g., ARM
3. DSP (Digital Signal Processor) — used in audio, video
Microcontroller Types:
1. 8-bit Microcontroller — e.g., 8051, PIC
2. 16-bit Microcontroller — e.g., MSP430
3. 32-bit Microcontroller — e.g., ARM Cortex-M series
📗Applications:
Microprocessor Applications:
Personal computers
Laptops
Servers
Microcontroller Applications:
Home appliances (microwave, washing machines)
Automotive systems (airbags, engine control)
IoT devices (smart thermostats)
Medical devices (glucose meters)
Consumer electronics (TV remotes, toys)
🏹ARDUINO
What is Arduino?
Arduino is an open-source electronics platform based on easy-to-use hardware and software. It’s designed to make it simple for anyone — from beginners to experts — to build interactive electronic projects.
The heart of an Arduino system is a microcontroller, which can be programmed to sense and control objects in the real world, like lights, motors, sensors, and more.
🎇Key Features of Arduino:
Arduino boards are able to read analog or digital input signals from different sensors and turn them into an output such as activating a motor, turning an LED on/off, connecting to the cloud, and many other actions.
You can control your board’s function by sending a set of instructions to the microcontroller on the board via the Arduino IDE (referred to as uploading a sketch).
Unlike most previous programmable circuit boards, Arduino does not need an extra piece of hardware to load new code onto the board. You can simply use a USB cable.
Additionally, the Arduino IDE uses a simplified version of C++, making it easier to learn to program.
Finally, Arduino provides a standard form factor that breaks the functions of the microcontroller into an accessible package.
ARDUINO UNO
What is Arduino Uno?
Arduino Uno is one of the most popular and widely used Arduino boards. It’s based on the ATmega328P microcontroller and is ideal for beginners.
Key Features of Arduino Uno:
Microcontroller: ATmega328P
Digital I/O Pins: 14 (6 can be used as PWM outputs)
Analog Input Pins: 6
Clock Speed: 16 MHz
USB port for programming
Reset button and power jack
→ In short:
Arduino is the overall platform, and Arduino Uno is a specific board in that platform used to build electronics projects.
Day — 5
ARDUINO IDE
☝️Arduino IDE is a software that works on Windows, Mac & Linux, which makes uploading your code as simple as connecting a USB cable and clicking a button.
☝️IDE is a text editor like Notepad, and a compiler is a bare minimum requirement to start coding.
☝️A compiler : is a special program that processes statements which convert code into machine-understandable language.
☝️But unlike a text editor, an IDE is a software tool which has a lot more functionality to make programming easier for the user.
☝️It has a built-in text editor and compiler, along with easy-to-use tools, menus, and buttons to compile, run, debug, analyze & save the program.
☝️In Arduino, we use Embedded C/C++.Arduino is a cross-compiler.
☝️The Arduino IDE is an open-source software used to write and upload code to the Arduino board.
☝️It supports the programming languages C and C++.
☝️The program or code written in the Arduino IDE is often called a Sketch.
☝️We need to connect the Arduino board with the IDE to upload the sketch written in the Arduino IDE software.
☝️The sketch is saved with the extension .ino.
☝️The projects are authorized under the GPL & LGPL licenses.
☝️GPL is named as GNU General Public License.
☝️The licensed LGPL is named as GNU Lesser General Public License. It allows the use of Arduino boards, software distribution, and can be manufactured by anyone.
Note:
Compiler: Same code execution in the same computer.
Cross Compiler: Program code written in one machine, execution and compilation in another.
INSTALLATION OF ARDUINO IDE:
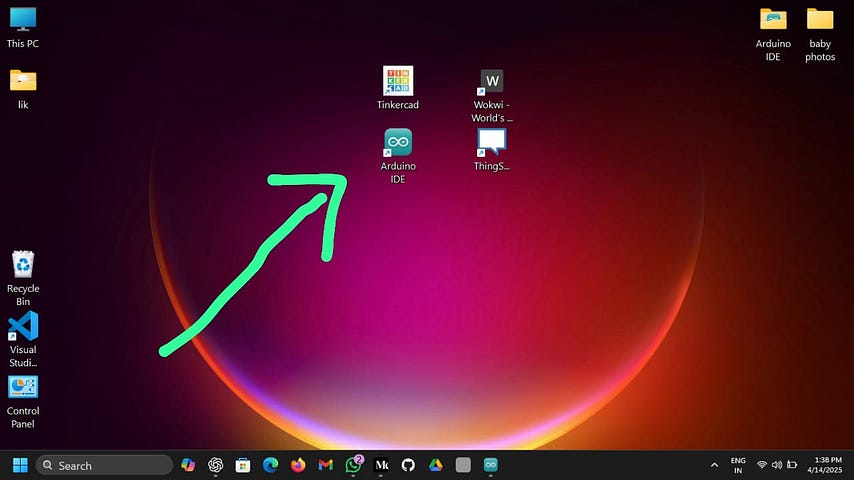
I HAVE SUCCESSFULLY DOWNLOADED THE ARDUINO UNO
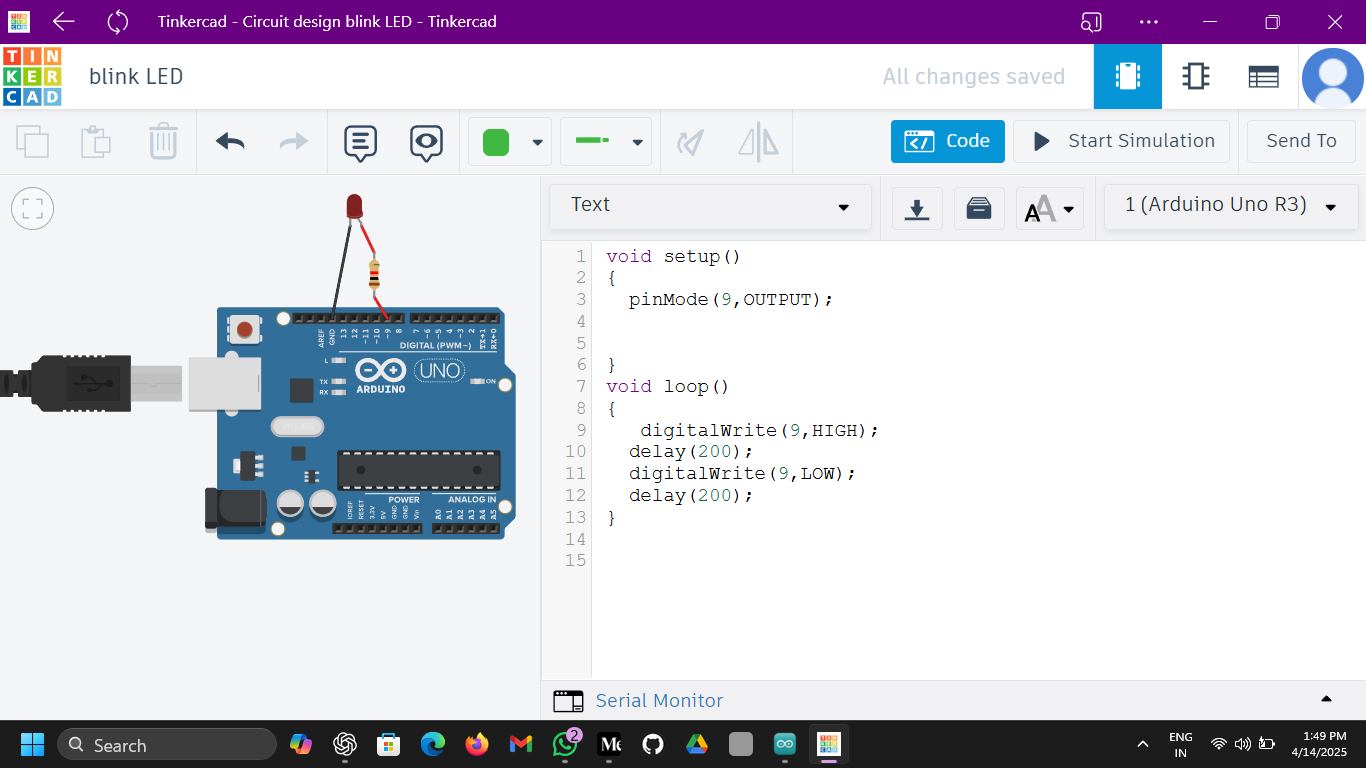
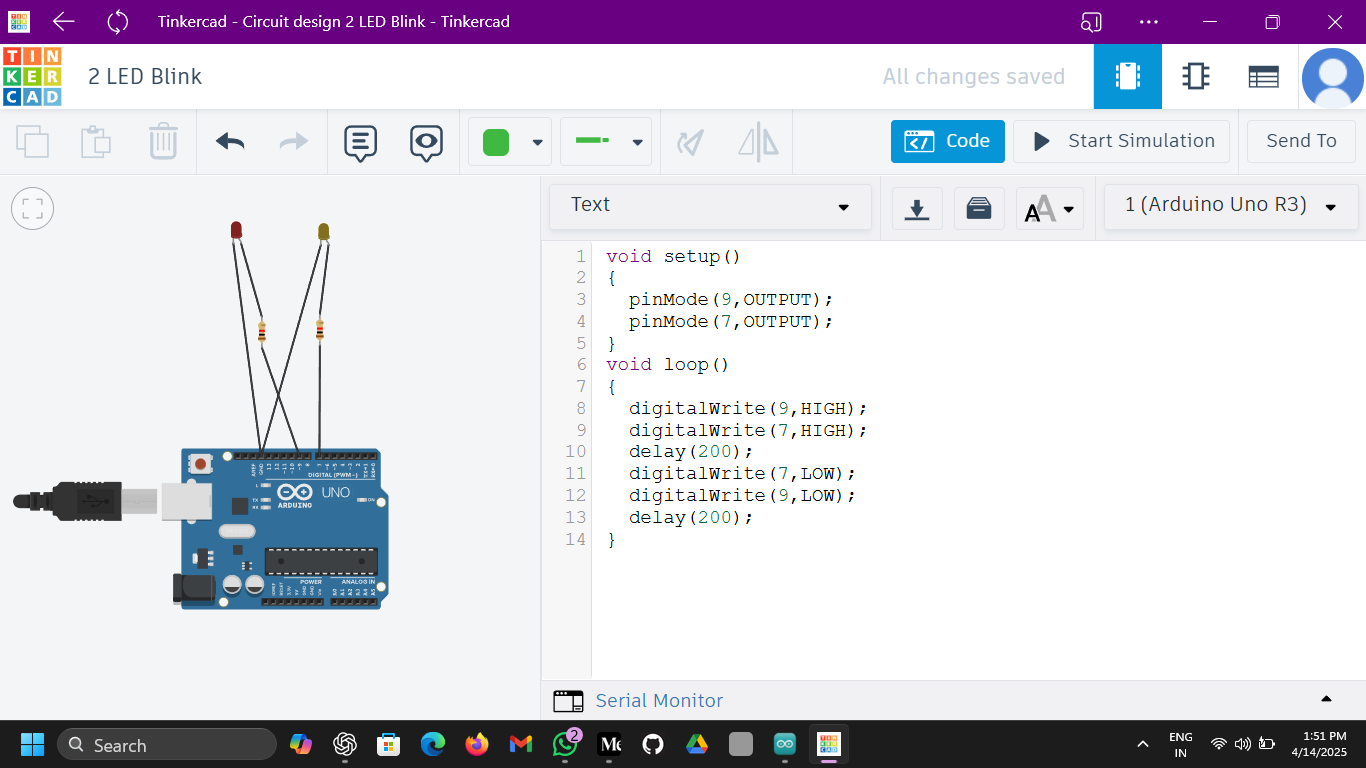
🖥️Demonstration of these Arduino functions
like setup(), loop(), pinMode(), digitalWrite(), digitalRead(), analogWrite(), and analogRead() ,delay()— including syntax, what they connect to, their status (like input/output), number of arguments, and return values.
1. setup()
Syntax: void setup() { /\ your code */ }*
Purpose: Runs once when the board is powered or reset.
Use: To initialize pin modes, serial communication, etc.
Connected peripheral: Not directly connected but sets up pins or modules.
2. loop()
Syntax: void loop() { /\ your code */ }*
Purpose: Repeats continuously after setup() finishes.
Use: Main logic of your program goes here.
Connected peripheral: Same as setup, depends on usage.
3. pinMode(pin, mode)
Syntax: pinMode(13, OUTPUT);
Purpose: Sets a digital pin to input or output mode.
Arguments:2
pin: The digital pin number (e.g., 13)
mode: INPUT, OUTPUT, or INPUT_PULLUP
Returns: Nothing
Connected peripheral: Digital devices (LED, button, sensor)
Status: Sets whether the pin is reading data (INPUT) or sending data (OUTPUT)
4. digitalWrite(pin, value)
Syntax: digitalWrite(13, HIGH);
Purpose: Sends HIGH or LOW signal on a digital pin.
Arguments:2
value: HIGH or LOW
Connected peripheral: Digital devices like LEDs, buzzers
Status: Controls ON or OFF state of the device
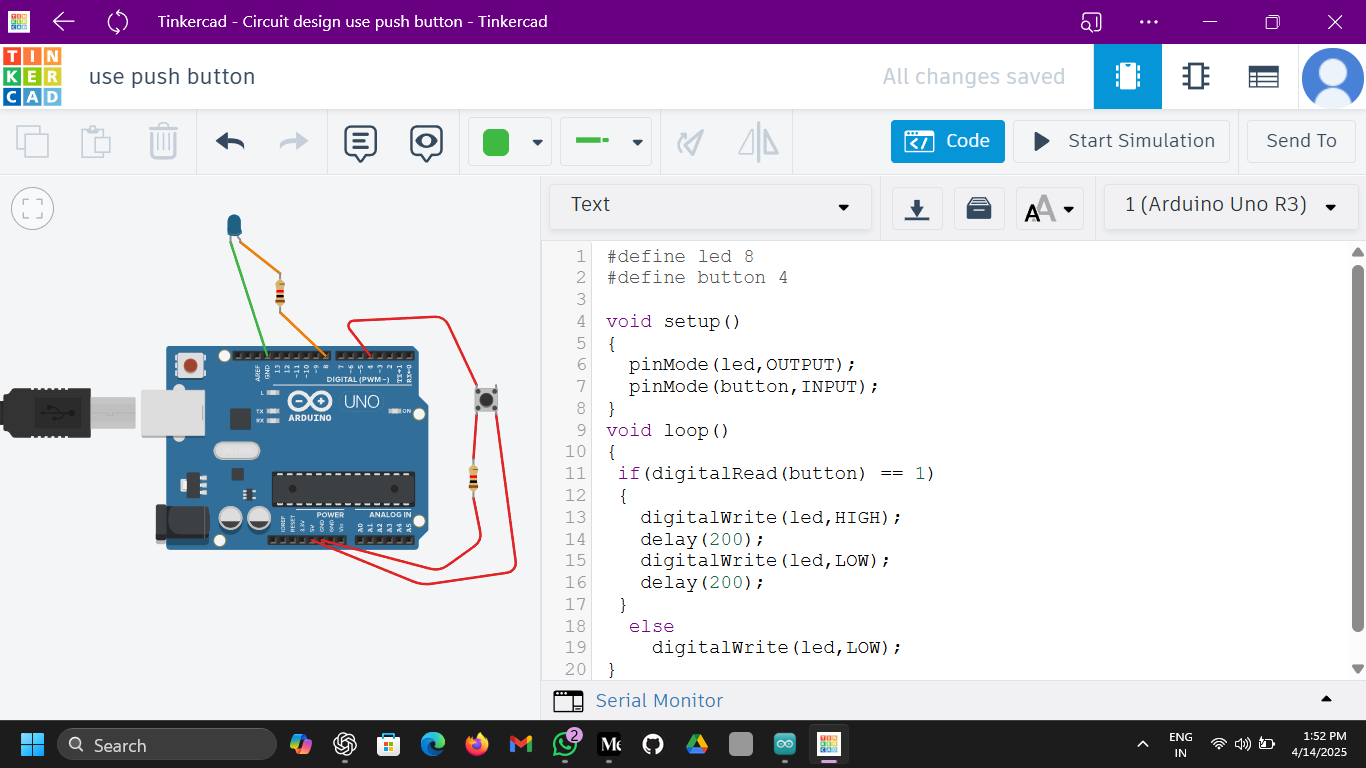
5. digitalRead(pin)
Syntax: int buttonState = digitalRead(2);
Purpose: Reads the signal from a digital pin (button, sensor)
Arguments:1
Returns: HIGH or LOW
Connected peripheral: Digital input devices like switches
Status: Returns current signal value
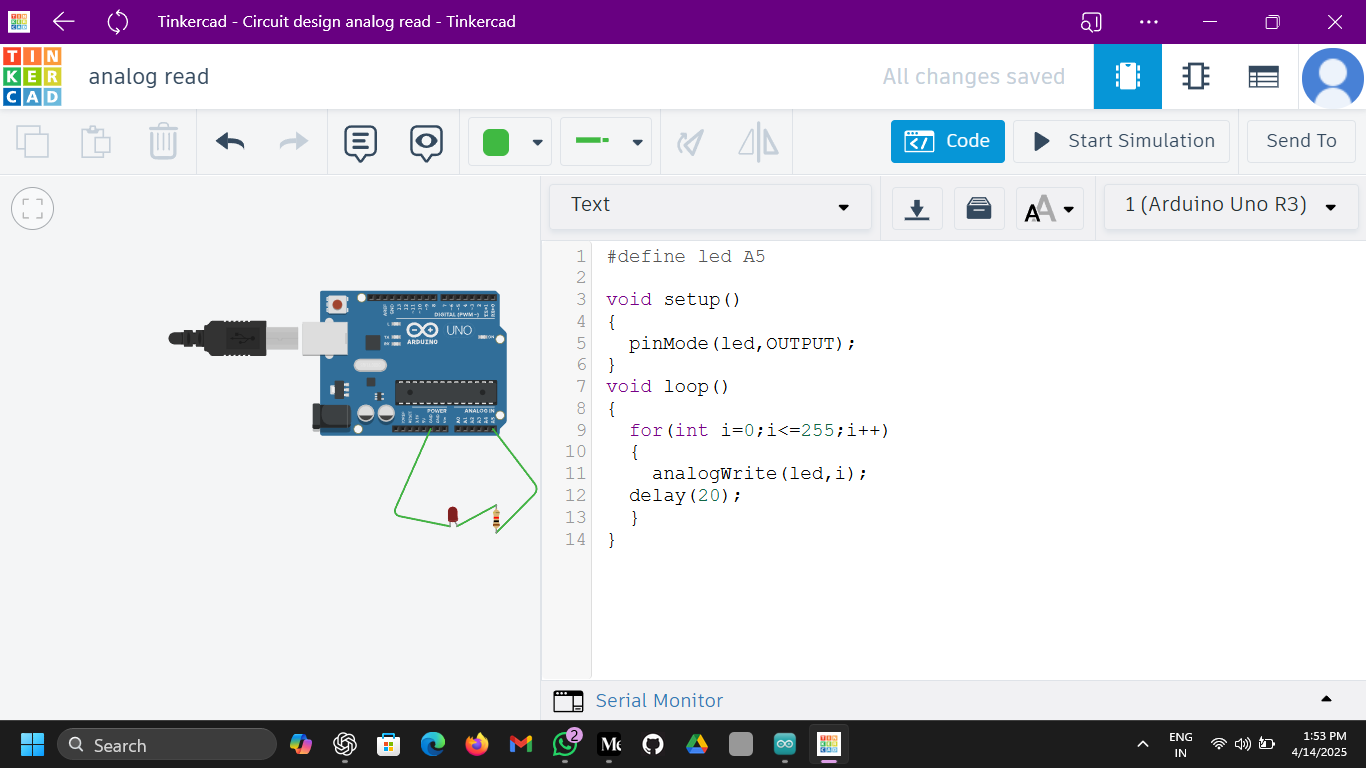
6. analogWrite(pin, value)
Syntax: analogWrite(9, 128);
Purpose: Outputs PWM signal on a pin (simulate analog output)
Arguments:2
pin: PWM-enabled digital pin
value: 0 to 255
Connected peripheral: LED brightness, motor speed, etc.
Status: Controls analog-like output (PWM)
7. analogRead(pin)
Syntax: int sensorValue = analogRead(A0);
Purpose: Reads the value from an analog pin
Arguments:1
pin: Analog pin (like A0, A1…)
Returns: Integer from 0 to 1023
Connected peripheral: Sensors like LDR, potentiometers
Status: Returns analog input voltage level
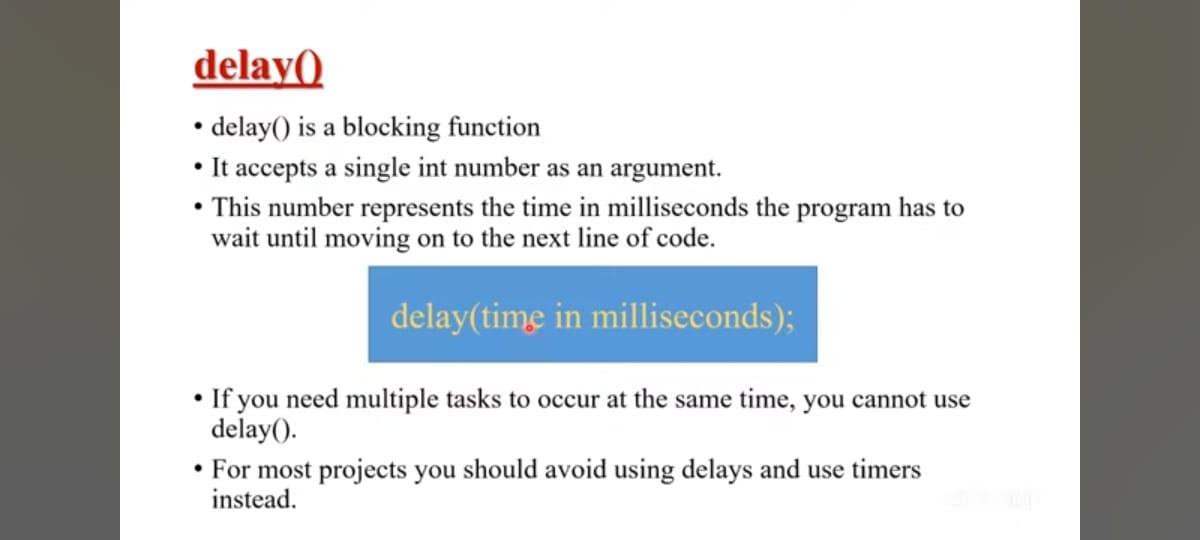
🌟delay() Function
Purpose:
The delay() function pauses the program for a specific amount of time in milliseconds (ms). It’s commonly used when you want to add a time gap between two actions, like blinking an LED on and off.
Syntax:delay(ms);
Can be used for timing actions with any peripheral like LEDs, motors, buzzers, sensors, etc.
Parameters:ms: The amount of time to wait, in milliseconds (1 second = 1000 milliseconds).
Example: delay(1000); will pause the program for 1 second.
🌟Type of Function:
Blocking — while the delay is running, Arduino does nothing else. It stops all other code execution, even if some other action could be happening (like reading a sensor or checking a button).
SIMULATOR : TINKER CAD

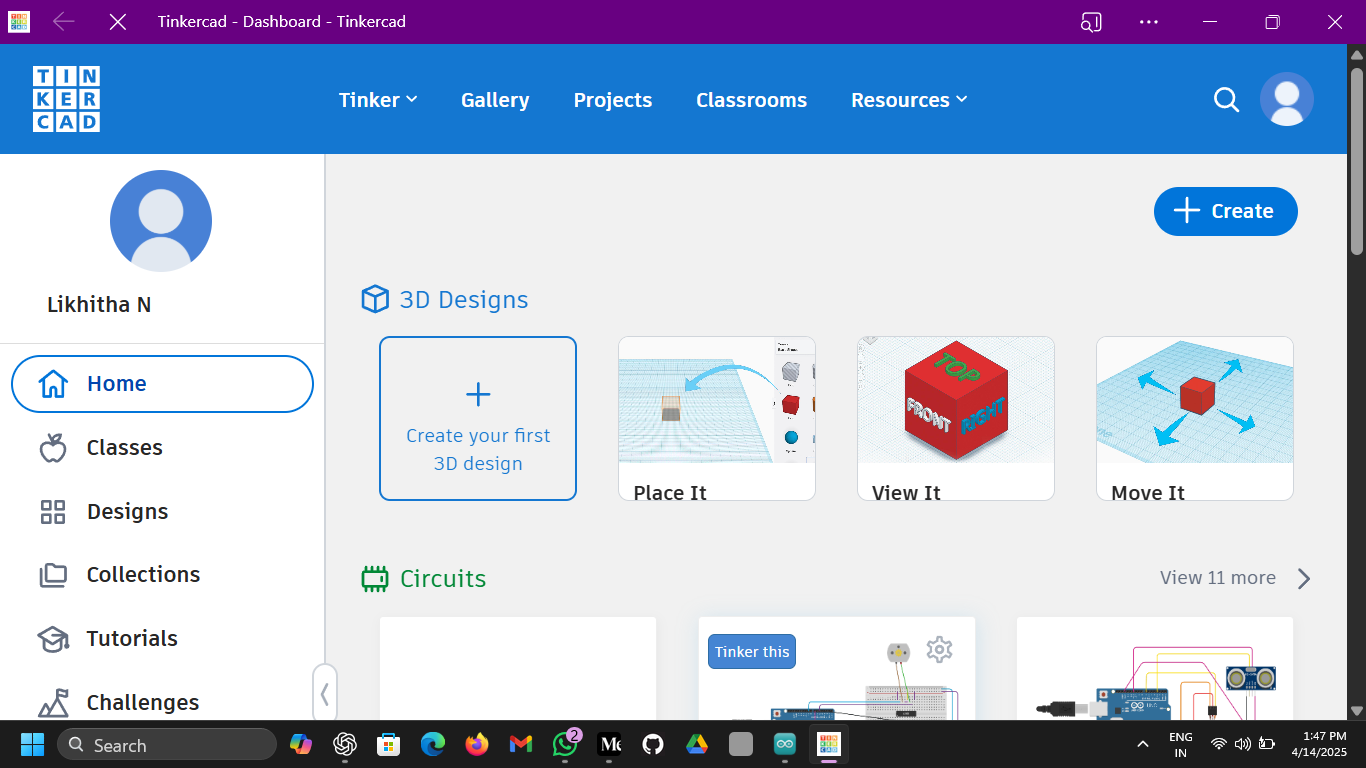
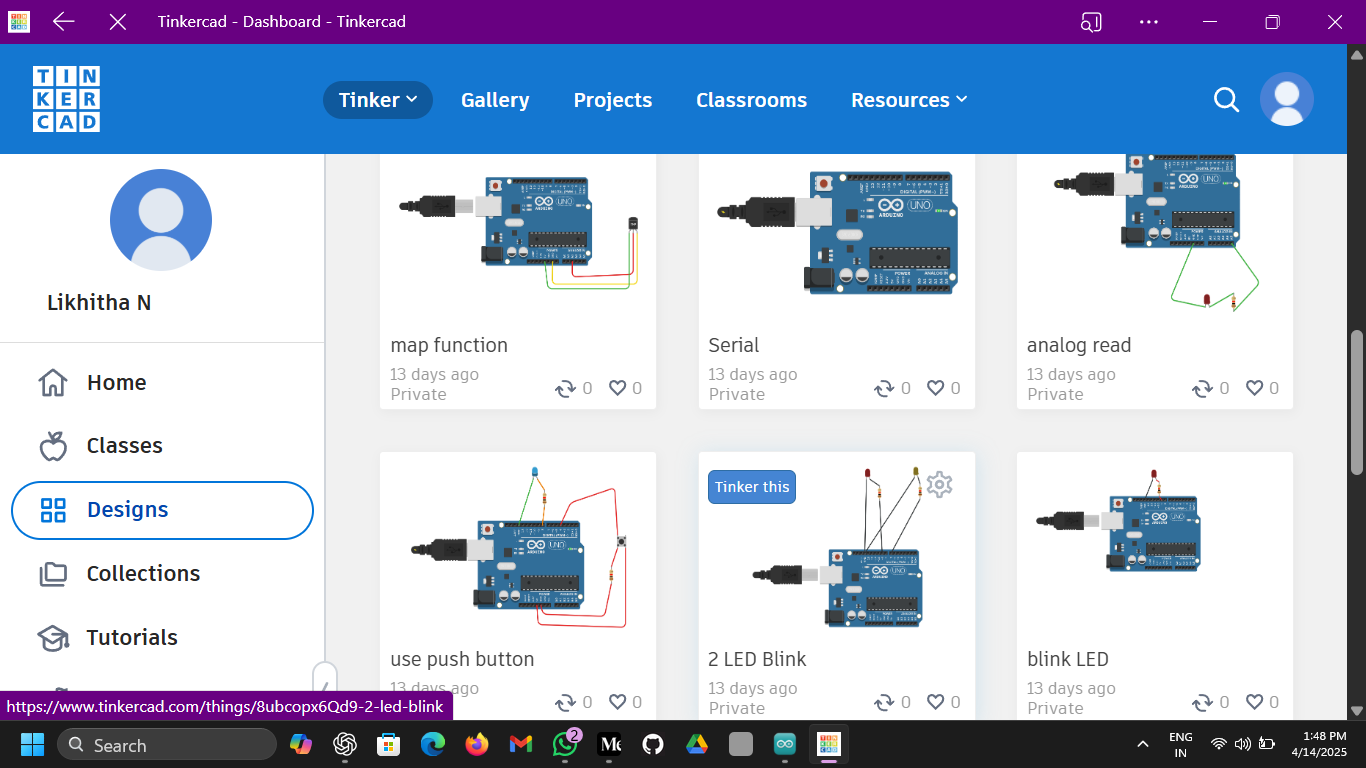
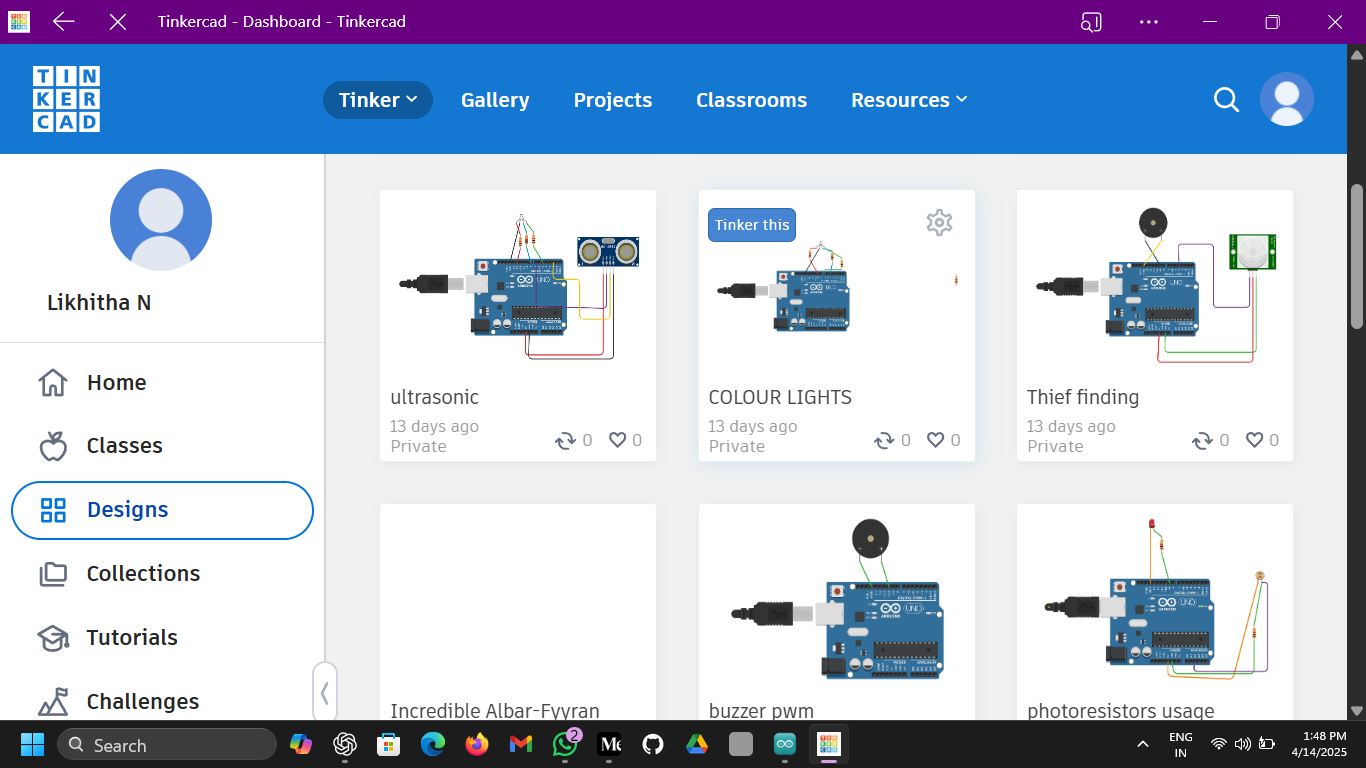
TINKER CAD SIMULATIONS BY MYSELF
DAY — 6
🖥️SERIAL MONITOR:
What is the Serial Monitor?
The Serial Monitor is a built-in tool in Arduino and also available in Tinkercad’s simulator. It allows you to send data from your Arduino board to your computer (or Tinkercad’s virtual terminal) and see that data in real-time.
It’s super useful for:
Debugging your code
Displaying sensor values
Understanding what your program is doing step by step
Serial Functions & Syntax
1. Serial.begin()
→ Syntax: Serial.begin(baudRate);
→ Purpose: Initializes serial communication at a specific speed (baud rate).
Example:
Baud Rate: Common value is 9600. It means 9600 bits per second.
2. Serial.print()
→ Syntax: Serial.print(data);
→ Purpose: Sends data to the serial monitor without a new line.
Example:
Serial.print(“Temperature: “);
Serial.print(tempValue);Output:Temperature: 25.3
3. Serial.println()
→ Syntax: Serial.println(data);
→ Purpose: Sends data to the serial monitor with a new line after it.
Example:
Output:
Hello
(moves to next line)
4. Serial.read() (Optional advanced use)
Used to receive data from the Serial Monitor (like when you’re typing input).
✨Why Use the Serial Monitor?
To check values from sensors (LDR, temp, etc.)
To track program flow (whether some code is running or not)
For debugging purposes (checking variable values, checking if buttons work, etc.)
🖥️map() FUNCTION
The map() function is used to re-map a number from one range to another. It’s especially useful in IoT projects to convert sensor readings to suitable output values.
Syntax: map(value, fromLow, fromHigh, toLow, toHigh)
Parameters:
value — The number you want to map.
fromLow, fromHigh — The current range of the value.
toLow, toHigh — The new range you want to map the value to.
PHOTO RESISTOR (LDR SENSOR)
A Photoresistor or LDR (Light Dependent Resistor) is a type of resistor whose resistance changes based on the amount of light falling on it.
Function of LDR:
In Bright Light:Resistance decreases (More current flows)
In Darkness:Resistance increases (Less current flows)
This behavior allows the LDR to act as a light sensor in various circuits.
Typical Applications in IoT / Arduino:
Automatic street lights
Light-activated alarms
Brightness control systems
Solar trackers
PWM PINS :
In Arduino (including Tinkercad), PWM (Pulse Width Modulation) pins allow you to output analog-like signals using digital pins — useful for dimming LEDs, controlling motor speed, etc.
DAY 7
🌐SERVO MOTOR
A servo motor in Arduino Tinkercad is used for precise control of angular position. It can rotate typically between 0° to 180° based on the signal received from a PWM-capable digital pin.
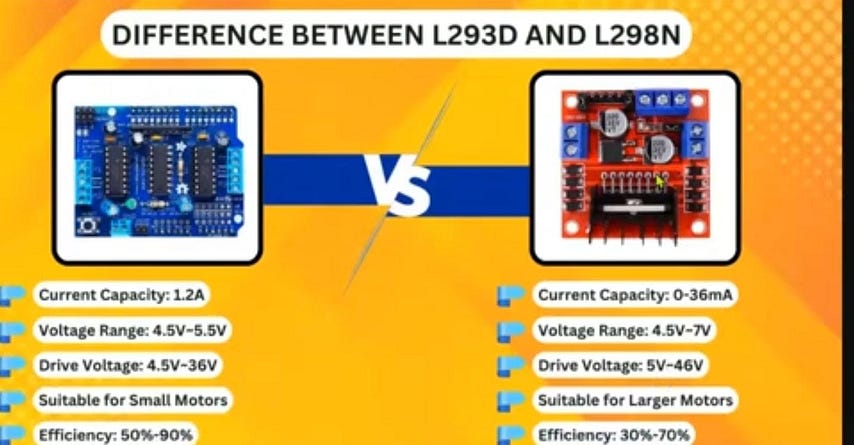
🎗️L293D V/S L293N
The L293D and L293N are both motor driver ICs used to control DC motors and stepper motors in robotics and IoT projects. They’re very similar, but there are a few small differences worth noting.
1. Manufacturer & Naming
L293D: Most common version, widely used in Arduino and hobbyist kits.
L293N: A less common variant, typically functionally equivalent but depends on manufacturer naming.
2. Internal Flyback Diodes
L293D: Has internal protection diodes for back EMF from motors — safer for beginners.
L293N: May not have internal diodes depending on manufacturer — may require external diodes.
3. Current Handling
L293D: Max output current per channel ~600 mA (with peaks up to 1.2A).
L293N: Similar or slightly higher current (sometimes listed up to 1A per channel depending on datasheet).
4. Availability
L293D is more popular and supported in Tinkercad and most beginner kits.
L293N might be seen in older or alternate kits.
5. Pin Configuration
- Both have the same pinout and can often be used interchangeably in basic circuits.
✨LCD(LIQUID CRYSTAL DISPLAY)
→ Using an LCD with Arduino in Tinkercad is a great way to display data like sensor readings or messages. The most common display used is the 16x2 LCD (with Hitachi HD44780 driver).
→ LCD Basics:16x2 means: 16 characters per row, 2 rows.Can be connected directly (parallel mode) or via I2C module (not natively available in Tinkercad).
DAY 8
🌐NODE MCU
NodeMCU is an open-source IoT (Internet of Things) platform based on the ESP8266 or ESP32 Wi-Fi modules. It combines the ESP chip with a USB interface, voltage regulator, and breadboard-friendly form factor, making it a popular choice for DIY electronics and IoT projects.
Key Features:
🎗️Microcontroller: ESP8266 (NodeMCU v1.0) or ESP32 (more powerful version)
🎗️Wi-Fi: Built-in Wi-Fi capability
🎗️Programming Language: Lua (originally), but more commonly programmed using Arduino IDE or PlatformIO in C/C++
🎗️GPIO Pins: Allows control of LEDs, sensors, motors, etc.
🎗️USB-to-Serial: Makes programming and communication with PC easy
Common Uses:
Home automation (like smart lights or fans)
IoT projects (weather stations, remote sensors)
Data logging
Wireless control systems
✨DIFFERENCE IN NodeMCU AND ARDUINO
NodeMCU and Arduino are both popular platforms used in electronics and IoT projects, but they have some key differences.
→ NodeMCU is based on the ESP8266 or ESP32 microcontroller, which has built-in Wi-Fi capability. This makes NodeMCU ideal for projects that require wireless communication or Internet access, such as IoT applications. It also supports more modern development environments and can be programmed using the Arduino IDE, MicroPython, or Lua. NodeMCU boards are generally more compact and offer better processing power and memory compared to traditional Arduino boards.
→ On the other hand, Arduino refers to a family of microcontroller boards such as the Uno, Mega, and Nano. These boards are based on AVR microcontrollers like the ATmega328P. While they are beginner-friendly and widely supported, they lack built-in Wi-Fi. To use Wi-Fi with Arduino, additional modules like the ESP8266 or ESP32 are required. Arduino is best suited for general-purpose electronics projects that don’t require internet connectivity.
In summary, NodeMCU is better suited for IoT and Wi-Fi-based projects due to its built-in wireless capabilities, while Arduino is more versatile for basic electronics and prototyping when wireless connectivity is not needed.
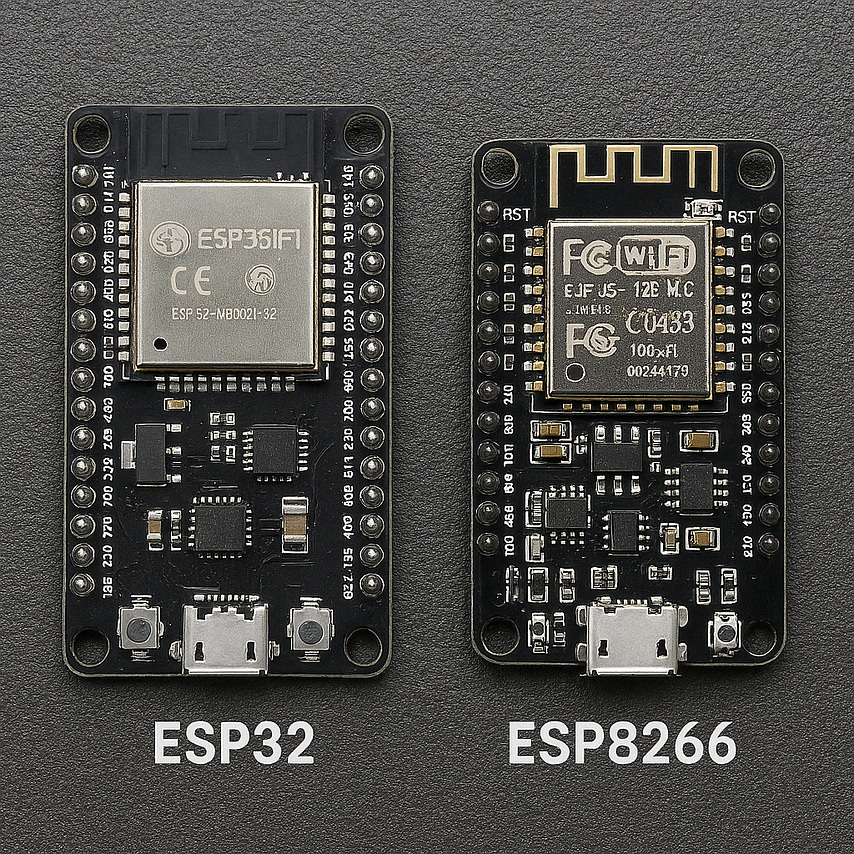
🌟ESP8266 VS ESP32
The ESP32 and ESP8266 are both Wi-Fi-enabled microcontrollers developed by Espressif Systems, but they have several differences in terms of performance, capabilities, and features.
ESP8266:
→ Microcontroller: Based on a single-core Tensilica L106 32-bit processor running at up to 80 MHz.
→ Memory: 64 KB of instruction RAM, 96 KB of data RAM, and up to 4 MB of Flash memory.
→ Connectivity: Built-in Wi-Fi (802.11 b/g/n), supports both Station and Access Point modes.
→ GPIO Pins: Typically has 17 GPIO pins available.
→ Power Consumption: Generally lower, making it suitable for low-power applications.
→ Use Case: Ideal for simple IoT projects, such as smart home devices, sensors, and basic Wi-Fi communication tasks.
ESP32:
→ Microcontroller: A more powerful, dual-core processor (based on Tensilica Xtensa LX6), running at up to 240 MHz.
→ Memory: Typically comes with 520 KB of SRAM, and 4 MB to 16 MB of Flash memory.
→ Connectivity: Supports Wi-Fi (802.11 b/g/n), as well as Bluetooth (Classic and BLE), making it much more versatile than the ESP8266.
→ GPIO Pins: Has more than 30 GPIO pins, offering greater flexibility for interfacing with sensors and actuators.
→ Power Consumption: Higher than the ESP8266 but has better power-saving modes, which can still make it efficient in certain applications.
→Use Case: Suitable for more complex applications, such as advanced IoT, Bluetooth communication, audio processing, and real-time systems.
Key Differences:
Processing Power: ESP32 has a dual-core processor with higher clock speed (up to 240 MHz), while ESP8266 is a single-core processor running at 80 MHz.
Memory: ESP32 has much more memory, including both SRAM and Flash, making it capable of handling more complex tasks.
Bluetooth Support: ESP32 includes Bluetooth (Classic and BLE), while ESP8266 only supports Wi-Fi.
GPIOs: ESP32 provides more GPIO pins, which are useful for larger and more intricate projects.
Energy Efficiency: ESP8266 is more power-efficient for basic tasks, but ESP32 offers better power management for more demanding applications.
Conclusion:
✨ESP8266 is ideal for simpler, cost-effective, Wi-Fi-based IoT applications.
✨ESP32 is more suited for advanced projects that require more processing power, memory, and the addition of Bluetooth connectivity.
🏹INTERRUPTS
Interrupts in NodeMCU (ESP8266 or ESP32) are special mechanisms that allow the microcontroller to pause the main program and quickly respond to specific events, such as a button press or a signal change on a pin. This is useful in real-time applications where immediate response is required without constantly checking the input in the main loop.
How Interrupts Work
An interrupt temporarily stops the regular program flow, jumps to an Interrupt Service Routine (ISR) (a special function), executes it, and then resumes the main program.
Types of Interrupts in NodeMCU (ESP8266/ESP32):
External interrupts: Triggered by GPIO pin changes (e.g., RISING, FALLING, or CHANGE).
Timer interrupts (mainly in ESP32): Triggered by hardware timers for periodic tasks.
delay() and milli() function
DAY — 9:
1. Ultrasonic Sensor (e.g., HC-SR04)
→ Function: Measures distance using ultrasonic waves.
→ Use Case: Obstacle detection, parking sensors, water level monitoring.
→ Output: Digital (measured in cm or inches).
2. Soil Moisture Sensor
→ Function: Detects the moisture level in the soil.
→ Use Case: Automatic plant watering systems.
→ Output: Analog or digital depending on the sensor type.
3. DHT Sensor (e.g., DHT11 or DHT22)
→ Function: Measures temperature and humidity.
→ Use Case: Weather stations, home automation, greenhouse monitoring.
→ Output: Digital.
4. Servo Motor (e.g., SG90)
→ Function: Rotates to a specific angle (0° to 180° or 360° continuous).
→ Use Case: Robotics, camera panning, control systems.
→ Control: PWM (Pulse Width Modulation) signal.
💎BLUETOOTH MODULE
A Bluetooth module like HC-05 or HC-06 can be used with Arduino to send/receive data wirelessly using the Arduino IDE. Here’s a basic overview:
delay(1000);
RELAY MODULE
We use a relay module with Arduino (or any microcontroller) to control high voltage or high current devices that the microcontroller cannot handle directly.
To control high voltage devices:
Electrical isolation:
Act like a switch:
Real-Life Examples:
Turning on a water pump when soil is dry.
Home automation: controlling lights/fans with a mobile app via Arduino.
Industrial automation: managing machines or alarms.
DAY- 10
🌐WIFI
In the Arduino environment, WiFi is used to connect your microcontroller (like ESP32 or ESP8266) to a wireless network. This allows your board to: Access the internet, Communicate with other devices on the same network,Create web servers or clients,Send/receive data to/from APIs, databases, or apps.
→ The WiFi library helps control the WiFi features of the board, like:
Scanning nearby WiFi networks
Connecting to a specific WiFi
Checking connection status
Getting the IP address
🖥️THINGSPEAK
ThingSpeak is an IoT (Internet of Things) platform that lets you collect, store, analyze, and visualize sensor data in the cloud.
Key Features:
Data Logging: Store sensor values (like temperature, humidity, etc.) from devices like Arduino, ESP8266, ESP32.
Visualization: Create real-time graphs of your data.
MATLAB Analytics: Run analysis or automation using MATLAB code directly in ThingSpeak.
APIs: Send (write) and receive (read) data using simple HTTP requests.
How it Works:
1. Create a Channel on ThingSpeak (a container for your data).
2. Get Your API Key (used to securely send data).
3. Upload Code to Your Board (ESP32/ESP8266) to send sensor values using WiFi.
4. View Live Graphs on your channel.
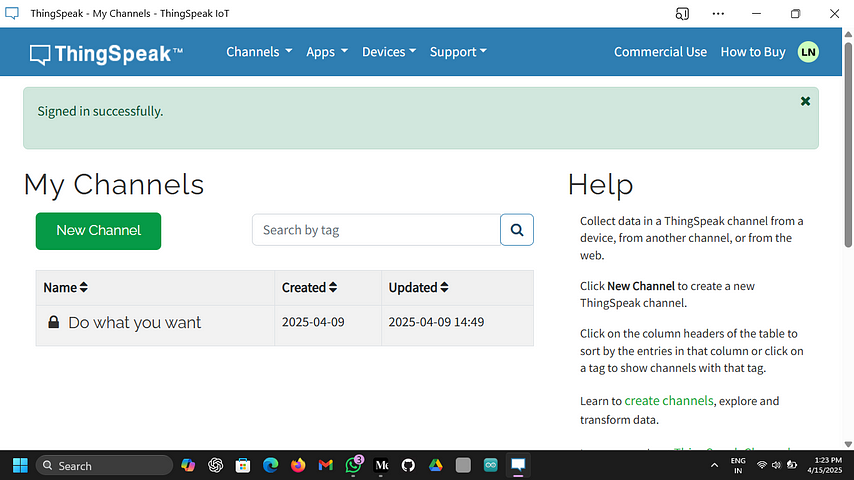
IN MY DEVICE
DAY — 11
🌟What is ThingSpeak?
ThingSpeak is an IoT cloud platform that allows you to:
Collect data from sensors (like ESP32).
Visualize it using graphs and charts.
Use MATLAB code to analyze and process that data.
What is ESP32-CAM?
ESP32-CAM is a low-cost microcontroller with:
Built-in WiFi + Bluetooth.
Camera module (OV2640).
Can capture images, stream video, and send data to cloud platforms like ThingSpeak.
How MATLAB Works with ThingSpeak:
ThingSpeak has a MATLAB Analysis feature where you can write MATLAB code to:
Analyze your sensor data (e.g., average, trend, alert).
Trigger actions (like sending an email or turning on devices).
Do real-time processing of live data from your ESP32.
🎇Types of Content You Can Do in ThingSpeak with ESP32-CAM
A. Data Collection
Send sensor values (temperature, humidity, motion detection) from ESP32 to ThingSpeak.
Send image or video data (processed or encoded).
B. Visualization
Image plots using URL links from ESP32-CAM.
C. Real-Time Alerts
Use MATLAB code to analyze data.
Send SMS or email if a condition is met (e.g., temperature too high).
D. Image-Based Projects
ESP32-CAM captures an image.
Sends the image to a web server or triggers an event on ThingSpeak.
MATLAB checks time stamps or camera values to make decisions.
DAY 12
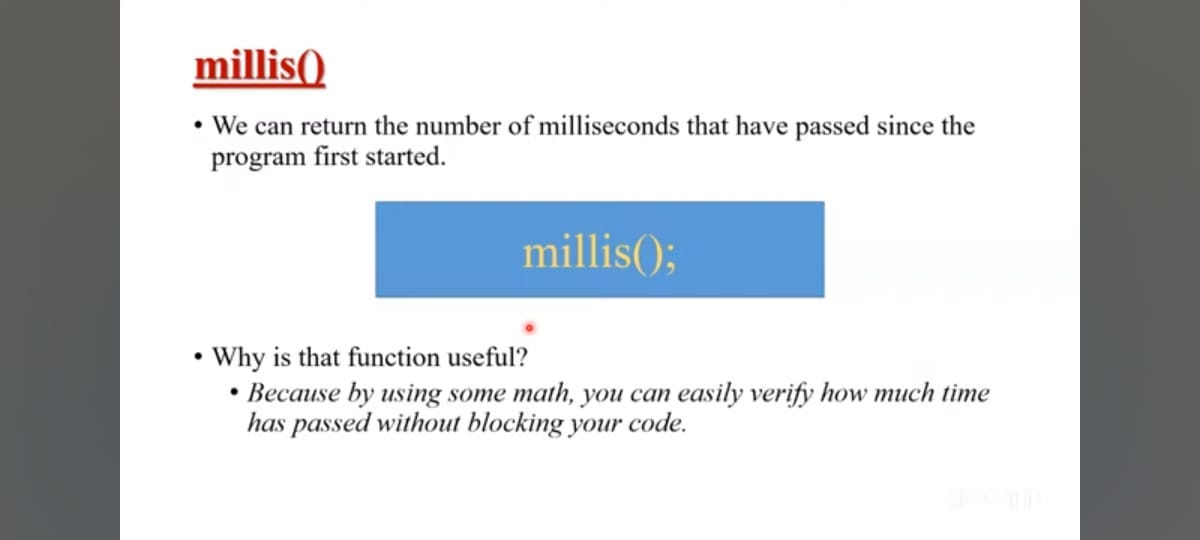
🌟What is millis()?
millis() returns the number of milliseconds since the board started running the program.
Why use millis() instead of delay()?
Because delay() freezes the whole program — millis() lets your code run non-blocking (more efficient for real-time control or multitasking).
🌐MQTT
What is MQTT?
→ MQTT is a lightweight messaging protocol designed for small sensors and mobile devices in low-bandwidth, high-latency or unstable networks.
→ Full form: Message Queuing Telemetry Transport
→ Created by IBM, now an open standard.
→ Perfect for IoT, smart homes, real-time sensors, and remote monitoring systems.
Why Use MQTT?
🌟Efficient communication between devices
🌟Ideal for devices like ESP32, ESP8266, Raspberry Pi, etc.
🌟Works over TCP/IP
🌟Very fast and lightweight compared to HTTP
How MQTT Works — Basic Structure
✨MQTT works on a Publish / Subscribe model:
1. Broker
- The central server that manages all message exchanges.
Examples: Mosquitto (popular open-source), HiveMQ, EMQX, etc.
2. Publisher
Example: ESP32 sensor sending temperature data.
3. Subscriber
Example: Your phone or dashboard that displays sensor data.
🎉Key Concept: Topics
- Messages in MQTT are organized by topics — like channels.
Example topic:
home/livingroom/temperature
Devices publish to a topic.
Other devices subscribe to that topic to receive the data.
MQTT Process Flow:
1. ESP32 connects to WiFi
2. ESP32 connects to MQTT Broker (like Mosquitto on cloud)
3. ESP32 publishes sensor data to a topic like:
home/room1/temperature
4. Your mobile app (like MQTT Dash or Node-RED) subscribes to that topic
5. It receives the data and displays it
MQTT Packet Types (Basics):
CONNECT — client connects to broker
PUBLISH — client sends data
SUBSCRIBE — client wants data from a topic
UNSUBSCRIBE — stop receiving
DISCONNECT — client disconnects
Popular MQTT Brokers:
Mosquitto (Open Source)
HiveMQ
Adafruit IO
Broker.mqtt-dashboard.com (Public test broker)
Libraries for Arduino IDE (ESP32/ESP8266):
PubSubClient — most common and lightweight MQTT client
DAY — 13
🌐IoT and MQTT Protocol
- The session focused on the MQTT protocol, which operates on a *publish-subscribe architecture*, widely used in IoT applications .
- The implementation involved using ESP32 devices for publishing and subscribing to messages, demonstrating data exchange between master and slave devices .
- Key libraries such as pubsubclient.h were utilized to establish MQTT connections, with practical coding examples provided .
🎇Raspberry Pi Introduction
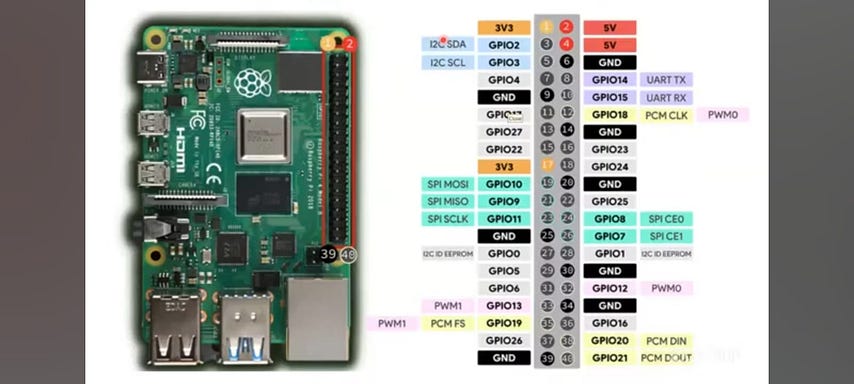
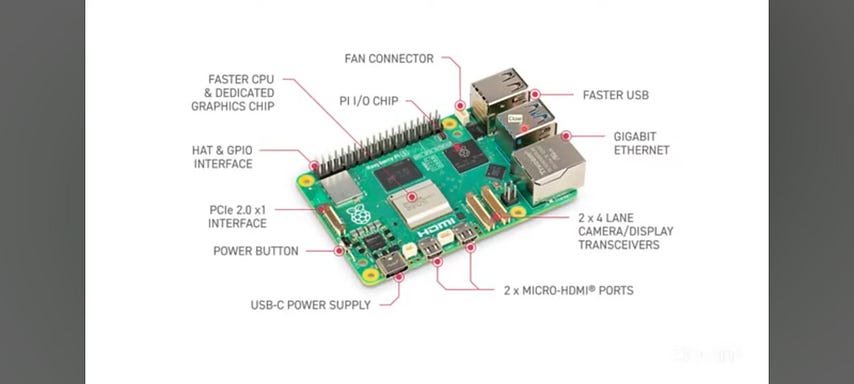
- The Raspberry Pi was introduced as a versatile computing platform, capable of functioning as a mini-computer and supporting various applications, including IoT .
- It features multiple connectivity options, GPIO pins for interfacing with sensors, and the ability to run machine learning models .
- The session covered the installation of operating systems on Raspberry Pi, emphasizing the use of SD cards for storage and the setup of SSH for remote access .
DAY — 14
🖥️Node-RED in IoT Applications
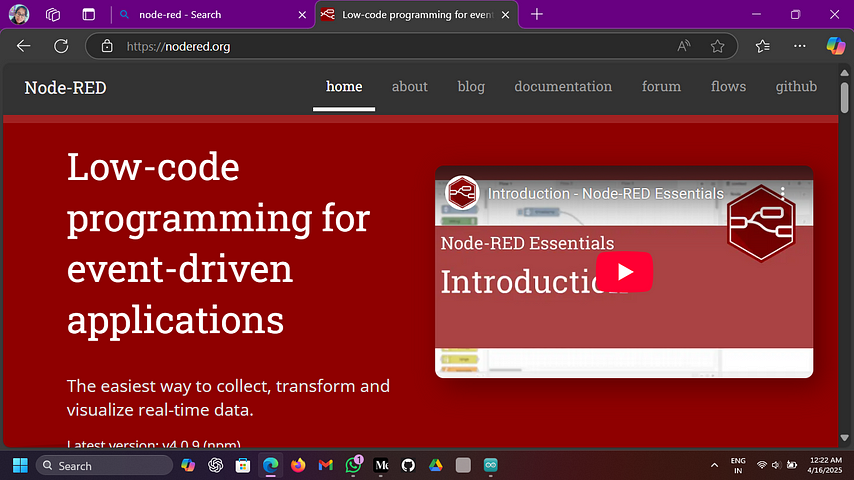
- Node-RED is a low-code programming tool designed for event-driven applications, facilitating the collection, transformation, and visualization of real-time data .
- It provides a visual programming environment where users can easily connect devices through APIs and services using a drag-and-drop interface .
- The platform supports rapid prototyping of IoT applications and integrates physical devices with cloud services .
🌟Key Features of Node-RED
- Visual Programming: Utilizes a visual editor with predefined nodes to create data flows, making it accessible for beginners .
- Node-Based Architecture: Each node represents a specific task, such as reading data from sensors or sending messages .
- Data Flow Management: Data is processed sequentially through nodes, allowing for real-time monitoring and visualization .
- Device Integration: Supports various protocols (e.g., MQTT, REST API) for connecting remote devices .
- Event-Driven Applications: Responds to events like sensor data changes, enabling automated actions .
🎇Applications and Benefits
- Node-RED simplifies the development of IoT applications, allowing for cloud connectivity, *data monitoring, and **automatic control of devices* .
- It is user-friendly and supports the creation of dashboards for visual data representation .
- The platform is platform agnostic, meaning it can run on various devices, including Raspberry Pi and cloud servers .
🎗️Industrial Internet of Things (IIoT)
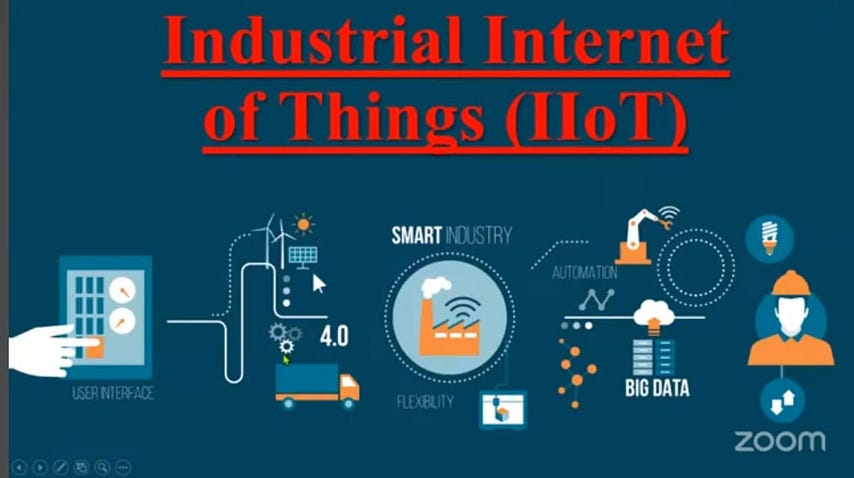
- IIoT connects IoT technology to industries, enhancing operational efficiency and productivity .
- It enables predictive maintenance, reducing downtime and improving resource management .
- The integration of IIoT leads to better quality control, inventory management, and overall digital transformation in manufacturing .
DAY-15
💎Introduction to AWS and IoT

- The session focused on Amazon Web Services (AWS), a cloud platform used for various services including IoT .
- AWS operates on a pay-as-you-use model, allowing companies to utilize only the services they need without upfront costs .
- AWS offers over 250 services across various domains, including storage, computing, and IoT .
🖥️AWS IoT Core
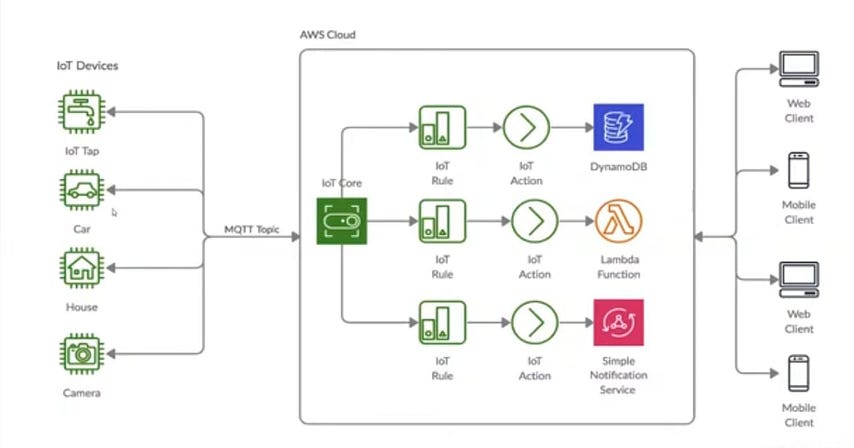
- AWS IoT Core is a service that connects devices to the cloud, allowing data collection from various IoT devices .
- Data is transmitted using the MQTT protocol, which is essential for real-time communication .
- The process of using AWS IoT involves creating a certificate for device authentication, establishing policies for access control, and creating a “thing” to represent the device in the cloud .
✨Steps to Use AWS IoT
1. Create a Certificate: This is essential for authenticating devices .
2. Create a Policy: This controls access to the IoT Core .
3. Create a Thing: Represents the physical device in the cloud .
4. Attach Policy to Certificate: Ensures the device can communicate with AWS IoT .
🌟Data Upload and Monitoring
- Data can be uploaded to AWS using Python or ESP32, with examples provided for both .
- Users can monitor data through the AWS console, utilizing the MQTT test client to view published data .
🌐Conclusion and Future Learning
→ The session concluded with an invitation for students to register for future programs, emphasizing the importance of continuous learning in IoT and related fields .
Subscribe to my newsletter
Read articles from LIKHITHA N directly inside your inbox. Subscribe to the newsletter, and don't miss out.
Written by
LIKHITHA N
LIKHITHA N
Tech enthusiast with a passion for learning and sharing. Blogging my journey through electronics, AI, and innovation. #LearningInPublic