Connect Blazor File Manager to Amazon S3 in 4 Easy Steps
 syncfusion
TL;DR: Learn to integrate Syncfusion® Blazor File Manager with Amazon S3 in four simple steps for secure cloud file management. This guide covers prerequisites like setting up an AWS account and S3 bucket, and walks you through creating a Blazor app, rendering the File Manager, setting up Amazon S3 web services, and binding the API URL. Includes tips on troubleshooting common setup errors.
The Syncfusion® Blazor File Manager supports easy connection with cloud storage services like Azure, Amazon, Google Drive, etc. Integrating cloud storage solutions, such as Amazon S3, with the Syncfusion® Blazor File Manager enables seamless upload, download, and organization of files directly from the cloud, with enhanced security.
This blog post will guide you through connecting Amazon S3 with the Syncfusion® Blazor File Manager in four steps.
Prerequisites
Before you start, make sure you have:
An active Amazon Web Services (AWS) account. Create an Amazon S3 bucket in your AWS account to store and manage files.
Set up an IAM role or generate access keys ( Access Key ID and Secret Access Key ) with permission to access the S3 bucket. Ensure that the role or keys have the necessary policies to perform desired operations like read, write, and list on the S3 bucket.
Let’s get started!
Step 1: Create a Blazor Web Application with File Manager dependencies
To get started, you must first set up the Blazor Web Application with the necessary File Manager dependencies.
Open Visual Studio and create a new Blazor project by choosing Blazor Web App with Interactive Auto, Interactive Server, or Interactive WebAssembly render modes.
Open the NuGet package manager in Visual Studio (Tools –>; NuGet Package Manager –>; Manage NuGet Packages), search and install Syncfusion.Blazor.FileManager, Syncfusion.Blazor.Themes and install the latest version.
Refer to the script and styles in the App.razor file.
<link href="_content/Syncfusion.Blazor.Themes/bootstrap5.css" rel="stylesheet" />
<script src="_content/Syncfusion.Blazor.Core/scripts/syncfusion-blazor.min.js" type="text/javascript"></script>
- Register the Syncfusion Blazor service in Program.cs file.
builder.Services.AddSyncfusionBlazor();
- Import the **Syncfusion.**Blazor and Syncfusion.Blazor.FileManager namespace in Imports.razor file.
@using Syncfusion.Blazor
@using Syncfusion.Blazor.FileManager
Note: For more details on the Blazor File Manager, refer to the documentation.
Step 2: Render the File Manager
Add the Syncfusion® Blazor File Manager component in the .razor file inside the Pages folder.
@using Syncfusion.Blazor.FileManager;

<SfFileManager TValue="FileManagerDirectoryContent">
</SfFileManager>
If an interactivity location is set as Per page/component in the web app, define a render mode at the top of the component, as follows:
| Interactivity Location | RenderMode | Code |
| Per page/component | Auto | @rendermode InteractiveAuto |
| WebAssembly | InteractiveWebAssembly | @rendermode InteractiveWebAssembly |
| Server | InteractiveServer | @rendermode InteractiveServer |
Note: Refer to the documentation for more details on interactive mode.
Step 3: Create an Amazon S3 web service
To establish a connection between the File Manager and Amazon S3:
Create an Amazon S3 bucket in one of the AWS Regions for accessing and storing the S3 objects as files or folders. Create an Amazon S3 account and an S3 bucket to perform the file operations.
Clone the provider code from the repository and open the project in Visual Studio. Restore the NuGet packages and register your Amazon S3 client account details like AccessKeyId, awsSecretAccessKey, bucketRegion, and bucketName details in the RegisterAmazonS3 method of the AmazonS3FileProvider controller to perform the file operations.
this.operation.RegisterAmazonS3("<---bucketName--->", "<---awsAccessKeyId--->", "<---awsSecretAccessKey--->", "<---region--->");
- For errors while connecting with the Amazon S3 bucket, refer to the Amazon documentation.
FAQ: Troubleshooting common errors with File Manager and Amazon S3
Q1: What does the error “System.InvalidOperationException: Sequence contains no elements” mean in the File Manager component?
A1: This error occurs when you set a file as the root folder for the File Manager component. The File Manager component is designed to accept only root folders, and setting a file as the root is not supported. Ensure you select a folder and not a file to use as the root folder.
Q2: How can I resolve the “System.ArgumentOutOfRangeException: ‘length (‘-1’) must be a non-negative value (Parameter ‘length’)” error when using the Amazon S3 file service provider?
A2: This issue arises due to how the Amazon S3 file service provider handles folder paths. Currently, the service provider only supports setting the available folder inside the Amazon bucket as the root folder, not nested subfolders. Ensure the root folder you specify is the first available folder in the bucket and not a subfolder.
Step 4: Bind the API URL with File Manager
- Run the service provider project with Visual Studio and map the provider-hosted URL in the File Manager code.
@using Syncfusion.Blazor.FileManager;

<SfFileManager TValue="FileManagerDirectoryContent">
    <FileManagerAjaxSettings Url=" http://localhost:{port}/api/FileManager/AmazonS3FileOperations"
                             UploadUrl=" http://localhost:{port}/api/FileManager/AmazonS3Upload"
                             DownloadUrl=" http://localhost:{port}/api/FileManager/AmazonS3Download"
                             GetImageUrl=" http://localhost:{port}/api/FileManager/AmazonS3GetImage">

    </FileManagerAjaxSettings>
</SfFileManager>
Run the application in Visual Studio or use the ‘ dotnet run ‘ command.
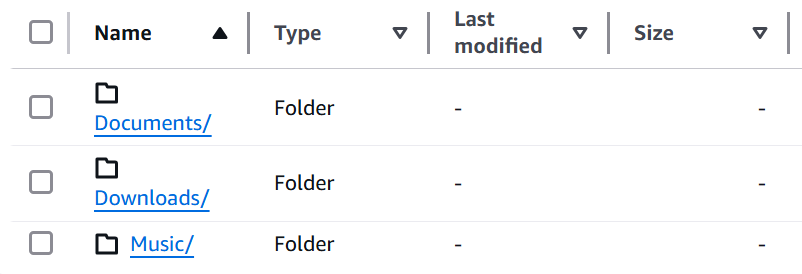
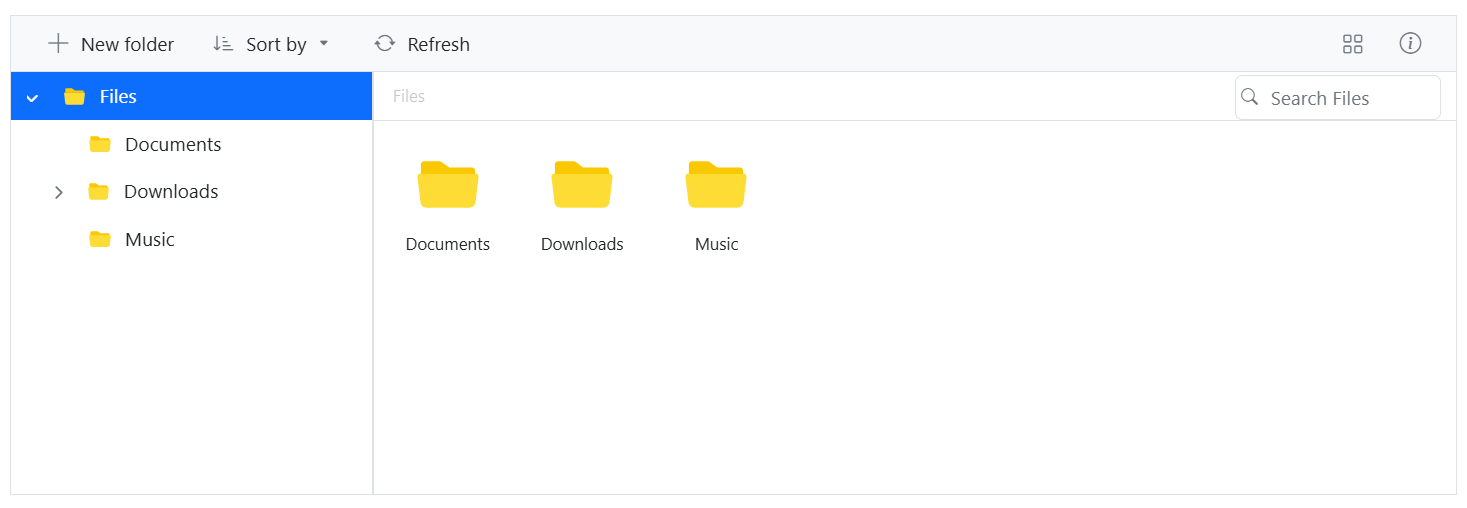
Now the File Manager connects with the Amazon S3 bucket and showcases the files and folders.
Amazon s3 bucket
Syncfusion File Manager
Conclusion
Integrating Amazon S3 with the Syncfusion ® Blazor File Manager provides a secure and efficient way to manage files directly from the cloud. By following the four simple steps in this guide, you can easily set up file uploads, downloads, and organization within your Blazor app.
This integration offers flexibility, scalability, and enhanced user experience, perfect for cloud-based file management. Expand your app’s functionality and explore more advanced features as you go.
The new version is available for current customers to download from the license and downloads page. If you are not a Syncfusion customer, you can try our 30-day free trial for our newest features.
You can also contact us through our support forums, support portal, or feedback portal. We are always happy to assist you!
Related Blogs
Subscribe to my newsletter
Read articles from syncfusion directly inside your inbox. Subscribe to the newsletter, and don't miss out.
Written by
syncfusion
syncfusion
Syncfusion provides third-party UI components for React, Vue, Angular, JavaScript, Blazor, .NET MAUI, ASP.NET MVC, Core, WinForms, WPF, UWP and Xamarin.