Understanding DVC : A practical guide to Data Version Control
 Parth
ParthDoes managing data for your data science projects feel like a constant battle? You’re not alone! But what if there was a tool that could organize your data, make collaboration easier, and guarantee reliable results? Enter DVC, your new best friend in the world of data science.

What is DVC ?
DVC, or Data Version Control, is an open-source tool specifically designed for data science and machine learning projects. It combines the version control power of Git with functionalities tailored for large datasets, allowing users to track data changes, collaborate efficiently, and ensure project reproducibility by referencing specific data versions.
Imagine DVC as a special organizer for your data science projects. Just like how Git keeps track of changes you make to your code, DVC keeps track of changes you make to your data.
GitHub uses an application known as Git to apply version control to your code. All the files for a project are stored in a central remote location known as a repository. Its simplistic UI and ease of using commands make it the best fit for versioning the files. But, the data science projects also deal with data files along with code files, and certainly, it is not advisable to maintain let’s say a 50 GB data file and multiple versions on GitHub. So, is there a way or a workaround to version our data files and keep track of it? Yes, and we achieve this with DVC(Data Version Control).
💫 DVC is your “Git for data”!
Why data versioning is important ?
Data versioning is crucial because it allows for tracking changes to data over time, ensuring that users have access to accurate and reliable information. By maintaining a history of data revisions, data versioning enables reproducibility, collaboration, and auditing in various fields such as software development, scientific research, and financial analysis. It helps prevent errors, facilitates troubleshooting, and promotes transparency, ultimately improving decision-making processes and reducing the risk of costly mistakes.
Understanding the above image : How DVC tracks data ?

Analogy of DVC with Git
Here's an overview of how DVC (Data Version Control) tracks data using .dvc files and Git:
- Initializing DVC : We start by initializing DVC in our project directory using the
dvc initcommand. This sets up DVC to work alongside Git.
dvc init
2. Adding Data : We add our data files to our project directory and then use the dvc add command to tell DVC to start tracking them. This creates a corresponding .dvc file for each data file. The actual data files are stored outside of our Git repository, usually in a separate directory (e.g., data/) to keep our repository lightweight.
dvc add data/ # this starts the tracking of our data
When you run above dvc command, it creates a data.dvc file in which your data unique hash ID is generated to track the data folder and in terminal it also says that add this data.dvc file in git.
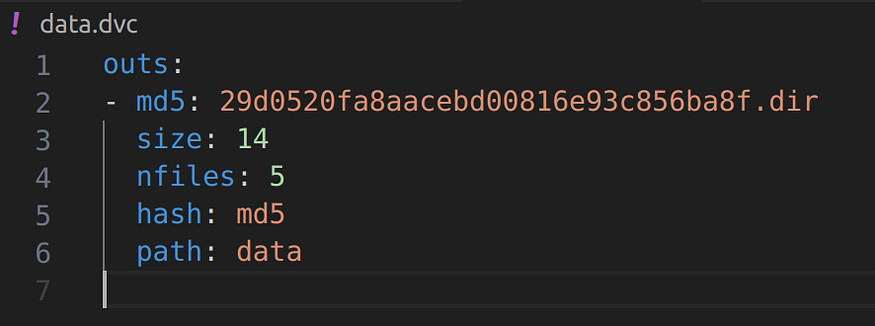
Inside the data.dvc file
3. Committing to Git : After adding your data files with DVC, you commit the changes to Git using git add, git commit, and git push commands as usual. The .dvc files, which are small metafiles, are also tracked by Git.

After running ‘dvc add’ command first time terminal says please add data.dvc file to git, so that it is tracked by git.
4. Versioning Data : DVC creates checksums of your data files and stores them in the .dvc files. These checksums act as unique identifiers for each version of the data. When you change a data file, DVC detects the change and updates the checksum in the corresponding .dvc file.
Let’s take an practical example for data versioning :
initial data
Hash generated regarding initial data in data.dvc file which is tracked by git

Perform some changes in initial data
Now checking the status of our data :
dvc status

By using above command, we clearly see that data folder is changed and dvc successfully tracked it. Now commit this change by using :
dvc commit
See the below hash of data.dvc file, here you will observe size =30 which is initially 14, this means dvc is tracked your data.

5. Managing Data Versions : You can use DVC commands like dvc checkout to switch between different versions of your data, dvc push to upload data to remote storage (like AWS S3 or Google Cloud Storage), and dvc pull to retrieve data from remote storage.
Procedure to connecting storage to dvc for data versioning :
# Uploading data on local storage
# Make a directory where you want to perform data versioning
mkdir temp
dvc remote add -d <give the name of your remote location> <folder name>
Ex.-> dvc remote add -d myremote temp


# Uploading data on Cloud storage
dvc remote add -d storage <your storage location like aws s3 bucker link, google drive link etc>
Pushing data to local storage :
dvc push

You can see above it is successfully send data to the local storage and if you connect your dvc to the cloud then it sends data to your cloud storage.
- Collaboration : Since the actual data files are stored separately from your Git repository, collaborating on data-intensive projects becomes easier. You and your team members can work on the code in the Git repository while using DVC to manage and version control the data.
7. Reproducibility : By tracking both code and data versions, DVC ensures that your experiments are reproducible. You can always recreate the exact environment, including the data, used for a particular experiment by checking out the corresponding Git commit and pulling the data with DVC.
Pulling data using dvc :
Since I am using my local storage as a cloud storage, so I am pulling data from my local. For doing this first I deleted my ‘cache folder’ from .dvc folder and then run the following command :

dvc pull
This workflow allows you to effectively manage and version control both your code and data, making collaboration easier and ensuring reproducibility in your projects.
Time Traveling with Your Data: Version Control with Git and DVC
This section explores how to “undo” changes to your data using Git and DVC for effective version control. Imagine you’re working with a text file and want to revert to an earlier version — think of it as a time machine for your data!
Setting the Stage:
Create a new folder: Open VS Code and create a new directory.
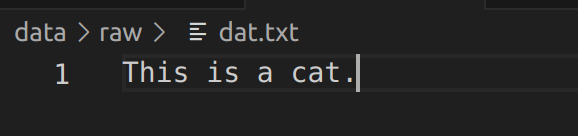
Data folder and file: Inside the directory, create a folder named “data” and a text file named “dat.txt” with the initial content “my first line.”

Initializing Version Control:
Git initialization: Open your terminal and navigate to the directory. Run
git initto create a Git repository for version control.DVC initialization: Run
dvc initto initialize DVC within the existing Git repository. DVC facilitates data management alongside Git for versioning.
Committing Changes:
Adding files: Use
dvc add data/to add the "data" folder to DVC's tracking.Ignoring unnecessary files: Create a
.gitignorefile (if absent) and add instructions to ignore specific files like.dvcto avoid unnecessary version control overhead.Git commit: Use
git add .gitignore data.dvcto add both.gitignoreanddata.dvcto Git's tracking.DVC commit: Run
dvc committo commit the data version managed by DVC.VS Code commit (optional): Use VS Code’s built-in Git feature to commit the changes visually (optional).

Making Changes and Committing Again:
- Modify data: Edit “dat.txt” and add a new line “My second line.”

2. DVC commit and Git commit: Repeat steps 4 and 5 from the previous section to commit these changes in both DVC and Git.
Traveling Back in Time:
- Reviewing history: Use
git logto view the commit history, displaying a list of commits with their unique identifiers.

2. Time travel: Identify the commit ID corresponding to your desired first version (usually the initial commit). Run git checkout <first commit log id> to "check out" and revert your data and code to that specific state.
3. Retrieving data: Run dvc pull to retrieve the data associated with the checked-out commit.
This process demonstrates how Git and DVC work together to manage data versions. By leveraging these tools, you can effectively track changes, revert to previous versions, and ensure a reliable history of your data, empowering you to experiment and iterate with confidence.
For more information regarding dvc , click here for the dvc documentation !
I hope this blog has deepened your understanding of data versioning using dvc . If you’ve found value in this content, consider following me for more insightful posts. Thank you! for investing your time in reading this article.
Subscribe to my newsletter
Read articles from Parth directly inside your inbox. Subscribe to the newsletter, and don't miss out.
Written by
Parth
Parth
ROHIT PARTH KALIDASBHAI | Tech Enthusiast | Aspiring Entrepreneur 👨🎓 Education BCA Graduate (2024) 💡 Interests & Hobbies 📚 Books | ⚽ Sports | 🎵 Music 🚀 Passionate about discussing new ideas & innovations 💻 Tech & Coding Exploring AI, ML, and DevOps Enthusiastic about building scalable and impactful solutions 🚀 Entrepreneurial Vision Aspiring entrepreneur with a keen interest in startups & business strategies Always eager to learn, innovate, and create something meaningful Let’s connect and discuss tech, startups, and everything in between! 🚀