Nx Monorepo Guide: React & Node Fullstack App
 Mohamed Mayallo
What is a Monorepo and Why Nx?
Ever find yourself checking many projects, each in its own GitHub repo, making updates feel like fixing one thing just makes another pop up? I know I used to.
It's often difficult to keep track of all the different versions of things or remember where that one shared piece of code actually lived. This scattered setup really tests your patience, doesn't it? Well, there's another way.
Understanding Monorepo Architecture
A monorepo holds all code for many projects in one single version control repository. All the different parts of a big system, like a website, an API, or even a mobile app, live side-by-side. For example, Google, Facebook, and Microsoft all use monorepos for parts of their massive codebases. This approach can really speed up things.
Consider a shared component library. In a traditional setup, you'd publish it to npm, then each project would install it. With a monorepo, you just import it directly, no publishing needed. This removes so much friction! However, managing changes across many projects in one place needs special tools. Otherwise, it becomes a mess, this is where Nx shines.
What Makes Nx Special for Developers
Smart monorepo tool: Nx is more than just a basic tool; it’s designed for managing monorepos, especially for JavaScript and TypeScript projects.
Understands project structure: Nx maps out how your projects are connected and knows exactly what needs to be rebuilt when you make even a small change.
Saves time and resources: By rebuilding only what’s necessary, Nx speeds up builds and testing, saving time and computing power.
Computation caching: Nx remembers tasks (like builds or tests) it has already done; if the code hasn’t changed, it skips the task and uses cached results instead.
Built-in code generators and plugins: Supports popular tools like React, Angular, Node.js, and Jest, which helps keep code clean, consistent, and easy to maintain across your entire project.
Supports clean testing setup: Nx makes it easier to set up and manage your testing framework.
Nx vs Other Monorepo Tools Comparison
Many tools support monorepos, but they offer different levels of functionality. Here's how Nx compares to some of the most popular options.
Nx vs Lerna
Lerna was one of the first monorepo tools, focusing on managing and publishing packages. Nx goes much further by including a full build system and more.
Key differences:
Build system: Nx includes smart task orchestration and caching; Lerna does not.
Code generation: Built into Nx; not available in Lerna.
Dependency graph: Nx understands task relationships; Lerna tracks only package dependencies.
Plugin ecosystem: Nx supports many frameworks and tools; Lerna is limited to package-related tasks.
CI/CD integration: Nx has built-in support for affected-only commands; Lerna needs manual setup.
Development activity: Nx is actively maintained and growing; Lerna is stable but less active.
Summary: Nx is an all-in-one solution, while Lerna often requires other tools to match the same functionality.
Nx vs Turborepo
Turborepo is known for its speed, especially with caching and parallel task execution. Nx offers similar performance but provides a broader developer experience.
Key differences:
Focus: Turborepo is minimal and fast; Nx is full-featured and flexible.
Tooling: Nx includes code scaffolding, plugins, and workspace generators; Turborepo does not.
Use case: Turborepo is great if you already have a strong setup; Nx helps guide structure from the start.
Summary: Turborepo is like a high-speed engine; Nx is a full vehicle ready for production use.
Nx vs npm Workspaces
npm Workspaces help link local packages inside a monorepo, letting you manage dependencies across projects.
Key differences:
Scope: npm Workspaces handle package linking only; Nx adds intelligent build orchestration and caching.
Features: Nx provides code generation, task execution, dependency graphs, and CI optimizations—none of which are part of npm Workspaces.
Integration: Nx works with npm Workspaces (and pnpm/Yarn) as a base, then builds on top of them.
Summary: npm Workspaces handle the basics; Nx turns that foundation into a powerful monorepo platform.
Setting Up Your First Nx Workspace
Ready to get your hands dirty? Setting up an Nx workspace isn't hard, I promise. It's a quick process to get a powerful development environment ready. You'll soon see how easy it is to manage different apps and libs in one place.
Please find the complete code here.
Creating Your Nx Workspace with CLI
Now, let's create our first Nx Monorepo. It's done with a single command. Open your terminal or command prompt and type this:
npx create-nx-workspace@latest my-awesome-nx-repo
npx: This runs thecreate-nx-workspacepackage without installing it globally.create-nx-workspace@latest: Ensures you get the most recent version of the Nx workspace generator.my-awesome-nx-repo: This is the name of your new workspace folder. You can name it whatever you like.
When you run this, Nx will ask you a few questions:
"Need to install the following packages: create-nx-workspace": Yes, if you want to install it globally.
"Which stack?": None, will set up each app individually.
"Prettier for code formatting?" Yes.
"Which CI provider?": Do it later.
"Remote caching using Nx Cloud?": No.
After this, Nx will install everything. It takes a minute or two. You now have a working Nx workspace! Go into the folder: cd my-awesome-nx-repo.
Essential Nx Configuration Files Explained
Nx uses a few main configuration files to know how to build, test, and lint your projects. Understanding these files helps you work better with Nx.
nx.json: This is the heart of your Nx workspace configuration. It defines projects, their types (application or library), and how they relate to each other. It also sets up caching strategies and task runners.package.json: This file, at the root of your workspace, lists all the global dependencies for your entire monorepo. Instead of each app having its ownnode_modules, Nx (via Yarn/pnpm/npm workspaces) often hoists them to the root.tsconfig.base.json: This is the top-level TypeScript configuration. It defines common settings for all TypeScript projects in your workspace. Keep in mind, every project has its owntsconfigfile to override this top configuration file.**tsconfig.json**: Acts as the project references entry point for TypeScript in a monorepo. Itsreferencesvalue lists all apps and libs, so TypeScript understands the project graph and can do incremental builds.
Nx CLI Commands Every Developer Should Know
Nx uses a command line interface (CLI) to manage your workspace. These commands are your daily tools for working with Nx.
nx generate [generator]ornx g [generator]: Creates new applications, libraries, components, etc.Example:
nx g @nx/react:app my-new-react-app(creates a new React app)Example:
nx g @nx/js:lib shared-data(creates a new JavaScript/TypeScript library)
nx serve [project-name]: Starts the development server for a specific application.- Example:
nx serve my-react-app
- Example:
nx build [project-name]: Builds a project for production.- Example:
nx build my-express-api
- Example:
nx test [project-name]: Runs tests for a project.- Example:
nx test my-react-app
- Example:
nx lint [project-name]: Runs linting checks for a project.- Example:
nx lint shared-ui
- Example:
nx graph: Visualizes the dependency graph of your workspace in your browser. This is super cool and really helps you understand how things connect.nx affected:[command]: Runs a command only on projects that have changed since your last commit (or a specific commit). This is where Nx's intelligence truly shines for CI/CD.Example:
nx affected:build(builds only changed projects)Example:
nx affected:test(tests only changed projects)
These commands, especially nx affected, are why large monorepos with Nx can still have fast CI pipelines. You only build and test the parts that are truly impacted.
Note: If you are using VS Code, there is a very handy extension that will make your life way easier; it is Nx Console; believe me, you will like it.
Creating Your First Node.js Backend App
Now that we have a workspace, let's add a Node.js backend. This is often the first step for a lot of web applications. You'll see how easy it is to add new parts to your Nx Monorepo.
Generating a Node.js Application
We can generate a new Node.js application using the Nx CLI. This will create a basic Express.js app for us. It sets up all the boilerplate, so you don't have to. It's truly a time saver.
npm i @nx/node -D  # Install the needed plugin
npx nx generate @nx/node:app packages/my-backend --framework=express # Setup our backend
@nx/node:app: This is the generator for creating Node.js applications.packages/my-backend: The name of your new Node.js application inside thepackagesdirectory.--framework=express: Tells Nx to set up the app using the Express.js framework. You could also choosenestornone.
Nx will add a new folder inside packages/ named my-backend, complete with a basic src/ directory and setup files. It also adds a new entry in packages.json workspaces for my-backend (or you will find "packages/*") and updates tsconfig.json with a path reference.
Note: You can list the available plugins using this command nx list.
Understanding the App Structure
Inside packages/my-backend, you'll find a simple Express app structure. It's designed to be clean and extensible.
packages/my-backend/
├── src/*
├── package.json
├── .spec.swcrc
├── tsconfig.json
├── tsconfig.app.json
└── tsconfig.spec.json
src/*: Your main app.package.json: The"nx": { "targets": { … } }section inpackage.jsonallows you to define, configure, and customize the various tasks (targets) related to your Node.js app. This is key for automating workflows like building, testing, serving, and linting within an Nx workspace..spec.swcrc: The configuration file used by SWC to optimize and configure the transpilation of your test files during unit tests.tsconfig.json: Base TypeScript configuration for the app (common settings for all files in the app).tsconfig.app.json: TypeScript configuration specifically for compiling the app's source code (src/*.ts).tsconfig.spec.json: TypeScript configuration for compiling the app’s test files (src/*.spec.ts).
Mostly, you will find these files in all of your newly generated applications or libraries.
Setting Up Basic Express Server
Nx already generates a basic Express server for you. To run it, simply use: npx nx serve my-backend. You'll see the server start up and listen on http://localhost:3000.
If you navigate there in your browser, you should see the "Hello API" message. Pretty neat, right?
Adding React Components to Your Monorepo
What about adding a frontend? Nx makes it just as easy to add React applications and shared React components. This is where the true power of a monorepo starts to show itself.
Creating a Shared React Library
Let's make a shared library for our React components. This library will live in libs/ and can be used by any React application in our monorepo. It’s like building a reusable Lego set that many different structures can use.
npm i @nx/react -D  # Install the needed plugin
npx nx generate @nx/react:lib libs/shared-ui --style=css
@nx/react:lib: This generator creates a React library.shared-ui: The name of our new library in thelibsfolder.--style=css: Specifies CSS as the styling approach. You could choosescss,less, orstyled-componentstoo.
Nx creates libs/shared-ui with a basic component, tests, and its own configuration files.
Building Your First Reusable Component
Inside libs/shared-ui/src/lib/ you'll find a shared-ui.tsx file (or similar, depending on Nx version). Let's modify it to be a simple Button component.
/* libs/shared-ui/src/lib/shared-ui.tsx */
import styles from './shared-ui.module.css'; // Assuming you have a CSS module

/* eslint-disable-next-line */
export interface ButtonProps {
  text: string;
  onClick: () => void;
}

export function Button(props: ButtonProps) {
  return (
    <button className={styles['my-button']} onClick={props.onClick}>
      {' '}
      {/* Render a button */}
      {props.text} {/* Display button text */}
    </button>
  );
}

export default Button; // Export for easier import
And a simple CSS file to go with it:
/* libs/shared-ui/src/lib/shared-ui.module.css */
.my-button {
  background-color: blue;
  color: white;
  padding: 10px 15px;
  border-radius: 5px;
  cursor: pointer;
  border: none;
}

.my-button:hover {
  opacity: 0.8;
}
Now, other projects can use this Button component.
Creating A New React App
Similar to our backend app, let's create the frontend app.
npx nx generate @nx/react:app packages/my-react-app --style=css
Note: if you encountered an error like this:
An error occurred while processing files for the @nx/vite/plugin
libs/shared-ui/vite.config.ts: Cannot find module 'ajv/dist/core'
Simply, run this command npm install ajv.
Importing Components Across Apps
To use our new Button component in my-react-app, we simply import it using its alias defined in package.json name property; @my-awesome-nx-repo/shared-ui.
First, find packages/my-react-app/src/app/app.tsx (the main app file).
// packages/my-react-app/src/app/app.tsx
import React from 'react';
import { Button } from '@my-awesome-nx-repo/shared-ui'; // Import our shared button
import './app.module.css';

export function App() {
  const handleClick = () => {
    alert('Button clicked from shared library!');
  };

  return (
    <div>
      <h1>Welcome to my-react-app!</h1>
      <Button text="Click Me" onClick={handleClick} /> {/* Use the shared button */}
      <p>This button comes from a shared library.</p>
    </div>
  );
}

export default App;
Now, if you run nx serve my-react-app, you'll see your React app with the shared button. Any change to libs/shared-ui will instantly update in my-react-app during development.
This is because Nx knows the dependency and rebuilds only what's needed. It's a huge time-saver and makes developing complex UIs much more manageable.
Hot Reloading and Development Workflow
Nx provides a smooth development experience with hot reloading. When you run nx serve [project-name], any changes you make to that project, or any library it depends on, will trigger a recompile and refresh your browser (for frontend apps) or restart your server (for backend apps). It is quite magical.
This workflow is incredibly efficient. You modify a shared UI component in libs/shared-ui, and all React apps that use it automatically update. You don't need to rebuild libraries manually or run separate watch commands. Nx handles it all. This rapid feedback loop is a big win for productivity.
Understanding Nx Workspace Architecture

Photo by Lucas Santos on Unsplash
To truly master Nx, you need to grasp its architectural ideas. It's more than just a collection of files; it's a way of thinking about how the different parts of a software system relate.
Apps (Packages) vs Libraries: When to Use Each
This is a core concept in Nx. Knowing when to make something an app and when it should be a lib is important. It's not just about what it is, but what it does.
Applications (
packages/orapps/):Purpose: These are the deployable units of your workspace. They are what users interact with, or what gets deployed to a server.
Examples: A React web app, a Node.js API server, an Electron desktop app, a mobile app.
Characteristics: They usually depend on libraries, but other applications generally don't depend on them. They often contain specific configurations for deployment.
Libraries (
libs/):Purpose: These are reusable, shareable units of code within your workspace. They are meant to be consumed by applications or other libraries.
Examples: UI component library, data access layer, utility functions, shared types, authentication logic.
Characteristics: They should be cohesive and focused on a single responsibility. They often depend on other libraries but should generally not depend on applications. This promotes modularity and reusability.
Choosing correctly ensures a cleaner architecture. If you find yourself copying code between applications, you probably need a new library. If a project contains UI components and API logic, it should probably be split into a UI library and an API application. This enforces better separation of concerns.
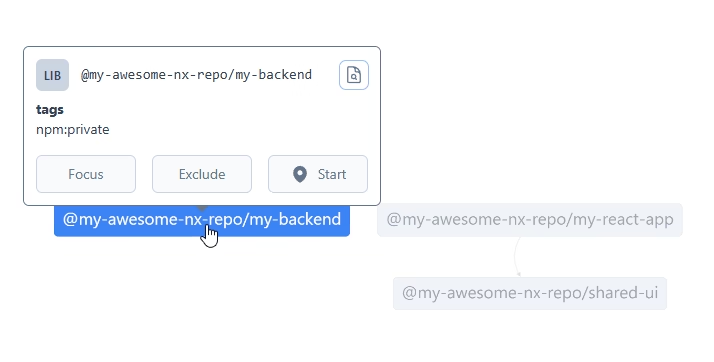
Dependency Graph Visualization
One of Nx's most powerful features is its ability to build and visualize the dependency graph of your workspace. It maps out how every project (app or lib) connects to others. This graph is not just for show; Nx uses it to figure out what needs to be built or tested when you make a change.
To see your graph, run:
npx nx graph
This command opens a browser window showing a visual representation of your projects and their dependencies. You can click on projects to see their specific connections.
Module Boundaries and Import Restrictions
Nx lets you enforce rules about how projects can import each other. This is called "Module Boundaries." It helps maintain a healthy, layered architecture and prevents spaghetti code. For example, you might want to stop a frontend UI library from importing a backend database library. This is a common problem in big systems, and Nx helps prevent it.
You define these rules in your root .eslint.config.mjs file using enforceBuildableLibDependency and depConstraints.
// .eslint.config.mjs example showing depConstraints

// other configs
{
  files: ['**/*.ts', '**/*.tsx', '**/*.js', '**/*.jsx'],
  rules: {
    '@nx/enforce-module-boundaries': [
      'error',
      {
        enforceBuildableLibDependency: true,
        allow: ['^.*/eslint(\\.base)?\\.config\\.[cm]?js$'],
        depConstraints: [
          // Here are our rules!
          {
            sourceTag: 'scope:frontend', // Projects with this tag
            onlyDependOnLibsWithTags: ['scope:shared', 'scope:frontend'], // Can only depend on these tags
          },
          {
            sourceTag: 'scope:backend',
            onlyDependOnLibsWithTags: ['scope:shared', 'scope:backend'],
          },
          {
            sourceTag: 'scope:shared',
            onlyDependOnLibsWithTags: ['scope:shared'], // Shared libs can only depend on other shared libs
          },
        ],
      },
    ],
  },
},
// other configs
To make these rules work, you add "tags" to your projects in their package.json files.
// packages/my-react-app/project.json
{
  "name": "@my-awesome-nx-repo/my-react-app",
  ... // other details
  "nx": {
    "tags": ["scope:frontend"] // Apply tags here
  }
}
// libs/shared-ui/project.json
{
  "name": "@my-awesome-nx-repo/shared-ui",
  ... // other details
  "nx": {
    "tags": ["scope:shared"] // Apply tags here
  }
}
Try to violate these rules by removing the scope:shared dependent from the React app, then run npx nx lint my-react-app, you will get the following error:
error A project tagged with "scope:frontend" can only depend on libs tagged with "scope:frontend"
This helps enforce a clean architecture, like preventing an app from depending on a library that is not allowed to be called.
Managing Dependencies in Nx Workspace
In a monorepo, managing dependencies can be done using two strategies:
Centralized Dependency Management: All dependencies are defined in the root package.json, shared across all apps and libraries.
Pros: Simplifies management, ensures consistency, and reduces duplication.
Cons: Less flexibility for individual projects to use different versions of dependencies.
Explicit Project-Specific Dependencies: Dependencies are scoped to individual apps or libraries, allowing each project to manage its own.
Pros: Provides flexibility and isolation for each project.
Cons: Increases complexity, may lead to duplication, and code sharing becomes more challenging.
So, it is a tradeoff as usual, but I would stick to the centralized dependency strategy.
Conclusion
Nx Monorepo isn't a one-size-fits-all solution, but when it fits, it transforms how teams build and scale applications.
It's ideal for large, interconnected projects that benefit from shared code, consistent tooling, and fast CI/CD. While it might be overkill for small or isolated projects.
For most modern development workflows, Nx offers the structure, performance, and flexibility to build with confidence and maintain long-term efficiency.
Think about it
If you enjoyed this article, I’d truly appreciate it if you could share it—it really motivates me to keep creating more helpful content!
If you’re interested in exploring more, check out these articles.
Do you really know, what is Single Responsibility Principle?
Unit, Integration, and E2E Testing in One Example Using Jest
Thanks for sticking with me until the end—I hope you found this article valuable and enjoyable!
Subscribe to my newsletter
Read articles from Mohamed Mayallo directly inside your inbox. Subscribe to the newsletter, and don't miss out.
Written by
Mohamed Mayallo
Mohamed Mayallo
I'm a Software Engineer Passionate about Clean Code, Design Patterns, and System Design. Learning something new every day. Feel free to say Hi on LinkedIn at https://www.linkedin.com/in/mayallo