Creating a “Hello World” AVS with EigenLayer Restaking!
 0xKaushik
In this blog post, we will walk through the steps to create a simple “Hello World” Actively Validated Services (AVS) using EigenLayer restaking. This project demonstrates the basic functionality and components of an AVS. By following this guide, you’ll gain a concrete understanding of how AVS works and be ready to explore more sophisticated implementations.
Prerequisites:
Before we start, ensure you have the following dependencies installed on your system:
Step-by-Step Guide
1. Clone the Repository
First, clone the hello-world-avsrepository from GitHub:
git clone https://github.com/Layr-Labs/hello-world-avs
cd hello-world-avs
This repository contains all the necessary code and configurations to set up and run our AVS.
2. Start the Blockchain and Deploy Contracts
Next, we’ll build the smart contracts, start a local blockchain using Anvil, deploy the contracts to it, and keep the chain running.
Run the following command in your terminal:
make start-chain-with-contracts-deployed
You will get following output in the terminal:
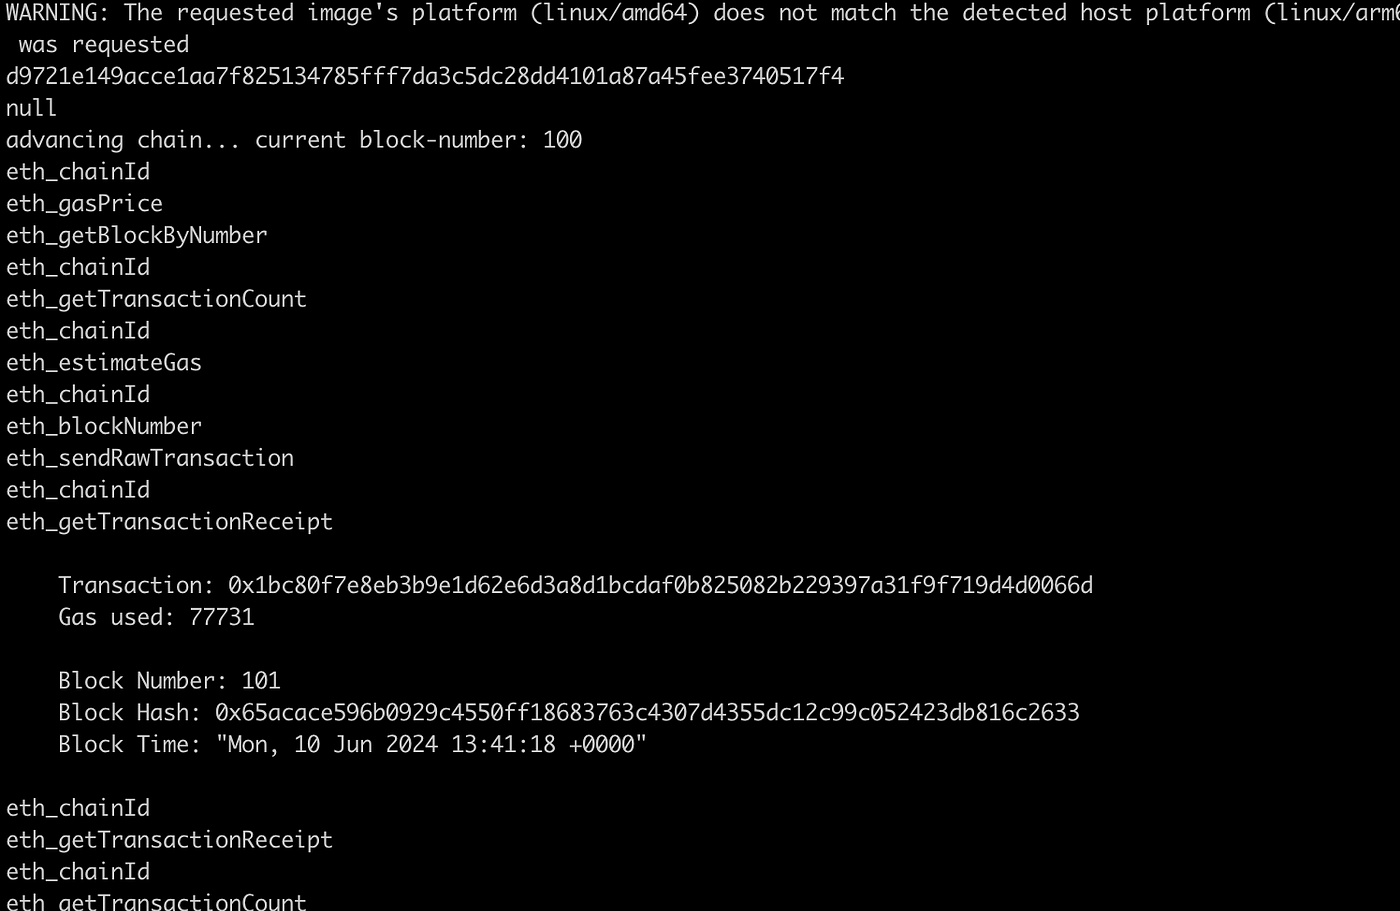
This command will:
Build the smart contracts.
Start an Anvil blockchain instance.
Deploy the contracts to the local blockchain.
Keep the blockchain running in the current terminal session.
3. Start the AVS Operator
Open a new terminal tab or window and navigate to the hello-world-avs directory. Then, start the AVS operator by running:
make start-operator
You will get following output in the terminal:

This command will start executing the following file in the code
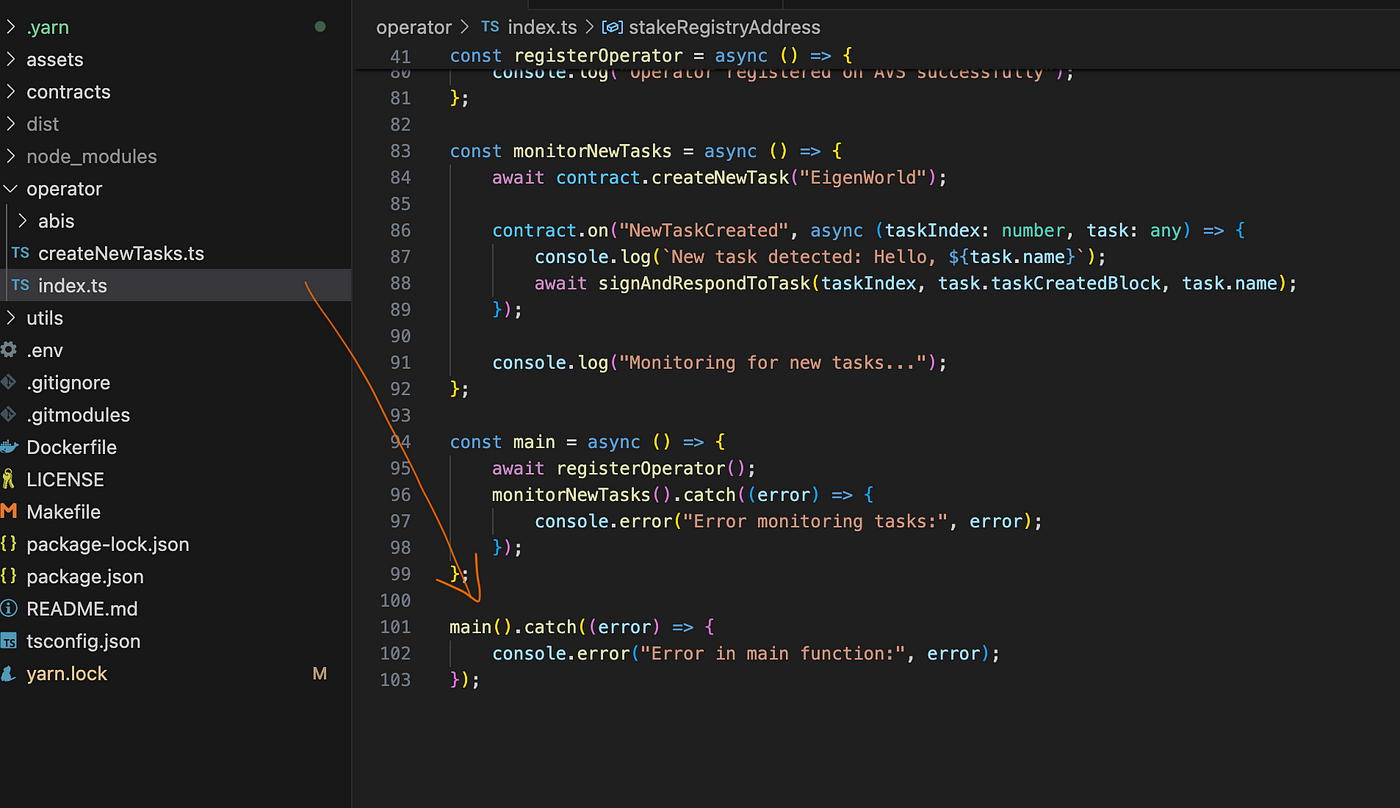
This command will compile the AVS software and start monitoring for new tasks.
4. Spam the AVS with Tasks (Optional)
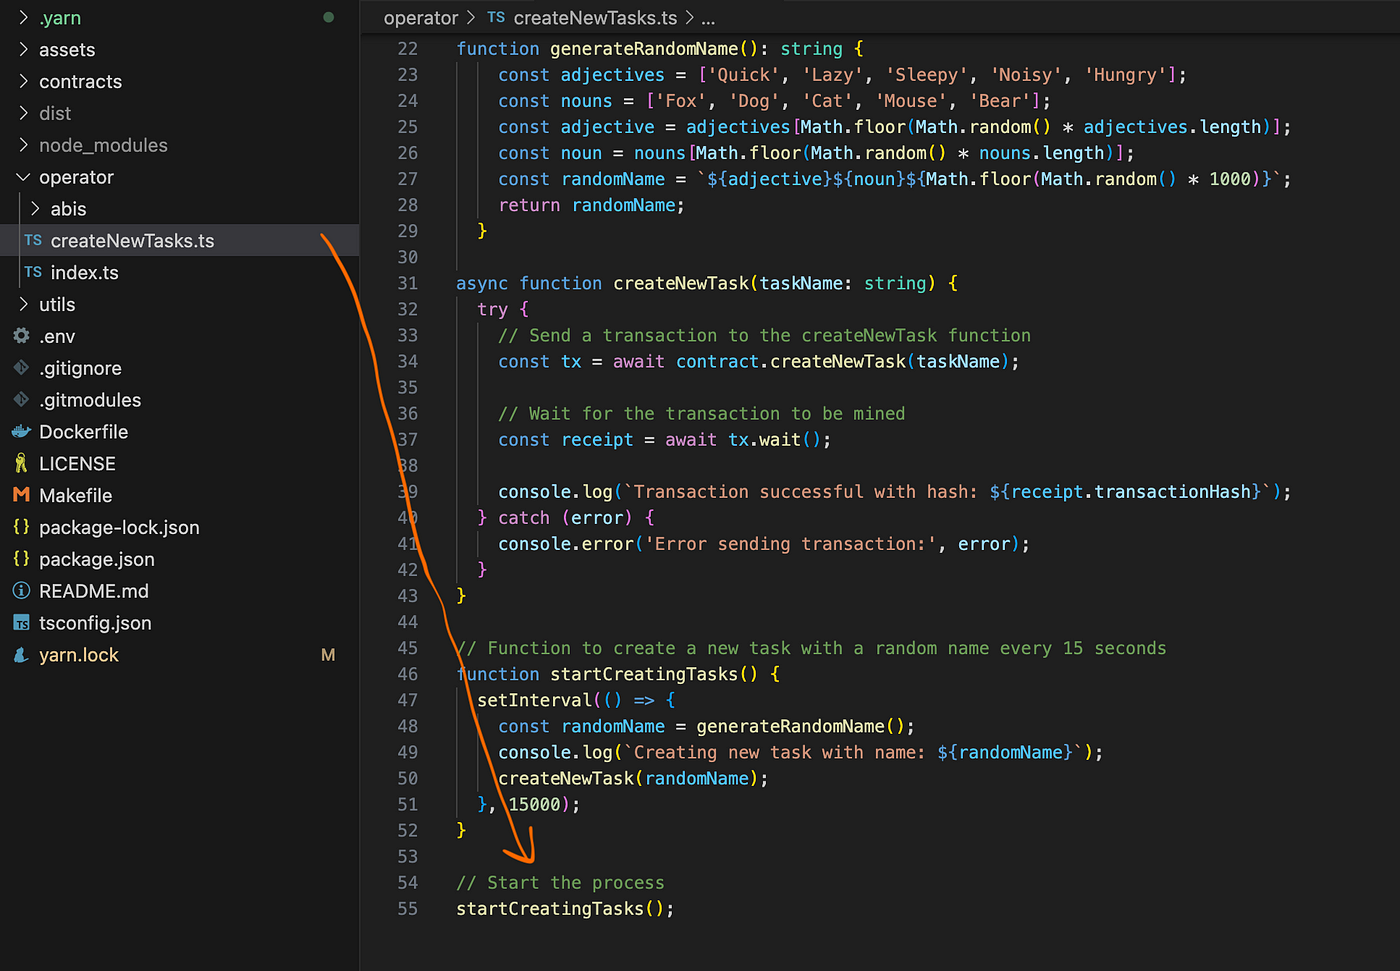
To test the AVS with random tasks, you can spam it with random names every 5 seconds. Open another new terminal tab or window and run:
make spam-tasks
You will get following output in the terminal:
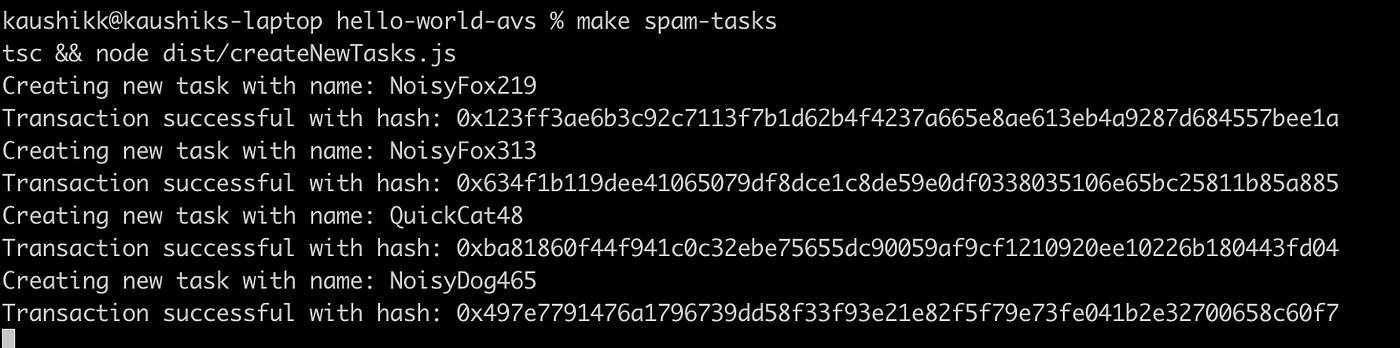
This command will start executing the following file in the code
This step is optional but useful for testing the AVS under a load of tasks.
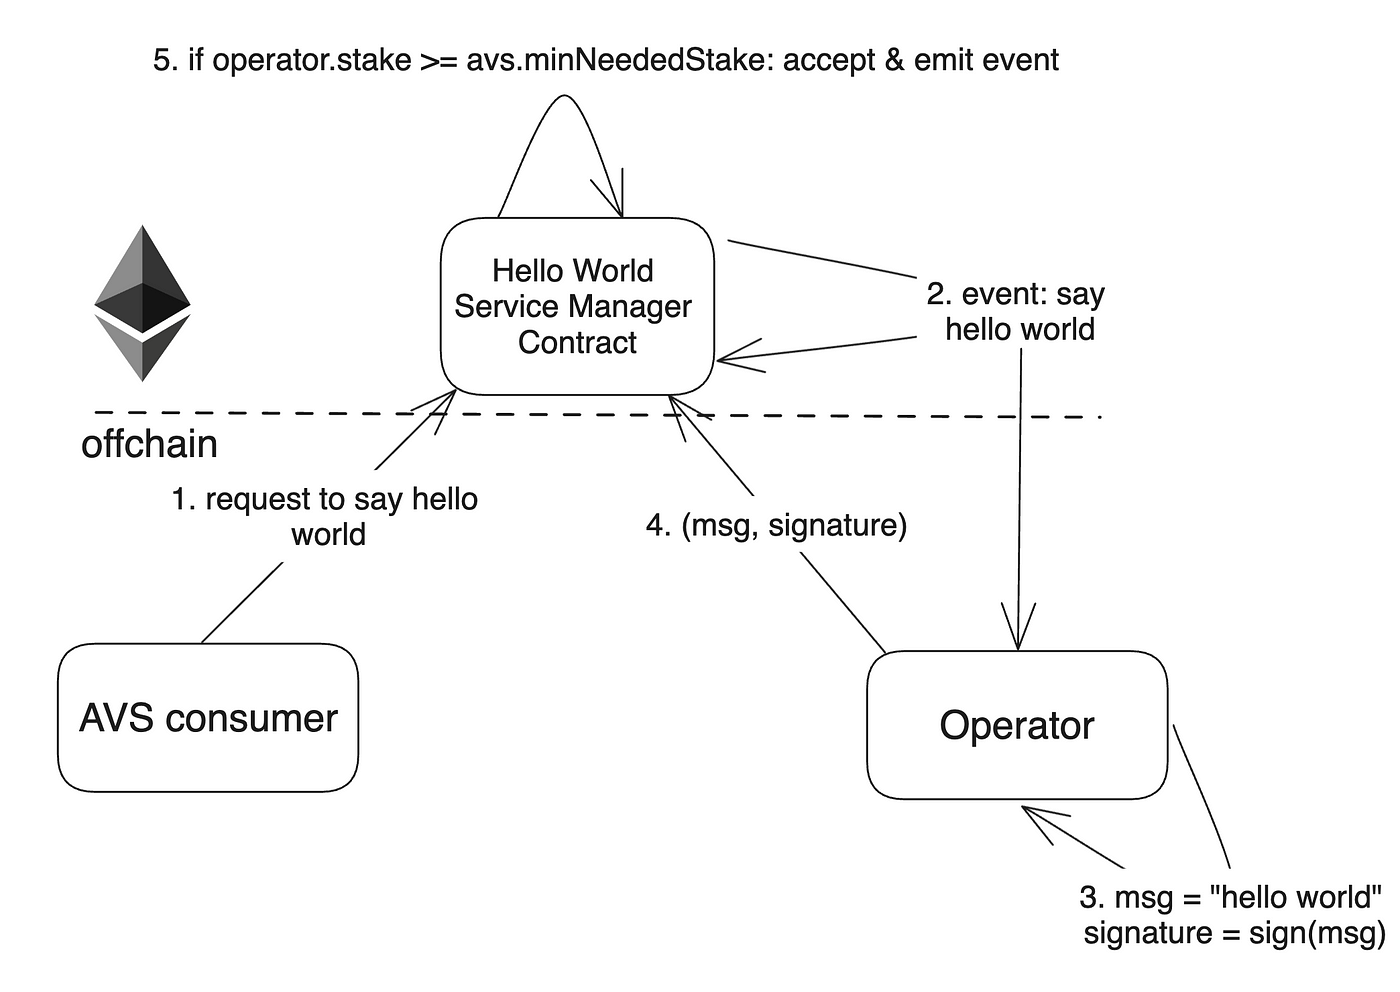
Understanding the AVS Workflow
Here’s a breakdown of the basic AVS workflow:
Request Generation: An AVS consumer requests a “Hello World” message to be generated and signed.
Event Emission: The AVS emits an event for operators to pick up the request.
Operator Handling: Any operator staked to serve this AVS picks up the request, generates the message, and signs it.
Submission: The operator submits the signed message back to the AVS.
Validation: If the operator is registered to the AVS and has the required minimum stake, the submission is accepted.
This simple flow highlights the core mechanics of how AVSs work. More sophisticated AVS implementations can involve complex requests, operator coordination, different types of signatures, and varied security measures.
Conclusion
By following this guide, you’ve set up a basic “Hello World” AVS using EigenLayer restaking. This foundational example provides a solid understanding of AVS components and workflows. As you explore further, you can build more complex AVSs that handle diverse types of requests and incorporate advanced security and coordination mechanisms.
Feel free to share your thoughts, questions, or improvements in the comments below. Happy coding!
Subscribe to my newsletter
Read articles from 0xKaushik directly inside your inbox. Subscribe to the newsletter, and don't miss out.
Written by