Building Trust in Digital Transactions: A Deep Dive into Smart Contract Escrow Systems
 Pranav Konde
In today's digital economy, trust remains one of the biggest challenges for online transactions. How can you ensure that you'll receive what you paid for? How can sellers guarantee they'll get paid after delivery? This is where blockchain technology, specifically smart contracts, offers an elegant solution through escrow systems.
In this comprehensive guide, we'll walk through building a secure escrow system using Solidity smart contracts on the Rootstock (RSK) blockchain. Whether you're a blockchain enthusiast, a developer looking to expand your skills, or simply curious about how to make online transactions more secure, this tutorial is designed for you!
What is Rootstock (RSK)?
Rootstock (RSK) is the first and most established Bitcoin sidechain, offering a groundbreaking Layer 2 solution that combines Bitcoin's unmatched proof-of-work security with Ethereum's smart contract capabilities. As a fully open-source and EVM-compatible platform, RSK enables developers to build and deploy decentralized applications (dApps) while leveraging the strength and security of Bitcoin's network.
Some key features that make Rootstock special:
Security: Secured by over 60% of Bitcoin's hashing power through merged mining
Compatibility: Fully compatible with Ethereum's development tools and smart contracts
Versatility: Supports DeFi applications, tokenization, and identity management
Interoperability: Functions as a bridge between Bitcoin and smart contract functionality
Understanding Escrow Systems
An escrow system acts as a trusted intermediary that holds funds until contractual obligations are met. In traditional finance, this role is often played by banks or specialized escrow companies. With blockchain technology, we can implement this as a trustless, transparent smart contract.
A blockchain-based escrow system typically involves three parties:
Buyer: The person making a purchase or payment
Seller: The person providing goods or services
Arbiter: A trusted third party who can resolve disputes
The basic flow works like this:
Buyer deposits funds into the escrow contract
Seller delivers the product or service
Both parties confirm the transaction is complete
Funds are automatically released to the seller
If a dispute arises, the arbiter steps in to make a fair decision about where the funds should go.
Prerequisites
Before we begin coding our escrow system, make sure you have the following tools installed:
Node.js (v12.0 or higher)
npm (Node Package Manager)
A code editor (such as Visual Studio Code)
Git (for version control)
MetaMask (browser extension for interacting with the blockchain)
Setting Up Your Development Environment
Let's start by setting up our development environment step by step.
Step 1: Install and Configure MetaMask
Install the MetaMask browser extension from metamask.io
After installation, set up your wallet and pin the extension for easy access
Connect MetaMask to the Rootstock Testnet by:
Opening MetaMask
Going to Settings > Networks > Add Network
Entering the following details:
Network Name: Rootstock Testnet
RPC URL: https://public-node.testnet.rsk.co/
Chain ID: 31
Currency Symbol: tRBTC
Block Explorer URL: https://explorer.testnet.rootstock.io/
💡 Tip: For more information, check out the official setup guide: MetaMask Integration Guide.
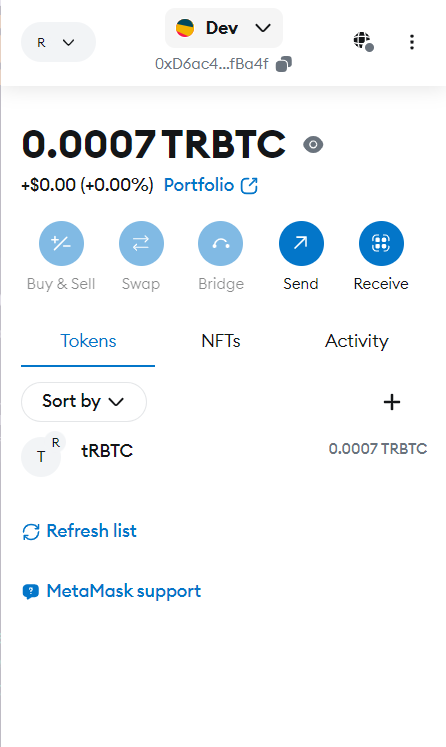
Step 2: Get Test RBTC
Before deploying contracts, you'll need some test RBTC to cover transaction costs:
Visit the Rootstock faucet
Enter your MetaMask wallet address
Request test RBTC
Wait for the tokens to appear in your wallet
Step 3: Create a New Project
Open your terminal and run the following commands:
# Create a new directory for your project
mkdir escrow-contract
cd escrow-contract

# Initialize a new npm project
npm init -y

# Install the required dependencies
npm install --save-dev hardhat @nomicfoundation/hardhat-toolbox @nomiclabs/hardhat-ethers ethers dotenv


Step 4: Initialize Hardhat
Hardhat is a development environment specifically designed for Ethereum smart contract development. Let's set it up:
npx hardhat init

When prompted:
Choose "Create a JavaScript project"
Accept the default project root
Add a .gitignore
This will create a basic project structure including:
contracts/- Where your smart contracts livescripts/- For deployment and interaction scriptstest/- For your test fileshardhat.config.js- The configuration file
Building the Escrow Smart Contract
Now that our environment is set up, let's create our escrow smart contract!
Step 1: Contract Structure and State Variables
Create a new file called Escrow.sol in the contracts/ directory and add the following code:
// SPDX-License-Identifier: MIT
pragma solidity ^0.8.7;

contract Escrow {
    // Define the main participants
    address public buyer;
    address public seller;
    address public arbiter;

    // Track the amount and approval states
    uint256 public amount;
    bool public buyerApproval;
    bool public sellerApproval;

    // Define possible states of the escrow
    enum EscrowState {
        AWAITING_PAYMENT,
        AWAITING_DELIVERY,
        COMPLETE,
        DISPUTED
    }
    EscrowState public state;

    // Events for off-chain tracking
    event Deposited(address indexed buyer, uint256 amount);
    event DeliveryApproved(address indexed approver);
    event Disputed(address indexed disputer);
    event Resolved(address indexed arbiter, bool releasedToSeller);
    event Completed(uint256 amount, address recipient);
Let's break down what we just wrote:
We declare our contract with
contract EscrowWe define state variables to store the addresses of all participants
We create variables to track the payment amount and approval states
We define an enum for different states of the escrow
We add events to make tracking the contract's activity easier
Step 2: Adding Access Control
Security is paramount in smart contracts. Let's add modifiers to control who can do what:
// Modifiers for access control
    modifier onlyBuyer() {
        require(msg.sender == buyer, "Only the buyer can call this function.");
        _;
    }

    modifier onlySeller() {
        require(msg.sender == seller, "Only the seller can call this function.");
        _;
    }

    modifier onlyArbiter() {
        require(msg.sender == arbiter, "Only the arbiter can call this function.");
        _;
    }

    modifier inState(EscrowState _state) {
        require(state == _state, "Invalid state for this action.");
        _;
    }
These modifiers act like security guards, ensuring only authorized users can perform specific actions and that operations happen in the correct state.
Step 3: Implementing the Constructor
Next, let's add the constructor that sets up our escrow contract:
// Constructor sets up the escrow participants
    constructor(address _buyer, address _seller, address _arbiter) {
        require(_buyer != address(0) && _seller != address(0) && _arbiter != address(0),
                "Addresses cannot be zero.");
        require(_buyer != _seller && _buyer != _arbiter && _seller != _arbiter,
                "Participants must be different addresses.");

        buyer = _buyer;
        seller = _seller;
        arbiter = _arbiter;
        state = EscrowState.AWAITING_PAYMENT;
    }
The constructor:
Takes the addresses of the buyer, seller, and arbiter as parameters
Validates these addresses to ensure they're not zero addresses and are all different
Initializes the contract state to
AWAITING_PAYMENT
Step 4: Core Escrow Functions
Now, let's implement the main functionality of our escrow system:
// Buyer deposits funds
    function deposit() external payable onlyBuyer inState(EscrowState.AWAITING_PAYMENT) {
        require(msg.value > 0, "Deposit amount must be greater than 0.");
        amount = msg.value;
        state = EscrowState.AWAITING_DELIVERY;

        emit Deposited(buyer, msg.value);
    }

    // Buyer approves the transaction
    function approveDelivery() external onlyBuyer inState(EscrowState.AWAITING_DELIVERY) {
        buyerApproval = true;
        emit DeliveryApproved(buyer);
        finalize();
    }

    // Seller confirms delivery
    function confirmDelivery() external onlySeller inState(EscrowState.AWAITING_DELIVERY) {
        sellerApproval = true;
        emit DeliveryApproved(seller);
        finalize();
    }

    // Internal function to finalize the transaction
    function finalize() internal {
        if (buyerApproval && sellerApproval) {
            payable(seller).transfer(amount);
            state = EscrowState.COMPLETE;
            emit Completed(amount, seller);
        }
    }
These functions handle the core escrow process:
deposit(): Allows the buyer to deposit funds, changing the state toAWAITING_DELIVERYapproveDelivery(): Allows the buyer to approve the transactionconfirmDelivery(): Allows the seller to confirm deliveryfinalize(): An internal function that releases the funds if both parties approve
Step 5: Dispute Resolution
Let's implement dispute handling:
// Either party can raise a dispute
    function dispute() external {
        require(msg.sender == buyer || msg.sender == seller,
                "Only buyer or seller can dispute.");
        require(state == EscrowState.AWAITING_DELIVERY,
                "Can only dispute while awaiting delivery.");

        state = EscrowState.DISPUTED;
        emit Disputed(msg.sender);
    }

    // Arbiter resolves disputes
    function resolveDispute(bool releaseToSeller) external onlyArbiter
            inState(EscrowState.DISPUTED) {
        if (releaseToSeller) {
            payable(seller).transfer(amount);
        } else {
            payable(buyer).transfer(amount);
        }

        state = EscrowState.COMPLETE;
        emit Resolved(arbiter, releaseToSeller);
    }
These functions handle disputes:
dispute(): Allows either buyer or seller to flag a transaction as disputedresolveDispute(): Allows the arbiter to decide where the funds should go
Step 6: Emergency Functions
Let's add safety mechanisms:
// Emergency refund function (with time lock in a real-world scenario)
    function refundBuyer() external onlyBuyer inState(EscrowState.AWAITING_DELIVERY) {
        // In a production environment, you might want to add:
        // require(block.timestamp > deliveryDeadline, "Cannot refund before deadline.");

        payable(buyer).transfer(amount);
        state = EscrowState.COMPLETE;
        emit Completed(amount, buyer);
    }

    // Get contract balance (for debugging)
    function getBalance() external view returns (uint256) {
        return address(this).balance;
    }
}
These additional functions enhance our contract:
refundBuyer(): An emergency function allowing the buyer to get a refund (in a real-world scenario, you would add a time lock)getBalance(): A helper function to check the contract's balance
The Complete Escrow Contract
Here's our complete escrow contract:
// SPDX-License-Identifier: MIT
pragma solidity ^0.8.7;

contract Escrow {
    // Define the main participants
    address public buyer;
    address public seller;
    address public arbiter;

    // Track the amount and approval states
    uint256 public amount;
    bool public buyerApproval;
    bool public sellerApproval;

    // Define possible states of the escrow
    enum EscrowState {
        AWAITING_PAYMENT,
        AWAITING_DELIVERY,
        COMPLETE,
        DISPUTED
    }
    EscrowState public state;

    // Events for off-chain tracking
    event Deposited(address indexed buyer, uint256 amount);
    event DeliveryApproved(address indexed approver);
    event Disputed(address indexed disputer);
    event Resolved(address indexed arbiter, bool releasedToSeller);
    event Completed(uint256 amount, address recipient);

    // Modifiers for access control
    modifier onlyBuyer() {
        require(msg.sender == buyer, "Only the buyer can call this function.");
        _;
    }

    modifier onlySeller() {
        require(msg.sender == seller, "Only the seller can call this function.");
        _;
    }

    modifier onlyArbiter() {
        require(msg.sender == arbiter, "Only the arbiter can call this function.");
        _;
    }

    modifier inState(EscrowState _state) {
        require(state == _state, "Invalid state for this action.");
        _;
    }

    // Constructor sets up the escrow participants
    constructor(address _buyer, address _seller, address _arbiter) {
        require(_buyer != address(0) && _seller != address(0) && _arbiter != address(0),
                "Addresses cannot be zero.");
        require(_buyer != _seller && _buyer != _arbiter && _seller != _arbiter,
                "Participants must be different addresses.");

        buyer = _buyer;
        seller = _seller;
        arbiter = _arbiter;
        state = EscrowState.AWAITING_PAYMENT;
    }

    // Buyer deposits funds
    function deposit() external payable onlyBuyer inState(EscrowState.AWAITING_PAYMENT) {
        require(msg.value > 0, "Deposit amount must be greater than 0.");
        amount = msg.value;
        state = EscrowState.AWAITING_DELIVERY;

        emit Deposited(buyer, msg.value);
    }

    // Buyer approves the transaction
    function approveDelivery() external onlyBuyer inState(EscrowState.AWAITING_DELIVERY) {
        buyerApproval = true;
        emit DeliveryApproved(buyer);
        finalize();
    }

    // Seller confirms delivery
    function confirmDelivery() external onlySeller inState(EscrowState.AWAITING_DELIVERY) {
        sellerApproval = true;
        emit DeliveryApproved(seller);
        finalize();
    }

    // Either party can raise a dispute
    function dispute() external {
        require(msg.sender == buyer || msg.sender == seller,
                "Only buyer or seller can dispute.");
        require(state == EscrowState.AWAITING_DELIVERY,
                "Can only dispute while awaiting delivery.");

        state = EscrowState.DISPUTED;
        emit Disputed(msg.sender);
    }

    // Arbiter resolves disputes
    function resolveDispute(bool releaseToSeller) external onlyArbiter
            inState(EscrowState.DISPUTED) {
        if (releaseToSeller) {
            payable(seller).transfer(amount);
        } else {
            payable(buyer).transfer(amount);
        }

        state = EscrowState.COMPLETE;
        emit Resolved(arbiter, releaseToSeller);
    }

    // Internal function to finalize the transaction
    function finalize() internal {
        if (buyerApproval && sellerApproval) {
            payable(seller).transfer(amount);
            state = EscrowState.COMPLETE;
            emit Completed(amount, seller);
        }
    }

    // Emergency refund function (with time lock in a real-world scenario)
    function refundBuyer() external onlyBuyer inState(EscrowState.AWAITING_DELIVERY) {
        // In a production environment, you might want to add:
        // require(block.timestamp > deliveryDeadline, "Cannot refund before deadline.");

        payable(buyer).transfer(amount);
        state = EscrowState.COMPLETE;
        emit Completed(amount, buyer);
    }

    // Get contract balance (for debugging)
    function getBalance() external view returns (uint256) {
        return address(this).balance;
    }
}
Testing Your Escrow Contract
Testing is a crucial part of smart contract development. Let's create a test script to ensure our contract works as expected.
Create a file called escrow-test.js in the test/ directory:
const { expect } = require("chai");
const { ethers } = require("hardhat");

describe("Escrow Contract", function () {
  let Escrow;
  let escrow;
  let buyer, seller, arbiter, otherAccount;
  const depositAmount = ethers.utils.parseEther("1.0");

  beforeEach(async function () {
    // Get signers (accounts)
    [buyer, seller, arbiter, otherAccount] = await ethers.getSigners();

    // Deploy the contract
    Escrow = await ethers.getContractFactory("Escrow");
    escrow = await Escrow.deploy(buyer.address, seller.address, arbiter.address);
    await escrow.deployed();
  });

  describe("Deployment", function () {
    it("Should set the right participants", async function () {
      expect(await escrow.buyer()).to.equal(buyer.address);
      expect(await escrow.seller()).to.equal(seller.address);
      expect(await escrow.arbiter()).to.equal(arbiter.address);
    });

    it("Should start in AWAITING_PAYMENT state", async function () {
      expect(await escrow.state()).to.equal(0); // AWAITING_PAYMENT = 0
    });
  });

  describe("Transactions", function () {
    it("Should allow buyer to deposit funds", async function () {
      await escrow.connect(buyer).deposit({ value: depositAmount });

      expect(await escrow.amount()).to.equal(depositAmount);
      expect(await escrow.state()).to.equal(1); // AWAITING_DELIVERY = 1
    });

    it("Should not allow non-buyer to deposit", async function () {
      await expect(
        escrow.connect(seller).deposit({ value: depositAmount })
      ).to.be.revertedWith("Only the buyer can call this function.");
    });

    it("Should process the transaction when both approve", async function () {
      // Deposit funds
      await escrow.connect(buyer).deposit({ value: depositAmount });

      // Get initial balances
      const initialSellerBalance = await seller.getBalance();

      // Both approve
      await escrow.connect(buyer).approveDelivery();
      await escrow.connect(seller).confirmDelivery();

      // Check results
      expect(await escrow.state()).to.equal(2); // COMPLETE = 2

      // Check seller received the funds (approximation due to gas costs)
      const finalSellerBalance = await seller.getBalance();
      expect(finalSellerBalance.sub(initialSellerBalance)).to.be.closeTo(
        depositAmount,
        ethers.utils.parseEther("0.01") // Allow for gas costs
      );
    });

    it("Should handle disputes correctly", async function () {
      // Deposit funds
      await escrow.connect(buyer).deposit({ value: depositAmount });

      // Create dispute
      await escrow.connect(buyer).dispute();
      expect(await escrow.state()).to.equal(3); // DISPUTED = 3

      // Get initial balances
      const initialBuyerBalance = await buyer.getBalance();

      // Arbiter resolves in favor of buyer
      await escrow.connect(arbiter).resolveDispute(false);

      // Check results
      expect(await escrow.state()).to.equal(2); // COMPLETE = 2

      // Check buyer received the refund (approximation due to gas costs)
      const finalBuyerBalance = await buyer.getBalance();
      expect(finalBuyerBalance.sub(initialBuyerBalance)).to.be.closeTo(
        depositAmount,
        ethers.utils.parseEther("0.01") // Allow for gas costs
      );
    });
  });
});
Run the tests with:
npx hardhat test
Deploying Your Escrow Contract to Rootstock Testnet
Now that our contract is built and tested, let's deploy it to the Rootstock testnet.
Step 1: Create a .env File
First, create a .env file in your project root to store your private key securely:
PRIVATE_KEY=your_metamask_private_key_here
RSK_TESTNET_URL=https://public-node.testnet.rsk.co/
⚠️ Security Warning: Never share your private key or commit the .env file to a public repository!
Step 2: Update Hardhat Configuration
Modify your hardhat.config.js file to include the Rootstock testnet network:
require("@nomicfoundation/hardhat-toolbox");
require("dotenv").config();

module.exports = {
  solidity: "0.8.20",
  networks: {
    rskTestnet: {
      url: process.env.RSK_TESTNET_URL,
      accounts: [process.env.PRIVATE_KEY],
      chainId: 31, // Rootstock Testnet chain ID
    },
  },
};
Step 3: Create a Deployment Script
Create a file called deploy.js in the scripts/ directory:
async function main() {
  const [deployer] = await ethers.getSigners();
  console.log("Deploying contracts with the account:", deployer.address);
  console.log("Account balance:", (await deployer.getBalance()).toString());

  // Replace these with actual addresses
  const buyerAddress = "BUYER_ADDRESS"; // Replace with actual address
  const sellerAddress = "SELLER_ADDRESS"; // Replace with actual address
  const arbiterAddress = "ARBITER_ADDRESS"; // Replace with actual address

  const Escrow = await ethers.getContractFactory("Escrow");
  const escrow = await Escrow.deploy(buyerAddress, sellerAddress, arbiterAddress);

  await escrow.deployed();

  console.log("Escrow contract deployed to:", escrow.address);
}

main()
  .then(() => process.exit(0))
  .catch((error) => {
    console.error(error);
    process.exit(1);
  });
Replace BUYER_ADDRESS, SELLER_ADDRESS, and ARBITER_ADDRESS with actual Ethereum addresses.
Final Codebase structure will Look like this:

Step 4: Deploy the Contract
Run the deployment script:
npx hardhat run scripts/deploy.js --network rskTestnet

CONGRATULATIONSSS! YOU DID IT 🚀🥇
Save this address you'll need it to interact with your contract.
Verifying Your Smart Contract on Rootstock Testnet
After deploying your contract, it's a good practice to verify the source code on the block explorer. This enhances transparency and allows users to interact with your contract directly through the block explorer interface.
Step 1: Prepare for Verification
Before verifying, make sure you have:
The deployed contract address
The exact Solidity compiler version used
Any optimization settings used during compilation
Step 2: Verify Through the Block Explorer
Visit the Rootstock Testnet Block Explorer

Search for your deployed contract address

Navigate to the "Code" tab

Look for the "Verify Contract" option
Enter the required information:
Contract Name: Escrow
Compiler Version: Should match your hardhat.config.js
Upload your .sol file
Select your optimization settings

Click "Verify"

If verification is successful, your contract's source code will now be visible on the block explorer, and users can interact with it directly through the UI.
Interacting with Your Escrow Contract
Now that your contract is deployed and verified, let's see how to interact with it.
Through MetaMask and the Block Explorer
After verification, you can interact with your contract through the block explorer:
Navigate to your contract on the block explorer
Go to the "Write Contract" tab
Connect your MetaMask wallet
Choose the function you want to call
Enter any required parameters
Click "Write" to execute the function
Through a Custom Frontend (Advanced)
For a better user experience, you might want to build a custom frontend. Here's a simplified example using React and ethers.js
import { useState, useEffect } from 'react';
import { ethers } from 'ethers';
import EscrowABI from './EscrowABI.json'; // Your contract ABI

function App() {
  const [contract, setContract] = useState(null);
  const [account, setAccount] = useState('');
  const [state, setState] = useState('');
  const [amount, setAmount] = useState('');

  useEffect(() => {
    const init = async () => {
      // Connect to MetaMask
      if (window.ethereum) {
        const provider = new ethers.providers.Web3Provider(window.ethereum);
        const accounts = await window.ethereum.request({
          method: 'eth_requestAccounts'
        });
        setAccount(accounts[0]);

        // Connect to the contract
        const contractAddress = 'YOUR_CONTRACT_ADDRESS';
        const escrowContract = new ethers.Contract(
          contractAddress,
          EscrowABI,
          provider.getSigner()
        );
        setContract(escrowContract);

        // Get initial state
        const state = await escrowContract.state();
        setState(["AWAITING_PAYMENT", "AWAITING_DELIVERY",
                  "COMPLETE", "DISPUTED"][state]);

        const amt = await escrowContract.amount();
        setAmount(ethers.utils.formatEther(amt));
      }
    };

    init();
  }, []);

  const deposit = async () => {
    if (contract) {
      const depositAmount = ethers.utils.parseEther("1.0");
      const tx = await contract.deposit({ value: depositAmount });
      await tx.wait();

      // Update state
      const newState = await contract.state();
      setState(["AWAITING_PAYMENT", "AWAITING_DELIVERY",
                "COMPLETE", "DISPUTED"][newState]);

      const amt = await contract.amount();
      setAmount(ethers.utils.formatEther(amt));
    }
  };

  return (
    <div className="App">
      <h1>Escrow Contract Interface</h1>
      <p>Connected Account: {account}</p>
      <p>Contract State: {state}</p>
      <p>Amount in Escrow: {amount} RBTC</p>

      <button onClick={deposit}>Deposit 1 RBTC</button>
      {/* Add more buttons for other functions */}
    </div>
  );
}

export default App;
Best Practices and Security Considerations
When developing smart contracts, especially those handling financial transactions, security is paramount. Here are some best practices:
1. Access Control
Our contract uses modifiers to restrict access to functions. Always ensure that:
Only authorized users can call specific functions
State constraints are enforced before execution
2. State Management
The contract carefully manages state transitions:
Each function checks the current state
State changes are atomic and consistent
Invalid state transitions are prevented
3. Fund Safety
The contract includes mechanisms to keep funds secure:
Funds are locked until specific conditions are met
Multiple approvals required for release
Dispute resolution by a trusted arbiter
Emergency refund option for the buyer
4. Event Logging
We've added events for important actions:
Helps with debugging and monitoring
Provides transparency for all parties
Enables off-chain systems to track contract activity
5. Additional Security Enhancements
For a production-ready contract, consider these additional security measures:
Reentrancy Guards: Prevent reentrant calls that could manipulate contract state
Timeouts: Add deadline functionality for automatic refunds if delivery doesn't happen
Rate Limiting: Prevent spamming of contract functions
Circuit Breakers: Add emergency stop functionality for critical issues
Formal Verification: Use formal verification tools to mathematically prove contract correctness
Common Pitfalls to Avoid
When developing smart contracts, be aware of these common pitfalls:
Floating-Point Arithmetic: Solidity doesn't support floating-point calculations directly
Gas Limits: Complex operations can exceed block gas limits
Timestamp Manipulation: Block timestamps can be slightly manipulated by miners
Private Data: Nothing on the blockchain is truly private
Integer Overflow/Underflow: Use SafeMath libraries or Solidity 0.8+ built-in checks
Logic Errors: Test all possible execution paths carefully
Potential Enhancements
Our escrow contract covers the basics, but there are many ways to enhance it:
Timeouts and Deadlines: Add automatic refunds if the seller doesn't deliver in time
Partial Payments: Allow for milestone-based payments
Multiple Currency Support: Accept different tokens
Ratings and Reputation: Add a feedback system
Multiple Arbiters: Implement a multi-signature approach for dispute resolution
Fee System: Add fees for the platform or arbiters
Conclusion
Congratulations! You've successfully built, tested, and deployed a secure escrow system on the Rootstock blockchain. This smart contract provides a trustless way to conduct online transactions, protecting both buyers and sellers.
By leveraging the power of blockchain technology, we've created a system that:
Eliminates the need for traditional intermediaries
Provides transparency and immutability
Automates the release of funds based on predefined conditions
Includes a fair dispute resolution mechanism
Remember, smart contracts are immutable once deployed, so always test thoroughly on testnets before moving to production. As you become more comfortable with blockchain development, you can enhance this escrow system with additional features and security measures.
If facing any errors, join Rootstock discord and ask under the respective channel.
Until then, dive deeper into Rootstock by exploring its official documentation. Keep experimenting, and happy coding!
Happy coding, and welcome to the exciting world of blockchain development!
Subscribe to my newsletter
Read articles from Pranav Konde directly inside your inbox. Subscribe to the newsletter, and don't miss out.
Written by