Make a console application in .NET Core 8.0 to add & get a message in the IBM MQ Queue without authentication
 Ronak Padaliya
Learning objectives
Learn how to configure your Queue Manager and Queues, which connect with a .NET Core 8.0 console app and put a message in the IBMMQ Queue.
Steps
Step 1. Download and install IBM MQ on a Windows machine
Follow this article: https://ronakpadaliya.hashnode.dev/install-ibm-mq-on-windows-10
Step 2. Create and start a queue manager
You need a queue in order to start putting and getting your messages. Queues live on queue managers, so you need to create a queue manager first. On your command line, type:
Copy
Copy
crtmqm QM1
You should see output like this:

The queue manager is created but not started. Start your queue manager:
Copy
Copy
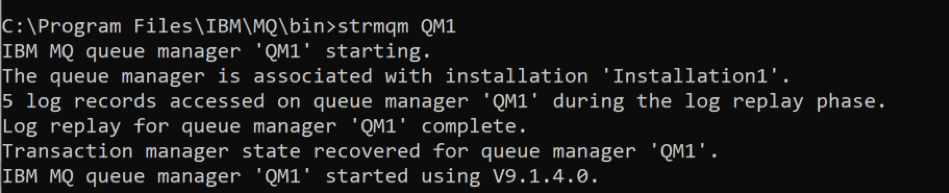
strmqm QM1
You should see output like this:
Step 3. Configure your queue manager
Create and save a file ‘unauth-mq-config.mqsc‘ with the below content,
* ========= Apply this using: runmqsc QM3 < unauth-mq-config.mqsc =========
*
* This MQSC script configures an IBM MQ Queue Manager (QM3) to allow unsecured client
* connections for development or testing purposes. It is NOT recommended for production.
*
* 1. Create or update a SVRCONN channel named 'DEV.ANY.SVRCONN'.
*    By default, this allows clients to connect. No MCAUSER is set here explicitly,
*    so it will use the default unless changed elsewhere.
DEFINE CHANNEL('DEV.ANY.SVRCONN') CHLTYPE(SVRCONN) REPLACE

* 2. Update the default authentication information to use IDPWOS
*    (Operating System user IDs) and make client checks optional.
*    This weakens authentication to allow more flexible (less secure) client logins.
ALTER AUTHINFO(SYSTEM.DEFAULT.AUTHINFO.IDPWOS) AUTHTYPE(IDPWOS) CHCKCLNT(OPTIONAL)

* 3. Disable channel authentication rules globally.
*    This removes all CHLAUTH rules, allowing all users and IPs to connect freely.
ALTER QMGR CHLAUTH(DISABLED)

* 4. Define and start a TCP listener on port 1414 controlled by the queue manager.
*    This enables clients to connect to the queue manager over TCP.
DEFINE LISTENER(TCP.LISTENER) TRPTYPE(TCP) PORT(1414) CONTROL(QMGR)
START LISTENER(TCP.LISTENER)

* 5. (Optional) Create sample local queues for testing message flow.
DEFINE QLOCAL(DEV.QUEUE.1)
DEFINE QLOCAL(DEV.QUEUE.2)
DEFINE QLOCAL(DEV.QUEUE.3)

* ========= End of Script =========
Run this command to create the MQ objects and add the location where you saved the script file, for example:
runmqsc QM1<"C:\Users\user\Downloads\mq-dev-config.mqsc"
When it's done, you should see output like this:

Step 4. Create a console application to put & get message from Queue
Create a Visual Studio console application project with .NET 8.0 the target framework.
Install the NuGet package named IBMMQDotnetClient v4.9.2
Create Program.cs file and write the below code into it,
using IBM.WMQ;
using IBM.WMQ.PCF;
using System.Collections;
using System.Collections.Generic;
using System.Globalization;
using System.Text;

namespace IBM_MQ_Testing
{
    public class Program
    {
        public static void Main(string[] args)
        {
            string queueManagerName = "QM1";

            Hashtable connectionProperties = new Hashtable
            {
                { MQC.HOST_NAME_PROPERTY, "localhost" },
                { MQC.PORT_PROPERTY, 1414 },
                { MQC.CHANNEL_PROPERTY, "DEV.ANY.SVRCONN" },
                { MQC.TRANSPORT_PROPERTY, MQC.TRANSPORT_MQSERIES_MANAGED },
            };

            try
            {
                MQQueueManager queueManager = new MQQueueManager(queueManagerName, connectionProperties);
                Console.WriteLine($"Connected to Queue Manager: {queueManager.Name}");

                int openOptions = MQC.MQOO_OUTPUT;
                openOptions |= MQC.MQAUTH_INPUT;
                var m_queue = new IBM.WMQ.MQQueue(queueManager, "DEV.QUEUE.1", openOptions, null, null, null);

                var requestMQMessage = new MQMessage();
                requestMQMessage.WriteString("<Message>Hello</Message>");

                m_queue.Put(requestMQMessage);
                requestMQMessage.Seek(0); // We previously wrote the message, so we need to reset the pointer to read the message correctly.
                Console.WriteLine("Put Message = " + requestMQMessage.ReadString(requestMQMessage.MessageLength));

                var getMessage = new MQMessage();

                m_queue.Get(getMessage);

                Console.WriteLine("Fetched Message = " + getMessage.ReadString(getMessage.MessageLength));

                queueManager.Disconnect();
            }
            catch (MQException mqe)
            {
                Console.WriteLine($"MQ Exception: {mqe.Message}, Reason Code: {mqe.ReasonCode}");
                if (mqe.InnerException != null)
                    Console.WriteLine($"Inner Exception: {mqe.InnerException.Message}");
            }
            catch (Exception ex)
            {
                Console.WriteLine("Error: " + ex.Message);
            }

            Console.ReadLine();
        }
    }
}
After that when you run it shows output like below,

Summary
In this tutorial, you configured the queue manager running on your Windows machine for incoming client connections. Using that, we put and fetch messages from the .NET Core 8.0 console application.
Subscribe to my newsletter
Read articles from Ronak Padaliya directly inside your inbox. Subscribe to the newsletter, and don't miss out.
Written by