How to Upload Images in Laravel Using a Reusable Trait
 Madin Bloch
Table of contents
- The Solution?
- What We’ll Build
- Step 1: Create the Laravel Project
- Step 2: Create the Post Model and Migration
- Step 3: Create a Reusable Image Upload Trait
- Step 4: Update the Post Model to Use the Trait
- Step 5: Create the Post Controller
- Step 6: Define Routes
- Step 7: Create the Blade View
- Final Result
- Why Use Traits for Image Upload?
- Wrapping Up
Uploading images is something you’ll find in almost every Laravel project whether it’s for a blog, product listing, user profile, or a gallery.
But here’s the common problem:
“I keep writing the same image upload logic in every controller or model. It’s repetitive and messy.”
The Solution?
Use a Trait to write the upload logic once, and reuse it anywhere you need.
In this tutorial, I’ll show you how to create a reusable image upload feature in Laravel using Traits. You’ll learn how to structure your code so it’s clean, reusable, and easy to manage — the Laravel way. 😎
What We’ll Build
We’ll create a simple image upload system where:
A user can upload a post with an image.
The uploaded image is stored inside the
public/post-imagesfolder.The image will be displayed with the post.
A Laravel Trait handles the image upload logic.
Old images get removed when a post is deleted.
Step 1: Create the Laravel Project
If you haven’t already, start a new Laravel project:
laravel new image-upload-app
cd image-upload-app
php artisan serve
Step 2: Create the Post Model and Migration
php artisan make:model Post -m
In the /database/migrations/xxx_xx_xx_create_posts_table.php file Create a table like this
// database/migrations/xxxx_xx_xx_create_posts_table.php

Schema::create('posts', function (Blueprint $table) {
    $table->id();
    $table->string('name');
    $table->string('image')->nullable();
    $table->timestamps();
});
Then run:
php artisan migrate
Step 3: Create a Reusable Image Upload Trait
Create a new file at app/Traits/ImageUpload.php or you can also use this command to create a Trait
php artisan make:trait Traits/ImageUpload
Now Create a Method In Trait app/Traits/ImageUpload.php like this
<?php

namespace App\Traits;


trait ImageUpload
{
     // This is Upload Method
    public function upload($file)
    {
        $filename = uniqid() . '-' . time() . '.' . $file->getClientOriginalExtension();
        $file->move(public_path($this->folderPath), $filename);
        return $filename;
    }

    // Get Image Path
    public function getImageUrl()
    {
        return $this->folderPath . '/' . $this->image;
    }
}
Why use a trait?
It makes the image upload logic reusable.
Keeps the controller and model clean.
You can use this Trait in multiple models like
User,Product,Category, etc.
Step 4: Update the Post Model to Use the Trait
Open your app\Models\Post.php model:
<?php

namespace App\Models;

use Illuminate\Database\Eloquent\Model;
use App\Traits\ImageUpload;  // always add namespace


class Post extends Model
{
    use ImageUpload;  // Must Have on Your Model


    protected $fillable = ['name', 'image'];


    // This is used by the Trait to decide where to store the image

    protected $folderPath = 'post-images';
}
A**lways use Trait namespace in Your Model to upload the image
Step 5: Create the Post Controller
php artisan make:controller PostController --resource
Now write your logic:
In Your app\Http\Controllers\PostController.php
<? php

use App\Models\Post;
use Illuminate\Http\Request;
use Illuminate\Support\Facades\Validator;

class PostController extends Controller
{
    // Display all post in post view
    public function index()
    {
        $posts = Post::all();
        return view('post', compact('posts'));
    }

    // Store the Image
    public function store(Request $request)
    {
        // Validate the inputs
        $validator = Validator::make($request->all(), [
            'name' => 'required|string',
            'image' => 'required|mimes:jpeg,jpg,png|max:2048',
        ]);
        if ($validator->fails()) {
            return redirect()->back()->withErrors($validator)->withInput();
        }
        // Create the post
        $post = Post::create([
            'name' => $request->name,
        ]);

        // Upload the image using the Trait
        $post->image = $post->upload($request->file('image'));
        $post->save();
        return redirect()->back();

    }

    public function destroy($id)
    {
        $post = Post::findOrFail($id);

        // Delete the image file from the folder
        $imagePath = public_path($post->getImageUrl());
        if (file_exists($imagePath)) {
            unlink($imagePath);
        }

        // Delete the post
        $post->delete();
        return redirect()->back();
    }
}
Step 6: Define Routes
In routes/web.php:
<?php

use App\Http\Controllers\PostController;

Route::get('/', function () {
    return redirect()->route('post.index');
});


// This is Resource Controller you also write as you perfer
Route::resource('post', PostController::class);
If you want to list your routes and display all routes use this command
php artisan route:list
Step 7: Create the Blade View
Create a file: resources/views/post.blade.php
Paste this UI code (uses Tailwind CSS):
<!doctype html>
<html lang="en">
<head>
  <meta charset="UTF-8" />
  <meta name="viewport" content="width=device-width, initial-scale=1.0" />

     {{-- Tailwind CDN --}}
  <script src="https://cdn.tailwindcss.com"></script>
  <title>Image Upload</title>
</head>
<body class="bg-gray-100 min-h-screen flex flex-col items-center py-10">

  <div class="w-full max-w-md bg-white rounded-xl shadow-lg p-6">
    <h2 class="text-2xl font-semibold text-center text-gray-800 mb-6">Upload a New Post</h2>

    {{-- Error Messages --}}
    @if ($errors->any())
      <div class="mb-4 bg-red-100 border border-red-400 text-red-700 px-4 py-3 rounded">
        <ul class="list-disc pl-5 text-sm">
          @foreach ($errors->all() as $error)
            <li>{{ $error }}</li>
          @endforeach
        </ul>
      </div>
    @endif

    {{-- Upload Form --}}
    <form method="POST" action="{{ route('post.store') }}" enctype="multipart/form-data" class="space-y-4">
      @csrf

      <div>
        <label for="name" class="block text-sm font-medium text-gray-700">Name</label>
        <input type="text" name="name" id="name" value="{{ old('name') }}"
               class="w-full border border-gray-300 rounded px-3 py-2">
      </div>

      <div>
        <label for="image" class="block text-sm font-medium text-gray-700">Choose Image</label>
        <input type="file" name="image" id="image" accept="image/"
               class="w-full text-sm border border-gray-300 rounded px-3 py-2">
      </div>

      <div>
        <button type="submit"
                class="w-full bg-blue-600 text-white py-2 px-4 rounded hover:bg-blue-700">
          Upload
        </button>
      </div>
    </form>
  </div>

  {{-- Display Uploaded Posts --}}
  <div class="w-full max-w-4xl mt-10 grid grid-cols-1 sm:grid-cols-2 md:grid-cols-3 gap-6 px-4">
    @forelse ($posts as $post)
      <div class="bg-white rounded-lg shadow overflow-hidden">
        <img src="{{ asset($post->getImageUrl()) }}" alt="Post Image" class="w-full h-48 object-cover">
        <div class="p-4">
          <h3 class="text-lg font-semibold text-gray-800">{{ $post->name }}</h3>
          <form action="{{ route('post.destroy', $post->id) }}" method="POST" onsubmit="return confirm('Are you sure you want to delete this?');">
            @csrf
            @method('DELETE')
            <button type="submit" class="text-red-600 hover:text-red-800">Delete</button>
          </form>
        </div>
      </div>
    @empty
      <div class="col-span-full text-center text-gray-500">
        No Posts Available
      </div>
    @endforelse
  </div>

</body>
</html>
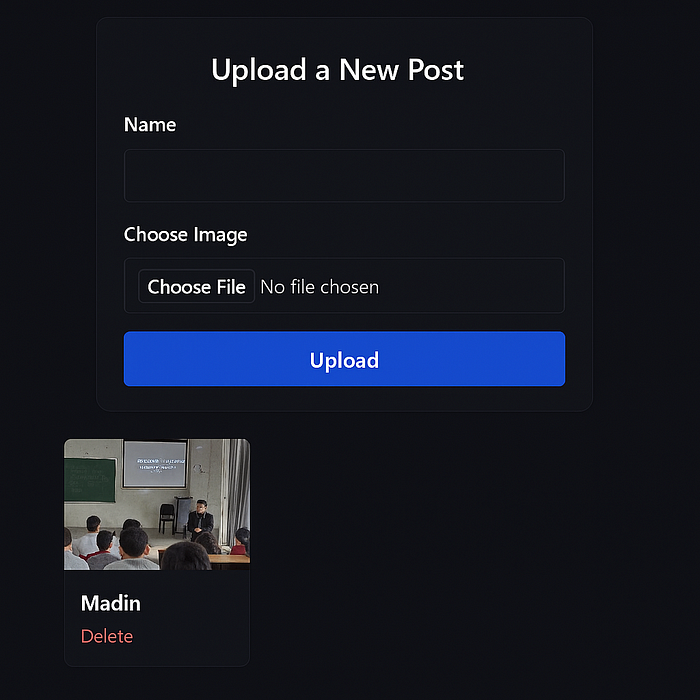
Final Result
You now have:
A reusable
ImageUploadTrait.Clean controller and model logic.
A UI that lets users upload and delete posts with images.
All images stored in
public/post-images
Why Use Traits for Image Upload?
Reusability: Write once, use in any model (
User,Post,Product, etc.).Separation of Concerns: Keeps your controller and model focused.
Cleaner Code: Easy to maintain and update.
Wrapping Up
Using Traits in Laravel makes your code cleaner and DRY (Don’t Repeat Yourself). This image upload system is simple yet flexible enough to use in real-world projects. You can even extend the Trait later to support S3 or other cloud storage drivers.
Happy Coding !
Subscribe to my newsletter
Read articles from Madin Bloch directly inside your inbox. Subscribe to the newsletter, and don't miss out.
Written by