How to Take Professional Product Photos That Sell
 ProdShot Creator
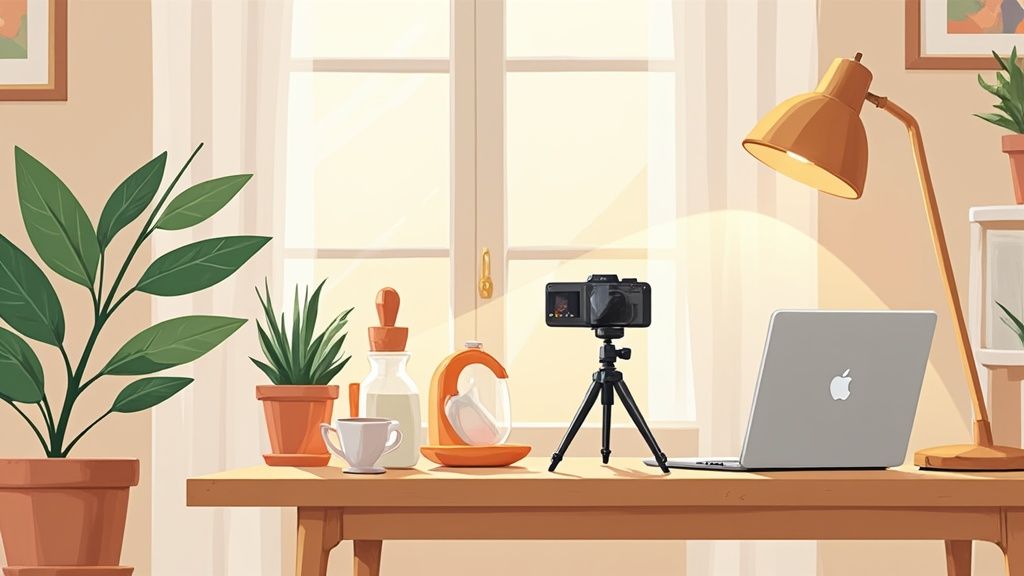
Creating Your Home Studio Without Spending a Fortune
Here's the honest truth: you don't need a fancy, expensive studio to capture professional-quality product photos. I've chatted with countless photographers who built successful businesses shooting right in their living rooms. Their secret? Resourcefulness. With a bit of creativity, you can transform any space into a productive shooting environment. Everyday household items can become amazing props and backdrops. That bare wall you keep meaning to decorate? Boom – instant studio backdrop.
This simple setup using natural light shows just how effective a home studio can be:
See how the window creates soft, diffused light, and the reflector card bounces light back onto the subject? This gets rid of harsh shadows, a real pain point when you're learning product photography. This type of natural light, especially from a big window, is a game-changer. Place your products near the window and play around with different angles and distances to see how the light interacts with them. You might be surprised – the corner of your kitchen, with its natural light and clean countertops, could become your go-to spot for shooting smaller products.
Managing Shadows and Reflections
Even with beautiful natural light, you'll still have to deal with shadows and reflections. But don’t worry, they’re easy to manage with a few simple tricks. White foam boards, or even pieces of white poster board, make excellent reflectors. They bounce light back onto your product, filling in those pesky shadows. For shiny products, try black foam boards to absorb light and reduce reflections. It’s all about understanding how light works and using readily available tools to control it.
This resourceful approach is especially relevant considering how much the product photography industry is booming. The international market was valued at about $129 million in 2021 and is expected to hit $275 million by 2028. Discover more insights into photography industry statistics. This growth shows just how much demand there is for high-quality product images – a demand you can absolutely meet from your own home.
Choosing the Right Room
Different rooms work better for different products. A large living room might be perfect for furniture, while a smaller, brighter bathroom could be ideal for cosmetics or jewelry thanks to its typically more diffused lighting. Think about the background too. A plain wall is always a good choice, but think about how other elements in the room can add a touch of style to your photos. Maybe a textured curtain, a bookshelf, or even some houseplants could fit your brand aesthetic. And remember, consistency is key. Once you find a setup you like, stick with it to keep your product images looking cohesive.
Unlocking Your Smartphone's Hidden Photography Potential
Your phone isn't just for calls and texts anymore—it’s a seriously powerful camera just waiting to be explored. The secret to amazing product photos isn’t about having the newest phone, it's about mastering the settings that most people ignore. I've personally witnessed photographers create stunning images using just their phones, proving expensive equipment isn’t a necessity. It's all about knowing what to tweak.
Mastering Manual Controls
Auto mode is great for everyday snapshots, but taking manual control is like shifting from automatic to manual transmission in a car. You suddenly have so much more power and precision. Exposure, focus, and white balance become your best friends. Adjusting exposure manually lets you fine-tune the brightness, which is a lifesaver in challenging lighting. Locking focus ensures crisp, clear details, especially vital for close-up product shots. And getting the white balance right keeps colors true to life, avoiding those weird yellow or blue casts that can make your product look, well, wrong.
Here’s a handy infographic that shows how aperture, shutter speed, and ISO work together:
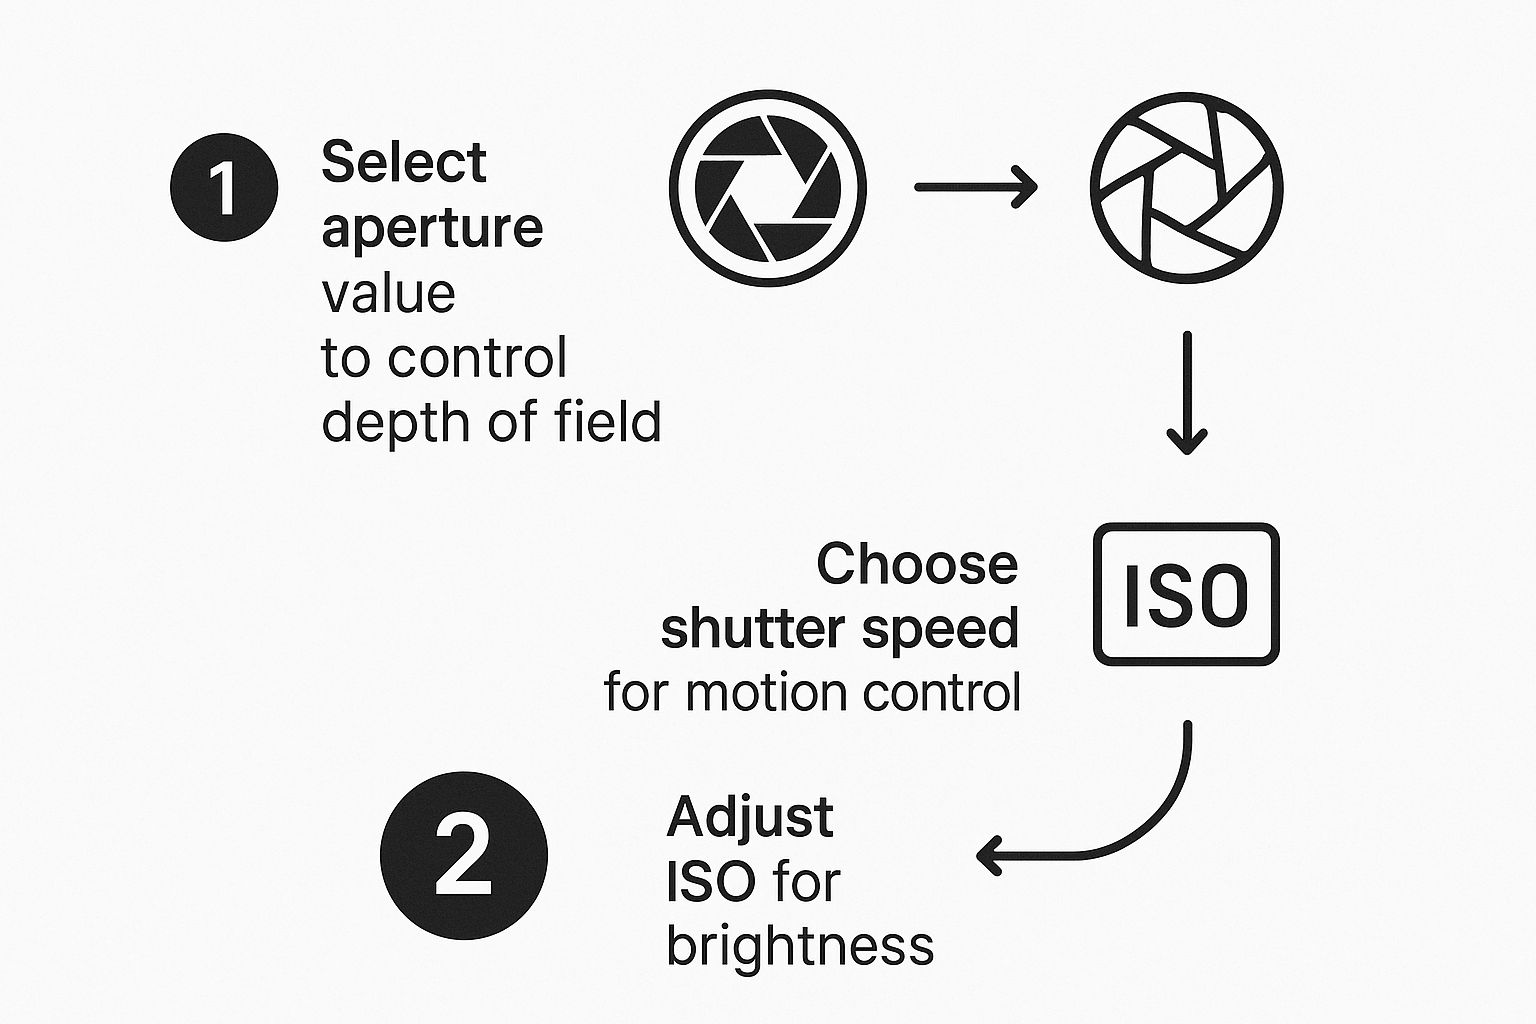
Understanding these elements gives you control over depth of field, motion blur, and the overall brightness of your images. It's like having a professional camera in your pocket.
Exploring Apps and Features
Don't forget about the cool features already built into your phone's camera! Play around with different modes. Portrait mode creates that blurry background effect (shallow depth-of-field) that makes products pop, while burst mode is perfect for capturing action shots. There are also tons of third-party camera apps like Adobe Lightroom and VSCO out there with advanced controls for things like ISO and shutter speed. Some even let you shoot in RAW format, giving you maximum flexibility when editing. A word to the wise though: not all camera apps are created equal. Look for ones with solid manual controls and good reviews.
Before we move on to consistency, let's take a look at some key camera settings and their best use cases across different phone types. This table can be a helpful starting point for fine-tuning your setup:
Smartphone Camera Settings Comparison Essential camera settings across different smartphone brands for optimal product photography results
| Setting | iPhone | Android | Best Use Case |
| HDR | Auto/On/Off | Auto/On/Off | High contrast scenes, balancing bright and dark areas |
| Grid | On/Off | On/Off | Composition, following the rule of thirds |
| Focus | Tap to focus, lock focus | Tap to focus, lock focus | Ensuring sharp details, macro photography |
| Exposure | Slider control | Slider control | Brightening or darkening the image, compensating for lighting |
| White Balance | Presets (Daylight, Cloudy, etc.) | Presets (Daylight, Cloudy, etc.) | Accurate color reproduction, avoiding color casts |
| Resolution | Choose from available options | Choose from available options | Higher resolution for larger prints and more detail |
This table highlights some standard settings and their applications. While specific features and interfaces may vary, these core principles apply to most smartphones. Experimenting with these settings will allow you to find what works best for you and your products.
Consistency is Key
Consistency in your product photos is crucial for a professional, branded look. Imagine it like building a brand identity – you want a consistent aesthetic. Stick with the same background, lighting style, and editing process for every product shot. This creates a cohesive look for your product gallery that appears polished and builds customer trust. Capturing those tiny details and textures that make a product look high-end, and then maintaining that consistent style across all your images, is what transforms simple snapshots into professional product photography.
Styling Secrets That Make Products Irresistible
Great product photos don't just show your product—they make people want it. Think about those times you've been scrolling and stopped dead in your tracks because an image just grabbed you. That's the power of presentation, and we're going to dive into how to achieve it. Let's explore the psychology behind those irresistible images, pulling from real-world e-commerce examples and my own styling experience.
The Power of Color and Props
Color combinations can seriously influence buying decisions. I've seen it firsthand. For example, if you're shooting a tech gadget, try using complementary colors like blue and orange. The contrast is eye-catching and creates visual interest. On the other hand, if you're photographing a cozy blanket, a warm palette—think earthy browns and deep reds—evokes feelings of comfort and makes the customer imagine themselves curled up with it. It all comes down to understanding the mood and message you want to convey.
Props are another game-changer, but they can be tricky. They can either add to the scene or totally distract from it. Let's say you’re photographing a watch. A small stack of books can elevate the product and give it a sophisticated feel. But if you clutter the scene with random objects, the focus shifts away from the watch itself. Remember, less is often more. Simplicity is key.
Creating Lifestyle Contexts
Lifestyle photos are all about helping customers see themselves using your product. Imagine you're selling a coffee mug. A plain shot on a white background is fine, but what if you showed that mug filled with steaming coffee, next to an open book on a sunny windowsill? Suddenly, it’s not just a mug; it's a moment of peaceful enjoyment. That’s the kind of emotional connection that sells.
Showcasing Scale, Texture, and Functionality
How do you communicate the soft texture of a cashmere sweater in a photo? Or the size of a small piece of jewelry? These are challenges every product photographer faces. Using props for scale can be incredibly helpful. A coin next to a delicate necklace instantly gives viewers a sense of its size. Close-up shots of that sweater's knit highlight its luxurious texture.
Showing how a product works is another powerful tool. If you’re selling a foldable backpack, show it both folded and unfolded to emphasize its versatility. This kind of practical demonstration can make a big difference.
For anyone serious about mastering product photography for marketplaces like Amazon, I highly recommend checking out our guide on professional Amazon product photography. It’s packed with information on creating images that convert. The key is balancing those essential details with visual appeal. You want to highlight your product's best features without overwhelming the viewer.
Creating a cohesive product gallery that tells a story is crucial. Each image is a piece of the puzzle, contributing to a compelling narrative about your product. This builds trust and encourages customers to click that "add to cart" button.
Lighting Techniques That Transform Ordinary Into Extraordinary
The difference between a product that looks cheap and one that screams “luxury” often comes down to lighting. I’ve seen it time and again – a simple lighting adjustment can completely change a product shot. Let's explore how to use both natural and artificial light to your advantage, drawing on practical examples and my own experience shooting product photography.
Eliminating Harsh Shadows
Harsh shadows can flatten a product and make it look unappealing. A diffuser is one of the easiest and best ways to fix this. It works like a cloud softening sunlight. A diffuser spreads the light, creating softer, more even illumination. You can buy professional diffusers, but a thin white sheet or even parchment paper can do the trick. Place it between your light source and the product to dramatically soften those harsh shadows, highlighting details and giving the product a more three-dimensional appearance.
I’ve even used a white shower curtain liner in a pinch – it’s surprisingly effective!
Reducing Glare Without Losing Detail
Shiny surfaces love to create glare, which can obscure important product details. You want to minimize reflections, but you don't want to lose the highlights that make a product shine. That’s where flags come into play. Black flags, usually made of cardboard or foam core, absorb light. Strategically placing these around your product can control reflections and glare without losing those all-important highlights. Play around with different flag positions and sizes to see what works best for each product.
A little trick I use is to start with larger flags and gradually reduce their size until I find the sweet spot.
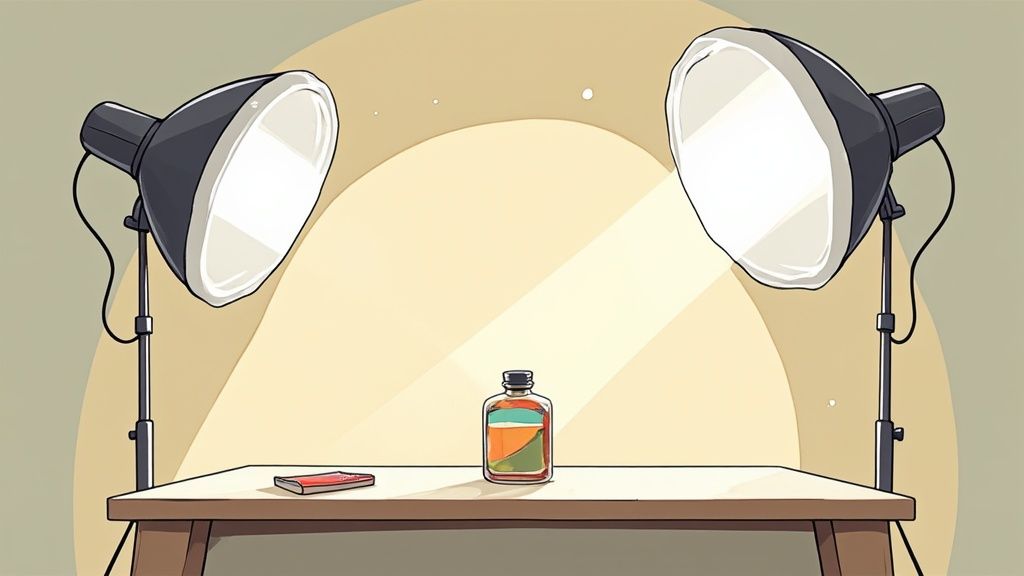
Here's a great example of different lighting setups for product photography:
This image really shows the impact of directional lighting, backlighting, and reflectors. See how different lighting positions drastically change the product's mood and appearance? Mastering light control gives product photos that polished, professional look.
Creating Soft, Even Illumination
That beautiful, soft lighting you see in professional product photos isn't always from fancy studio equipment. You can get similar results with some clever DIY lighting setups. Positioning two desk lamps, each fitted with a diffused light source (remember those DIY diffusers we talked about?), on either side of your product creates a soft, even light. This two-light setup, along with a reflector card to bounce light back onto the subject, mimics professional studio lighting. This gives your products that desirable, high-end look. Don't be afraid to experiment with different bulb wattages and distances to fine-tune the lighting. Find that perfect balance!
AI Editing Tools That Take Good Photos to Great
AI image editing has become a game-changer for product photography, especially when you're working with a smartphone. What used to take hours of work in expensive software can now be done in minutes with AI-powered platforms like ProdShot. Think automatic enhancements, clean background removal, and a consistently professional look across all your product images. Let me share how these tools can truly elevate your product photography game.
Enhancing Your Images With AI Power
AI editing tools are incredibly good at automatically enhancing images. They analyze your photos, tweaking things like brightness, contrast, and sharpness for a polished result. For instance, I recently shot some product photos in less-than-ideal lighting. The AI brightened them perfectly without that artificial, over-processed look. It’s a huge time saver, especially when you have a lot of product shots to edit.
Background Removal and Replacement Made Easy
One of the biggest pain points in product photography used to be background removal. Now, AI tools make it incredibly simple. They identify the product and seamlessly erase the background, giving you a clean, professional image. Many even offer background replacement, letting you put your product on a pure white backdrop or even in a lifestyle setting. This is so helpful for creating a consistent look and feel across your product catalog. You might be interested in: Photo editing services for ecommerce.
This kind of automation frees up so much time to focus on other crucial aspects, like styling and composition. It's interesting to see how even professional photographers are integrating AI into their workflow. For example, by offering in-person viewing sessions after a shoot, photographers can boost their revenue by up to 20%, according to Great Big Photography World. It’s all about smart strategies!
The Balancing Act: Realism vs. Enhanced Appeal
While AI offers powerful enhancements, it's essential to strike a balance between making your product look appealing and keeping it realistic. The aim isn’t to make your product look fake, but rather to showcase its best features. Subtle enhancements are key. For instance, smoothing out minor blemishes is fine, but drastically changing the shape or texture can be misleading. Authenticity matters.
Building an Efficient Editing Workflow
AI tools are all about efficiency. Features like batch processing let you upload multiple images and apply the same edits to all of them at once. This is a life-saver when dealing with large catalogs. Some tools also directly integrate with e-commerce platforms, making uploading edited images to your store super smooth. This simplifies the entire process from shooting to selling. Look for tools that offer automatic background removal, color correction, and image resizing. These features are particularly beneficial when working on professional product photos.
To help you choose the right tool, I’ve put together a comparison table:
AI Editing Tools Feature Comparison: Comparison of popular AI-powered editing tools for product photography, including features, pricing, and best use cases
| Tool | Key Features | Pricing | Best For |
| ProdShot | Background removal, automated enhancements, e-commerce integration | Varies by plan | High-volume product sellers |
| Remove.bg | Background removal, API access | Free tier, paid plans | Quick background removal needs |
| Pixelcut | Background removal, AI-powered image editing, templates | Free trial, paid plans | Social media and marketing content |
This table gives you a quick overview of some popular options, highlighting their key features and pricing. Choosing the right tool depends on your specific needs and workflow. Finding the perfect fit can drastically streamline your image editing process.
Turning Your Photography Skills Into Real Income
So you've got the hang of taking professional product photos. Awesome! Now comes the fun part: actually making money from it. I've seen firsthand how photographers can turn this skill into anything from a nice side hustle to a full-blown career. Let me share some advice on how you can do the same.
Pricing Your Services Competitively
Pricing your work is always a balancing act. You have to be competitive, but you also deserve to be paid fairly for your skills and the time you invest. Early in my career, I definitely undercharged, and it led to quick burnout. Trust me, it's not worth it. Do some research and see what other photographers in your area are charging. Think about things like how complex the product is, how many photos the client needs, and any special requests they might have. A solid pricing structure needs to account for all of this while still leaving you with a healthy profit.
Building a Portfolio That Attracts Clients
Your portfolio is essentially your storefront. It needs to showcase your absolute best work and speak to the kinds of clients you want to attract. When I was starting out, I offered discounted shoots to local businesses just to build up a diverse portfolio. This gave me great experience and a wide range of images to show potential clients. Being able to handle a variety of products shows you're adaptable and can be a real asset.
Scaling Your Operations Without Compromising Quality
As your business grows, you'll need to figure out how to handle the increased demand without sacrificing quality. I've seen photographers get overwhelmed and start rushing, which ultimately hurts their reputation. The key is to create efficient workflows for everything from setting up the shoot to the final edits. Things like communication templates, standardized editing processes, and clear project timelines will help keep everything running smoothly.
Speaking of pricing, you might find this helpful: Check out our guide on the cost of professional product photography. It offers some valuable insights into building a profitable photography business.
Finding Your Niche and Positioning Yourself
The photography market is massive. Finding a niche can really help you stand out. Maybe you specialize in food photography, jewelry, or something else entirely. Becoming a specialist in a specific area makes you the go-to person for businesses that need that particular expertise. Keeping an eye on market trends can be helpful too. For example, did you know that as of 2025, the Asia-Pacific region holds 35% of the global photography market? Discover more insights into the photography industry. This kind of information can really inform your long-term business strategy.
Client Communication and Project Management
Good communication is essential for any photography business. Being clear with your clients, from the initial consultation all the way to delivering the final images, prevents misunderstandings and keeps everyone happy. I personally use project management tools to stay organized and keep track of deadlines, revisions, and client feedback. This makes a huge difference. Plus, happy clients lead to referrals, which is the best kind of marketing.
Your Roadmap to Professional Product Photography Success
So, we've covered a lot of ground! Now, let's talk about how to put it all into action. This isn’t about following a rigid set of rules, but more like planning a road trip. You know where you want to end up, but you’re also open to exploring different routes along the way.
Building Your Photography Toolkit
First things first: let's gather your gear. Don’t worry about having the most expensive equipment right off the bat. Start with what you have and upgrade as you go. Your smartphone is an incredibly powerful tool. Remember those manual settings we talked about? Getting comfortable with those is a game-changer. It’s like learning to drive a stick shift – you’ll have so much more control.
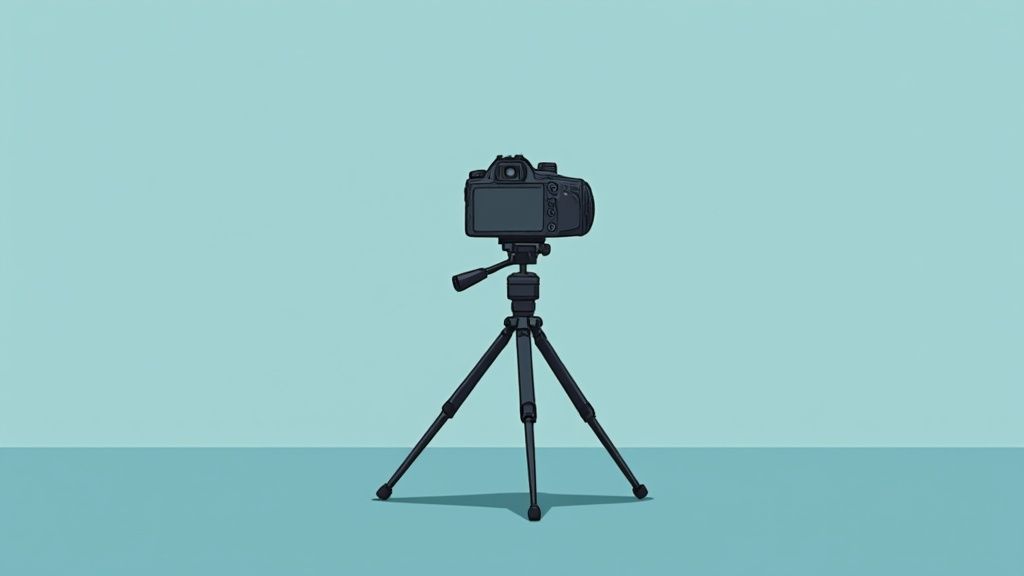
A tripod, even an inexpensive one, is essential for tack-sharp images and keeping your framing consistent. Think of it as having a super steady hand that never gets tired.
When it comes to lighting, natural light from a window is ideal, but sometimes you need a boost. A simple reflector, even a piece of white foam board, can work wonders. It bounces light back onto your product, filling in those pesky shadows. This creates a beautiful, even light that makes your products really shine.
Streamlining Your Workflow
Just like a well-organized kitchen, a smooth workflow will make your life so much easier. Before you even start shooting, create a simple shot list. This doesn't need to be fancy, just a quick list of the angles and details you want to capture for each product. It’s like having a roadmap for your shoot, keeping you focused and on track.
Styling is where you can really get creative and bring your products to life. Think about the story you want to tell. The backgrounds and props you choose can make all the difference. A watch photographed on a stack of vintage books tells a completely different story than one on a sleek, modern table.
Finally, let’s talk editing. AI-powered tools like ProdShot can save you tons of time. They can handle things like background removal and image enhancement automatically, freeing you up to focus on the creative side of editing, like fine-tuning colors and creating a consistent look across all your images.
Tracking Your Progress and Staying Motivated
Learning photography is a journey. It's like learning to play a musical instrument – it takes practice and patience. Set achievable goals and celebrate your progress along the way. Sharing your work with friends or online communities is a great way to get feedback and stay inspired.
Don’t be afraid to experiment! The more you shoot, the better you’ll understand light, composition, and styling. And remember, even the pros are constantly learning and evolving their techniques. Ready to take your product photos to the next level? Start your free trial with ProdShot today!
Subscribe to my newsletter
Read articles from ProdShot Creator directly inside your inbox. Subscribe to the newsletter, and don't miss out.
Written by