Building a DApp on Rootstock with Next.js, TypeScript, and Solidity: A Step-by-Step Guide
 Pranav Konde
In this guide, we will create a simple decentralized application (DApp) for message storage on the Rootstock platform, leveraging the power of blockchain technology. Blockchain provides a secure and transparent way to store data, ensuring that information remains immutable and accessible to all users. Our DApp will enable users to store and retrieve messages on the blockchain, showcasing the benefits of decentralization. We will use Next.js for the frontend, TypeScript for enhanced type safety, and Solidity for our smart contract implementation. By the end of this guide, you will have a fully functional DApp deployed on the Rootstock testnet, featuring wallet integration and message management capabilities. Let’s dive in and get started!
Introducing Rootstock
Rootstock (RSK) is the first and most established Bitcoin sidechain, offering a groundbreaking solution that combines Bitcoin’s unmatched proof-of-work security with Ethereum’s smart contract capabilities. Fully open-source and EVM-compatible, RSK enables developers to build and deploy decentralized applications (dApps) seamlessly while leveraging the strength and decentralization of Bitcoin's network. Secured by over 60% of Bitcoin’s hashing power through merged mining, RSK ensures a high level of security and trustlessness for its users. This innovative platform acts as a bridge, expanding Bitcoin’s functionality beyond simple transactions to power use cases such as DeFi, tokenization, and identity management. With its commitment to scalability, interoperability, and decentralization, RSK is at the forefront of enabling a vibrant ecosystem of dApps, fostering innovation while staying anchored to Bitcoin’s secure and decentralized infrastructure.
Now that you’ve got a quick overview of Rootstock, let’s jump right into creating a DApp on Rootstock with Next.js, TypeScript, and Solidity and deploying it on the Rootstock testnet. The process is straightforward and follows a similar approach to EVM-based chains. Let’s get started!
Building a DApp on the Rootstock
Step 1: Setting Up Your Environment
To begin, you’ll need some basic tools:
Install MetaMask
Add the MetaMask browser extension, set it up, and pin it.
To connect MetaMask to the Rootstock Testnet, open MetaMask > Settings > Networks > Add Network, and then enter the required details.
Network Name: Rootstock Testnet
RPC URL:
https://public-node.testnet.rsk.co/Chain ID: 31
Currency Symbol: tRBTC
Block Explorer URL:
https://explorer.testnet.rootstock.io/
Get Test RBTC
Visit the Rootstock faucet to acquire some test RBTC. This will cover your deployment transaction costs.
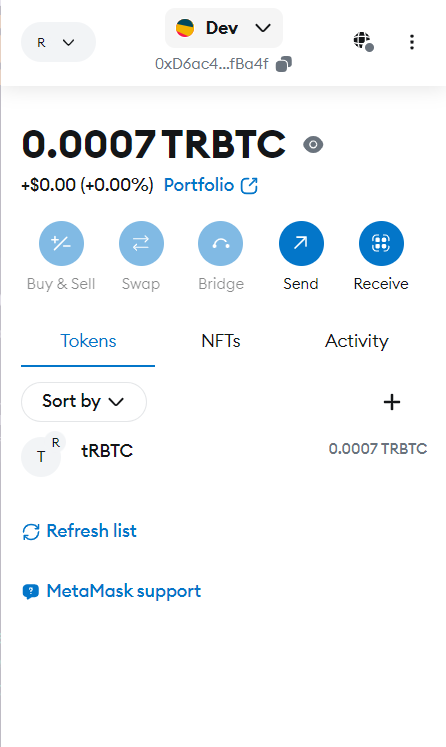
Finally, it should look like:
💡 Tip: For more information, check out the official setup guide: MetaMask Integration Guide.
Step 2: Setting up the Development Environment
Make sure you have the following tools installed:
Node.js (v16 or later)
Foundry - A fast Ethereum development environment
MetaMask wallet configured for the Rootstock testnet
Some testnet RBTC from the Rootstock faucet
Project Structure
Our DApp consists of two main parts:
Smart Contracts (Backend) - Written in Solidity
Web Interface (Frontend) - Built with Next.js
 .
 ├── contracts/          # Smart contract code
 │   ├── src/
 │   ├── test/
 │   └── foundry.toml
 └── frontend/           # Next.js frontend
     ├── src/
     └── .env.local
Install Foundry Dependencies
Navigate into your
contractsdirectory and install the required packages with the following commands:
cd contracts
forge install
This command sets up the foundational structure for your project, preparing it for smart contract creation.
We will now set the .env file in the contract folder
PRIVATE_KEY="your_private_key_here"
ROOTSTOCK_TESTNET_RPC_URL="https://public-node.testnet.rsk.co/"
Source the .env File in your terminal:
source .env
Step 1: Creating a Smart Contract
We will create a simple smart contract named MessageStorage.sol, which will store and retrieve messages on the blockchain.
MessageStorage Contract Code
/* /contracts/src/MessageStorage.sol */

// SPDX-License-Identifier: MIT
pragma solidity ^0.8.19;
contract MessageStorage {
    string private message;
    address public owner;

    event MessageUpdated(string newMessage, address updatedBy);

    constructor() {
        owner = msg.sender;
        message = "Hello Rootstock!";
    }

    modifier onlyOwner() {
        require(msg.sender == owner, "Only owner can call this function");
        _;
    }

    function setMessage(string memory _message) public onlyOwner {
        message = _message;
        emit MessageUpdated(_message, msg.sender);
    }

    function getMessage() public view returns (string memory) {
        return message;
    }
}
Contract Explanation
The MessageStorage contract is licensed under MIT and enables the owner to store and update a message. It initializes with a default message "Hello Rootstock!" and assigns the contract creator as the owner. Essential features include:
An event
MessageUpdatedthat logs the change of message along with the address of the updater.A modifier
onlyOwnerthat restricts access to certain functions, ensuring that only the owner can update the message.Functions
setMessageto allow the owner to update the message, andgetMessagefor anyone to retrieve the current message.
Perform the Forge Build
Once you have your smart contracts ready, it’s essential to compile them. You can build your project by using the following command in the contracts directory:
forge build
This command performs the following tasks:
Compilation: It compiles your Solidity (.sol) files to generate the corresponding bytecode and ABI (Application Binary Interface).
Verification: It checks for errors in your smart contracts, ensuring they are syntactically and semantically correct before deployment.
Output: The compiled contracts will be output to the
out/directory, containing the generated files necessary for deployment.

Step 2: Writing Test Cases
Testing is a critical component of blockchain development. It ensures the functionality, security, and reliability of your smart contract, helping to catch bugs before deployment.
Test Suite for MessageStorage
/* /contracts/test/MessageStorage.t.sol */

// SPDX-License-Identifier: MIT
pragma solidity ^0.8.19;

import {Test, console2} from "forge-std/Test.sol";
import {MessageStorage} from "../src/MessageStorage.sol";

contract MessageStorageTest is Test {
    MessageStorage public messageStorage;
    address public owner;
    address public user;

    function setUp() public {
        owner = address(this);
        user = address(0x1);
        messageStorage = new MessageStorage();
    }

    function test_InitialMessage() public {
        assertEq(messageStorage.getMessage(), "Hello Rootstock!");
    }

    function test_SetMessage() public {
        string memory newMessage = "New message";
        messageStorage.setMessage(newMessage);
        assertEq(messageStorage.getMessage(), newMessage);
    }

    function test_RevertWhen_NonOwnerSetsMessage() public {
        vm.startPrank(user);
        vm.expectRevert("Only owner can call this function");
        messageStorage.setMessage("Should fail");
        vm.stopPrank();
    }
}
Test Suite Breakdown
test_InitialMessagechecks that the initial message is correctly set.test_SetMessageverifies that the owner can successfully update the message.test_RevertWhen_NonOwnerSetsMessageensures that non-owners are unable to modify the message, testing the access control.
Running the Tests
To run the smart contract tests, execute the following command:
cd contracts
forge test

Step 3: Writing Deployment Scripts
Deployment scripts are essential in automating the deployment process, ensuring consistency and reducing manual errors.
Deployment Script
/* /contracts/script/Deploy.s.sol */
// SPDX-License-Identifier: MIT
pragma solidity ^0.8.19;

import {Script, console} from "forge-std/Script.sol";
import {MessageStorage} from "../src/MessageStorage.sol";

contract DeployScript is Script {
    function setUp() public {}

    function run() public {
        uint256 deployerPrivateKey = vm.envUint("PRIVATE_KEY");
        vm.startBroadcast(deployerPrivateKey);

        MessageStorage messageStorage = new MessageStorage();
        console.log("MessageStorage deployed to:", address(messageStorage));

        vm.stopBroadcast();
    }
}
Script Explanation
The deployment script for the MessageStorage smart contract is designed using the Forge framework. It begins by specifying the Solidity version and importing necessary libraries, such as Script and console from the Forge standard library. The DeployScript contract inherits from the Script class and consists of two primary functions:
setUp: This function is currently empty and can be used for any required initialization tasks prior to deployment.
run: This is the core function for the deployment process. It retrieves the deployer's private key from the environment variable "PRIVATE_KEY" to authorize the deployment transaction. The script then initiates the broadcasting of this transaction, creates a new instance of the
MessageStoragecontract, and logs the contract's deployed address. Finally, it halts the transaction broadcasting, completing the deployment procedure.
Deployment Steps
You can deploy your contract to the Rootstock Testnet using the command:
forge create --rpc-url $ROOTSTOCK_TESTNET_RPC_URL --private-key $PRIVATE_KEY --broadcast --legacy src/MessageStorage.sol:MessageStorage

Make sure to save the deployed contract address for frontend integration.
Step 4: Frontend Development
Now, let's build a user-friendly interface using Next.js to interact with our smart contract.
Setting Up Next.js Project
cd frontend
npm install
Configure Environment Variables
In the .env.local file, include:
NEXT_PUBLIC_CONTRACT_ADDRESS="your_deployed_contract_address"
Key Components of the Frontend
Wallet Connection: Allow users to connect their crypto wallets.
Message Display: Show the current message fetched from the smart contract.
Message Update Form: Enable the owner to update the message.
Transaction Status Notifications: Provide feedback on transaction executions.
Frontend Code Implementation
- Layout Component
The layout component defines the global structure of the application, including metadata and styling.
/* frontend/src/app/Layout.tsx */
import type { Metadata } from "next";
import { Inter } from "next/font/google";
import "./globals.css";
import { Providers } from "./providers";

const inter = Inter({ subsets: ["latin"] });

export const metadata: Metadata = {
  title: "Message Storage DApp",
  description: "A simple DApp for storing messages on Rootstock",
};

export default function RootLayout({
  children,
}: Readonly<{
  children: React.ReactNode;
}>) {
  return (
    <html lang="en">
      <body className={inter.className}>
        <Providers>{children}</Providers>
      </body>
    </html>
  );
}
- Home Component
The main interface where the wallet connection, message display, and update functionality reside.
/* frontend/src/app/page.tsx */
'use client'

import { useState } from 'react'
import { useAccount, useConnect, useDisconnect, useReadContract, useWriteContract } from 'wagmi'
import { injected } from 'wagmi/connectors'

const CONTRACT_ADDRESS = process.env.NEXT_PUBLIC_CONTRACT_ADDRESS || ''

const messageStorageABI = [
  {
    inputs: [],
    name: "getMessage",
    outputs: [{ type: "string" }],
    stateMutability: "view",
    type: "function"
  },
  {
    inputs: [{ type: "string", name: "_message" }],
    name: "setMessage",
    outputs: [],
    stateMutability: "nonpayable",
    type: "function"
  },
  {
    inputs: [],
    name: "owner",
    outputs: [{ type: "address" }],
    stateMutability: "view",
    type: "function"
  }
] as const

export default function Home() {
  const { address, isConnected } = useAccount()
  const { connect } = useConnect()
  const { disconnect } = useDisconnect()
  const [newMessage, setNewMessage] = useState('')

  const { data: message } = useReadContract({
    address: CONTRACT_ADDRESS as `0x${string}`,
    abi: messageStorageABI,
    functionName: 'getMessage',
  })

  const { writeContract: setMessage } = useWriteContract()

  const handleSetMessage = () => {
    if (!newMessage) return
    setMessage({
      address: CONTRACT_ADDRESS as `0x${string}`,
      abi: messageStorageABI,
      functionName: 'setMessage',
      args: [newMessage],
    })
  }

  return (
    <main className="min-h-screen p-8">
      <div className="max-w-2xl mx-auto">
        <h1 className="text-4xl font-bold mb-8">Message Storage DApp</h1>

        <div className="mb-8">
          {!isConnected ? (
            <button
              onClick={() => connect({ connector: injected() })}
              className="bg-blue-500 text-white px-4 py-2 rounded hover:bg-blue-600"
            >
              Connect Wallet
            </button>
          ) : (
            <div>
              <p className="mb-4">Connected: {address}</p>
              <button
                onClick={() => disconnect()}
                className="bg-red-500 text-white px-4 py-2 rounded hover:bg-red-600"
              >
                Disconnect
              </button>
            </div>
          )}
        </div>

        {isConnected && (
          <div className="space-y-4">
            <div className="p-4 bg-gray-100 rounded">
              <h2 className="text-xl mb-2 font-black">Current Message:</h2>
              <p>{message || 'Loading...'}</p>
            </div>

            <div>
              <input
                type="text"
                value={newMessage}
                onChange={(e) => setNewMessage(e.target.value)}
                placeholder="Enter new message"
                className="w-full p-2 border rounded mb-2"
              />
              <button
                onClick={handleSetMessage}
                className="bg-green-500 text-white px-4 py-2 rounded hover:bg-green-600"
              >
                Update Message
              </button>
            </div>
          </div>
        )}
      </div>
    </main>
  )
}
- Providers Component
This component sets up the necessary providers for Web3 interaction and query management.
/* frontend/src/app/providers.tsx */
'use client'

import { WagmiProvider, createConfig, http } from 'wagmi'
import { QueryClient, QueryClientProvider } from '@tanstack/react-query'
import { rootstockTestnet } from '../config/chains'
import { injected } from 'wagmi/connectors'

const config = createConfig({
  chains: [rootstockTestnet],
  connectors: [injected()],
  transports: {
    [rootstockTestnet.id]: http(),
  },
})

const queryClient = new QueryClient()

export function Providers({ children }: { children: React.ReactNode }) {
  return (
    <WagmiProvider config={config}>
      <QueryClientProvider client={queryClient}>
        {children}
      </QueryClientProvider>
    </WagmiProvider>
  )
}
- Chain Configuration
The chain configuration sets up the Rootstock Testnet parameters.
/* frontend/src/config/chain.ts */
import { defineChain } from 'viem'

export const rootstockTestnet = defineChain({
  id: 31,
  name: 'Rootstock Testnet',
  network: 'rootstock-testnet',
  nativeCurrency: {
    decimals: 18,
    name: 'Rootstock Testnet RBTC',
    symbol: 'tRBTC',
  },
  rpcUrls: {
    default: {
      http: ['https://public-node.testnet.rsk.co'],
    },
    public: {
      http: ['https://public-node.testnet.rsk.co'],
    },
  },
  blockExplorers: {
    default: {
      name: 'RSK Testnet Explorer',
      url: 'https://explorer.testnet.rsk.co',
    },
  },
  testnet: true,
})
Starting the Frontend Development Server
Once your code is in place and your environment variable is set up, you can start the development server by running:
cd frontend
npm run dev
After connecting your wallet, you will be able to see a UI that allows message updates.
Once the wallet is connected, the UI will look like this, where you can update the message

For reference, find this attached Github Repo
Woaahhh, you have successfully build your DApp on Rootstock🥳🥳
Conclusion
Building on Rootstock merges the security of Bitcoin with the versatility of Ethereum-compatible smart contracts. This guide has provided a step-by-step approach to developing a DApp, from writing smart contracts and deploying them to building a frontend user interface. By following these practices, you can ensure robust, reliable, and user-friendly applications on the Rootstock platform. Whether you're a novice or an experienced developer, this tutorial aims to enhance your understanding and implementation of decentralized applications in the blockchain ecosystem.
If facing any errors, join Rootstock discord and ask under the respective channel.
Until then, dive deeper into Rootstock by exploring its official documentation. Keep experimenting, and happy coding!
Subscribe to my newsletter
Read articles from Pranav Konde directly inside your inbox. Subscribe to the newsletter, and don't miss out.
Written by