Top 6 Best Lighting for eBay Photos in 2025
 ProdShot Creator
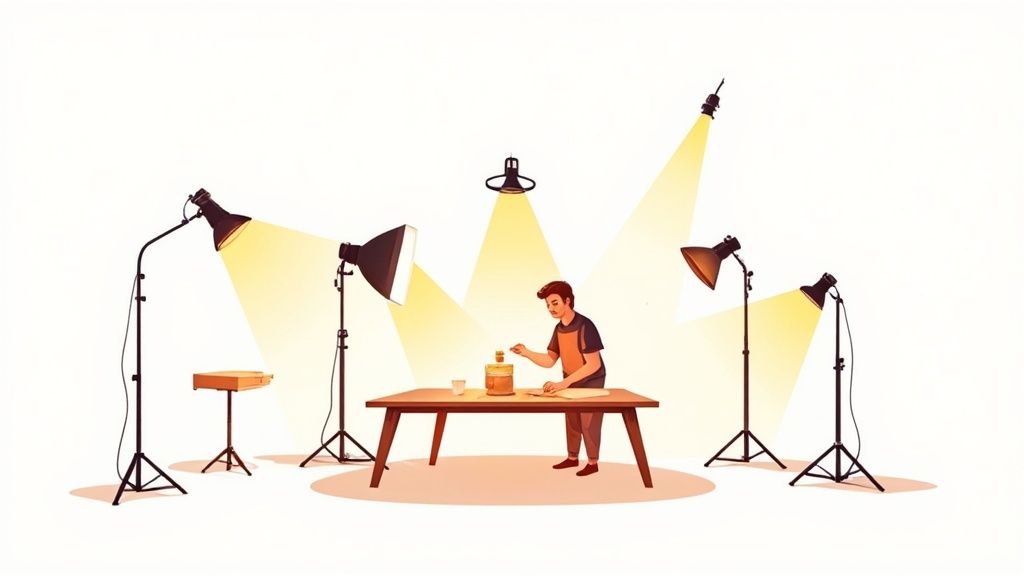
From Drab to Fab: Why Pro Lighting is Your eBay Secret Weapon
In the crowded eBay marketplace, your product photos are your silent salesperson, working 24/7. Grainy, poorly lit images scream 'amateur,' leading to lower bids, fewer sales, and a higher chance of returns from customers who feel the product was misrepresented. Conversely, crisp, well-lit photos build trust, justify higher prices, and make your listings irresistible.
This guide moves beyond generic advice like 'use more light.' We will dissect six distinct, professional lighting setups that cater to different budgets, product types, and seller ambitions. Our goal is to help you find the best lighting for eBay photos by exploring the technical nuances, practical applications, and step-by-step implementation for each method. You will get actionable advice designed for immediate results, not just abstract theory.
Whether you're a beginner using your smartphone or a high-volume seller building a brand, mastering your lighting is the single most impactful investment you can make. Prepare to transform your product photos from a liability into your most powerful sales asset. This article provides the roadmap to achieving images that not only meet eBay's standards but also captivate buyers and drive conversions.
1. Softbox Lighting Kit
A softbox kit is the quintessential starting point for any serious eBay seller looking to achieve professional-grade product photography. It consists of light heads enclosed in a tent-like box with a white diffusion panel on the front. This setup takes a harsh, direct light source and transforms it into a soft, flattering, and even glow that wraps around your product, eliminating the stark shadows and bright hotspots that can make items look amateurish.
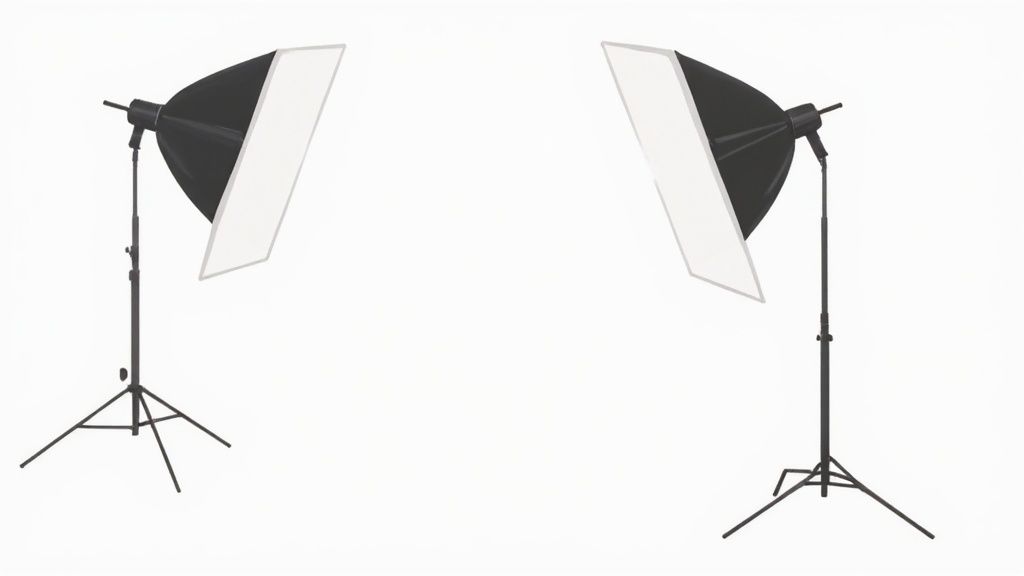
Why This is a Top Choice
The magic lies in the diffusion. By scattering the light rays, a softbox mimics the gentle, non-directional light of an overcast day. This quality is invaluable for accurately representing product textures, shapes, and details without any distracting glare, making it a foundational tool for achieving the best lighting for eBay photos. This controlled environment gives you consistent results every time you shoot.
Actionable Setup Tips
Getting a professional look is about placement and precision. To maximize your kit's potential, follow these specific strategies:
- Master the 45-Degree Angle: Position your two main lights (your key and fill light) at 45-degree angles on either side of your product. This classic setup sculpts the item with light, defines its shape, and dramatically reduces unwanted shadows behind it.
- Create a Pure White Background: For that clean "e-commerce" look, dedicate a third light to illuminating your background (like a white paper sweep) separately. This ensures the background is evenly lit and truly white, preventing it from appearing gray in the final photo.
- Control Intensity with Distance: The easiest way to adjust light brightness is by physically moving the stands. Moving a light closer makes it brighter and the shadows softer; moving it further away makes it dimmer and the shadows harder. Experiment to find the perfect balance for your product.
- Ensure True-to-Life Color: Use daylight-balanced bulbs, typically rated at 5500K. This color temperature replicates natural daylight, ensuring that the colors of your product in the photo are accurate to the real item. This builds buyer trust and reduces returns. For an in-depth look at this process, eBay sellers can perfect their product photos with these techniques.
When to Use a Softbox Kit
This setup is incredibly versatile and excels in situations where detail and color accuracy are paramount. It's the go-to choice for sellers of electronics who need clean, reflection-free shots on white backgrounds. Fashion retailers rely on softboxes to showcase the delicate texture of fabrics, and home goods sellers use them to evenly illuminate everything from small decor to larger furniture pieces.
2. Ring Light Setup
While popularized by beauty influencers, the ring light is a surprisingly powerful and efficient tool for eBay sellers dealing with small to medium-sized products. This single, circular light source provides direct, even illumination from a 360-degree angle. Its unique donut-shaped design means your camera lens shoots through the center, surrounding your subject with light and effectively erasing harsh shadows from the front and sides.
Why This is a Top Choice
The key advantage of a ring light is its simplicity in achieving a clean, shadowless look. The light wraps around the object, minimizing texture-hiding shadows and producing a flat, even exposure that is ideal for clear product representation. This makes it an incredibly user-friendly option for getting the best lighting for eBay photos with minimal setup. For reflective items, it creates a signature circular "catchlight" that can add a professional and engaging pop.
Actionable Setup Tips
A great ring light photo is about controlling the intensity and reflections. Use these specific techniques to elevate your product shots from simple to stunning:
- Soften the LEDs: Many ring lights have visible LED bulbs that can create distracting, speckled reflections. Tape a layer of diffusion paper or even simple baking parchment over the ring to soften the light into a continuous, gentle glow.
- Position Off-Center for Reflective Items: To avoid a perfect ring reflection on glossy surfaces, watches, or gemstones, position the product slightly above or below the center of the ring. This maintains the even lighting while hiding the light source's reflection.
- Use as a Fill Light: Don't be afraid to combine your ring light with other sources. Place your setup near a window and use the ring light as a "fill" to soften the shadows created by the natural light, giving you a dynamic yet clean look.
- Stick to Neutral Backgrounds: A ring light’s direct illumination can cause color casts from vibrant backgrounds. Use a white or light gray background to ensure the light bounces cleanly and keeps your product’s colors true and accurate.
When to Use a Ring Light Setup
This setup is the hero for small-scale e-commerce photography where frontal detail is crucial. It’s a top choice for jewelry sellers who need to illuminate every facet of a gemstone and the fine details of metalwork without distracting shadows. Cosmetics retailers use it to get perfectly even lighting on packaging and true-to-life swatches. It also excels for small electronics, accessories like watches, and any intricate craft items where a clear, unobstructed view is the top priority.
3. Natural Window Light with Reflectors
Harnessing the power of the sun is the most budget-friendly yet highly effective method for illuminating your products. Using a large window as your primary light source provides a broad, soft light that beautifully renders colors and textures. By strategically adding simple reflectors, like white foam boards, you can bounce this light back onto your product, filling in shadows and creating a professional, dimensional look without any expensive equipment.
Why This is a Top Choice
Natural daylight is a full-spectrum light source, meaning it contains all the colors of the rainbow. This results in superior color accuracy, ensuring the item your buyer sees on screen is true-to-life. The diffused nature of window light, especially from a north-facing window or on an overcast day, acts like a giant softbox, wrapping your product in flattering light. This makes it one of the best lighting for eBay photos for sellers who value authenticity and have a limited budget. If the background captured isn't ideal, you can easily improve it later; you can even learn more about how an AI product photo generator can help perfect your final images.
Actionable Setup Tips
Controlling natural light is key to consistency. Use these proven techniques to get predictable, high-quality results every time:
- Soften with Sheer Curtains: Direct, harsh sunlight creates strong shadows and hotspots. Place a thin white sheet or sheer curtain over the window to act as a diffuser, instantly softening the light for a more professional effect.
- Position for Dimension: Place your product and camera setup at a 90-degree angle (perpendicular) to the window. This creates a beautiful side-light that reveals texture and form. The light will illuminate one side, while the other falls into shadow.
- Use Reflectors to Fill Shadows: Take a simple white foam board or poster board and place it on the shadow side of your product. Angle it to bounce light from the window back into the shadows, brightening them up for a clean, balanced look.
- Shoot on Overcast Days: An overcast sky is a photographer's best friend. The clouds act as a massive, natural diffuser, providing even, non-directional light that is perfect for shadow-free product shots.
- Maintain Consistency: For multiple product photos, try to shoot around the same time of day to maintain consistent color temperature and light quality across all your listings.
When to Use Natural Window Light
This method excels when you want to convey a sense of authenticity and natural appeal. It's the ideal choice for clothing sellers who need to show the true texture and drape of fabrics. Sellers of handmade crafts and artisanal goods use it to create a warm, inviting, and authentic mood. It is also perfect for vintage items, where the soft, natural light can enhance the item's character and nostalgic charm without feeling sterile or overly commercial.
4. LED Panel Lighting System
An LED panel lighting system represents a modern and highly efficient approach to product photography. These systems consist of flat, rectangular panels packed with hundreds of small LEDs, which together produce a broad, even, and powerful light source. Known for their low heat output and incredible control, they are a favorite among professionals and content creators who need consistent, high-quality lighting for extended periods.
Why This is a Top Choice
The primary advantage of LED panels is precision. High-end models offer granular, digital control over both brightness (intensity) and color temperature, allowing you to dial in the exact look you need without moving the light stands. This level of control makes it simple to match lighting conditions from one photo session to the next, ensuring your eBay listings have a uniform and professional appearance. This consistency is a cornerstone of creating the best lighting for eBay photos.
Actionable Setup Tips
Leveraging the technical advantages of LED panels is key to unlocking their full potential. Use these strategies to achieve superior results:
- Dial in Daylight: Set your panels to 5600K (Kelvin) to perfectly replicate the color of natural daylight. This ensures your camera's white balance captures true-to-life colors, which is critical for buyer confidence and reducing returns due to color discrepancies.
- Create Dimension with Angles: Avoid placing all your lights directly in front of the product, which can make it look flat. Use one panel as your main (key) light from a 45-degree angle, a second panel at a lower intensity as a fill light on the opposite side, and consider a third to light the background or create a subtle rim light on the product.
- Add Softness with Diffusion: While LED panels provide even light, it can sometimes be too direct for highly reflective items. Many panels come with a built-in diffusion layer, but you can also place a separate diffusion sheet in front of the panel to further soften the light and minimize harsh glare.
- Prioritize a High CRI Rating: When purchasing panels, invest in a model with a high Color Rendering Index (CRI) of 95 or higher. CRI measures a light's ability to accurately reveal the colors of an object. A high CRI guarantees that the vibrant red of a handbag or the specific blue of a car part is rendered perfectly.
When to Use an LED Panel System
This lighting setup is the ultimate choice for sellers who demand absolute color accuracy and consistency. It is indispensable for electronics sellers who need to achieve a perfect white background without any color cast. Automotive parts sellers rely on high-CRI LEDs to show the exact finish and color of components, while fashion accessories retailers can precisely match the colors of jewelry, scarves, and bags, ensuring what the customer sees is what they get.
5. Light Tent with Built-in Lighting
A light tent, often called a lightbox or photo studio box, is a game-changer for sellers of small-to-medium-sized items. This all-in-one solution is a collapsible fabric cube with built-in LED light strips along the top or sides. It creates a self-contained, miniature studio that bathes your product in soft, even, 360-degree light, effectively erasing harsh shadows and distracting reflections.
Why This is a Top Choice
The primary advantage of a light tent is its incredible simplicity and consistency. It removes the guesswork from lighting by providing a perfectly diffused, controlled environment right out of the box. This enclosure ensures that light hits your product from almost every angle, which is essential for minimizing glare on shiny surfaces and revealing detail in complex items. For sellers who need to photograph many products quickly without a steep learning curve, it's a fast track to achieving the best lighting for eBay photos.
Actionable Setup Tips
Maximizing your light tent's effectiveness is about a few simple but crucial adjustments. To get that polished, professional look every time, apply these key strategies:
- Select the Correct Size: Always opt for a light tent that is significantly larger than your biggest product. This gives you ample room to shoot from different angles without the walls of the tent appearing in your frame and ensures the light has space to diffuse properly.
- Position Products Centrally: Place your item in the middle of the lightbox, away from the back and side walls. Pushing it too close to a surface, even inside the tent, can create subtle, unwanted shadows that flatten the object's appearance.
- Maintain a Pristine Background: The included backgrounds (usually black, white, and other colors) are magnets for dust and lint. Wipe them down before every shoot to prevent specks from showing up in your photos. While this helps, for a truly flawless look, professional product photo editing services can perfect your background and colors.
- Use the Top-Down Hatch: Most light tents have a flap on the top for overhead shots. This is perfect for flat-lay photography of items like documents, jewelry arrangements, or small clothing items, giving you a clean, bird's-eye view.
When to Use a Light Tent with Built-in Lighting
This setup is the undisputed champion for sellers specializing in smaller products where detail and a lack of glare are non-negotiable. It's the ideal choice for handmade jewelry and crafts, as it softly illuminates intricate details without creating harsh specular highlights on metal or gemstones. Sellers of collectibles and antiques, like coins or figurines, rely on it to capture fine textures and markings. It's also perfect for small electronics and gadgets, ensuring screens are free of reflections and product casings look clean and professional.
6. Three-Point Lighting Setup
The three-point lighting setup is the gold standard in professional photography and videography, offering unparalleled control over how a product is illuminated. This technique uses three distinct light sources: a key light (the main, brightest light), a fill light (a softer light to reduce shadows created by the key light), and a rim light (also called a backlight, used to separate the subject from the background). By strategically placing these three lights, you can sculpt your product, add depth, and create a truly commercial-grade image.
This decision tree infographic helps you determine if a three-point lighting setup aligns with your resources and goals.
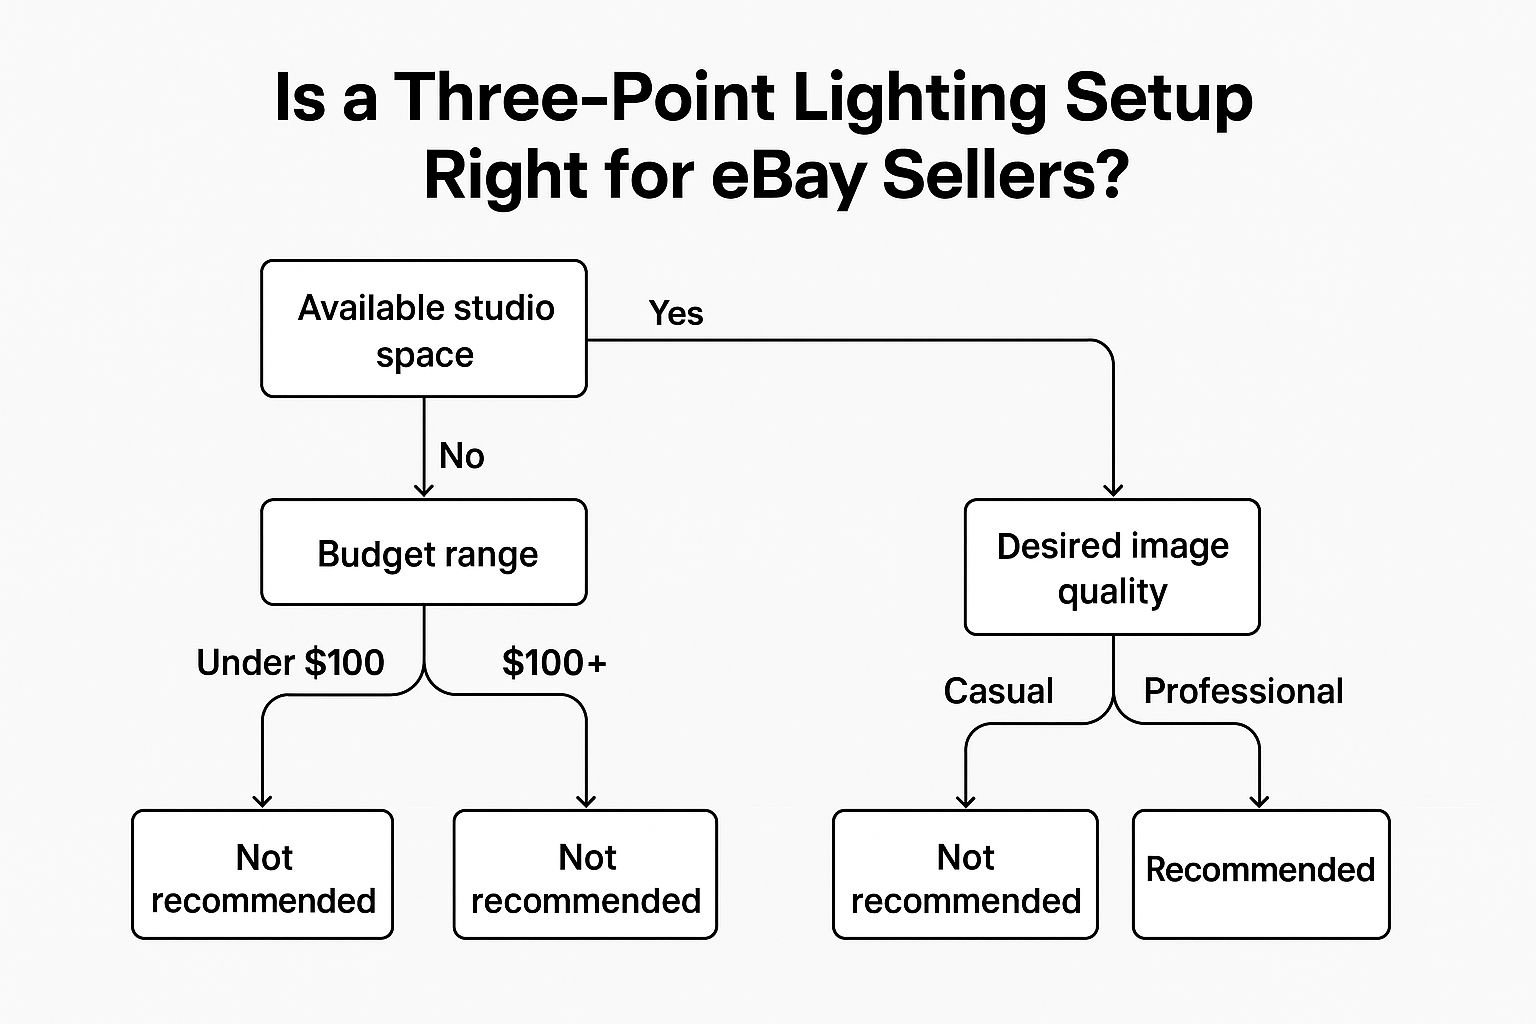
As the flowchart illustrates, this setup is the ideal path for sellers with adequate space and budget who are aiming for professional-quality results, while simpler options may be better for those with significant constraints.
Why This is a Top Choice
Complete creative control is the main advantage of this setup. Unlike a single light source that can produce flat images, the three-point method allows you to precisely manage highlights and shadows. The key light defines the form, the fill light reveals details in the shadows, and the rim light creates a crisp outline that makes the product "pop" from the background. This sophisticated approach is fundamental to achieving the best lighting for eBay photos when selling high-value or visually complex items.
Actionable Setup Tips
While it requires more equipment, mastering this setup is achievable. Follow these core principles for a polished and professional look:
- Establish a Lighting Ratio: Start with a 2:1 ratio, meaning your key light is twice as bright as your fill light. This can be achieved by moving the fill light further away or using a lower power setting. This creates gentle, dimensional shadows rather than eliminating them completely.
- Position the Key Light First: Place your main (key) light at a 45-degree angle to the side of your product and slightly above it. This is your primary light source for shaping the item.
- Add the Rim Light for Separation: Position the rim light behind your product, opposite the key light and pointing toward the back of the item. This creates a subtle, bright outline that prevents your product from blending into the background.
- Meter Each Light: For maximum precision, use a light meter to measure the output of each light individually. This allows you to perfectly replicate your setup for consistent photos every time.
When to Use a Three-Point Lighting Setup
This technique excels for products where dimension, texture, and a premium feel are critical. It's the preferred method for high-end electronics, where you need to highlight sleek curves and finishes without creating distracting glare. Sellers of luxury fashion items, like designer handbags or watches, use it to create a dramatic, aspirational mood. It is also invaluable for automotive parts, where it can define complex shapes and showcase metallic or matte surface textures with perfect clarity.
Lighting Options Comparison for eBay Photos
| Item | Implementation Complexity 🔄 | Resource Requirements ⚡ | Expected Outcomes 📊 | Ideal Use Cases 💡 | Key Advantages ⭐ |
| Softbox Lighting Kit | Moderate: requires setup and space | Moderate: 2-4 lights, stands, power | Professional, consistent, shadow-free | High-volume sellers with diverse products | Soft, even lighting; good for reflective surfaces |
| Ring Light Setup | Low: quick setup, compact | Low: single circular LED with stand | Shadow-free, even illumination | Small products, smartphone photography | Portable, easy to use, excellent for macro shots |
| Natural Window Light with Reflectors | Low: no electrical setup, weather dependent | Very low: foam boards/reflectors, natural light | Soft, natural color-accurate lighting | Beginners, low-budget sellers | Cost-effective, no heat, natural light quality |
| LED Panel Lighting System | Moderate: learning curve for settings | Moderate-high: multiple panels, power | Precise color control, even illumination | Professionals needing color accuracy | Cool operation, portable, versatile lighting |
| Light Tent with Built-in Lighting | Very low: foldable, built-in LEDs | Low: compact all-in-one solution | Consistent, shadow-free for small items | Sellers of small items needing quick results | Portable, no extra equipment needed |
| Three-Point Lighting Setup | High: complex setup and space needed | High: multiple professional lights, stands | Complete control, dimensional and dramatic | High-value items, professional studios | Full lighting control; creates depth and interest |
Choosing Your Setup and Adding the Final Polish
You have now explored the complete spectrum of options for achieving the best lighting for eBay photos. From harnessing the free, dynamic power of the sun to building a sophisticated three-point lighting system, the path to professional-grade imagery is clearer than ever. The key takeaway is that the "perfect" setup is not a one-size-fits-all solution; it is a strategic choice based on your specific needs, products, and operational scale.
Making the right choice is about matching the tool to the task. Your decision-making process should be a simple evaluation of your inventory and goals. A well-chosen lighting system doesn't just illuminate a product; it communicates professionalism and builds buyer trust before they even read your description.
From Theory to Action: Making Your Choice
To crystallize your decision, consider these final points:
- For Maximum Simplicity & Speed: If you sell small, consistent items like jewelry, collectibles, or small electronics, the Light Tent with built-in LEDs is your most efficient path. It provides diffused, even light with minimal setup, ensuring every photo in your gallery has a uniform look.
- For Versatility & Brand Building: If your inventory is diverse, ranging from clothing to home goods, a Softbox Kit or LED Panel System offers unparalleled control. These systems allow you to sculpt light, create mood, and develop a signature visual style that makes your listings stand out. They represent an investment in your brand's future.
- For the Budget-Conscious Starter: Do not underestimate Natural Window Light. Paired with simple reflectors and a diffuser, it can produce stunning, high-end results for free. Mastering it requires practice and patience, but it’s an invaluable skill for any seller.
The Critical Final Step: Post-Production Polish
Capturing a well-lit photograph is the most crucial step, but it's not the final one. Even with an ideal setup, achieving the crisp, pure white background that eBay and other marketplaces prefer is incredibly difficult to do in-camera. Minor shadows, slight color casts, or distracting elements in the frame can detract from an otherwise perfect shot.
This is where post-production becomes your most powerful ally. Traditionally, this meant spending hours learning and using complex software to manually remove backgrounds and correct colors. Today, a smarter, faster workflow exists. The goal is not to fix bad lighting, but to elevate great lighting to a level of flawless, commercial-ready perfection. This final polish ensures every image is optimized not just for clarity, but for conversion.
Your investment in finding the best lighting for eBay photos creates a high-quality foundation. Now, it's time to build upon it with the right finishing tools.
Ready to take your perfectly lit photos and make them absolutely flawless? Upload your images to ProdShot and let our AI instantly create perfect, white-background product shots, enhance colors, and generate lifestyle scenes that sell. Stop editing and start selling more, faster.
Subscribe to my newsletter
Read articles from ProdShot Creator directly inside your inbox. Subscribe to the newsletter, and don't miss out.
Written by